Citrix Gateway data source
The Gateway data source represents the on-premises Citrix Gateway instances in your environment. Citrix Analytics automatically discovers the Citrix Application Delivery Management (ADM) agents and the Gateway instances added to the Citrix ADM service.
When users access any services or applications through Gateway, Citrix Analytics receives the user access events in real time. The user events are processed to detect any security threats.
This article describes the steps to add Citrix Gateway to Citrix Analytics. These steps are applicable for both the offerings: Citrix Analytics for Performance™ and Citrix Analytics for Security.
Prerequisites
-
Subscribe to Citrix ADM offered on Citrix Cloud. To learn how to get started with Citrix ADM, see Getting Started.
-
Verified Citrix ADM license. To know more about Citrix ADM Licensing, see Licenses.
-
Review the system requirements and ensure that the requirements are met.
Gateway data sources added to Citrix ADM
Citrix Analytics automatically discovers the Citrix ADM agents and the Citrix Gateway instances that are already added to the Citrix ADM service.
To view the data source:
From the top bar, click Settings > Data Sources. Depending on your offering, select either Security or Performance to view the Gateway site card.
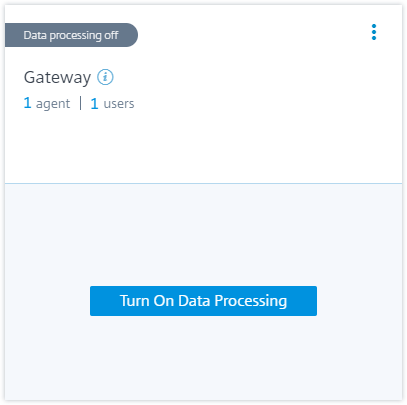
The discovered agents and the users are displayed on the Gateway site card. Click Turn On Data Processing to allow Citrix Analytics to begin processing data for this data source.
You can view the received events.
Refer A unified process to enable analytics on virtual servers to enable Citrix Analytics if not enabled already on the Citrix ADM Service.
Gateway data sources not added to Citrix ADM
The Gateway site card displays 0 discovered agents when Citrix ADM agents and Citrix Gateway instances are not added to the Citrix ADM service.

To discover the agents and Gateway instances, do the following:
-
If you already have a Citrix ADM service subscription, click + on the site card to add the agents and the Gateway instances.
-
If you do not have a Citrix ADM service subscription, you must subscribe to it. Go to your Citrix Cloud™ account and do the following:
-
Under Available Services, click Manage on the Application Delivery Management tile.
-
Follow the on-screen instructions to create an Express account for Citrix ADM. For more information, see Getting started on the Citrix ADM documentation.
-
After creating the Express account, log back to Analytics and click Settings > Data Sources > Security.
-
On the Gateway site card, click + to add the agents and the Gateway instances.
-
-
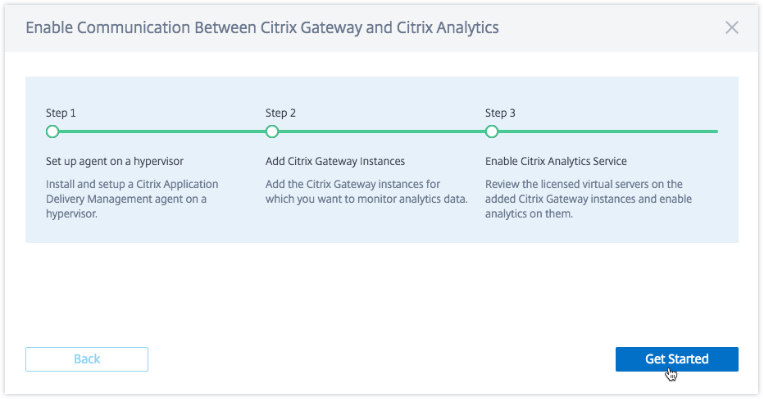
On the following page, click Get Started.
-
Do the following tasks:
Prerequisites
-
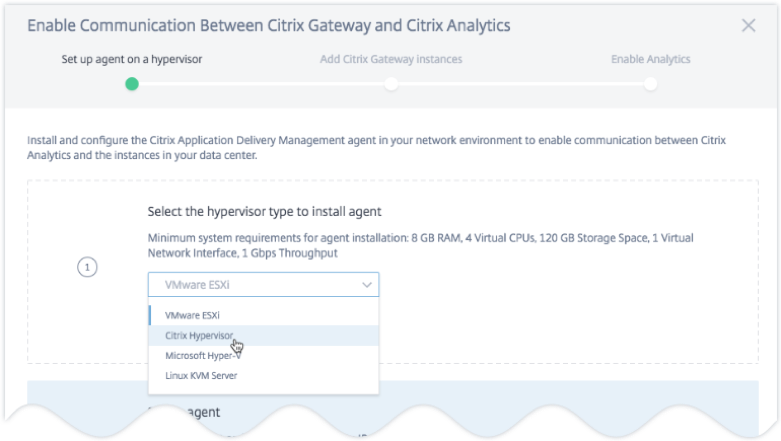
Citrix ADM agent installation requirement: In your data center, you can install an agent on Citrix Hypervisor™, VMware ESXi, Microsoft Hyper-V, and Linux KVM Server.
The following table lists the virtual computing resources that the hypervisor must provide for the agent.
Component Requirement RAM 8 GB (32 GB recommended for better performance.) Virtual CPU 4 (8 virtual CPUs recommended for better performance) Storage space 120 GB Virtual network interfaces 1 Throughput 1 Gbps -
Port requirements: Ensure that the following ports are open for the Citrix ADM agent to communicate with the Citrix Gateway instances.
Type Port Description TCP 80/443 For NITRO communication from agent to Citrix Gateway instances TCP 22 For SSH communication from agent to Citrix Gateway instance. UDP 4739 For AppFlow® communication from Citrix Gateway to agent ICMP No reserved port To detect network reachability from agent to Citrix Gateway instances. SNMP 161, 162 To receive SNMP events from Citrix Gateway instance to agent. Syslog 514 To receive syslog messages in agent from Citrix Gateway instance. TCP 5557 For log stream communication from Citrix Gateway instances to agent. For communication between the Citrix ADM agent and Citrix Analytics, ensure that the following port is open:
Type Port Description TCP 443 For NITRO communication between the agent and the Citrix Application Delivery Management service. For communication between the Citrix ADM agent and Citrix Analytics, ensure that the following endpoint is whitelisted:
Endpoint US region EU region APS region Event Hub https://cas-eh-ns-alias.servicebus.windows.net/https://cas-eh-ns-eu-alias.servicebus.windows.net/https://cas-eh-ns-aps-alias.servicebus.windows.net/
Install and set up an agent
Install and configure the Citrix ADM service agent in your network environment to enable communication between Analytics and the Gateway instances in your data center.
You can install an agent on the following hypervisors in your enterprise data center:
-
Citrix Hypervisor
-
VMware ESXi
-
Microsoft Hyper-V
-
Linux KVM Server
To install and set up an agent, do the following:
-
Download the agent image.
On the Set up agent on a hypervisor page, select the hypervisor, and click Download Image to download the agent image to your local system.
-
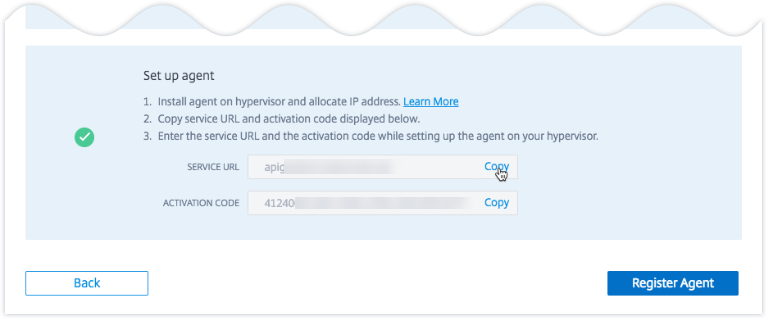
Copy service URL and activation code.
A service URL and an activation code are generated and displayed on the UI as shown in the following image. (This process might take a few seconds.) The agent uses the service URL to locate the service and the activation code to register with the service. Enter the service URL and the activation code while installing the agent on your hypervisor.
-
Install the agent on a hypervisor.
Note
Before you begin agent installation, ensure that:
-
You have the required virtual computing resources that the hypervisor must provide for each agent: RAM: 8 GB, vCPU: 4, storage space: 120 GB, virtual network interface: 1, and throughput: 1 Gbps
-
You configure your DNS to allow internet access to your agent.
-
On a Citrix Hypervisor, perform the following:
-
Import the agent image file to your hypervisor. From the Console tab configure the initial network configuration options as shown in the following example.
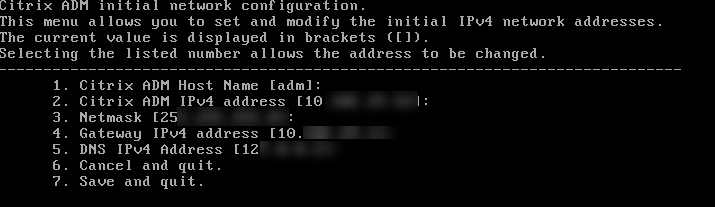
If you have entered incorrect values or want to change any value, log on to the shell prompt by using the default credentials
nsrecover/nsroot. Then run the commandnetworkconfig. -
Enter the Service URL and the Activation Code that you saved while downloading the agent image.

If you entered the service URL or the activation code incorrectly, log on to the shell prompt of the agent and then run the script:
deployment_type.py. This script lets you reenter the Service URL and activation code.
-
-
On a VMware ESXi hypervisor, perform the following:
-
Import the agent image file to your hypervisor. From the Console tab configure the initial network configuration options as shown in the following example.
-
After you configure the network, when prompted, log on to the shell prompt of the agent using the default credentials
nsrecover/nsroot.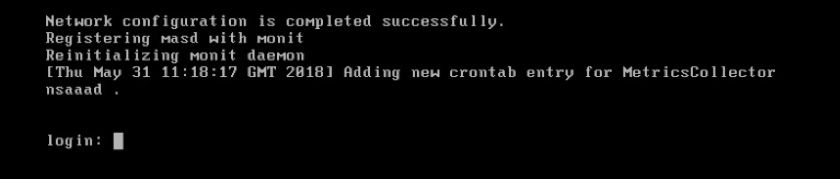
-
Navigate to the /mps directory, run the script, and enter the Service URL and the Activation Code that you saved when you while downloading the agent image.

-
Note
You can use the same image file to install multiple agents. However, you cannot use the same activation code on more than one agent. To generate a new activation code, access Citrix Analytics, and on the Setup agent on a hypervisor step, click Download Image again. A new activation code is generated.
-
-
Register Agent.
After agent registration is successful, the agent restarts to complete the installation process. After the agent has restarted, access Citrix Analytics and click Register Agent, and then verify the status of the agent.
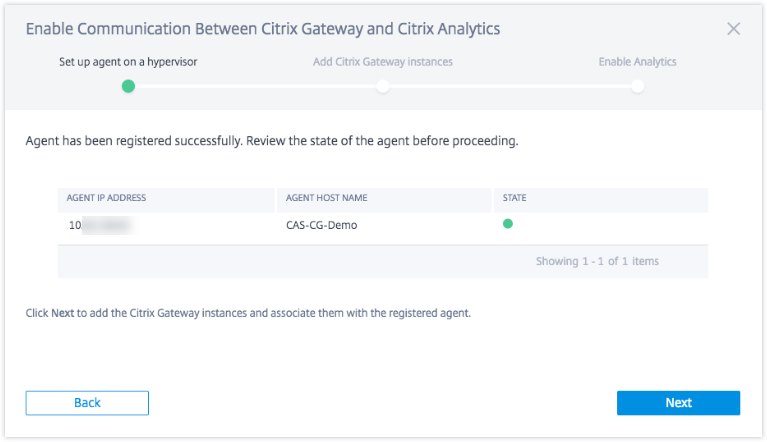
When the agent status is in the UP state denoted by a green dot next to it, click Next to start adding instances to the service.
Add Citrix Gateway instances
Instances are Citrix Gateway appliances or virtual appliances that are the data sources for Citrix Analytics.
-
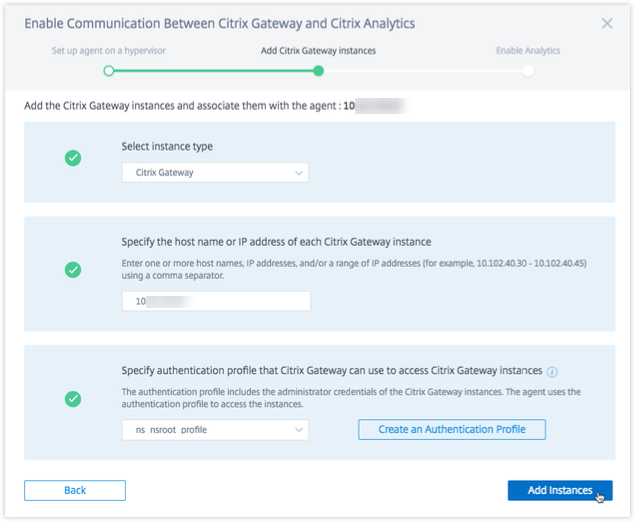
On the Add Citrix Gateway Instances page, select the instance type and specify host names or IP Addresses or range of IP addresses of Gateway instances to discover.
-
Create an authentication profile that the agent can use to access the Gateway instances. This profile is the administrator credentials of a Gateway instance. Then, click Add Instances.
After the instances are added, you can view the number of instances that have been successfully discovered. To add more instances, click Add Citrix Gateway Instance.
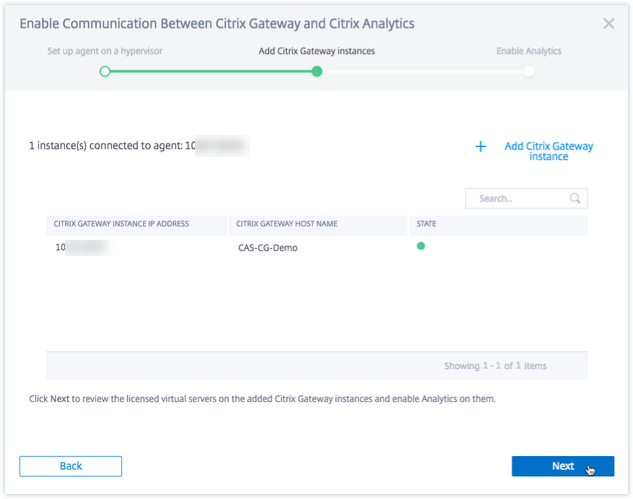
Click Next to enable analytics.
Enable analytics
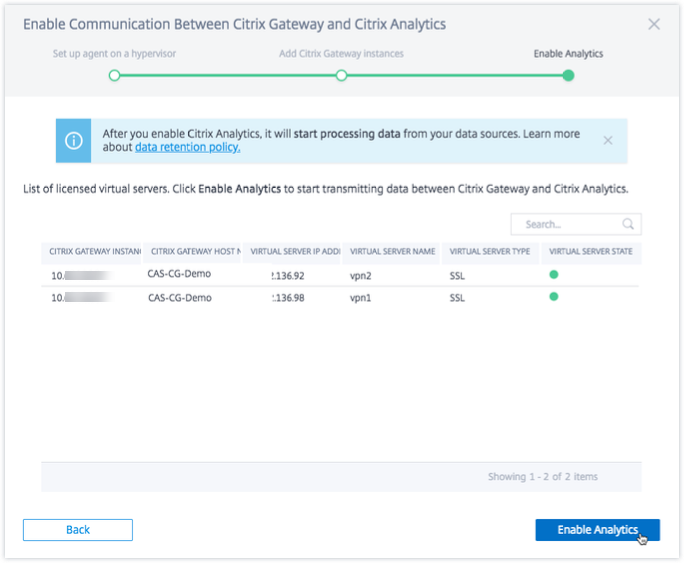
Citrix Analytics automatically discovers the licensed virtual servers on the added Citrix Gateway Instances. Enable analytics on all the discovered virtual servers.
On the Enable Analytics page, by default, all the licensed virtual servers from the Gateway instances appear. Review the list of licensed virtual servers and click Enable Analytics to enable analytics on the virtual servers.
Note
The virtual servers might take some time, approximately 10 minutes, to appear on the page.
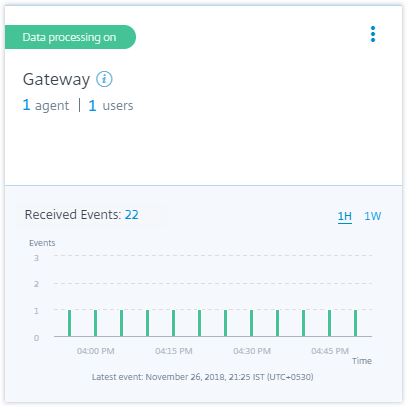
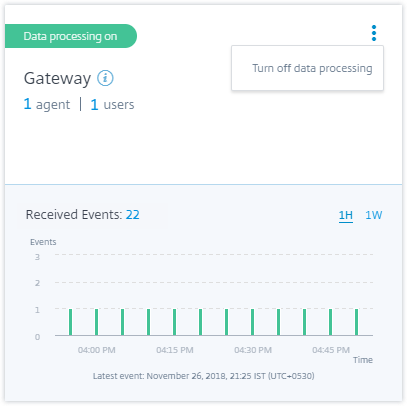
The status of the site card changes to Data Processing On. You can view the received events.
Watch the onboarding video
The following video shows the steps to onboard a Gateway instance:
View received events, users, and agents
The site card displays the number of Gateway users, Citrix ADM agents, and the events received from the data source for the last one hour, which is the default time selection. You can also select 1 week (1W) and view the data. Click the number of users to view on the Users page. Click the number of agents to view the Citrix Gateway instances and the agents.
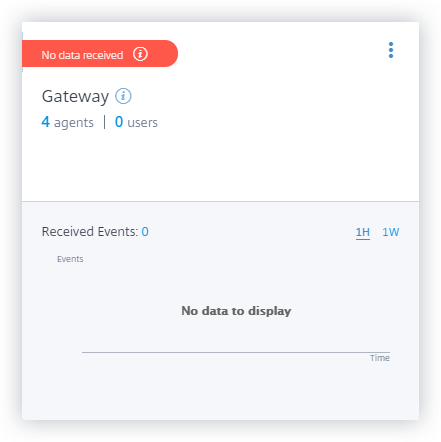
After you have enabled data processing, the site card might display the No data received status. This status appears for two reasons:
-
If you have turned on data processing for the first time, the events take some time to reach the event hub in Citrix Analytics. When Citrix Analytics receives the events, the status changes to Data processing on. If the status does not change after some time, refresh the Data Sources page.
-
Analytics has not received any events from the data source in the last one hour.
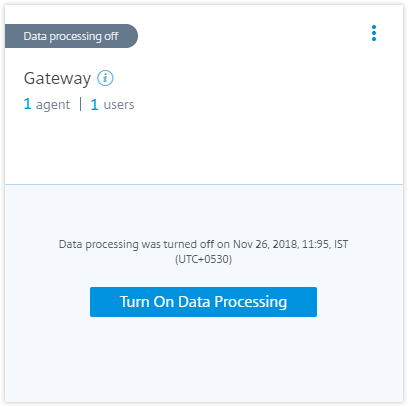
Turn on or off data processing
To stop data processing, click the vertical ellipsis (⋮) on the site card and then click Turn off data processing. Citrix Analytics stops processing data for this data source.
To enable data processing again, click Turn On Data Processing.
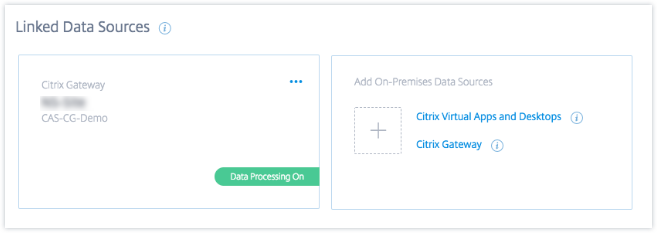
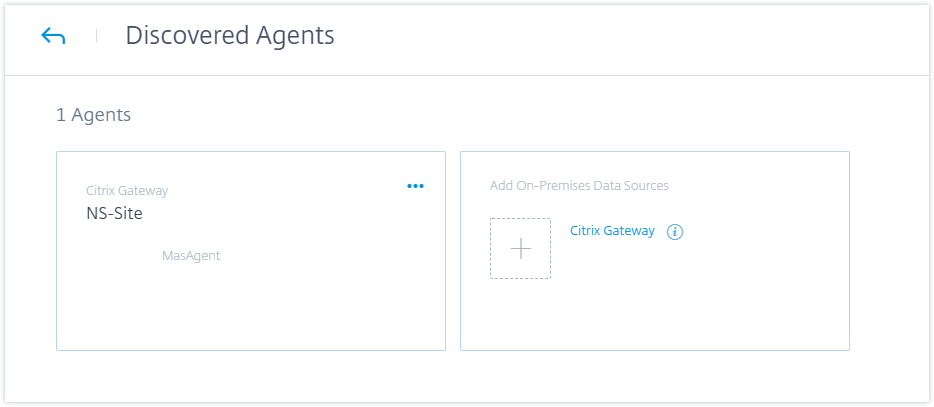
Add more Gateway instances
If you want to add more Gateway instances, click the number of agents on the Gateway site card to view the Discovered Agents page. From the Add On-Premises Data Sources tile, click Citrix Gateway.
Manage data source
You can also add more instances to an agent or remove instances associated with an agent. You can also remove the agent and it’s associated instances from Citrix Analytics.
Flip an agent site card and do one of the following:
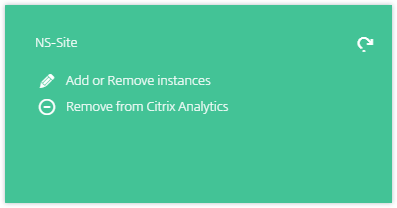
-
Add or Remove instances. You can add more Gateway instances to an agent and enable Analytics on the virtual servers configured on those instances. You can also remove instances added to an agent. When you dissociate an instance from an agent, Citrix Analytics cannot communicate with that instance.
-
Remove from Citrix Analytics. After you remove an agent site, Citrix Analytics stops collecting data from the instances associated with that agent. But all the previously processed data is available during the retention period.