Google Cloud
Note:
Version 2409 of the App Layering appliance for Google Cloud is not yet available but will be released soon.
To install the App Layering service on Google Cloud, you deploy the appliance to a virtual machine on Google Cloud. You can configure a static IP address, if you need one, using the appliance configuration utility.
Google Cloud project configuration
Configure a Google Cloud project.
Enable APIs
Enable the following Citrix Cloud™ APIs:
- Compute Engine API
- Cloud Storage API
- Cloud Resource Manager API
- Identity and Access Management (IAM) API
- Cloud Build API
See the Citrix Virtual Apps and Desktops instructions for enabling the Google Cloud APIs.
Create a Service Account
The service account needs the following three roles:
- Service Account User
- Compute Admin
- Storage Admin
See Create a Service Account for details.
Note:
The account for App Layering does not need all of the roles & permissions described in the article above.
Open required firewall ports
Open the firewall ports for Google Cloud so the appliance can communicate with the Google Cloud.
Virtual machine requirements and settings
Ensure that the virtual machine where you install the appliance on Google Cloud is connected to a Google Cloud virtual network.
The virtual machine that you use for the appliance must be configured as follows:
| Name | Value |
|---|---|
| Virtual Machine Name | App Layering Appliance (Enterprise Layer Manager) |
| Virtual Machine Generation | Generation 1 |
| Memory | 8192 MB |
| CPUs | 4 |
| Boot Disk | unidesk_gcp-system |
| Additional Disk | unidesk_gcp-repository |
Download the installation package
Download the installation package, citrix_app_layering_gcp_x.x, from the Citrix download site. The zip file includes:
| File | Description |
|---|---|
| unidesk_gcp-system.tar.gz | Tarball containing system disk for the appliance VM |
| citrix_app_layering_agent_installer.exe | App Layering agent installer |
| citrix_app_layering_os_machine_tools.exe | OS Machine Tools |
Upload the system disk to Google Cloud
- Extract the download package, citrix_app_layering_gcp_x.x.zip.
- Using the Navigation menu on the top left of the Google Cloud UI, go to the STORAGE section and select Storage > Browser. You can either create a new bucket or add a personal folder to an existing bucket.
- Select the upload-disks bucket link to upload the disk.
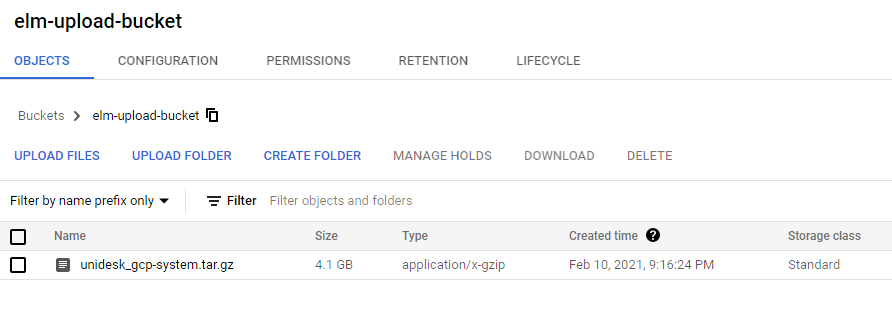
- Select the UPLOAD FILES link, and navigate to the directory where you extracted the unidesk_gcp-system.tar.gz file.
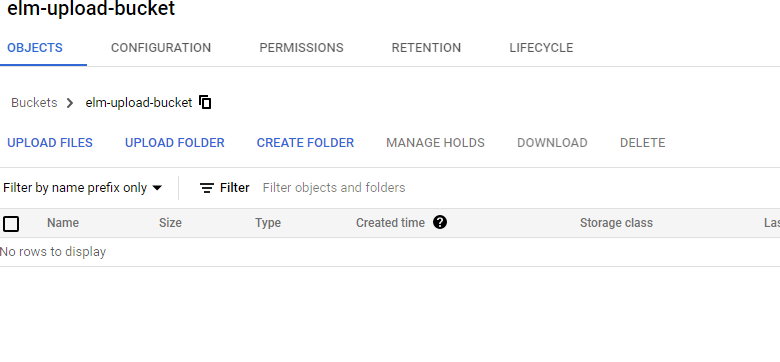
- Select unidesk_gcp-system.tar.gz and click the Open button. See the status message on the lower right side of the window to track the progress of the upload.
Create an image for the system disk
- Select the Navigation menu on the top left of the Google Cloud window, go to the STORAGE section, and select Compute Engine > Images.
- Select [+] CREATE IMAGE.
- In the Name field, enter a permanent name for the image. Google Cloud warns that the name is permanent.
- Under Source, select Cloud Storage file.
- Under Cloud Storage file, use the Browse button to select the unidesk_gcp-system.tar.gz file.
- Under Location, select Multi-regional or Regional, and the Location.
- Select Create. The Images page tracks the image creation as it progresses. A green checkmark appears when the image is created. If creation fails, the image name no longer appears on the Images screen.
Create a VM instance
Next, create a VM instance, attach the system disk, and create repository disks:
- Select the Navigation menu on the top left of the Google Cloud window, go to the COMPUTE section, and select Compute Engine > VM instances.
- Select [+] CREATE INSTANCE.
- Enter data, choosing the desired Region and Machine configuration.
- Expand the CPU platform and GPU section, and check Turn on display device.
- In the Boot disk section, select the Change button. The Boot disk window opens.
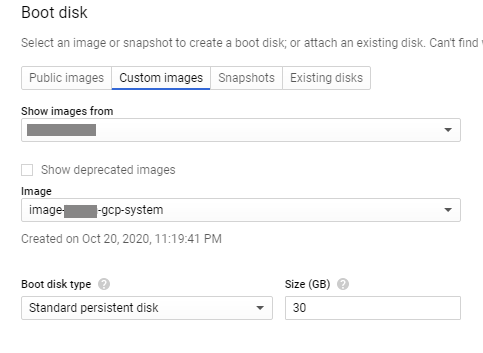
- Select the Custom images tab and the system image previously created. Your data populates the project’s Show images from and Boot disk type and Size (GB) dropdowns.
- Click Select. The Create an instance page appears with the boot disk image set to the image you just selected.
- Select Allow HTTPS traffic.
- Expand the Management, security, disks, networking, sole tenancy section. Select the Disks tab.
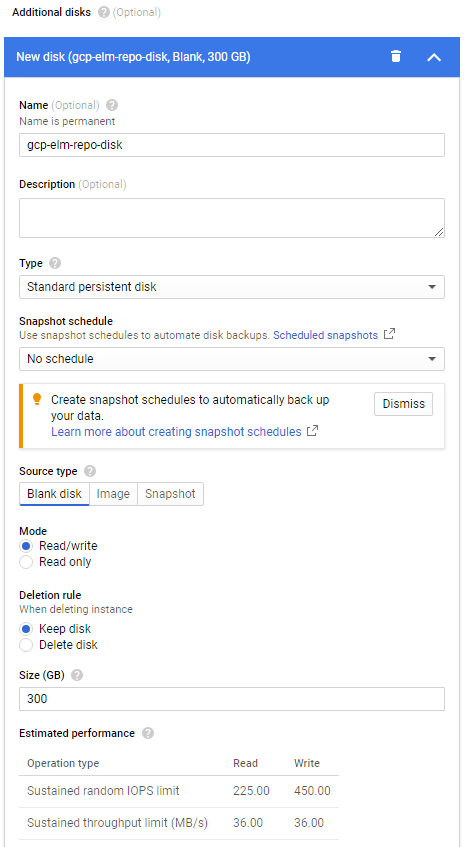
- In the Additional disks section, select + Add new disk button.
- Enter a descriptive name.
- For Source type, select the Blank disk tab and enter the Size (in GB) for the repository disk.
- Select Done to finish adding an additional disk.
- Still in the Management, security, disks, networking, sole tenancy section, select the Networking tab.
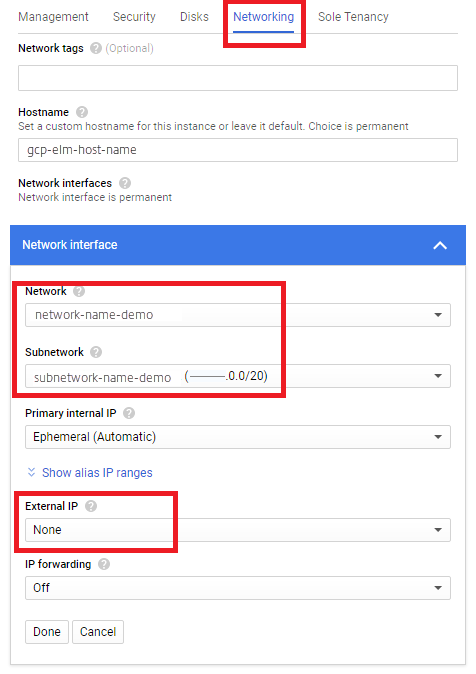
- In the Network interface section, select a Network. Verify that a value appears in the Subnetwork field, and select a value for it.
Important:
We recommend that you do not create an external (public) IP address.
- (Recommended) From the External IP dropdown, select None.
- Select Done to finish editing the network interface.
- Select Create to create the VM instance. The VM is created and the appliance powers on. Once the appliance is created, you no longer need the system disk download.
- To clean up after installation, remove:
- The .zip file that you downloaded.
- The folder containing the uncompressed files.
- The unidesk_gcp-system.tar.gz file from the folder where you uploaded it.
If you want the appliance to use a Static IP address
You can change the appliance’s IP address and its DNS servers. When the appliance is first deployed, the DNS settings are retrieved through DHCP. If DHCP is not available and you are using static IP addresses, once you select Static, you are prompted to enter the IP addresses for your DNS servers.
- Log in to the Appliance Configuration utility, using the steps and default password described in Appliance settings.
- At the Action prompt, enter C (for Configure Networking), and press Return.
- At the next prompt, type D for Dynamic (DHCP) or S for Static. If you choose Static, you are prompted for the IP address and Subnet mask, along with the default addresses for the Gateway and DNS addresses.
- When prompted, enter Y to save settings.
- At the Action prompt, enter Q to quit.
- Restart the appliance.
Next steps
Once the appliance is installed and the IP address is correctly configured, you need to: