iOS features
This article discusses the iOS features that are supported in Secure Mail.
Create Microsoft Teams meetings in Secure Mail Calendar events
In Secure Mail for iOS, you can create Microsoft Teams meeting invites while creating calendar events. To create a Microsoft Teams meeting, turn on the Microsoft Teams Meeting toggle. The meeting invite link and the details are automatically sent with the event details. For more information, see Create Microsoft Teams meetings in Secure Mail Calendar events
Prerequisites:
Ensure that the global admin of the Azure Active Directory performs the following:
- Enable modern authentication (OAuth), and ensure that you are an Exchange Online mailbox user with a valid Microsoft Teams license.
- Provides tenant wide admin consent to the Secure Mail app.
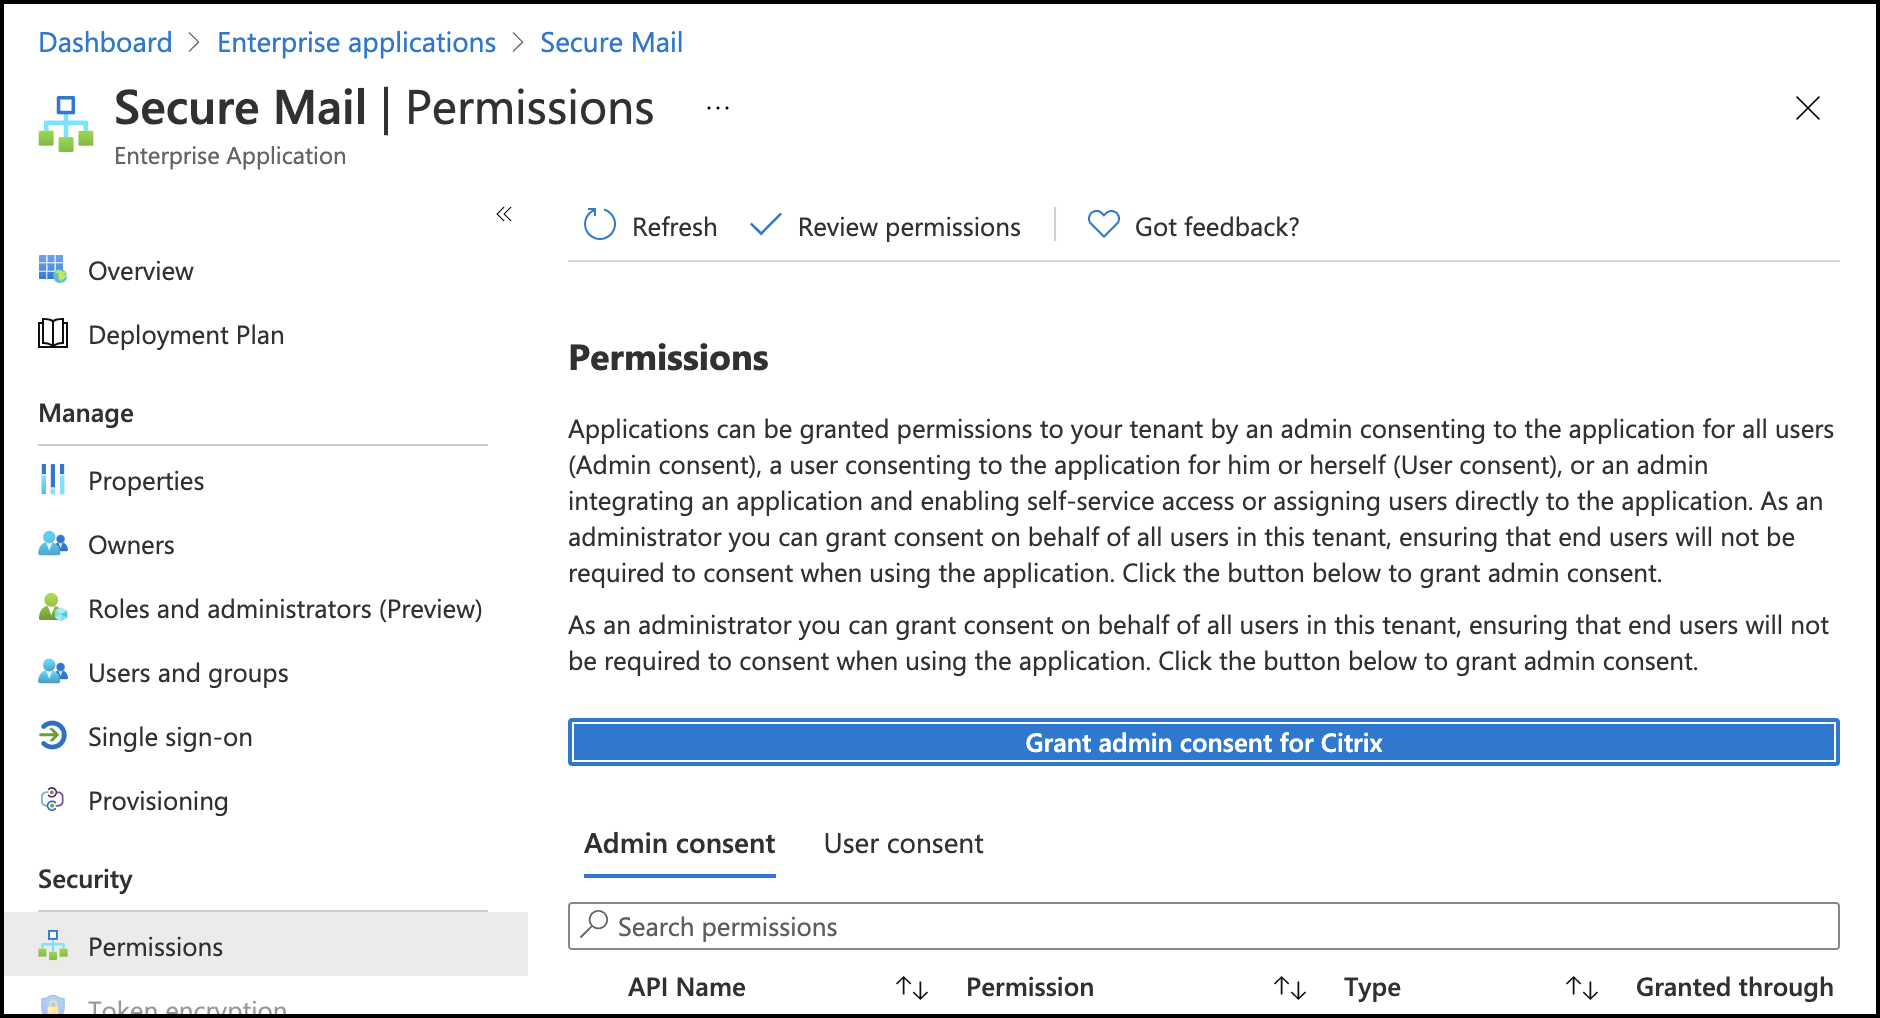
- Configure your Exchange account on the Secure Mail app, and allow app permission for all users to sign in. See the following screen:
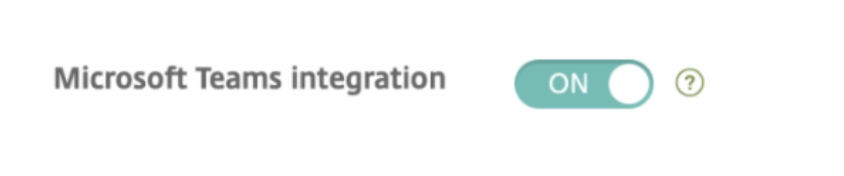
- Enable the Microsoft Teams integration policy.
Limitations:
For meetings created on Secure Mail, currently the feature has the following limitations on the Microsoft Outlook Calendar:
- The Join online option is not available
- The Meeting has started notification is not available
Minimize drafts
In Secure Mail for iOS, you can minimize a draft while you’re composing an email and navigate within the app. This feature is available on devices running iOS 13 and later. For user help documentation on this feature, see the Citrix User Help Center article Minimize a draft email.
Reporting phishing emails with MIME headers
In Secure Mail for iOS, when a user reports a phishing mail, an EML file is generated as an attachment corresponding to that mail. Admins receive this mail and can view the MIME headers associated with the reported mail. To enable this feature, an admin must configure the Report Phishing Email Address policy and set the Report Phishing Mechanism as Report Via Attachment in the Citrix Endpoint Management console. For details, see Report phishing email as an attachment.
Support for WkWebView
Secure Mail for iOS supports WkWebView. This feature improves the way Secure Mail email and Calendar events are rendered on your device.
Support for Slack EMM
Slack EMM is for Slack customers with Enterprise Mobility Management (EMM) enabled. Secure Mail for iOS supports the application Slack EMM, which allows admins to choose the integration of Secure Mail with either the Slack app or the Slack EMM app.
Group notifications
With the Group notification feature, conversations in an email thread are grouped. You can quickly glance at grouped notifications on the lock screen of your device. Group notification settings are enabled by default on the device. The feature requires iOS 12.
Notification response option
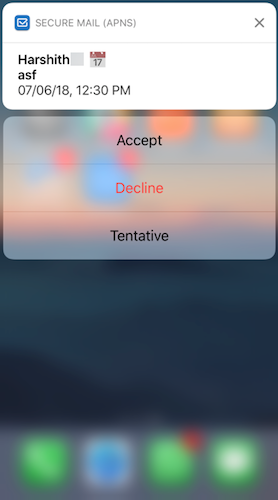
In Secure Mail for iOS, users can respond to meeting notifications, such as Accept, Decline, and Tentative. They can respond to message notifications with Reply and Delete.
Enhancements to rich push notification failure messages
In Secure Mail for iOS, appropriate push notification failure messages appear in the notification center on your device based on the type of notification failure. For details, see Secure Mail notifications.
Support for rich push notifications on Microsoft setups
Secure Mail for iOS supports rich push notifications on setups running Microsoft Enterprise Mobility + Security (EMS)/Intune with modern authentication (O365). To enable the rich push notifications feature, ensure that the following prerequisites are met:
- In the Endpoint Management console, set Push notifications to ON.
- The Network access policy is set to Unrestricted.
- The Control locked screen notifications policy is set to Allow or Email sender or event title.
- Navigate to Secure Mail > Settings > Notifications and then enable Mail Notifications.
Support for S/MIME for derived credentials
Secure Mail for iOS supports S/MIME for derived credentials. For this feature to work, you need to do the following:
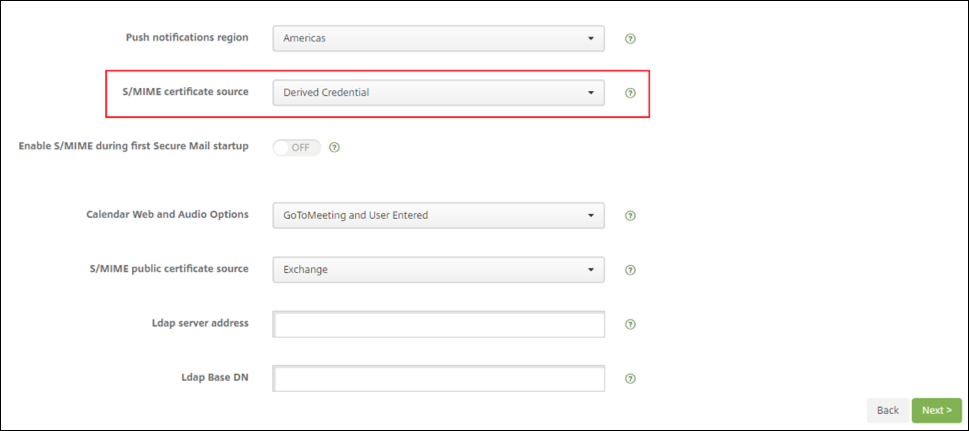
- Select Derived Credential as the S/MIME certificate source. For details, see Derived credentials for iOS.
- Add the LDAP Attributes client property in Citrix Endpoint Management. Use the following information:
- Key: SEND_LDAP_ATTRIBUTES
-
Value:
userPrincipalName=${user.userprincipalname},sAMAccountNAme=${user.samaccountname},displayName=${user.displayName},mail=${user.mail}
For steps on how to add a client property, for XenMobile Server, see Client properties and for Endpoint Management, see Client properties.
For more information about how devices enroll when using derived credentials, see Enrolling devices by using derived credentials.
- On your Endpoint Management Console, navigate to Configure > Apps.
- Select Secure Mail and then click Edit.
- Under the iOS platform, for the S/MIME certificate source, select Derived Credential.
Rich text signatures
You can use images or links in your email signature. To update your signature, simply copy and paste images or links in the signature field.

To add a rich text signature
-
Copy the image or URL you want to use.
-
Navigate to Secure Mail > Settings > Signature.
-
Paste the image or URL.
Alternatively, you can long press in the signature field and tap Insert Picture to select an image from your gallery.
Secure Mail Caller ID
In Secure Mail for iOS, you can identify incoming calls from your Secure Mail contacts by enabling Secure Mail Caller ID in your device settings. You must enable the following administrative prerequisite: In Citrix Endpoint Management, ensure that the CallerIDSupportEnabled MDX policy is enabled.
For user help documentation on this feature, see the Citrix User Help Center article, Set up caller ID.
Set colors in Calendars
For user help documentation on this Calendar feature, see the Citrix User Help Center article, Set colors for synchronized Secure Mail calendars.
Attach files from the Files app
In Secure Mail for iOS, you can attach files from the iOS native Files app. For more information about the iOS Files App, see the Apple article, Files App. For user help documentation on this feature, see the Citrix User Help Center article, View and attach files.
Spellcheck feature
Secure Mail spellcheck interacts with the device Auto-Capitalization and Check Spelling settings under General > Keyboard in the following ways:
| Auto-Correction on Device | Check Spelling on Device | Check Spelling in Secure Mail | Behavior |
|---|---|---|---|
| ON | ON | ON | Red underline shows. When tapped, the word is highlighted in pink and a suggestion appears. |
| OFF | OFF | ON | Red line shows. When tapped, no suggestion appears. |
| ON | ON | OFF | No red underline shows. When tapped, the word is highlighted in pink and a suggestion appears |
| OFF | OFF | OFF | No red underline, highlighting, or suggestion appear. |
| ON | OFF | ON | Red underline shows. When tapped, the word is highlighted in pink and a suggestion appears. |
| OFF | ON | ON | Red underline shows. When tapped, the word is highlighted in pink and a suggestion appears. |
| ON | OFF | OFF | No red underline shows. When tapped, the word is highlighted in pink and a suggestion appears. |
| OFF | ON | OFF | No red underline shows. When tapped, the word is highlighted in pink and a suggestion appears. |
Mailboxes screen
The Mailboxes screen displays all the accounts you have configured and has the following views:
- All Accounts: Contains emails from all Exchange accounts that you have configured.
- Individual accounts: Contains emails and folders of an individual account. These accounts appear as a list that you can expand to view the subfolders.
The All Accounts mailbox is the global view by default. This view contains attachments and emails from all Exchange accounts that you have configured on your device.
The All Accounts mailbox has the following menu items:
- All attachments
- Inbox
- Unread
- Flagged
- Drafts
- Sent Items
- Outbox
- Deleted Items
Although the All Accounts view displays your emails from multiple accounts collectively, the following actions use the email address of the default or primary account:
- New message
- New event
To change the email address of the sender while composing a new mail from the All Accounts view, tap the default address in the From: field and select a different account from the mail accounts that appear.
Note:
Composing an email from the conversation view auto-populates the From: field with the email address that conversation is addressed to.
Individual accounts
All the accounts you have configured appear as a list below All Accounts. The default or the primary account always appears first followed by the other accounts in alphabetical order.
The individual accounts display any subfolders you might have created. You can view the subfolders folders by tapping the V icon next to the folder.
The following actions are limited to individual accounts only:
- Moving items.
- Composing emails from conversation view.
- Importing vCard.
- Saving contacts.
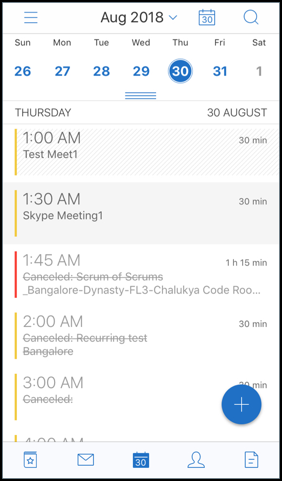
Calendar
The calendar displays all events pertaining to the multiple accounts on your device. You can set colors to individual accounts to differentiate calendars events pertaining to individual accounts.
To set colors to calendar events
- Tap the Calendar icon in the footer bar and then tap the hamburger icon in the top left. The Calendar screen displays all the accounts you have configured.
- Tap on the default color displayed on the right of an Exchange account. The Colors screen displays the available colors for that account.
- Select a color of your choice and then tap Save.
- To return to the previous screen, tap Cancel. The selected color is set for all calendar events pertaining to that Exchange account.
When you are creating a calendar invitation or event, the Organizer field auto-populates with the email address of the default account. To change the mail account, tap this email address and select another account.
Note:
When you exit and then launch Secure Mail, the app restores the last configured calendar settings on your device.
Search
You can perform a global search from the Mailboxes or the Contacts view. This action displays the appropriate results after searching all the accounts in the app. All searches from within an individual account displays results pertaining to that account only.
Print emails, calendar events, or inline images on iOS
You can now print emails, calendar events, or inline images from your iOS device.
Prerequisites
Before you begin, ensure that the following requirements are met:
- The Block AirPrint option is set to OFF.
- The Allow viewers to print option is disabled in IRM.
By default, the print feature is enabled in Secure Mail for iOS. The printing feature might be controlled by your administrator through administrative policies via Apple AirPrint or Microsoft Information Rights Management (IRM). In these scenarios, printing an email, calendar event, or inline image will not work and an error message might appear.
To print emails
- Open the email item you want to print.
- Tap the More icon on the top left of the screen. The following options appear:
- Move
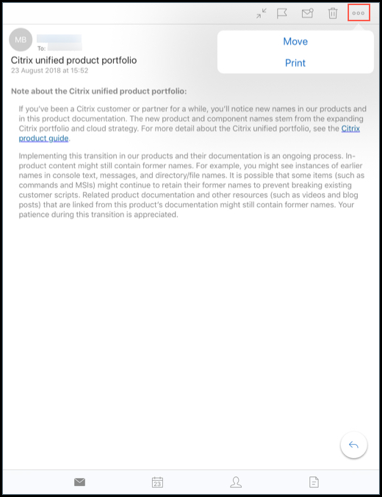
-
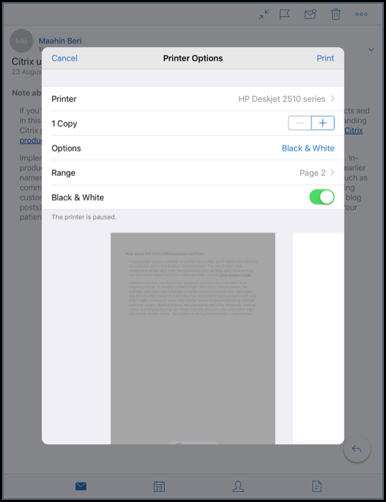
Tap Print. The Printer Options screen appears.
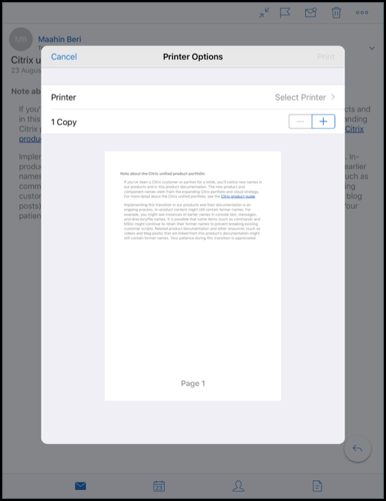
-
To select a printer, tap Select Printer. The Printer screen appears.
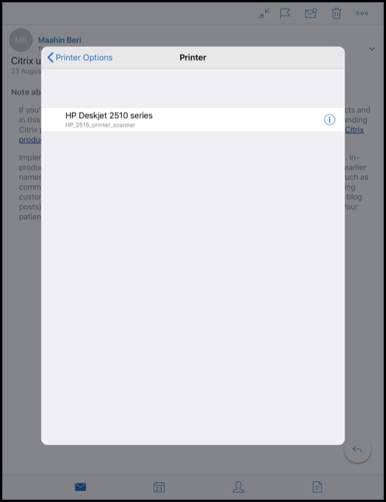
-
Select the printer you want to print to.
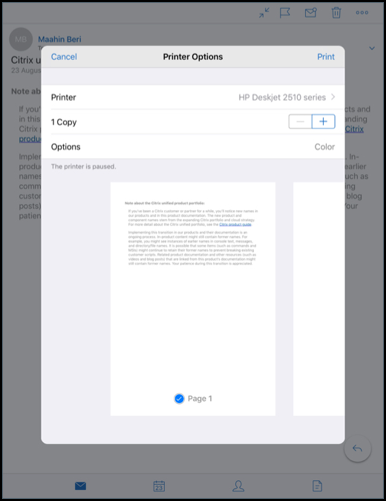
-
Tap – or + to decrease or increase the number of copies you want to print.
-
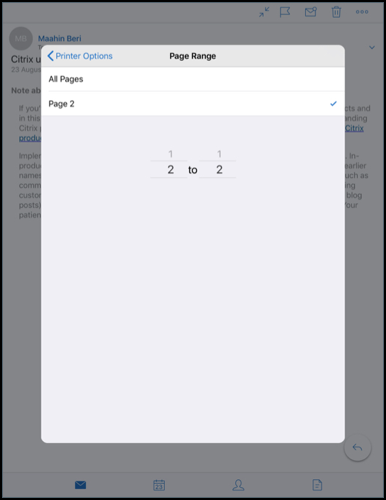
To print a specific page or a range of pages, tap Range. The Page Range screen appears. By default, All Pages is selected.
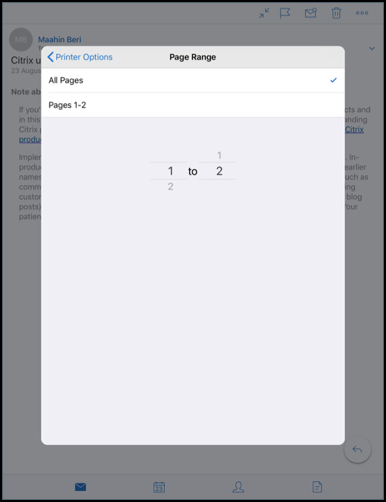
-
To change the page selection, swipe the page numbers up or down.
-
Tap Printer Options to go back to the Printer Options screen.
-
To print in black and white, tap the Black & White button. By default, Secure Mail prints in color.
- Tap Print on the top right to print the email.
- To cancel the print job, tap Cancel on the top left.
To print a calendar event
-
Navigate to calendar and select an event.
-
Tap the Print icon and follow the same instructions as mentioned in the preceding section To print emails.

To print inline images:
- Open the email item with the inline image.
-
Tap the More icon. The following options appear:
- Move
- Cancel
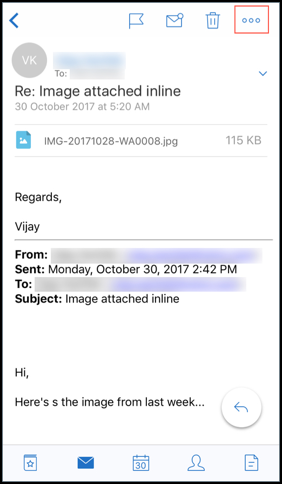
- Tap Print and follow the instructions as mentioned in the proceeding section To print emails.
Multiple conference codes (Dial-In to a meeting)
Secure Mail for iOS supports multiple conference codes. You can now select a conference code, from a list of available conference codes, to join a meeting.
To dial-in to a meeting
-
Open a meeting invite and tap Dial In.
-
From the list of phone numbers that appear, select one to dial in.
-
From the list of conference codes that appear, select one to join the meeting.
-
Tap Call to join the meeting.
Support to print email attachments
Secure Mail for iOS supports printing email attachments.
In this article
- Create Microsoft Teams meetings in Secure Mail Calendar events
- Minimize drafts
- Reporting phishing emails with MIME headers
- Support for WkWebView
- Support for Slack EMM
- Group notifications
- Notification response option
- Enhancements to rich push notification failure messages
- Support for rich push notifications on Microsoft setups
- Support for S/MIME for derived credentials
- Rich text signatures
- Secure Mail Caller ID
- Set colors in Calendars
- Attach files from the Files app
- Spellcheck feature
- Calendar
- Print emails, calendar events, or inline images on iOS
- Multiple conference codes (Dial-In to a meeting)
- Support to print email attachments