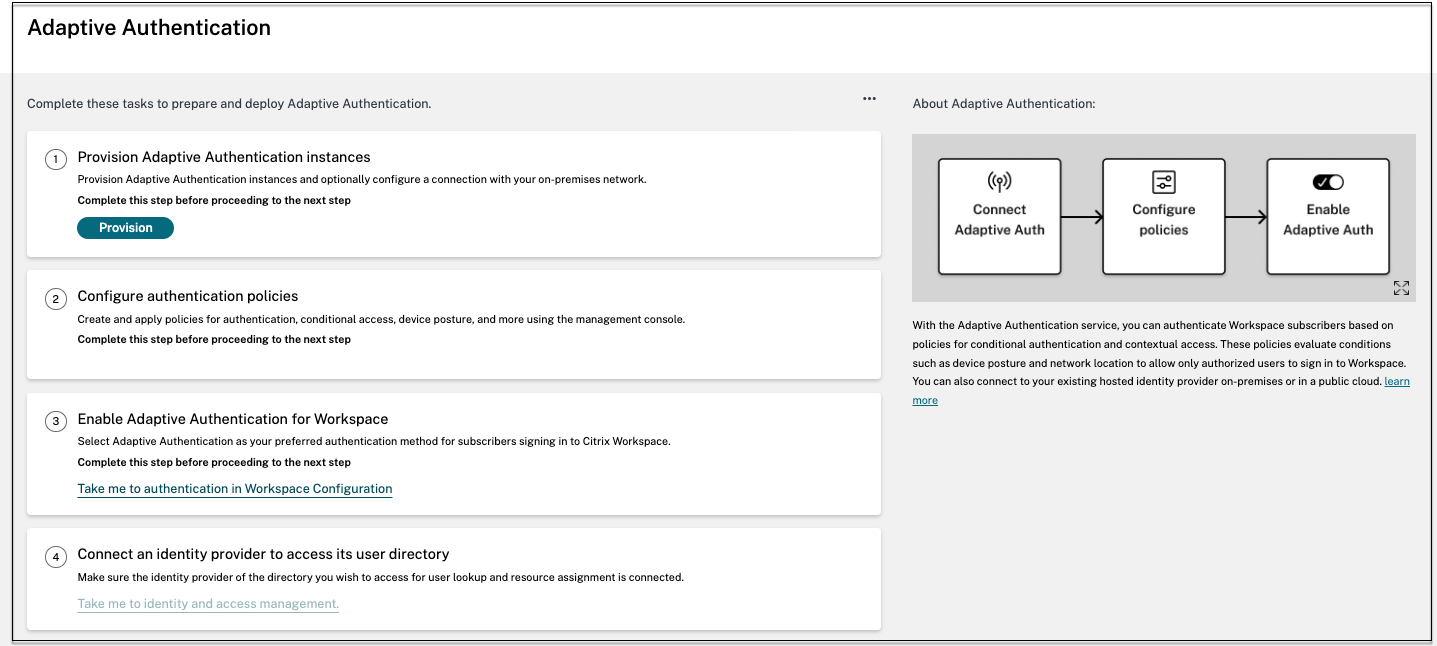
Configure Adaptive Authentication service
The following steps are involved in configuring the Adaptive Authentication service.
- Provision Adaptive Authentication
- Configure Adaptive Authentication policies
- Enable Adaptive Authentication for Workspace
How to configure the Adaptive Authentication service
Access the Adaptive Authentication user interface
You can access the Adaptive Authentication user interface by one of the following methods.
- Manually type the URL https://adaptive-authentication.cloud.com.
-
Log in using your credentials and select a customer.
After you’re successfully authenticated, you’re redirected to the Adaptive Authentication user interface.
OR
- Navigate to Citrix Cloud™ > Identity and Access Management.
- In the Authentication tab, in Adaptive Authentication, click the ellipsis menu and select Manage.
The Adaptive Authentication user interface appears.
The following figure illustrates the steps involved in configuring Adaptive Authentication.
Note:
Do not run clear config for any Adaptive Authentication instance.
Do not modify any configuration with the prefix
AA(example, AAuthAutoConfig) including certificates. This disrupts Adaptive Authentication management and user access is impacted.The Adaptive Authentication instance does not require SNIP configurations.
The Adaptive Authentication instances fail to establish the tunnel if a proxy is configured in the customer’s setup. Therefore, it is recommended that you disable proxy configuration for Adaptive Authentication.
If you are using third-party authentication services such as SAML, authentication might fail if all claims are not found. Therefore, it is recommended that customers add an additional factor such as NOAUTH in the multifactor authentication configuration to pass all the claims.