Creating a VPX Amazon Machine Image (AMI) in SC2S
Contributors
Author: Jill Fetscher, Architect
SC2S is an air-gapped AWS instantiation with no access to an AWS Marketplace. All Amazon Machine Images (AMI) must be manually uploaded into the environment using the vmimport tool. Due to the nature of the Citrix ADC VPX appliance, the image file is too large to use the vmimport tool. The VPX AMI must be created so that it is bootable for future use. We created the following method specifically for SC2S, but it can be used for future use cases of this nature, where no Marketplace exists, or no VPX AMI offering is available in the Marketplace.
Create a VPX in SC2S: Steps on the low side (commercial AWS)
-
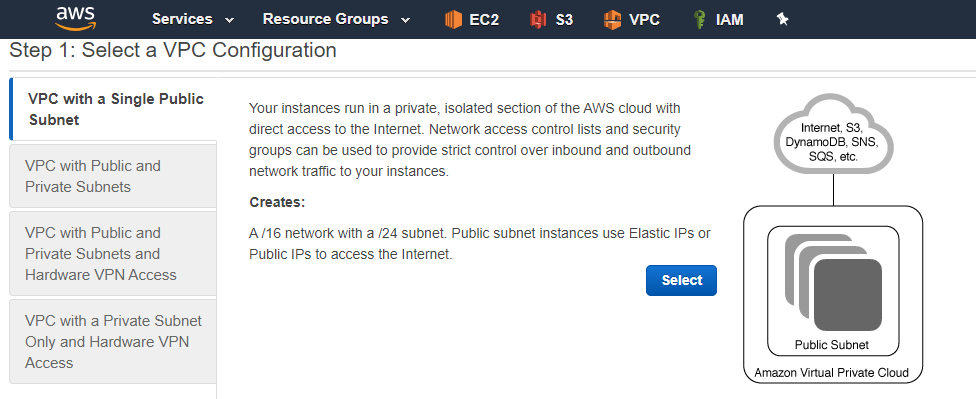
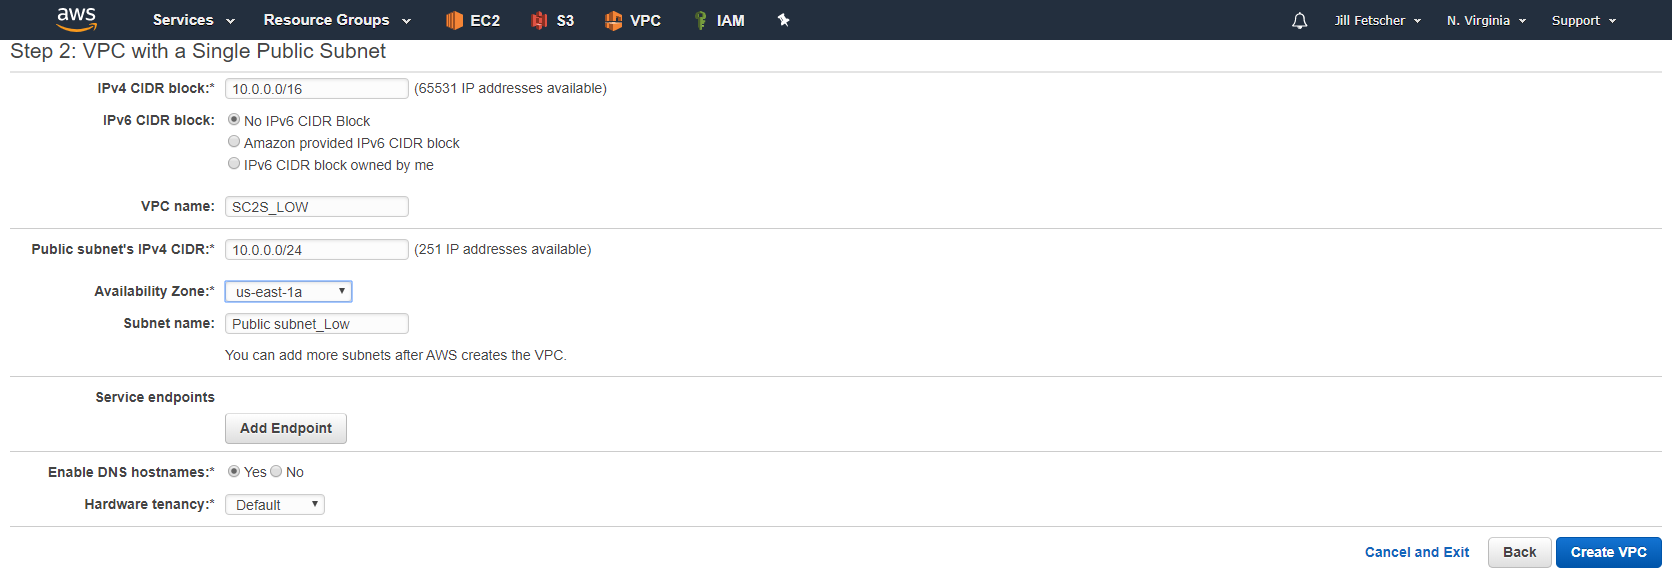
Create a VPC and subnet in UC2S (commercial) using the same CIDR block as the VPC where the Citrix ADC resides in SC2S. (for example, create a VPC of 10.0.0.0/16 size, with a single public subnet of size 10.0.0.0/24 using the VPC Wizard.)
This can be done one of two ways:
- Create a testing VPC in SC2S with the basic CIDR and subnetting
- Copy the CIDR and subnetting that is used in SC2S
Note:
For C2S, VPC creation is done through a service and automatically allocated an IP space from the supernet. In this case, the second method is necessary. For GovCloud, wait for further instruction, or download the latest version of VPX from the Marketplace.
-
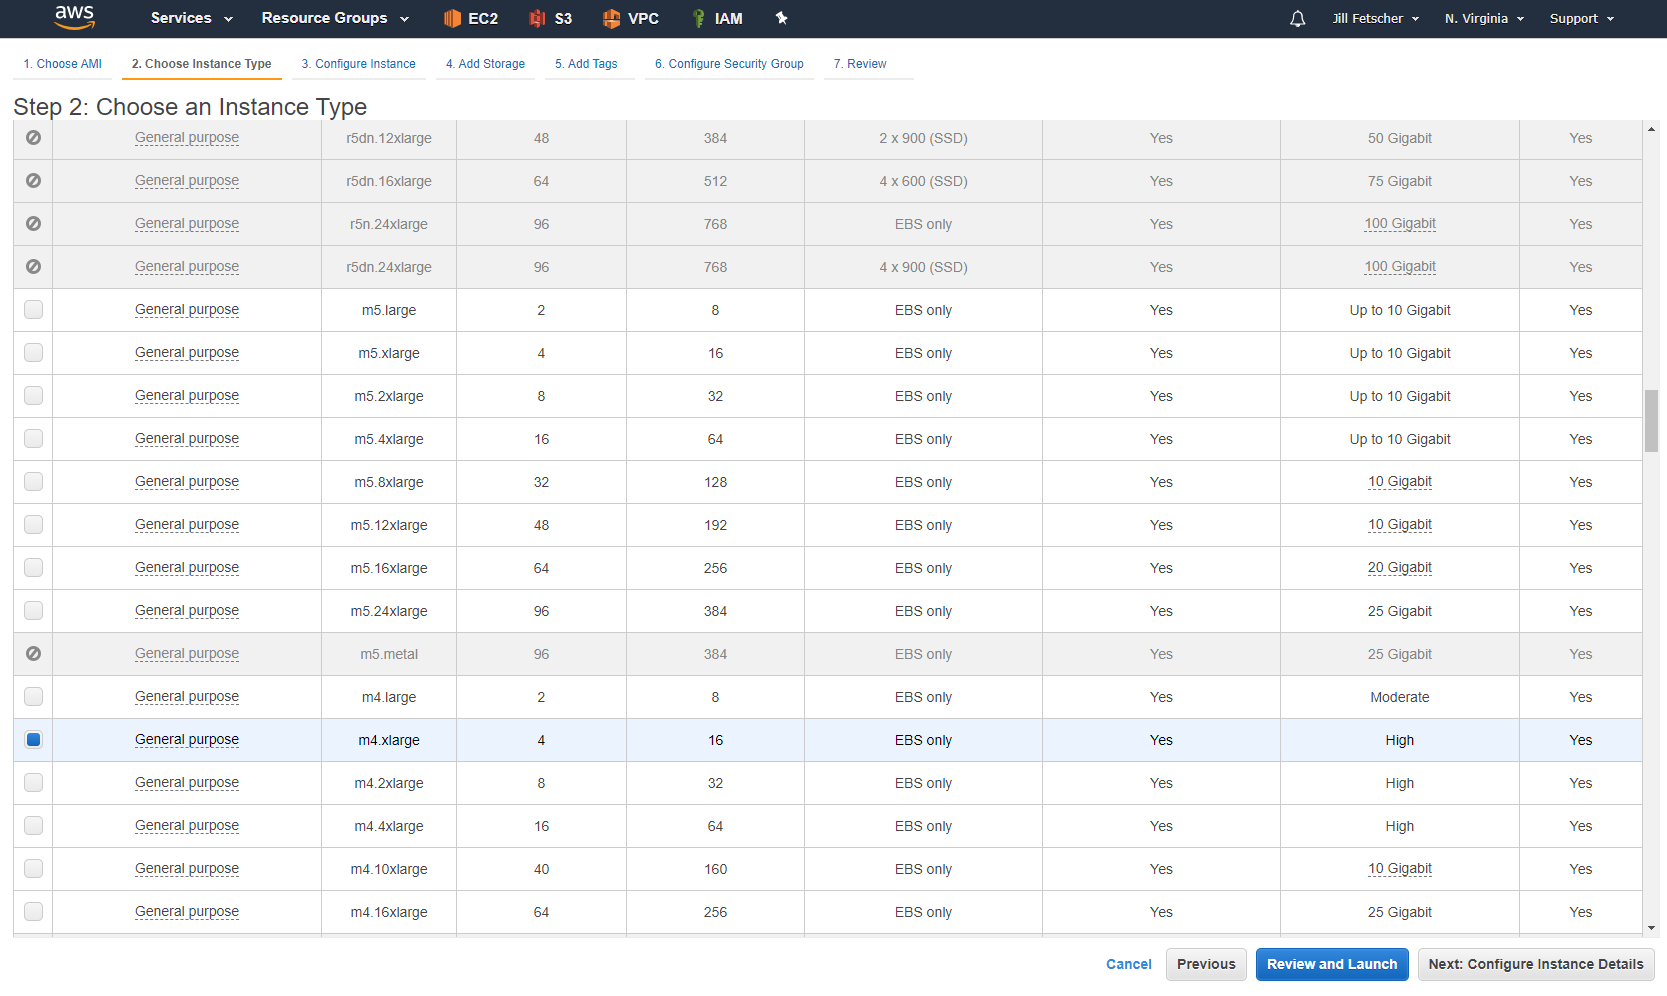
Deploy an EC2 instance from the Citrix ADC AMI in AWS Marketplace. The instance is required to be Customer Licensed. Use a non-nitro-based instance (for example,
m4.xlarge).
Choose the VPC you created in the previous steps. Disable Auto-assign Public IP.
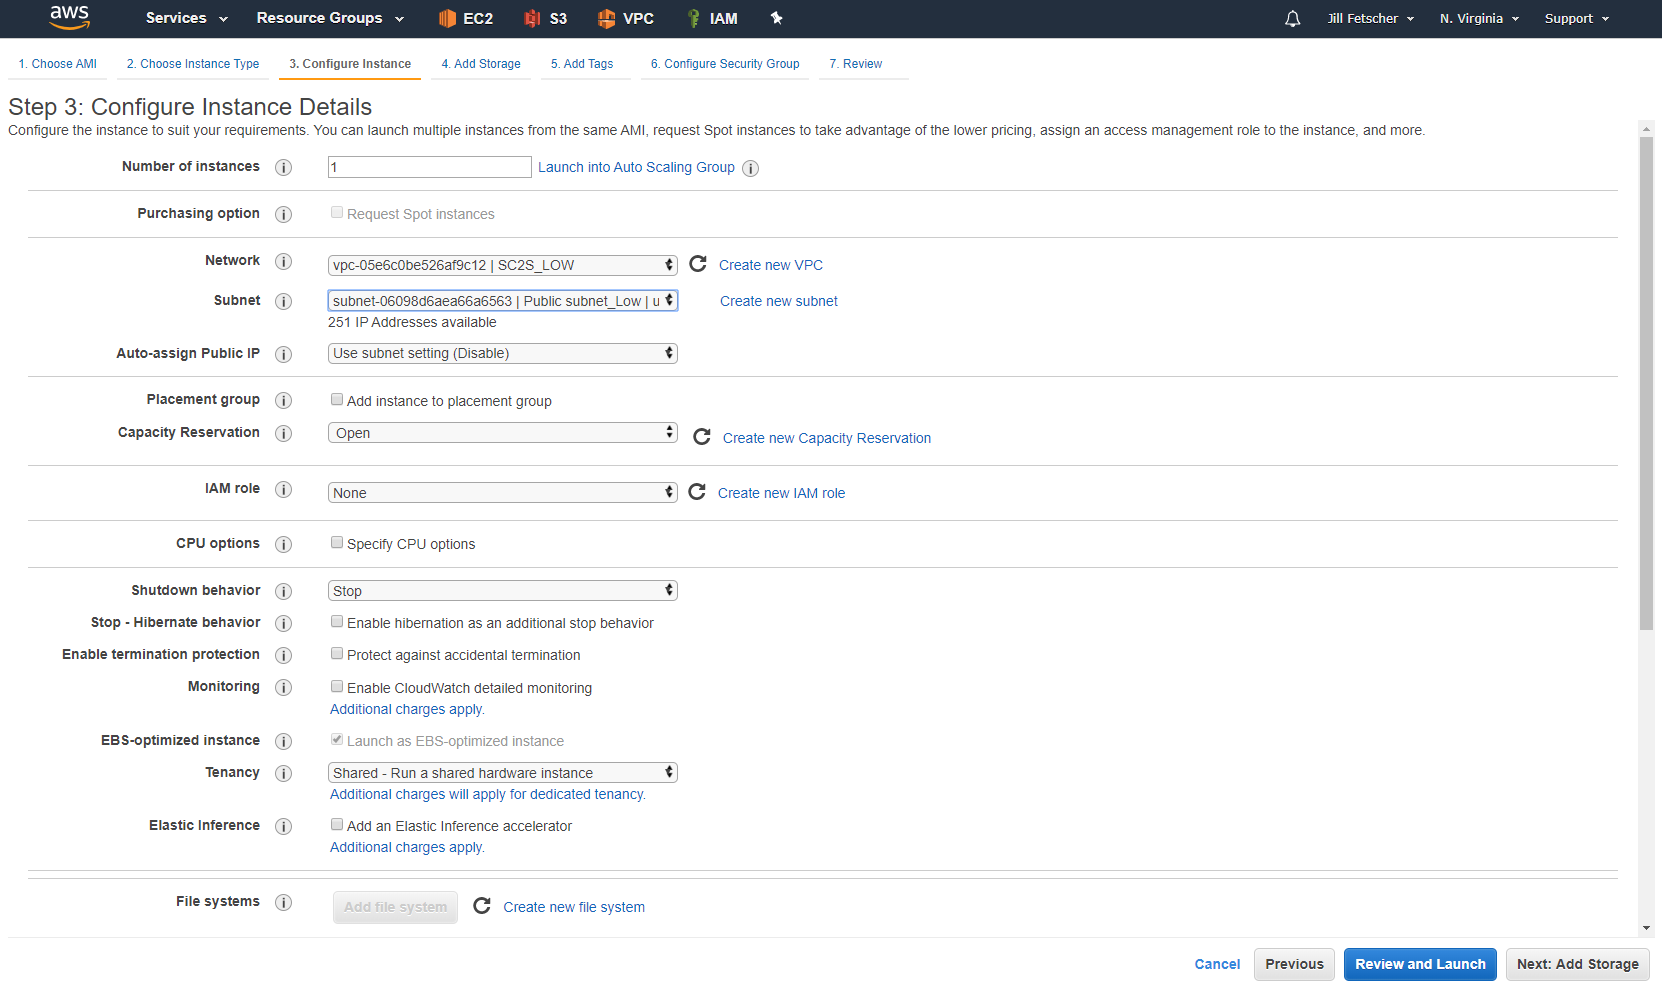
Name the instance with an easily recognizable name. We create many instances in the following steps and it is necessary to identify each instance for further configuration.
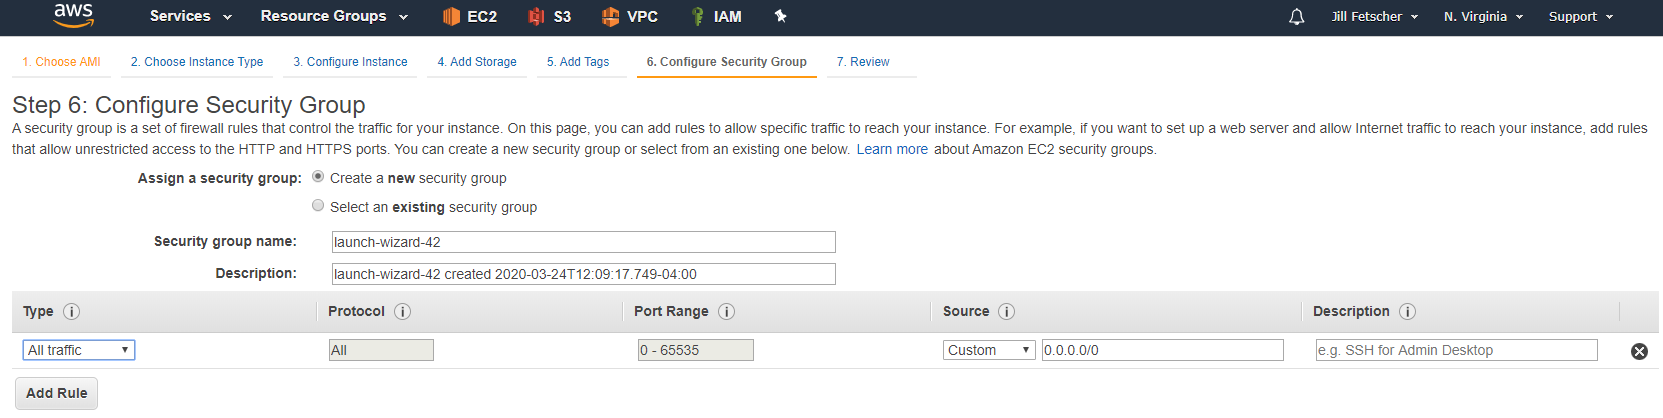
The security group auto-populates. Click Next through the rest of the steps for instance launch.
-
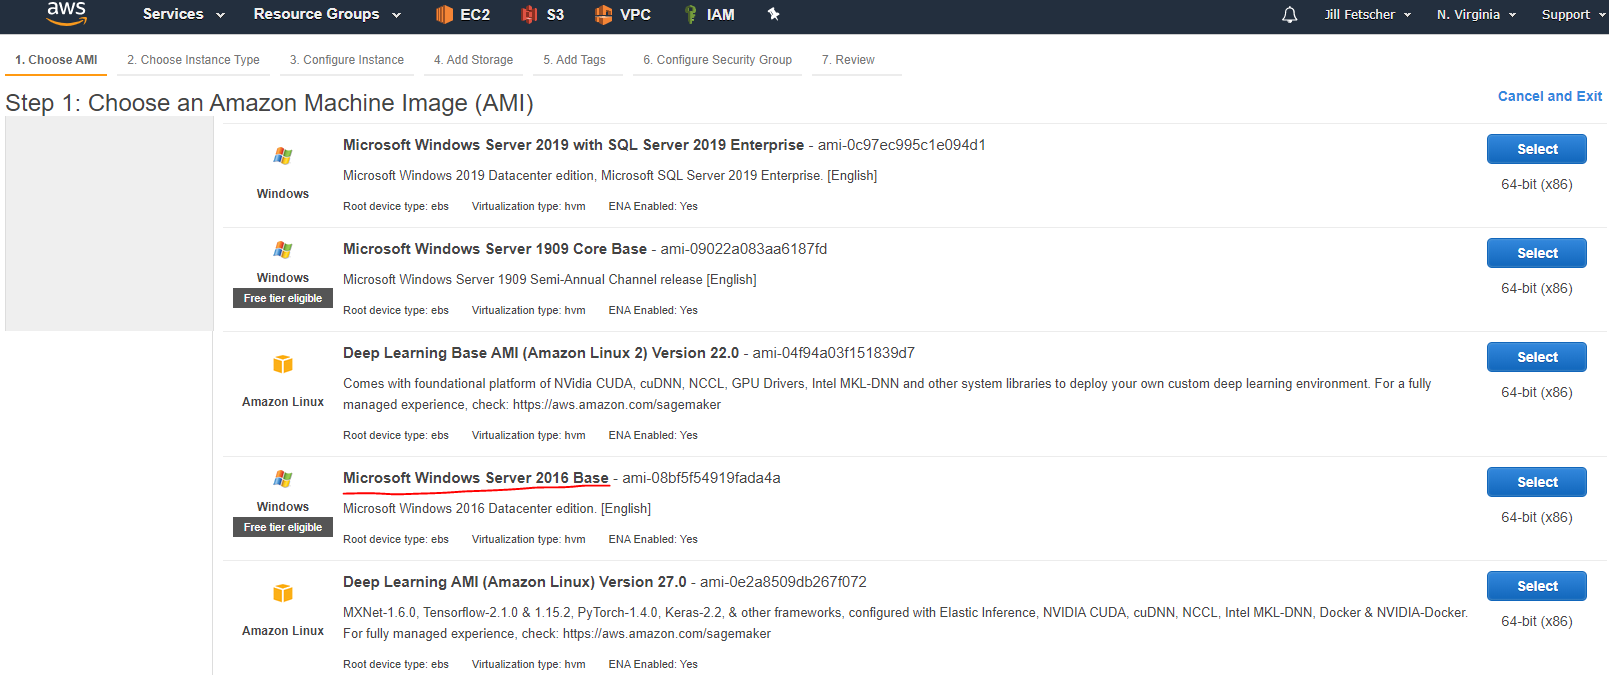
Create a Windows Server 2019 or 2016 Base bastion host to reach your VPX instance.
This instance can be an
m4.xlarge, and must be built in the same VPC and AZ as the Citrix ADC, with an auto-assigned Public IP. The root volume requires a minimum of 45 GiB, General Purpose SSD (gp2).Note:
If the environment allows creation of Elastic IPs (EIP), you can skip the creation of the bastion host, and the VPX instance can be connected to directly from the network or internet. We recommend the use of a bastion host for security purposes and the lack of EIP availability in air-gapped environments.
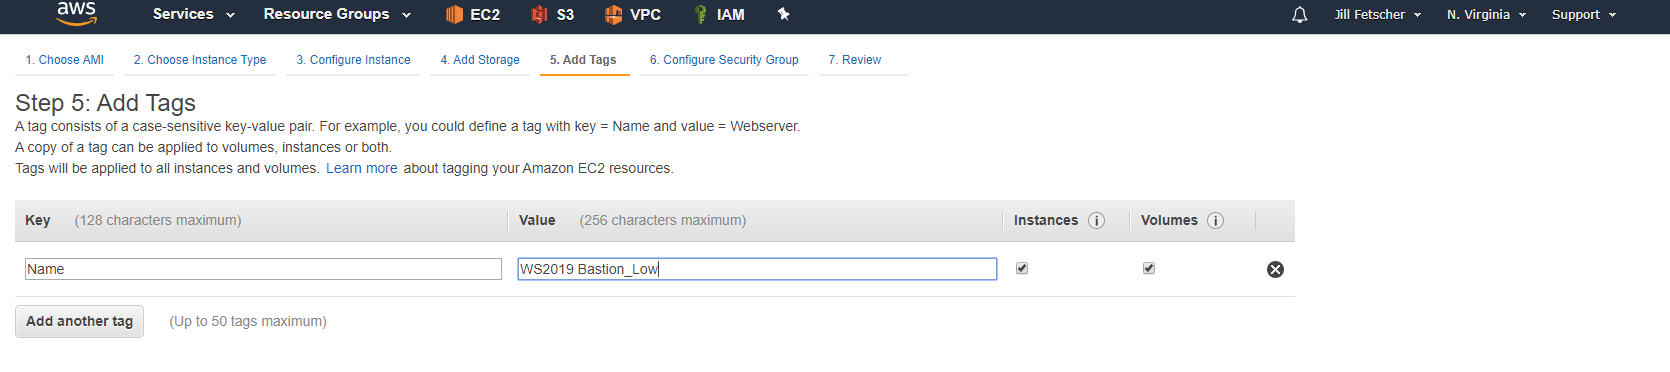
Name the instance something recognizable (for example, SC2S: WS2016 Bastion Low).
For simplicity, create a security group to allow All Traffic. You can lock down this security group later.
Once the instance is ready, RDP in to the machine using the public IP. Then download PuTTY and WinSCP, and copy over the keypair that was used to create the VPX instance. This requires the conversion of the .pem to a .ppk, using PuTTYgen. In Server Manager, disable Windows Firewall and Internet Explorer Enhanced Security. Using PuTTY, verify that you are able to SSH into the newly deployed Citrix ADC appliance. Note the
nsrootpassword for the instance. By default, this is the AWS InstanceID. Make a note of the private IP of the instance, as it is needed in a later step. At this stage, you have a working Citrix ADC appliance.Note:
Do not configure this VPX! Simply log in as
nsrootto verify functionality. -
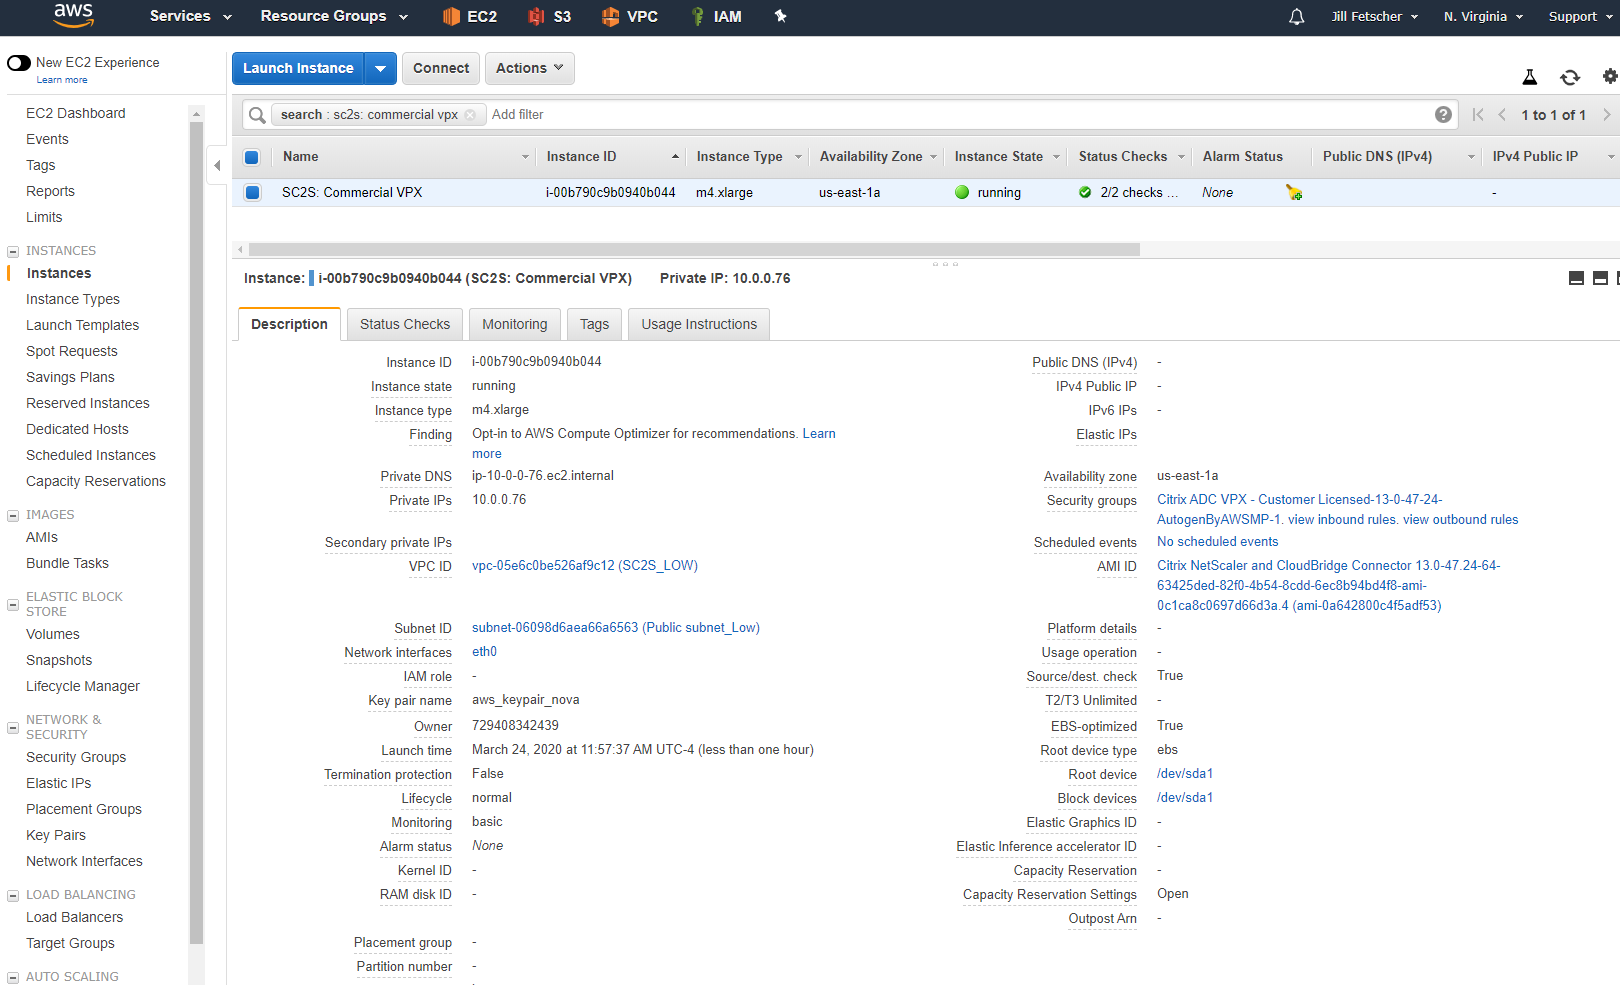
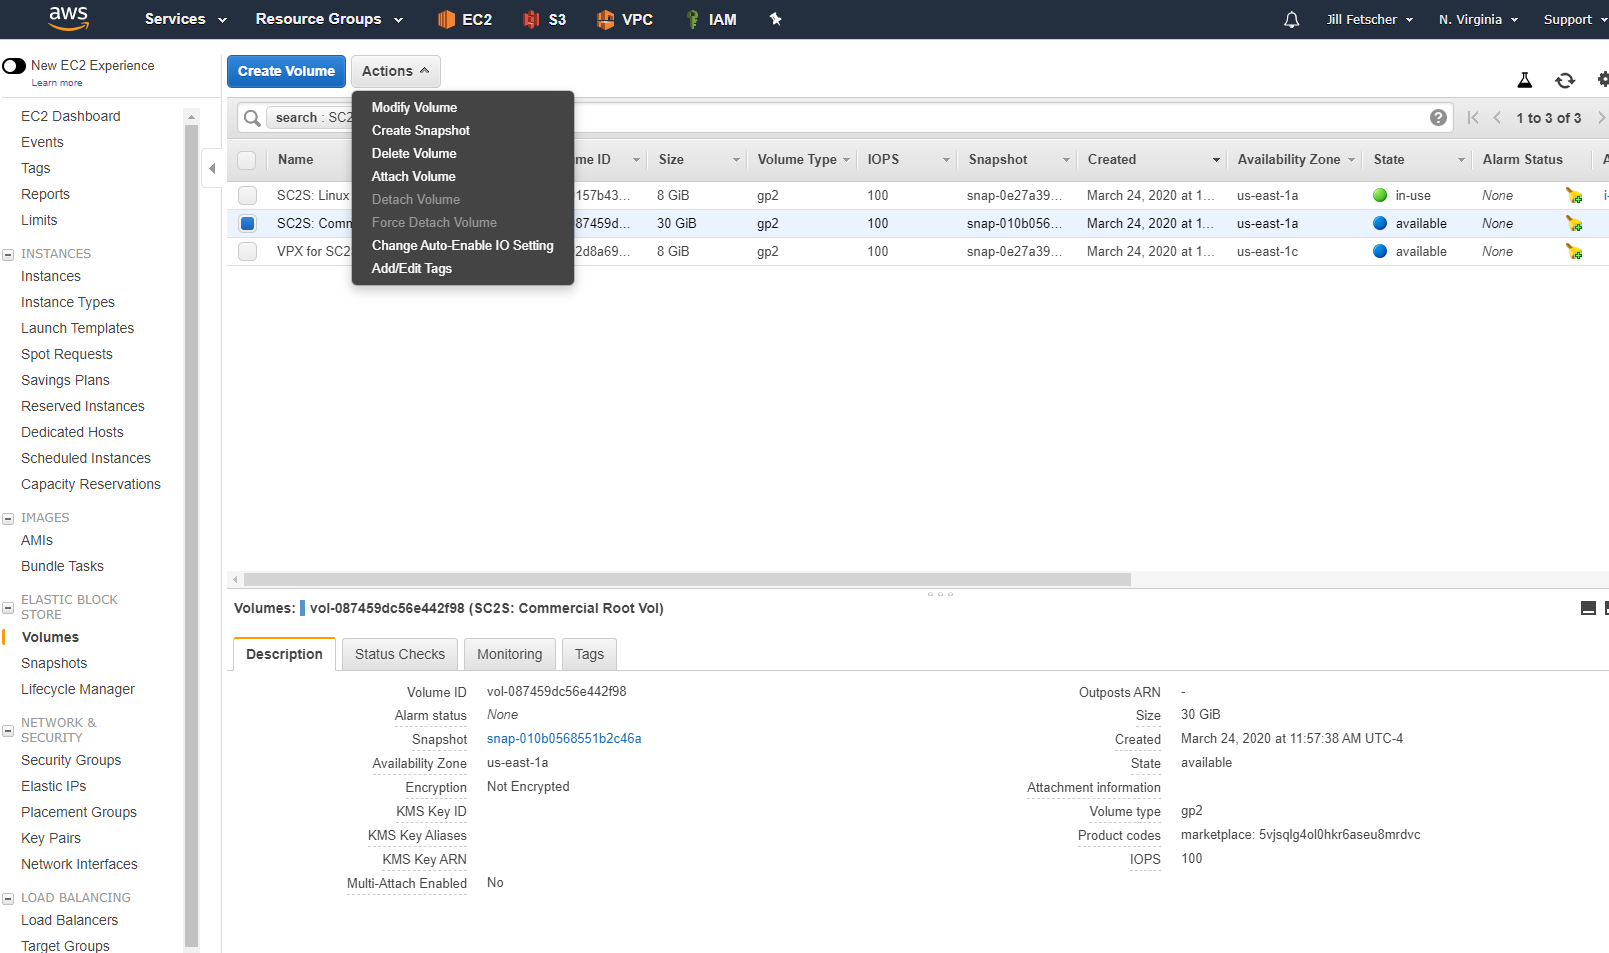
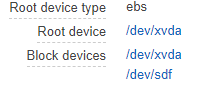
Power off the Citrix ADC instance from the AWS console. Detach the root EBS volume from the Citrix ADC instance.
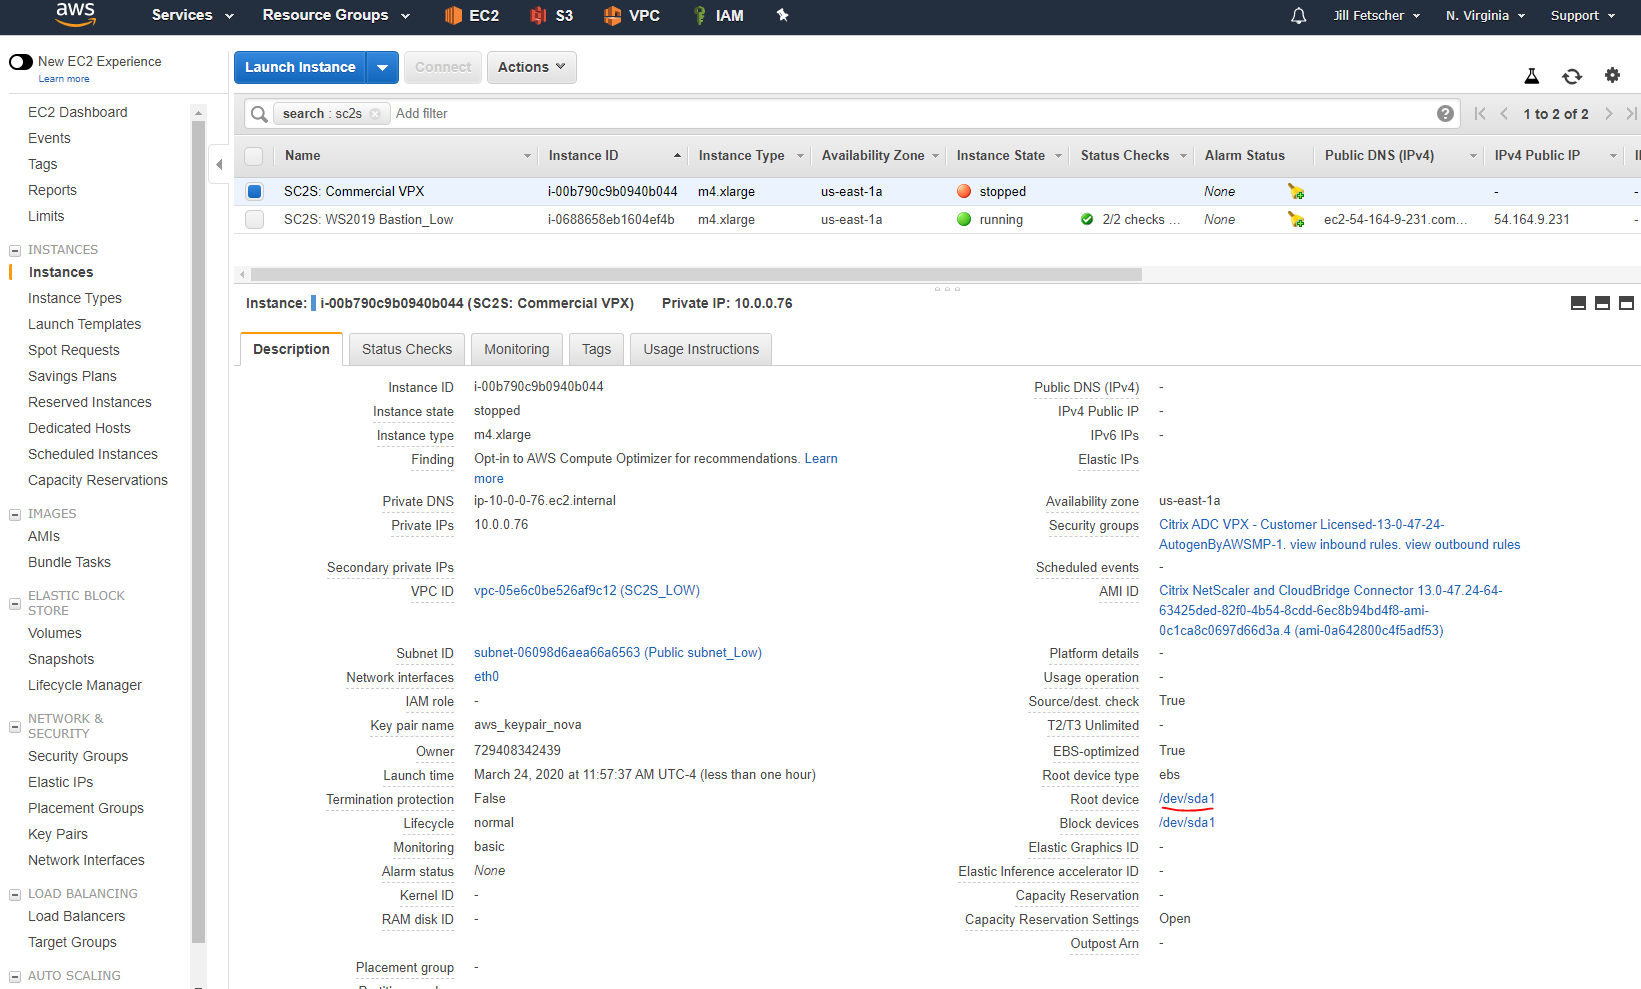
To detach the root volume, click the root device
/dev/sda1, and then click the volume ID. In the Volume tab, select the volume, name it something recognizable (for example, SC2S: Commercial Root Vol), and note the volume ID. Click Actions > Detach Volume > OK. The volume state should now be Available.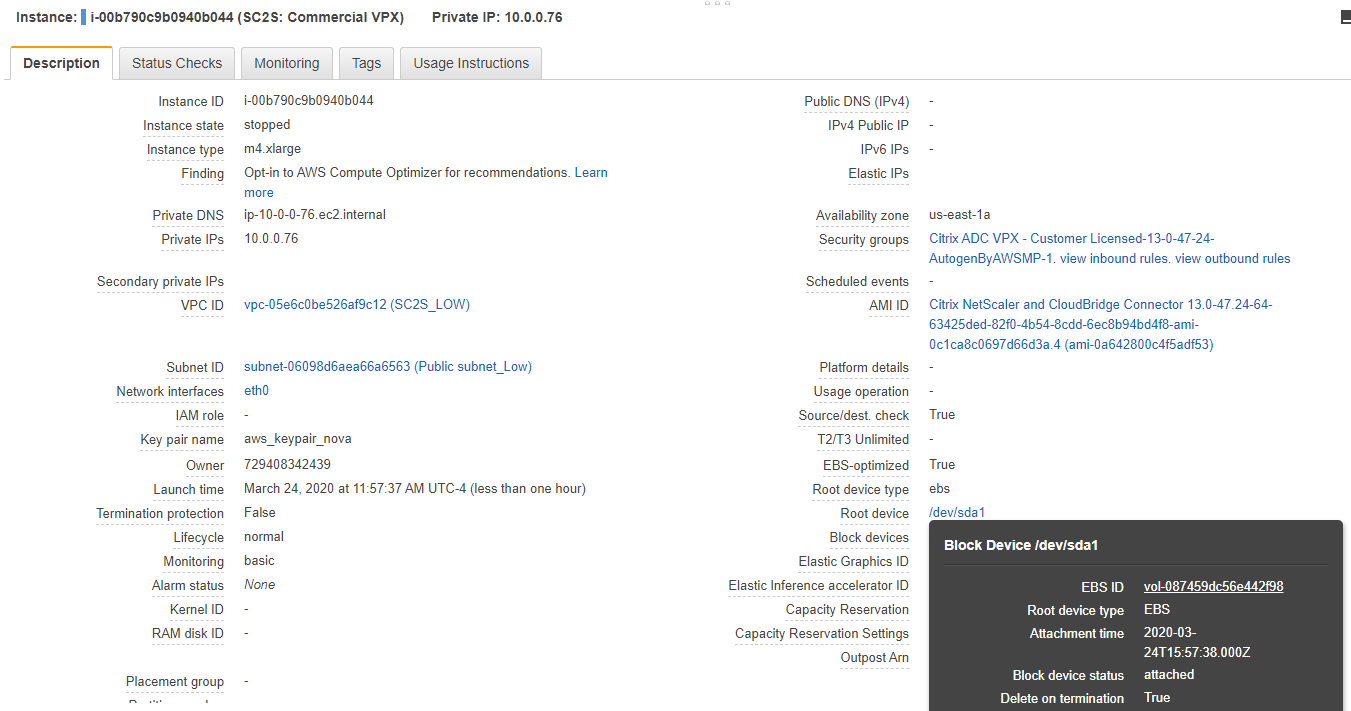
-
Deploy a new Amazon Linux EC2 instance (Amazon Linux 2 AMI (HVM), SSD Volume Type, 64-bit, EBS-backed, ENA-enabled). This instance should be the same instance type as the previously deployed VPX instance (for example
m4.xlarge), and should be in the same VPC and subnet, with the “Auto-assign Public IP” setting disabled. Name the instance something recognizable (for example SC2S: Linux Low). Set the Security Group to allow all traffic for now. Once the instance launches, power it off.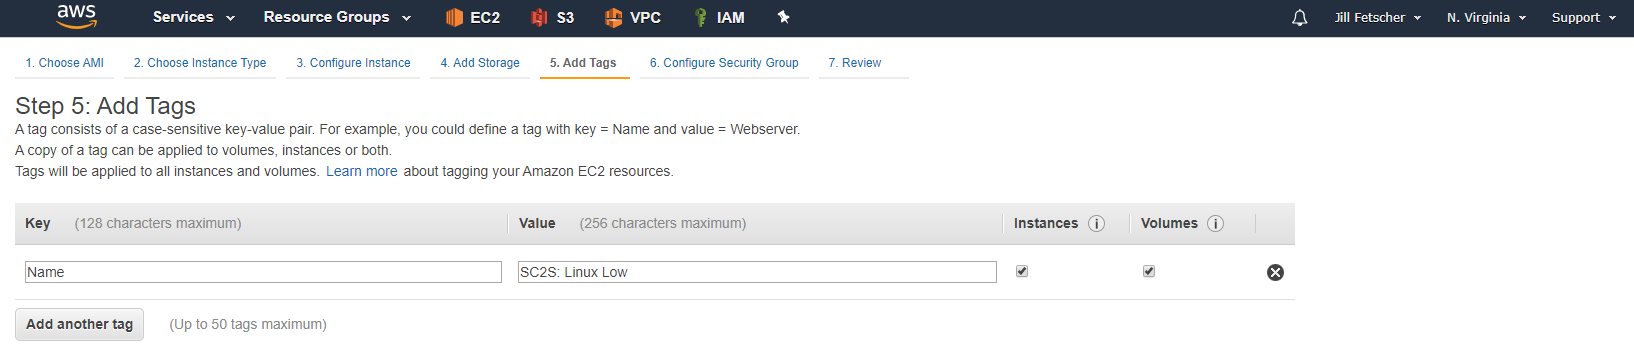
-
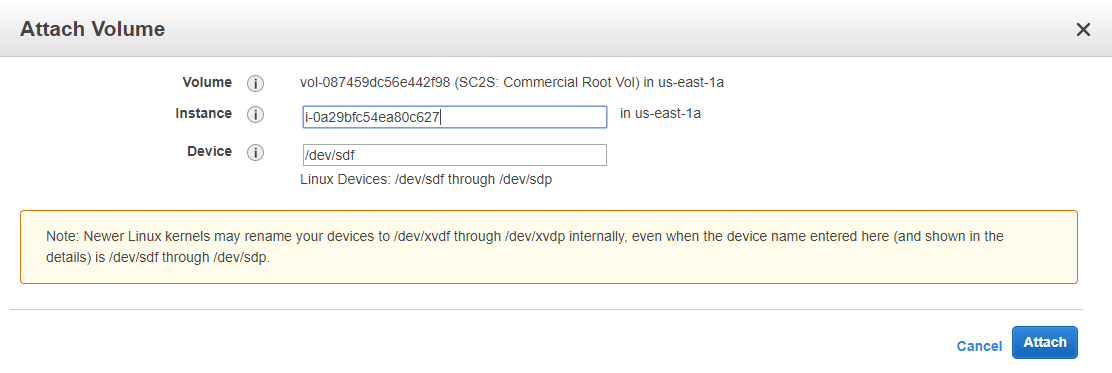
Attach the detached root EBS volume from the VPX to the Linux EC2 instance.
Choose the Linux instance you created by clicking Instance > Attach.
-
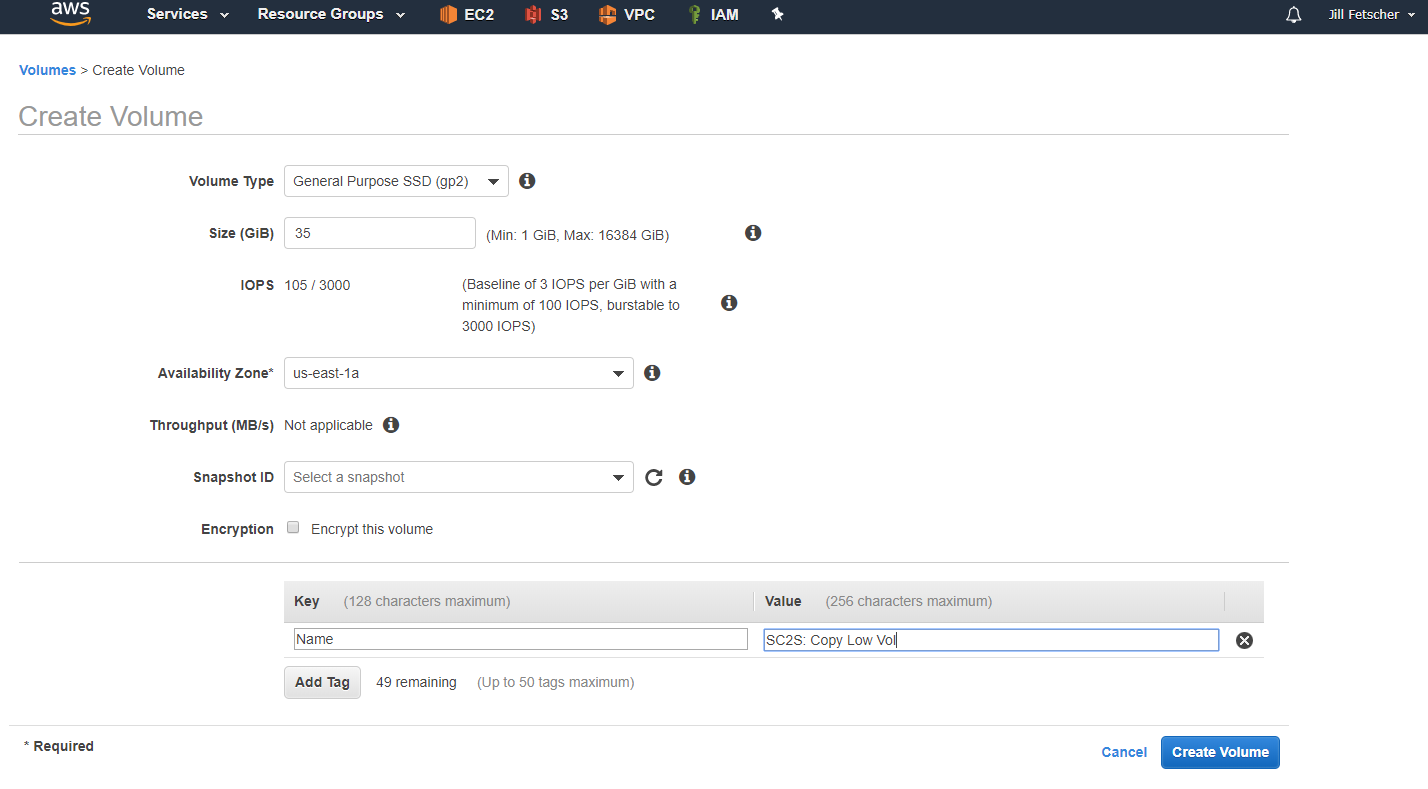
Create a volume with a higher capacity than the root VPX volume. The root volume capacity of the VPX volume is 30 GiB. Create the volume with a capacity of 35 GiB. Set the volume type to General Purpose SSD (gp2) and name it something recognizable (for example, SC2S: Copy Low Vol). Attach the new volume to the Linux instance.

-
Power on the Linux instance and SSH to it from the bastion host using the private key file. Log in as
ec2-user*. -
Create a partition on the NEW EBS volume.
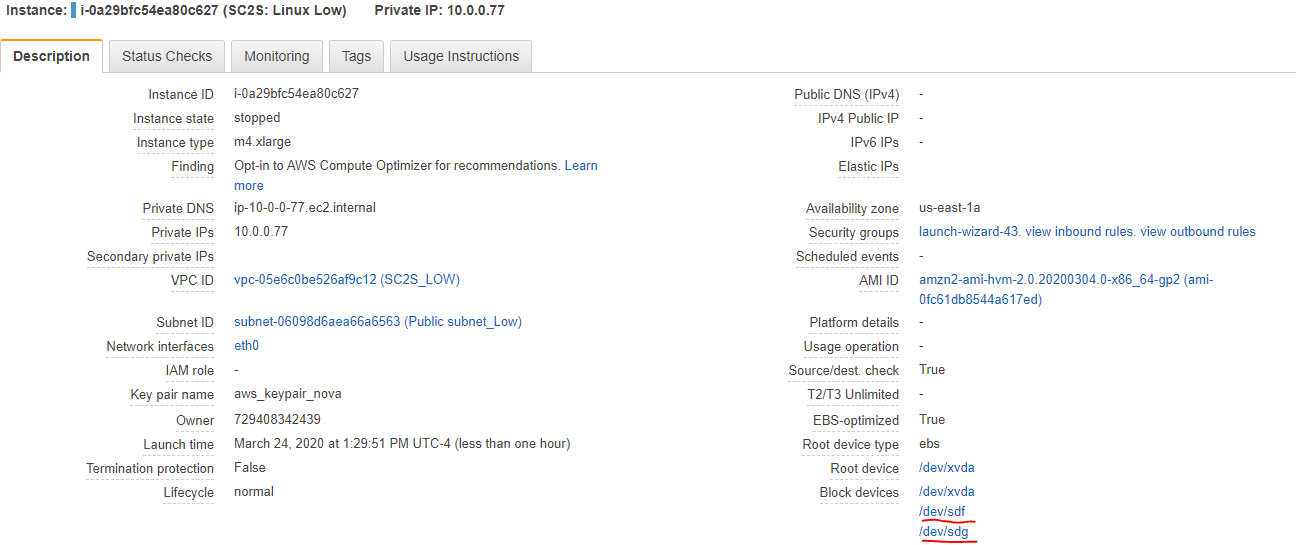
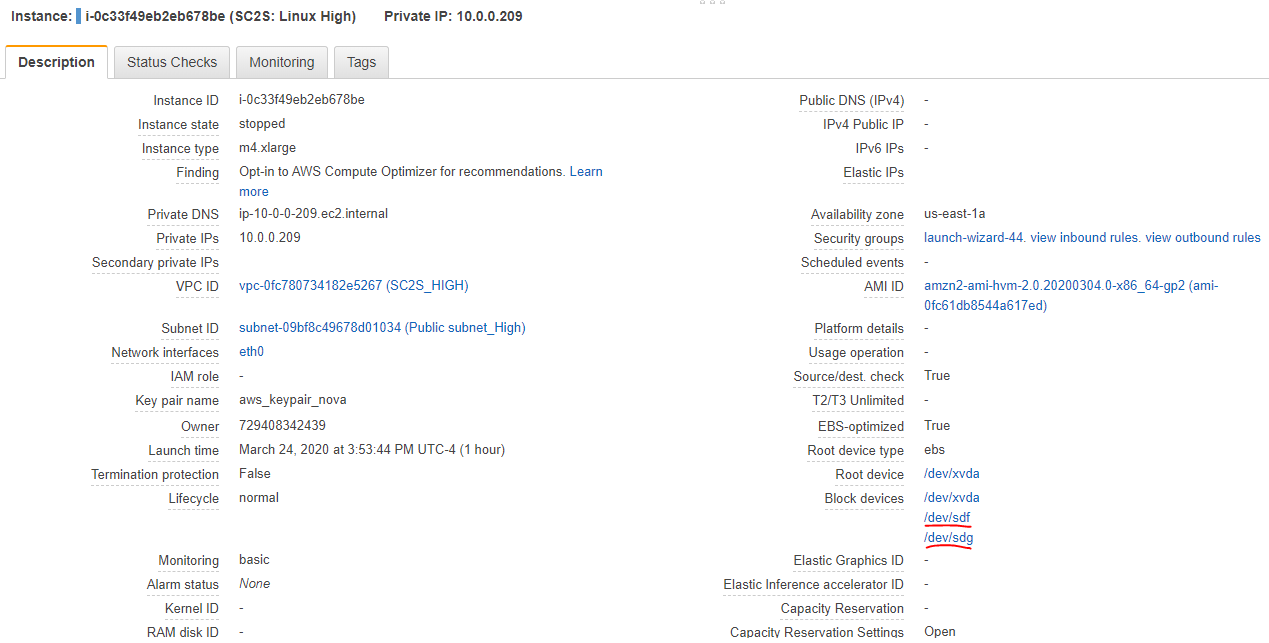
Note:
In this example, the VPX root volume SC2S: Commercial Root Vol is
/dev/sdfand the newly created 35 GiB volume SC2S: Copy Low Vol is/dev/sdg. The partition is to be created on SC2S: Copy Low Vol only. In the AWS console, these block devices are denoted by symbolic links. In the Linux instance,/dev/sdfand/dev/sdgare referred to as/dev/xvdfand/dev/xvdg, respectively.In the Linux CLI, verify that there is no file system. The response should be data only.
sudo file –s /dev/xvdg
<!--NeedCopy-->
Create a file system.
sudo mkfs -t xfs /dev/xvdg
<!--NeedCopy-->
Create a mount point and mount the device.
sudo mkdir /copy
<!--NeedCopy-->
sudo mount /dev/svdg /copy <!--NeedCopy-->Verify that the device has been mounted, and that there are three devices (for example
xvda,xvdf, andxvdg).lsblk <!--NeedCopy-->Create the partition using
fdisk, choosingnfor new,pfor primary partition,1for the partition number, and the defaults for first and last sector (ENTER, ENTER). Press CRTL+C to exit.sudo fdisk /dev/xvdg >n >p >1 >enter >enter >CTRL+C <!--NeedCopy--> -
Copy the VPX root volume to the new EBS volume at the block level (for example, copy SC2S: Commercial Root Vol to SC2S: Copy Low Vol). The file created here,
citrixADC.img, can then be moved to the SC2S environment.sudo dd if=/dev/xvdf of=/copy/citrixADC.img status=progress <!--NeedCopy-->This copy can take several hours.
Once the file copy is complete, verify that the file is in the /copy directory, and change the permissions on the file to allow read, write, and execute.
ls /copy sudo chmod 777 /copy/citrixADC.img <!--NeedCopy--> -
WinSCP the
citrixADC.imgfile to a location where it can be DTO’ed up to the high side. If need be, the bastion is large enough to copy the image file to.
Create a VPX in SC2S - Steps on High Side
-
Create a VPC with the same CIDR block and subnet as in step 1 for the Low side, or use the existing VPC. In this example, the CIDR of the VPC is 10.0.0.0/16 and the subnet IP space is 10.0.0.0/16. This is extremely important, because the final VPX that is created must be the same IP as the original from the commercial Marketplace.

-
In the new VPC and subnet, launch an instance of Amazon Linux (Amazon Linux 2 AMI (HVM), SSD Volume Type, EBS-backed, ENA-Enabled, 64-bit) of the SAME instance type as the Citrix ADC instance deployed on the low side (for example
m4.xlarge). Name the instance something recognizable (for example SC2S: Linux High). When the instance is ready, power it down.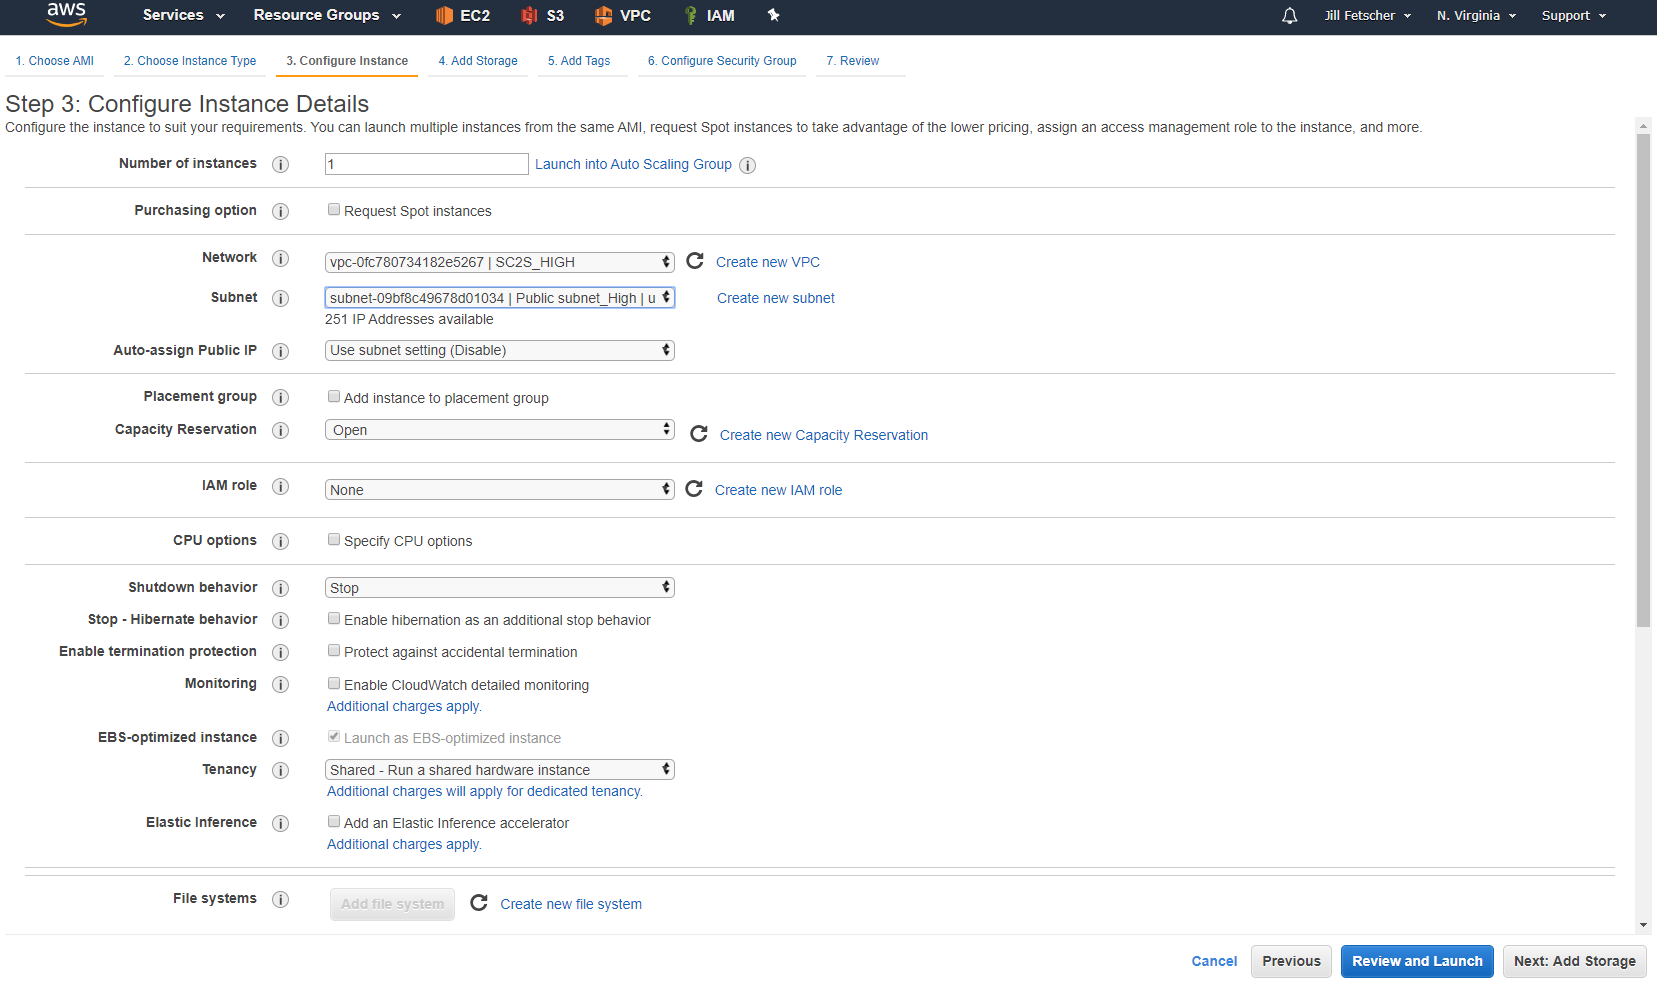
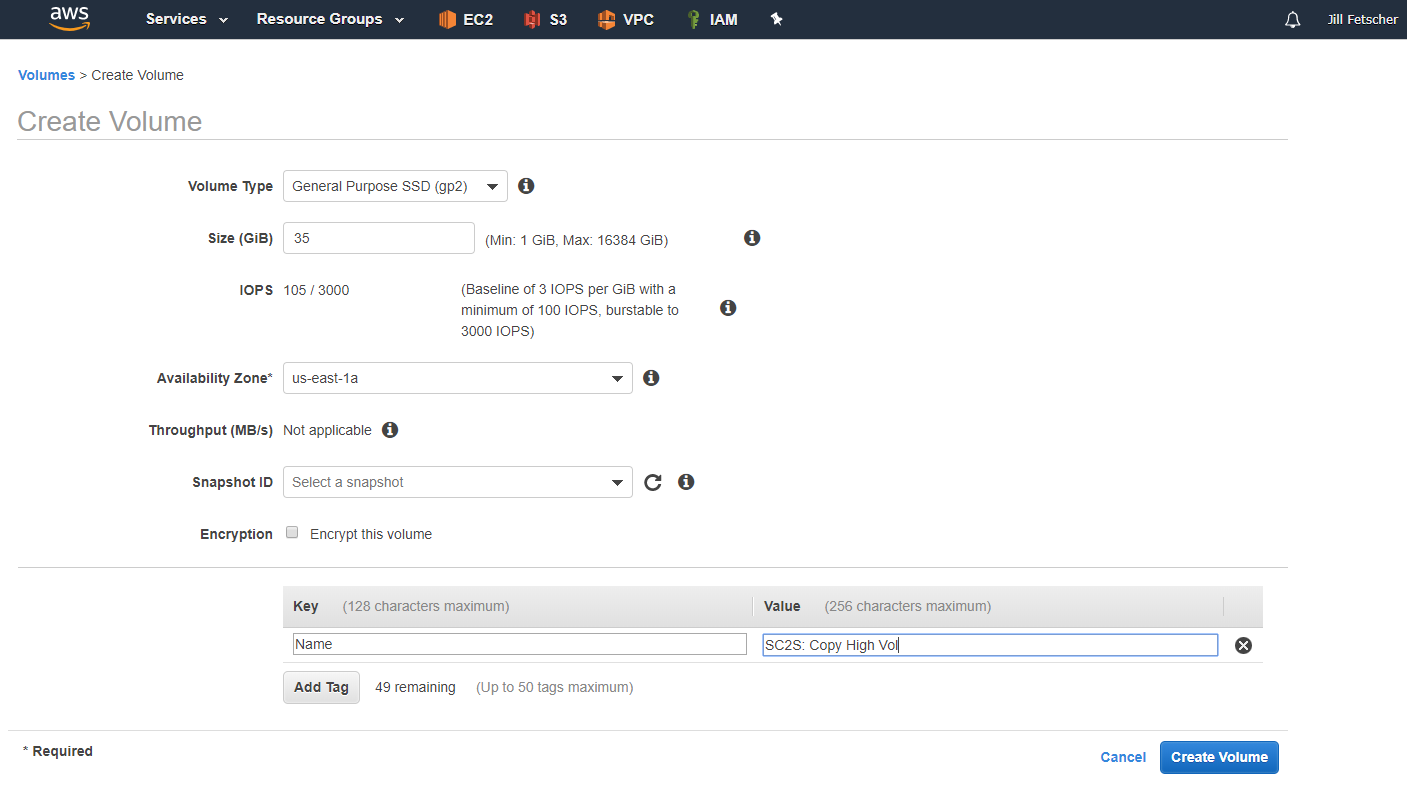
- Add two EBS volumes with a higher capacity than the transferred file size (for example 35 GiB). These volumes must be the same SSD type (gp2) as the one created on the low side.
- The first volume is for the copy from the low side. Name the volume something recognizable (for example “SC2S: Copy High Vol”). Attach this volume to the new Linux instance in SC2S as
/dev/sdf. This is the symbolic link for/dev/xvdfon the instance.
- The second volume becomes the root volume for the new VPX. Name the volume something recognizable (for example “SC2S: Final VPX Vol”). Attach this volume to the new Linux instance in SC2S as
/dev/sdg. This is the symbolic link for/dev/xvdgon the instance.
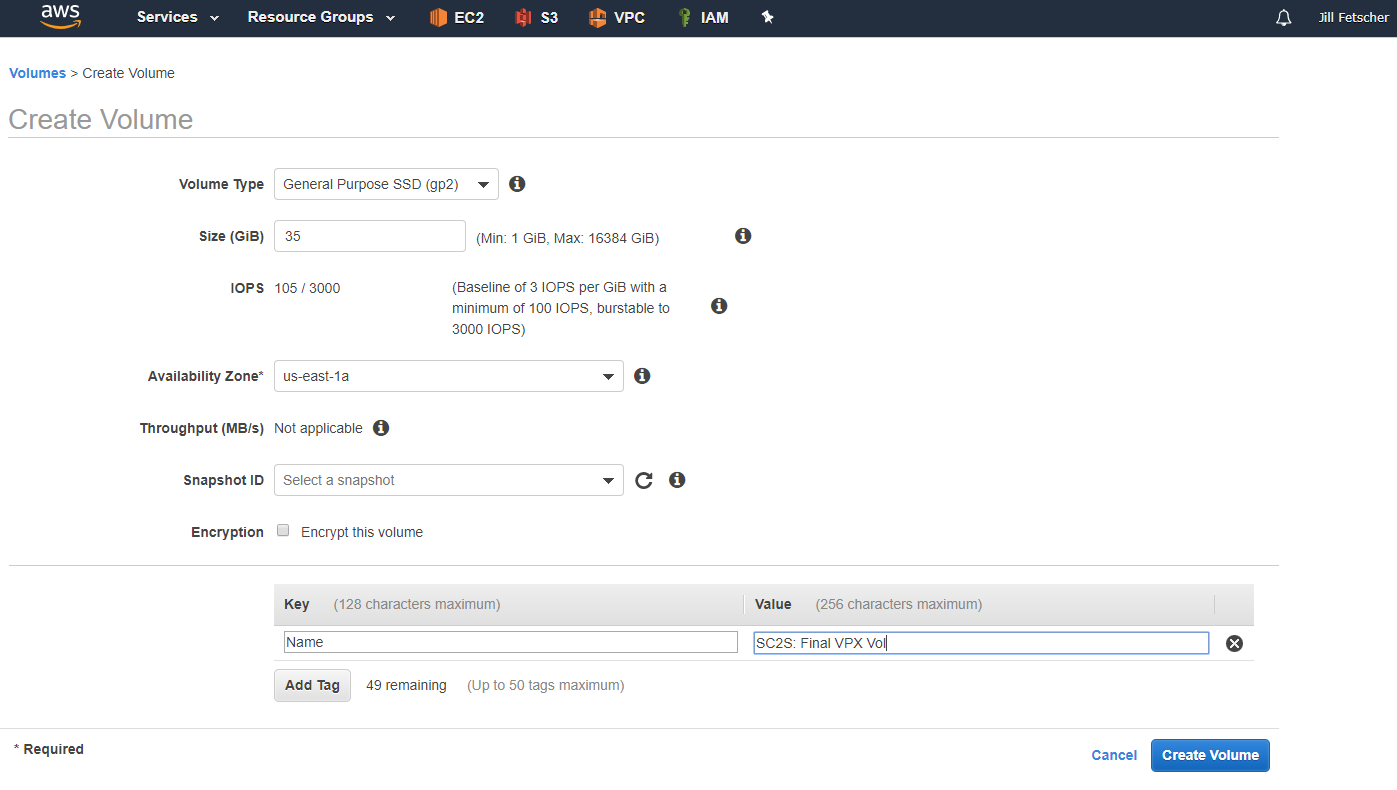
The instance now has three block devices attached, including the root device. Power on the instance.
- The first volume is for the copy from the low side. Name the volume something recognizable (for example “SC2S: Copy High Vol”). Attach this volume to the new Linux instance in SC2S as
-
Create a highside Windows Server 2019 or 2016 base bastion host in the same manner as the low side bastion. This instance should be in the newly created VPC and subnet, and should be at least 45 GiB for file transfers. Set “Auto-assign Public IP” to enabled. Name the instance something recognizable (for example “SC2S: WS2016 Bastion_High”) and set the Security Group to allow “All Traffic” for now.
-
Once the bastion host is ready, RDP in to the machine using the Public IP, and download PuTTY and WinSCP, and copy over the Keypair that was used to create the VPX instance. This requires the conversion of the .pem to a .ppk, using PuTTYgen. In Server Manager, disable Windows Firewall and Internet Explorer Enhanced Security for now.
-
Copy the citrixADC.img file to the new bastion host.
-
Start a PuTTY session to the new Linux instance (for example “SC2S: Linux High”) from the bastion host, using the AWS private key with the user name
ec2-user. -
Use
lsblkto verify that all devices are present on the instance.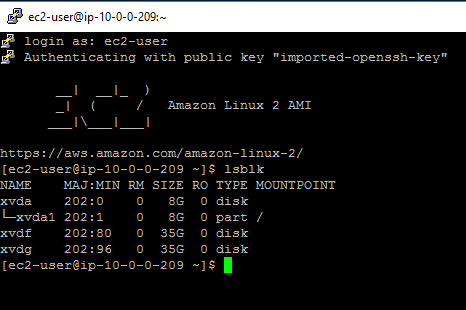
-
Verify that the
/dev/xvdfdevice does not have a file system, and then create one.Note:
Do NOT create a file system on the
/dev/xvdgdevice.sudo file –s /dev/xvdf sudo mkfs –t xfs /dev/xvdf <!--NeedCopy-->
-
Create a mount point for the device, mount the device, and verify that the volume mountpoint is
/copy.sudo mkdir /copy sudo mount /dev/xvdf /copy lsblk <!--NeedCopy-->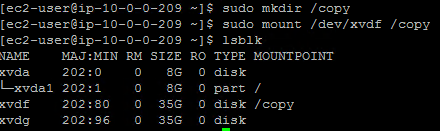
-
Create a partition using
fdisk.sudo fdisk /dev/xvdf >n >p >1 >enter >enter >CTRL+C <!--NeedCopy-->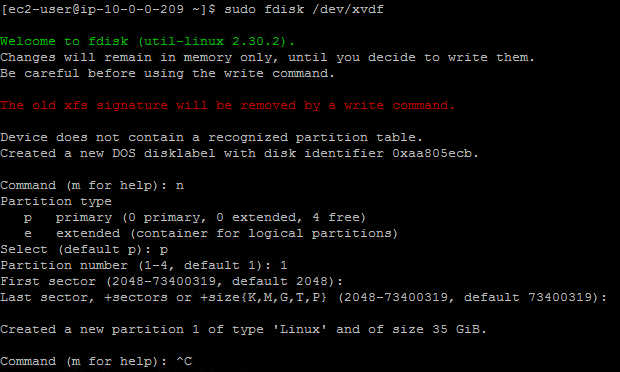
-
Change the permissions on the /copy directory.
sudo chmod 777 /copy
<!--NeedCopy-->
-
Using WinSCP on the bastion host, connect to the Linux instance. Copy the citrixADC.img file to the /copy directory. Once the file has copied, change the permissions to allow read, write, and execute for all from the WinSCP console.
-
In the Linux CLI, copy the image file to the /dev/xvdg device using the following command:
sudo dd if=/copy/citrixADC.img of=/dev/xvdg status=progress
<!--NeedCopy-->
-
Once the copy has completed, run the
lsblkcommand to verify that the partitions of the Citrix ADC are showing on the /dev/xvdg device.lsblk <!--NeedCopy-->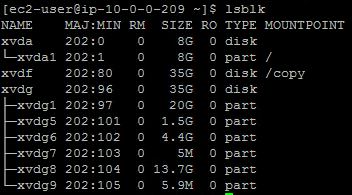
-
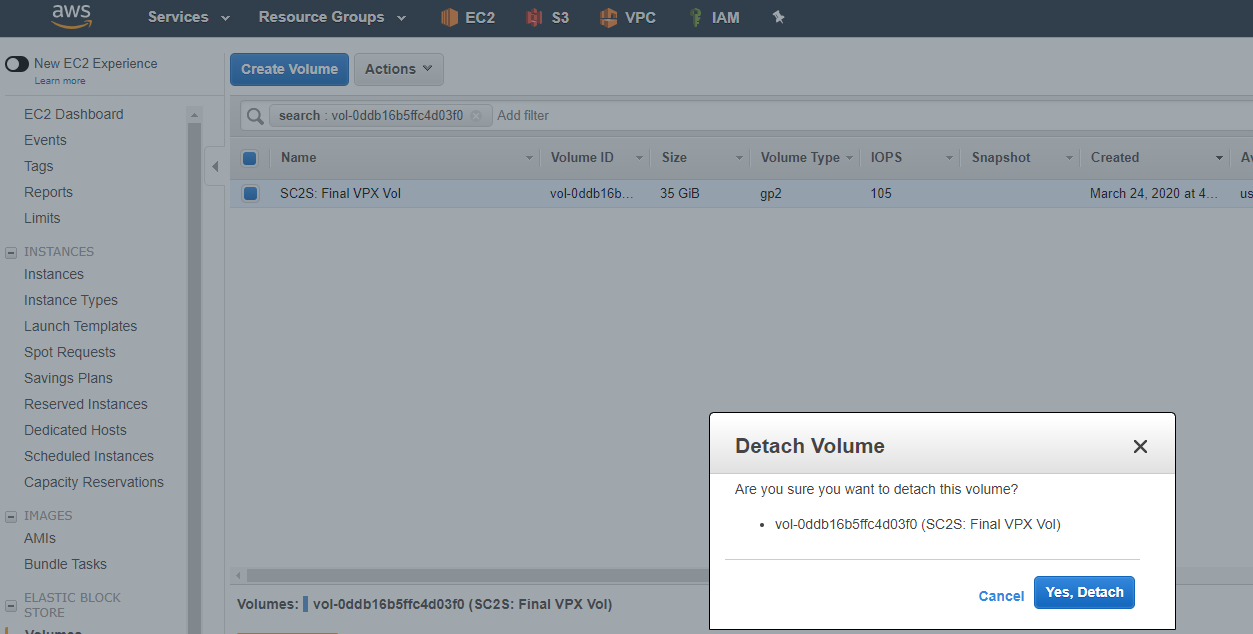
Power off the Linux instance and detach the /dev/xvdg (/dev/sdg) volume (for example “SC2S: Final VPX Vol”).
-
Deploy a new Linux instance of the EXACT same instance type as the VPX on the low side, in the same VPC and subnet that was created on the high side (Amazon Linux 2 AMI (HVM), SSD Volume Type, EBS-backed, ENA-enabled, 64-bit,
m4.xlarge, Security Group set to allow “All Traffic”). During the setup, set the IP to the SAME as the VPX on the low side, that was noted in the previous section of this document. Once the instance is ready, power off the instance.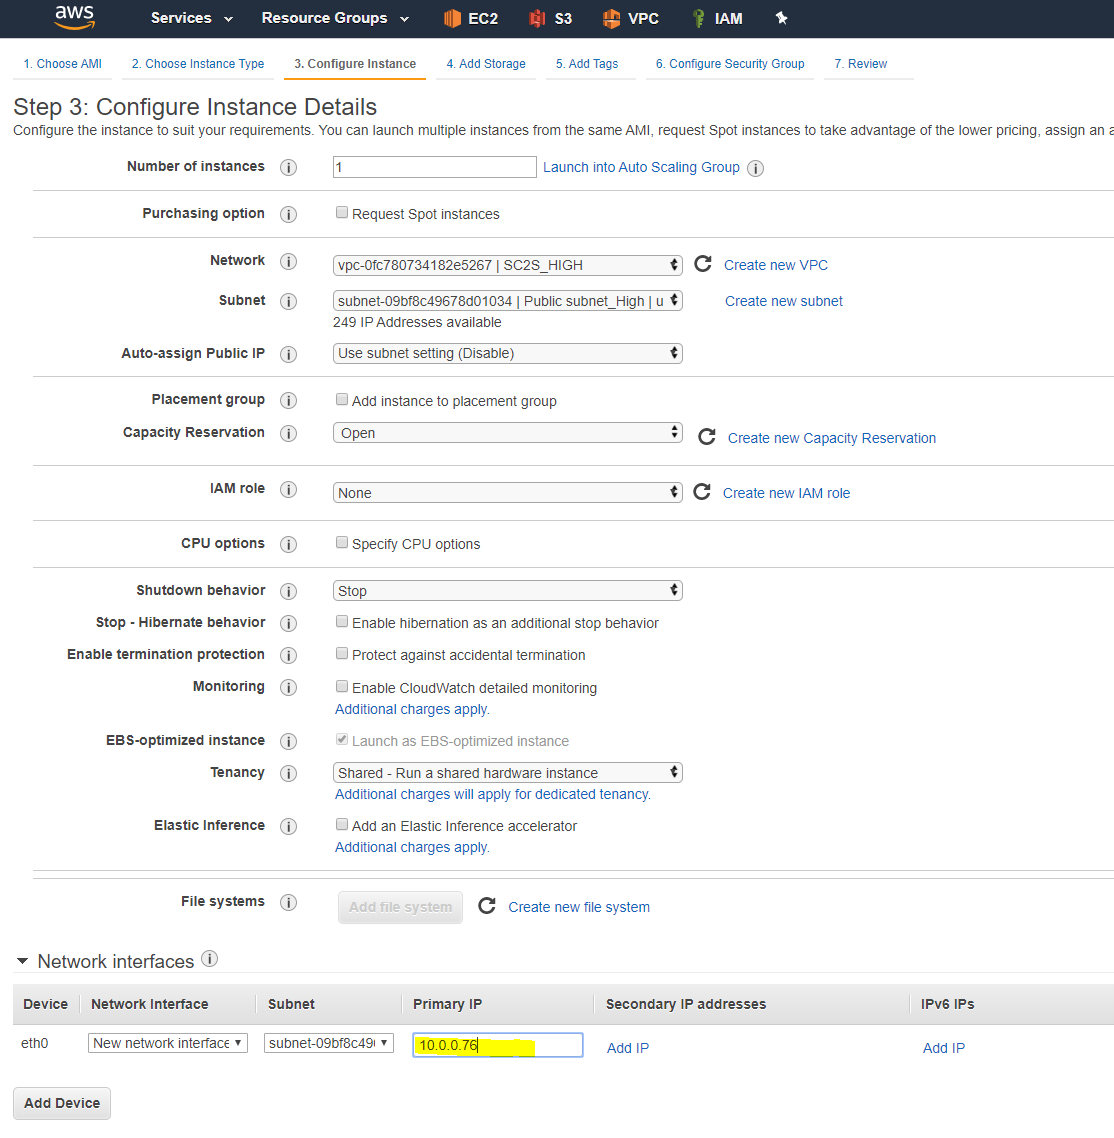
-
Detach the root volume of the newly deployed Linux instance and attach the detached instance (for example “SC2S: Final VPX Vol”). During the attachment, specify the device as the root volume (that is,
/dev/xvda).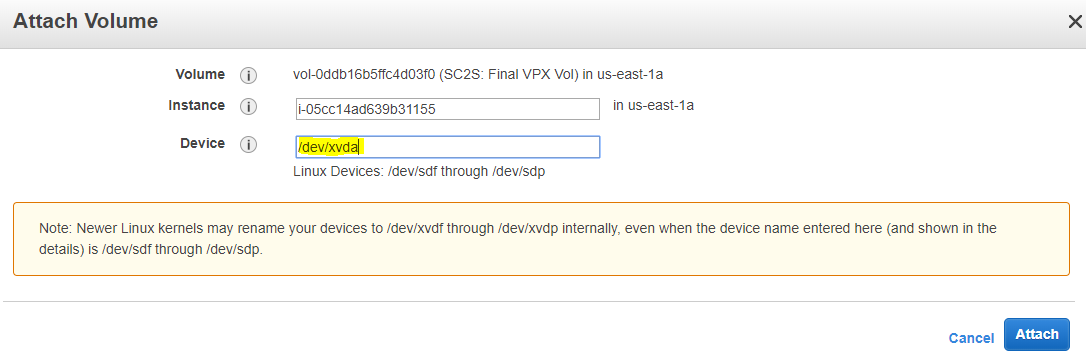
-
Power on the instance. Using the highside bastion host, PuTTY/SSH to the instance to verify the functionality of the VPX. Log in as
nsrootwith the instance ID password noted in the previous section of this document, and perform a simple command.sh version <!--NeedCopy-->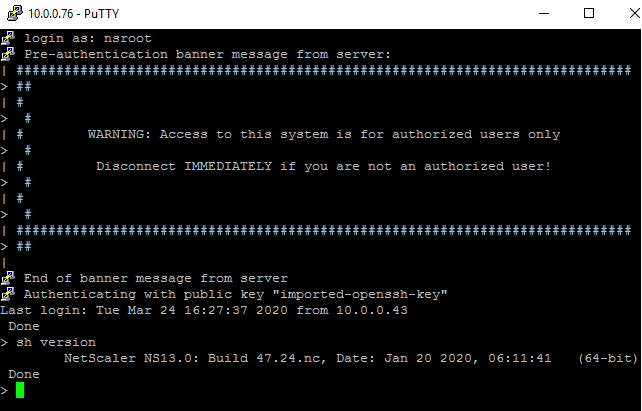
Creating an AMI from the launched VPX instance
-
Log into the Citrix ADC instance. Go into the shell to perform the necessary modifications as root.
shell
<!--NeedCopy-->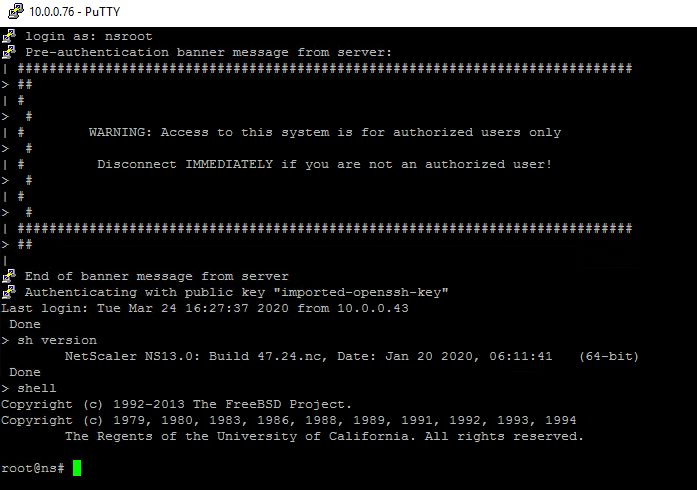
-
Forcefully and recursively remove the following directories and files from the ADC software manually. To remove the files and directories manually, add rm –rf in front of each. ‘/nsconfig/ns.conf’
‘/nsconfig/ssh/’
‘/nsconfig/ssl/’
‘/nsconfig/aws_bootstrap’
‘/nsconfig/rainman.conf’
‘/var/nslog’
‘/var/log/messages’
‘/var/log/.log’
‘/var/core/’
‘/nsconfig/.AWS/’
‘/var/db’
‘/etc/resolv.conf’
‘/flash/BUILD’
‘/mpsconfig/pgxl/.ssh/id_rsa.pub’
‘/var/pubkey/nsroot/.ssh/authorized_keys’
‘/var/pubkey/root/.ssh/authorized_keys’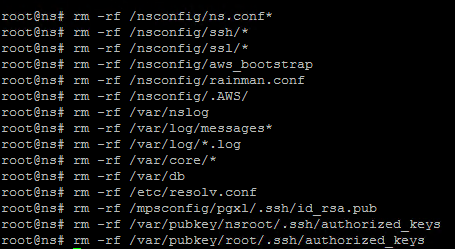
or run this script:
#!/bin/sh -x rm -rf /nsconfig/ns.conf* rm -rf /nsconfig/ssh/* rm -rf /nsconfig/ssl/* rm -rf /nsconfig/aws_bootstrap rm -rf /nsconfig/rainman.conf rm -rf /var/nslog rm -rf /var/log/messages* rm -rf /var/log/*.log rm -rf /var/core/* rm -rf /nsconfig/.AWS/ rm -rf /var/db rm -rf /etc/resolv.conf rm -rf /flash/BUILD rm -rf /mpsconfig/pgxl/.ssh/id_rsa.pub rm -rf /var/pubkey/nsroot/.ssh/authorized_keys rm -rf /var/pubkey/root/.ssh/authorized_keys <!--NeedCopy--> -
Change the permissions on the /flash/nsconfig directory to 755.
chmod 755 /flash/nsconfig
<!--NeedCopy-->
-
Verify that there are no residual keys remaining. If there are, forcefully and recursively remove them.
find / -type f -name “authorized*”
rm -rf <filename>
<!--NeedCopy-->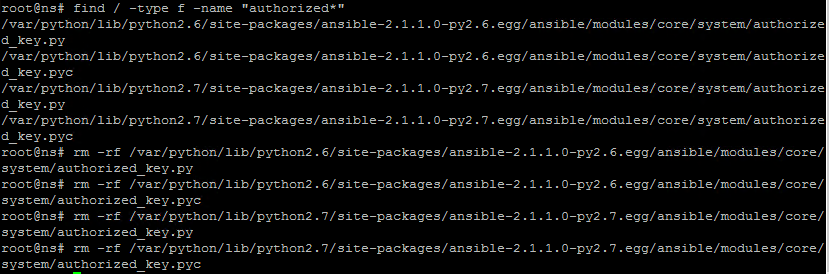
-
Verify that no residual licenses exist in /nsconfig/license. If there are, forcefully and recursively remove them.
Note:
There will be other directories and files in this folder (for example SSL and XML), only remove license files if present.
ls /nsconfig/license
ls /nsconfig/license/ssl
ls /nsconfig/license/xml
<!--NeedCopy-->
-
Power off the machine from the AWS console. Once the instance has stopped, create an AMI from the instance.
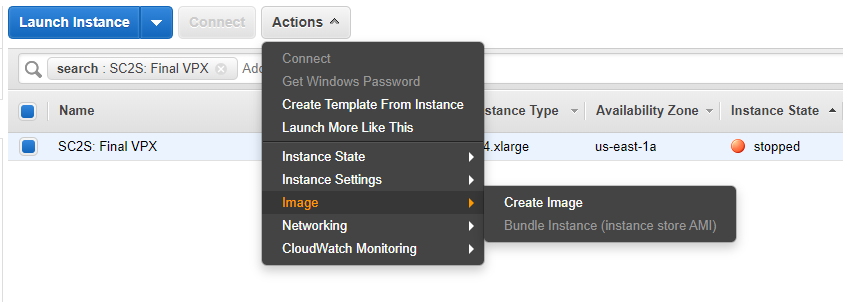
Name the instance something recognizable to ALL, as this is shared publicly to all admins of SC2S (for example “Citrix ADC VPX 13.0–47.24”)

-
Once the AMI is ready, deploy an instance from it to verify functionality.

-
Set the permissions on the AMI to
Public, so that it is available to all admins of SC2S.
To upgrade to a new release
-
For existing Citrix ADC VPXs in SC2S: Upgrade the VPX using the upgrade software available at https://citrix.com/downloads, DTO the file to the highside. Follow the guidance in Upgrade a Citrix ADC standalone appliance to install. The recommended upgrade method is to use the command line.
-
For new Citrix ADC VPXs in SC2S: Create an AMI to share publicly. Launch an instance from the existing AMI, upgrade the machine as in the preceding section, and perform the steps from the section “Creating an AMI from the launched VPX instance” in this document.