Create a resource location
After you sign up for Citrix Cloud™ Government, continue setting up your account by creating a resource location.
What is a resource location?
A resource location contains the compute and network resources required to deliver services to your users. The resources that your resource location contains depends on the services you want to deliver. For example, if you plan to deliver applications and desktops through Citrix DaaS (formerly Citrix Virtual Apps and Desktops™ service), your resource location might include the following components:
- An Active Directory domain to authenticate and authorize users who want to access applications and desktops.
- One or more Virtual Delivery Agents (VDAs) to manage the connection between the machines that host the applications and desktops. You might want to deliver the devices used to access those resources.
- A supported hypervisor or cloud service, like Citrix XenServer® or Microsoft Azure, to provision the virtual machines that deliver applications and desktops.
- A Citrix Gateway to enable external users to access applications and desktops securely.
Default resource locations
If you have no resource locations in your Citrix Cloud Government account and you install Cloud Connectors in your domain. The resource location that Citrix Cloud Government creates becomes the default resource location. You can have only one default resource location in your account. If needed, you can create another resource locations in Citrix Cloud Government. Select the resource location that you want when you install Cloud Connectors in other domains.
You can also first create the resource locations you need in the console, before you install Cloud Connectors in your domains. The Cloud Connector installer prompts you to select the resource location you want during installation.
Task 1: Prepare machines
- Review Citrix Cloud Connector requirements for important considerations, supported Active Directory functional levels, and troubleshooting information.
- Prepare machines that meet the configuration requirements.
- Join the prepared machines to your domain.
Task 2: Verify connectivity
Connecting to the Internet from your data centers requires opening port 443 to outbound connections. However, to operate within environments containing an Internet proxy server or firewall restrictions, further configuration might be needed.
- Review Connectivity requirements for a list of contactable addresses for available services.
- Make sure port 443 (HTTPS) is open for outbound connections.
- Ensure that the required addresses can be contacted so that you can operate and consume Citrix Cloud Government services.
- Review Citrix Cloud Connector proxy and firewall configuration for information about using the Cloud Connector with a web proxy.
Task 3: Install Cloud Connectors
Note:
Connector Appliance is not available for Citrix Cloud Government.
During installation, the Cloud Connector requires access to the cloud to authenticate the user to perform the installation. Validates the installer’s permissions, download, and configure the services that the Cloud Connector provides. The installation occurs with the privileges of the user who initiates the install.
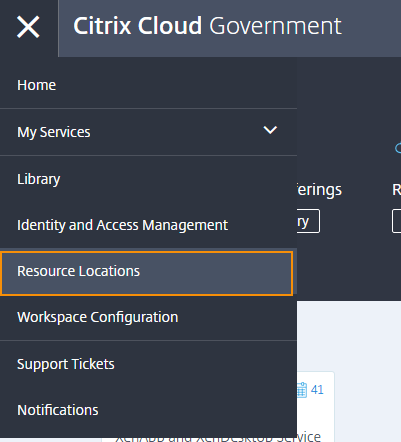
- From the Citrix Cloud Government menu, select Resource Locations.
- Click Download to download the Cloud Connector installer.
- Double-click the installer. Citrix Cloud Government performs an initial connectivity check and prompts you for your Citrix Cloud Government administrator user name and password.
- Follow the wizard to install and configure the Cloud Connector. When the installation finishes, Citrix Cloud Government performs a final connectivity check to verify that the Cloud Connector can communicate with Citrix Cloud Government.
After installation, Citrix Cloud registers your domain in Identity and Access Management.
Notes:
- If you’re an administrator for multiple organization accounts, Citrix Cloud Government prompts you to select the account you want to associate with the Cloud Connector.
- Use of the same Cloud Connector installer for repeated installations over a period isn’t recommended.
- Download a new Cloud Connector from the Resource Locations page in the Citrix Cloud Government console.
Configure connectivity for users
Provide internal or external access to the services that you make available in the resource location. Secure access for external users requires an existing Citrix Gateway in your environment.
-
From the Resource Locations page, locate the resource location you want to configure and click Gateway. The Configure Connectivity dialog appears.
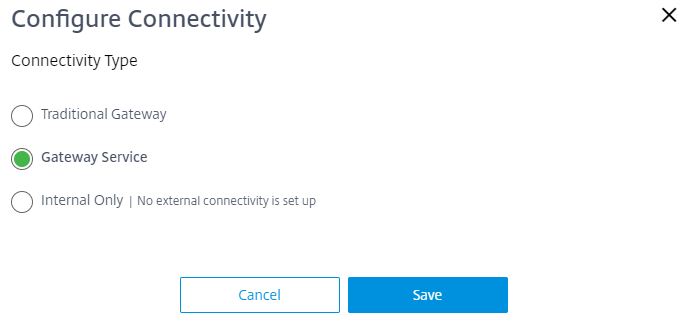
- To configure secure access for external users using an on-premises Gateway:
- Select Traditional Gateway.
- Enter the external FQDN of the Citrix Gateway. Example: mynsg.my-domain.com
- To use the Citrix Gateway service to provide secure access to applications and desktops for external users, select Gateway Service
- To configure internal-only access, select Internal only.
- Click Save.
Create more resource locations
- From the Citrix Cloud Government management console, click the menu button and select Resource Locations.
- Click Resource Location and enter a friendly name.
- Click Save. Citrix Cloud Government displays a tile for the new resource location.
- Click Cloud Connectors and then click Download to acquire the Cloud Connector software.
- On each prepared machine, install the Cloud Connector software using either the installation wizard or the command-line installation. Citrix Cloud Government prompts you to select the resource location you want to associate with the Cloud Connector.
Cloud Connector installation logs
Cloud Connector installation logs are located at %LOCALAPPDATA%\Temp\CitrixLogs\CloudServicesSetup.
Also, logs are added to %ProgramData%\Citrix\WorkspaceCloud\InstallLogs after installation.