Device Posture logs and events
Administrators can monitor device compliance through the device posture dashboard. They can view all configured device posture policies that define compliance requirements for endpoints accessing organizational resources. They can also view real-time compliance status for all devices, including detailed evaluation results categorized as follows:
- Compliant: Devices that meet all specified security requirements and policy criteria.
- Non-compliant: Devices that fail to meet one or more security requirements but might still have limited access.
- Access denied: Devices that pose significant security risks and are blocked from accessing resources.
You can view the Device Posture logs and events in the Secure Private Access dashboard and in the Device Posture dashboard in the Identity and Access Management console.
Device Posture dashboard in Identity and Access Management console
Perform the following steps to view the logs and events for the Device Posture dashboard in the Identity and Access Management console.
- Sign into Citrix Cloud.
- From the Citrix Cloud menu, select Identity and Access Management,
-
Click Device Posture > Manage and then click Dashboard.
The Logging and Troubleshooting section displays the diagnostic logs related to the Device Posture service.
- Click the See more link to view the details of the logs. You can refine your search based on the policy results (Compliant, Non-Compliant, and Login Denied).

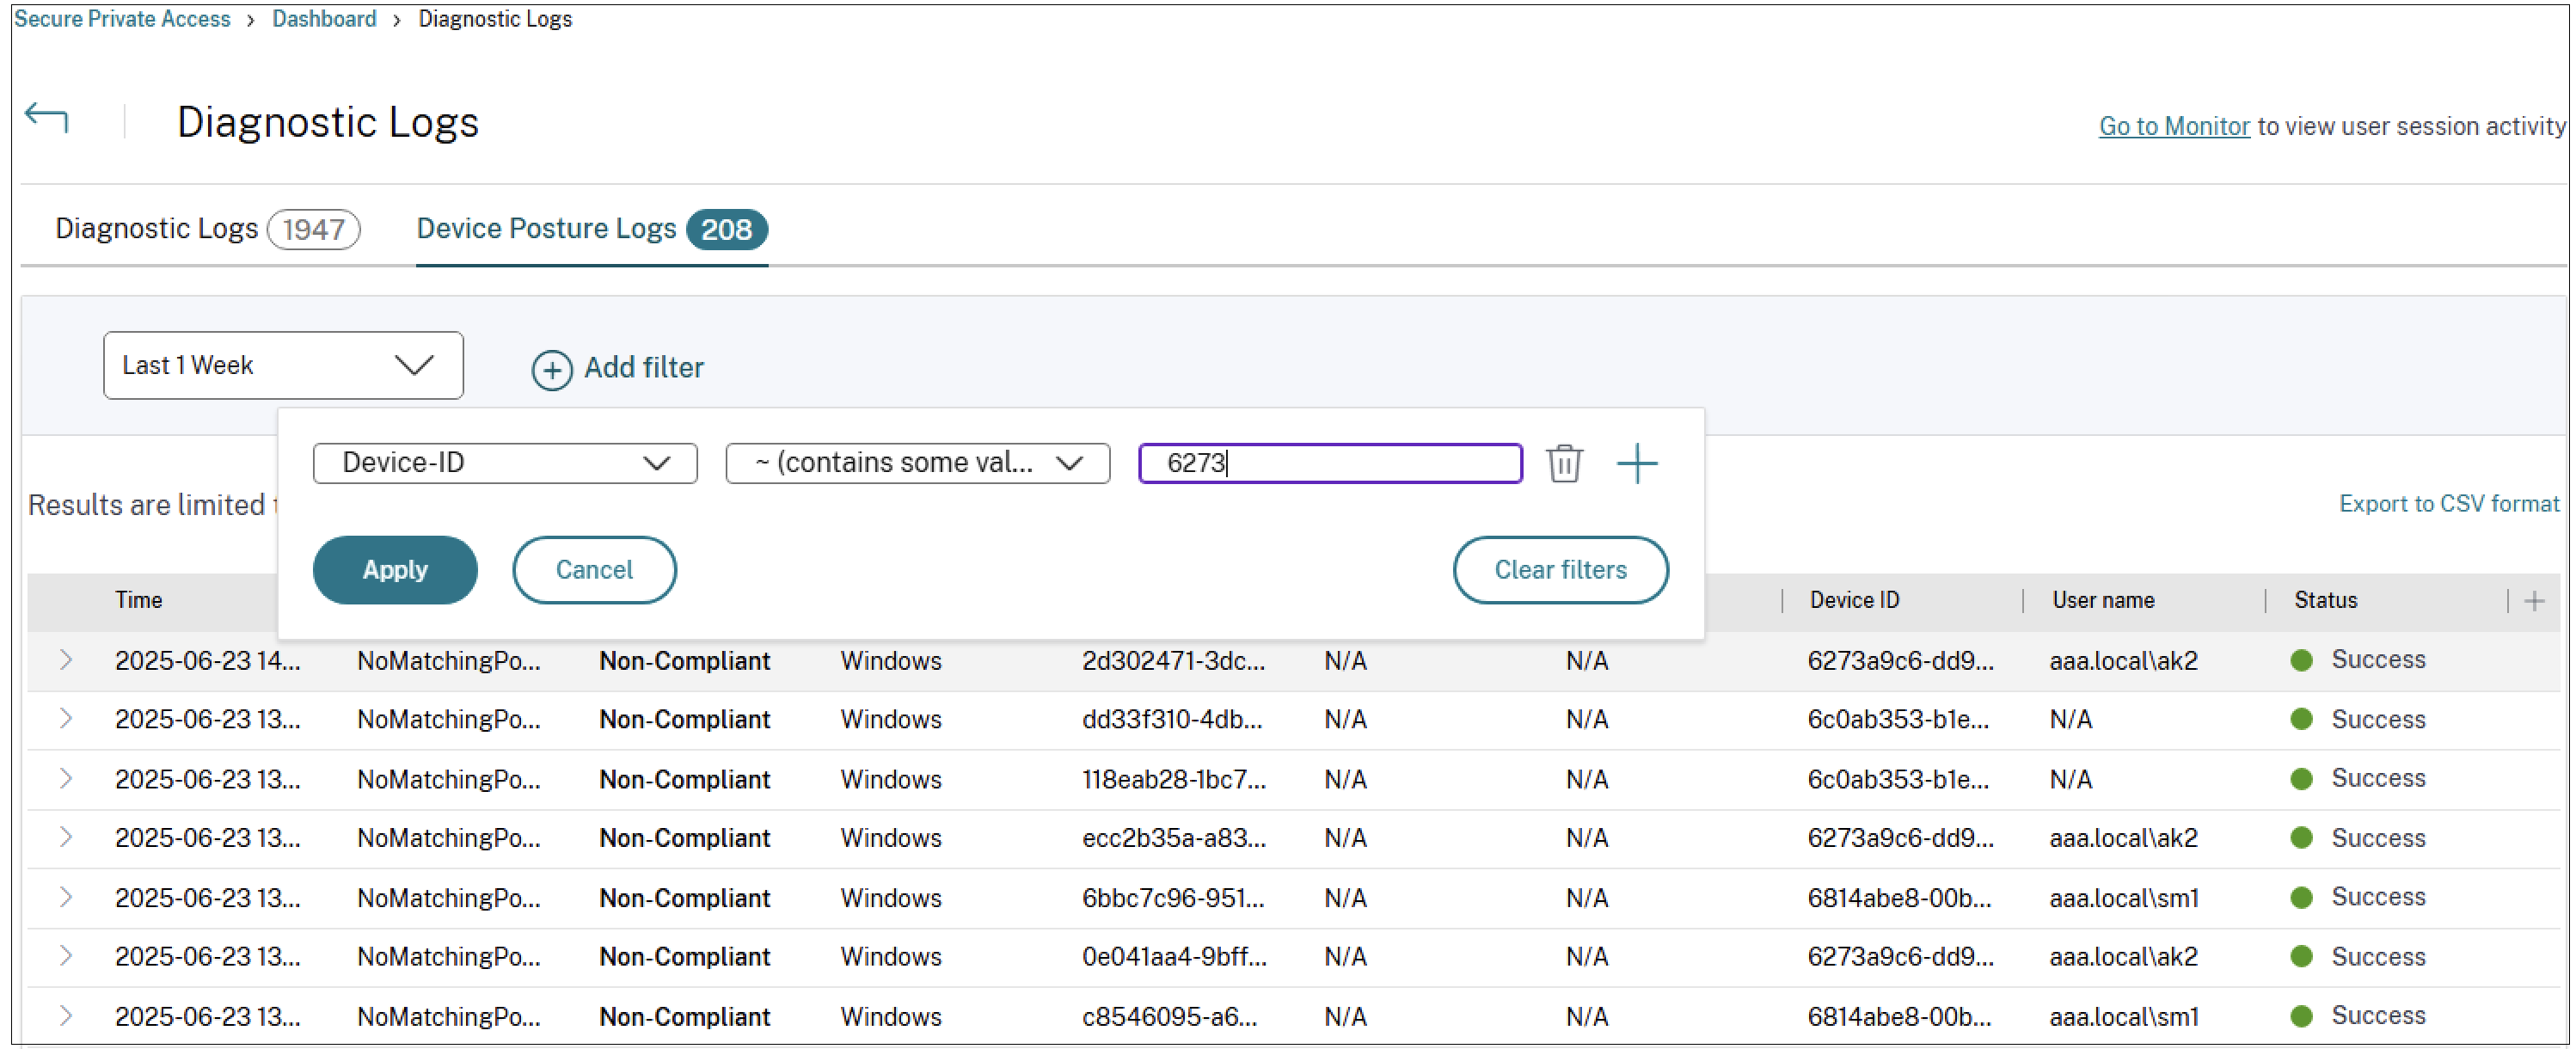
You can use the Add filter option to refine your search based on various criteria such as policy info, policy result, operating system, transaction ID, info code, or device ID. For example, in the search field, you can click Device-ID, select ~ (contains some value), and enter 6273. All logs related to device IDs containing 6273 are displayed.
Click the expand icon next to each log entry to view comprehensive details, such as scan type, client app version, client library version, and endpoint information.
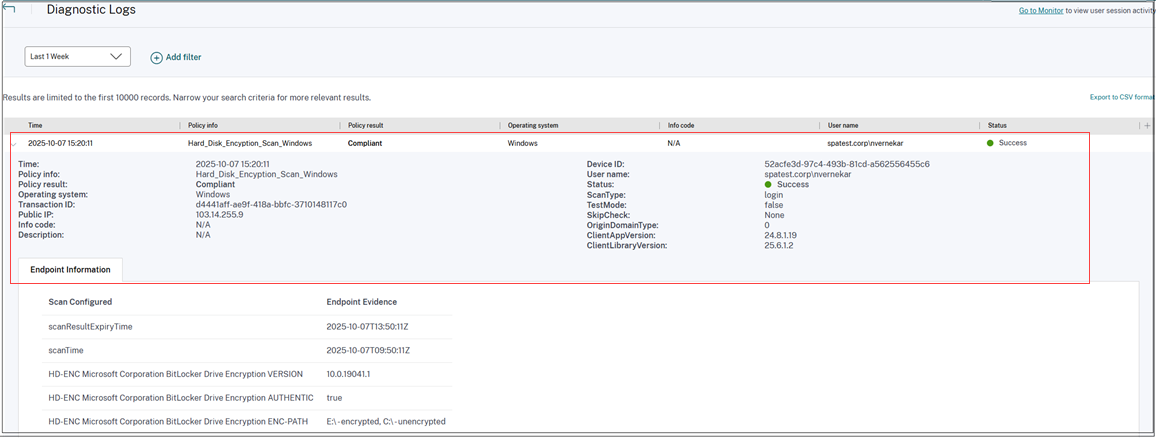
Note:
- The ClientAppVersion and the ClientLibraryVersion fields display the EPA client version and library version respectively.
- The transaction ID is also displayed to the end user whenever access is denied.
- If there’s an error or a scan failure, the Device Posture service displays a transaction ID. This transaction ID is available in the Secure Private Access service dashboard. If the logs do not help resolve the issue, end users can share the transaction ID with Citrix Support to resolve the issue.
Logs location
The Windows client logs can be found at:
- %localappdata%\Citrix\EPA\dpaCitrix.txt
- %localappdata%\Citrix\EPA\epalib.txt
The macOS client logs can be found at:
- ~/Library/Application Support/Citrix/EPAPlugin/EpaCloud.log
- ~/Library/Application Support/Citrix/EPAPlugin/epaplugin.log
Secure Private Access dashboard
Perform the following steps to view the logs and events for the Device Posture service.
- Sign into Citrix Cloud.
-
On the Secure Private Access tile, click Manage and then click Dashboard.
The Logging and Troubleshooting section displays the diagnostic logs related to the Device Posture service.
- Click the See more link to view the details of the logs. You can refine your search based on the policy results (Compliant, Non-Compliant, and Login Denied).
Device posture error logs
The following logs related to the Device Posture service can be viewed on the Citrix Monitor and Secure Private Access dashboard. For all these logs, it’s recommended that you contact Citrix Support for resolution.
- Failed to read configured policies
- Failed to evaluate endpoint scans
- Failed to process policies/expression
- Failed to save endpoint details
- Failed to process scan results from endpoints
Device posture data export
The Device Posture service events (such as device posture results and event types) can be exported to the Security Information and Event Management (SIEM) service. These events are generated when the Citrix Endpoint Analysis (EPA) client performs a posture check on a device attempting to access Citrix Virtual Apps and Desktops™ or Citrix Secure Private Access resources.
- To understand how to set up, configure, and export your Device Posture service logs to SIEM, see Security Information and Event Management (SIEM) integration.
- To know more about what events and logs you can export from the Device Posture service, see Device Posture service events.
- To understand how to diagnose and troubleshoot Device Posture service transactions, see Diagnose Device Posture service transactions.