Settings for Windows
Important:
The Settings screen for License Server VPX is different and is missing some of the settings included in the Windows version. For the License Server VPX Settings screen, see Settings for License Server VPX.
Display the Settings by clicking the Settings gear icon on the top of the screen. There are three types of settings:
- Account
- Server configuration
- Usage and statistics
Account
By using this screen, you can do the following:
Configure the user and group access to manage the License Server.
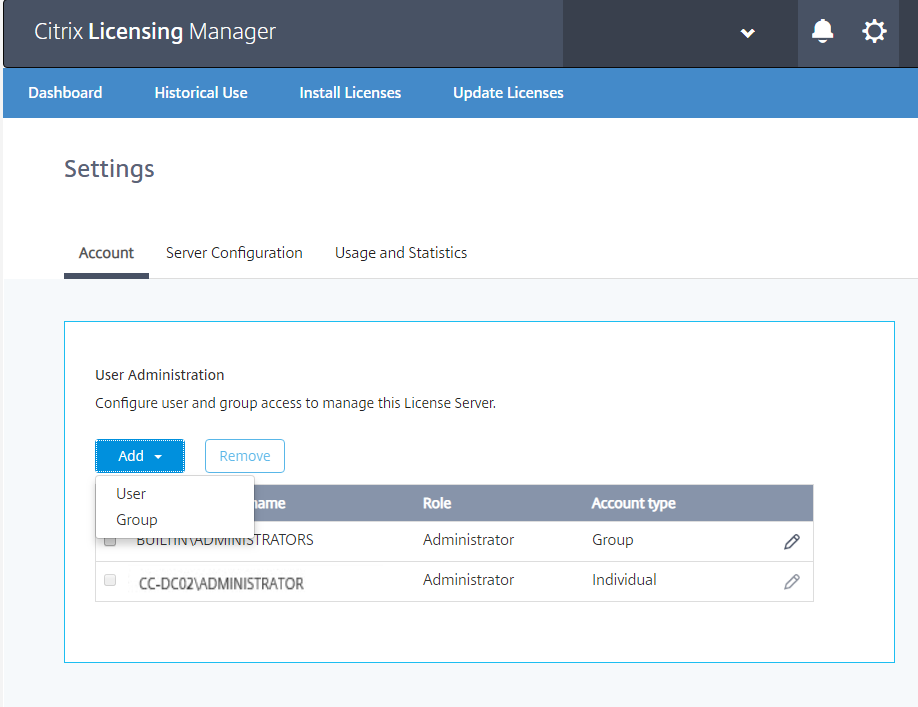
The Citrix Licensing Manager can use local Windows users and groups and Active Directory users and groups. Users configured here can access the Citrix Licensing Manager and the Citrix License Administration Console.
Active Directory users and groups are part of an Active Directory/network authentication system. To support them, ensure that the Windows License Server is a member of a Microsoft Active Directory domain and running the Citrix Licensing Manager.
Users are configured with local roles. All users created as administrators can:
- Select a console display language.
- View system information.
- Add and remove users.
- Configure the License Server port.
- Configure the vendor daemon port.
- Configure the Web Services for Licensing port.
- Configure and add licenses.
A default administrator account is created during the installation of the Citrix Licensing Manager. Use the administrator account to first log on to the console and then configure more users.
Server configuration
By using this screen, you can do the following:
- Configure the License Server, vendor daemon, and Web Services for Licensing ports.
- Configure Customer Success Services renewal license actions.
- Enable and disable the License burst mode.
- Select the console display language.
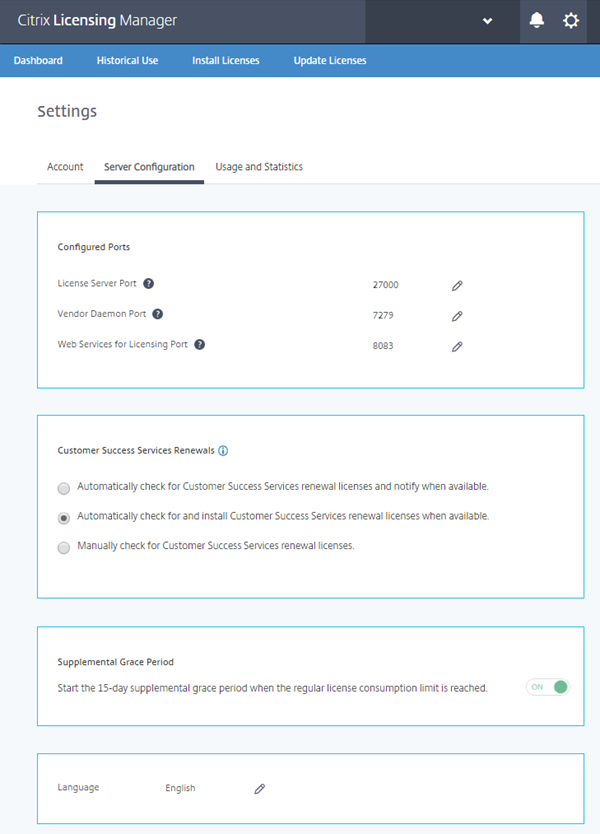
Configure port numbers (Not available in License Server VPX.)
You can edit the three default ports:
-
License Server. This port number is used by the License Server Manager. License Server Manager handles the initial communication among the products, starts the vendor daemon, and relays check out and check in requests to the vendor daemon. By default, this port number is 27000.
-
Vendor Daemon. This port number is used by the CITRIX vendor daemon. The vendor daemon is responsible for the core operations of the License Server, including license allocation. By default, this port number is 7279. However, if you have a firewall or if the number is already in use, you might need to change the port number.
-
Web Services for Licensing. Port used by the Web Services for Licensing. The Web Services for Licensing hosts the Citrix Licensing Manager, so users connecting to Citrix Licensing Manager use this port. Director and Studio use this port to communicate with the License Server using Web Services for Licensing. By default, this port number is 8083.
Check for and install the Customer Success Services renewal
When enabled, the Citrix Licensing Manager contacts Citrix.com web services weekly to check for available Customer Success Services renewal licenses.
Based on how you configure it, the Citrix Licensing Manager automatically or manually checks for Customer Success Services renewal licenses. It notifies you or installs the licenses when found.
- In the Citrix Licensing Manager, choose the settings icon on the upper bar of the UI.
- Select how you want to be notified and if you want renewal licenses to be installed automatically, and then choose Save.
If the automatic checks for Customer Success Services renewal licenses fail, check the firewall setting or configure a proxy. For this feature to work, the License Server must be able to access https://citrixservices.citrix.com.
- Automatically check for Customer Success Services renewal licenses and notify when available: Citrix Licensing Manager displays a notification. Click a link to download and install available renewals. This same notification appears in Studio and Director if they are configured to manage the License Server.
- Automatically check for and install Customer Success Services renewal licenses when available: Citrix Licensing Manager checks weekly and automatically installs renewal licenses when available. A notification displays for a few days stating that renewals have been installed.
- Manually check for Customer Success Services renewal licenses: Select the Update License tab and Check for Available Renewals. You can check the Update License tab at any time to see a list of licenses installed in the last 30 days.
License burst mode (Not available in License Server VPX.)
Specify whether to start the 15-day License burst mode when you reach the regular license consumption limit. For more information, see “License burst mode” in the Technical overview article.
Change the default and display language
You can change the default language of the Citrix Licensing Manager display. The default applies to all console users. Available languages include:
- Chinese (Simplified)
- English
- French
- German
- Japanese
- Spanish
Usage and statistics
By using this screen, you can do the following:
- Configure how you share usage statistics with Citrix.
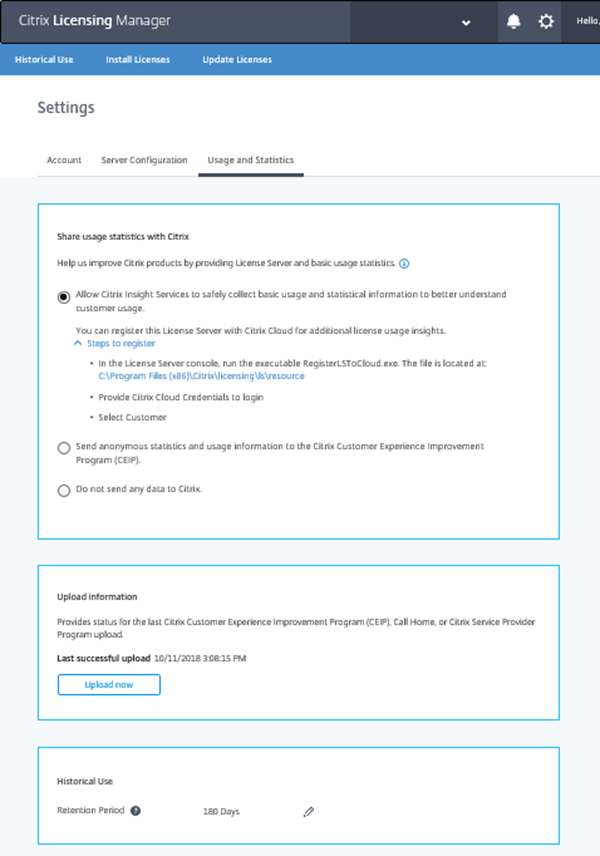
- Use an 8-digit code to register your License Server with Citrix Cloud and find out if your License Server is registered with Citrix Cloud.
- Learn how to register your License Server with Citrix Cloud and find out if your License Server is registered with Citrix Cloud.
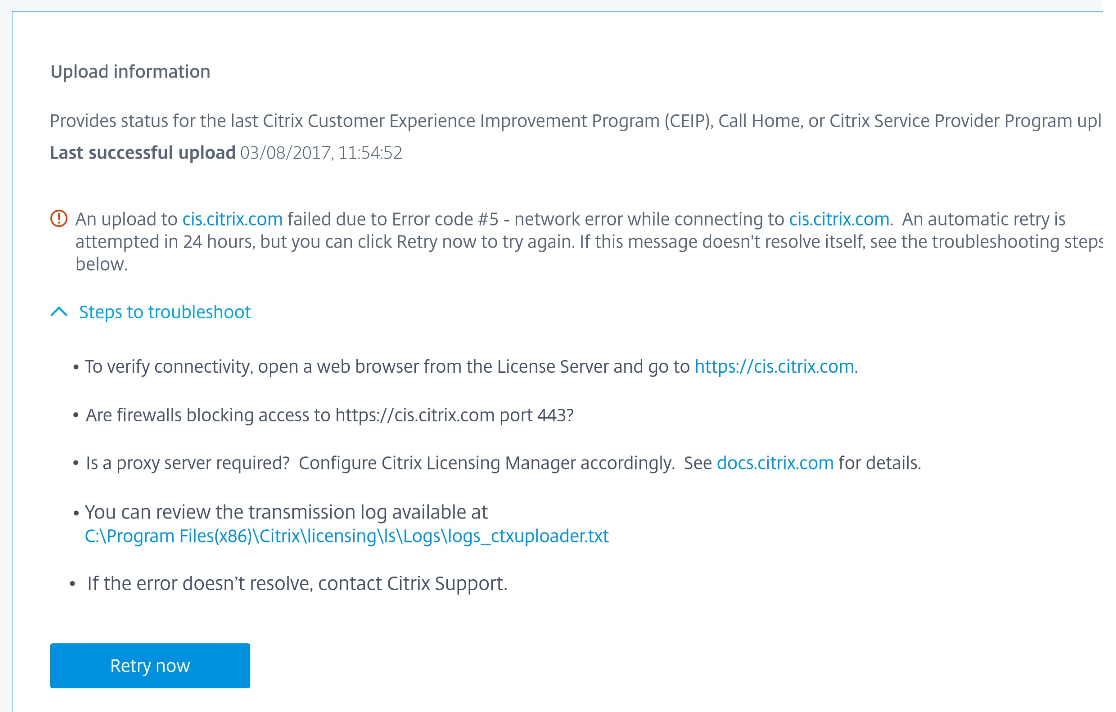
- Know the status of your uploads. If uploads fail, information appears with suggestions to fix the issues.
- Force a data upload to Citrix.
- Set the period to retain the historical usage information. The default is 180 days.
Register and remove registration with Citrix Cloud™
The Usage and Statistics section of the Settings screen includes short-code activation to easily register your Citrix License Server with Citrix Cloud. When you have done that, this screen indicates that you are registered.
Use the same screen to remove your registration.
When you register the License Server with Citrix Cloud, the License Server collects and stores the Call Home license usage information. The License Server regularly transmits that data to Citrix Cloud.
Important:
Before registering your License Server with Citrix Cloud, use firewall rules to open these URLs:
https://trust.citrixnetworkapi.net:443
https://trust.citrixworkspacesapi.net:443
https://core.citrixworkspacesapi.net:443Ensure that the License Server can access the Certificate Revocation List server for DigiCert. The License Server checks the server to see if the required certificates are valid or revoked.
Register:
- On the Usage and Statistics screen, click Register and an 8-character alphanumeric code is generated.
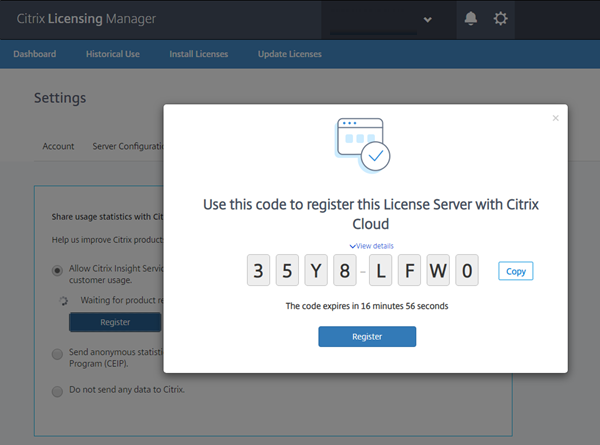
- Select View details to see your License Server version, MAC ID, host name, and IP address.
- Click Register and you’re taken to the Citrix Cloud log on page.
- Type your valid Citrix Cloud credentials and you are taken to the Product Registration > Register.
- Paste in the same 8-character alphanumeric code, and click Continue.
- Review the registration details and then click Register.
Note:
If you’re not redirected to the Product Registration experience, do the following:
- Go to
citrix.cloud.comand log on.- Select your company, and select menu > Identity and Access Management > API Access tab > Product Registrations.
For more information, see Register on-premises products with Citrix Cloud.
Your License Server registered successfully in Citrix Cloud. You can view the details in the Citrix Cloud UI.
Remove registration:
There are reasons that you might want to remove the License Server registration with the Citrix Cloud. For example, you’ve registered your License Server to Company A, which is now merged into another organization. You want to consolidate your license usage data into one Citrix customer account. To do that, remove your registration, and then register with a new Citrix Cloud account.
In builds 29000 and 30000:
- On the Usage and Statistics screen, click Remove Registration.
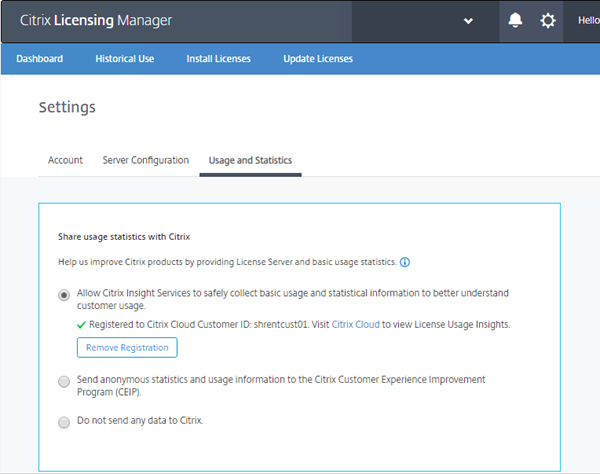
- On the Remove Registration confirmation modal, click Remove Registration to confirm removal from the Citrix Licensing Manager.
Your registration is removed from Citrix Cloud.
In build 28000:
- On the Usage and Statistics screen, click Remove Registration.

- On the Remove Registration confirmation modal, click Remove Registration to confirm removal from the Citrix Licensing Manager.
- To complete the registration removal process, you have to remove the registration on Citrix Cloud. Go to the Citrix Cloud log on page.
- Type your valid Citrix Cloud credentials and select Identity and Access Management in the Citrix Cloud menu.
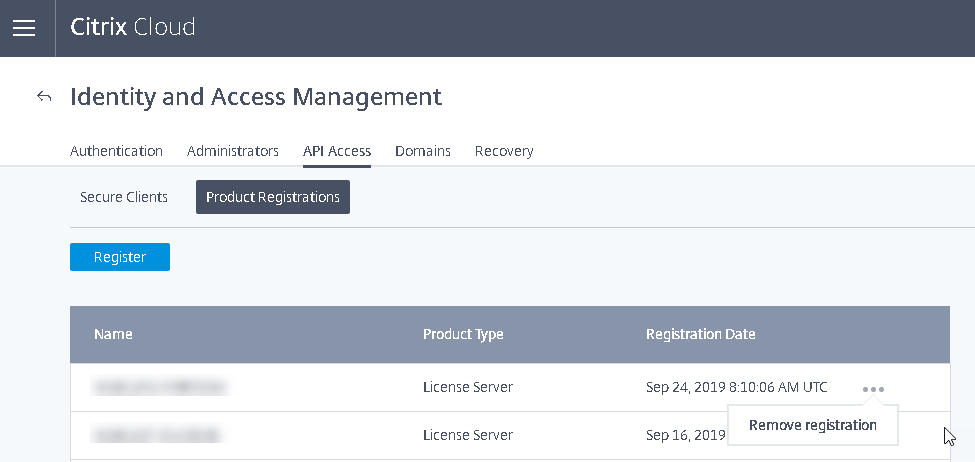
- Navigate to the API Access tab, click Product Registrations, select the product by clicking the dots on the product line, and click Remove registration.
- In the confirmation modal, click Remove.
Your registration is removed from Citrix Cloud.
Share usage statistics
The Citrix Licensing CEIP and Call Home usage and analytics programs are voluntary data collection programs designed to improve your product experience. You can participate in the programs anonymously, choose to be identified, or decline to participate.
Important
The Citrix Service Provider™ program requires CEIP and Call Home. If you have Citrix Service Provider licenses installed, you can change the settings, but you cannot disable CEIP or Call Home.
Upload now
The Usage and Statistics section of the Settings screen includes Upload now. When you enable CEIP, use Upload now to force a data upload to Citrix. Wait five minutes between uploads.
Upload information
This section provides status for the last CEIP, Call Home, or Citrix Service Provider upload. If the upload fails, the Citrix Licensing Manager displays troubleshooting information.
You can force a data upload to Citrix without waiting for the daily upload. The only restriction is that you wait five minutes between uploads.
Historical usage retention
Set the amount in days to retain your License Server usage information.
Citrix Licensing Manager for License Server VPX
For information about the License Server VPX Citrix Licensing Manager, see Citrix Licensing Manager.