Remote PC Access
Overview
Remote PC Access is an extension of Citrix Virtual Apps and Desktops. It enables organizations to easily allow employees to access their physical office PCs remotely in a secure manner. If users can access their office PCs, they can access all the applications, data, and resources they need to do their work.
Remote PC Access uses the same Citrix Virtual Apps™ and Desktops components that deliver virtual desktops and applications. The requirements and process of deploying and configuring Remote PC Access are the same as the requirements and process required for deploying Citrix Virtual Apps and Desktops. This uniformity provides a consistent and unified administrative experience. Users receive the best user experience by using Citrix HDX to deliver their remote office PC sessions.
For more information, see Remote PC Access in the Citrix Virtual Apps and Desktops documentation.
Considerations
These considerations are specific to the Linux VDA:
-
On physical machines, use the Linux VDA only in non-3D mode. Due to limitations on NVIDIA’s driver, the local screen of the PC cannot be blacked out when HDX™ 3D mode is enabled. Showing this screen is a potential security risk.
-
Use machine catalogs of type single-session OS for physical Linux machines.
-
Automatic user assignment is not available for Linux machines. With automatic user assignment, users are assigned to their machines automatically when they log on locally to the PCs. This logon occurs without administrator intervention. Citrix Workspace™ app on the client helps users access the applications and data on the office PC within the Remote PC Access desktop session.
-
If users are already logged on to their PCs locally, attempts to launch the PCs from StoreFront™ fail.
-
Power saving options are not available for Linux machines.
Configuration
To deliver Linux PC sessions, install the Linux VDA on target PCs, create a machine catalog of the Remote PC Access type, and create a Delivery Group to make the PCs in the machine catalog available for users who request access. The following section details the procedure:
Step 1 - Install the Linux VDA on target PCs
We recommend you use easy install to install the Linux VDA. During the installation, set the value of the CTX_XDL_VDI_MODE variable to Y.
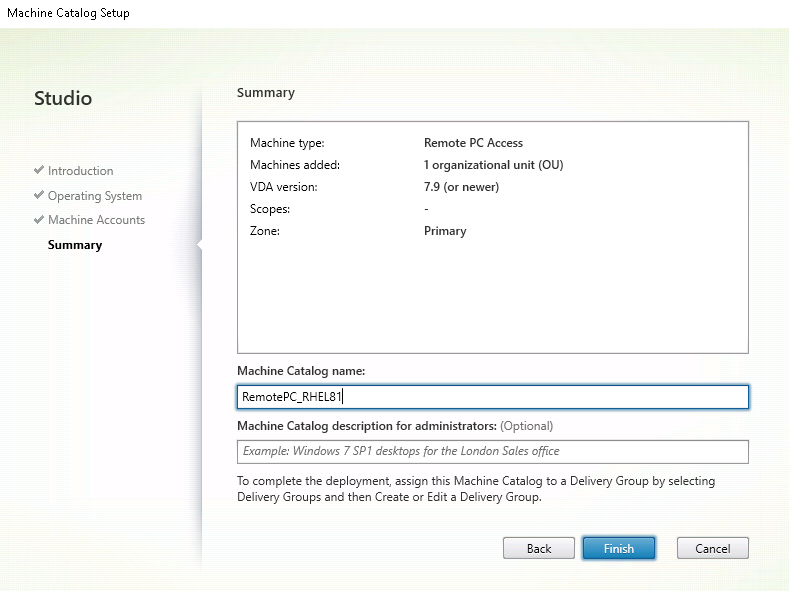
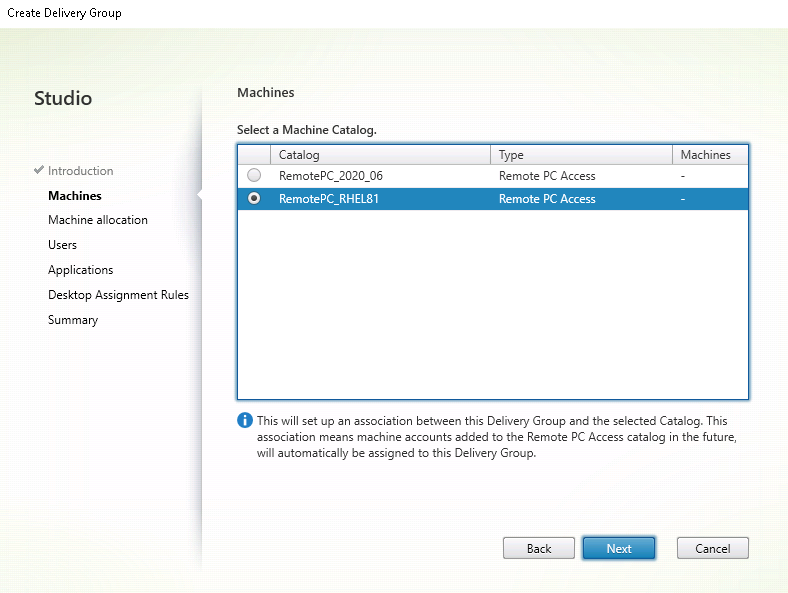
Step 2 - Create a machine catalog of the Remote PC Access type
-
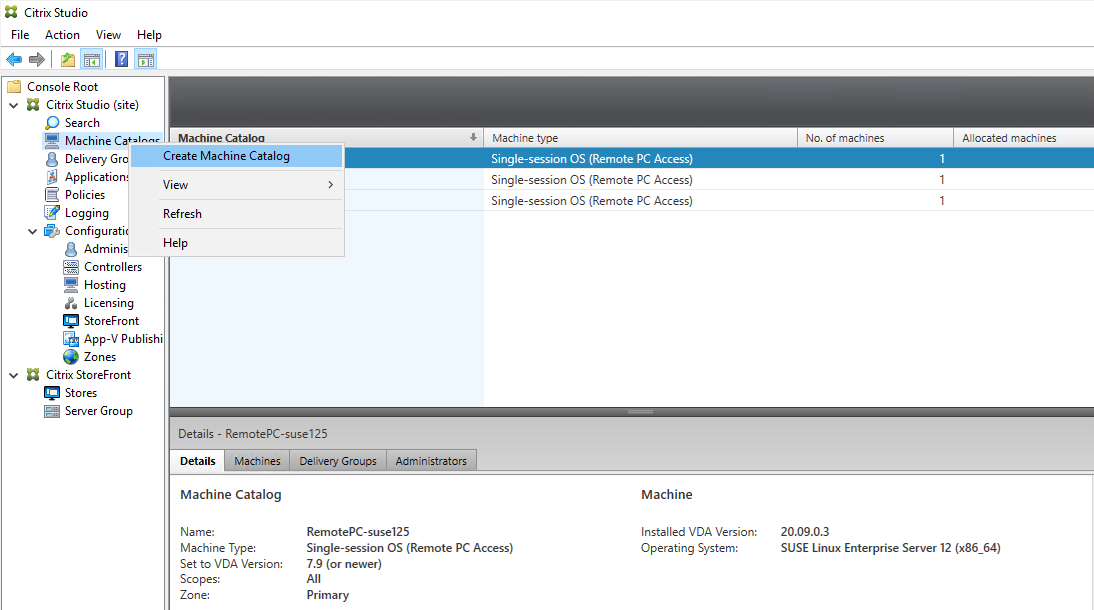
In Citrix Studio, right-click Machine Catalogs and select Create Machine Catalog from the shortcut menu.
-
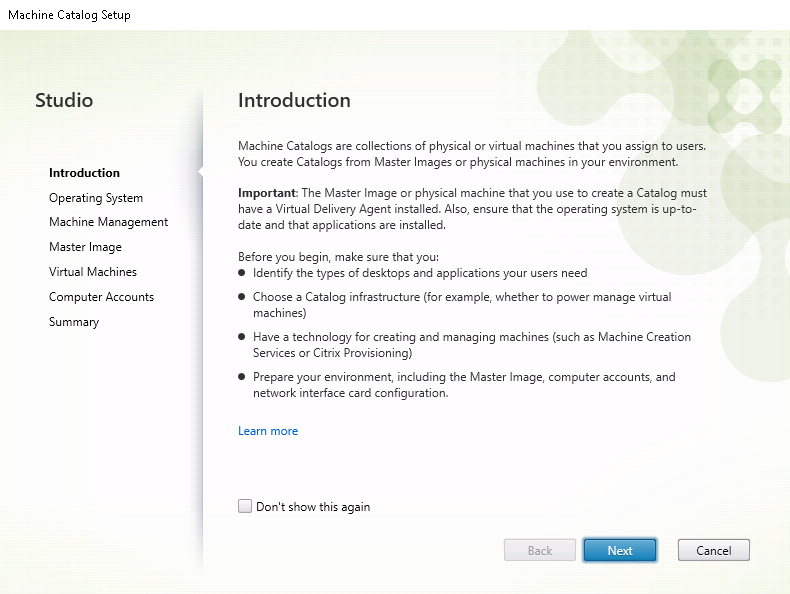
Click Next on the Introduction page.
-
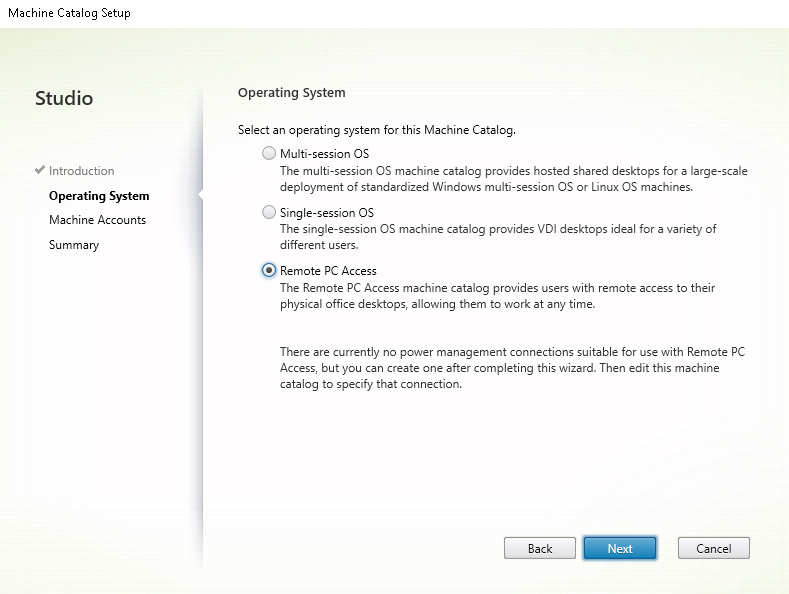
Select Remote PC Access on the Operating System page.
-
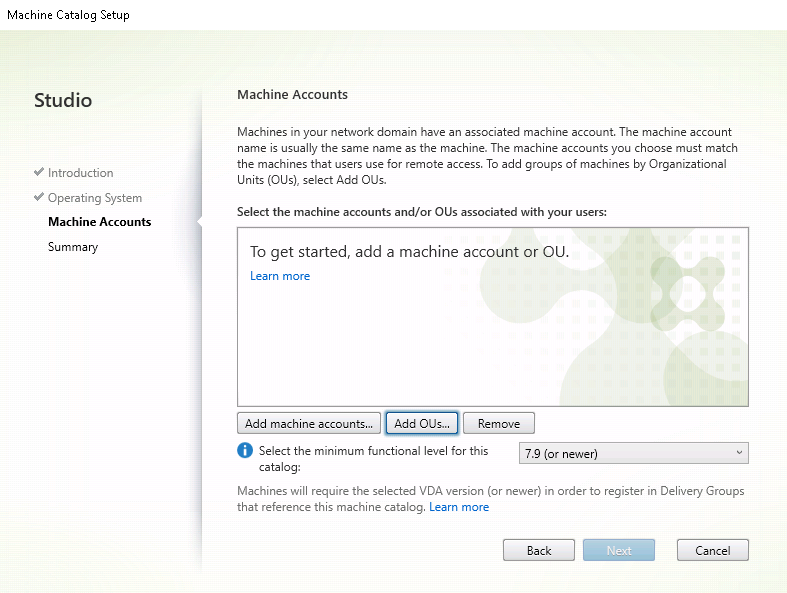
Click Add OUs to select OUs that contain the target PCs, or click Add machine accounts to add individual machines to the machine catalog.
-
Name the machine catalog.
-
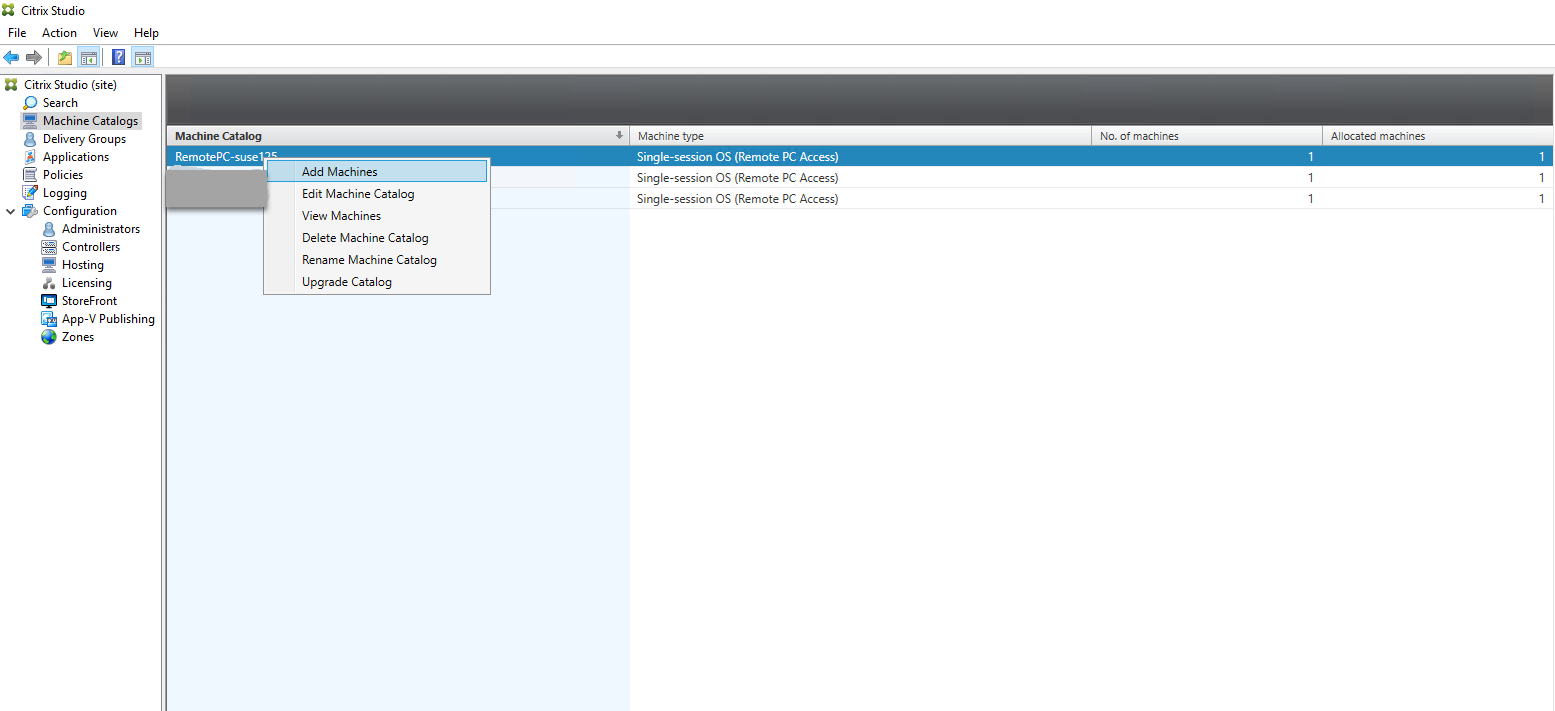
(Optional) Right-click the machine catalog to perform relevant operations.
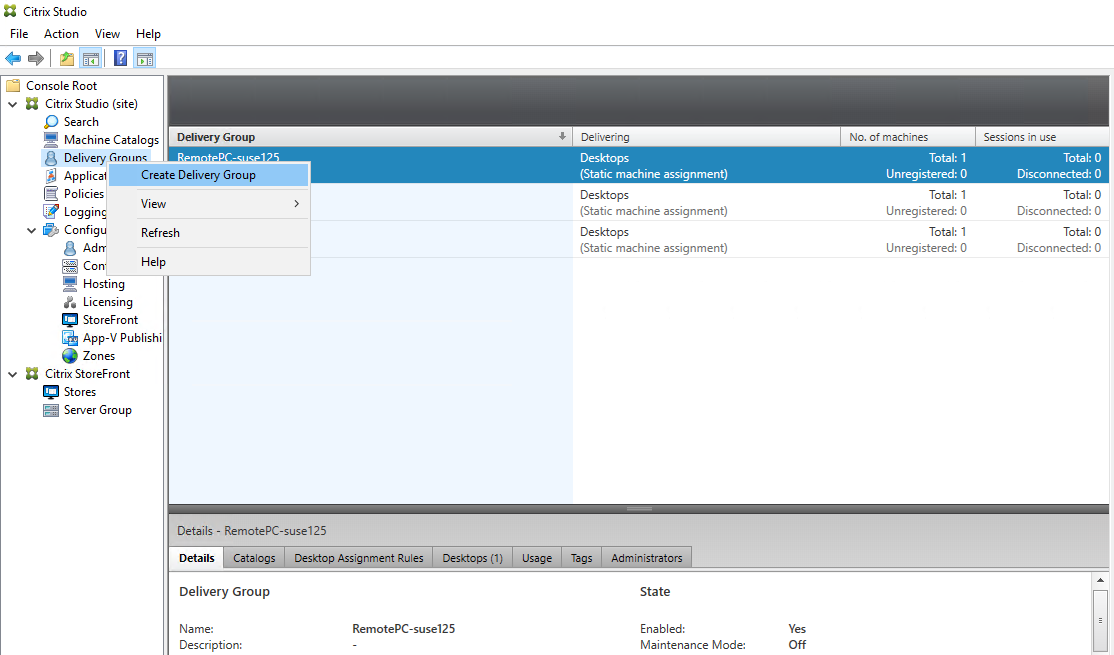
Step 3 - Create a Delivery Group to make the PCs in the machine catalog available for users who request access
-
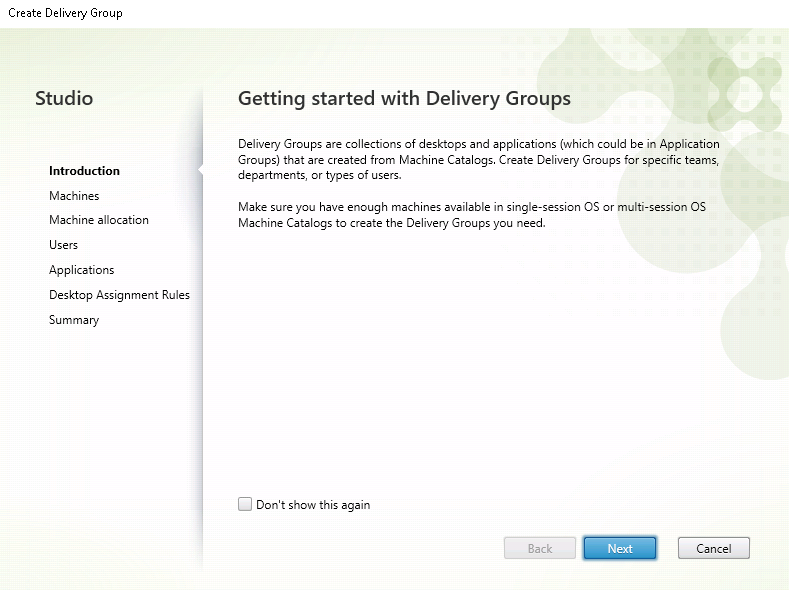
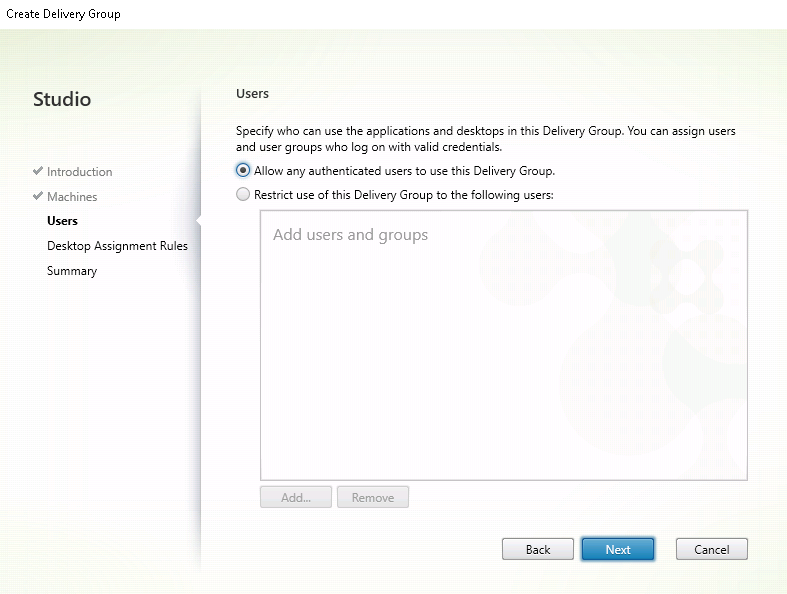
In Citrix Studio, right-click Delivery Groups and select Create Delivery Group from the shortcut menu.
-
Click Next on the Getting started with Delivery Groups page.
-
Select the machine catalog created in Step 2 to associate it with the Delivery Group.
-
Add users who can access the PCs in the machine catalog. The users you add can use Citrix Workspace app on a client device to access the PCs remotely.
Wake on LAN
Remote PC Access supports Wake on LAN, which gives users the ability to turn on physical PCs remotely. This feature enables users to keep their office PCs turned off when not in use to save energy costs. It also enables remote access when a machine has been turned off inadvertently.
With the Wake on LAN feature, the magic packets are sent directly from the VDA running on the PC to the subnet in which the PC resides when instructed by the delivery controller. This allows the feature to work without dependencies on extra infrastructure components or third-party solutions for delivery of magic packets.
The Wake on LAN feature differs from the legacy SCCM-based Wake on LAN feature. For information on the SCCM-based Wake on LAN, see Wake on LAN – SCCM-integrated.
System requirements
The following are the system requirements for using the Wake on LAN feature:
- Control plane:
- Citrix DaaS™ (formerly Citrix Virtual Apps and Desktops service)
- Citrix Virtual Apps and Desktops 2012 or later
- Physical PCs:
- VDA version 2012 or later
- Wake on LAN enabled in BIOS and on the NIC
Configure Wake on LAN
Currently, the configuration of integrated Wake on LAN is only supported using PowerShell.
To configure Wake on LAN:
- Create the Remote PC Access machine catalog if you do not have one already.
- Create the Wake on LAN host connection if you do not have one already.
Note:
To use the Wake on LAN feature, if you have a host connection of the “Microsoft Configuration Manager Wake on LAN” type, create a host connection.
- Retrieve the Wake on LAN host connection’s unique identifier.
-
Associate the Wake on LAN host connection with a machine catalog.
To create the Wake on LAN host connection:
# Load Citrix SnapIns
Add-PSSnapIn -Name "*citrix*"

# Provide the name of the Wake on LAN host connection
[string]$connectionName = "Remote PC Access Wake on LAN"

# Create the hypervisor connection
$hypHc = New-Item -Path xdhyp:\Connections `
            -Name $connectionName `
            -HypervisorAddress "N/A" `
            -UserName "woluser" `
            -Password "wolpwd" `
            -ConnectionType Custom `
            -PluginId VdaWOLMachineManagerFactory `
            -CustomProperties "<CustomProperties></CustomProperties>" `
            -Persist

$bhc = New-BrokerHypervisorConnection -HypHypervisorConnectionUid $hypHc.HypervisorConnectionUid

# Wait for the connection to be ready before trying to use it
while (-not $bhc.IsReady)
{
    Start-Sleep -s 5
    $bhc = Get-BrokerHypervisorConnection -HypHypervisorConnectionUid $hypHc.HypervisorConnectionUid
}
<!--NeedCopy-->
When the host connection is ready, run the following commands to retrieve the host connection’s unique identifier:
$bhc = Get-BrokerHypervisorConnection -Name "<WoL Connection Name>"
$hypUid = $bhc.Uid
<!--NeedCopy-->
After you retrieve the connection’s unique identifier, run the following commands to associate the connection with the Remote PC Access machine catalog:
Get-BrokerCatalog -Name "<Catalog Name>" | Set-BrokerCatalog -RemotePCHypervisorConnectionUid $hypUid <!--NeedCopy--> -
Enable Wake on LAN in BIOS and on the NIC on each VM in the machine catalog.
Note: The method for enabling Wake on LAN varies with different machine configurations.
- To enable Wake on LAN in BIOS:
-
Enter BIOS and enable the Wake on LAN feature.
The method for accessing BIOS depends on the manufacturer of your motherboard and the BIOS vendor the manufacturer has selected.
-
Save your settings and restart the machine.
-
- To enable Wake on LAN on the NIC:
-
Run the
sudo ethtool <NIC>command to check whether your NIC supports magic packets.<NIC>is the device name of your NIC, for example,eth0. Thesudo ethtool <NIC>command provides output about the capabilities of your NIC:- If the output contains a line similar to
Supports Wake-on: <letters>where<letters>contains the letterg, your NIC supports the Wake on LAN magic packet method. - If the output contains a line similar to
Wake-on: <letters>where<letters>contains the lettergand does not contain the letterd, the Wake on LAN magic packet method is enabled. However, if<letters>contains the letterd, it indicates that the Wake on LAN feature is disabled. In this case, enable Wake on LAN by running thesudo ethtool -s <NIC> wol gcommand.
- If the output contains a line similar to
-
On most distributions, the
sudo ethtool -s <NIC> wol gcommand is required after each startup. To persistently set this option, complete the following steps based on your distributions:Ubuntu:
Add theup ethtool -s <NIC> wol gline to the interface configuration file/etc/network/interfaces. For example:# ifupdown has been replaced by netplan(5) on this system. See # /etc/netplan for current configuration. # To re-enable ifupdown on this system, you can run: # sudo apt install ifupdown auto eth0 iface eth0 inet static address 10.0.0.1 netmask 255.255.240.0 gateway 10.0.0.1 up ethtool -s eth0 wol g <!--NeedCopy-->RHEL/SUSE:
Add the followingETHTOOL_OPTSparameter to the interface configuration file/etc/sysconfig/network-scripts/ifcfg-<NIC>:ETHTOOL_OPTS="-s ${DEVICE} wol g" <!--NeedCopy-->
-
- To enable Wake on LAN in BIOS:
Design considerations
When you are planning to use Wake on LAN with Remote PC Access, consider the following:
- Multiple machine catalogs can use the same Wake on LAN host connection.
- For a PC to wake up another PC, both PCs must be in the same subnet and use the same Wake on LAN host connection. It does not matter if the PCs are in the same or different machine catalogs.
- Host connections are assigned to specific zones. If your deployment contains more than one zone, you need a Wake on LAN host connection in each zone. The same applies to machine catalogs.
- Magic packets are broadcasted using the global broadcast address 255.255.255.255. Ensure that the address is not blocked.
- There must be at least one PC turned on in the subnet - for every Wake on LAN connection - to be able to wake up machines in that subnet.
Operational considerations
The following are considerations for using the Wake on LAN feature:
- The VDA must register at least once before the PC can be woken up using the integrated Wake on LAN feature.
- Wake on LAN can only be used to wake up PCs. It does not support other power actions, such as restart or shut down.
- After the Wake on LAN connection is created, it is visible in Studio. However, editing its properties within Studio is not supported.
- Magic packets are sent in one of the two ways:
- When a user tries to launch a session to their PC and the VDA is unregistered
- When an administrator sends a power on command manually from Studio or PowerShell
- Because the delivery controller is unaware of a PC’s power state, Studio displays Not Supported under power state. The delivery controller uses the VDA registration state to determine whether a PC is on or off.
More resources
The following are other resources for Remote PC Access:
-
Solution design guidance: Remote PC Access Design Decisions.
-
Examples of Remote PC Access architectures: Reference Architecture for Citrix Remote PC Access Solution.