Power BI integration for Citrix Performance Analytics
The Citrix Analytics Service platform ODATA API currently supports the Performance Analytics data export capability.
This document describes the necessary steps required to integrate the CAS ODATA API with Power BI, which also supports:
- Incremental data refresh (this support is critical for a large data set)
- Scheduled data refresh (automatically pull and export the data to Power BI workspace)
Prerequisites
The following items are required to connect the CAS ODATA feed:
- Citrix Cloud™ customer ID (CCID)
- Global CAS ODATA API endpoint:
https://api.cloud.com/casodata - Citrix Cloud API client.
The CAS ODATA API uses the Citrix Cloud bearer token for authentication. A Citrix Cloud API client is required to get the bearer token. For information on how to to create a Citrix Cloud API client and save the client ID and secret, see the Get started with Citrix Cloud APIs documentation.
Note:
The admin who creates the API client needs to have the “Read-only” access or the “Full admin access” to the Citrix Cloud Analytics service.
Connect CAS ODATA feed with Power BI
Perform the following steps to connect the CAS ODATA feed with Power BI:
- Open Power BI desktop.
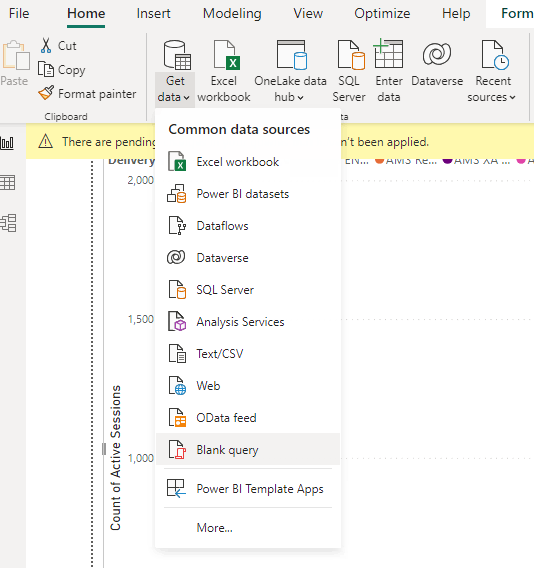
-
Select Home -> Get Data -> Blank Query. The Power Query Editor page appears.
-
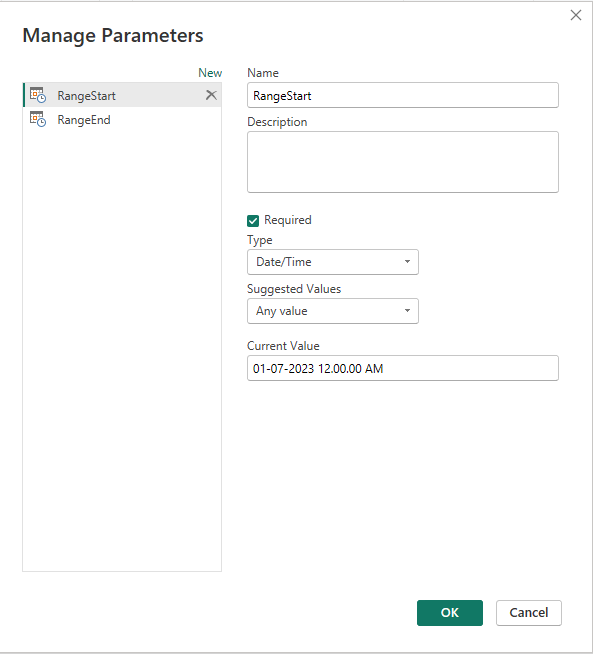
On the Power Query Editor screen, select Manage Parameters and add the following two parameters to support incremental refresh:
- RangeStart: the refresh start date (must use the “Date/Time” type)
- RangeEnd: the refresh end date (must use “Date/Time” type)
For more information, see the Microsoft documentation.
-
On the Power Query Editor screen, select Advanced Editor, enter the following query to interact with Citrix Cloud to get the bearer token and to interact with the CAS ODATA feed to get the data required.
Note:
Use the bearer token retrieved in the previous step for authentication.
let customerId = "placeholder_customerId", // get citrix cloud API credential (bearer token) tokenUrl = "placeholder_tokenUrl", headers = [ #"customerid" = customerId, #"Content-Type" = "application/x-www-form-urlencoded", #"Accept" = "*/*" ], postData = [ grant_type = "client_credentials", client_id = "placeholder_ApiClientId", client_secret = "placeholder_ApiSecretKey" ], response = Json.Document(Web.Contents(tokenUrl, [Headers = headers, Content = Text.ToBinary(Uri. BuildQueryString(postData))])), // get the CC bearer toekn from the response token = "CwsAuth bearer=" & response[access_token], reportDate = DateTime.AddZone(RangeStart, 0), reportDateYear = Number.ToText(Date.Year(reportDate)), reportDateMonth = Number.ToText(Date.Month(reportDate)), reportDateDay = Number.ToText(Date.Day(reportDate)), // CAS ODATA API endpoint and ODATA query. Sample below will retrieve active sessions (non-terminated) // apiURL = "https://api.cloud.com/casodata/sessions?$filter=SessionState ne '3'", apiURL = "placeholder_OdataApiUrl", // have to separate api queries below to make PowerBI happy apiQuery = [ #"year" = reportDateYear, #"month" = reportDateMonth, #"day" = reportDateDay ], apiHeaders = [ #"Authorization" = token, #"Citrix-CustomerId" = customerId ], Source = OData.Feed(apiURL, null, [Query=apiQuery, Headers=apiHeaders]), #"Filtered Rows" = Table.SelectRows(Source, each [Timestamp] >= DateTime.AddZone(RangeStart, 0) and [Timestamp] <= DateTime.AddZone(RangeEnd, 0)) in #"Filtered Rows" <!--NeedCopy--> -
Replace the following placeholders based on your site:
- Placeholder_customerId: customer ID
-
placeholder_tokenUrl: regional specific CC auth URL
https://api.cloud.com/cctrustoauth2/root/tokens/clients - placeholder_ApiClientId: API client ID
- placeholder_ApiSecretKey: API client secret key
- placeholder_OdataApiUrl: API URL for CAS ODATA with optional ODATA query (for example:
"https://api.cloud.com/casodata/sessions?$filter=SessionState ne '3'")
- Once completed, click Done. The request for data source access credentials appears.
-
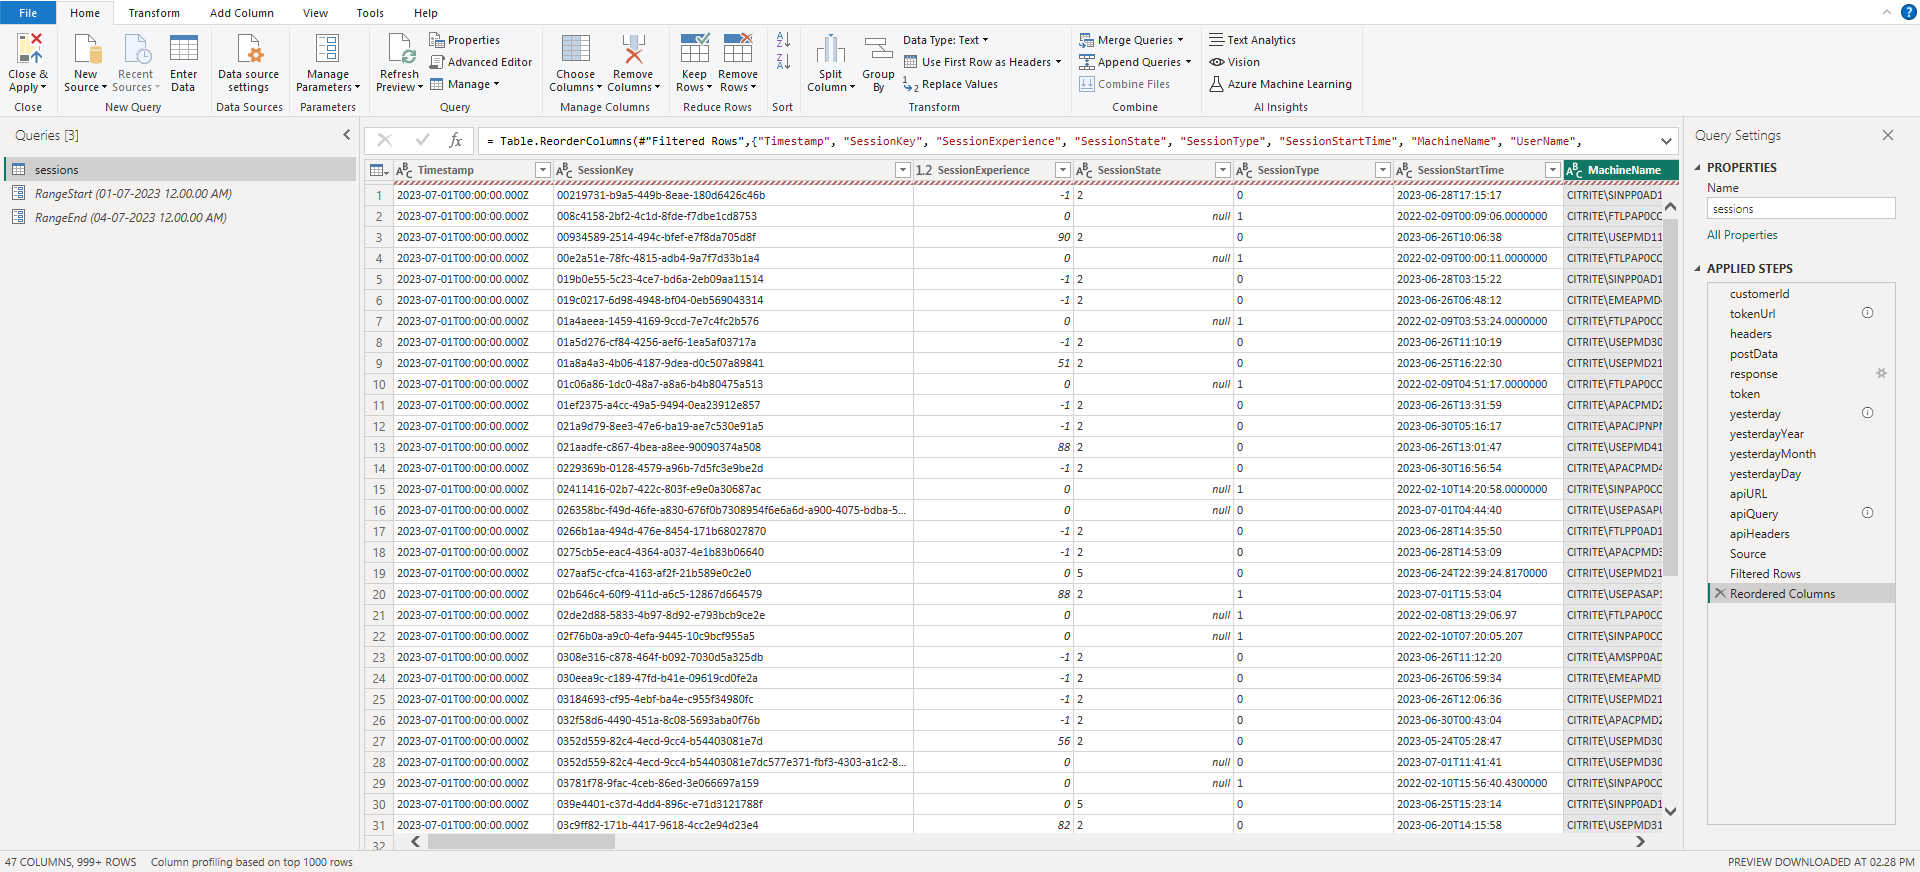
Select Anonymous and then click Apply. The data is refreshed as follows:
Configure PowerBI to support incremental refresh
When the Power Query can pull data, you need to configure incremental refresh for the data source.
Right-click the data source and select Incremental refresh to configure the policy to enable incremental refresh:
Note:
Power BI premium or pro license is required to support incremental refresh.

Important:
- When the incremental refresh is enabled, the first refresh triggers the ODATA API calls to get all the historical data. As the ODATA API aggregates the data in a daily manner, it’s important to use number of “days” for archived data.
- Consider a reasonable number of days to keep the data to save your PowerBI workspace disk space (for example “7” days).
Publish to Power BI cloud and enable scheduled refresh
Once the preceding changes are completed, select Power BI desktop Home -> File -> Publish to Power BI. The dataset and reports are published to the Power BI cloud workspace.
Enable the scheduled refresh by clicking Settings in the dataset:
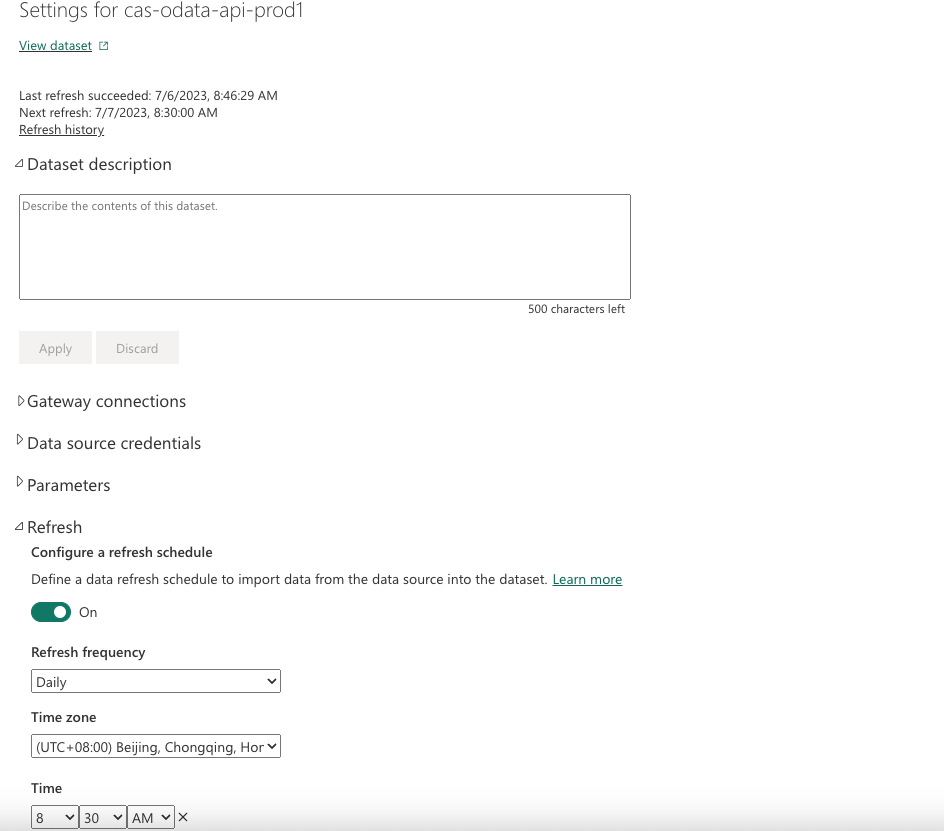
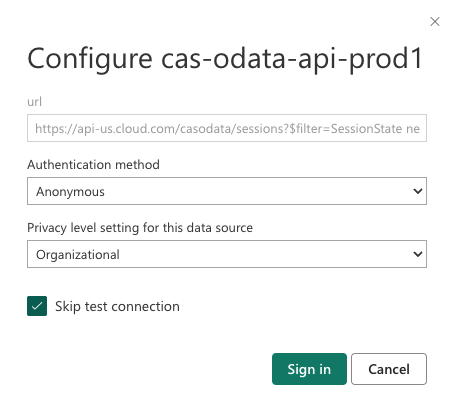
Configure anonymous access for the data sources in the Data source credentials section and select Skip connection test, and then click Sign in as follows:
The first dataset refresh pulls the historical data, which might take a longer time. And the later incremental refresh pulls only the latest day’s data. This refresh is done as configured in the incremental refresh policy in the previous section.
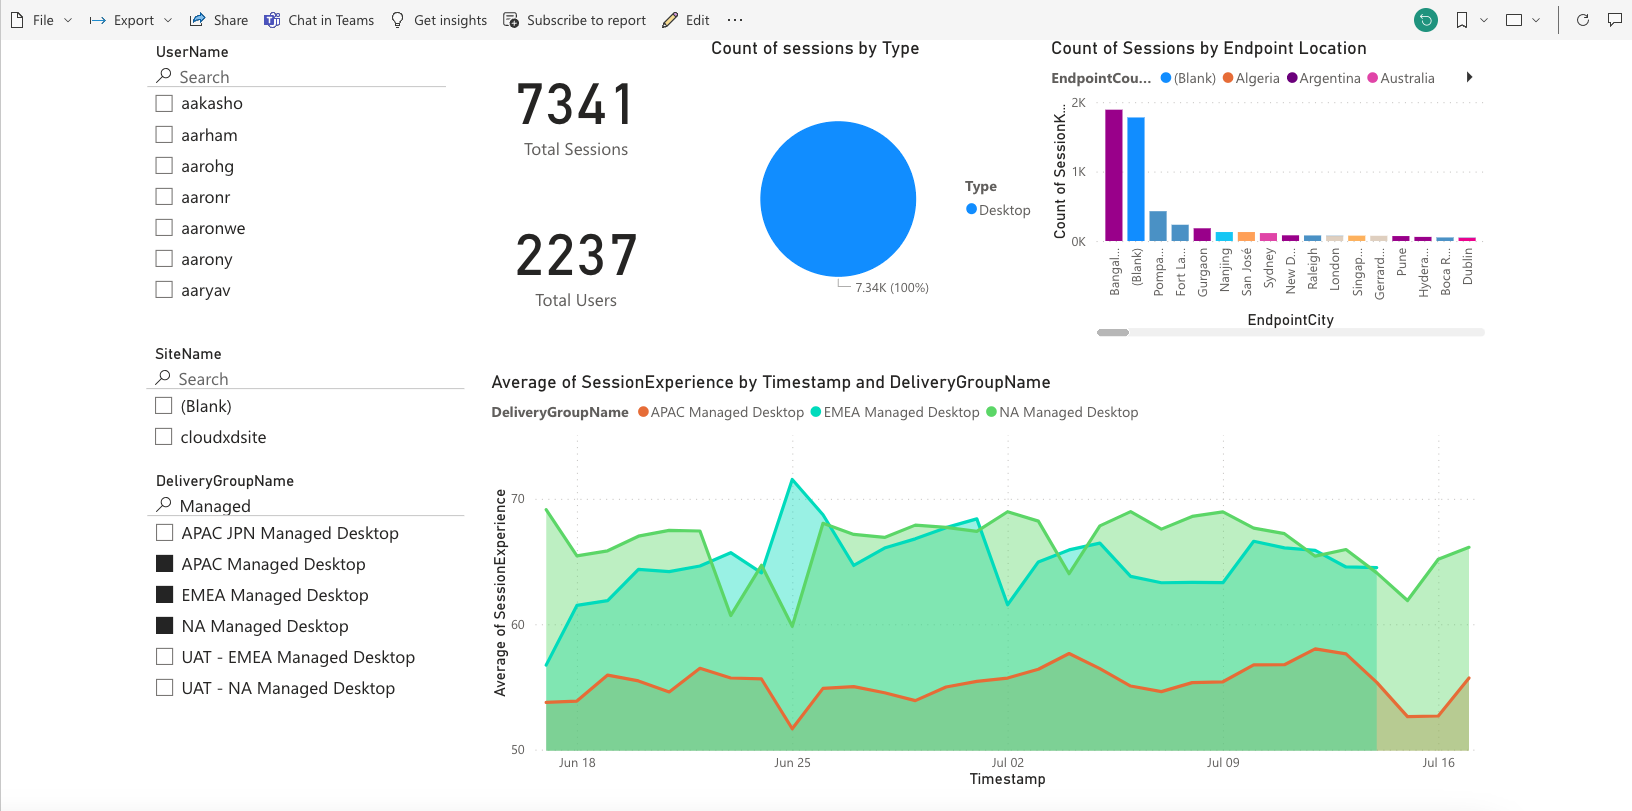
The refresh history looks as follows:
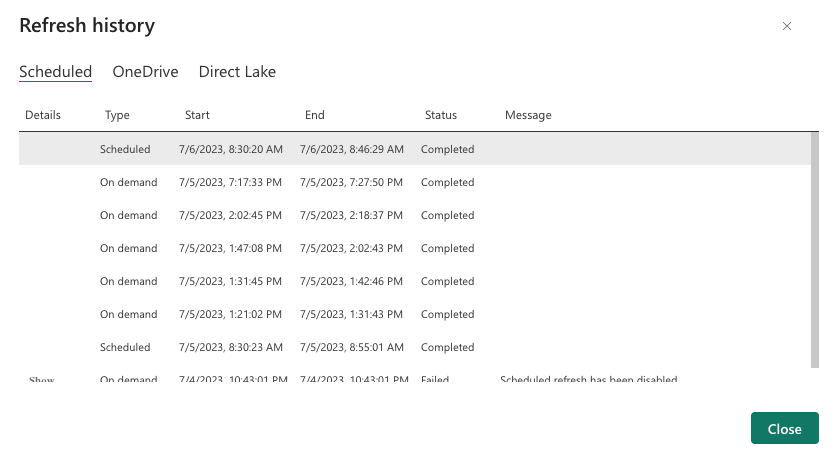
Once the refresh is completed, you are able to continuously pull the data to Power BI automatically.