-
-
-
-
Data Tables
-
This content has been machine translated dynamically.
Dieser Inhalt ist eine maschinelle Übersetzung, die dynamisch erstellt wurde. (Haftungsausschluss)
Cet article a été traduit automatiquement de manière dynamique. (Clause de non responsabilité)
Este artículo lo ha traducido una máquina de forma dinámica. (Aviso legal)
此内容已经过机器动态翻译。 放弃
このコンテンツは動的に機械翻訳されています。免責事項
이 콘텐츠는 동적으로 기계 번역되었습니다. 책임 부인
Este texto foi traduzido automaticamente. (Aviso legal)
Questo contenuto è stato tradotto dinamicamente con traduzione automatica.(Esclusione di responsabilità))
This article has been machine translated.
Dieser Artikel wurde maschinell übersetzt. (Haftungsausschluss)
Ce article a été traduit automatiquement. (Clause de non responsabilité)
Este artículo ha sido traducido automáticamente. (Aviso legal)
この記事は機械翻訳されています.免責事項
이 기사는 기계 번역되었습니다.책임 부인
Este artigo foi traduzido automaticamente.(Aviso legal)
这篇文章已经过机器翻译.放弃
Questo articolo è stato tradotto automaticamente.(Esclusione di responsabilità))
Translation failed!
Data Tables
Using Data Tables in a ShareFile Projects is a way to organize data in projects with a structured manner. This data could be:
- Project related data
- Data from 3P apps
Adding a tab in ShareFile Projects
-
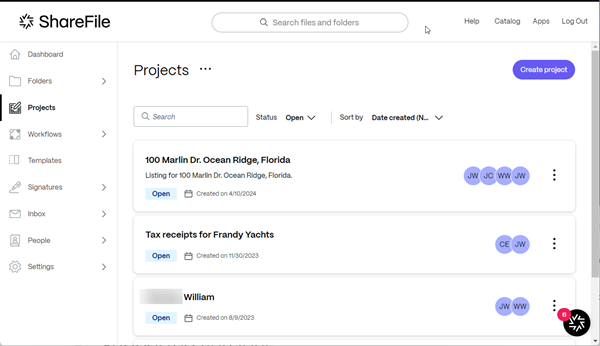
Navigate to Projects in your ShareFile account.

-
Select an existing project or select Create Projects. For these instructions, we selected an existing project.

-
Select + to open the Add a tab.

-
Type in a title for the Tab name.

-
Select a default view. You can choose one of the following:
- Table view
- Kanban view
- List view
- Calendar view
Note:
The default view for now is Table view.
-
Select Add.
The new Tab is added to your Project.

-
In the first row, select the V to access the drop-down menu.

-
Select Edit field.
The Edit field popup displays.

-
Type in a title for the field, then select Save.

The Field added message displays briefly.

-
Select Add in the next column to add another field. Repeat this process until you complete your table.

The Add field popup displays.

-
Once you complete the table, you can then enter the data for the table.
-
Use Create row to add additional rows as required.

Share
Share
In this article
This Preview product documentation is Citrix Confidential.
You agree to hold this documentation confidential pursuant to the terms of your Citrix Beta/Tech Preview Agreement.
The development, release and timing of any features or functionality described in the Preview documentation remains at our sole discretion and are subject to change without notice or consultation.
The documentation is for informational purposes only and is not a commitment, promise or legal obligation to deliver any material, code or functionality and should not be relied upon in making Citrix product purchase decisions.
If you do not agree, select I DO NOT AGREE to exit.