Installing Scout Board
Note:
Scout Board is installed as a component of the Scout Enterprise Management Suite.
-
Download the latest version of the Scout Enterprise Management Suite and start the installation process. For further information, see Installing Scout Enterprise Management Suite.
-
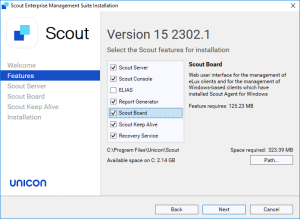
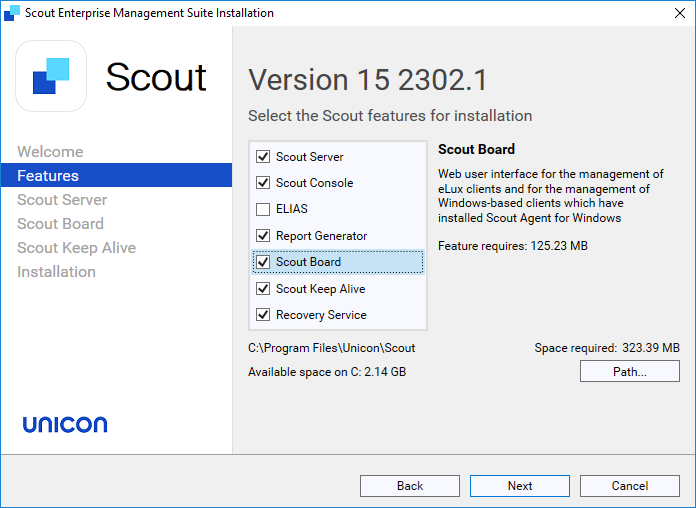
Fresh installation: By default, the Scout Board is part of the installation. Upgrading a previous version without Scout Board: Activate the Scout Board component.
-
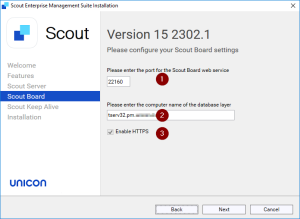
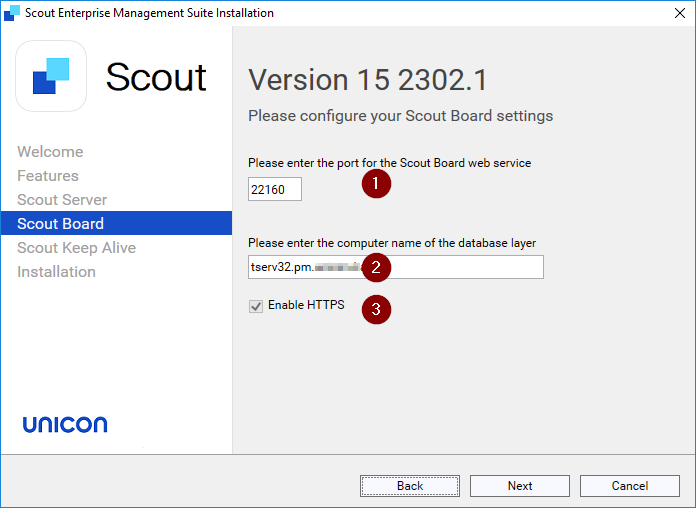
Then configure your Scout Board settings.
| Information | |
|---|---|
| 1 | Number of the port on which the Scout Board service should run |
| 2 | Computer name (FQDN) of the machine on which the database layer is to run |
| 3 | With HTTPS, a secure connection to the interface is used. |
| Initially, a self-signed certificate is created. To configure an individual SSL certificate instead, see below. |
- Follow the further instructions.
Note:
From 15.2609, an update to Scout Board keeps hand-made changes to the
.envfile. Before 15.2609, every update rewrote.envusing only the installer’s own values, so any manual change — for example the settings described in the following sections — had to be reapplied after each update.From 15.2609, five settings are still rewritten by every update regardless of your own values:
USEHTTPS,DBLAYER_TIMEOUT,JWT_EXPIRATION,ZERO_MQ_IS_CURVE_ACTIVATED, andDOMAINS. The settings of a sign-in method you aren’t using are also removed. Comment lines in the file are not kept.
Configuring an individual HTTPS certificate for Scout Board
Self-signed certificates are not accepted as secure by the browser. To provide the browser with a valid SSL certificate for Scout Board perform the following steps:
-
Rename your certificate file to
certificate.crtand the private key file toprivate.key -
Copy both files into the Scout Board program directory. By default, this is
C:\Program Files\Unicon\Scout\Scout Board -
Still in the Scout Board program directory, edit the
.envfile and change the entryCERTIFICATE=SELFSIGNtoCERTIFICATE=SIGN -
Restart the Scout Board service.
For further information and detailed certificate configuration, see HTTPS Certificate Setup.
Configuring authentication options for Scout Board
During installation, you can choose which authentication method should be used for Scout Board.
The following authentication methods are supported:
- AD (Active Directory)
- Entra ID (SAML or OIDC)
- OKTA (SAML or OIDC)
After an authentication method has been configured during the installation, you can change or reconfigure it in the .env file. As a reference and an example, the template file .env.example can be used.
| Authentication method | Parameter | Value |
|---|---|---|
| AD | AUTH_TYPE |
AD |
| OIDC | AUTH_TYPE |
OKTA_OIDC or ENTRAID_OIDC
|
OIDC_ISSUER |
your-issuer-url |
|
OIDC_CLIENT_ID |
your-client-id |
|
OIDC_CLIENT_SECRET |
your-client-secret |
|
| SAML | AUTH_TYPE |
OKTA_SAML or ENTRAID_SAML
|
SAML_SSO_ENTRY |
your-sso-entry-url |
|
SAML_LOGOUT_URL |
your-logout-url |
|
SAML_SERVICE_PROVIDER_ISSUER |
https://scoutboard.com/47d899fb-3002-4692-b741-8068b8f7fbb4 Only replace, if you are not using the Scout Board default issuer |
|
SAML_CERT_PATH |
your-certificate-path |
|
SAML_PRIVATE_KEY_PATH |
your-provate-key-path |
|
SAML_ACS_URL |
The externally visible assertion consumer service address, for example https://scoutboard.example.com/api/v1/auth/login-saml/callback. Set this only when Scout Board is published under a different address or port than it sees itself, for example behind a reverse proxy — by default, Scout Board builds this address from HOST_NAME, USEHTTPS and PORT. |
Note:
From 15.2609, a SAML sign-in must be one Scout Board itself started: it rejects a response sent straight from the identity provider, for example by launching Scout Board from an Okta app tile or a Microsoft Entra My Apps tile. Each rejected response is logged as a Login rejected event. When Scout Board is reached over HTTPS, it reacts by discarding the response and immediately starting a fresh sign-in of its own, so the tile still reaches Scout Board, just through an extra round trip. To avoid that round trip, point the tile at
https://<Scout Board address>/api/v1/auth/login-samlinstead, or setSAML_ALLOW_IDP_INITIATED=true(defaultfalse) to accept the tile’s response directly.A SAML response is also single-use from 15.2609 on — Scout Board refuses a replay of the same response, whether or not
SAML_ALLOW_IDP_INITIATEDis set.GET /login-samlno longer acceptsSAMLRequestas a query parameter.Scout Board also applies three timing limits to a SAML sign-in:
- Up to 30 seconds of clock difference between the identity provider and Scout Board is tolerated.
- A response is accepted for at most 10 minutes after the identity provider issued it.
- The user has 45 minutes to finish signing in at the identity provider, once they start.
A refused sign-in shows Sign-in could not be completed with the reason, a reference code and a Sign in again link.
Configuring AD domains for Scout Board
The AD domain for the logon process is being used from the provided data during the installation process.
In the .env file, the configuration is available. If the domain changes or additional domains need to be added, these can be added manually.
The defined domains will be selectable in the Scout Board Logon dialog.
Example:
| Domain option | Domain configuration |
|---|---|
| One domain | DOMAINS=["production.mydomain.com"] |
| Multiple domains | DOMAINS=["production.mydomain.com", "test.mydomain.com"] |
Note:
DOMAINSis one of the settings an update always rewrites (see the note above). Reapply this setting after every update, even from 15.2609 onward.
Note:
From 15.2609, Scout Board resolves the domain controller for a sign-in only from its own configuration —
DOMAINStogether withLDAPS_SERVERS, orAUTH_DOMAIN_MAP— instead of from a domain-controller address sent with the sign-in request or listed on the sign-in page. This applies to 15.2609 only; 15.2603 and 15.2607.x still use an address sent this way.A sign-in for a domain that is neither in
DOMAINSnor inAUTH_DOMAIN_MAP, and is not a subdomain of one of them, is refused with HTTP 412 and the message Unable to resolve domain. Please contact your administrator. The single-tenant sign-in page only ever offers aDOMAINSentry, so this mostly affects REST API callers and multi-tenant installations (TENANT_MODE=multi-tenant) that take the domain from the user name. A subdomain of a configured domain, for examplechild.corp.example.comundercorp.example.com, signs in with no extra configuration.To add a domain for REST API or multi-tenant sign-in without exposing it on the sign-in page, add it to
AUTH_DOMAIN_MAPinstead of toDOMAINS:AUTH_DOMAIN_MAP={"CORP":{"domain":"corp.example.com","ldapServer":"ldaps://dc01.corp.example.com"}}. The key (CORPabove) is the short domain name used inCORP\user.ldapServeris optional; a plain string value names the domain only. UnlikeDOMAINS, an update does not rewriteAUTH_DOMAIN_MAP.If neither
LDAPS_SERVERSnor a domain’sAUTH_DOMAIN_MAPentry names a domain controller, Scout Board connects toldaps://<domain>. With the defaultLDAP_TLS_MODE=verify-full, this fails if the domain controller’s certificate names only its own host name. SetldapServerin the domain’sAUTH_DOMAIN_MAPentry to anldaps://address with the domain controller’s FQDN, for exampleldaps://dc01.corp.example.com, to fix this — for the server’s own domain only, the firstLDAPS_SERVERSentry also works.
If you are using LDAPS,in the .env file, you can configure them: LDAPS_SERVERS=["ldaps://my.ldaps.server", "ldaps://my.other.ldaps.server"]
Note
Scout Board now uses
ldaps://only and validates the DC certificate chain (chain + hostname/SAN). Previously, this validation was turned off. LDAPS silently failed and used plaintextldap://.Affected: On-Premises
AUTH_TYPE=ADdeployments with an untrusted, expired or SAN-mismatched DC certificate, or a plaintextldap://entry inLDAPS_SERVERS/AUTH_DOMAIN_MAP.Logins that worked in UniconOS Management version 15 2605 will fail. SSO modes and UniconOS Management Cloud deployments are not affected. The login screen will provide information on the cause, and the details will be in the
backend.loglog file.Action required: In the Scout Board
.envconfiguration file:Perform configuration:
LDAP_CA_PATH=<PEM CA bundle>orNODE_USE_SYSTEM_CA=1You might need to setNODE_USE_SYSTEM_CA=1as an environment variable, if the change in.envdoes not work.Name mismatch: Use the DC FQDN in
LDAPS_SERVERS/AUTH_DOMAIN_MAP, orLDAP_TLS_MODE=verify-caTemporary workaround only: Use
LDAP_TLS_MODE=insecure.This is not supported in production environments, and it does not restore plaintext. (
ldap://is refused in every mode)The default is
LDAP_TLS_MODE=verify-fullNote:After modifying the .env file, the windows service “Scout Board” needs to be restarted.
Signing in through the REST API
A REST API sign-in (loginData64) can request a token lifetime with expirationTime, but only
to make the token shorter — the lifetime is always capped at JWT_EXPIRATION, one of the
settings every update rewrites to its default of 4h (see the note near the top of this page).
Give expirationTime a string holding a positive whole number with an optional unit m
(minutes), h (hours) or d (days), for example "30m"; a number with no unit is read as hours.
Any other value gets HTTP 400.
If AUTH_TYPE is not AD, a sign-in with a user name and password gets HTTP 404 with the message
AD authentication is not enabled! — use the identity provider sign-in configured for this
Scout Board instead.
Configuring the Database Layer key for Scout Board
Scout Board no longer fetches the Database Layer’s public key at startup. Instead, it reads
ZERO_MQ_PUBLIC_KEY from its .env file, which the installer writes.
-
Scout Board on the same server as the Database Layer: no action needed. If
ZERO_MQ_PUBLIC_KEYis missing or outdated, Scout Board takes the key from the localdblayer.iniinstead. -
Scout Board on a separate server from the Database Layer:
- On the Database Layer server, copy the value of
[Certificates] DBLayerPublicKeyfrom%PUBLIC%\Documents\Unicon\Scout\ScoutBoard\dblayer.ini. - On the Scout Board server, set
ZERO_MQ_PUBLIC_KEY=<key>in the.envfile and restart the Scout Board service. On a new installation, you can instead passUCPROP_SCOUTBOARD_REMOTE_DBLAYER_PUBLIC_KEY=<key>to the installer; an upgrade keeps whichever key is already in.env. - Repeat these steps whenever the Database Layer’s key changes, for example after the Scout database is restored or Scout Board is re-pointed at a different Database Layer.
- On the Database Layer server, copy the value of
Without a usable key, Scout Board still starts, but cannot reach the Database Layer; its log
names ZERO_MQ_PUBLIC_KEY as the setting to check.