This content has been machine translated dynamically.
Dieser Inhalt ist eine maschinelle Übersetzung, die dynamisch erstellt wurde. (Haftungsausschluss)
Cet article a été traduit automatiquement de manière dynamique. (Clause de non responsabilité)
Este artículo lo ha traducido una máquina de forma dinámica. (Aviso legal)
此内容已经过机器动态翻译。 放弃
このコンテンツは動的に機械翻訳されています。免責事項
이 콘텐츠는 동적으로 기계 번역되었습니다. 책임 부인
Este texto foi traduzido automaticamente. (Aviso legal)
Questo contenuto è stato tradotto dinamicamente con traduzione automatica.(Esclusione di responsabilità))
This article has been machine translated.
Dieser Artikel wurde maschinell übersetzt. (Haftungsausschluss)
Ce article a été traduit automatiquement. (Clause de non responsabilité)
Este artículo ha sido traducido automáticamente. (Aviso legal)
この記事は機械翻訳されています.免責事項
이 기사는 기계 번역되었습니다.책임 부인
Este artigo foi traduzido automaticamente.(Aviso legal)
这篇文章已经过机器翻译.放弃
Questo articolo è stato tradotto automaticamente.(Esclusione di responsabilità))
Translation failed!
WebSocketの自己署名証明書の構成
2402 LTSRの初期リリース以降、Citrix Virtual Apps and Desktopsでは、Citrix Brokering Protocol (CBP)経由でWebSocketテクノロジを使用することで、VDAとDelivery Controller間で容易に通信できるようになりました。 この機能では、VDAからDelivery Controllerへの通信にTLSポート443のみが必要です。 詳しくは、Citrix Virtual Apps and Desktopsドキュメントの「VDAとDelivery Controller間のWebSocket通信」を参照してください。
WebSocketは、クライアントとサーバー間のリアルタイムの双方向通信を可能にする強力なテクノロジです。 ただし、安全な接続を確保するには、特にwss://を使用する場合、自己署名証明書の構成が必要になることがよくあります(開発環境やテスト環境など)。 この記事では、WebSocket用の自己署名証明書を構成するためのベストプラクティスについて説明します。
手順1:(ドメイン非参加のVDAのみ)DNSサーバーを構成する
- UbuntuおよびDebian VDAの場合:
-
次のように/etc/systemd/resolved.confを編集してDNS設定を変更します:
[Resolve] # Some examples of DNS servers which may be used for DNS= and FallbackDNS=: # Cloudflare: 1.1.1.1#cloudflare-dns.com 1.0.0.1#cloudflare-dns.com 2606:4700:4700::1111#cloudflare-dns.com 2606:4700:4700::1001#cloudflare-dns.com # Google: 8.8.8.8#dns.google 8.8.4.4#dns.google 2001:4860:4860::8888#dns.google 2001:4860:4860::8844#dns.google # Quad9: 9.9.9.9#dns.quad9.net 149.112.112.112#dns.quad9.net 2620:fe::fe#dns.quad9.net 2620:fe::9#dns.quad9.net DNS=<DNS IP address> #FallbackDNS= #Domains= #DNSSEC=no #DNSOverTLS=no #MulticastDNS=no #LLMNR=no #Cache=no-negative #CacheFromLocalhost=no #DNSStubListener=yes #DNSStubListenerExtra= #ReadEtcHosts=yes #ResolveUnicastSingleLabel=no <!--NeedCopy--> -
systemd-resolvedサービスを再起動します。
sudo service systemd-resolved restart <!--NeedCopy-->詳しくは、https://notes.enovision.net/linux/changing-dns-with-resolveを参照してください。
- RHEL、Rocky Linux、およびSUSE VDAの場合:
-
接続名の一覧を取得するには、次のnmcliコマンドを実行します:
sudo nmcli connection <!--NeedCopy--> -
別のnmcliコマンドを実行して、DNS IPアドレスを設定します:
  sudo nmcli con mod {connectionNameHere} ipv4.dns "<dns ip address>"
<!--NeedCopy-->
たとえば、次のコマンドを使用して、DNS IPアドレスを192.168.2.254に設定できます:
sudo nmcli con mod eth0 ipv4.dns "192.168.2.254" <!--NeedCopy--> -
次のいずれかのコマンドを実行して、新しいDNS設定を再読み込みします:
  sudo systemctl restart NetworkManager.service
<!--NeedCopy-->
sudo nmcli connection reload <!--NeedCopy-->For more information, see https://www.cyberciti.biz/faq/change-dns-ip-address-rhel-redhat-linux/.
手順2:証明機関(CA)に証明書を要求する
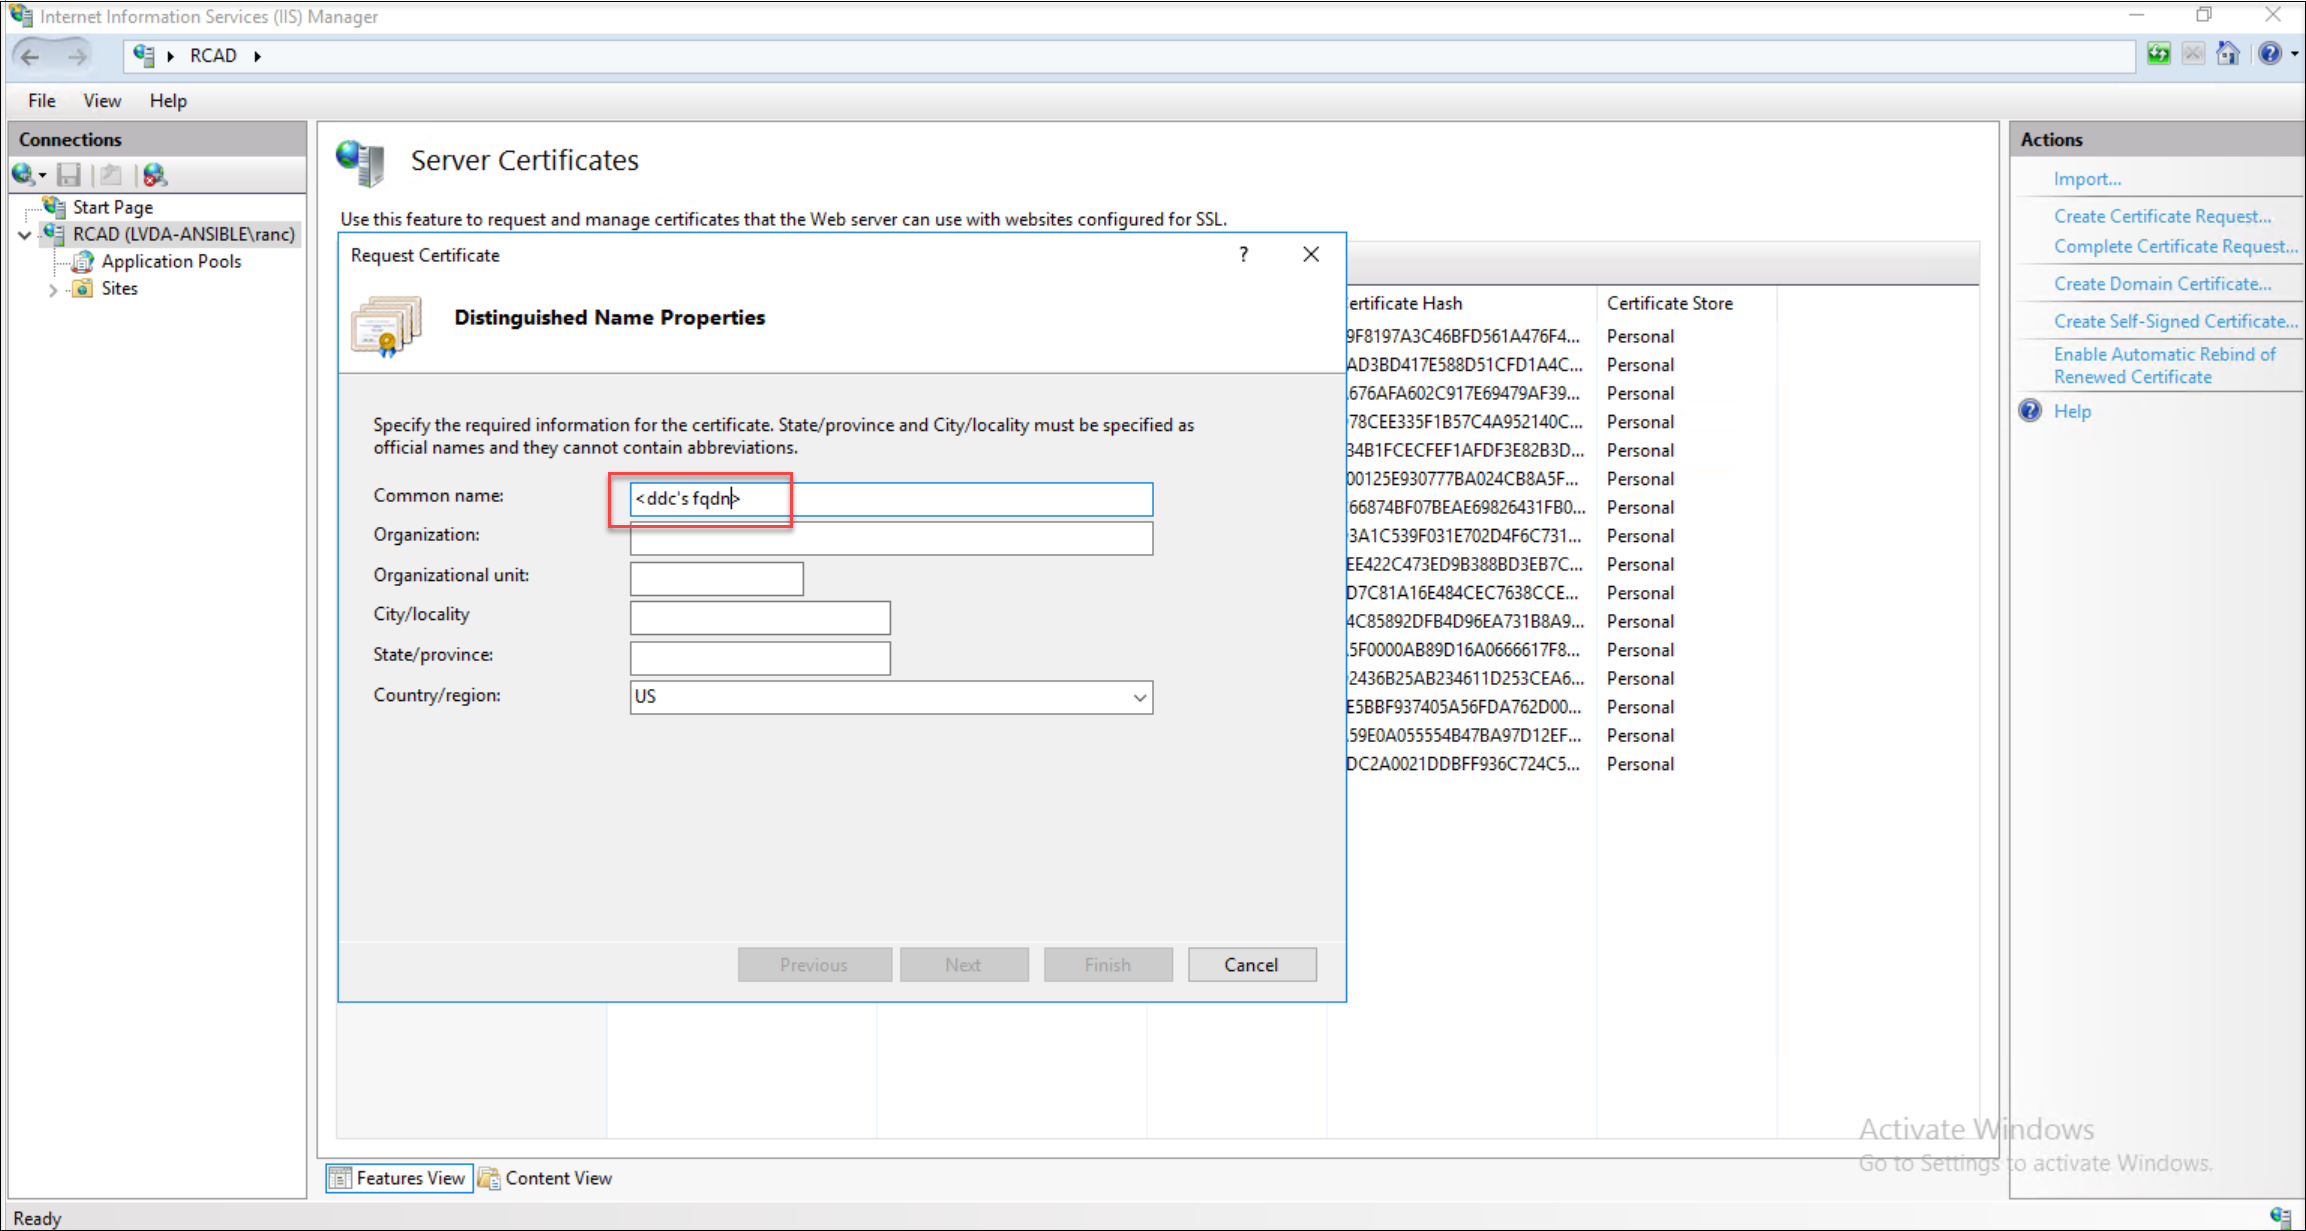
-
証明書要求を開始します。 証明書要求を開始するときは、Delivery Controllerの完全修飾ドメイン名(FQDN)を入力します。
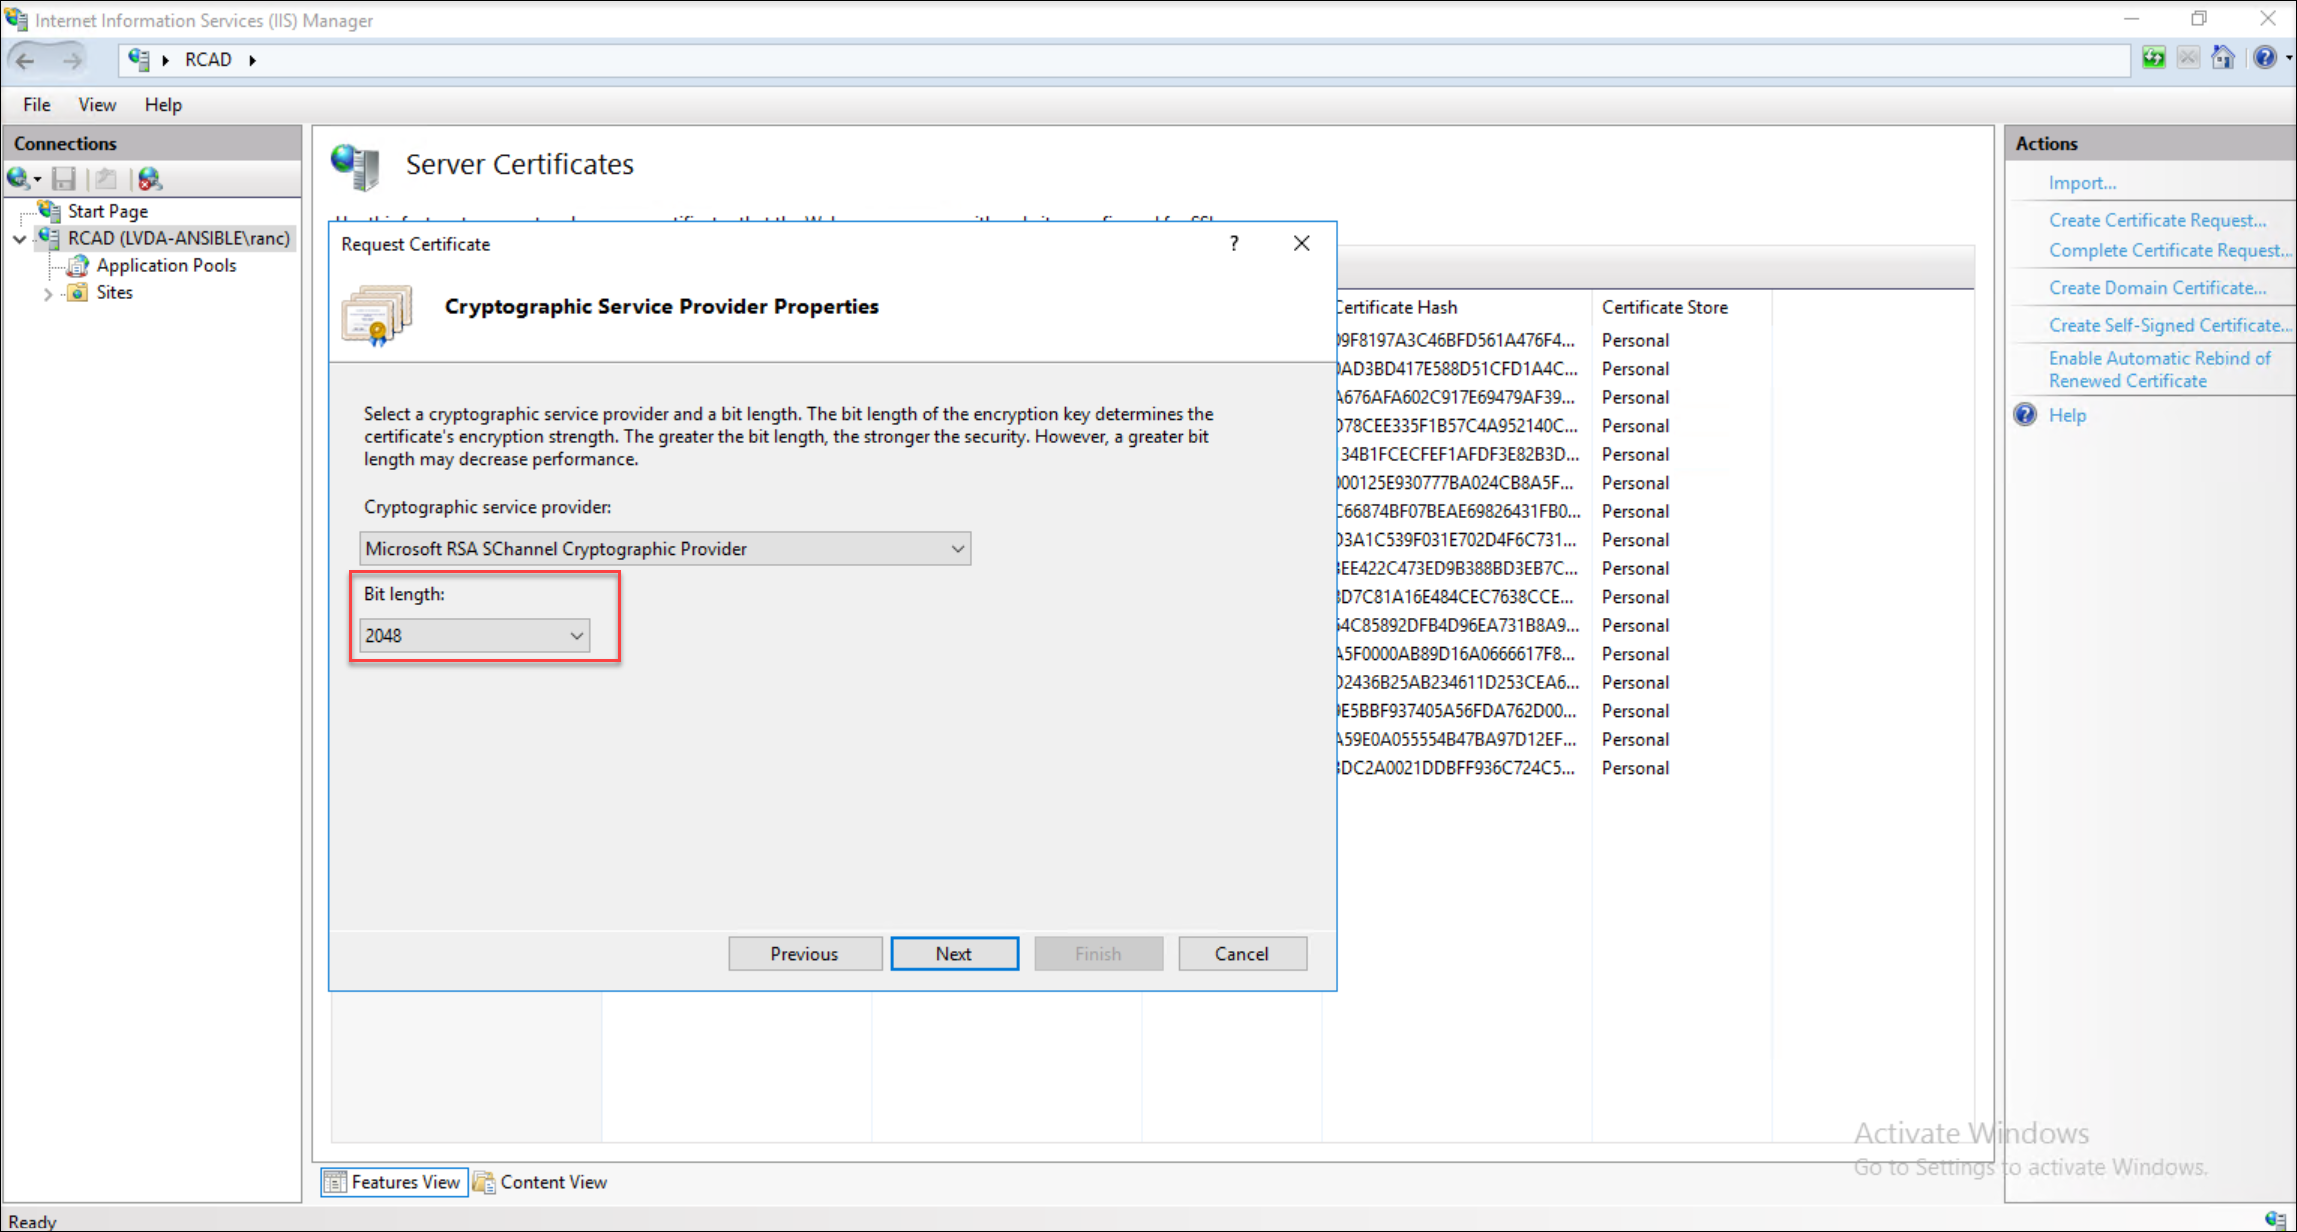
-
証明書で堅ろうなセキュリティを確保するには、2048ビット以上の長さを選択します。
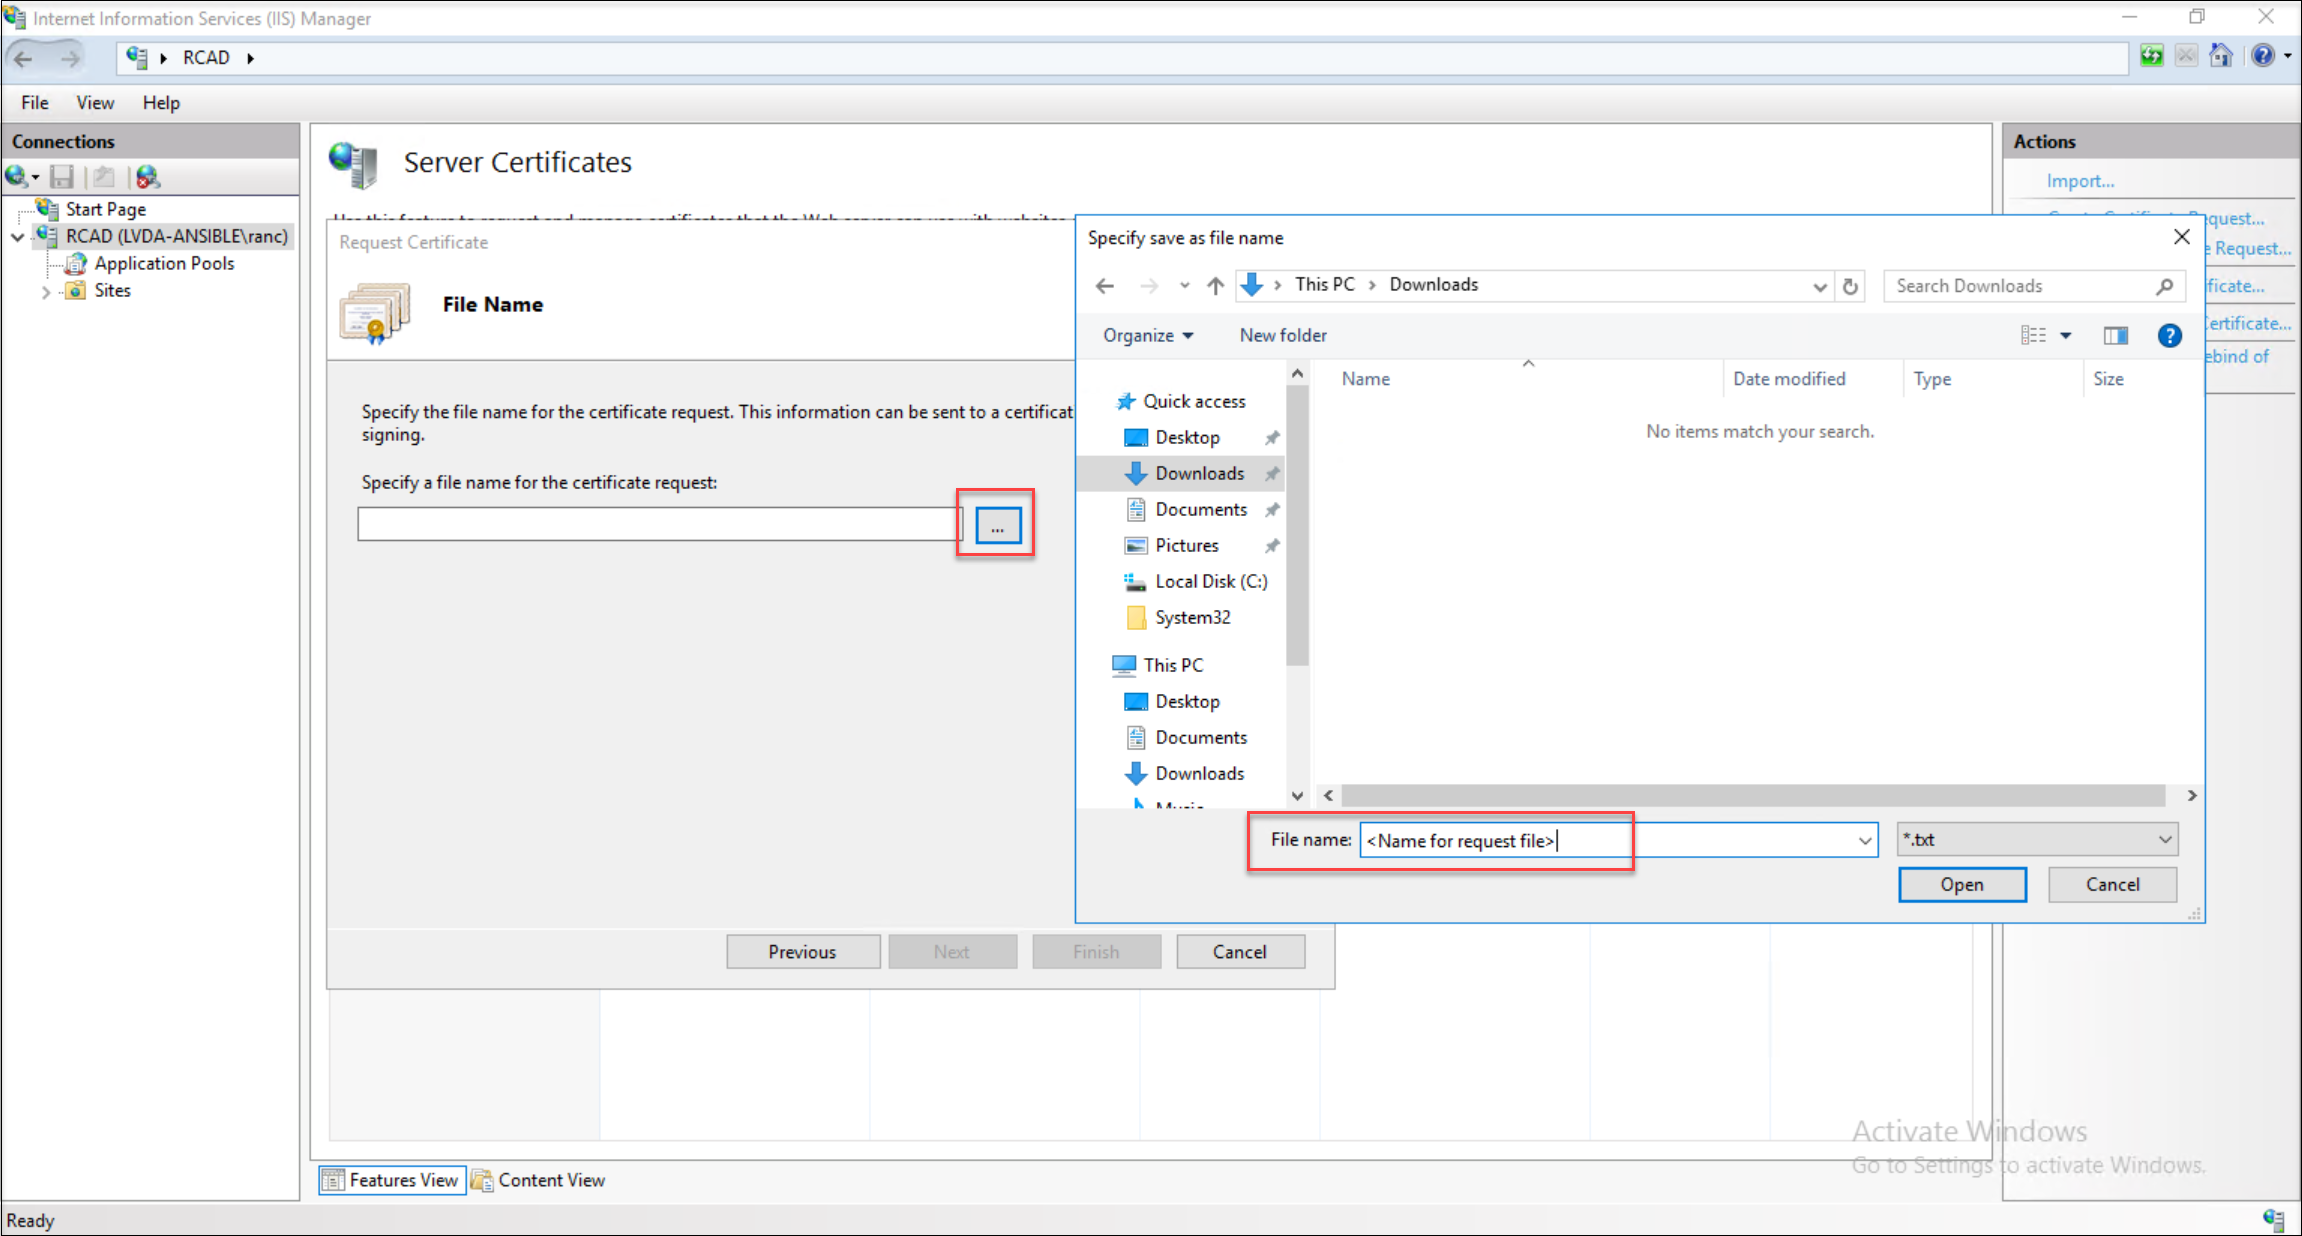
-
簡単に識別できるように、証明書要求ファイルにわかりやすい名前を割り当てます。
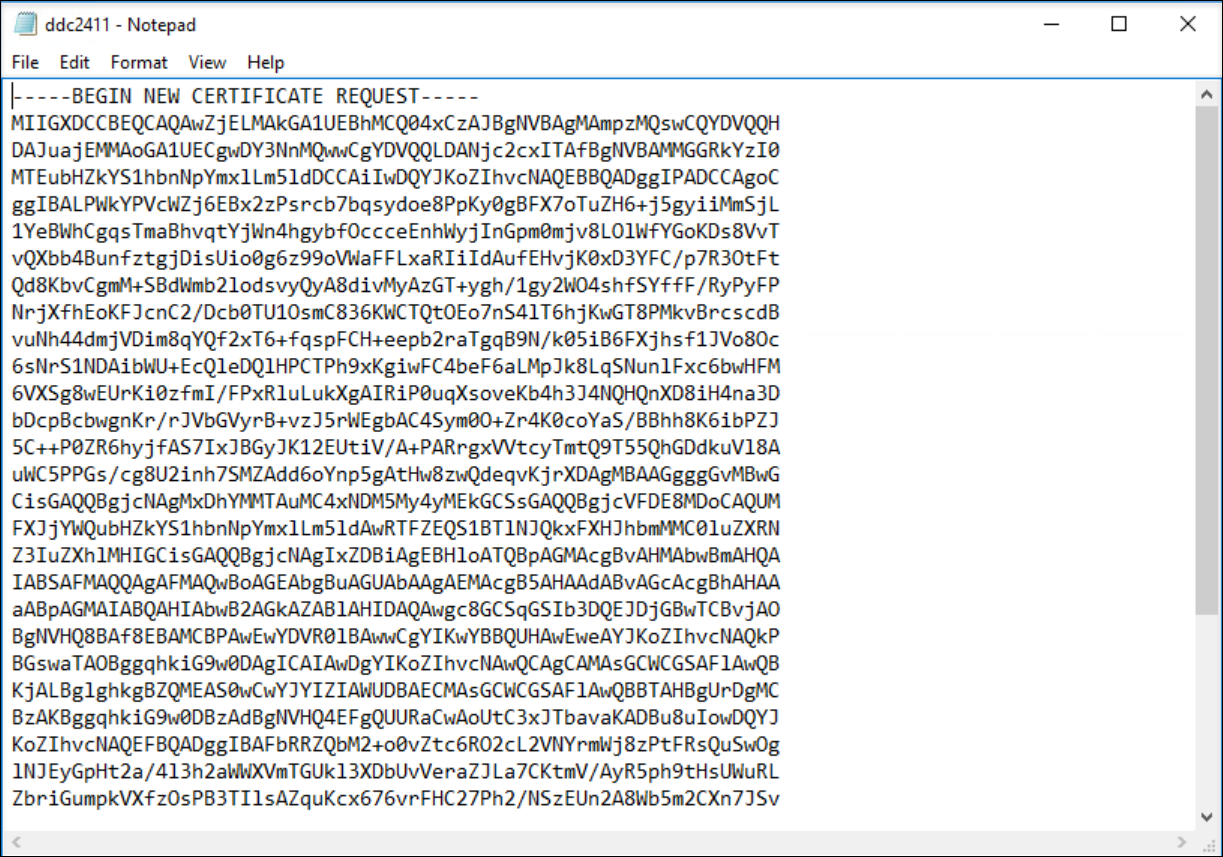
-
生成された証明書要求ファイルをメモ帳などのテキストエディターを使用して開き、その中のすべてのコンテンツを選択します。
-
Web証明書サーバーにログインし、証明書の要求に進みます。
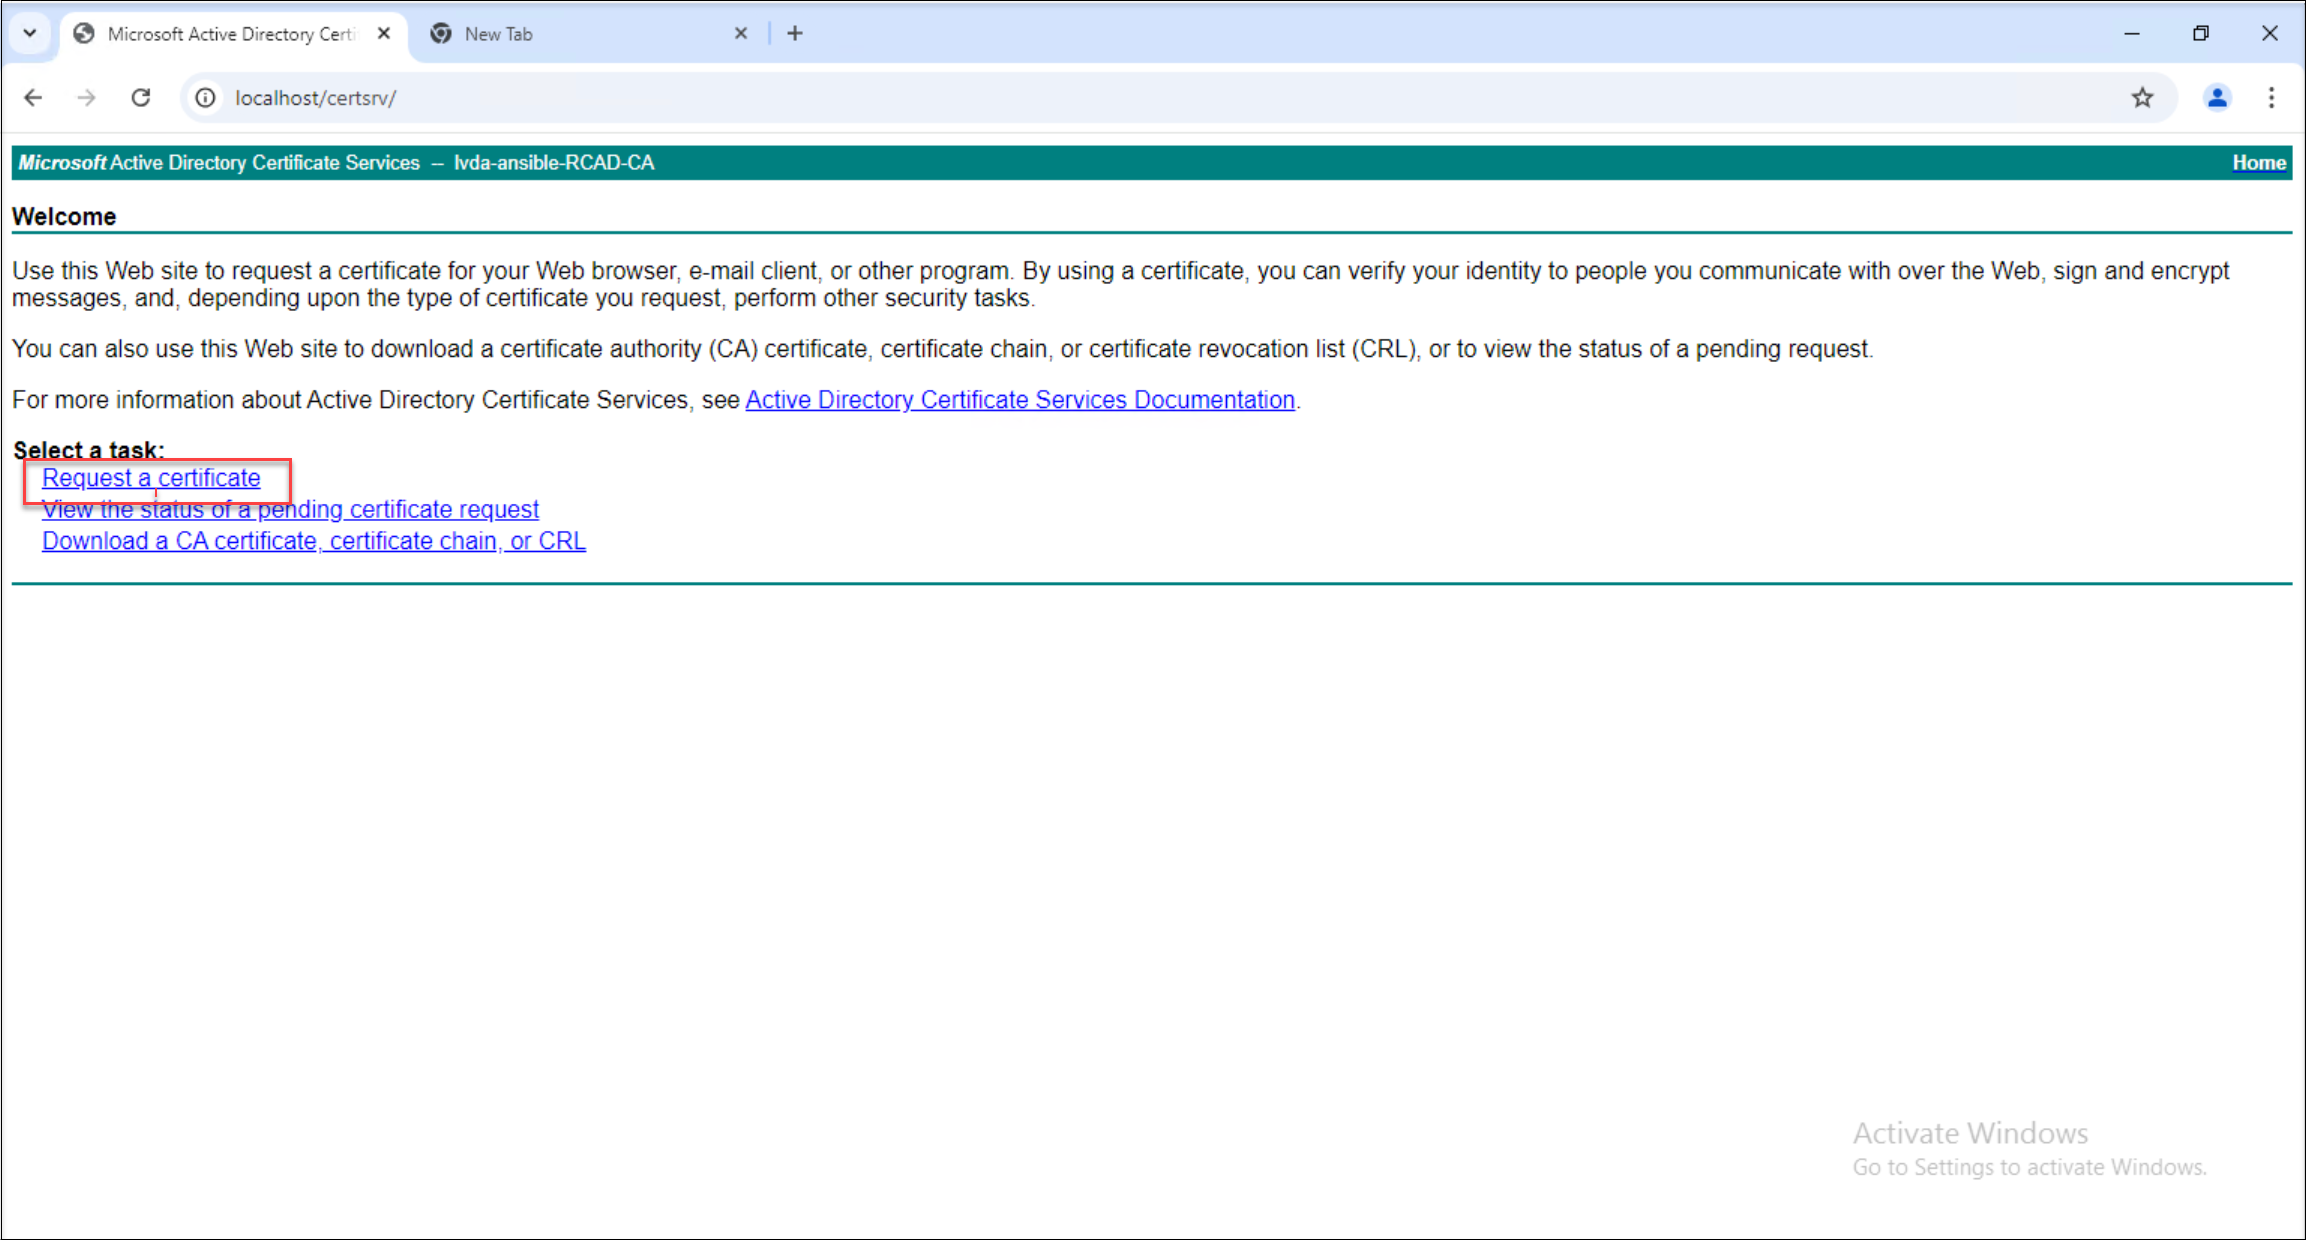
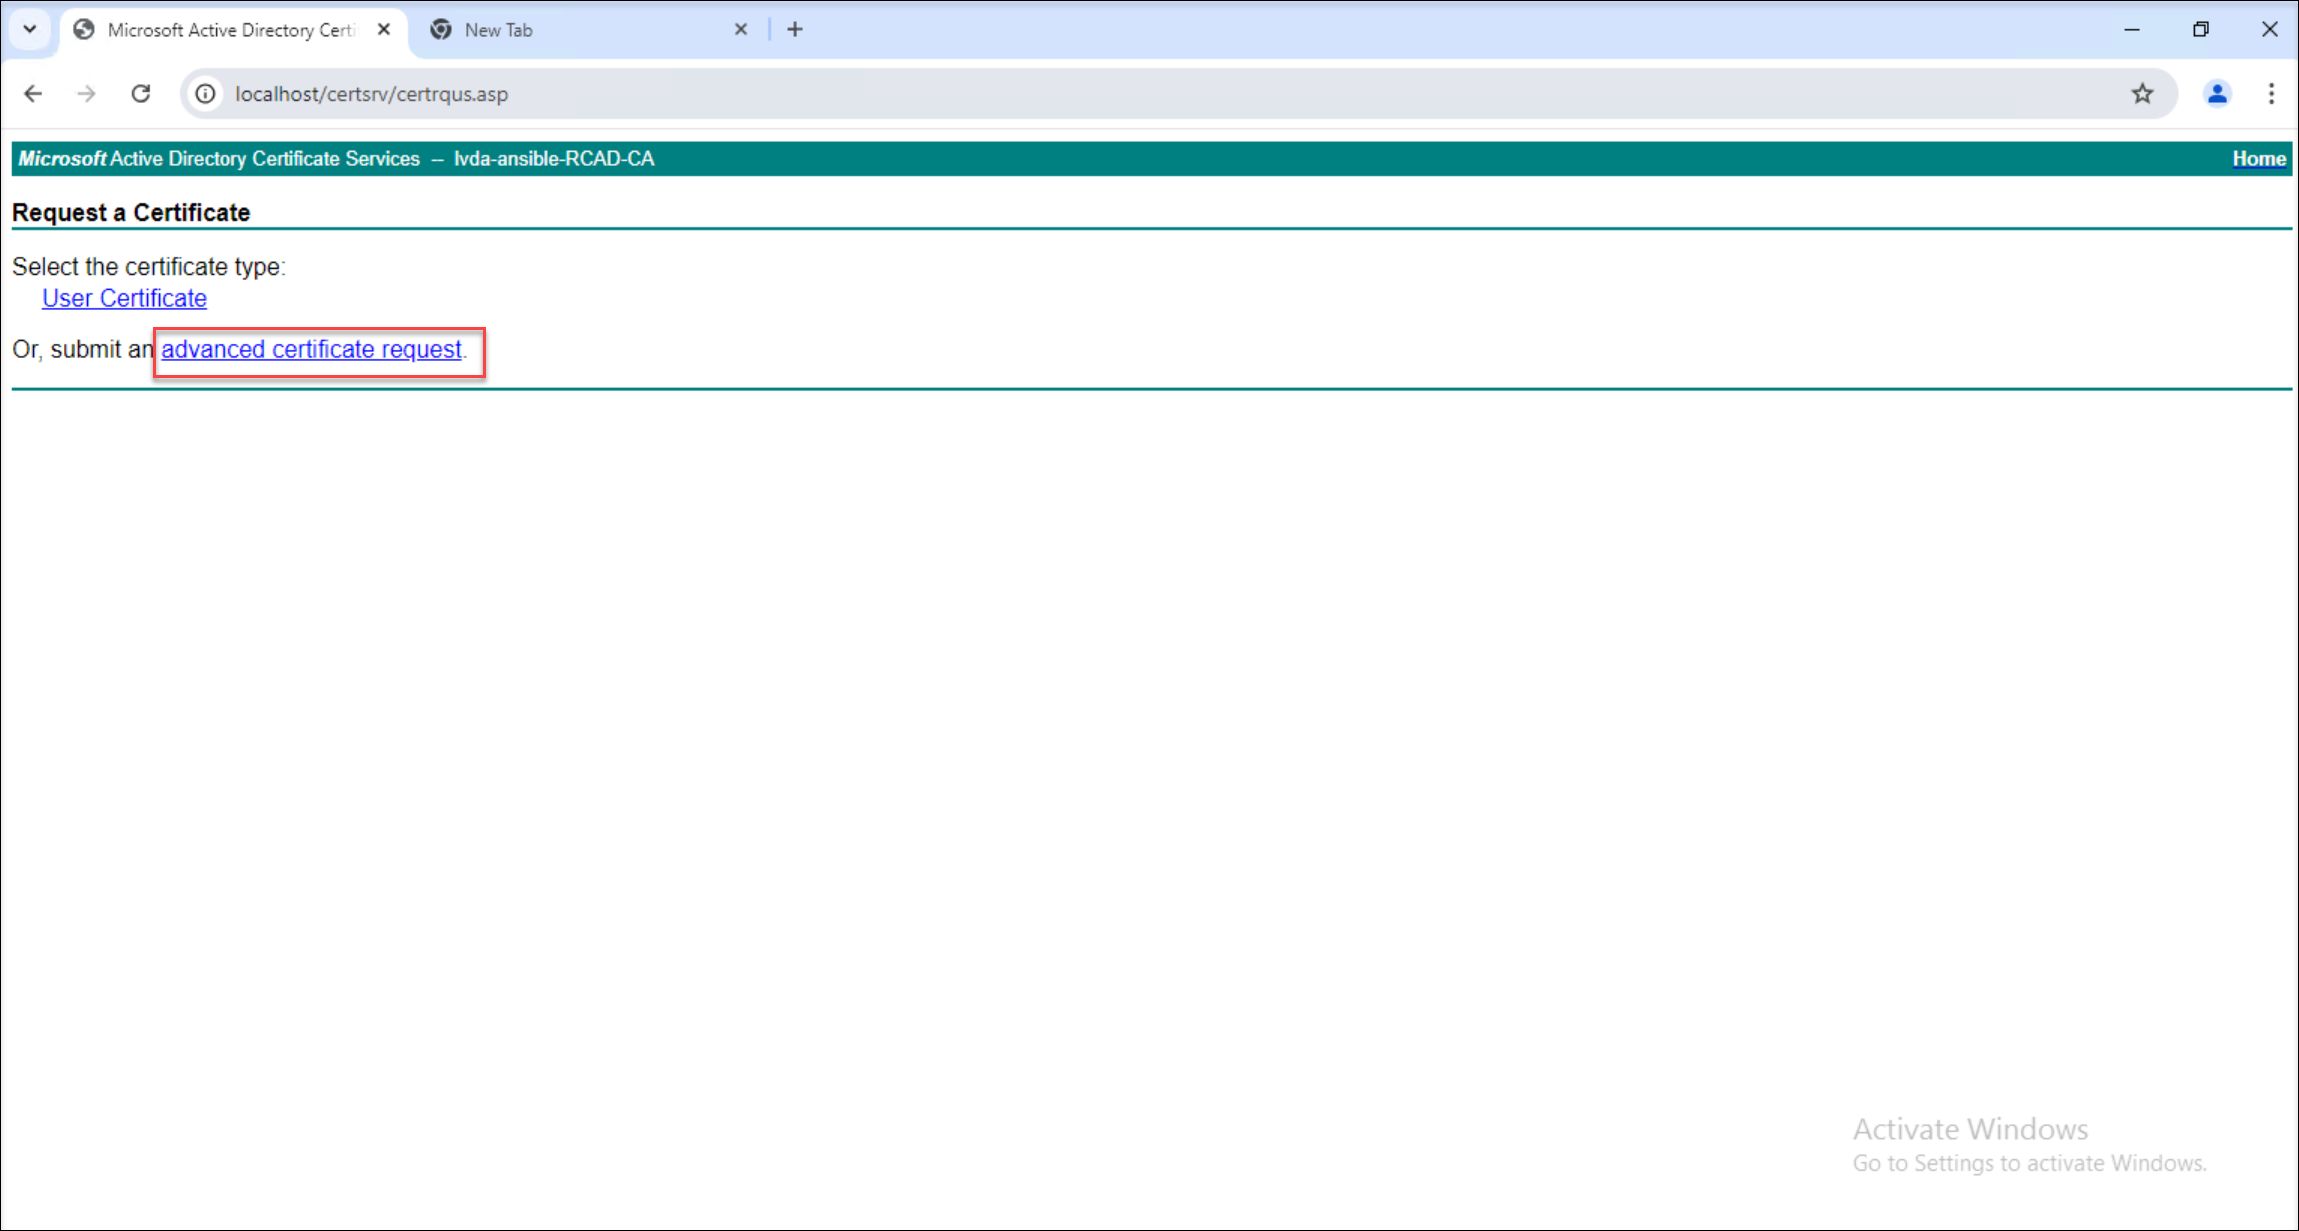
-
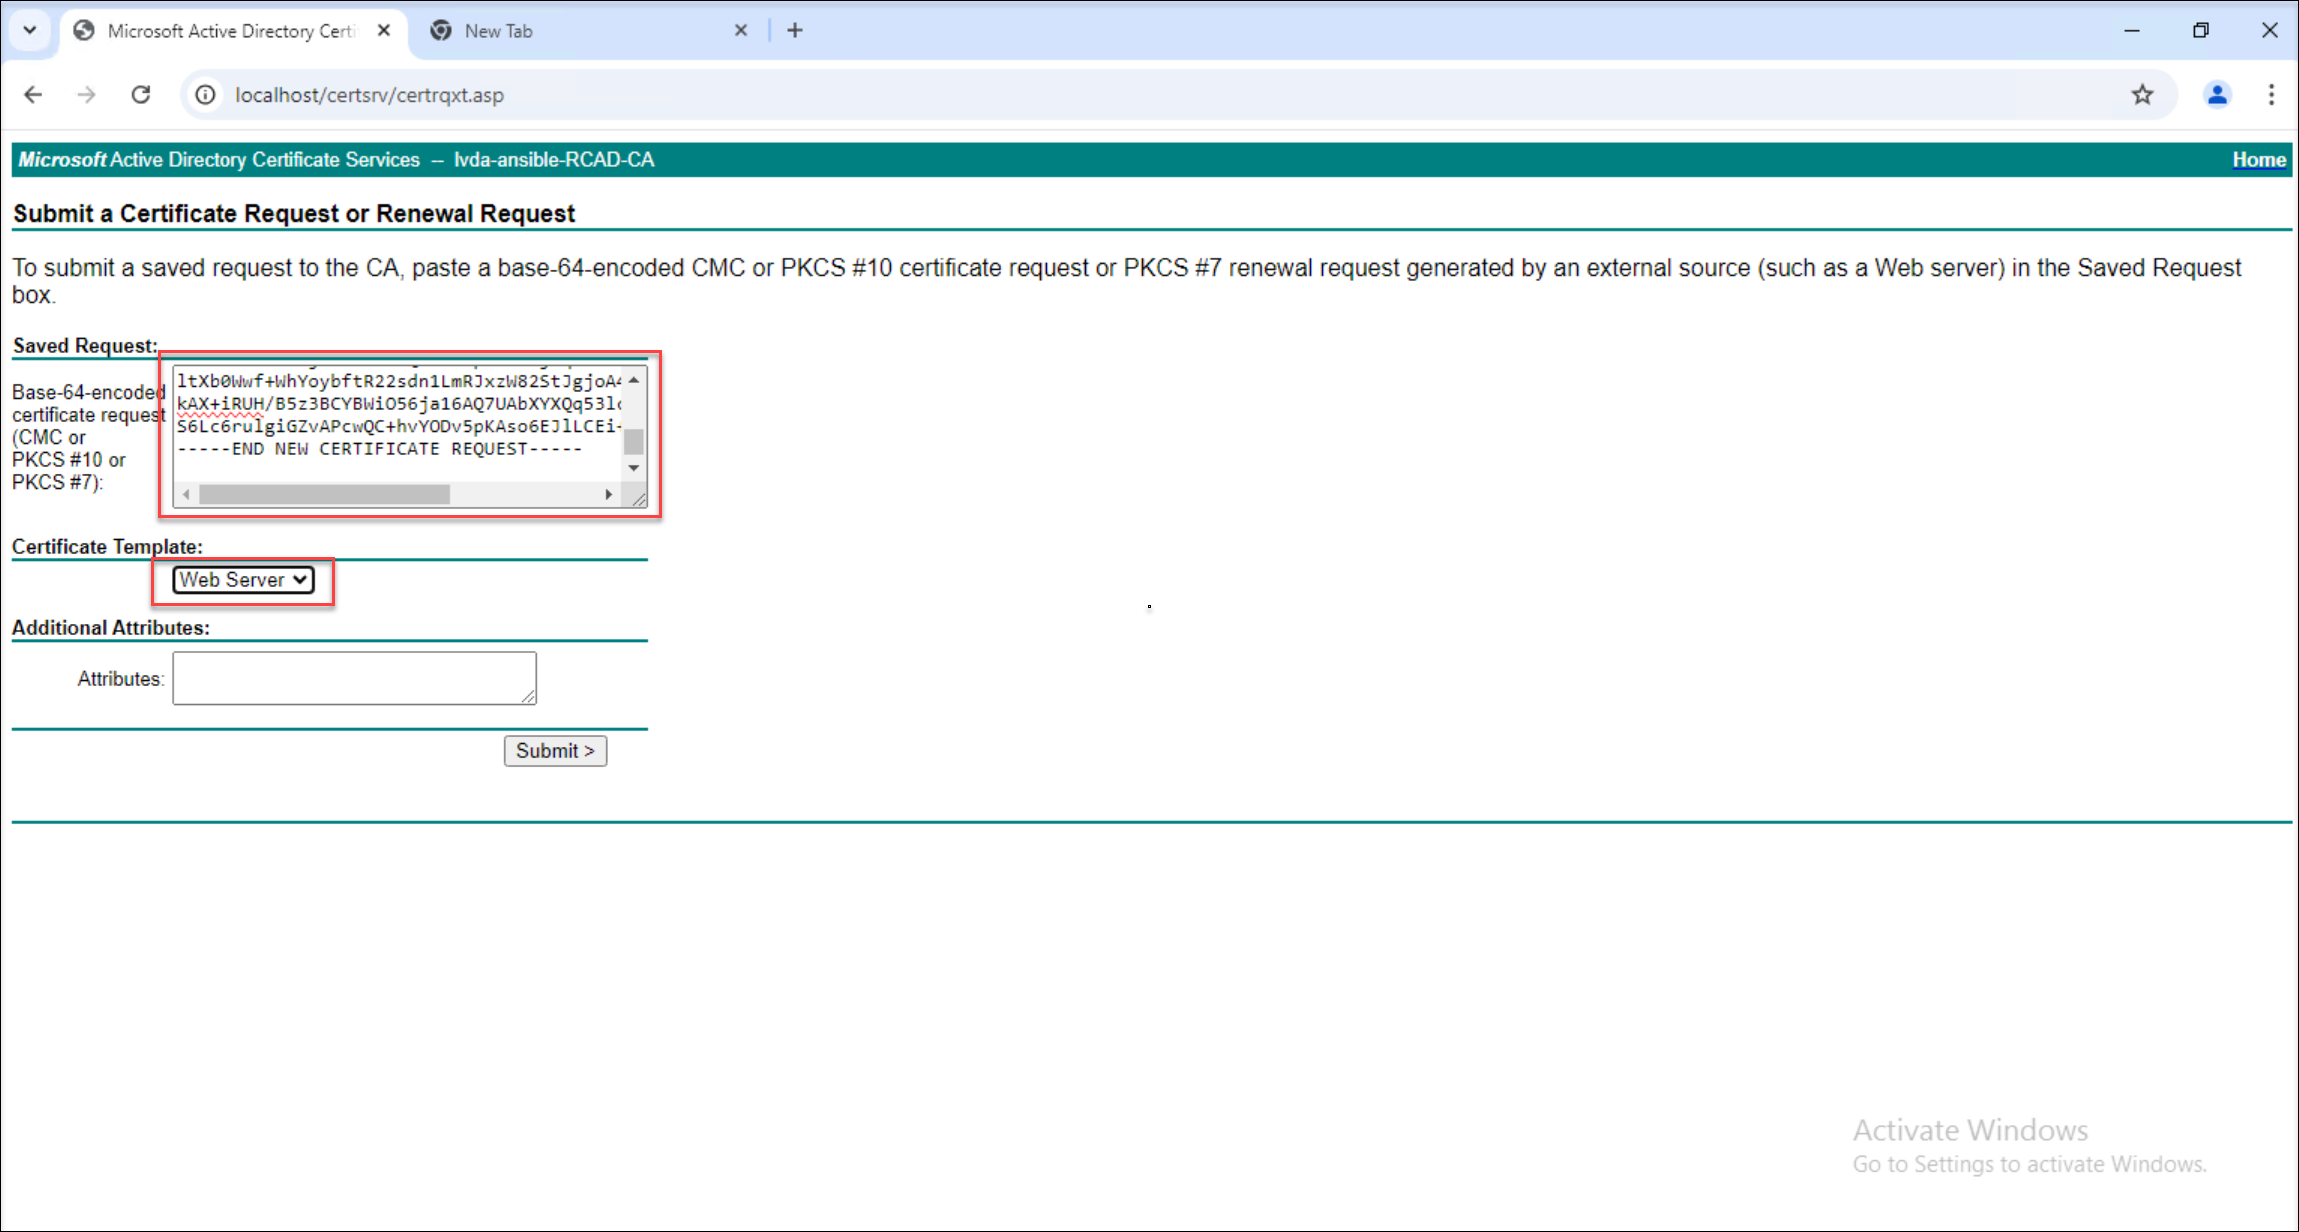
コピーした要求ファイルの内容をWebサーバー上の適切なフィールドに貼り付け、Web Server証明書テンプレートを選択します。
-
証明書をBase 64エンコード形式でダウンロードします。
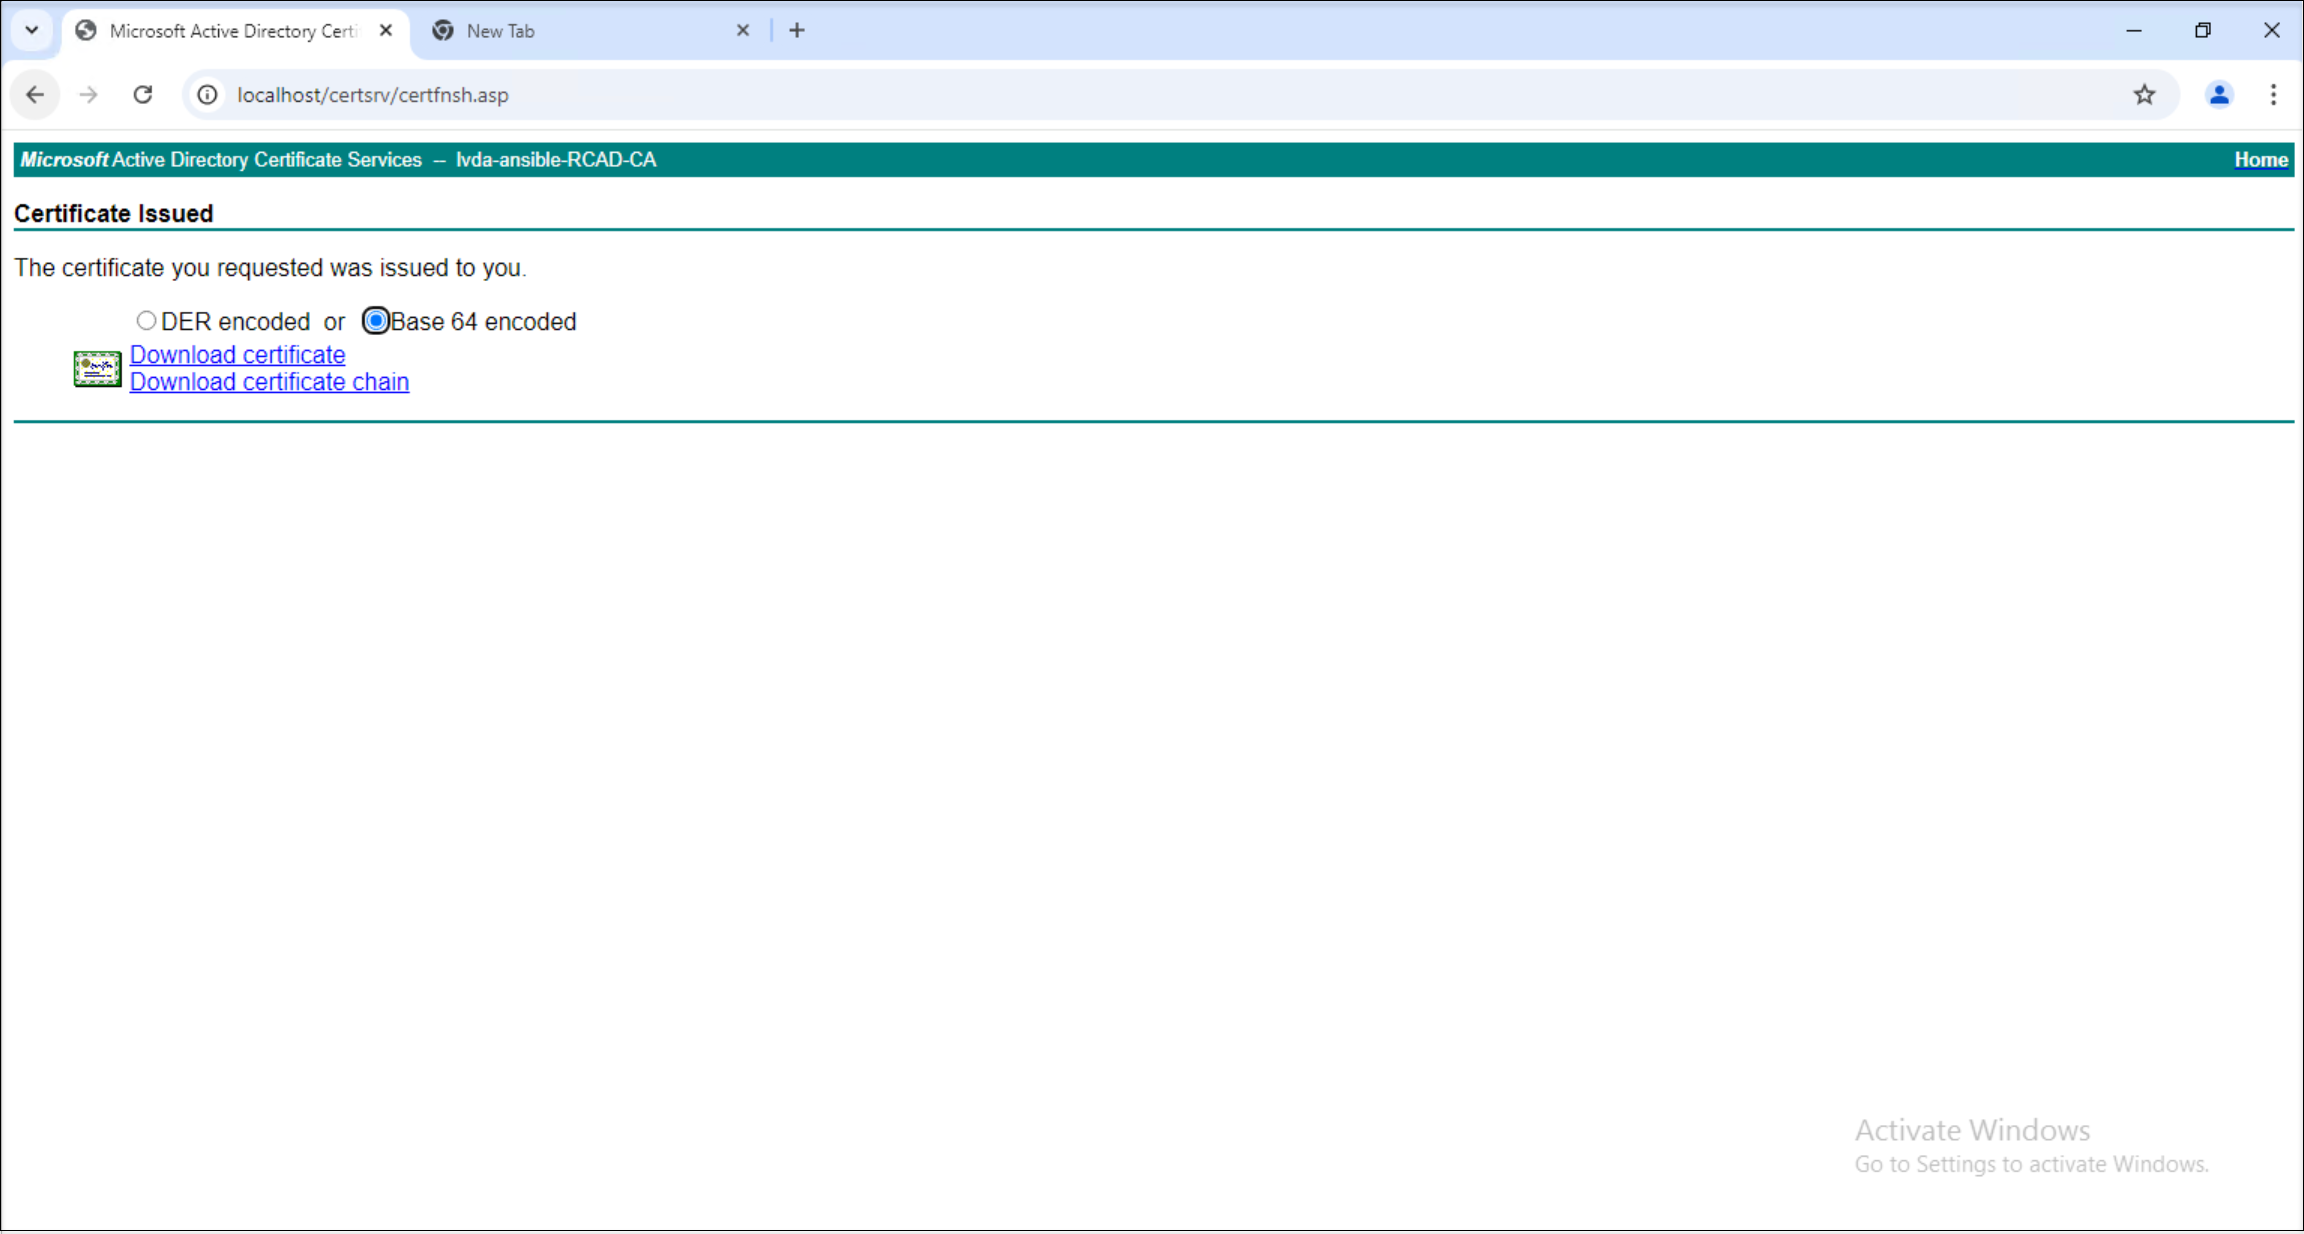
-
証明書要求を完了します。 ダウンロードの時点で、証明書要求プロセスは完了します。
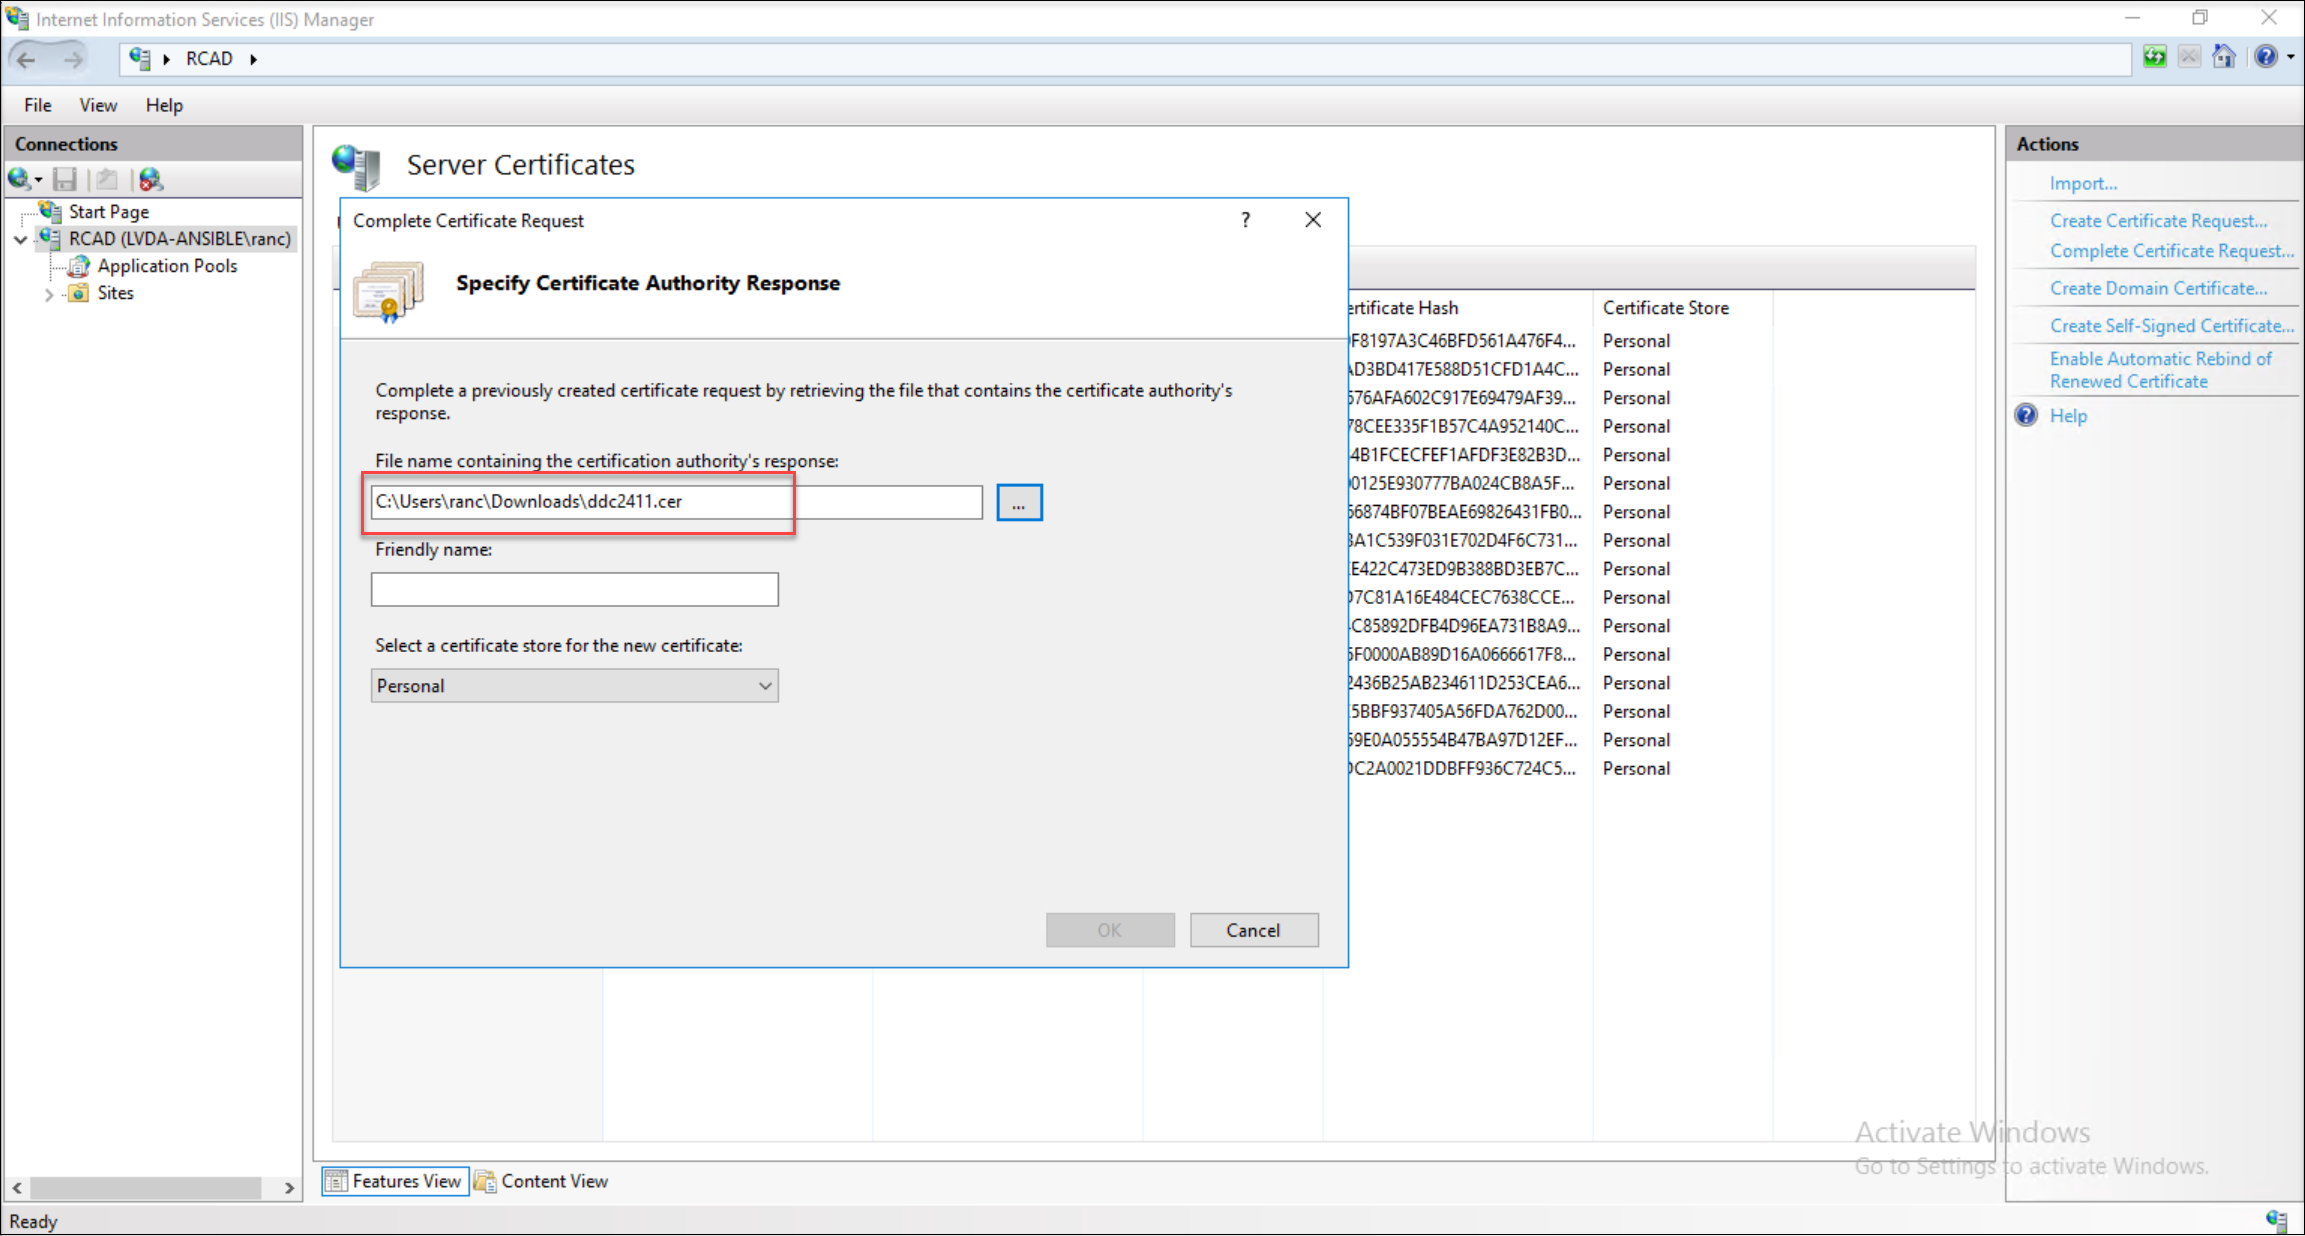
手順3:Delivery Controller FQDN証明書をバインドする
-
Delivery Controller FQDN証明書をPFXファイルとしてエクスポートします。
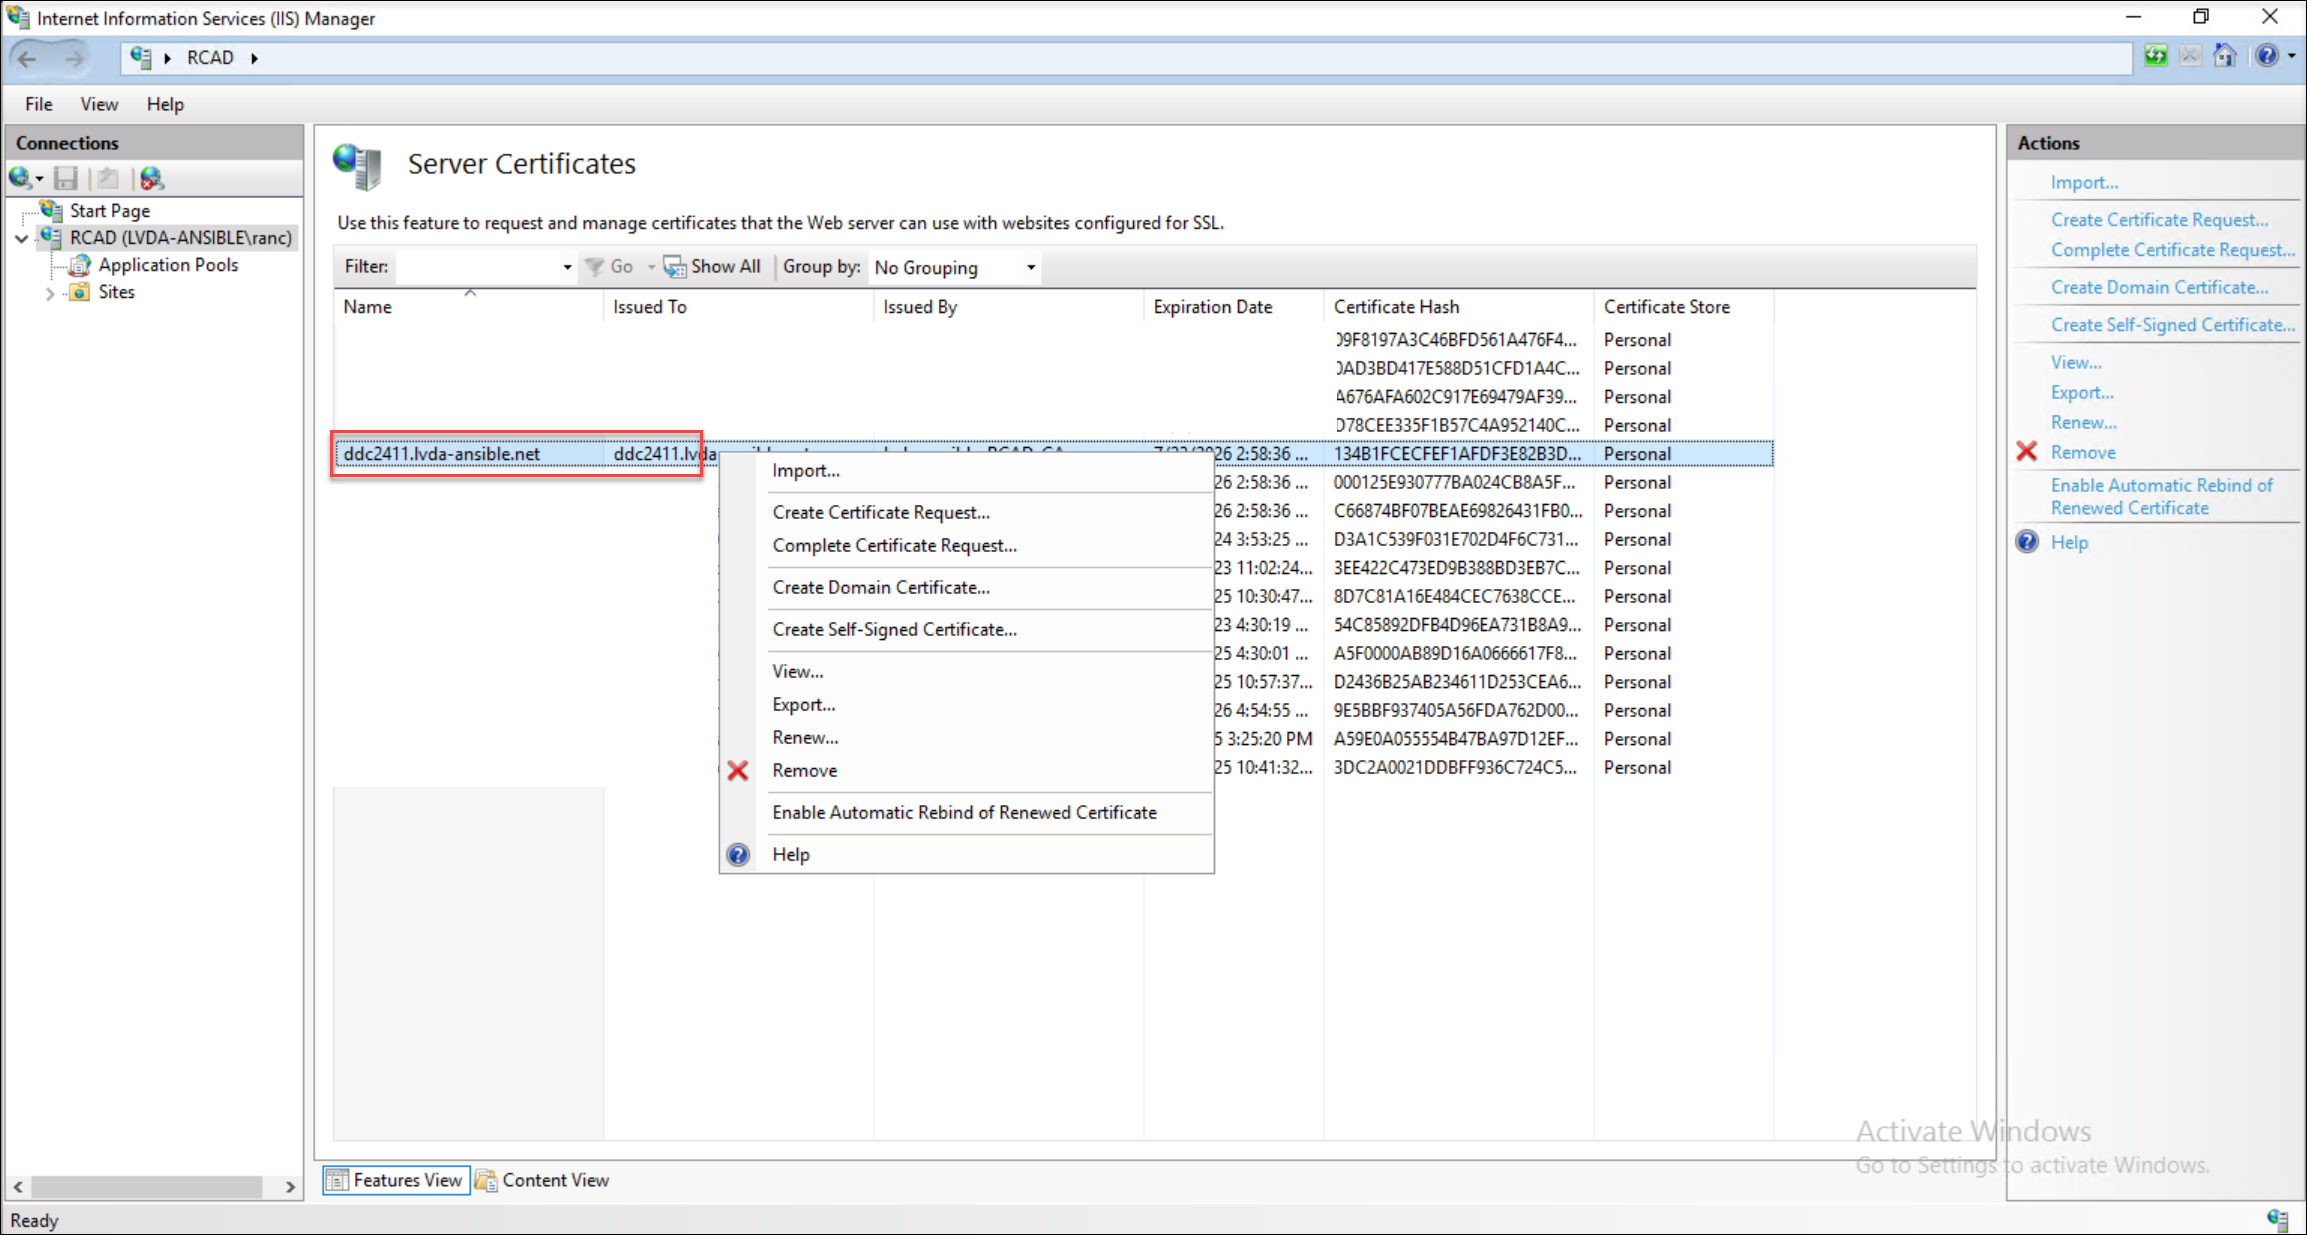
-
エクスポートしたPFX証明書を、Delivery Controllerサーバーのインターネットインフォメーションサービス(IIS)にインポートします。

-
インポートした証明書をIIS内のデフォルトのWebサイトにバインドします。
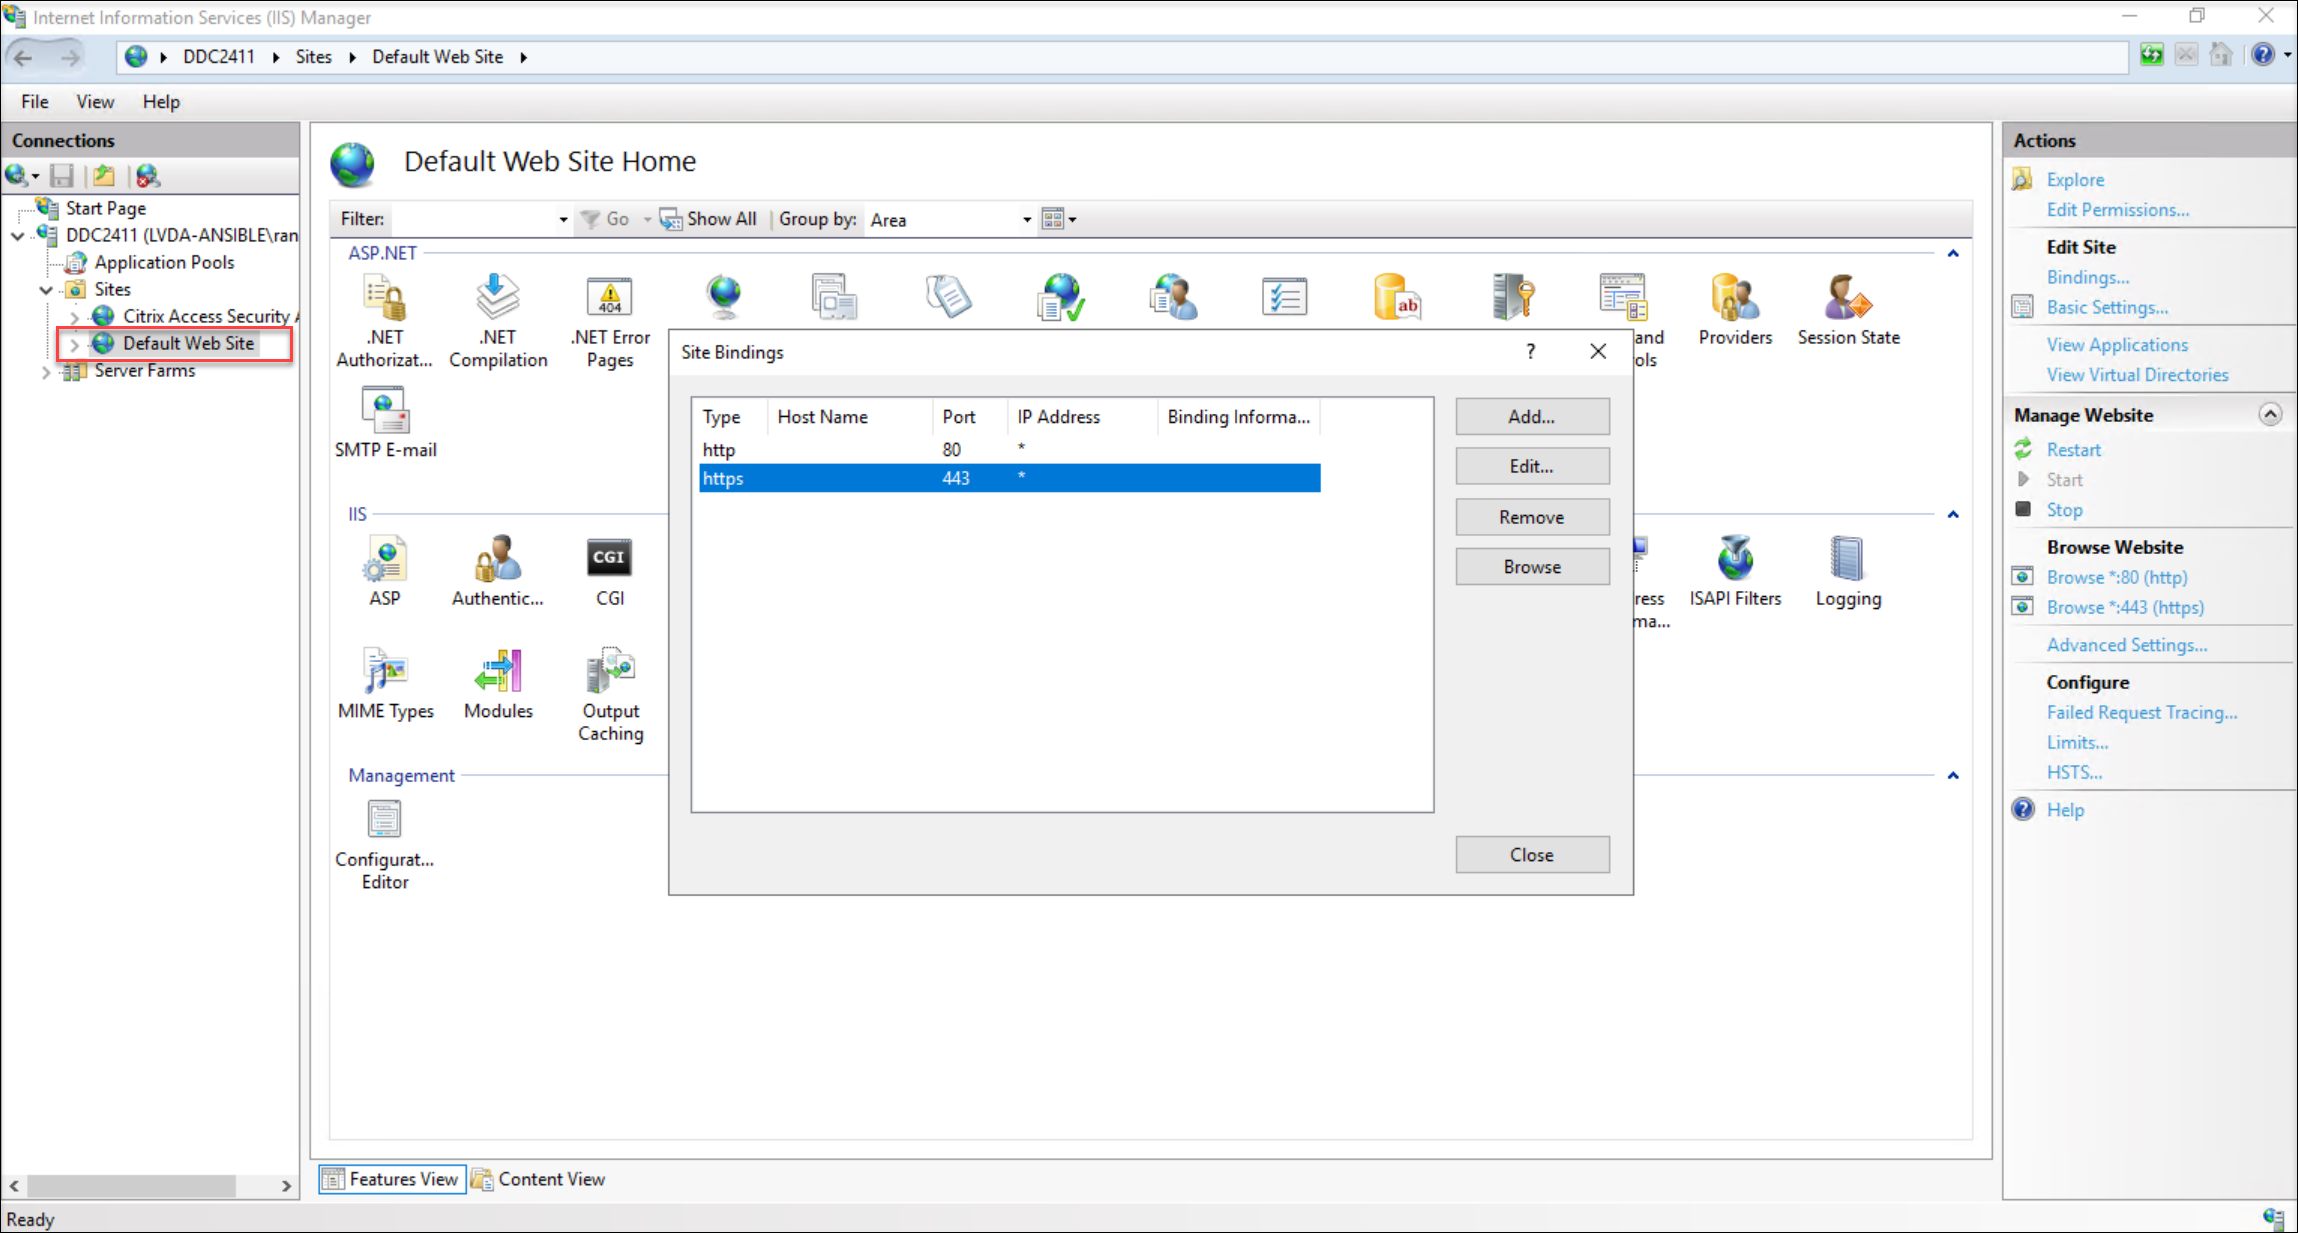
-
バインドプロセス中に、インポートした特定の証明書を選択します。

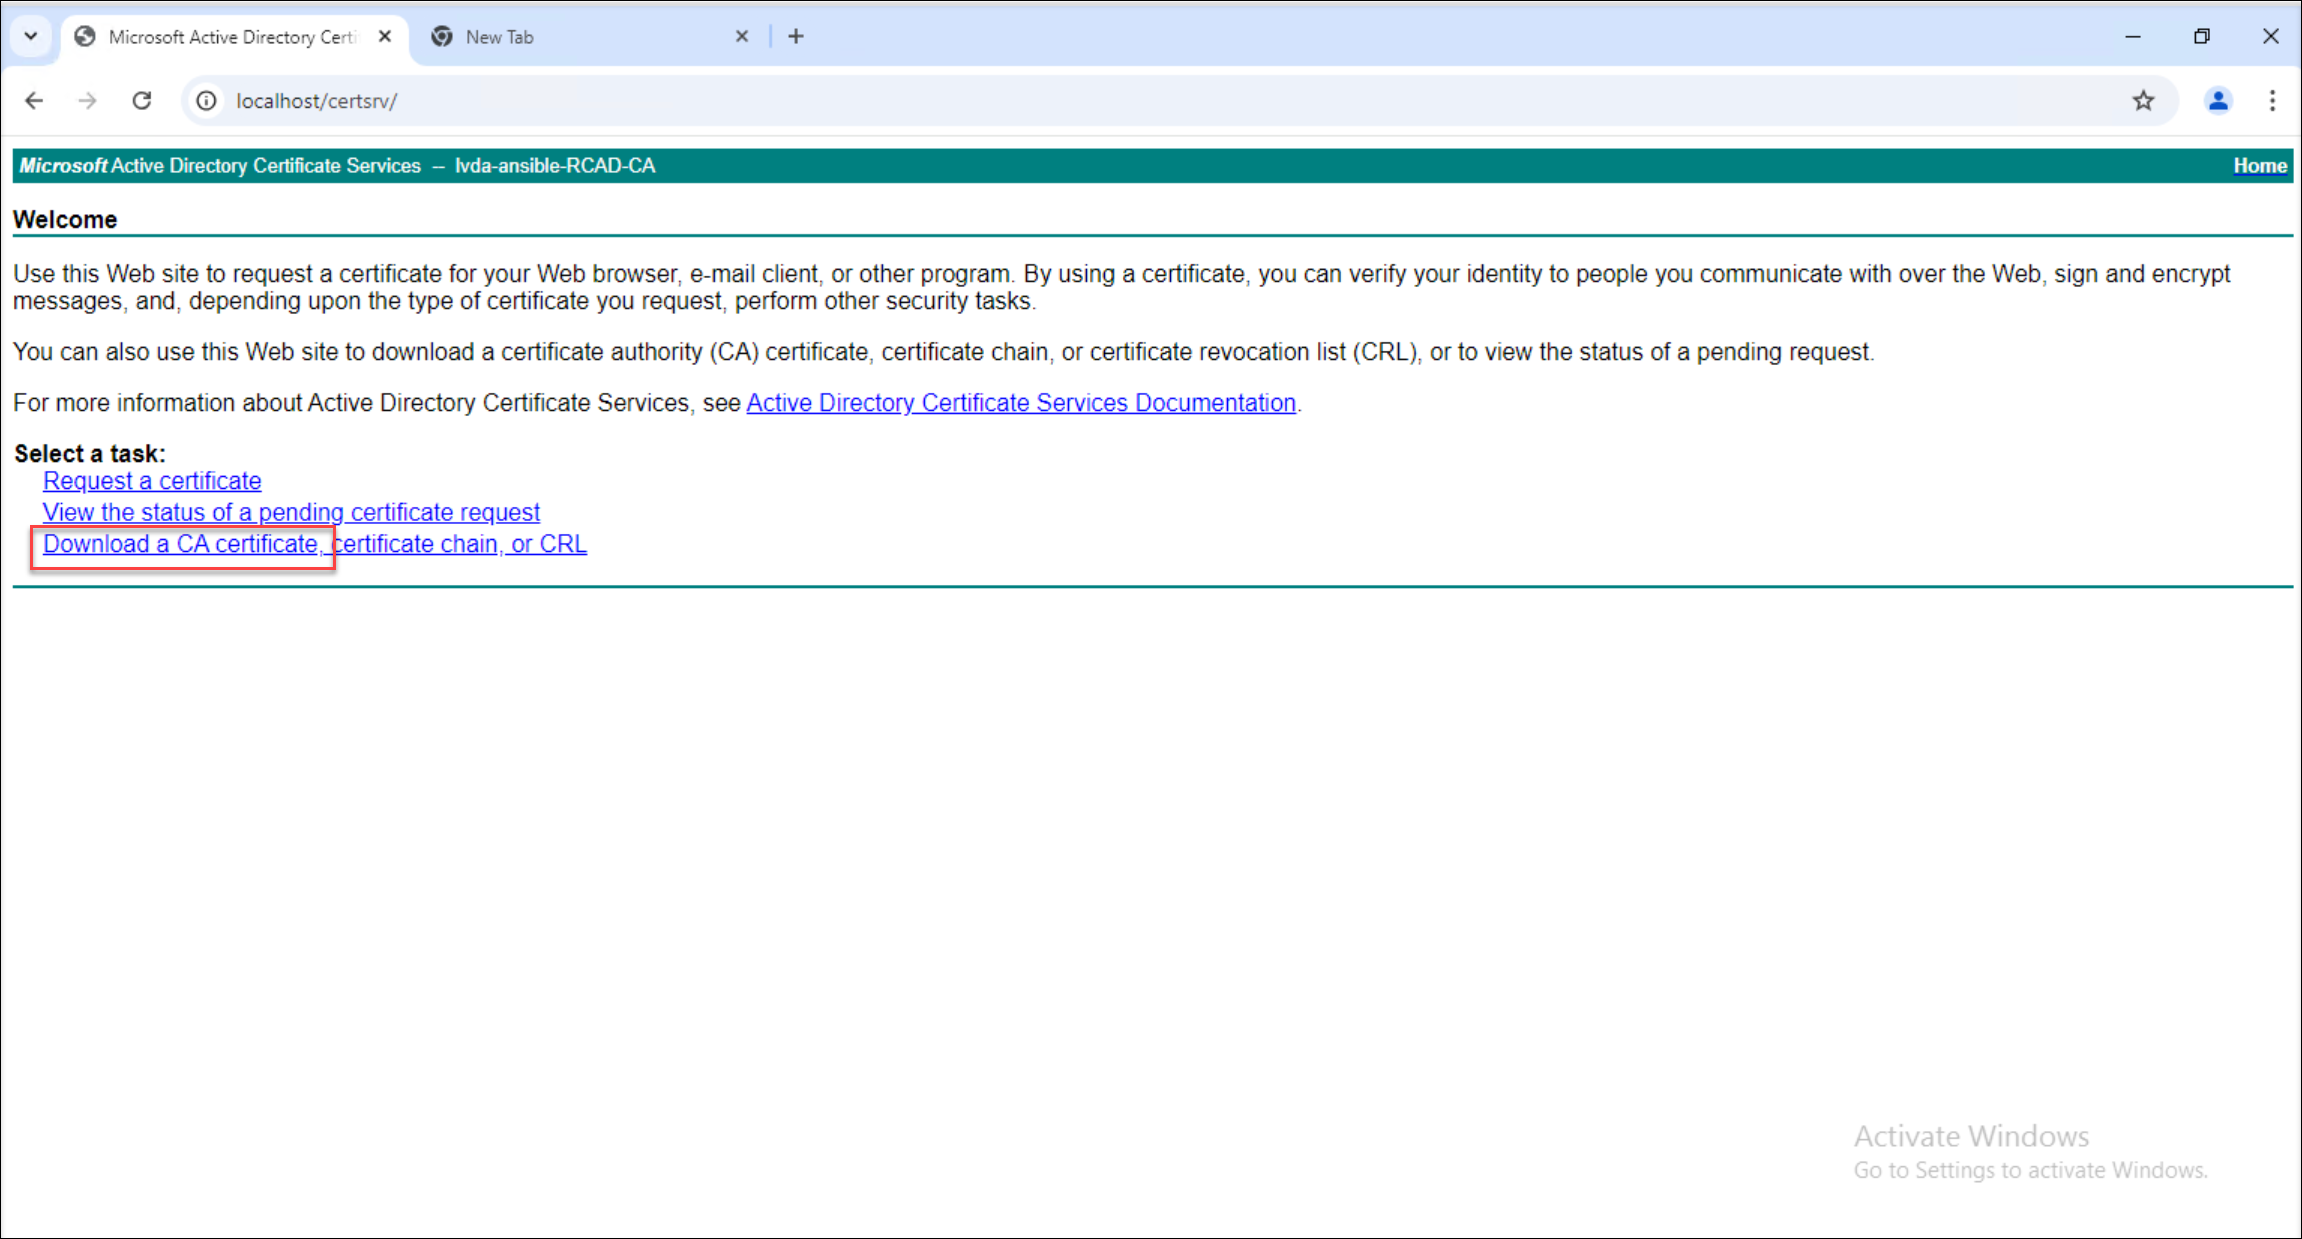
手順4:Linux VDAでCA証明書を保存して更新する
-
CA証明書をダウンロードします。 次に例を示します:
-
CA証明書を配置して更新します。
-
RHELおよびRocky Linuxの場合:
CA証明書を追加するには、trust anchorコマンドを使用します。 /etc/pki/ca-trust/source/anchorsディレクトリに証明書が手動で配置されていないことを確認します。 読み取り専用フィールドに関連するエラーが発生した場合は、そのディレクトリにあるすべての証明書を削除します。
-
SUSE、Ubuntu、Debianの場合:
ルートCA証明書を/usr/local/share/ca-certificatesディレクトリに配置します。 証明書に.crt拡張子が付いていない場合は、名前に追加してください。 次に、update-ca-certificateコマンドを実行します。
-
共有
共有
This Preview product documentation is Citrix Confidential.
You agree to hold this documentation confidential pursuant to the terms of your Citrix Beta/Tech Preview Agreement.
The development, release and timing of any features or functionality described in the Preview documentation remains at our sole discretion and are subject to change without notice or consultation.
The documentation is for informational purposes only and is not a commitment, promise or legal obligation to deliver any material, code or functionality and should not be relied upon in making Citrix product purchase decisions.
If you do not agree, select I DO NOT AGREE to exit.