Configure Device Posture global settings
The following are some of the global Device Posture settings that you can configure as required.
- Device compliance with event-driven posture checks
- Periodic scanning of devices
- Customized messages for access denied scenarios
- Skip device posture checks
- Custom workspace URLs support
- Session Recording configuration with Device Posture
- Device certificate check
- Configure the list of allowed domains
Device compliance with event-driven posture checks
Starting with EPA Library version 24.11.1.1, Device Posture introduces enhanced checks to assess the compliance of your devices.
The following two scans are added to provide more control over device compliance:
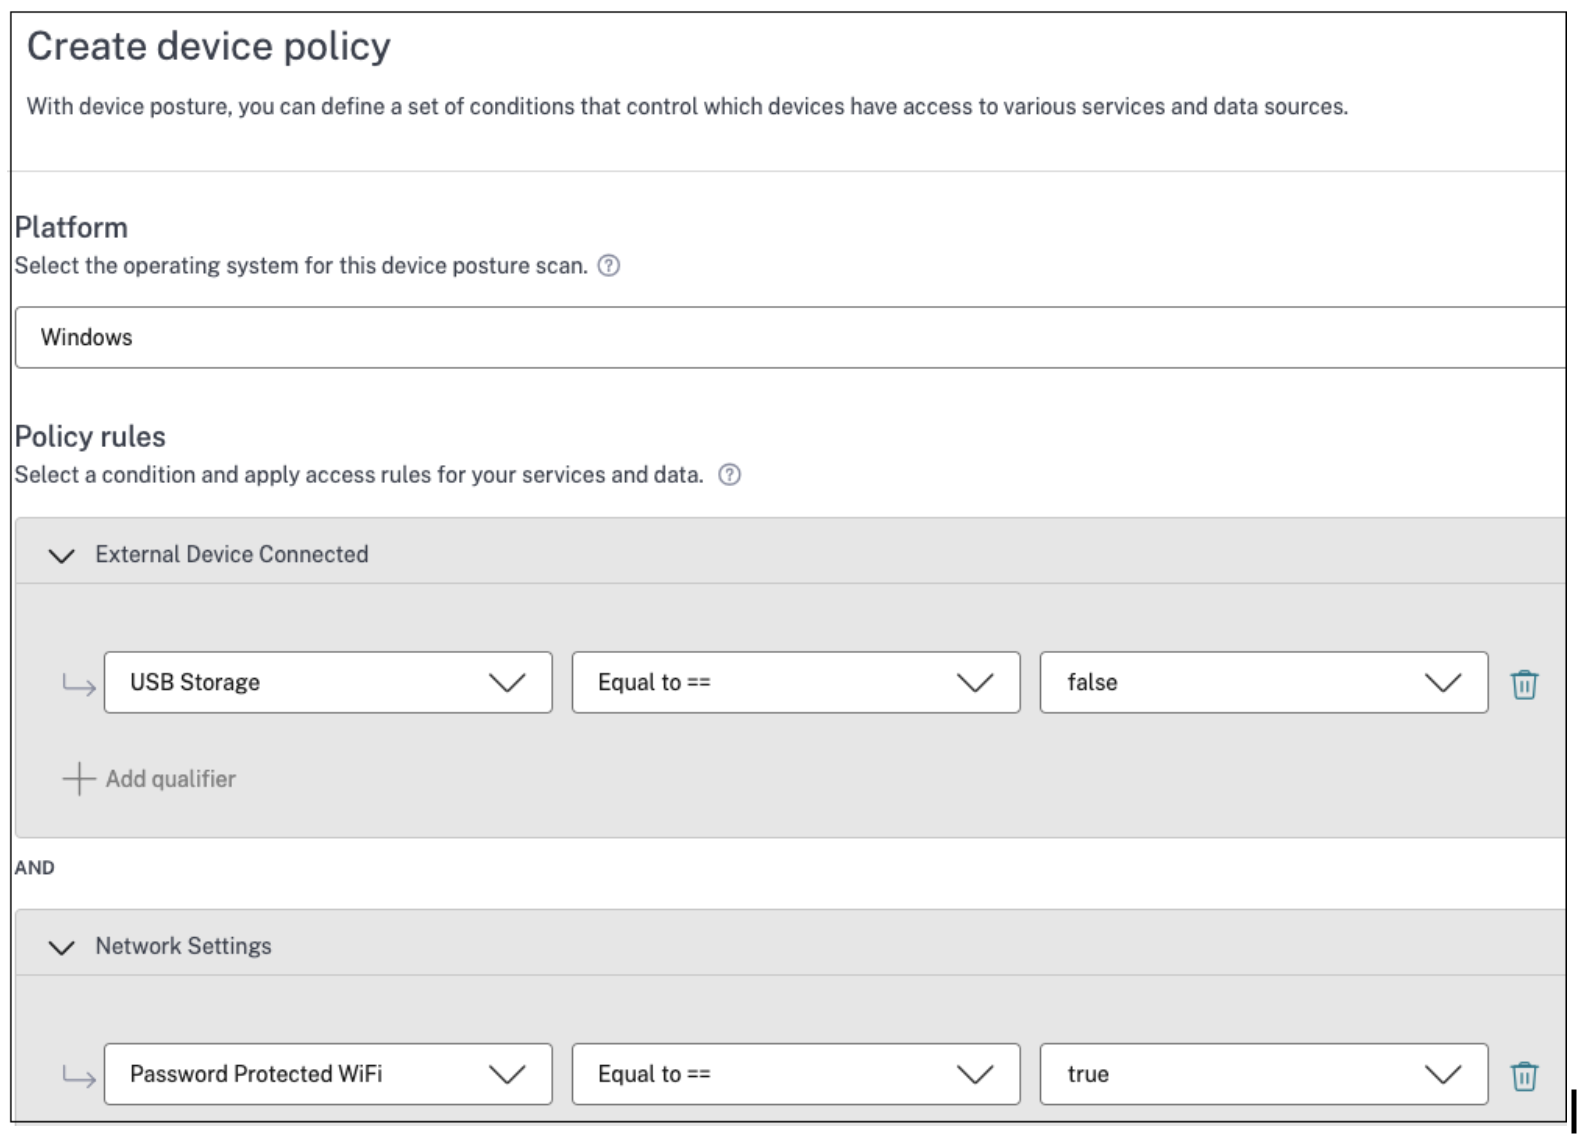
- External Device Connected: This scan detects if an external USB storage device is connected to the endpoint.
- Network Settings: This scan determines if the device is connected to a protected Wi-Fi network.
When any of the following events occur, Device Posture re-evaluates the device’s compliance status:
- The External Device Connected scan is configured, and an external USB storage device is inserted or removed.
- The Network Settings scan is configured, and a switch between an open network and a protected network is detected.
- The Windows Defender Firewall scan is configured, and it’s enabled or disabled.
Access to the resources is updated in accordance with the new compliance status. This ensures that access to resources is granted or revoked based on the device’s real-time compliance status.
Note:
- Event-driven posture checks are currently supported only on the Citrix Secure Access client for Windows version 24.8.1.19 and later.
- While both user and administrator installations can utilize the posture scans, real-time re-evaluation of device compliance based on events requires administrator privileges.
The following figure displays the External Device Connected and Network Settings scans configured in the Device Posture admin console.
Periodic scanning of devices
You can enable periodic scanning of Windows devices for the configured checks every 30 minutes. The EPA client on the end device must be installed with administrative rights to enable periodic scanning of devices. To enable periodic scanning, do the following:
- Navigate to Device Posture > Device Scans and click Settings.
- In Periodic device posture scans section, slide the toggle switch to ON to enable periodic scanning of devices.

-
For HTTP/HTTPS applications, if a device posture scan result changes from Compliant to Non-compliant or Denied access, access to the resources is updated in accordance with the new compliance status.
-
For TCP/UDP applications launched from the Citrix Secure Access client, if a device posture scan results in a downgrade (for example from Compliant to Non-compliant or Denied access), users receive a notification, and after 5 minutes, the active sessions are terminated.
Customized messages for access denied scenarios
Admins can customize the message that is displayed on the end device when access is denied.
Perform the following steps to add customized messages:
- Navigate to the Device Posture > Device Scans page.
- Click Settings.
- Click Edit and in the Message box, enter the message that must be displayed in access denied scenarios. You can enter a maximum of 256 characters.
-
Click Enable custom message on save to enforce the option of displaying the custom message. If you do not select this checkbox, the custom message is created but not displayed on the devices in access denied scenarios.
Alternatively, you can enable the Custom message toggle switch on the Settings page to display the message on the devices.
- Click Save.
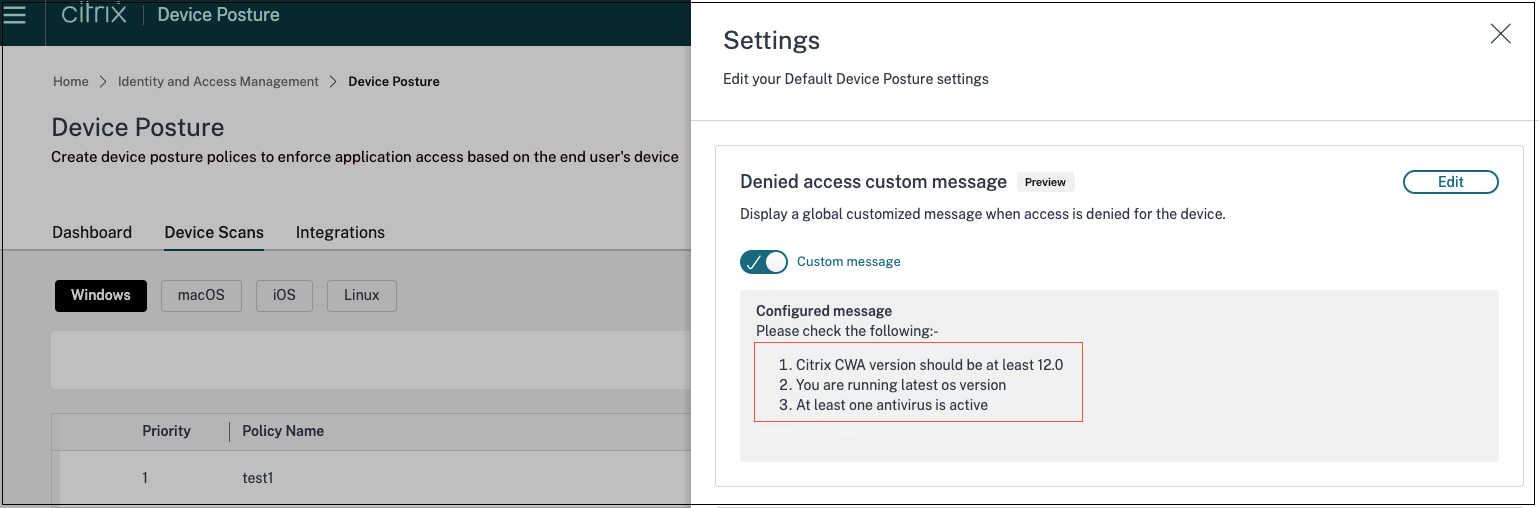
The following image displays a sample message added by the admin.
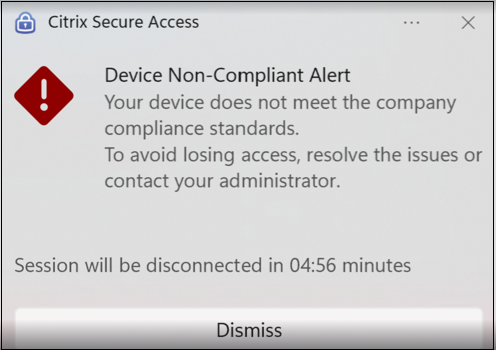
The following image displays the custom message that appears on the end user device when access is denied.

The message that you have entered appears whenever access is denied for the end device.
Skip device posture checks
Admins can configure device posture checks to be skipped automatically or allow end users to skip them in the following scenarios:
- The EPA client is not installed on the device.
- The EPA client installed on the device is outdated.
When the skip check feature is enabled, the default policy result (non-compliant) is enforced and the device is classified as non-compliant. End users are provided with partial or restricted access to the Citrix Secure Private Access™ or Citrix DaaS resources.
Enable skipping of the device posture checks
- Navigate to Device Posture > Device Scans.
- Click Settings.
-
In the Skip device posture check section, slide the toggle switch to ON to enable skipping of the device posture checks and then click Edit.

-
Select one of the following options:
- Automatically skip check - The system automatically bypasses posture checks when the EPA client is missing or outdated, thus streamlining the login process for users accessing Citrix Workspace from devices without the EPA client.
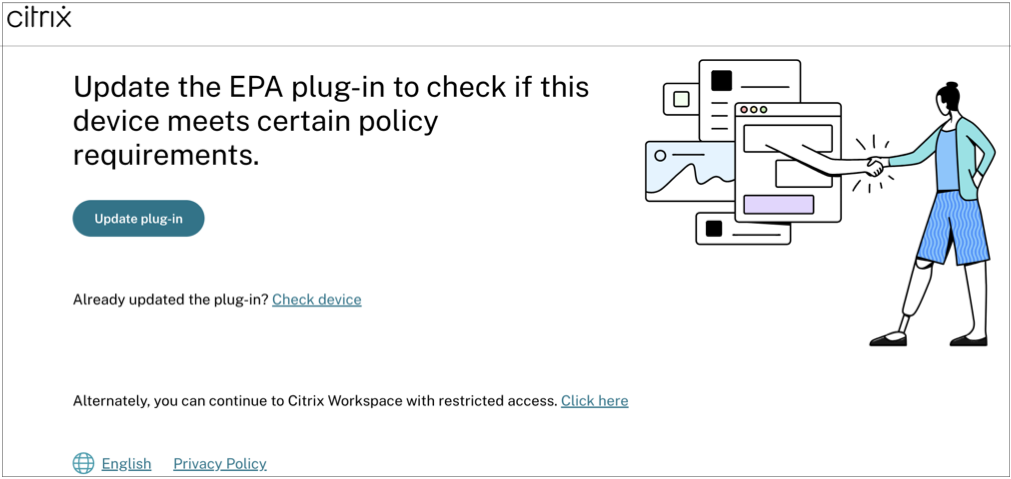
- Optionally skip check - When logging into Citrix Workspace from devices without the EPA client, the users are prompted to manually skip the posture checks by clicking Skip Posture Check.
When the Optionally skip check option is enabled and the end user logs on to Citrix Workspace, the following message appears when the end user tries to download the client or upgrade the EPA version.
- Click Save.
Custom workspace URLs support
Custom workspace URLs are supported with the Device Posture service. You can use a URL that you own in addition to your cloud.com URL to access workspace. Ensure that you allow access to citrix.com from your network. For details on custom domains, see Configure a custom domain.
Session Recording configuration with Device Posture
Session Recording allows organizations to record on-screen user activity in virtual sessions. You can specify tags when creating a custom session recording policy, event detection policy, or event response policy. For an example, see Create a custom recording policy.
Device certificate check
To configure device certificate checks with the Device Posture service, admins must import an issuer certificate from their device. Once a valid issuer certificate is present in the Device Posture service, admins can use device certificate checks as part of device posture policies.
Points to note:
- Device Posture service supports only PEM issuer certificate type.
- For the device certificate check on Windows, the EPA client on the end device must be installed with administrative rights. For other checks, you do not require the local administrative rights. For details on the supported scans, see Scans supported by device posture.
To install the EPA client with administrative rights on Windows, run the following command in the location where the EPA client plug-in is downloaded.
msiexec /i epasetup.msi- The device certificate check with the Device Posture service does not support the certificate revocation check.
If a device certificate is signed by an intermediate certificate, then you must upload the complete chain containing the root and the intermediate certificates in a single PEM file.
Example: chain.pem

-----BEGIN CERTIFICATE-----
******************************
-----END CERTIFICATE-----
-----BEGIN CERTIFICATE-----
******************************
-----END CERTIFICATE
Upload device certificate
- Click Settings on the Device Posture home page.
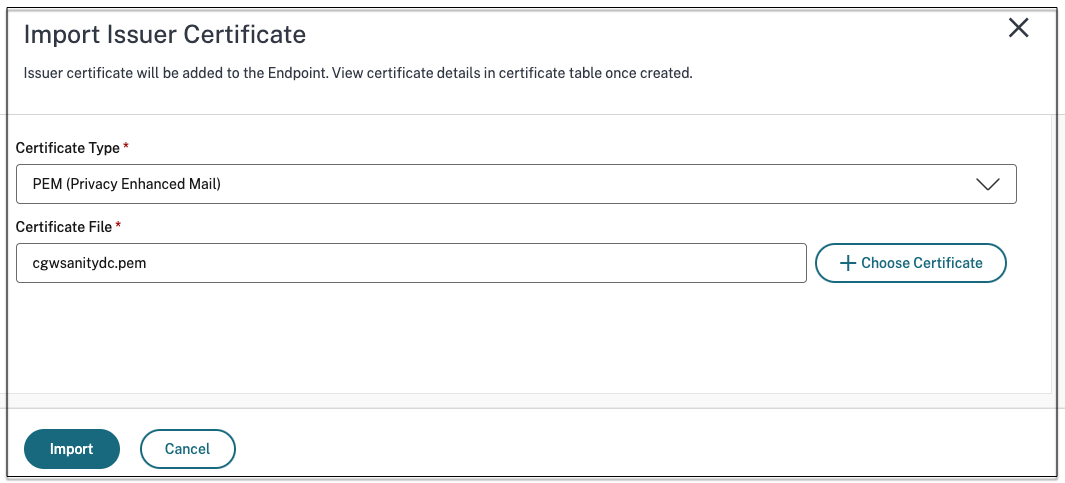
- Click Manage, and then click Import Issue Certificate.
- In Certificate Type, select the certificate type. Only the PEM type is supported.
- In Certificate File, click Choose Certificate to select the issuer certificate.
- Click Open, and then click Import.
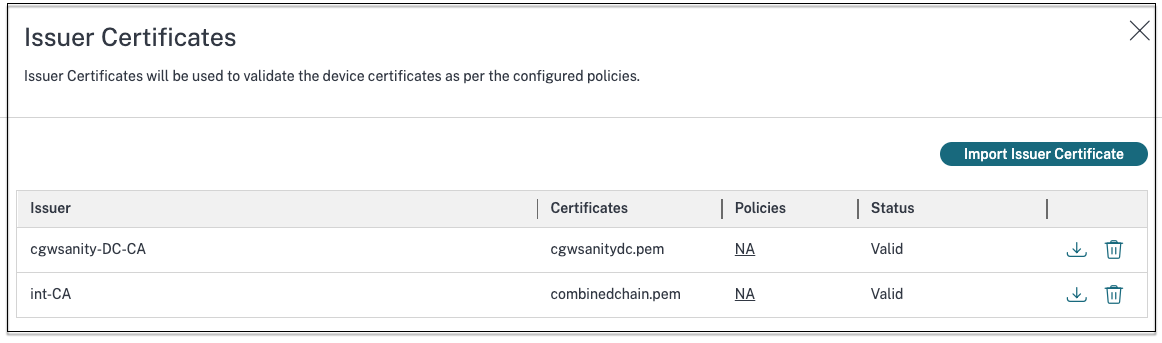
The selected certificate is listed in Settings > Issuer Certificates. You can import multiple certificates.
View imported certificates
- Click Settings on the Device Posture home page.
- In Issuer Certificates, click Manage.
- The Issuer Certificates page lists the imported issuer certificates.
Configure device certificate check scans
- Configure the device posture policy. For details, see Configure Device Posture policies.
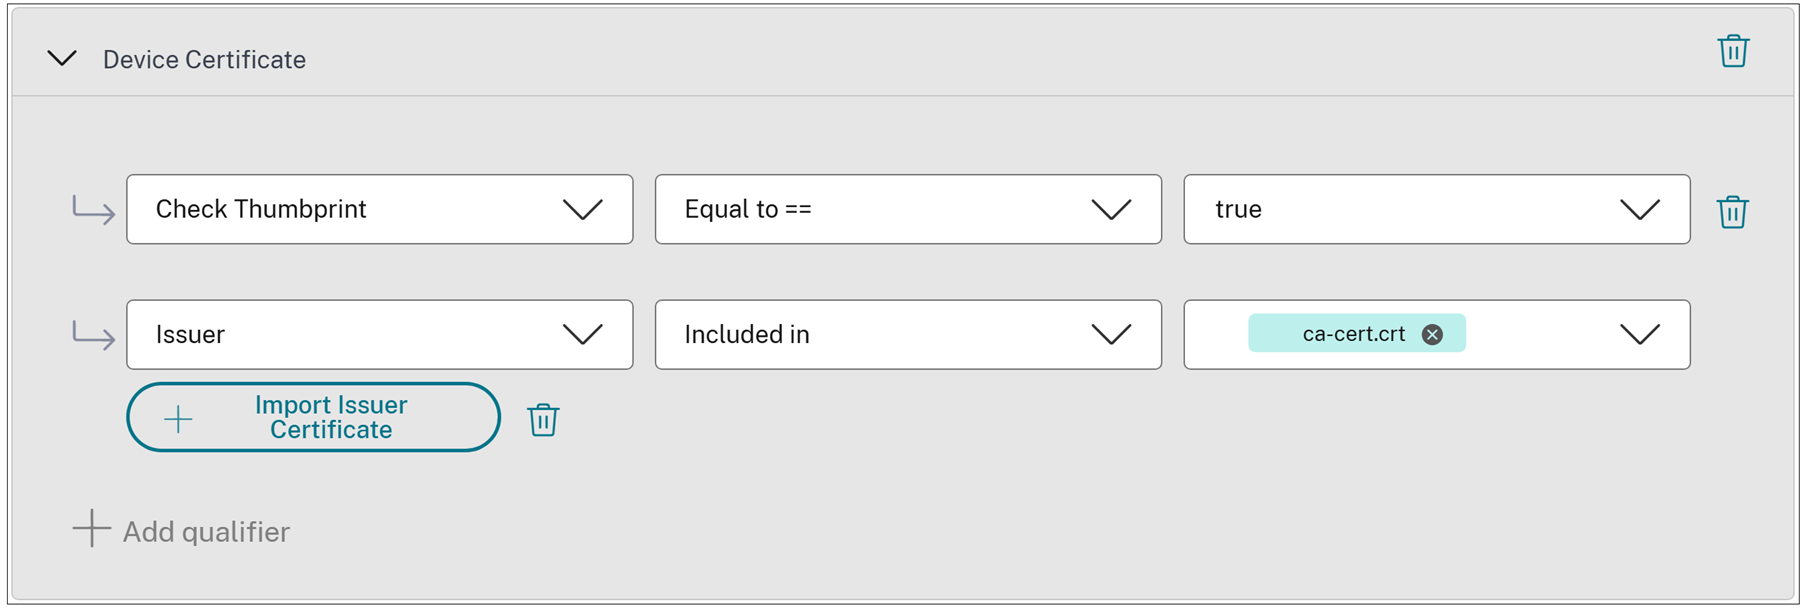
- When adding a policy rule for the device certificate check, specify both the Check Thumbprint and Issuer conditions.
Important:
If multiple device certificates in your environment share the same issuer name, you must enable the Check Thumbprint option to prevent the service from matching the wrong certificate. Without this option enabled, the service matches certificates by issuer name only, which can cause policy conflicts when duplicate issuer names exist.
Install the device certificate on the end device
Windows:
- From the Start menu, open Computer Certificate manager.
-
Ensure that the certificate is installed in
Certificates - Local Computer\Personal\Certificates.- The Intended Purposes must include Client Authentication.
- The Issued By column must match the issuer name configured on the admin GUI.

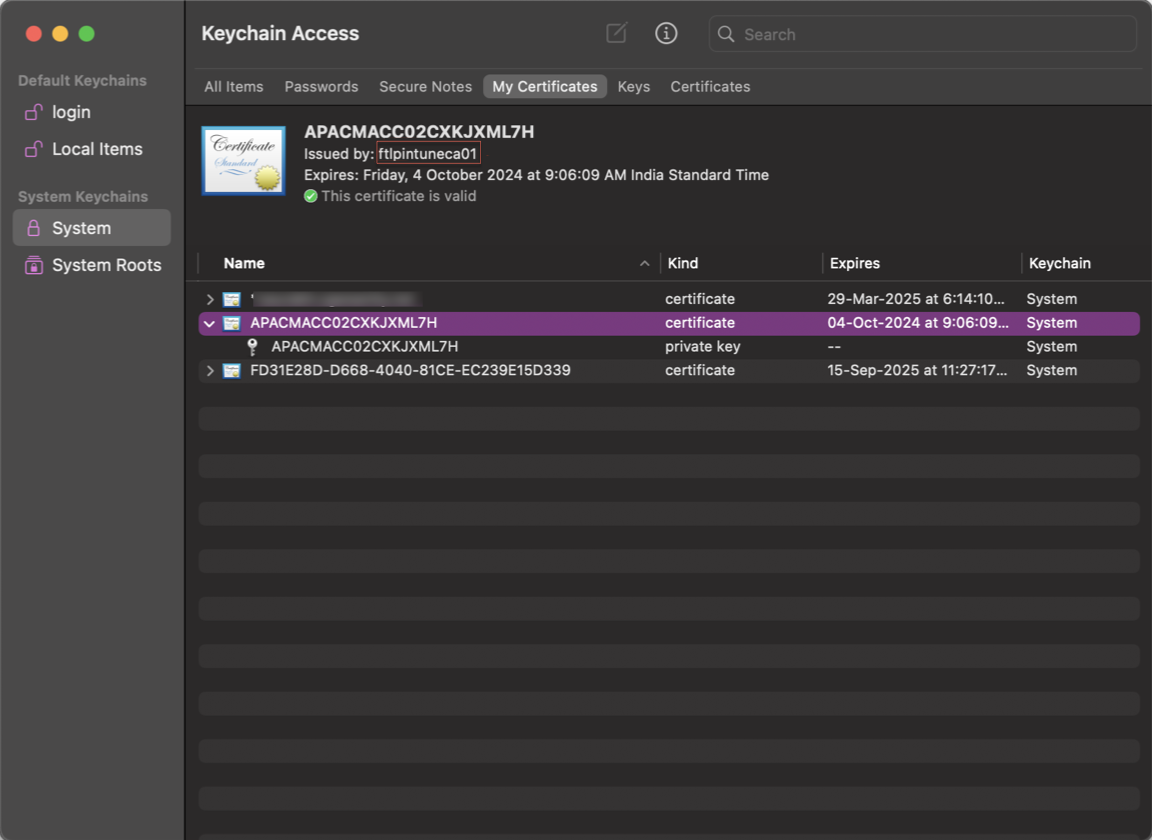
macOS:
- Open Keychain Access and then select System.
-
Click File > Import items to import the certificate.
The Issued by field must display the certificate issuer name.
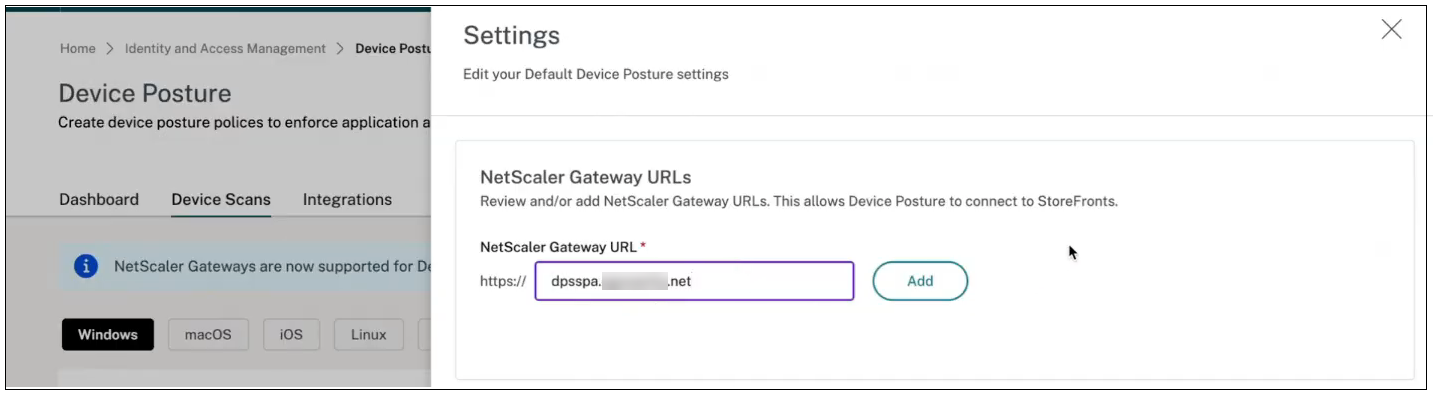
Configure the list of allowed domains
You can configure FQDNs of NetScaler Gateway virtual servers from which the Device Posture service scans can be initiated.
Note:
- This feature is only applicable for Secure Private Access deployments.
- To get this feature enabled for your Secure Private Access deployment, contact Citrix Support.
- Navigate to Device Posture > Device Scans, and then click Settings.
- In NetScaler Gateway URL, enter the FQDN of the virtual server for which the Device Posture checks must be enabled. For example,
https://gw.example.net.
For a sample use case of this feature, see Enable Device Posture for Secure Private Access hybrid solutions.
To configure device posture scans on NetScaler, see Device Posture checks on NetScaler Gateway.