HDX™ screen sharing
Overview
The Linux VDA lets you share the screen of your virtual desktop with session users on other virtual desktops.
The following example walks you through the procedure of sharing a screen and viewing some else’s screen.
To share a screen:
-
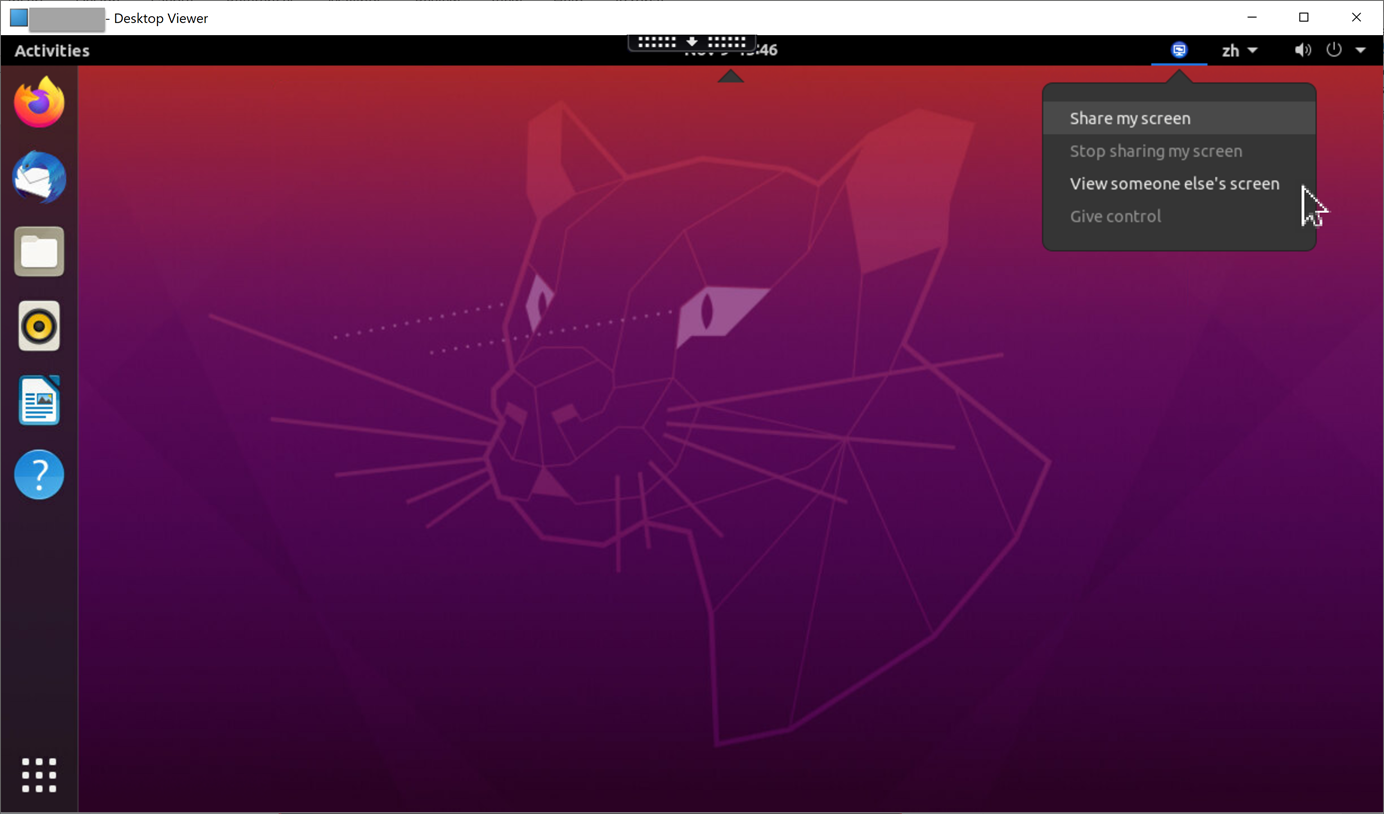
In the notification area of your virtual desktop, click the screen sharing icon and select Share my screen.
-
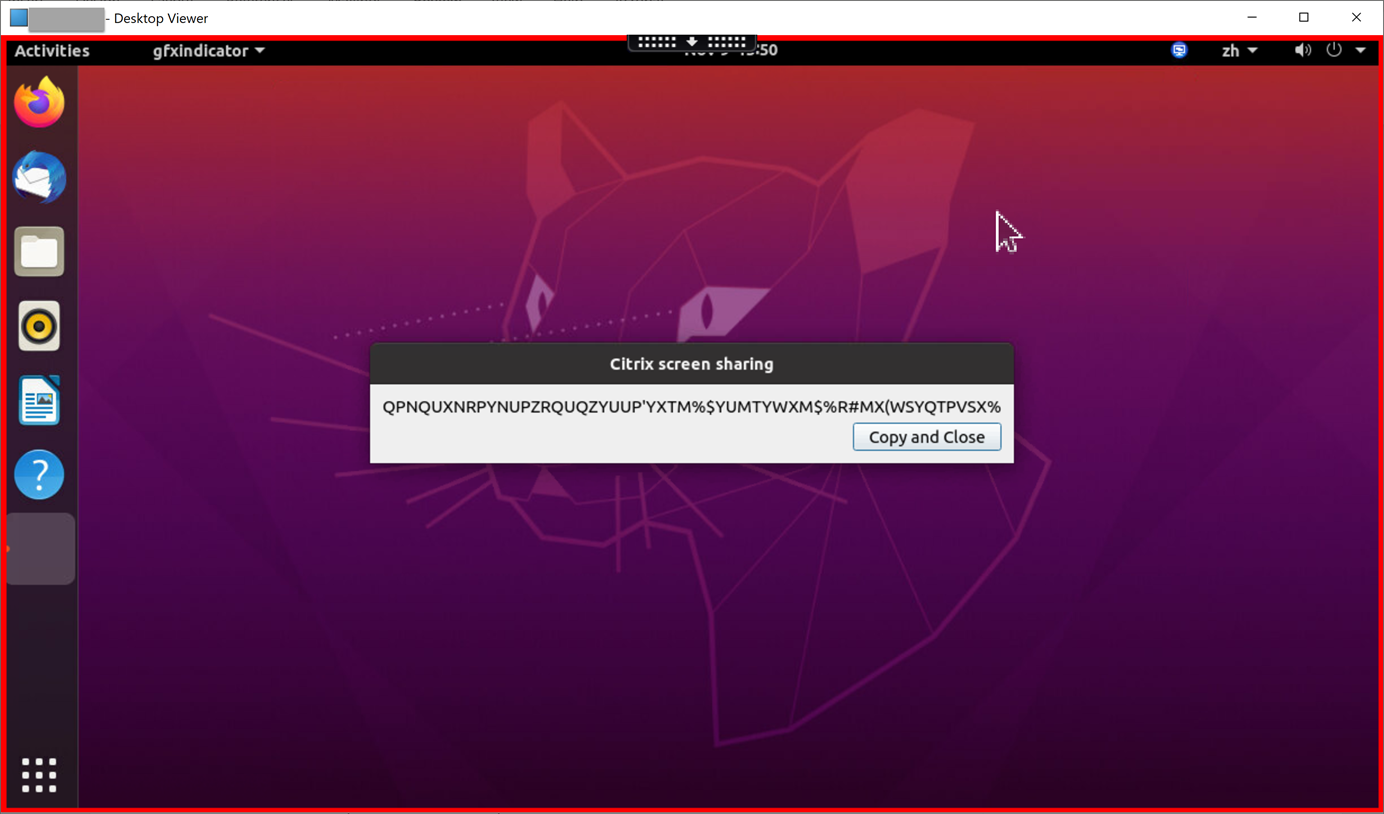
Click Copy and Close.
The current screen sharing code persists until you stop and restart sharing your screen.
Tip:
While you are sharing your screen, there is a red border around it, indicating that sharing is in progress.
-
Share the copied code with session users on other virtual desktops that you want to share your screen with.
-
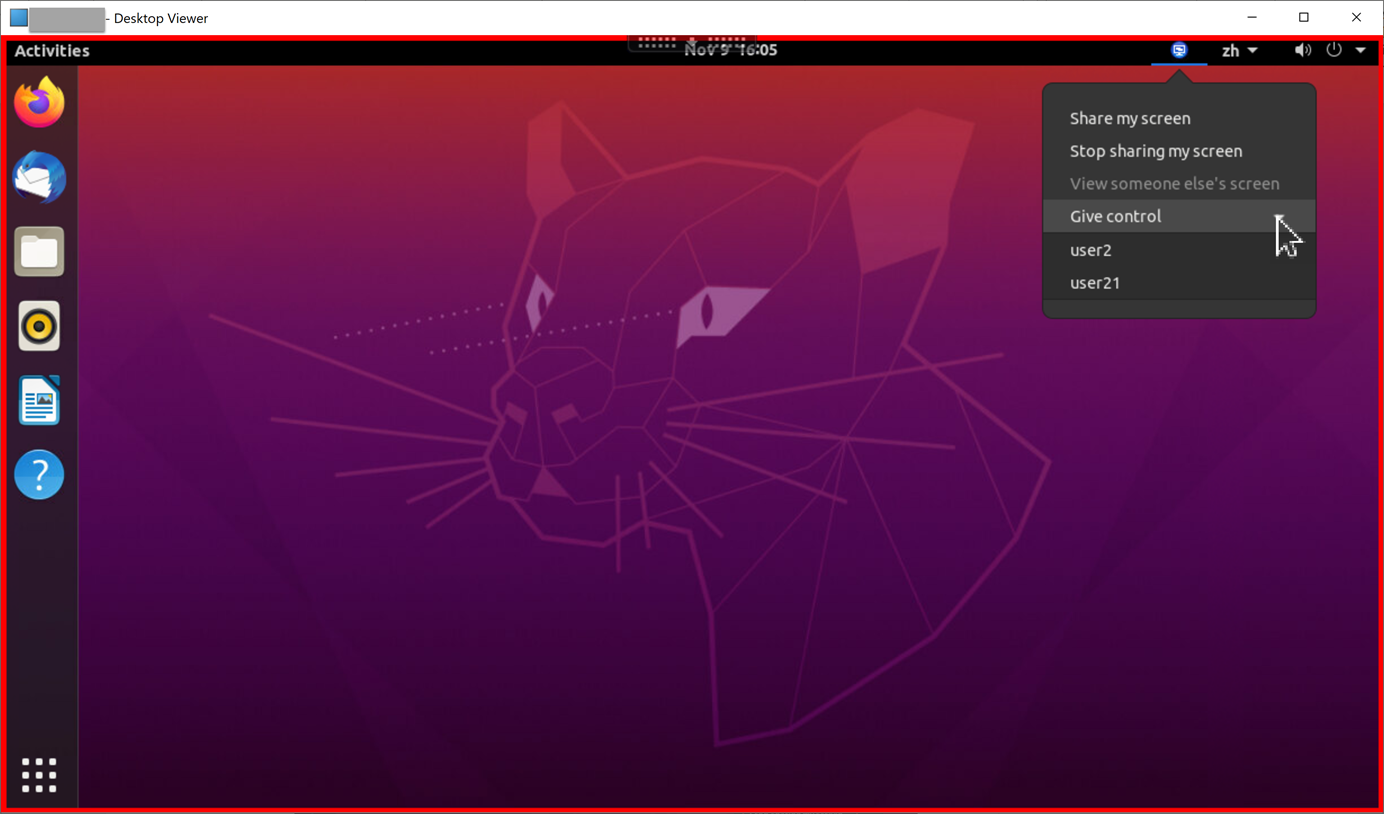
To let a viewer control your screen, select Give control and then the viewer’s name. To stop giving control, clear the viewer’s name.
-
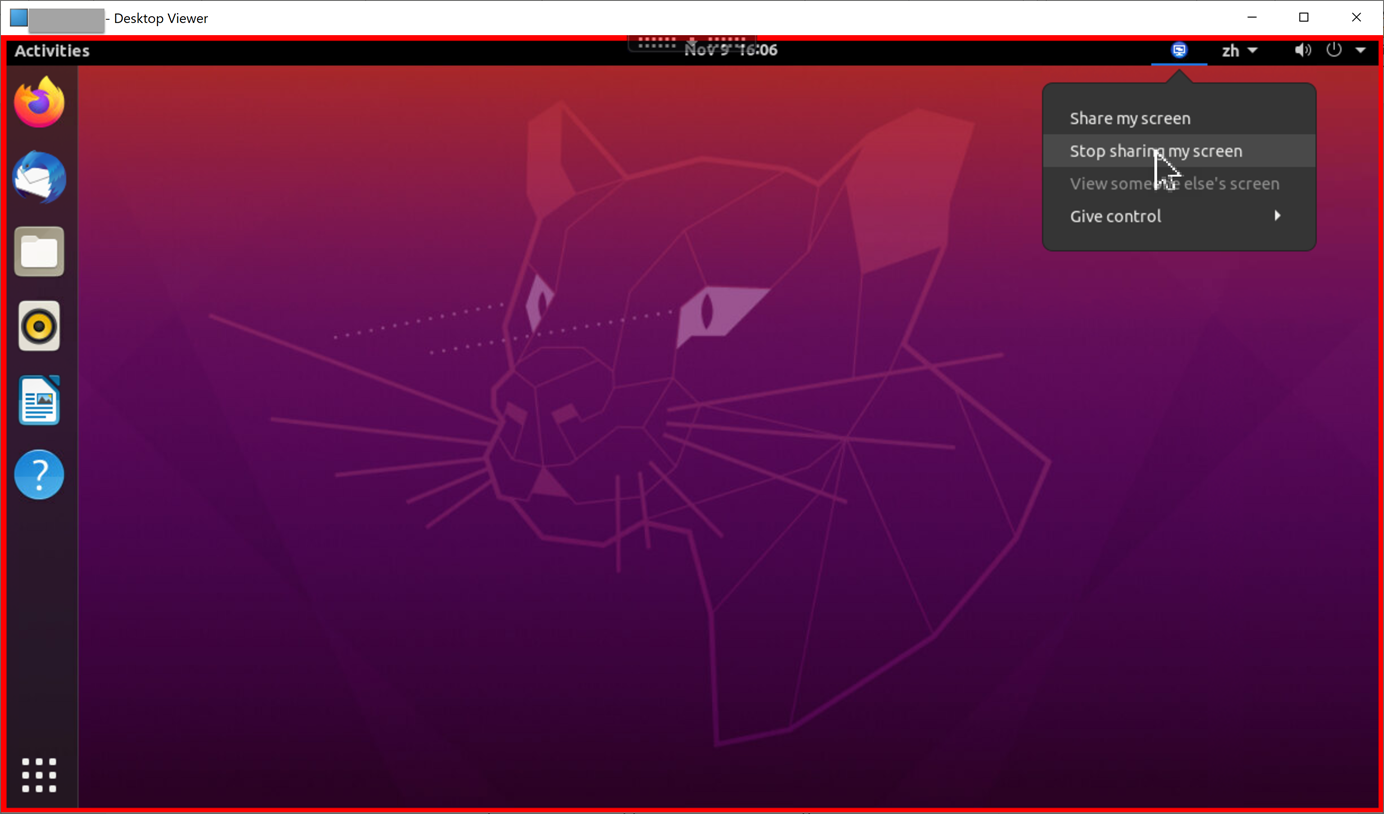
To stop sharing your screen, select Stop sharing my screen.
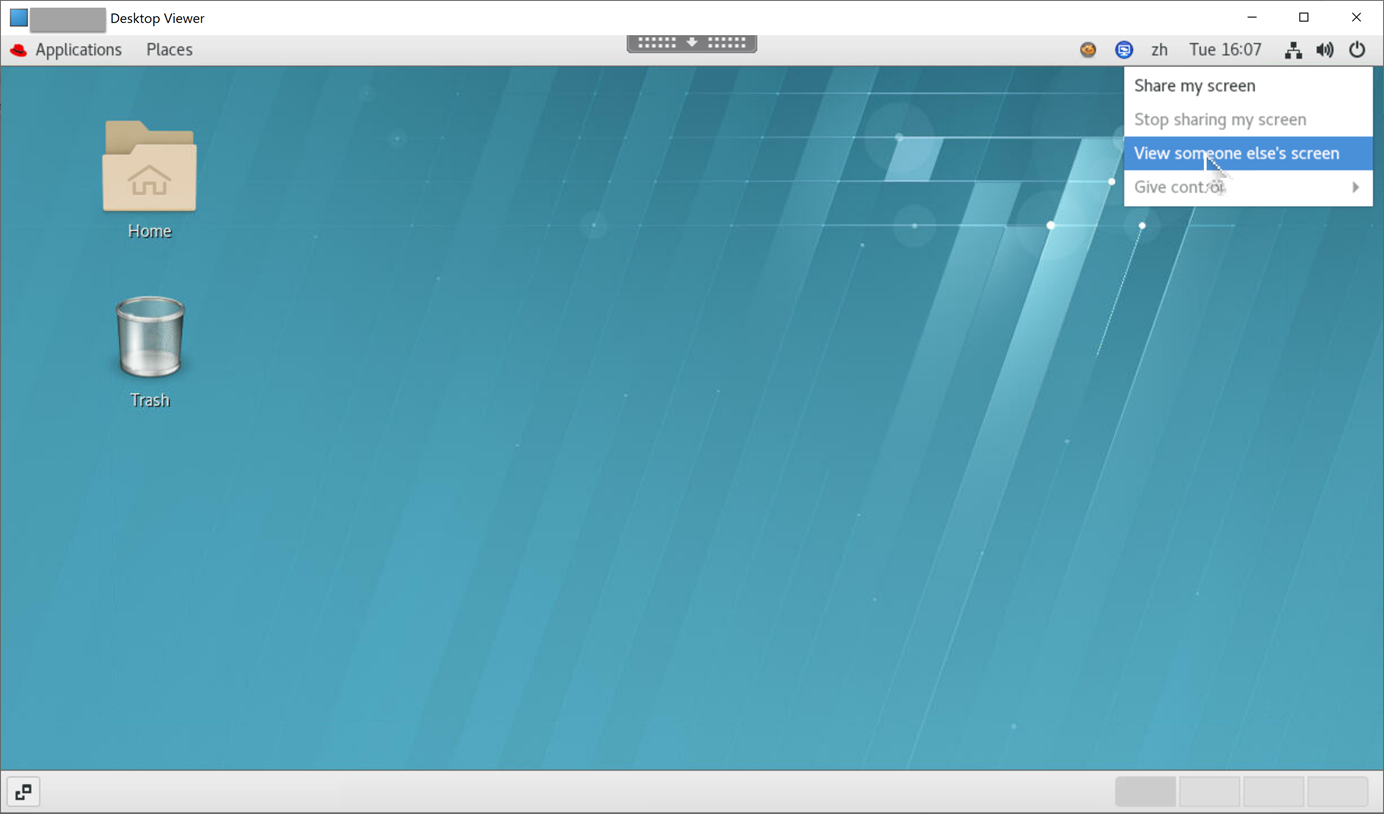
To view someone else’s screen:
-
In the notification area of your virtual desktop, click the screen sharing icon and select View someone else’s screen.
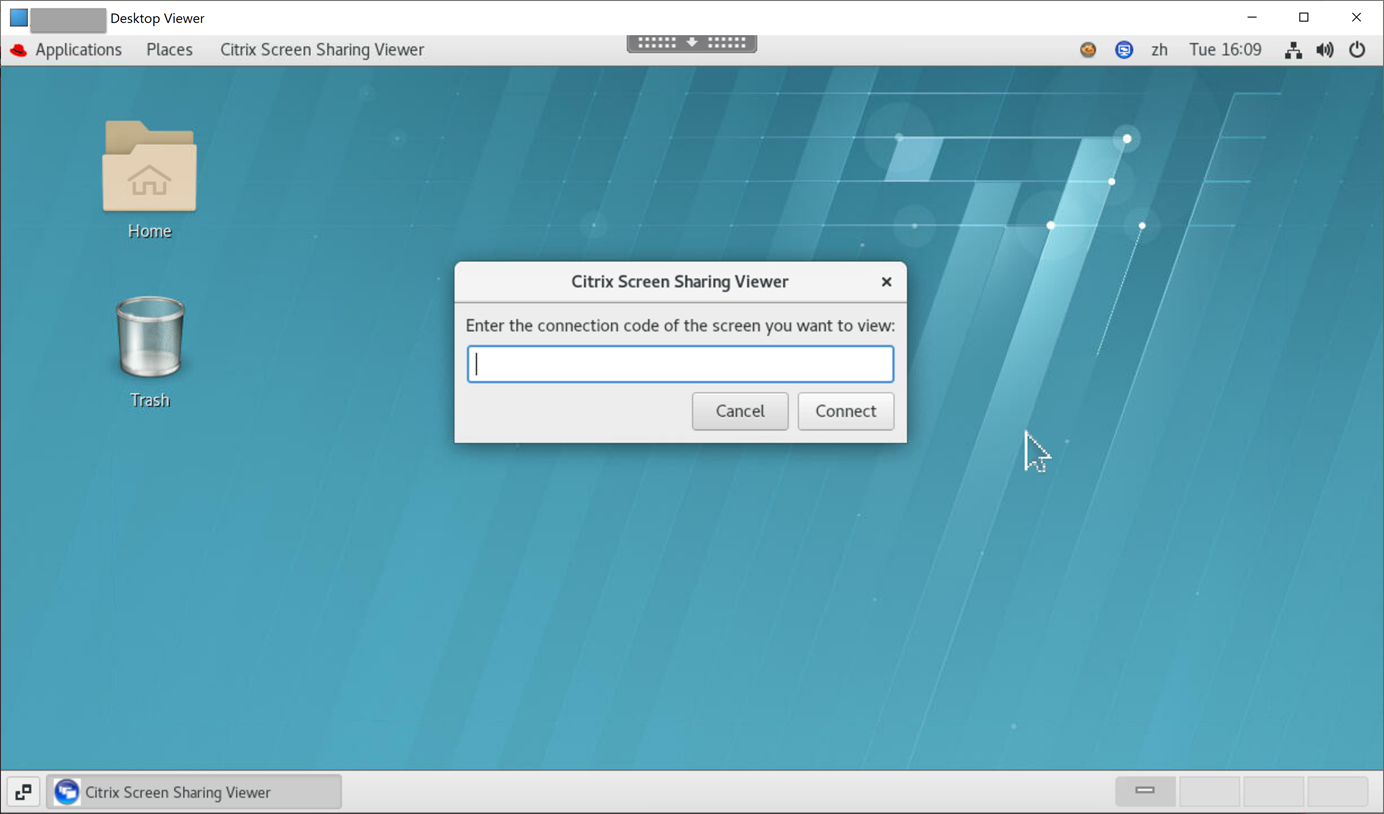
-
Enter the connection code of the screen that you want to view and then click Connect.
-
Wait for the screen sharer to accept your request. For example:
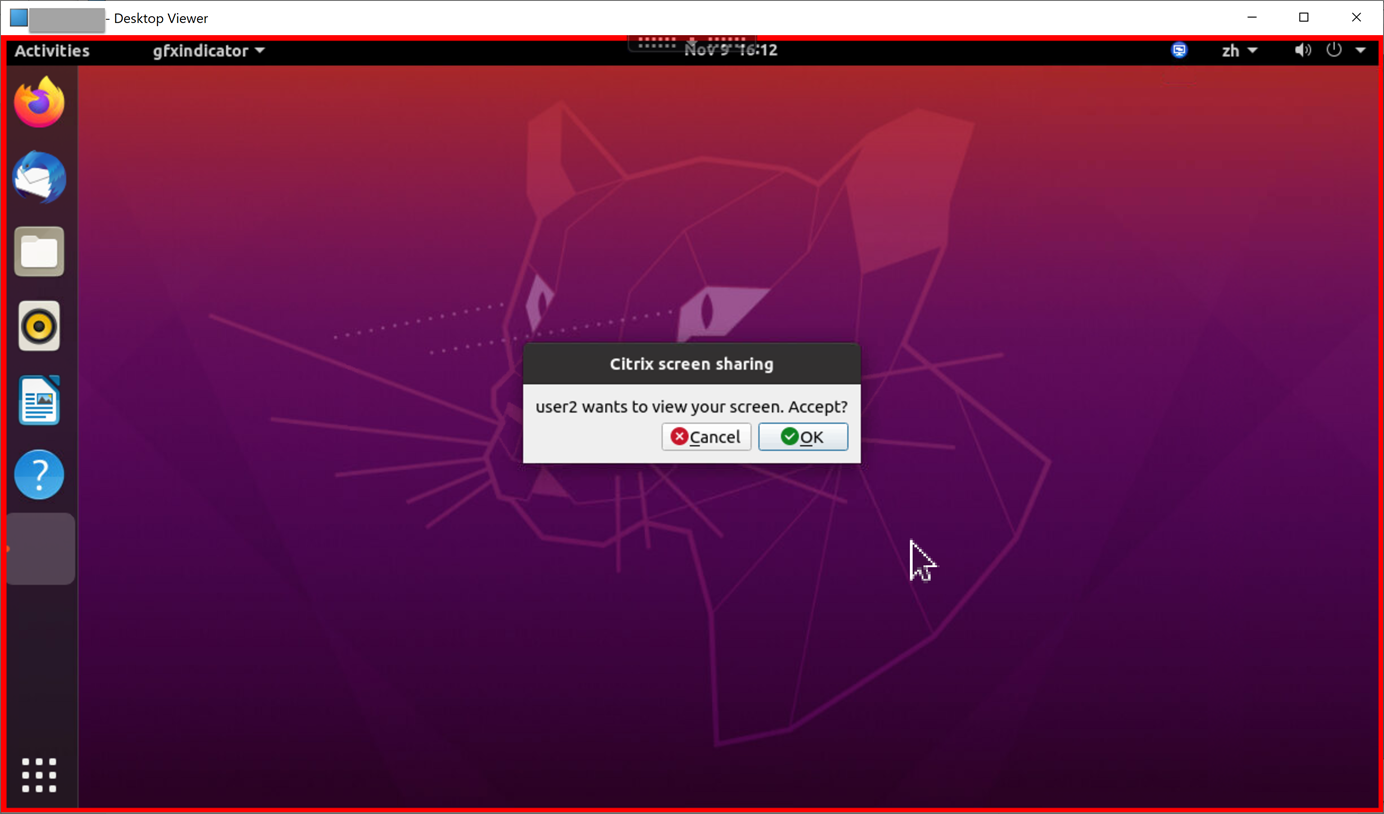
Tip:
- On the sharer side, the Linux system issues a notification of your request.
- If the sharer does not accept your request within 30 seconds, your request expires and a prompt appears.
-
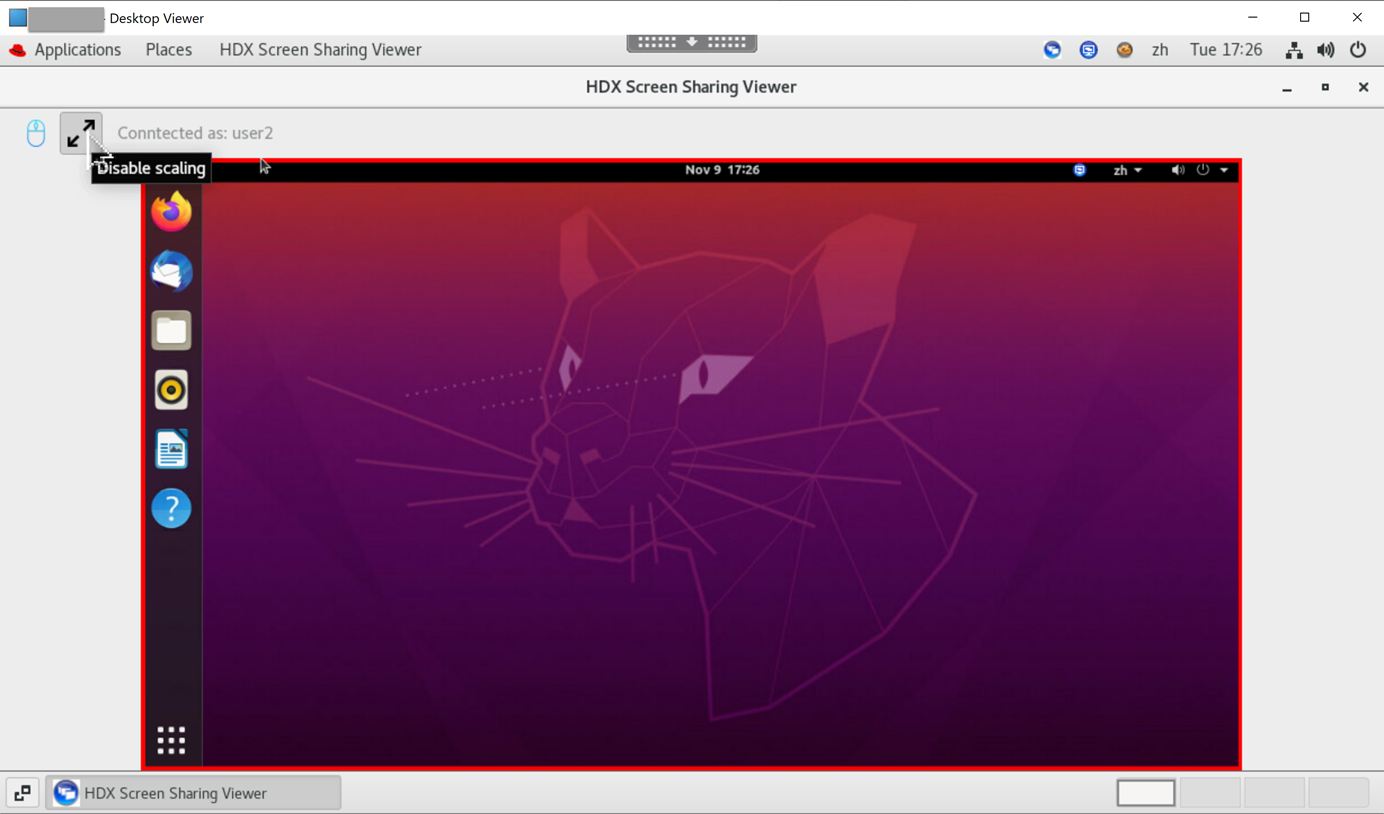
After the screen sharer accepts your request by clicking OK, the shared screen appears in your Desktop Viewer. You are connected as a viewer with an automatically assigned user name.
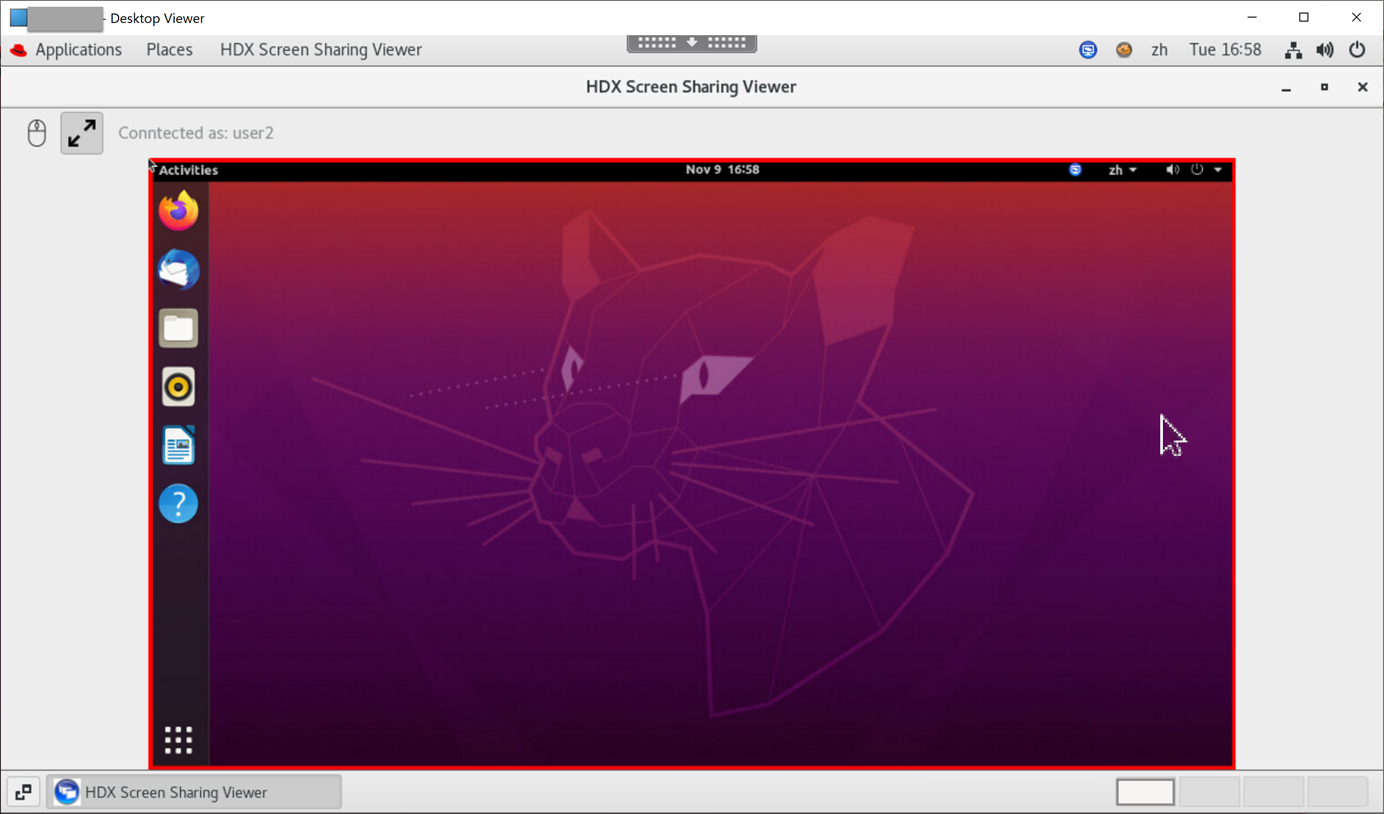
-
To request control over the shared screen, click the mouse icon in the upper left corner.
Tip:
- If the sharer does not accept your request within 30 seconds, your request expires.
- Only one viewer is allowed to control a shared screen at a time.
Click the mouse icon again to release control over the shared screen.

-
To disable display scaling or scale to the window size, click the icon next to the mouse icon.
Configuration
The screen sharing feature is disabled by default. To enable it, complete the following settings:
- Enable the graphics status indicator policy in Citrix Studio.
-
For Citrix Virtual Apps and Desktops™ 2112 and later, enable the ScreenSharing policy in Citrix Studio.
-
(Optional) For Citrix Virtual Apps™ and Desktops 2109 and earlier, enable screen sharing on the Linux VDA by running the following command:
sudo /opt/Citrix/VDA/bin/ctxreg update -k "HKLM\System\CurrentControlSet\Control\Citrix\Thinwire" -v "EnableScreenSharing" -d "0x00000001" <!--NeedCopy--> - Allow ports 52525–52625 in your firewall.
-
(Optional) If you are using RHEL 8.x, Debian 11, or SUSE 15.x installed with GNOME, install a compatible extension for your GNOME shell to enable AppIndicator support:
-
Run the
gnome-shell --versioncommand to check your GNOME shell version. -
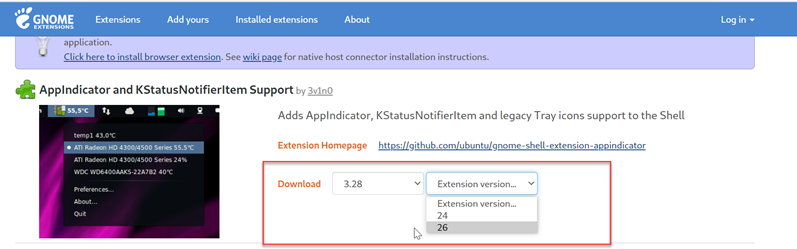
Download a compatible extension for your GNOME shell from https://extensions.gnome.org/extension/615/appindicator-support. For example, if your shell version is 3.28, you can select 24 or 26 for the extension version.
-
Untar the downloaded package. Verify that the “uuid” value in the metadata.json file in the package is set to appindicatorsupport@rgcjonas.gmail.com.
-
Run the
mvcommand to move the appindicatorsupport@rgcjonas.gmail.com directory to the location under/usr/share/gnome-shell/extensions/. -
Run the
chmod a+r metadata.jsoncommand to make the metadata.json file readable to other users.Tip:
By default, the metadata.json file in the appindicatorsupport@rgcjonas.gmail.com directory is readable only to the root user. To support screen sharing, make the metadata.json file readable to other users as well.
-
Install GNOME Tweaks.
-
In the desktop environment, reload your GNOME shell by pressing the
Alt+F2,r, andEnterkeys in sequence or by running thekillall -SIGQUIT gnome-shellcommand. -
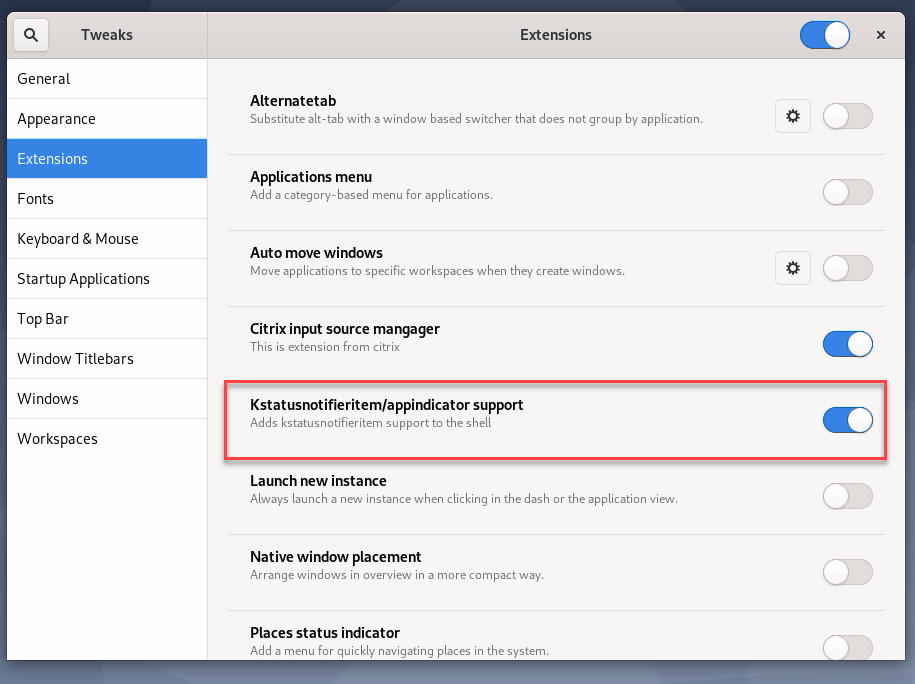
In the desktop environment, run GNOME Tweaks and then enable KStatusNotifierItem/AppIndicator Support in the Tweaks tool.
-
-
(Optional) If you are using Debian 11.3 installed with GNOME, complete the following steps to install and enable GNOME system tray icons:
-
Run the
sudo apt install gnome-shell-extension-appindicatorcommand. You might have to log out and then back in again for GNOME to see the extension. -
Search for Tweaks in your Activities screen.
-
Select Extensions in the Tweaks tool.
-
Enable Kstatusnotifieritem/appindicator support.
-
Considerations
-
The screen sharing feature does not support the H.265 video codec.
-
The screen sharing feature is not available for app sessions.
-
Users of desktop sessions can share their session screens with up to 10 viewers by default. The maximum number of viewers is configurable through
ctxreg update -k "HKLM\System\CurrentControlSet\Control\Citrix\Thinwire" -v "ScreenSharingViewerMaxNum" -d <hex_value>. When the maximum number is reached, a prompt appears when users try to accept extra connection requests.