Views
The Citrix Provisioning™ console view provides a method that allows you to quickly manage a group of devices. Views are typically created according to business needs. For example, a view can represent a physical location, such as a building or user type. Unlike device collections, a target device can be a member of any number of views.
Farm administrators create and manage views in the console tree’s Farm > Views folder. Farm views include any target device that exists in this farm. Site administrators can create and manage views in the console tree’s Farm > Sites > YourSite > Views folder. Site views can only include target devices that exist within that site, YourSite.
View properties
To display or edit the properties of an existing view, right-click on the view in the console, then select the Properties menu option. The View Properties dialog displays.
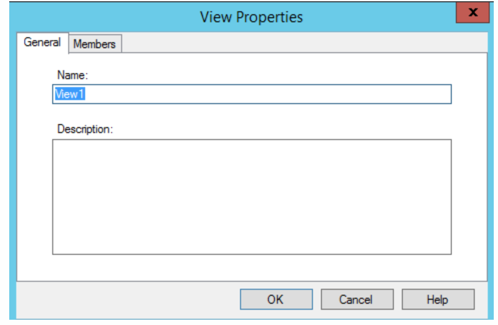
View properties are described in the tables that follow.
General tab
| Field | Description |
|---|---|
| Name | The name given to this view. |
| Description | Describes the purpose of this view. |
Members tab
| Field | Description |
|---|---|
| Member of this view | Lists target device members that belong to this view. |
| Add | Opens the Select Devices dialog, from which target devices to add to this view are selected. |
| Remove | Removes highlighted target devices from this view. |
| Remove all | Removes all target devices from this view. |
Manage views in the Citrix Provisioning console
Use the information in this section to manage views.
Create a view
- In the console, right-click on the Views folder where the new view exists, then select the Create view menu option. The View Properties dialog appears.
- On the General tab, type a name for this new view in the Name text box. Optionally include a description, then click the Members tab.
- Click the Add button to add new target device members to this view. The Select Devices dialog appears.
- From the menus, select the site, then the device collection that you want to add target devices from. All members of that device collection appear in the list of available target devices.
- Highlight one of more target devices in this collection, then click Add to add them to the new view. To add more target devices from other device collections, repeat steps 4 and 5.
- Click OK to close the dialog. All selected target devices now display on the Members tab.
Paste device properties
To copy and paste device properties to members in a view:
- In the console details pane, right-click on the target device that you want to copy properties from, then select Copy device properties. The Copy Device Properties dialog appears.
- Select the check box next to the properties that you want to copy, then click Copy. The properties are copied to the clipboard and the dialog closes.
- Right-click on the view containing the target devices that inherit the copied properties, then select the Paste device properties menu option. The Paste Device Properties dialog appears to display the name and properties of the target device that were copied.
- Under the Paste to table heading, highlight the target devices that inherit these properties, then click Paste.
- Click Close.
Delete a view
If a view becomes obsolete, you can delete the view. Deleting a view does not delete the target device from the collection.
- In the console’s tree, right-click on the view folder that you want to delete, then select the Delete menu option. A confirmation message appears.
- Click OK to delete this view. The view no longer displays in the console tree.
Refresh a view
After modifying a view, refresh the view before those changes appear in the console. To refresh the view, right-click on the view in the tree, then select the Refresh menu option.
Start devices within a view
- Right-click on the view in the console tree, then select the Boot devices menu option. The Target Device Control dialog displays with the Boot devices menu option selected in the Settings menu. By default, all devices are highlighted in the Device table.
- Click the Boot devices button to boot target devices. The Status column displays the Boot Signal status until the target device boots. As each target device successfully boots, the status changes to Success.
Restart devices within a view
- Right-click on the view in the console tree, then select the Restart devices menu option. The Target Device Control dialog displays with the Restart devices menu option selected in the Settings menu. By default, all devices are highlighted in the Device table.
- Type the number of seconds to wait before restarting target devices in the Delay text box.
- Type a message to display on target devices in the Message text box.
- Click the Restart devices button to restart target devices. The Status column displays the Restart Signal status until the target device restarts. As each target device successfully restarts, the status changes to Success.
Shut down devices within a view
- Right-click on the view in the console tree, then select the Shutdown devices menu option. The Target Device Control dialog displays with the Shutdown devices menu option selected in the Settings menu. By default, all devices are highlighted in the Device table.
- Type the number of seconds to wait before shutting down target devices in the Delay text box.
- Type a message to display on target devices in the Message text box.
- Click the Shutdown devices button to shut down target devices. The Status column displays the Shutdown Signal status until the target device shuts down. As each target device successfully shuts down, the status changes to Success.
Send messages to target devices within a view
To send a message to target devices members within a view
- Right-click on the view in the console tree, then select the Send message menu option. The Target Device Control dialog displays with the Message to devices menu option selected in the Settings menu. By default, all devices are highlighted in the Device table.
- Type a message to display on target devices in the Message text box.
- Click the Send message button. The Status column displays the Message Signal status until target devices receive the message. As each target device successfully receives the message, the status changes to Success.