Quick-start guide
This guide describes how to install and configure Workspace Environment Management™ (WEM). It provides step-by-step installation and configuration instructions, and suggested best practices.
Overview
WEM is a user environment management solution designed to let you deliver the best possible workspace experience to users. It is a software-only, driver-free solution.
Prerequisites
Before you install WEM in your environment, verify that you meet all system requirements. For more information, see System requirements.
Installation and configuration
Citrix® recommends that you install the latest version of WEM. Deploying WEM consists of installing and configuring three core components: Infrastructure services, Administration console, and Agent. The following procedures detail how to install and configure these components:
Note:
- Do not install any of the components above on a domain controller.
- Do not install the infrastructure services on the server where the Delivery Controller™ is installed.
Step 1: Install the infrastructure services
-
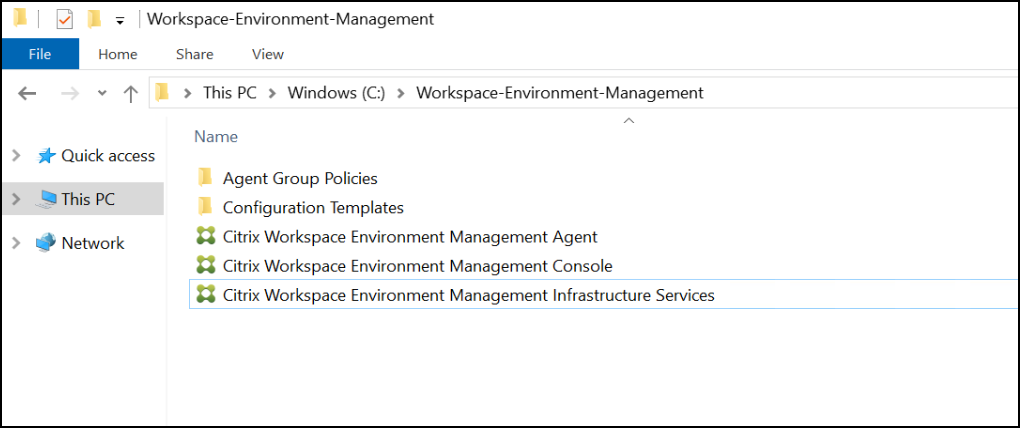
Download the latest WEM installer from the Citrix Virtual Apps and Desktops Advanced or Premium Edition Components downloads page https://www.citrix.com/downloads/citrix-virtual-apps-and-desktops/. Extract the zip file to a convenient folder.
-
Run Citrix Workspace Environment Management Infrastructure Services.exe on your infrastructure server.
-
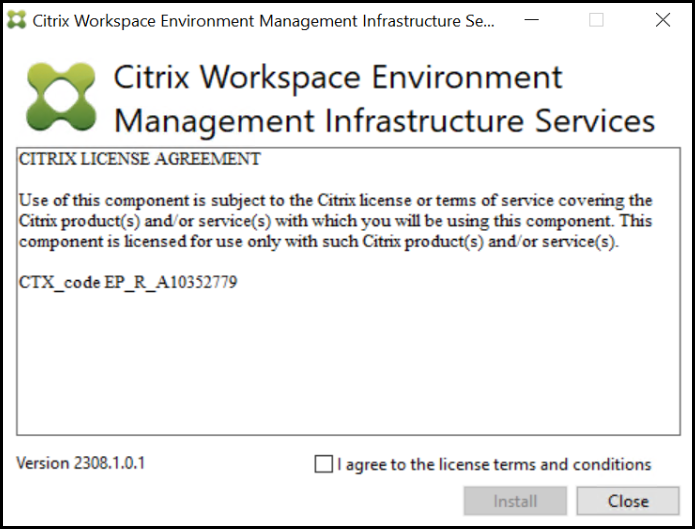
Click Install.
-
Click Next.
-
Select “I agree to the license terms and conditions” in the license agreement.
-
Follow the wizard instructions to complete the steps.
Step 2: Create a WEM database
-
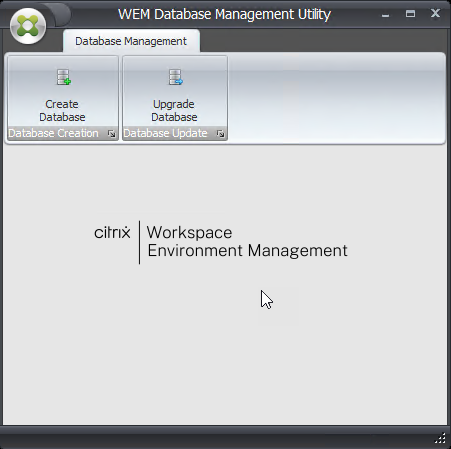
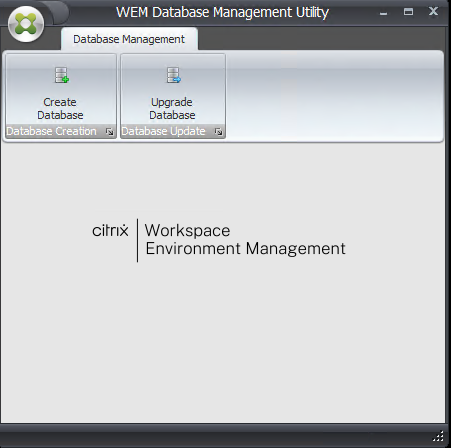
In the database management utility, click Create Database to create a WEM database for your deployment. The database creation wizard appears.
Note:
If you are using Windows authentication for your SQL Server, run the database creation utility under an identity that has system administrator permissions.
-
On the Welcome page, click Next.

-
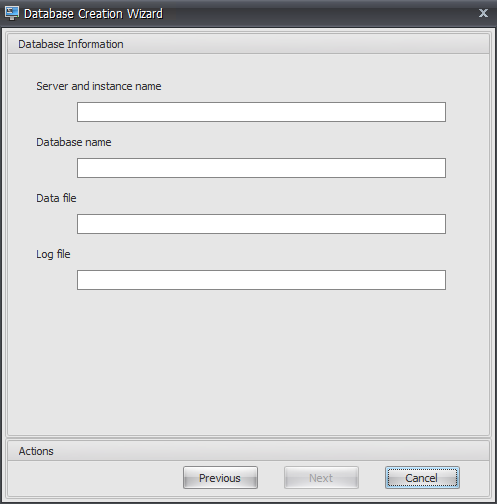
On the Database Information page, type the required information and then click Next.
Note:
- For the server and instance name, type the machine name, fully qualified domain name, or IP address.
- For the file paths, type the exact paths specified by your database administrator. Make sure that any auto-completed file paths are correct.
-
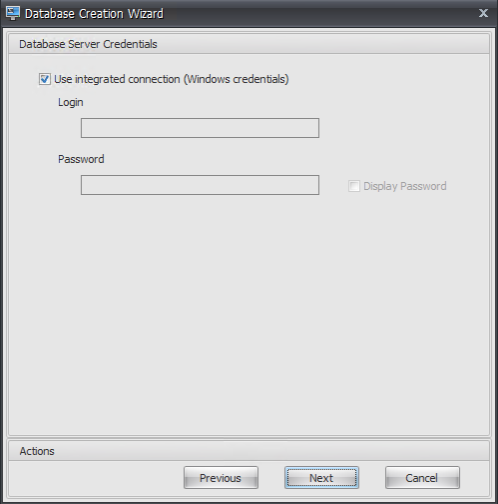
On the Database Server Credentials page, type the required information and then click Next.
-
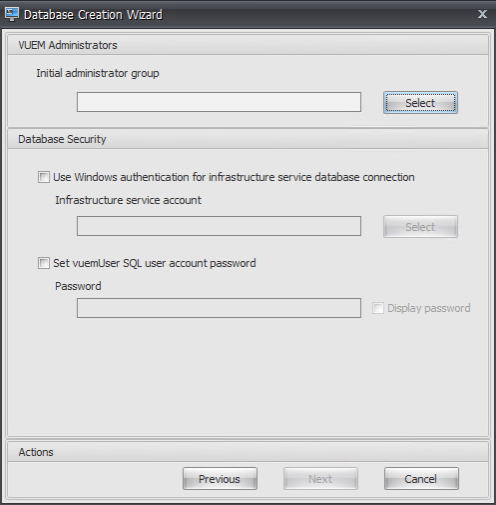
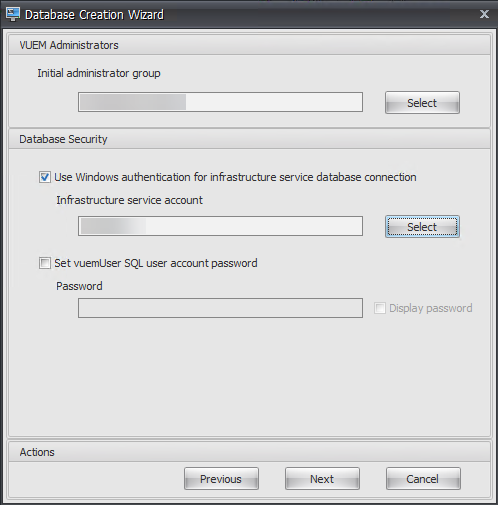
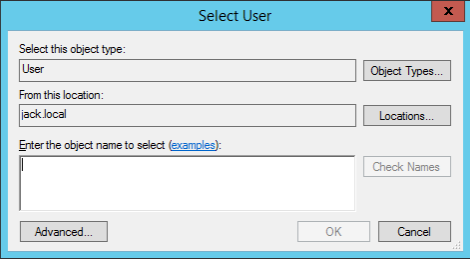
Under VUEM Administrators, click Select.
-
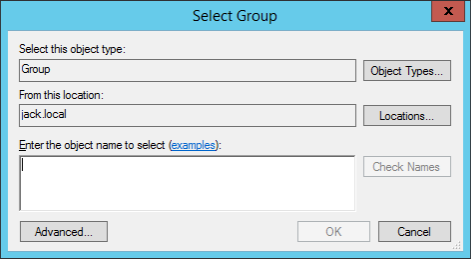
In the Select Group window, type a user group with administration permissions to the administration console, click Check Names, and then click OK.
-
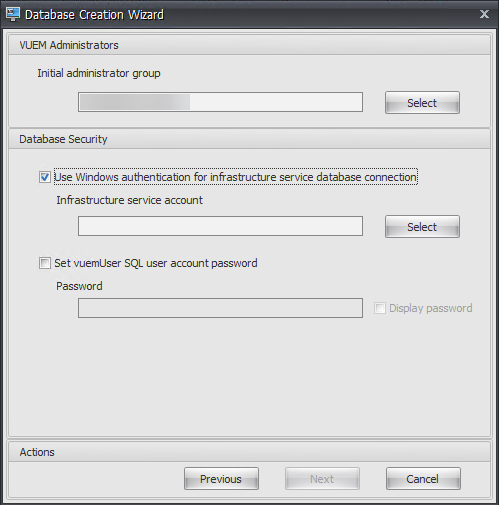
Under Database Security, select Use Windows authentication for infrastructure service database connection and then click Select.
Note:
- If you select neither Use Windows authentication for infrastructure service database connection nor Set vuemUser SQL user account password, the SQL user account is used by default.
- To use your own vuemUser SQL account password (for example, if your SQL policy requires a more complex password), select Set vuemUser SQL user account password.
-
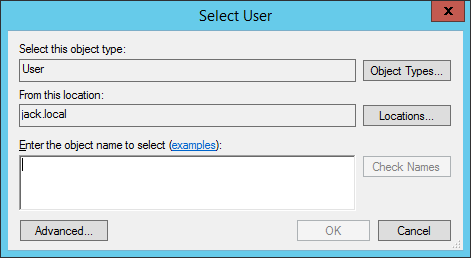
In the Select User window, type the name of the infrastructure service account, click Check Names, and then click OK.
-
Click Next.
-
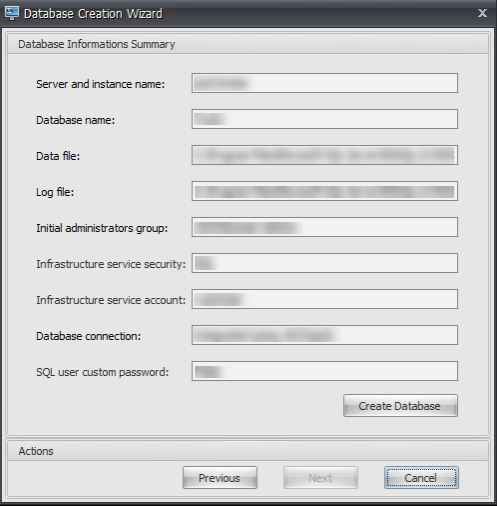
On the Database Information Summary page, click Create Database.
-
Click OK.

-
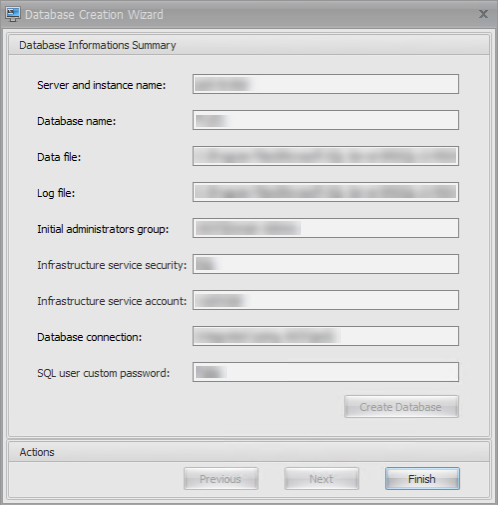
On the Database Information Summary page, click Finish.
-
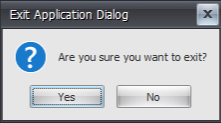
Close the WEM Database Management Utility.
-
In the Exit Application Dialog, click Yes.
Note:
If an error occurs during the database creation, check the log file “Citrix WEM Database Management Utility Debug Log.log” in the infrastructure services installation folder for more information.
Step 3: Configure infrastructure services
-
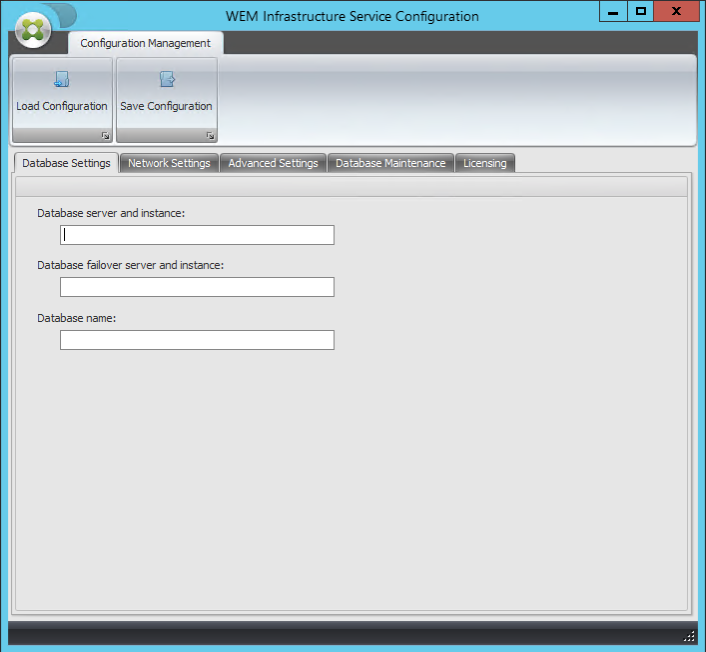
Open the WEM Infrastructure Service Configuration Utility from the Start menu.
-
On the Database Settings tab, type the required information.
-
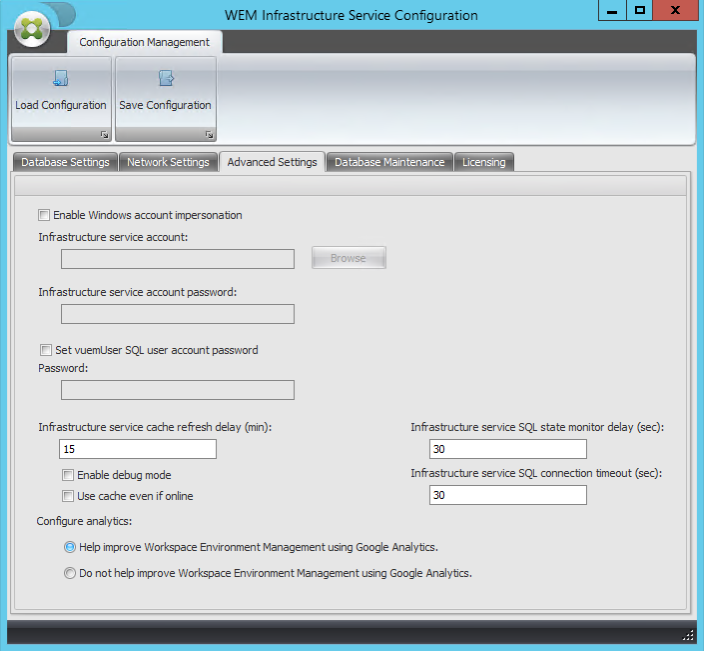
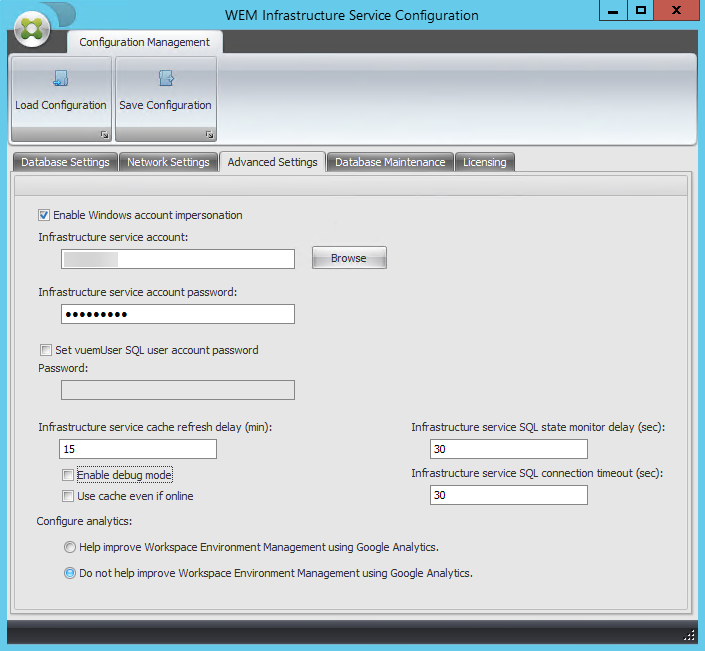
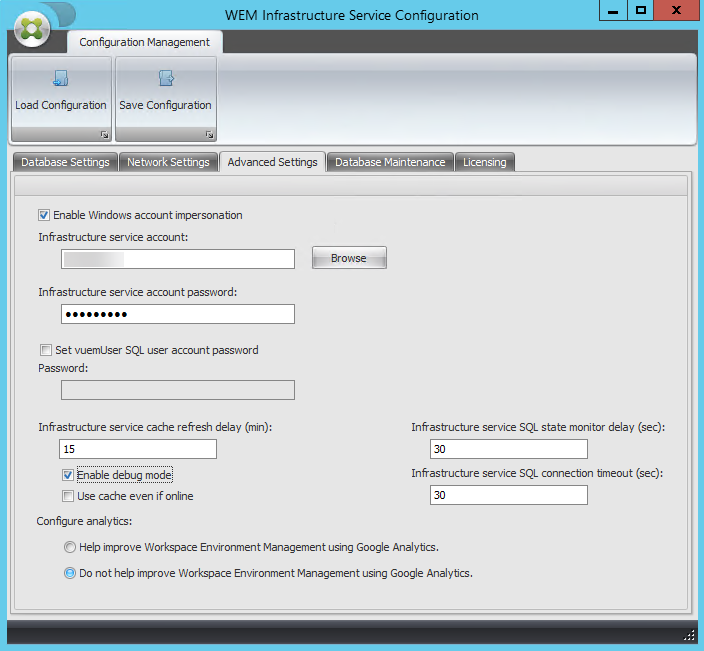
On the Advanced Settings tab, select Enable Windows account impersonation and then click Browse.
Note:
Depending on the choices you made during WEM database creation in Step 2, select Enable Windows account impersonation or Set vuemUser SQL user account password.
-
Type a user name, click Check Names, and then click OK.
-
Type the infrastructure service account password.
-
Select Enable debug mode.
-
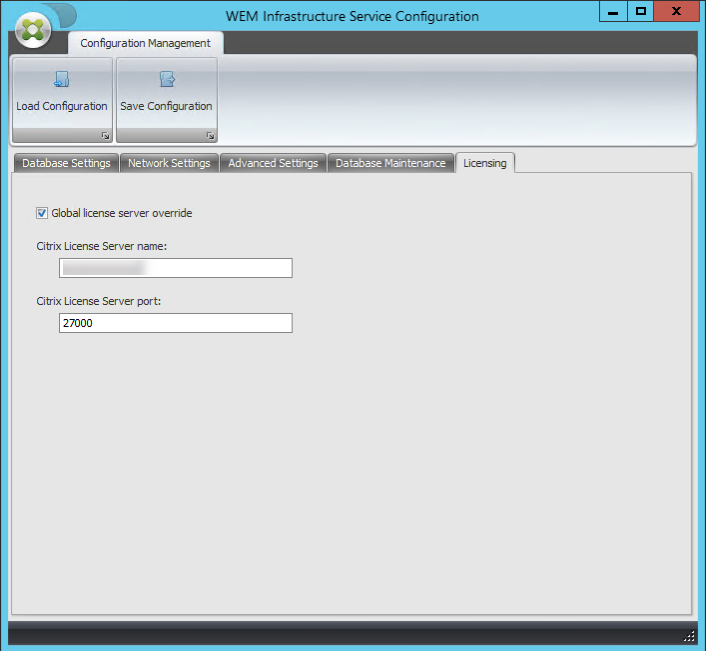
On the Licensing tab, select Global license server override, type your license information, and then click Save Configuration.
Note:
- For Citrix License Server name, type the machine name, fully qualified domain name, or IP address of the license server.
- For Citrix License Server port, the default port is 27000.
-
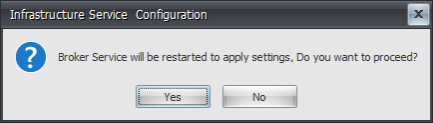
Click Yes.
-
Close the WEM Infrastructure Service Configuration utility.
Step 4: Install the administration console
-
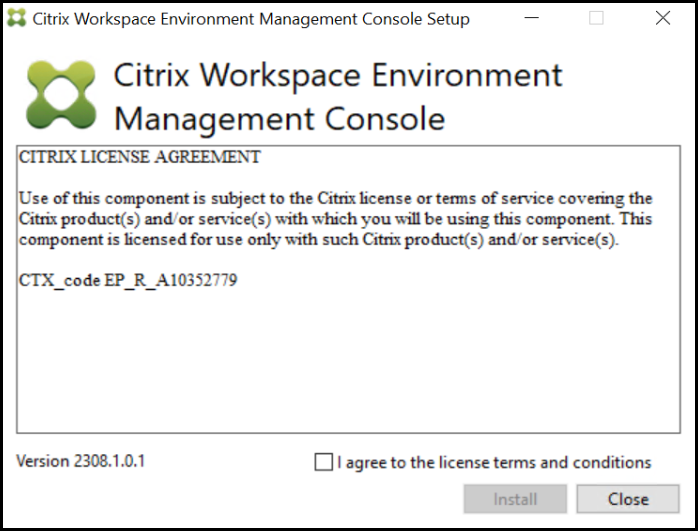
Run Citrix Workspace Environment Management Console.exe.
-
On the License Agreement page, select “I agree to the license terms and conditions”.
-
Follow the wizard instructions to complete the steps.
Step 5: Configure configuration sets
-
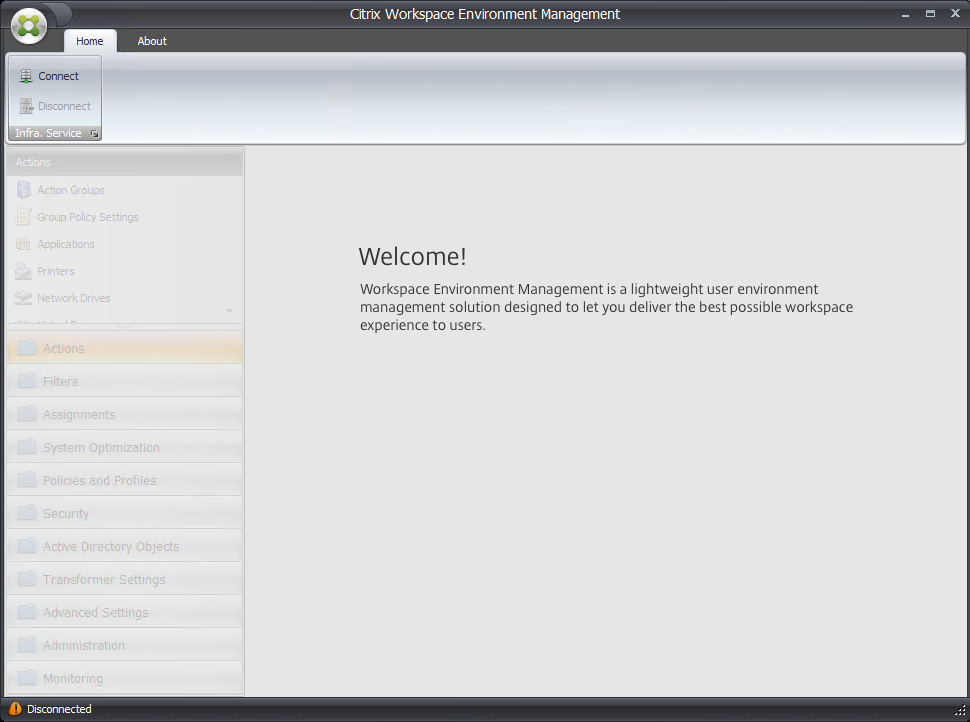
Open the WEM Administration Console from the Start menu and click Connect.
-
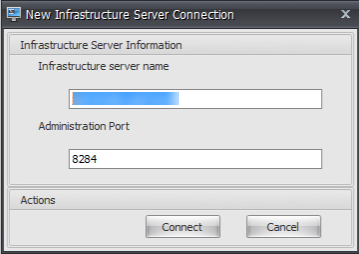
In the New Infrastructure Server Connection window, check the information and then click Connect.
Note:
- For Infrastructure server name, type the machine name, fully qualified domain name, or IP address of the WEM infrastructure server.
- For Administration port, the default port is 8284.
-
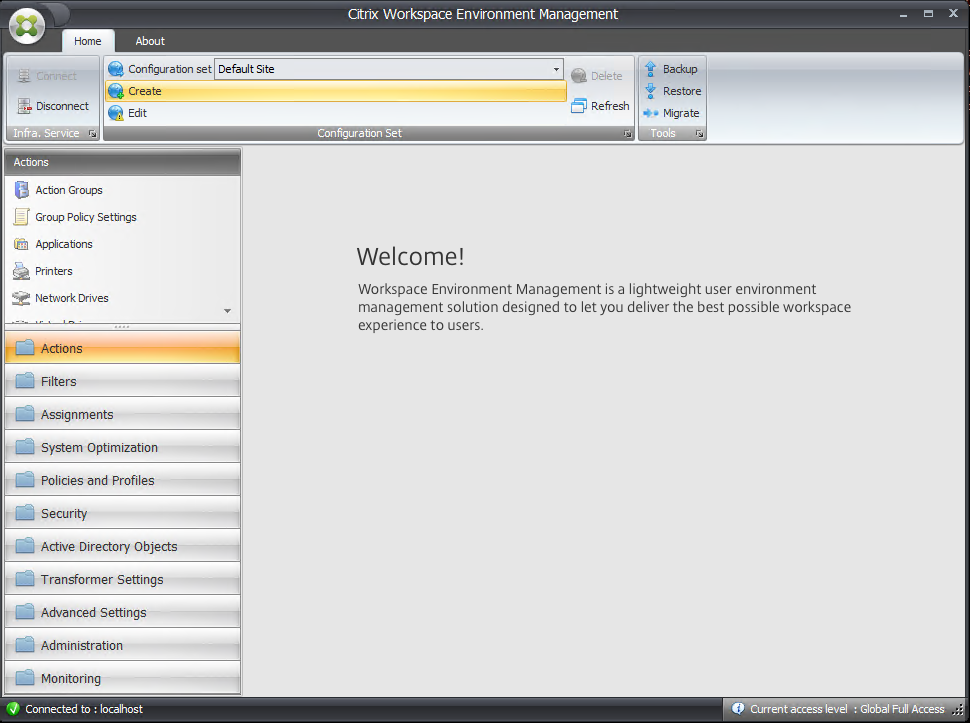
On the Home tab, on the ribbon, click Create to create your configuration set.
-
In the Create Configuration Set window, type a name and description for your configuration set and then click OK.

-
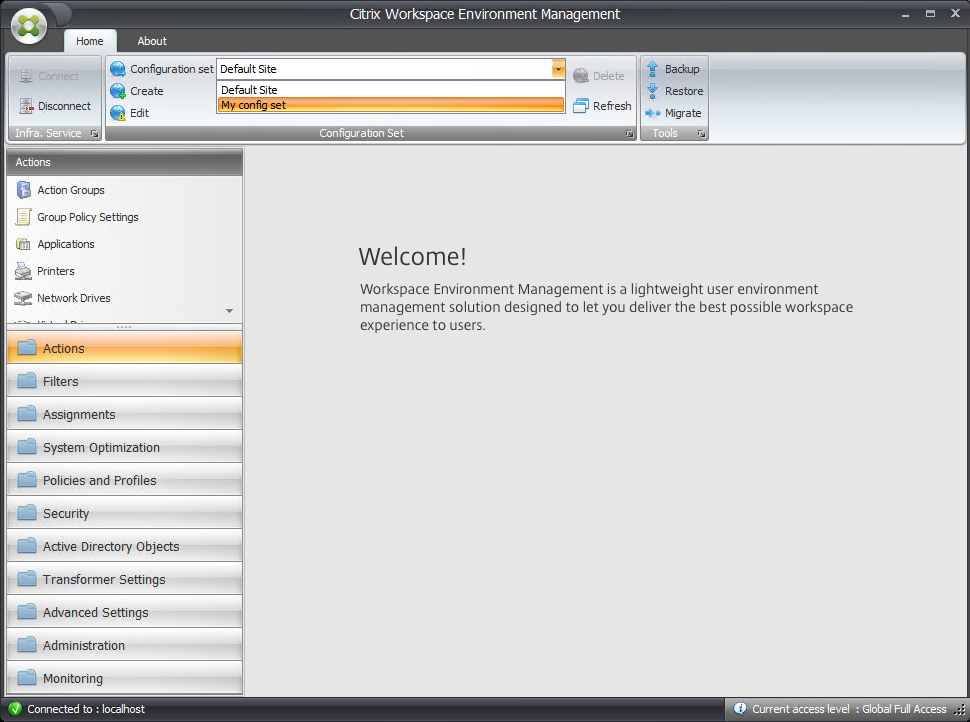
On the ribbon, under Configuration Set, select the newly created configuration set.
-
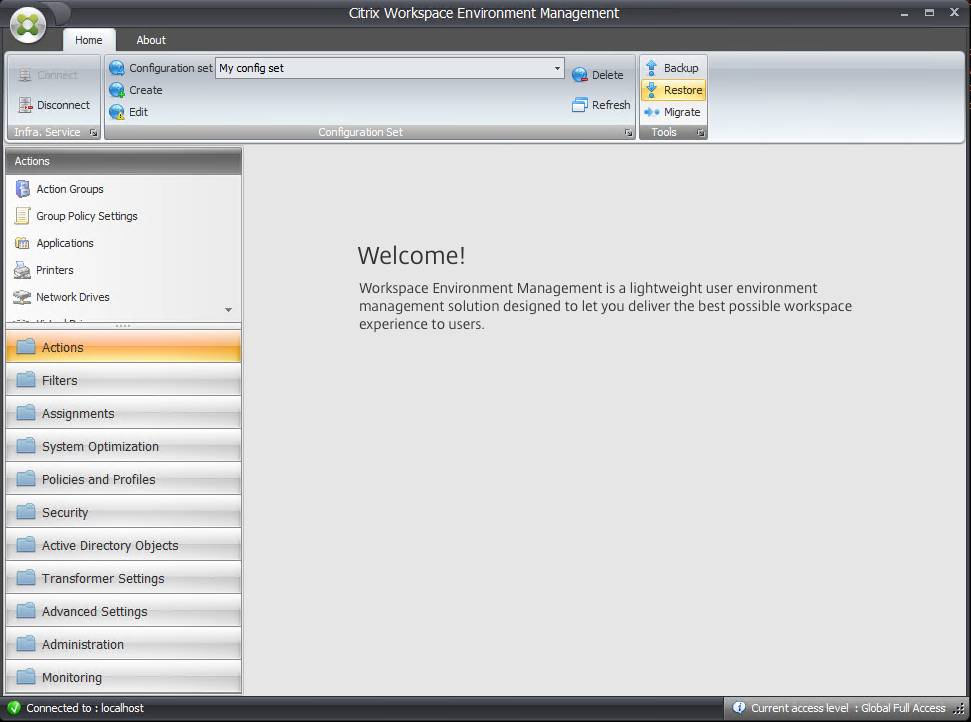
On the ribbon, under Backup, click Restore. The Restore wizard appears.
-
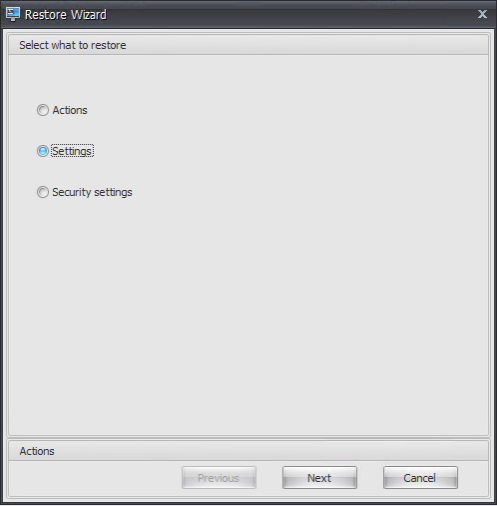
On the Select what to restore page, select Settings and then click Next.
-
On the Restore settings page, click Next.

-
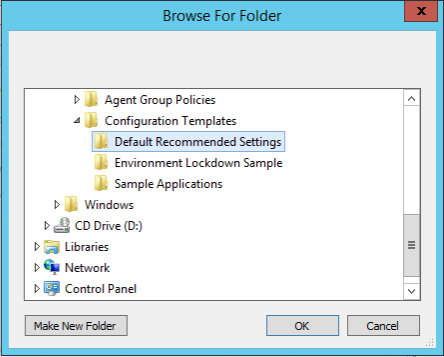
On the Source page, click Browse.
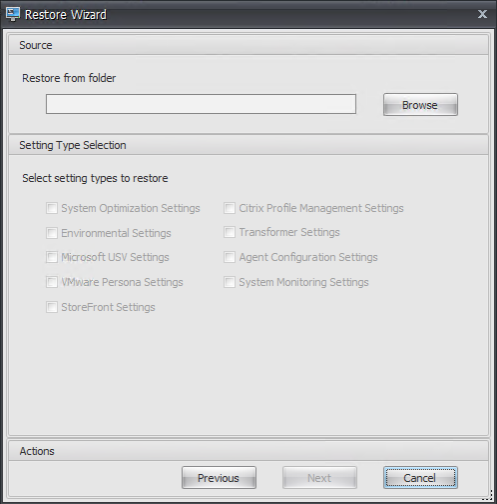
-
In the Browse For Folder window, browse to the Default Recommended Settings folder (provided with Workspace Environment Management) and then click OK.
-
On the Source page, select System Optimization Settings, Agent Configuration Settings, and System Monitoring Settings, and then click Next.
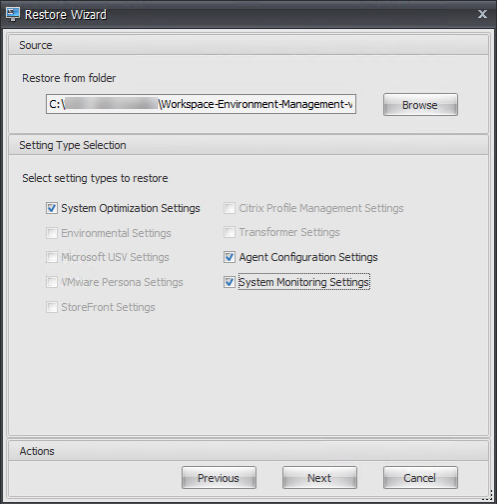
-
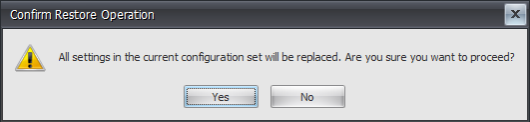
On the Restore settings processing page, under Restore settings, click Restore Settings.
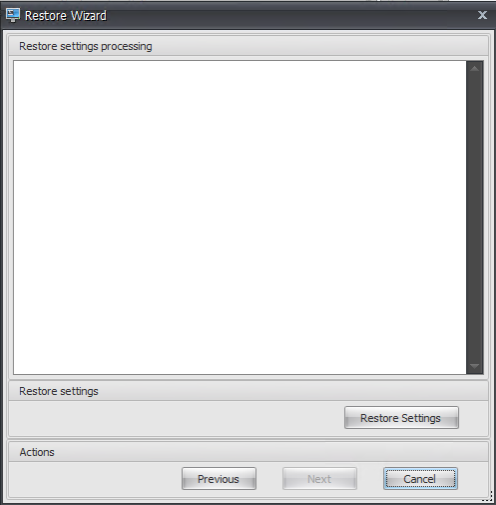
-
Click Yes.
-
Click Finish.

Step 6: Add the group policy template (optional)
Optionally, you can choose to configure the group policies. The Agent Group Policies administrative template, provided in the WEM agent package, adds the Agent Host Configuration policy.
-
Copy the Agent Group Policies folder provided with the WEM installation package to your WEM domain controller.
-
Add the .admx files.
- Go to the Agent Group Policies > ADMX folder.
- Copy the two files (Citrix Workspace Environment Management Agent Host Configuration.admx and CitrixBase.admx).
- Go to the
<C:\Windows>\PolicyDefinitionsfolder and then paste the files.
-
Add the .adml files.
- Go to the Agent Group Policies > ADMX > en-US folder.
- Copy the two files (Citrix Workspace Environment Management Agent Host Configuration.adml and CitrixBase.adml).
- Go to the
<C:\Windows>\PolicyDefinitions\en-USfolder and then paste the files.
-
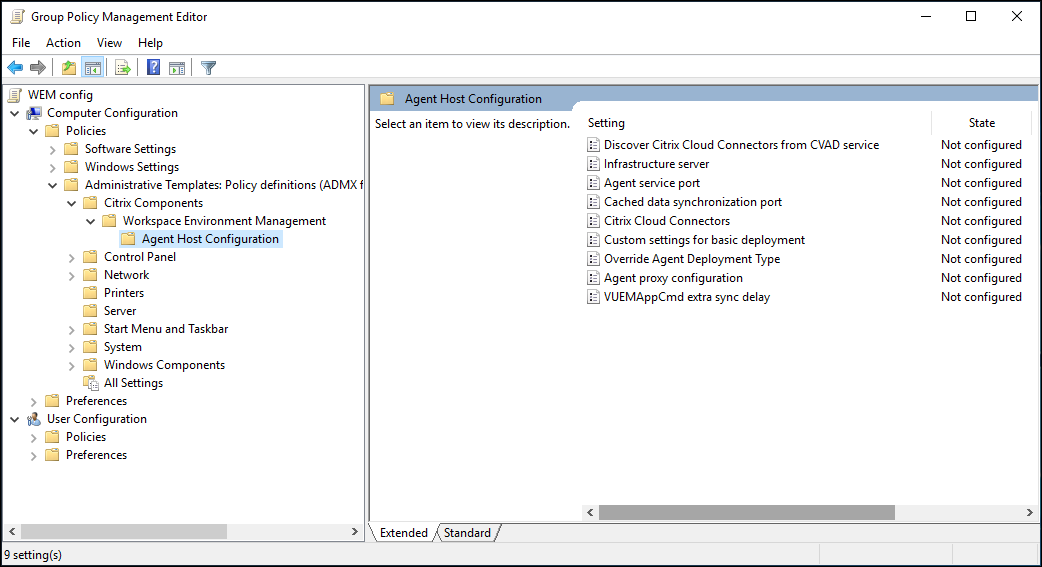
In the Group Policy Management Editor window, go to Computer Configuration > Policies > Administrative Templates > Citrix Components > Workspace Environment Management > Agent Host Configuration and double-click Infrastructure server.
-
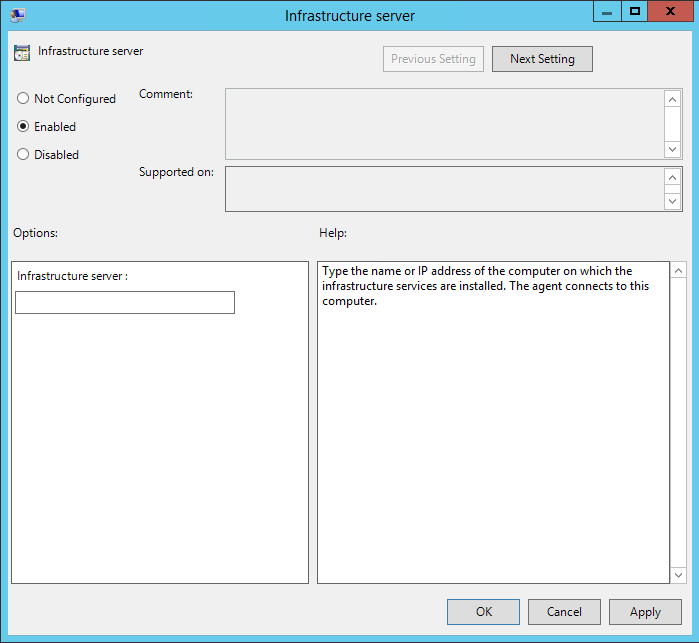
In the Infrastructure server window, select Enabled, and under Options, type the IP address of the computer on which the infrastructure services are installed, and then click Apply and OK.
-
Go to the agent host, open a command line, and type
gpupdate /force.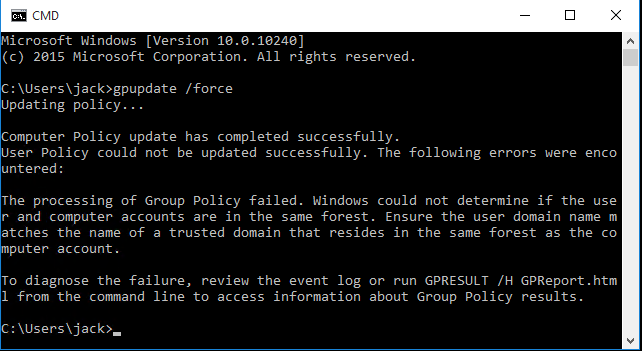
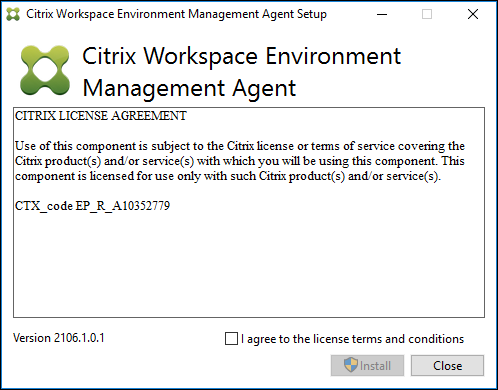
Step 7: Install the agent
Important:
Do not install the WEM agent on the infrastructure server.
-
Run Citrix Workspace Environment Management Agent.exe on your machine.
-
Select I agree to the license terms and conditions and then click Install.
-
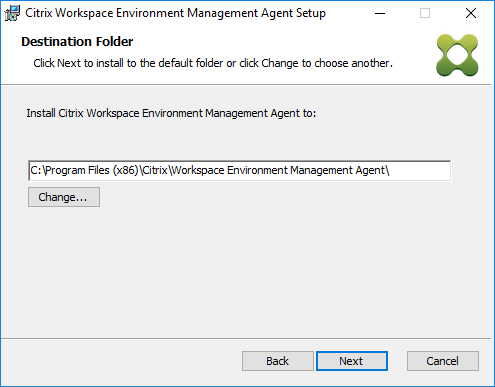
On the Welcome page, click Next.

-
On the Destination Folder page, click Next.
-
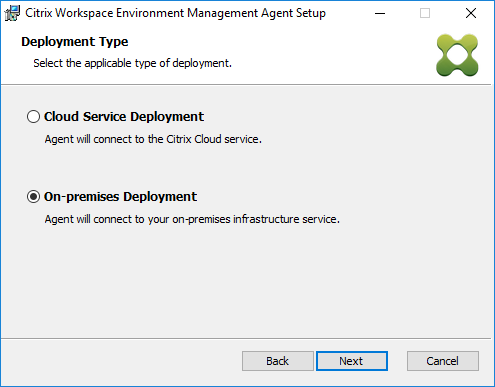
On the Deployment Type page, select the applicable type of deployment and then click Next. In this case, select On-premises Deployment.
-
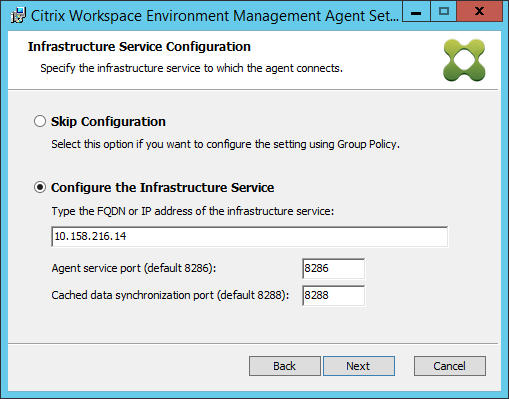
On the Infrastructure Service Configuration page, select Configure the Infrastructure Service, type the FQDN or IP address of the infrastructure service, and then click Next.
Note:
For the agent service port, the default port is 8286. For the cached data synchronization port, the default port is 8288. For more information, see Port information.
-
On the Advanced Settings page, click Next.

-
On the Ready to install page, click Install.
-
Click Finish to exit the installation wizard.
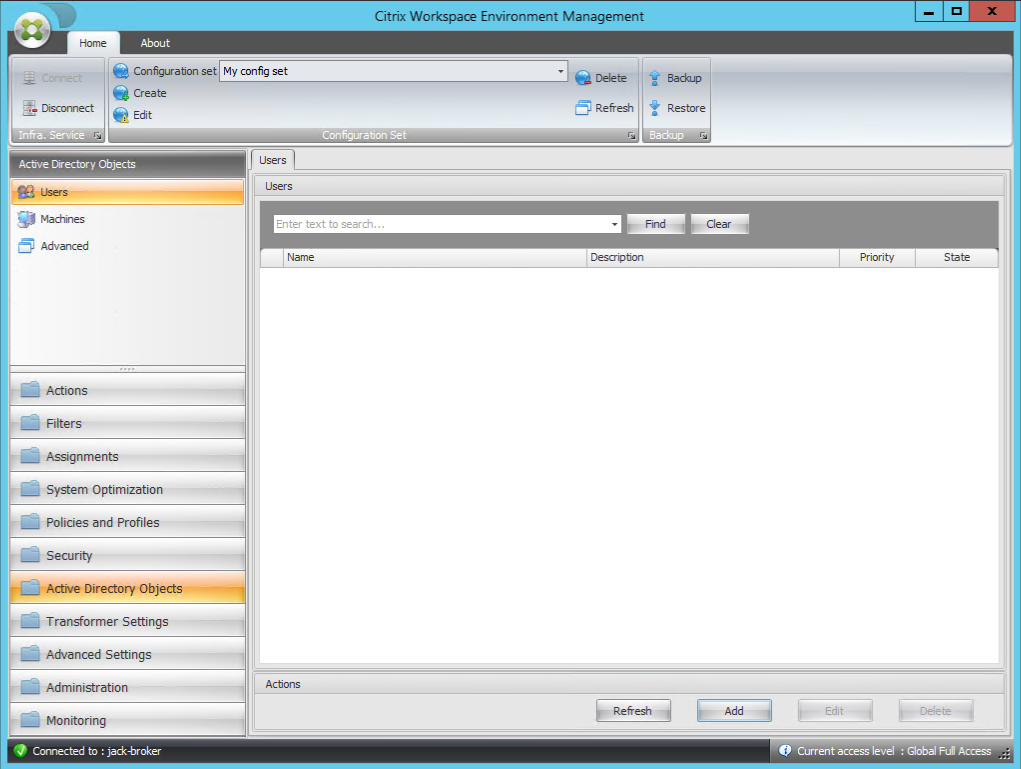
Step 8: Add the agent to the configuration set you created
-
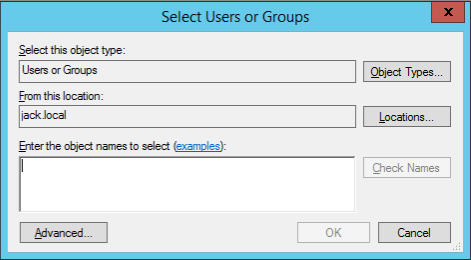
From the Start menu, open the WEM Administration Console, click Active Directory Objects, and then click Add.
-
In the Select Users or Groups window, type the name, click Check Names, and then click OK.
-
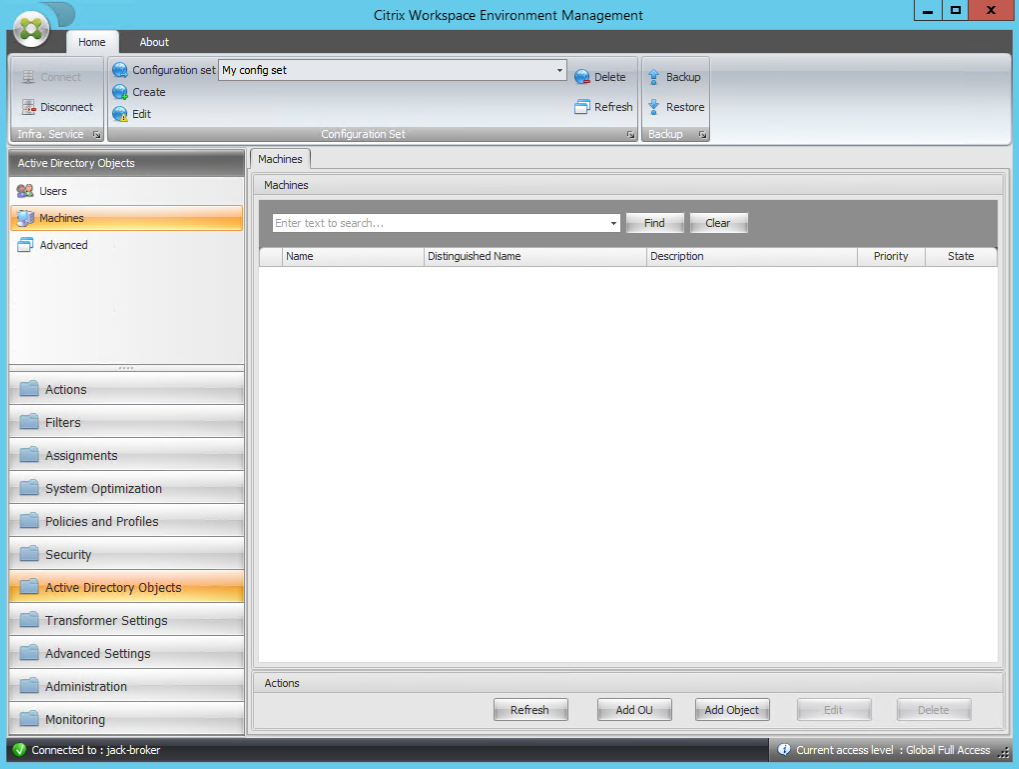
Click Machines.
-
On the Machines tab, click Add OU or Add Object to add the machines that you want to manage to the configuration set you created.
In this article
- Overview
- Prerequisites
- Installation and configuration
- Step 1: Install the infrastructure services
- Step 2: Create a WEM database
- Step 3: Configure infrastructure services
- Step 4: Install the administration console
- Step 5: Configure configuration sets
- Step 6: Add the group policy template (optional)
- Step 7: Install the agent
- Step 8: Add the agent to the configuration set you created