Scenario 2
This scenario covers how to enable App Protection for untrusted devices.
There are many definitions for trusted and untrusted devices. For this scenario, let’s consider a device trusted if the Endpoint analysis (EPA) scan is successful. All other devices are considered untrusted devices.
- Configure Adaptive Authentication.
-
Create an Authentication policy with the EPA scan using the following steps:
-
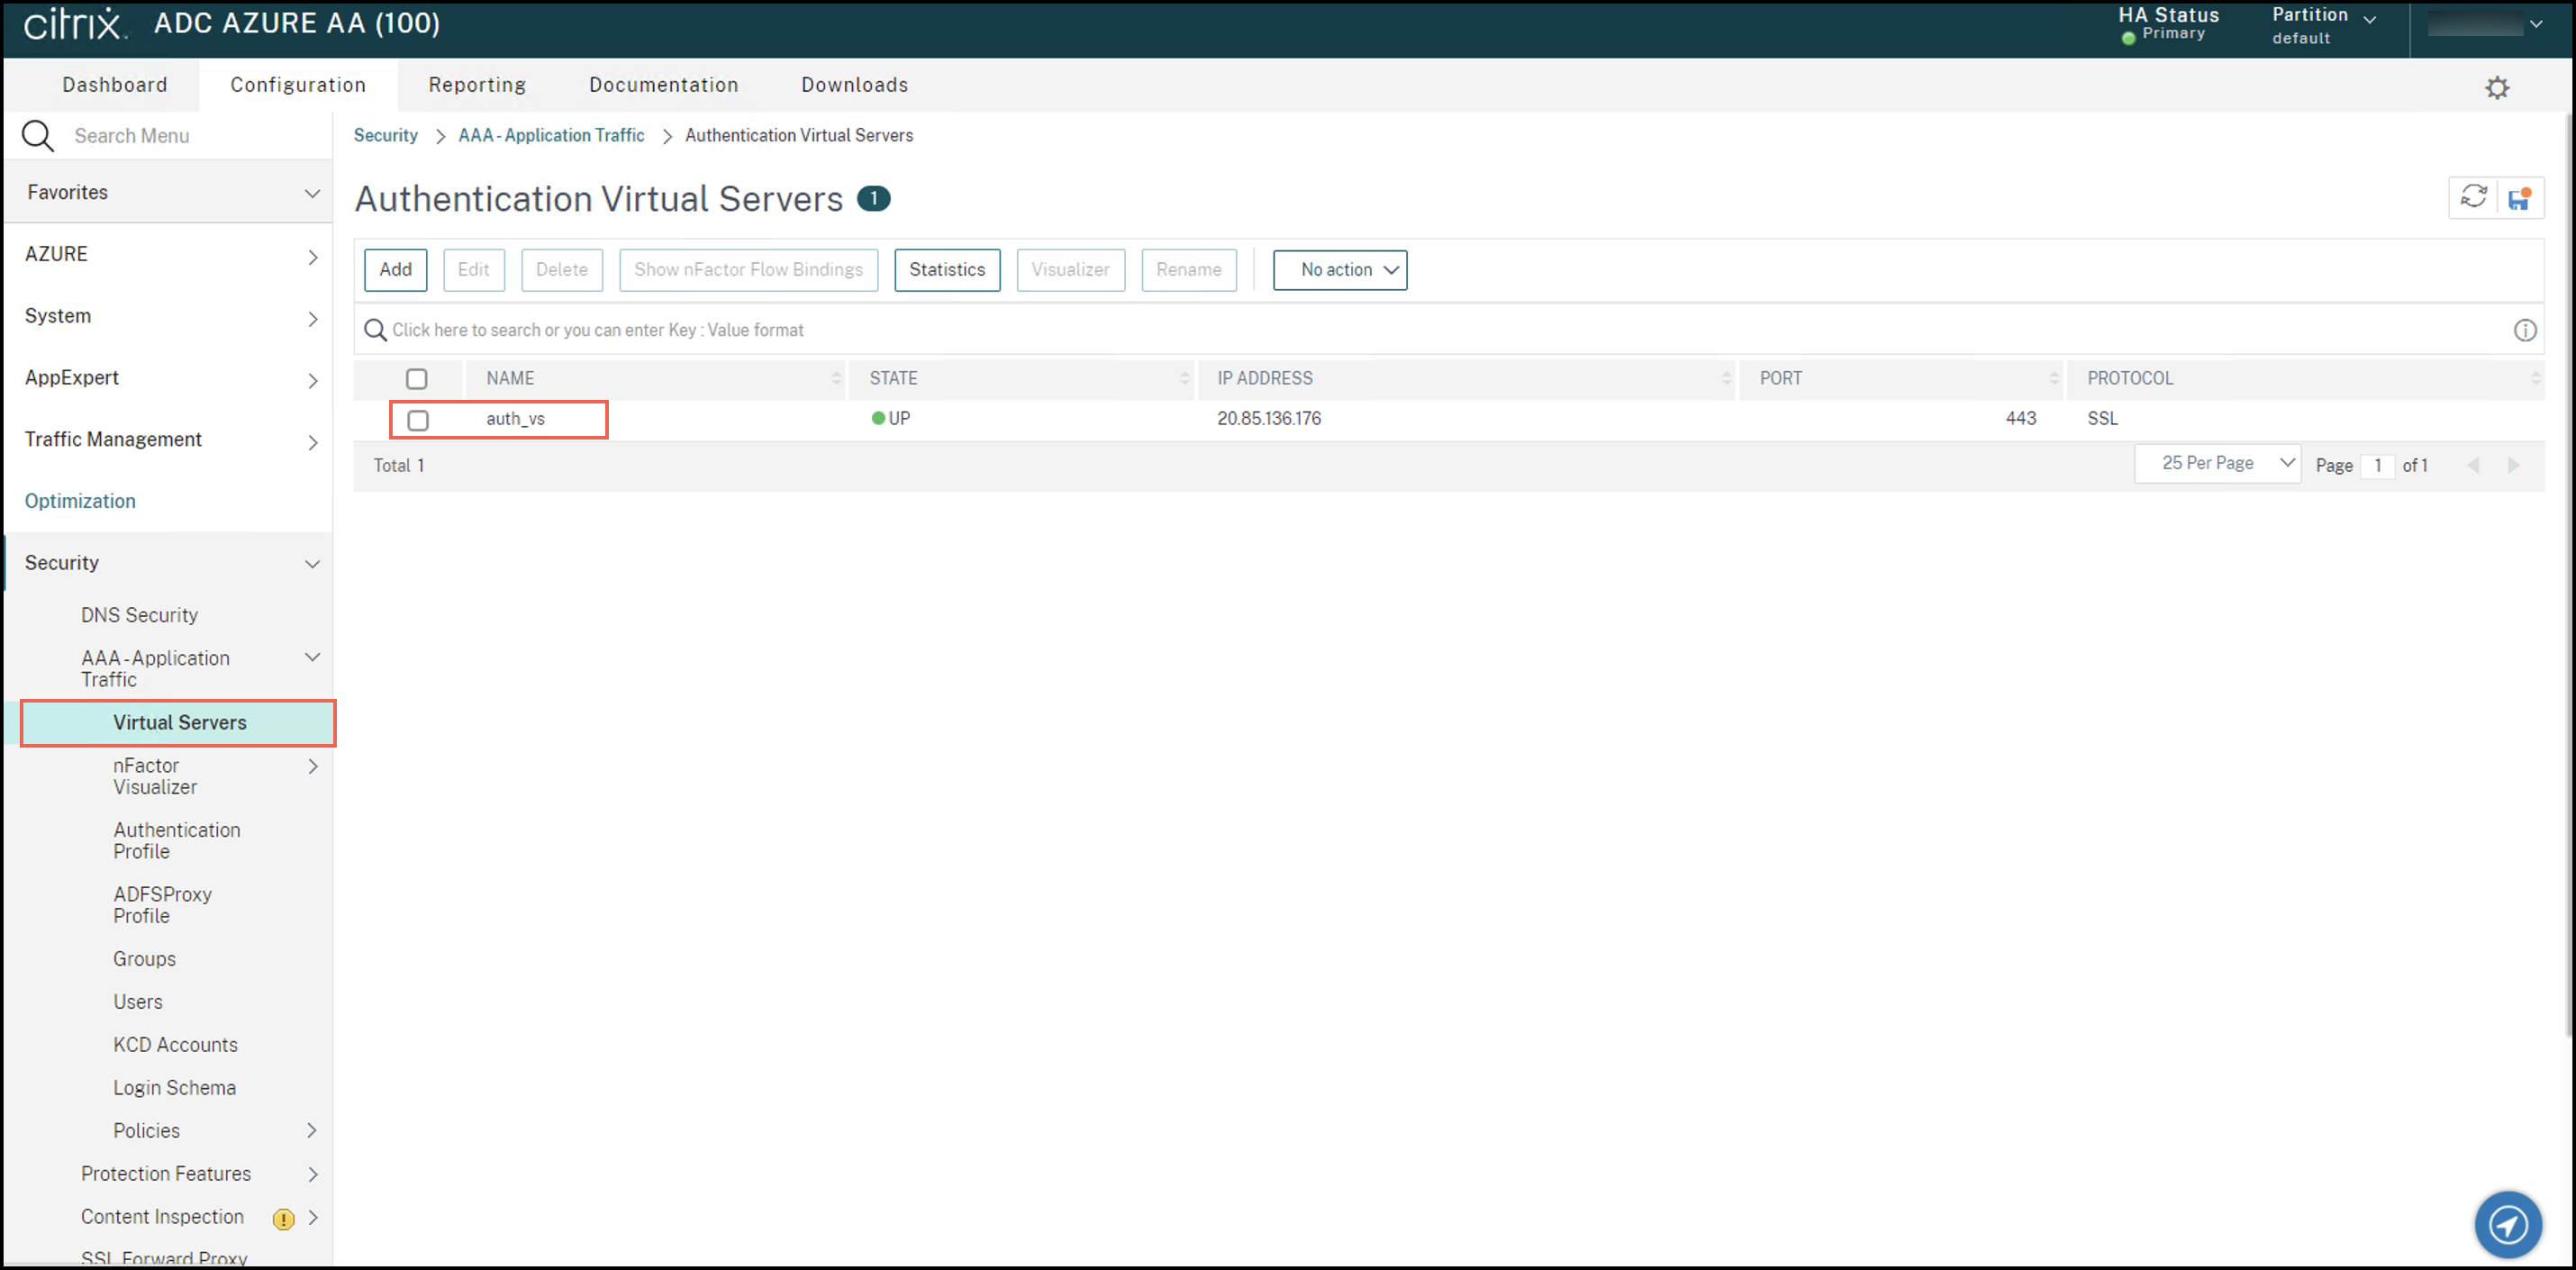
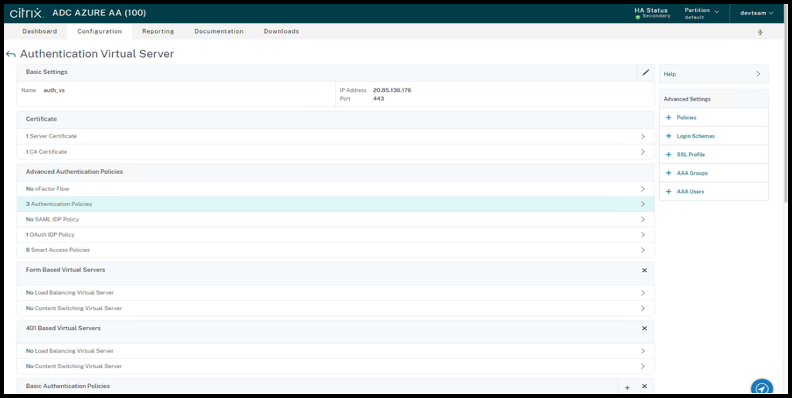
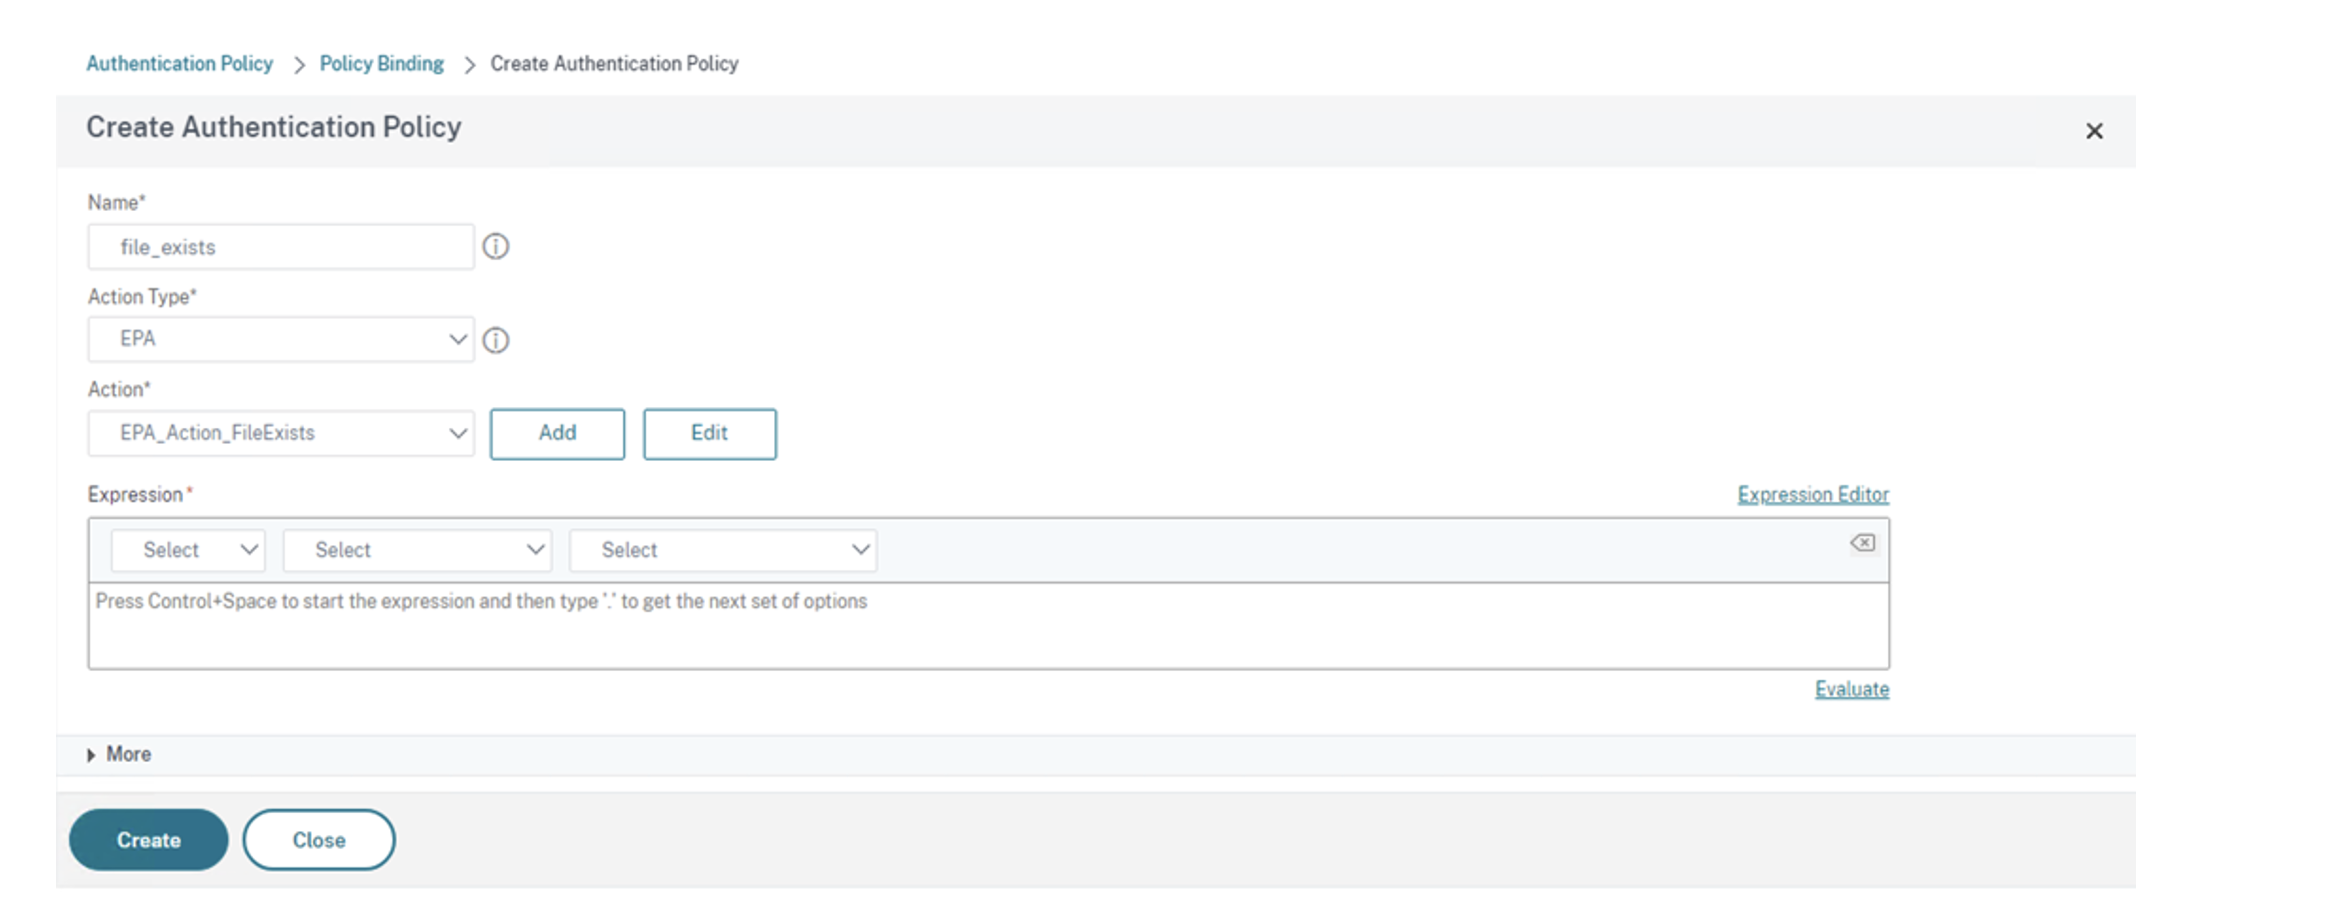
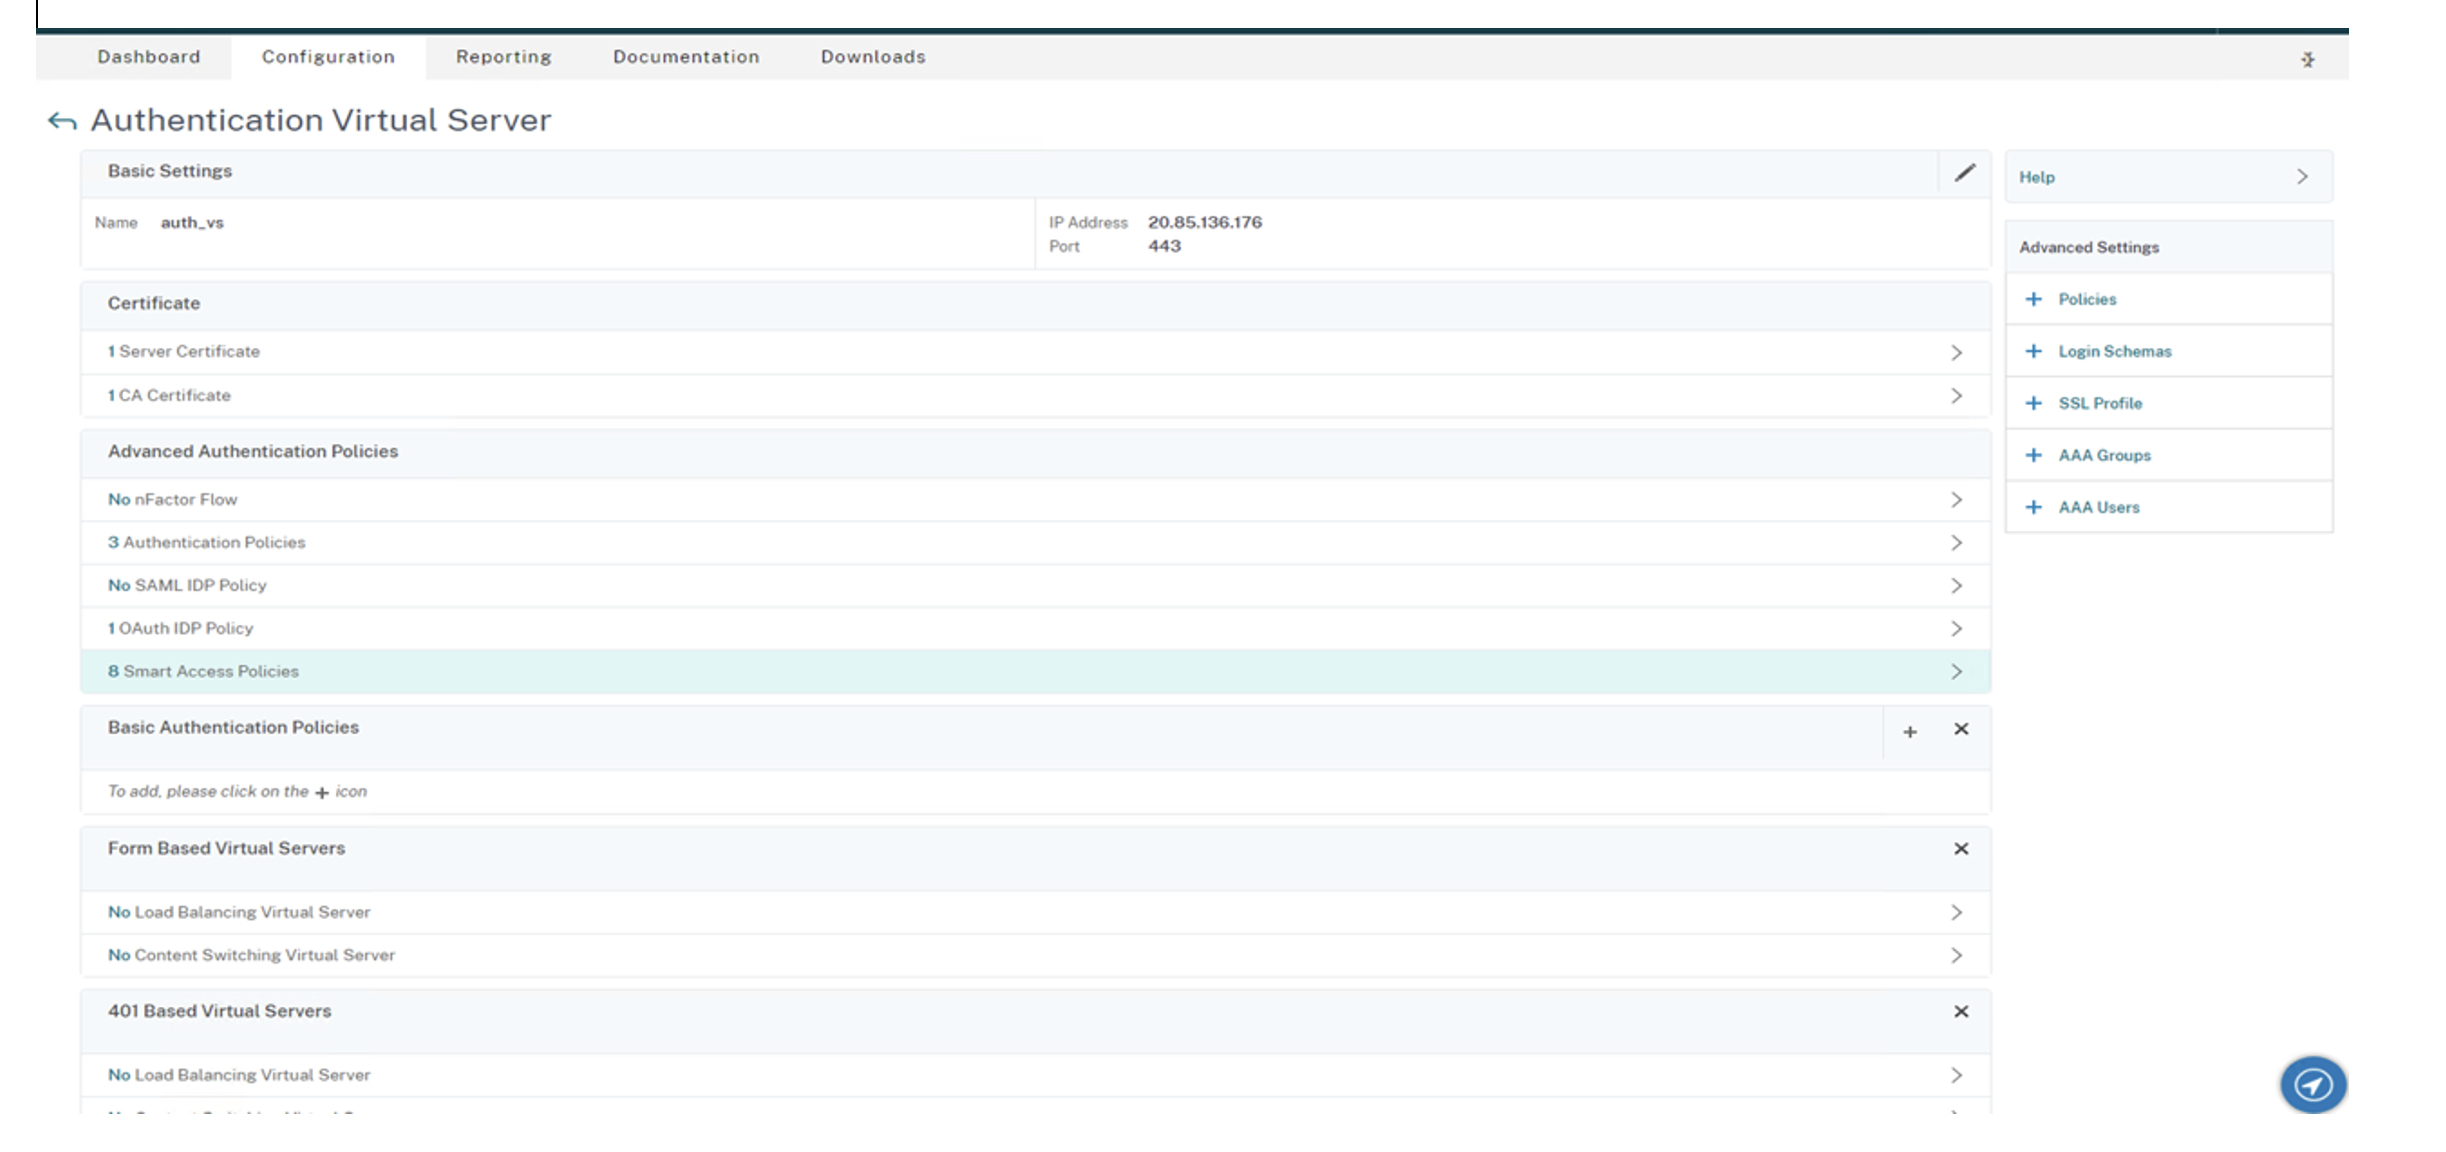
Sign in to Citrix ADC Administration UI. In the Configuration tab, navigate to Security > AAA-Application Traffic > Virtual Servers. Click the virtual server that you want to use, auth_vs in this case.
-
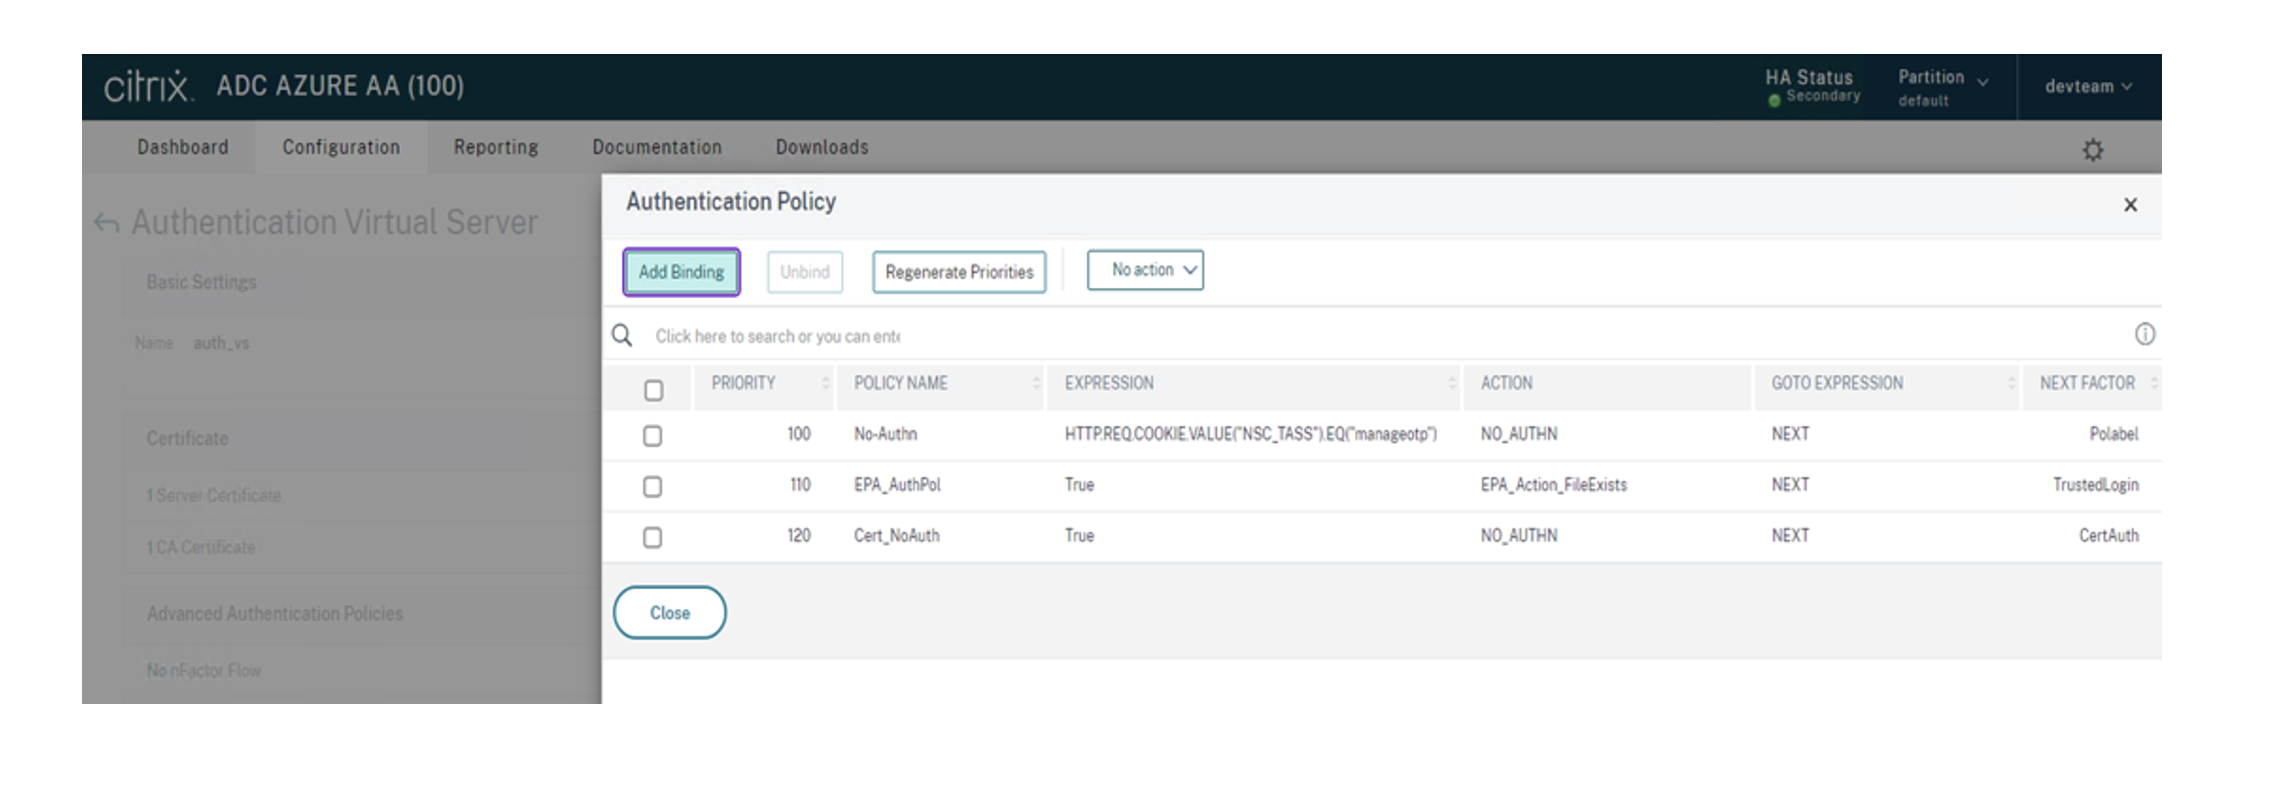
Navigate to Authentication Policies > Add Binding.
-
Click Add to create a policy.
-
Create an authentication policy based on the EPA scan. Enter the name of the policy. Select Action Type as EPA. Click Add to create action.
Create Authentication EPA Action screen appears.
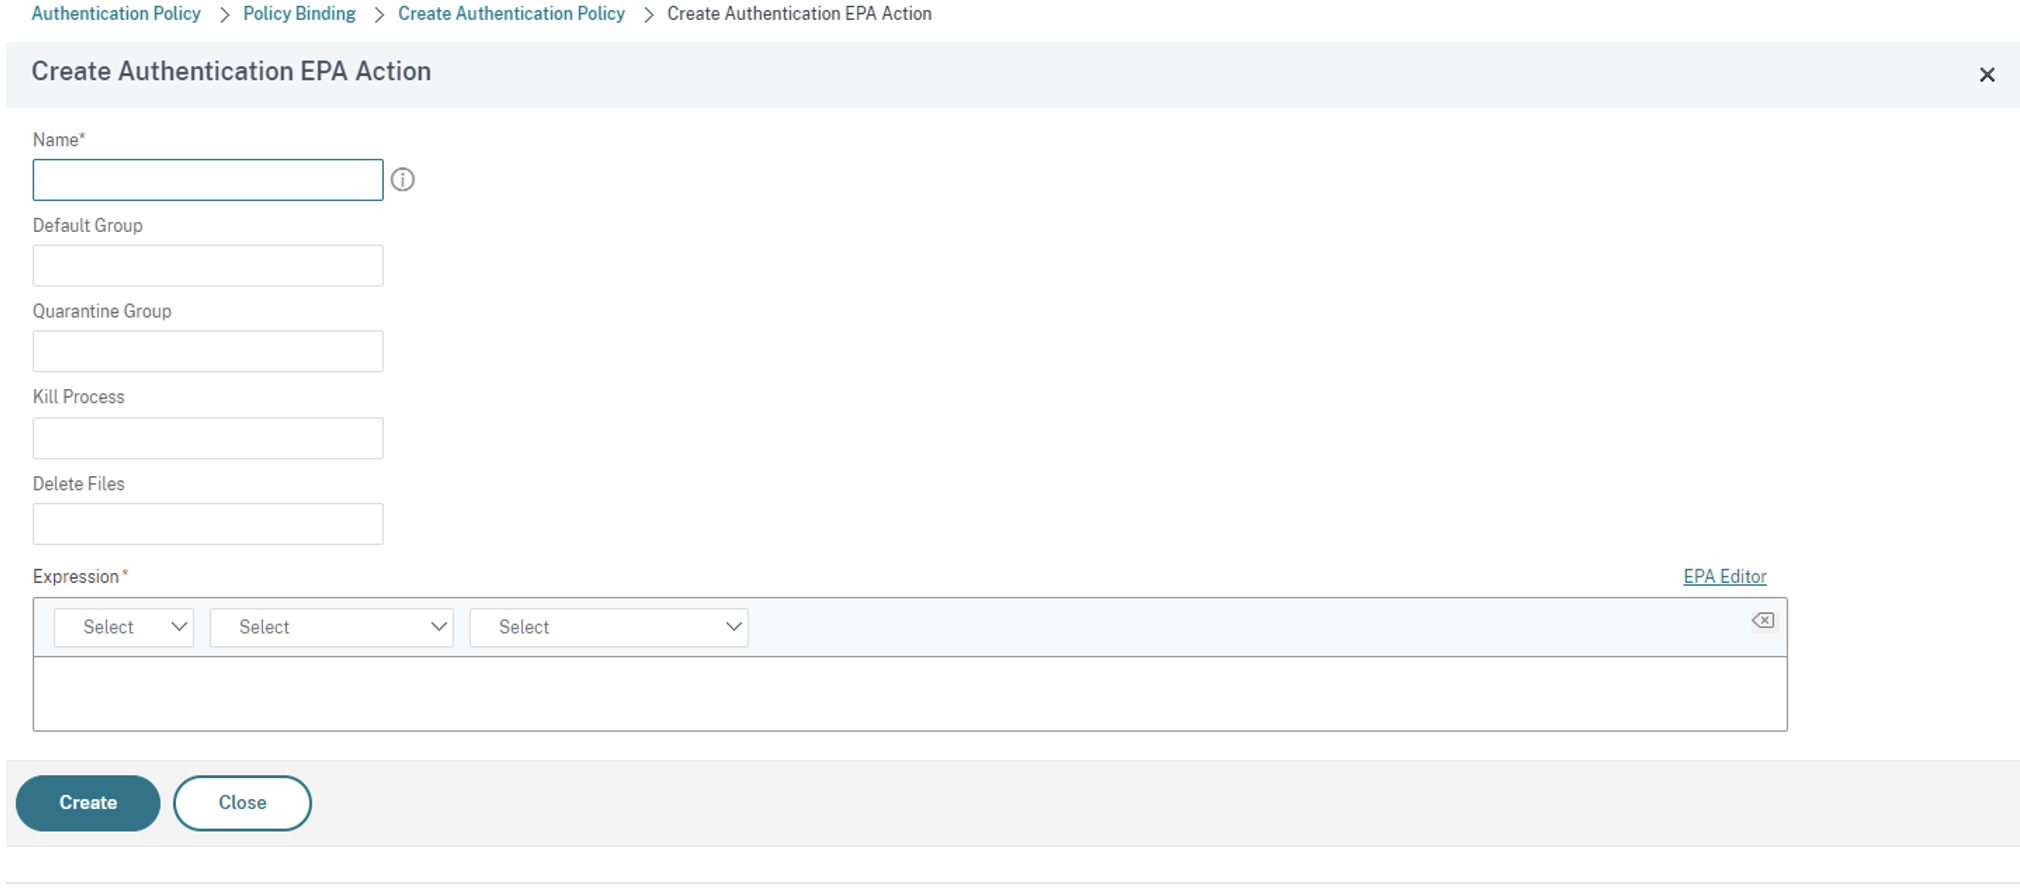
- On the Create Authentication EPA Action screen, enter the following details and click Create to create an action:
- Name: Name of the EPA action. In this case EPA_Action_FileExists.
- Default Group: Enter the default group name. If the EPA expression is True, users are added to the default group. The Default Group in this case is FileExists.
- Quarantine Group: Enter the quarantine group name. If the EPA expression is False, users are added to the quarantine group.
-
Expression: Add the EPA expression that you want to scan. In this example, we consider the EPA scan to be successful if a particular file is present:
sys.client_expr("file_0_C:\\\\epa\\\\avinstalled.txt")
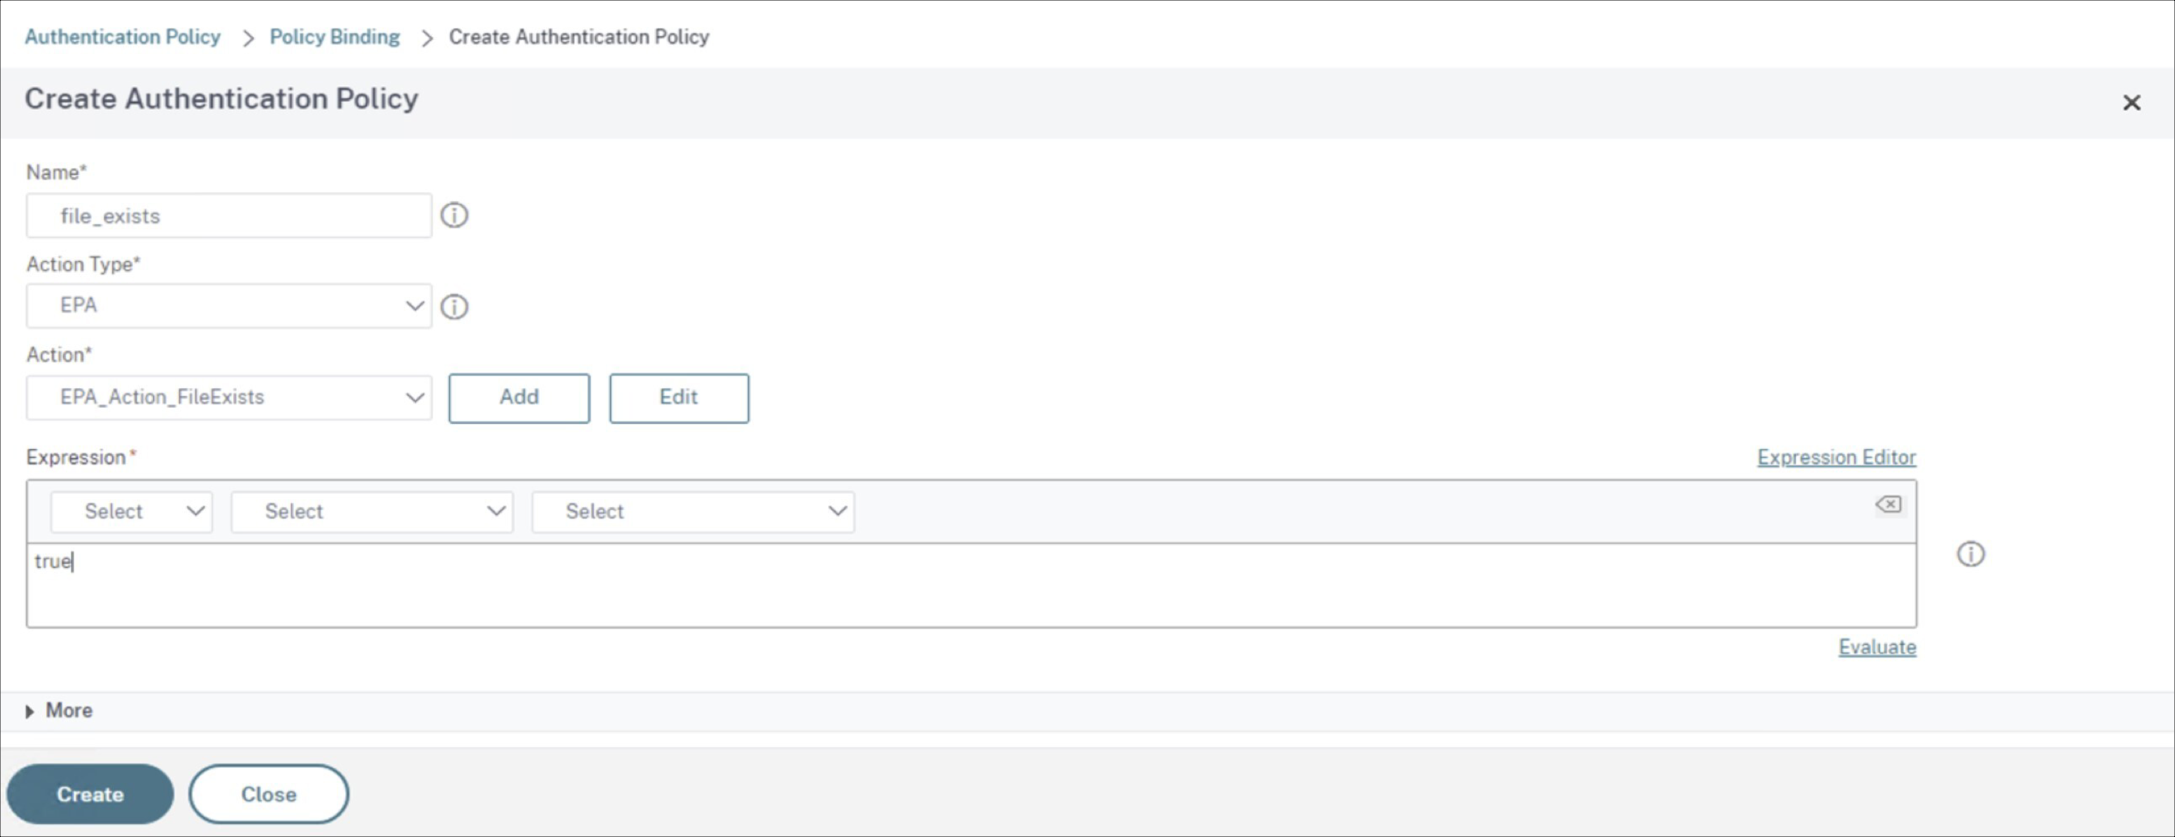
You return to the Create Authentication Policy screen.
-
Enter true in the Expression editor, and click Create.
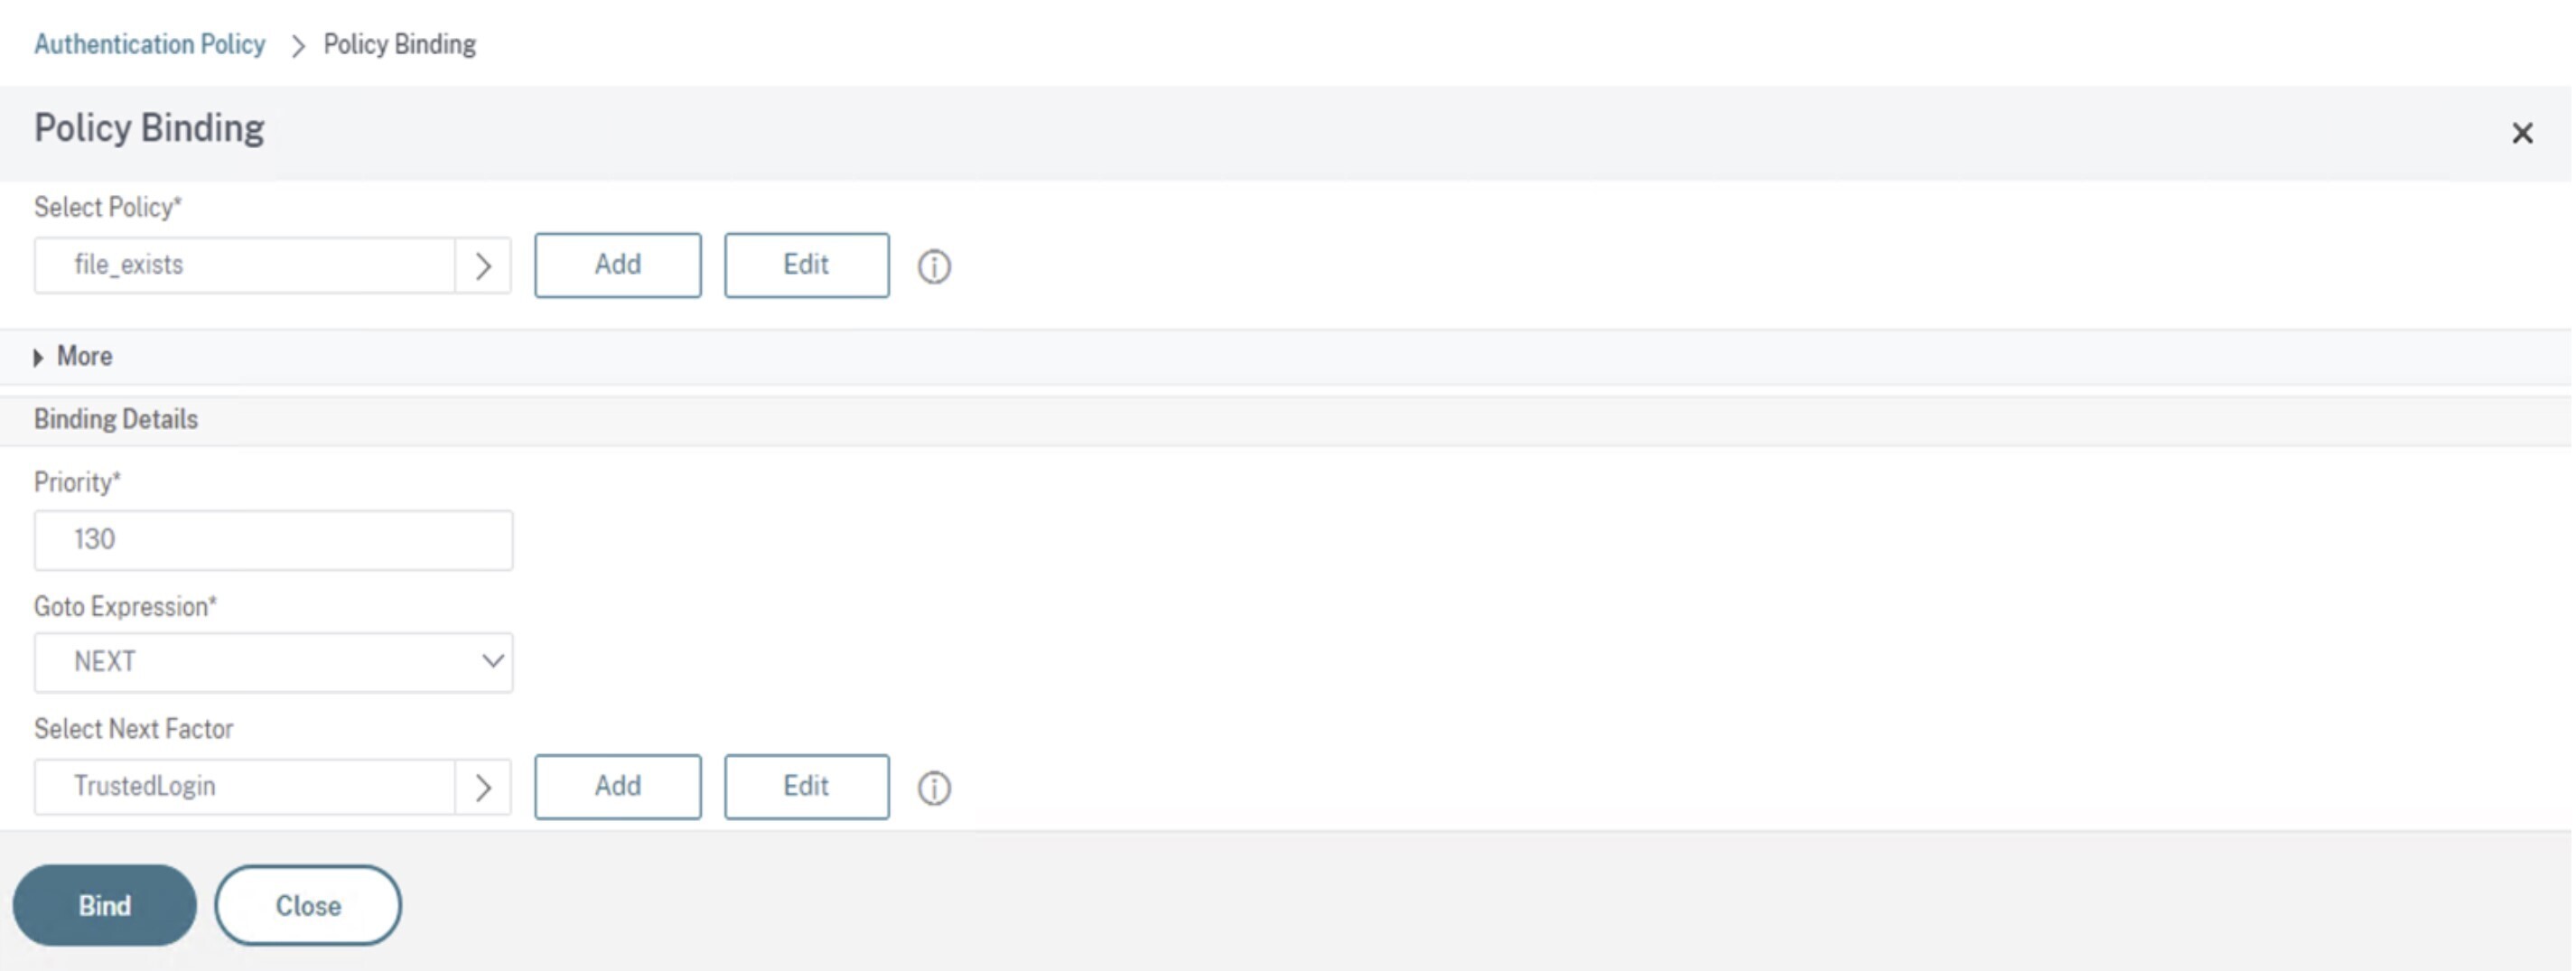
You return to the Policy Binding screen.
-
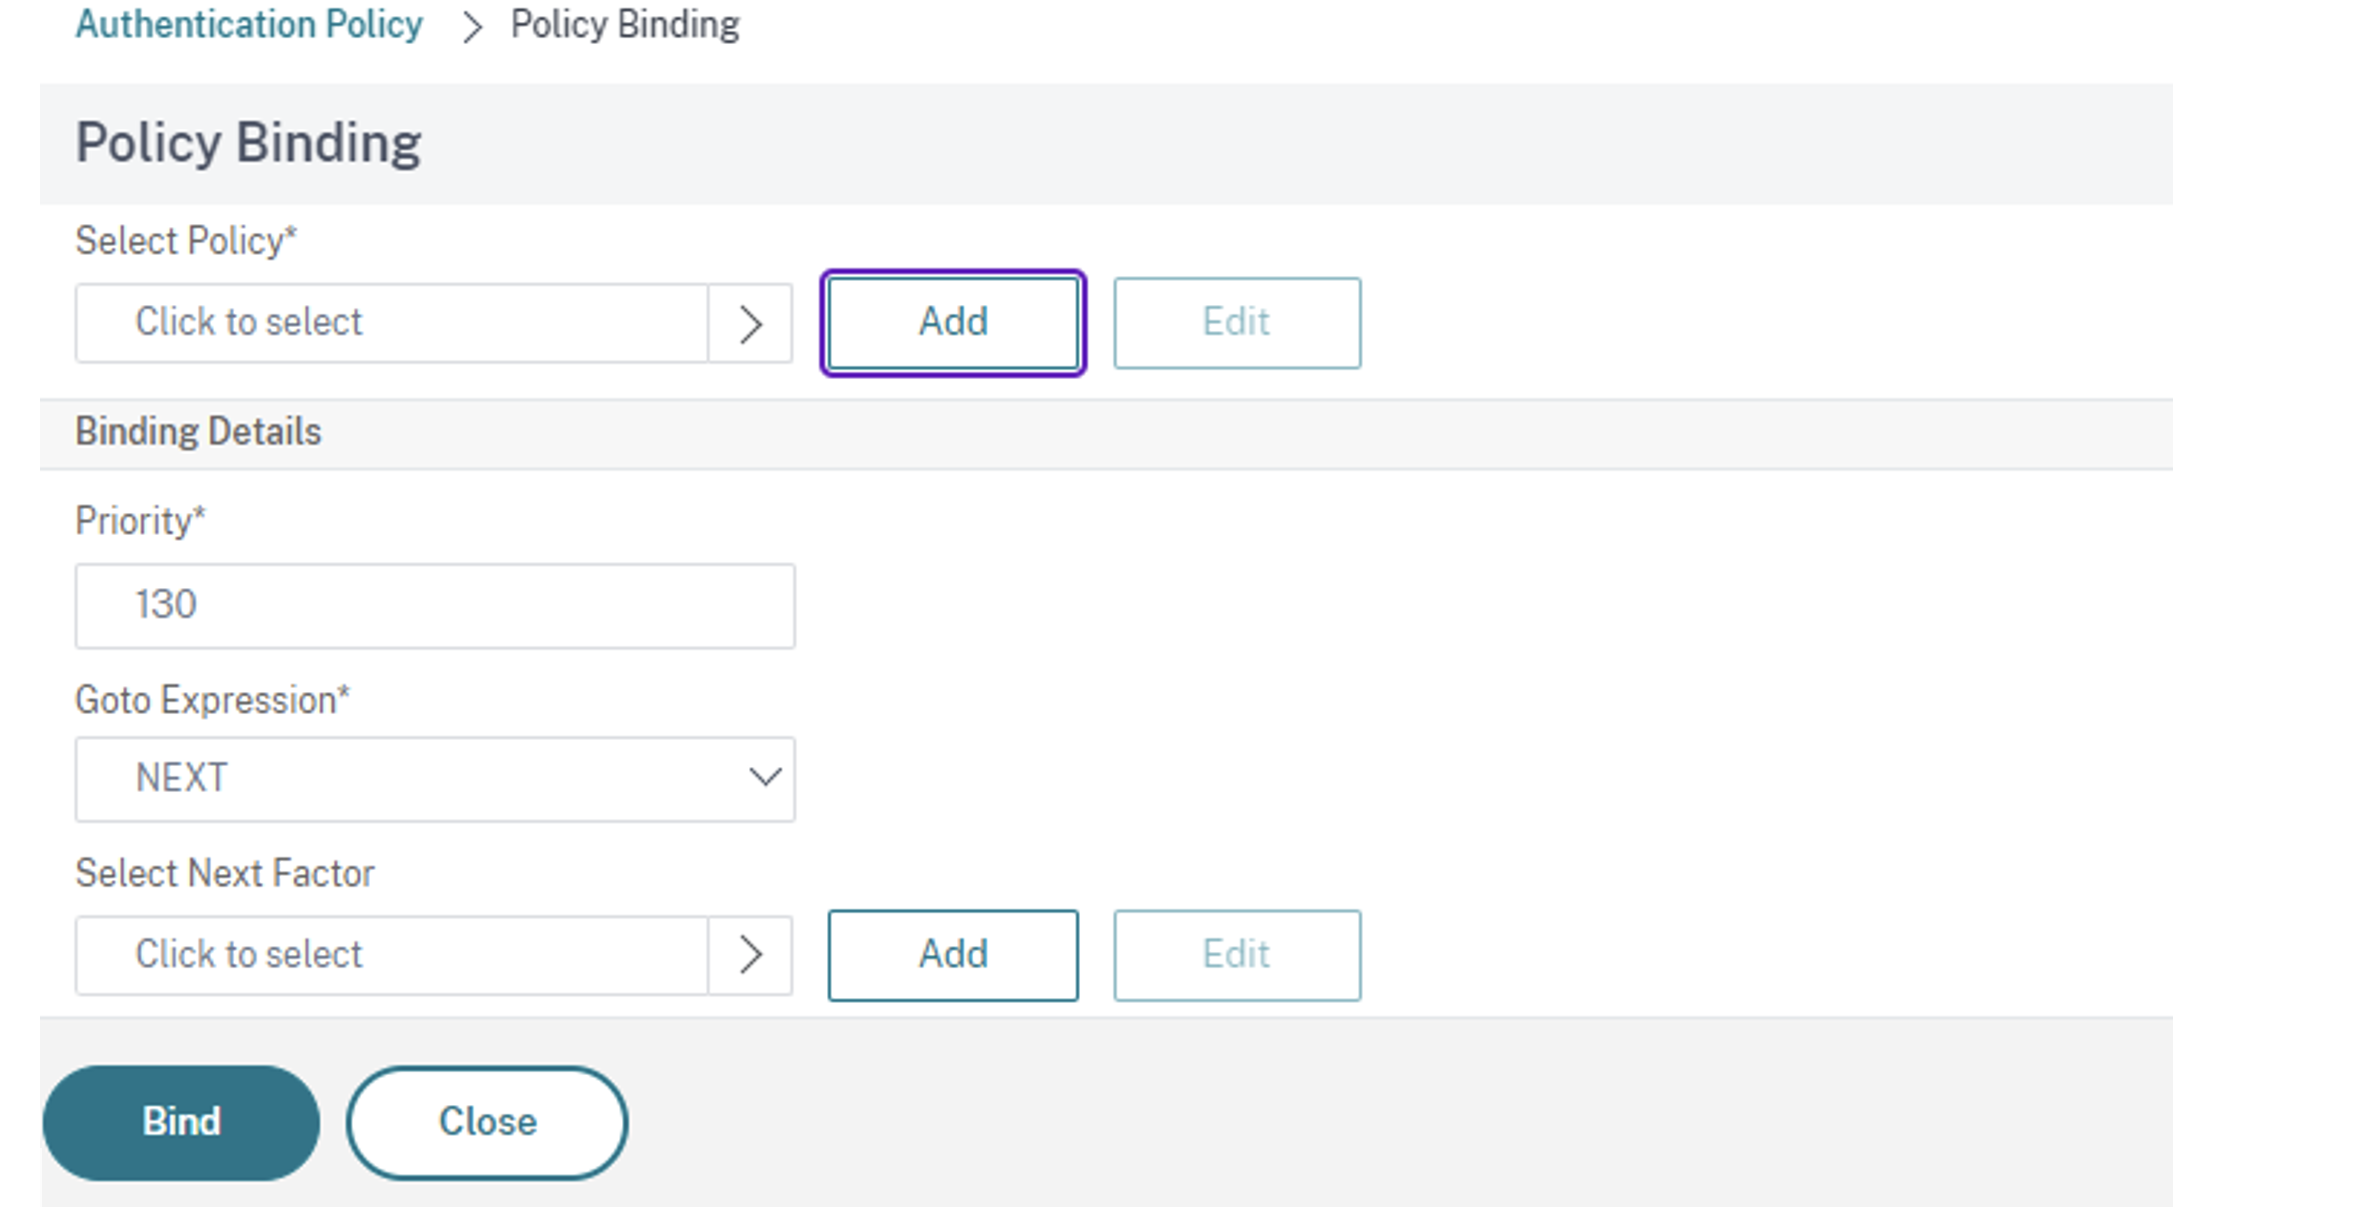
On the Policy Binding screen, do the following:
-
Select the Goto Expression as NEXT.
-
In the Select Next Factor section, select the LDAP policy that you’ve configured for the authentication in the Application Delivery Controller™ (ADC).
-
Click Bind.
-
-
-
Create a Smart Access Policy for trusted devices:
-
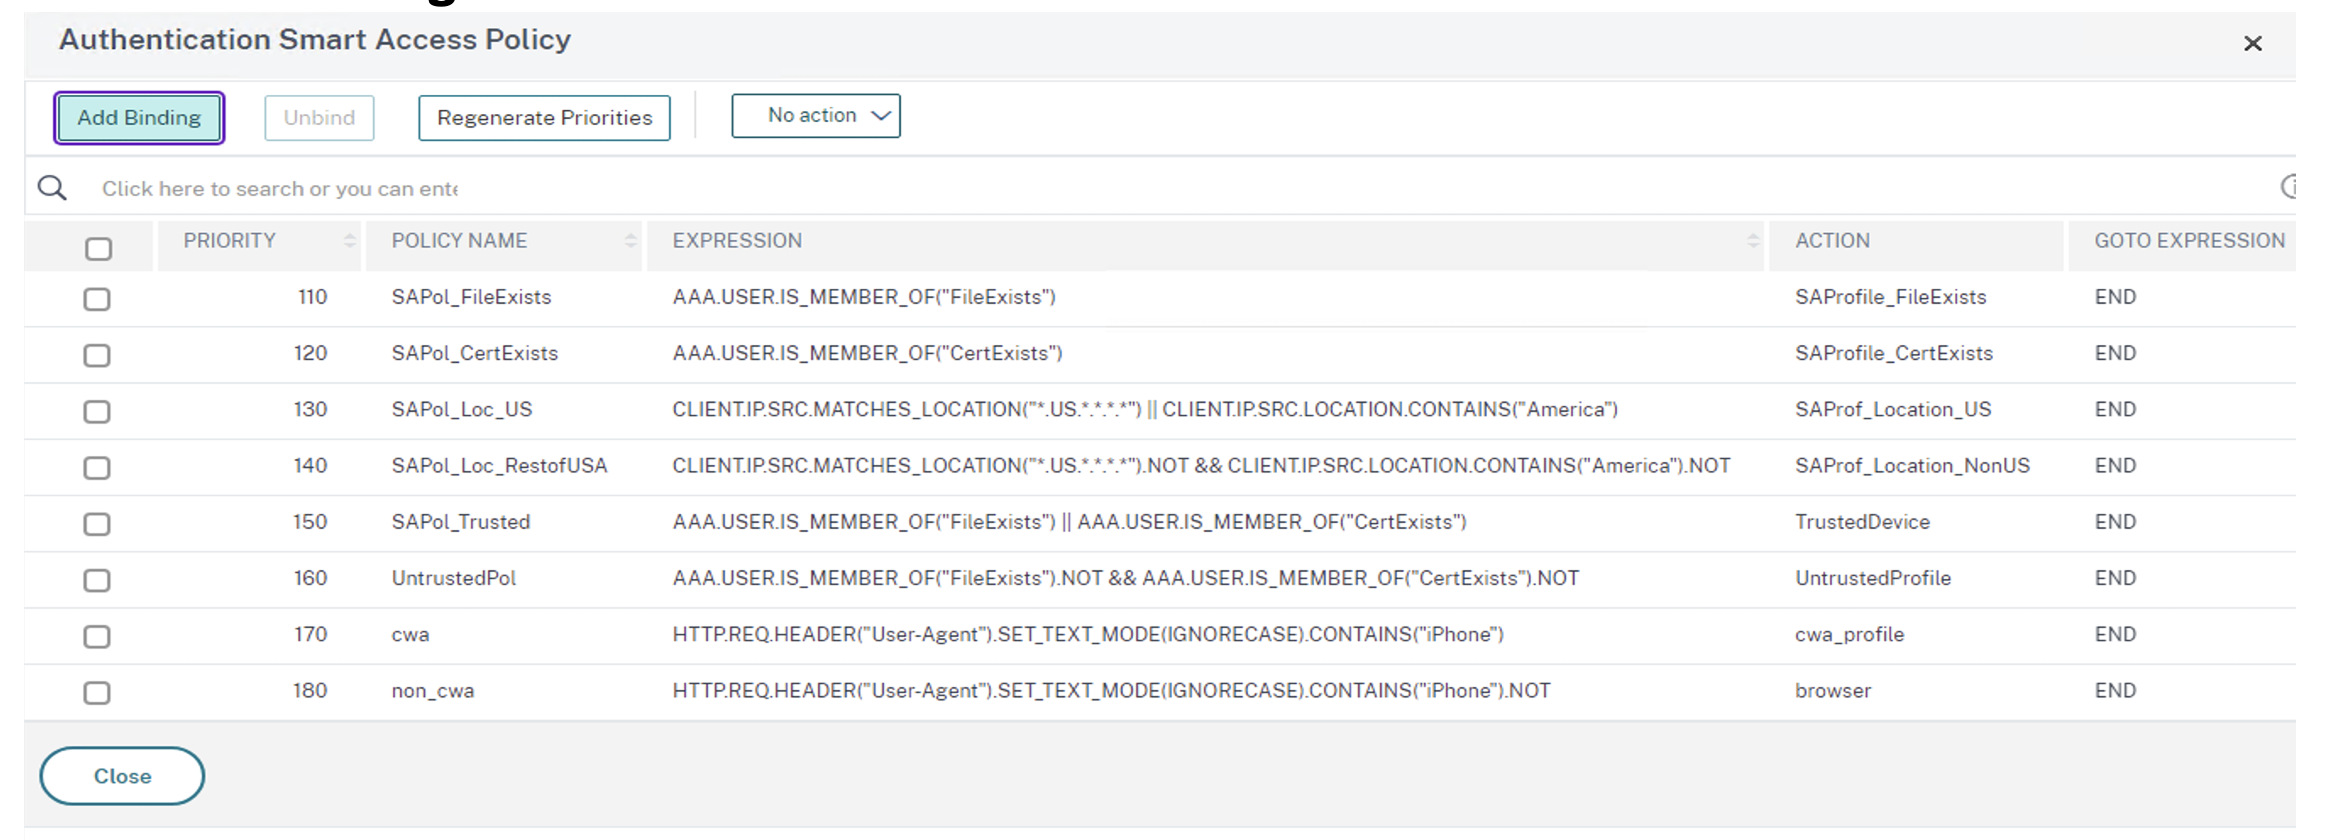
Select Smart Access Policies on the Authentication Virtual Server page of the auth_vs server.
-
Click Add Binding.
-
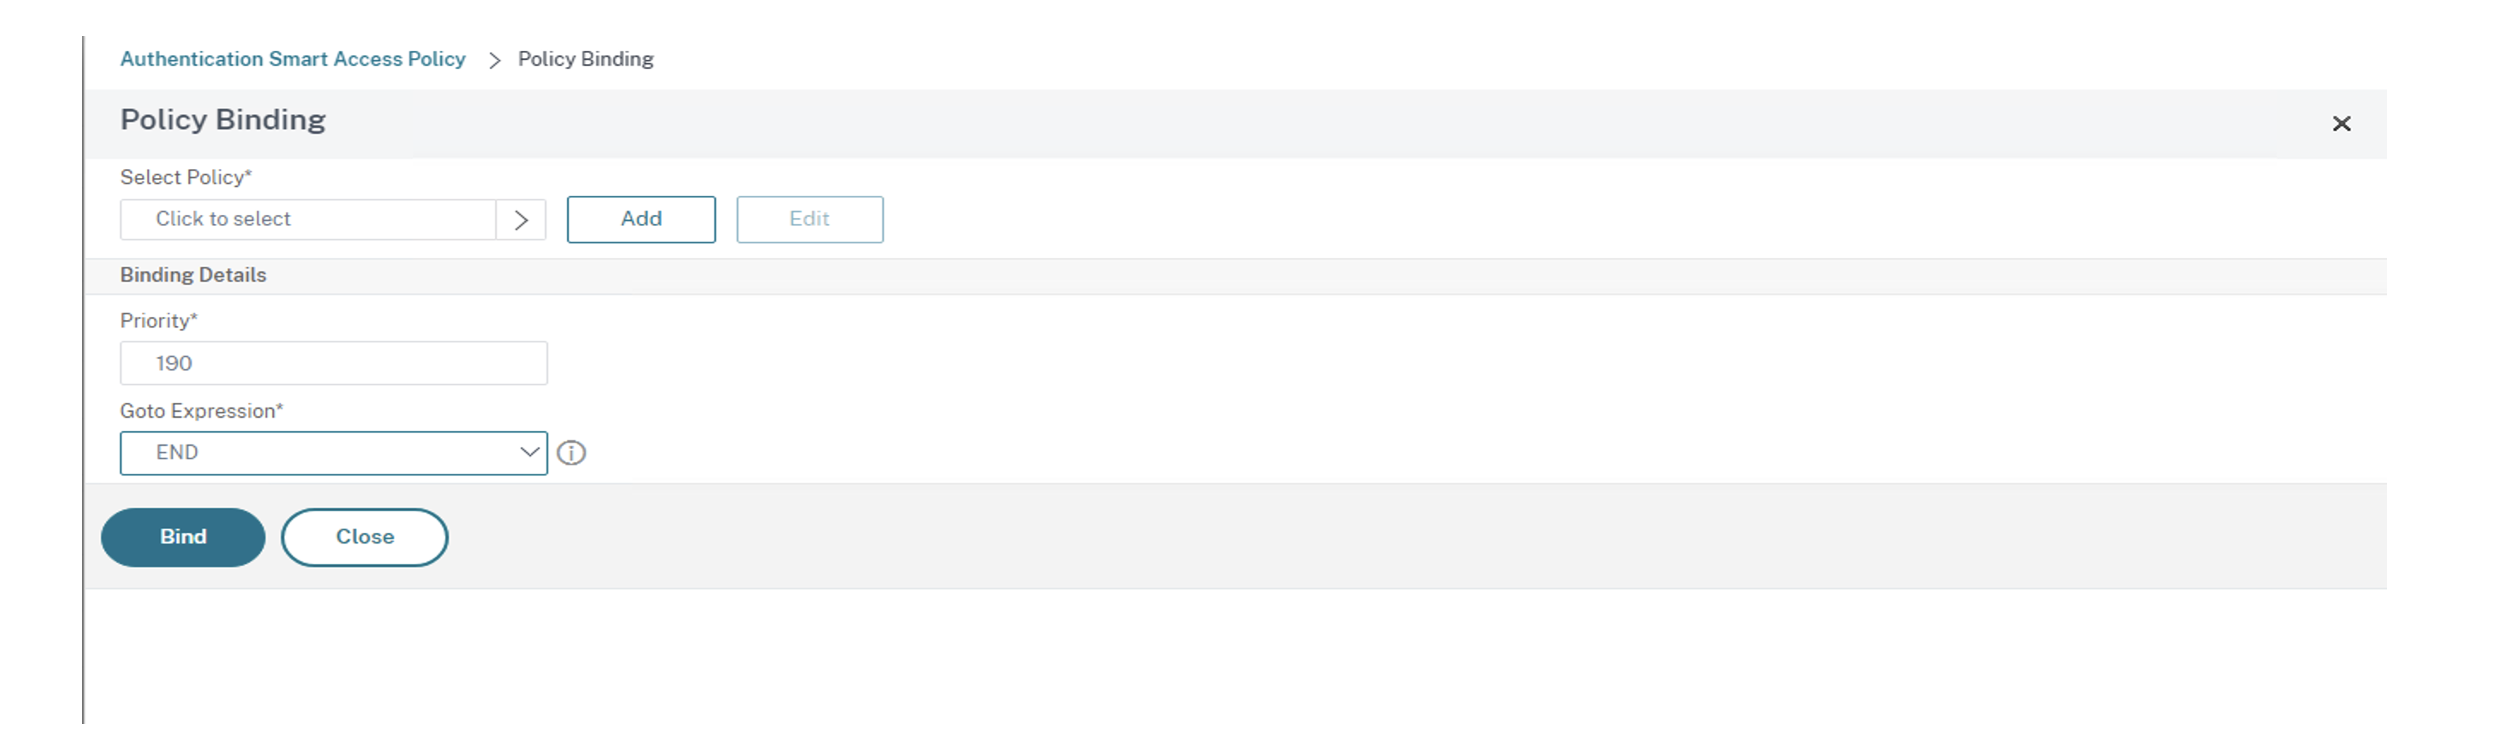
On the Policy Binding screen, click Add in the Select Policy section.
The Create Authentication Smart Access Policy screen appears.
-
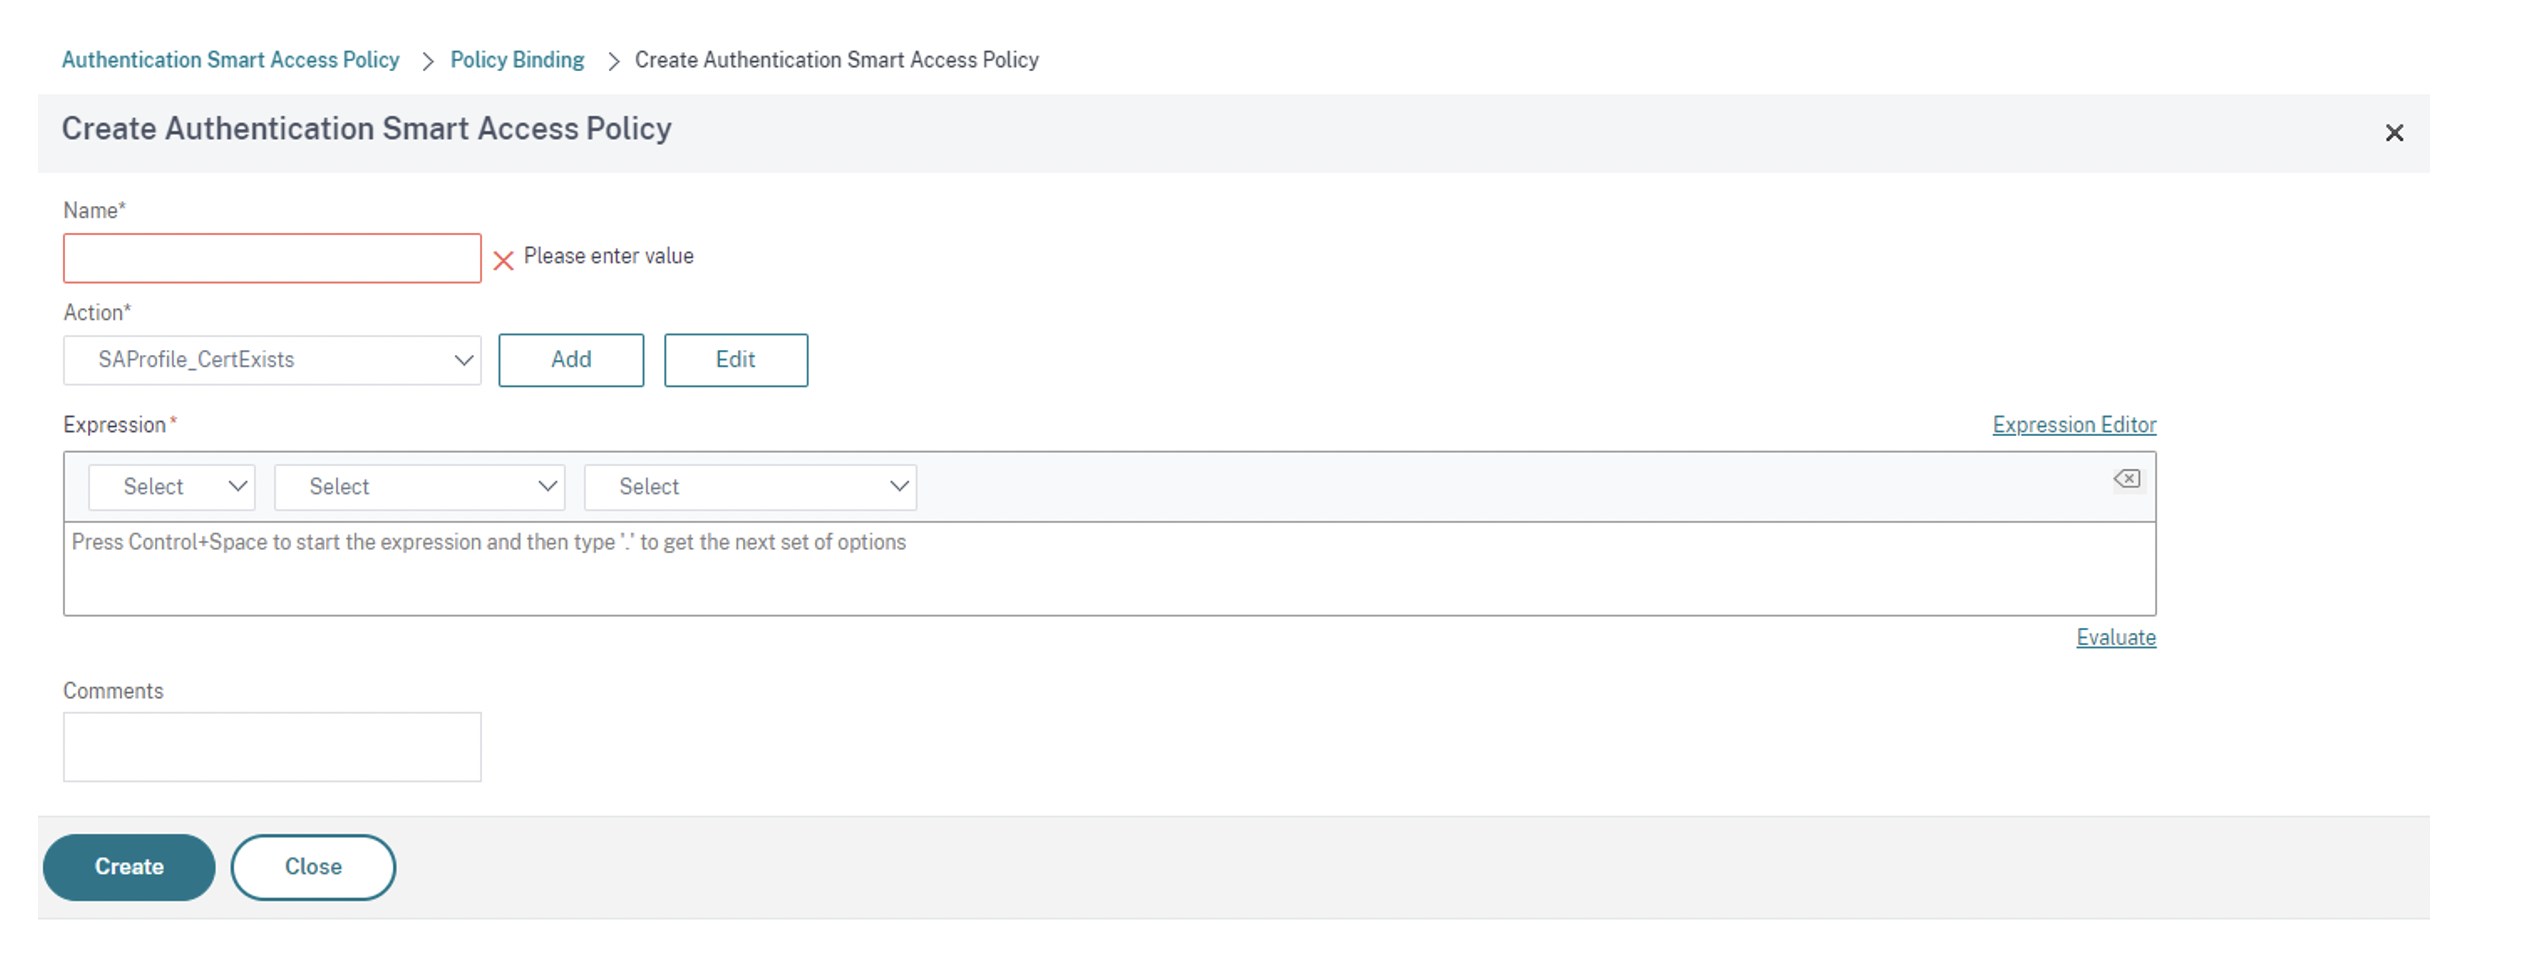
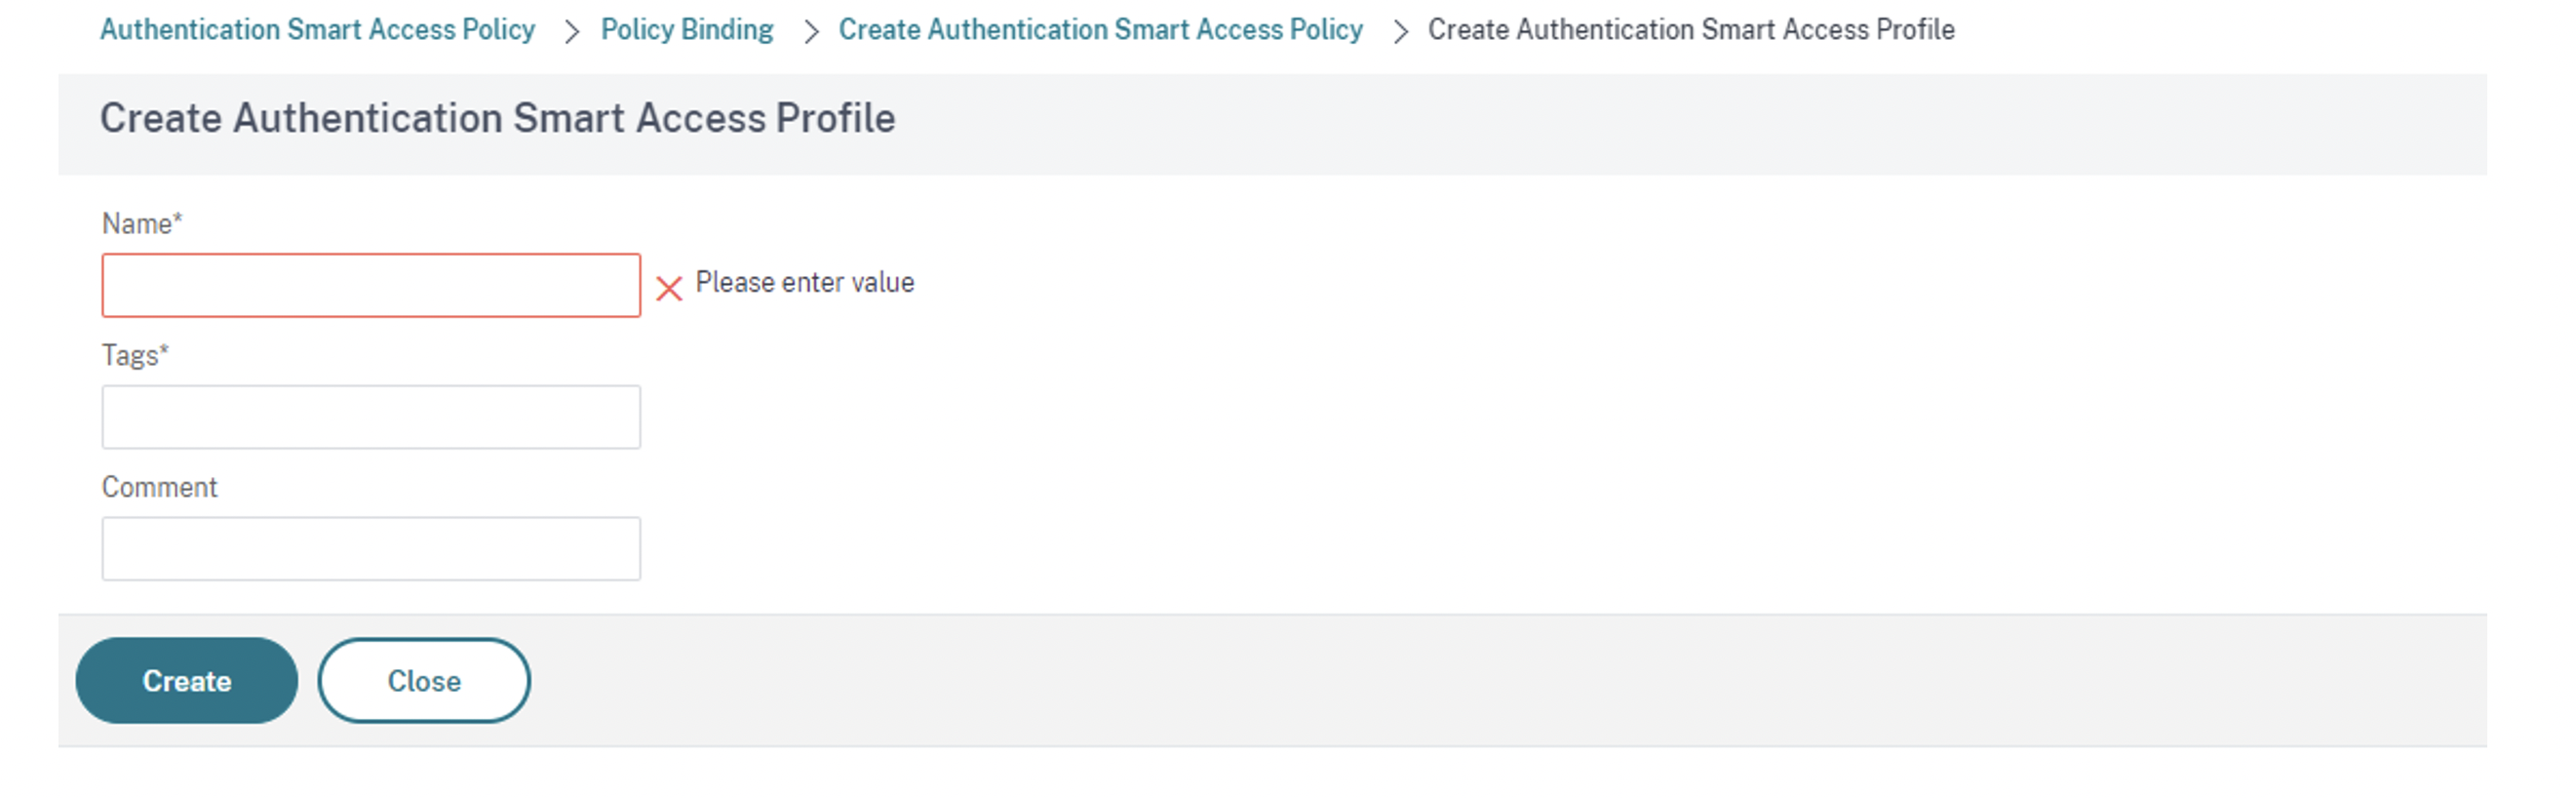
On the Create Authentication Smart Access Policy screen, enter Name for the Smart Access Policy and click Add to create a Smart Access Profile.
The Create Authentication Smart Access Profile screen appears.
-
Add Name for the action. Enter trusted in Tags. The tag is later referenced in the Broker Access Policy rule for configuring. Click Create.
You return to the Create Authentication Smart Access Policy screen.
-
In the Expression section, enter the expression for which you want to push the tag. In this case, since the tag is pushed for trusted devices, enter
AAA.USER.IS_MEMBER_OF("FileExists"). Click Create.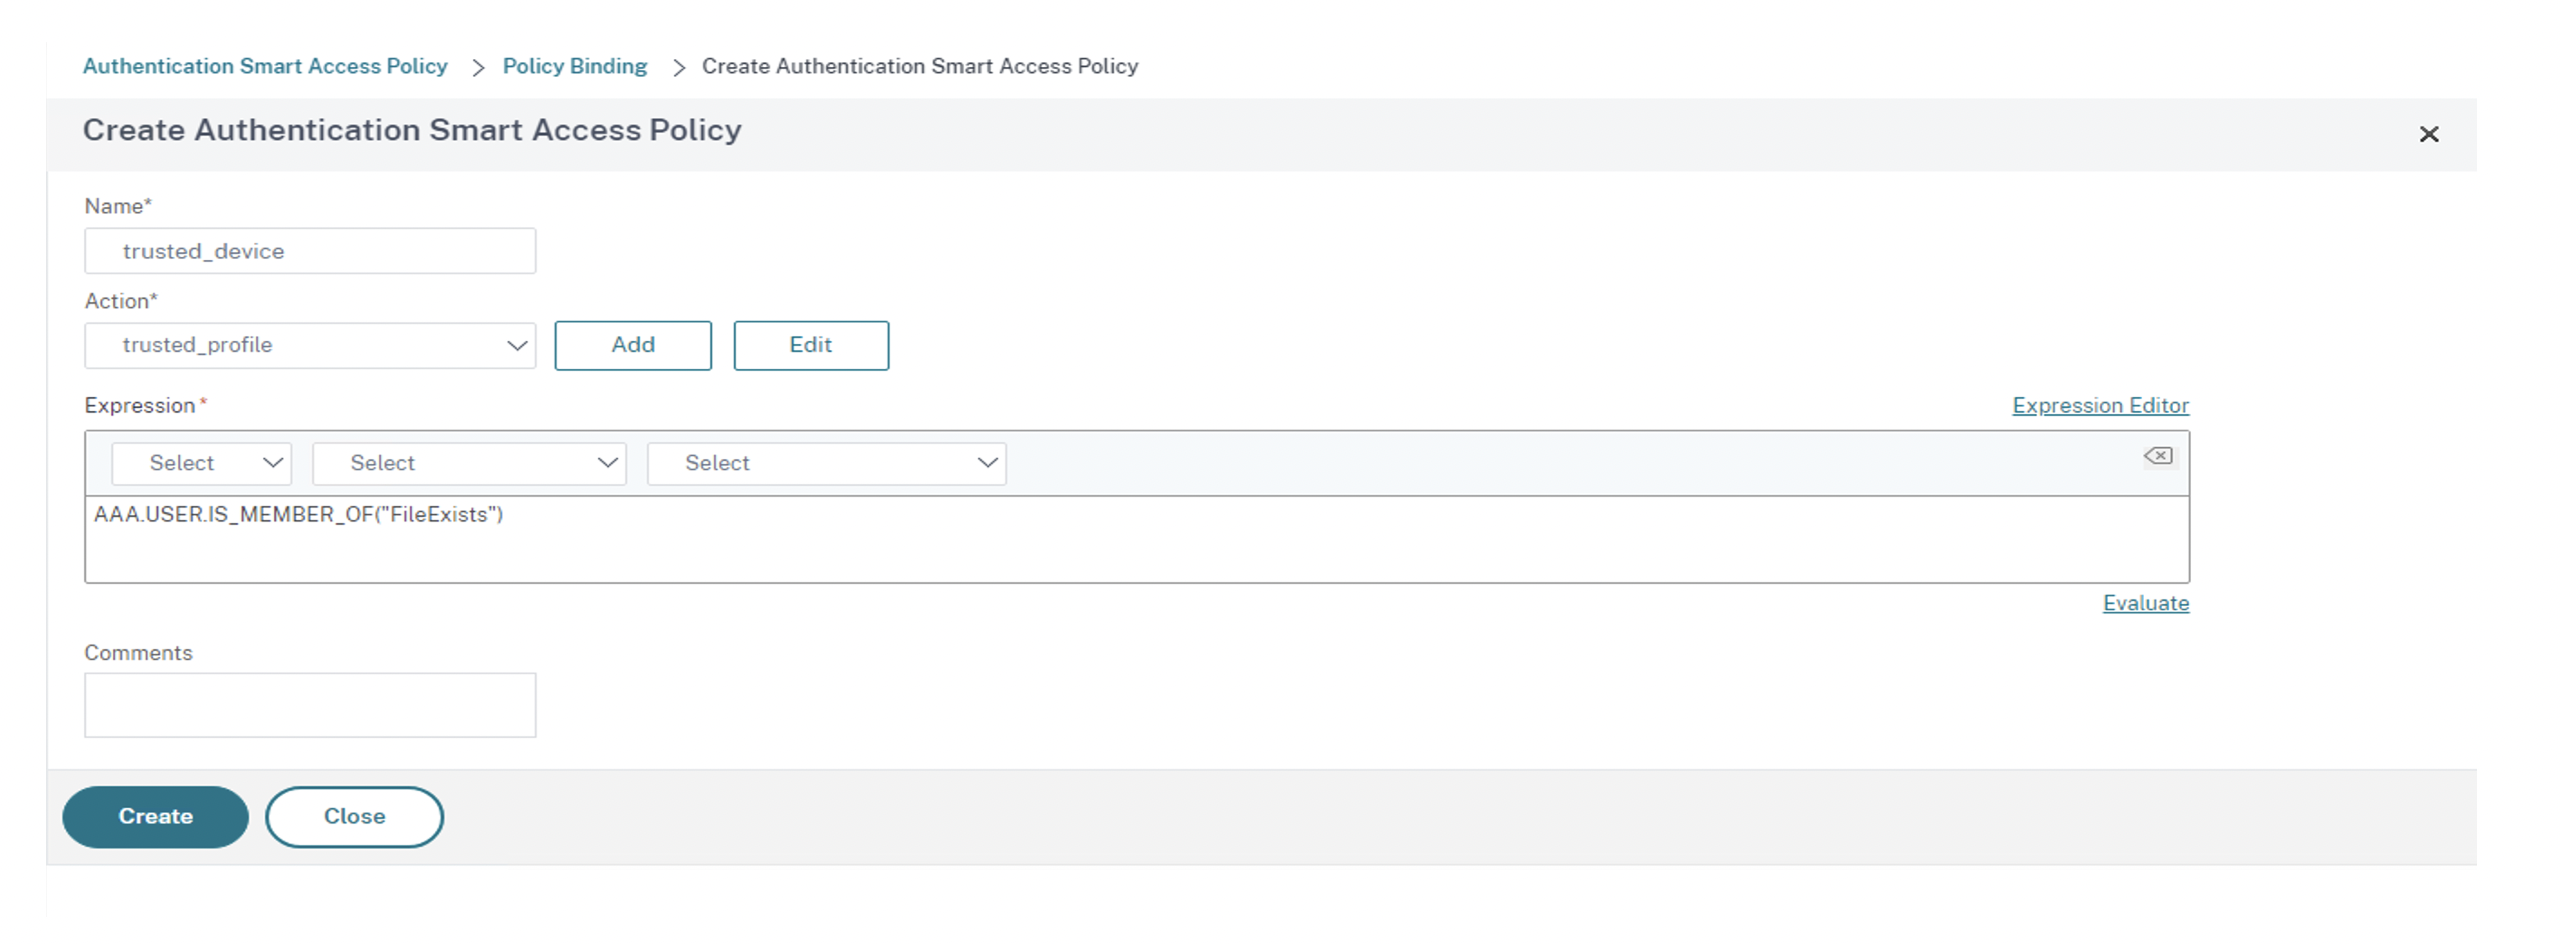
You return to the Policy Binding screen.
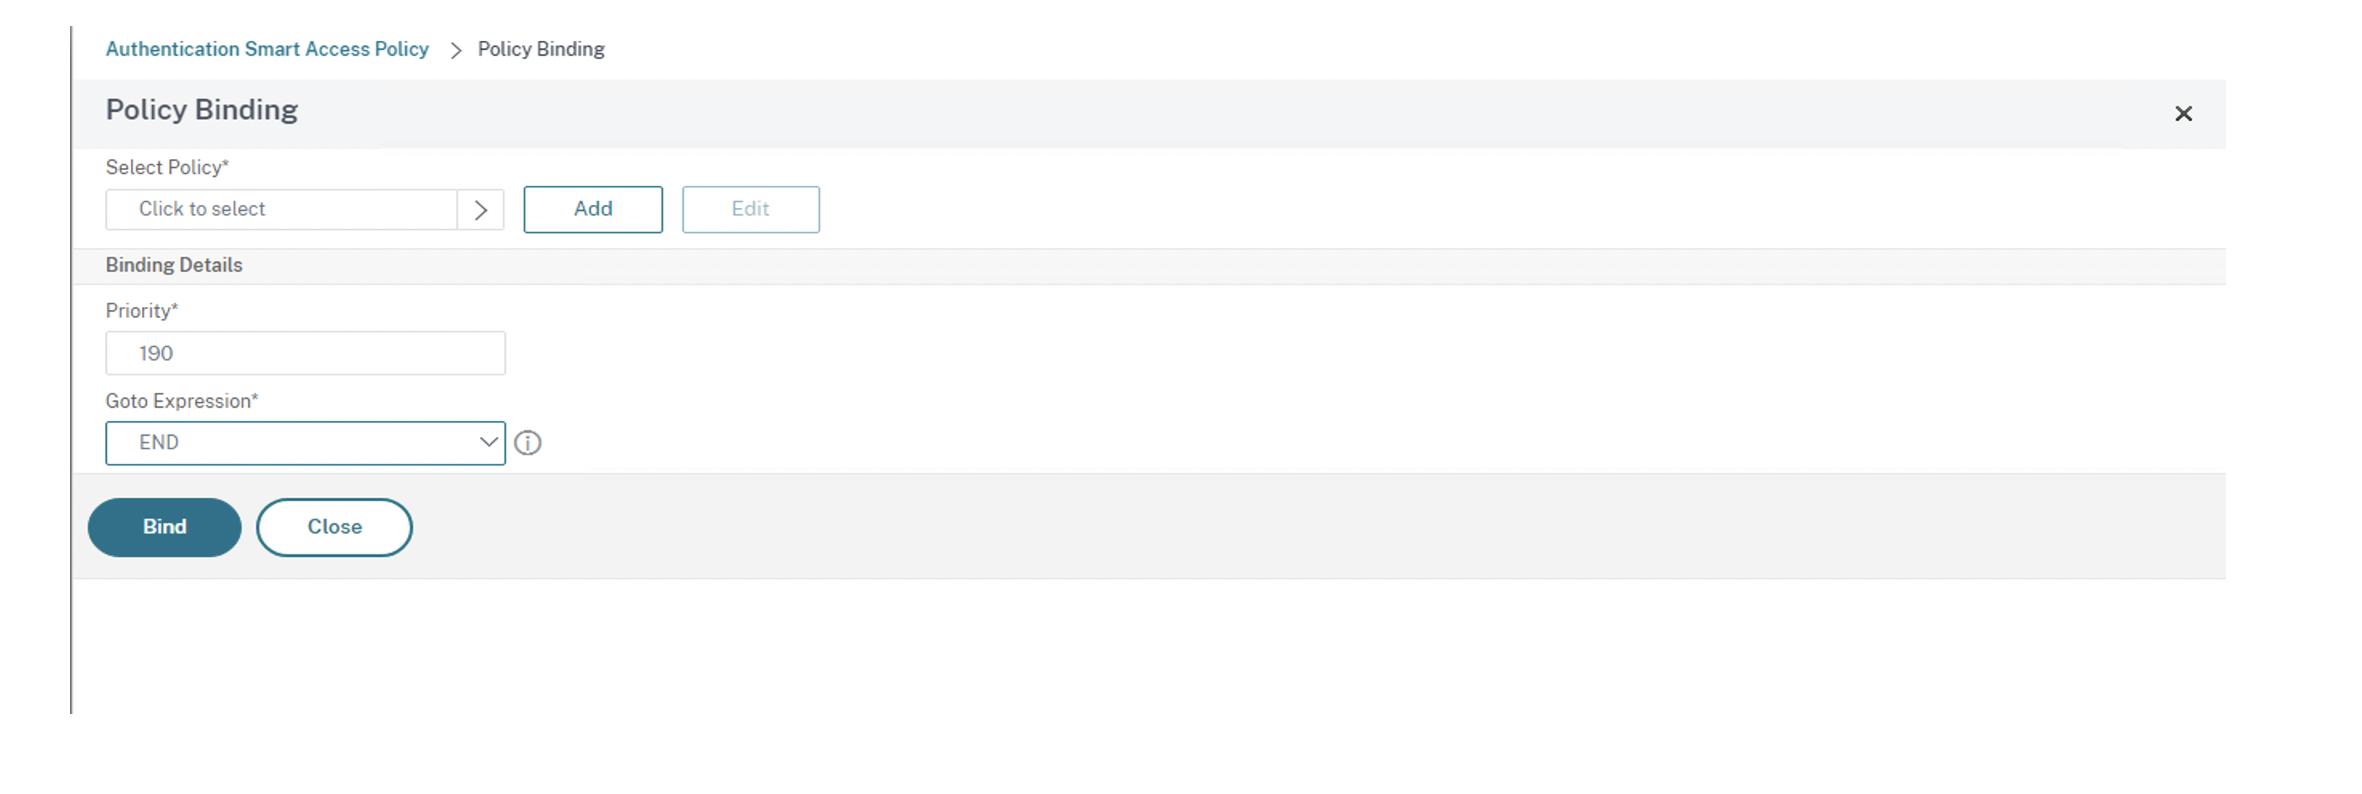
-
Select the Goto Expression as End and Click Bind.
-
-
Create a Smart Access Policy for untrusted devices:
-
Follow the instructions of the previous step, except sub-steps v and vi.
-
For the sub-step v, on the Create Authentication Smart Access Profile screen, add Name for the action. Enter untrusted in Tags. The tag is later referenced in the Broker Access Policy rule for configuring. Click Create.
-
For the sub-step vi, in the Expression section of the Create Authentication Smart Access Policy screen, enter the expression for which you want to push the tag. In this case, since the tag is pushed for untrusted devices, enter
AAA.USER.IS_MEMBER_OF("FileExists").NOT.
-
-
Configure the Broker Access policy rules:
-
Install the Citrix PowerShell SDK and connect to the cloud API as explained in the Citrix blog Getting started with PowerShell automation for Citrix Cloud.
-
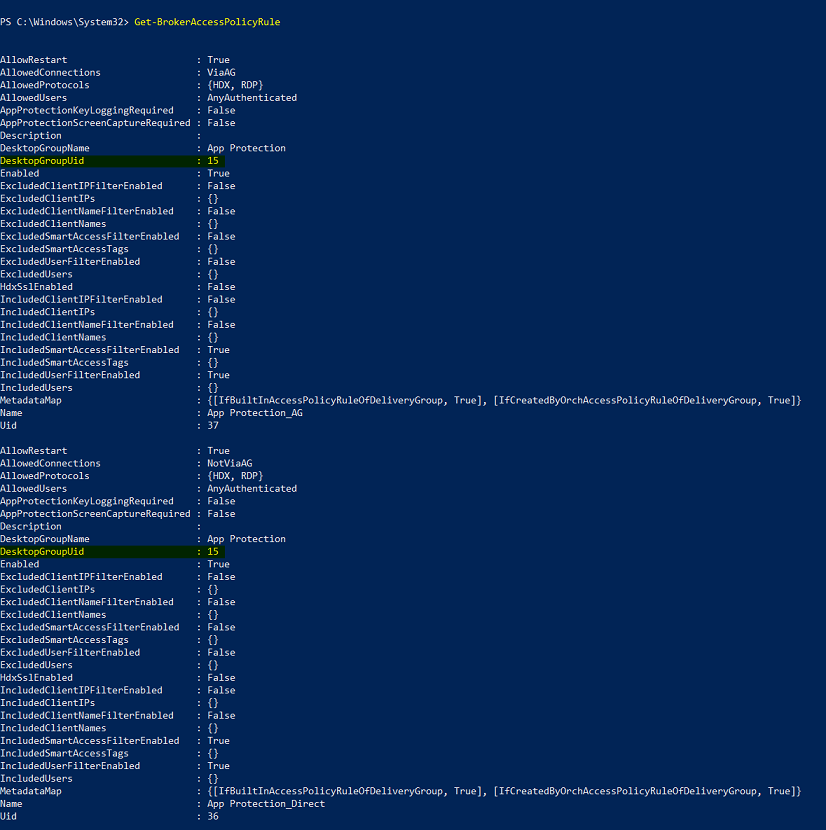
Run the command
Get-BrokerAccessPolicyRule.A list of all the broker access policies for all the delivery groups which are present is displayed.
-
Find the DesktopGroupUid for the delivery group that you want to change.
-
Get the policies that are applied only to a particular delivery group using the command:
Get-BrokerAccessPolicyRule -DesktopGroupUid 7 -
To filter users using trusted devices, create another Broker Access policy using the command:
New-BrokerAccessPolicyRule -Name CAP_Desktops_AG_Trusted-DesktopGroupUid 7 - AllowedConnections ViaAG -AllowedProtocols HDX, RDP -AllowedUsers AnyAuthenticated - AllowRestart $true -Enabled $true-IncludedSmartAccessFilterEnabled $true -
To disable App Protection for trusted devices and enable App Protection for untrusted devices, use the following command:
Set-BrokerAccessPolicyRule CAP_Desktops_AG_trusted -IncludedSmartAccessTags Workspace:trusted -AppProtectionKeyLoggingRequired $false -AppProtectionScreenCaptureRequired $falseSet-BrokerAccessPolicyRule CAP_Desktops_AG -IncludedSmartAccessTags Workspace:untrusted -AppProtectionKeyLoggingRequired $true -AppProtectionScreenCaptureRequired $true
-
-
Verification:
Sign out of Citrix Workspace app and sign in again. Launch the protected resource from a trusted device, one that meets the EPA scan condition. You see that the App Protection policies are not applied. Launch the same resource from an untrusted device. You see that the App Protection policies are applied.