Android features
This article discusses the Android features that are supported in Secure Mail.
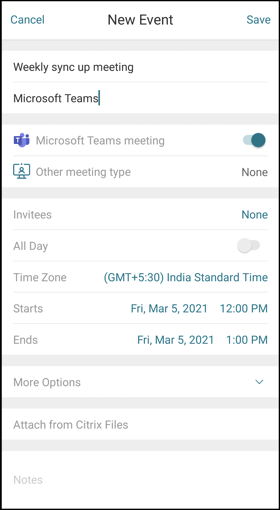
Create Microsoft Teams meetings in Secure Mail Calendar events
In Secure Mail for Android, you can create Microsoft Teams meeting invites while creating calendar events. To create a Microsoft Teams meeting, turn on the Microsoft Teams Meeting toggle. The meeting invite link and the details are automatically sent with the event details.
Prerequisites:
Ensure that the global admin of the Azure Active Directory performs the following:
- Enable modern authentication (OAuth), and ensure that you are an Exchange Online mailbox user with a valid Microsoft Teams license.
- Provides tenant wide admin consent to the Secure Mail app.
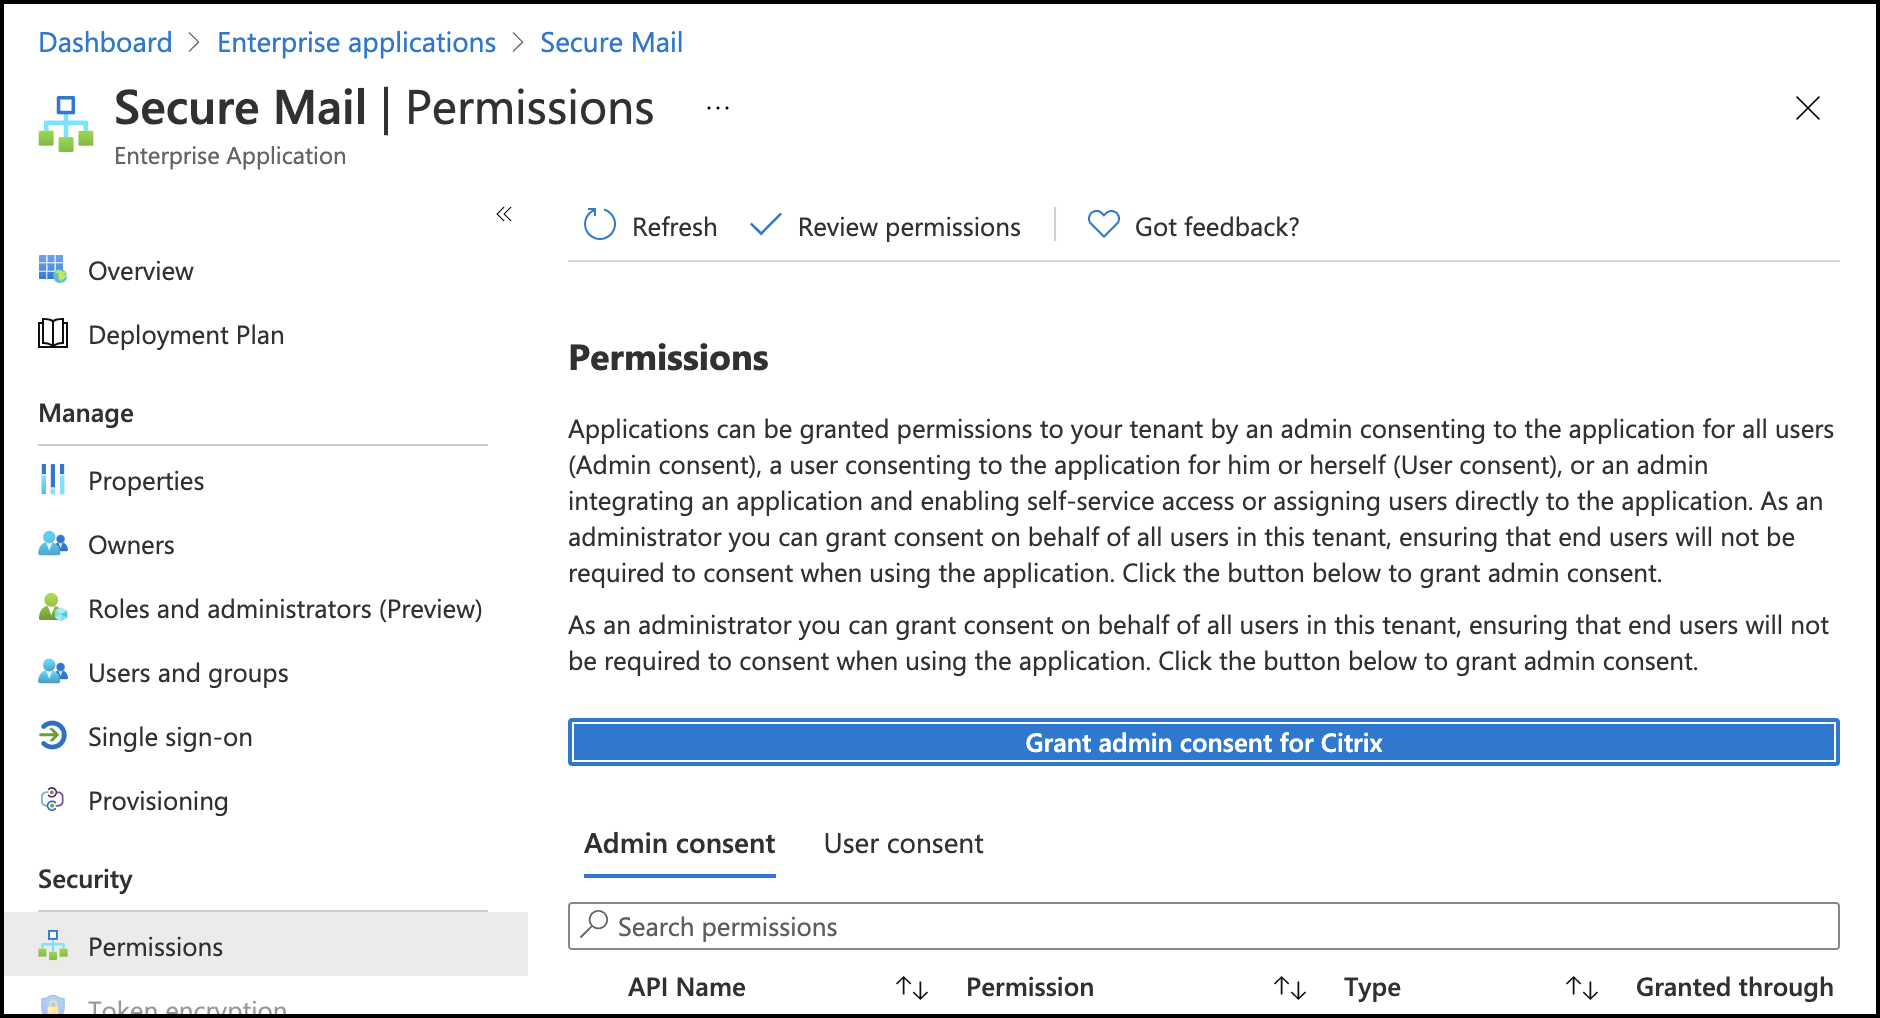
- Configure your Exchange account on the Secure Mail app, and allow app permission for all users to sign in. See the following screen:
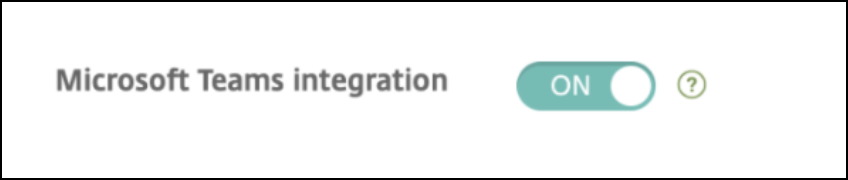
- Enable the Microsoft Teams integration policy.
Limitations:
For meetings created on Secure Mail, currently the feature has the following limitations on the Microsoft Outlook Calendar:
- The Join online option is not available
- The Meeting has started notification is not available
Two-way contact sync
In Secure Mail for Android, you can create, edit, and delete Secure Mail contacts from your local contacts list.
Undo sent mails
In Secure Mail for Android you can undo a sent mail. Once you tap the Send button, you get a toast message that allows you to undo the sent action. Tap Undo to revert the sent action and edit the mail, mail recipients, attach or remove attachments, or discard the mail
Attachments sync in Drafts folder
In Secure Mail for Android, when the Drafts folder is synced, the attachments are also synced and they are available across all your devices. This feature is available on devices running Exchange ActiveSync version 16 or later.
In-app view of PDF files
In Secure Mail for Android, you can view PDF files within the app, along with bookmarks and annotations. Also available is the enhanced view of other Microsoft Office attachments.
Use Web SSO for tunneling policy for setups running Modern authentication with Microsoft Office 365
In Secure Mail for Android, a new policy called Use Web SSO for tunneling is added. With this policy you can tunnel OAuth traffic to go over Tunneled – Web SSO. To do so:
- Set Use Web SSO for tunneling policy to On.
- Select the Tunneled - Web SSO option in the Network access policy.
- Exclude any host names related to OAuth from the Background services policy.
Drag and drop calendar events
In Secure Mail for Android, you can change the time of an existing calendar event by dragging and dropping the event. For user help documentation on this feature, see the Citrix User Help Center article, Change a calendar event time.
Support for 64-bit apps for Google Play
Secure Mail for Android supports 64-bit architectures.
Improvements to the Pull to refresh UI in Secure Mail for Android
In keeping with Material Design guidelines, we have made minor improvements to the Pull to refresh feature. The sync timestamp is available at the bottom of the screen when you tap the hamburger icon.
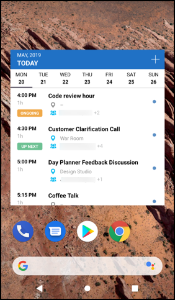
Widget for Calendar agenda
In Secure Mail for Android, the Calendar agenda is available as a widget. From this widget, you can view the upcoming events in the Calendar for a week. This feature allows you to create a Calendar event, view an existing event and edit the details. The Block screen capture policy does not apply to the widget placed on the home screen. You can, however, disable the widget using the Allow Calendar Agenda widget policy.
Network access policy
In Secure Mail for Android, a new option called Tunneled - Web SSO is added to the Network Access MDX policy. Configuring this policy gives you the flexibility to tunnel internal traffic over Tunneled – Web SSO and Secure Ticket Authority (STA) in parallel. You can also allow Tunneled – Web SSO connections for authentication services, like NTLM, Okta, and Kerberos. When you initially configure STA, you must add individual FQDNs and ports of service addresses to the Background network services policy. If you configure the Tunneled - Web SSO option, however, you need not make these configurations.
To enable this policy for Secure Mail for Android in the Citrix Endpoint Management™ console:
- Download and use the .mdx file for Android. For details see steps in Add an MDX app.
- In the Network access policy, click Tunneled – Web SSO option. For more information, see App Network Access
Enhancements to Feed cards
The following enhancements have been made to the existing Feeds folder, in Secure Mail for Android:
- Meeting invites from all auto-synced folders appear in your Feeds card.
- View up to five Upcoming meetings in your Feeds card.
- Upcoming meetings now appear based on a 24-hour period starting from your current time. These meeting invites are categorized into Today and Tomorrow. In previous releases, upcoming meetings until the end of the day would appear in your feeds.
Viewing attachments
In Secure Mail for Android, viewing mail and calendar attachments is easy. For user help documentation on this feature, see the Citrix User Help Center article, View and attach files.
Print emails and calendar events
In Secure Mail for Android, you can print emails and calendar events from your Android device. This print functionality uses Android Print framework.
Prerequisites
- Ensure that an administrator has set the Block Printing policy to OFF in the Citrix Endpoint Management console. For information about this policy for Android, see Block Printing policy.
- If an email is IRM protected, ensure you enable the Allow viewers to print option in the email.
You cannot print an email or a calendar event if these policies are set inappropriately.
Note:
This print capability has the following known limitations:
- Inline images print only if you have downloaded images by tapping Show Pictures. If you don’t tap Show Pictures, only the image placeholders print.
- In Secure Mail, large-sized emails are truncated. Before printing, tap Download complete message to print the complete email. If the complete message doesn’t download, a truncated email prints.
- No metadata from an email or event is added while printing these items.
To print an email
- Open the email that you want to print.
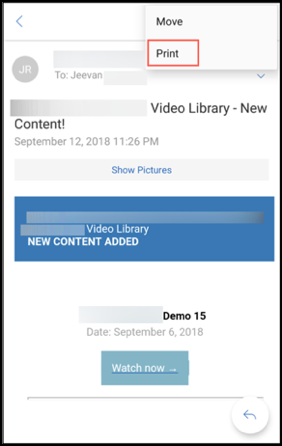
- Tap the More icon on the top left of the screen. The following options appear:
- Move
Note:
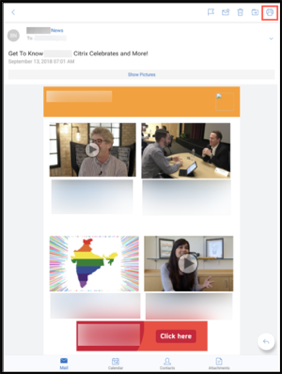
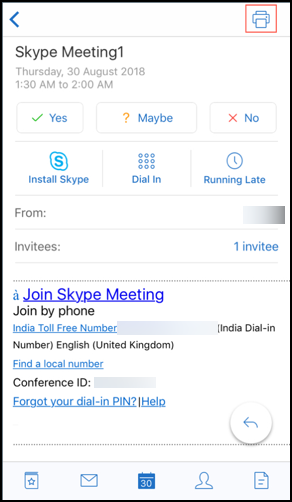
On tablets, you can directly use the print icon on the top left of the screen to print an email.
-
Tap Print. A preview of your email appears.
- Tap the list and the following options appear:
- Save as PDF
- All printers
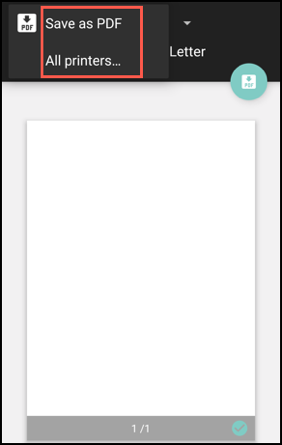
- Tap Save as PDF to save your email in a PDF format.
- Tap All printers. Install the printer as per your requirement.
-
Once the printer is installed, tap Select Printer to select a printer. The Printer screen appears.
Note:
Print options vary based on the printer selected. The following image is from a Canon E480 printer and is used for representational purpose only.
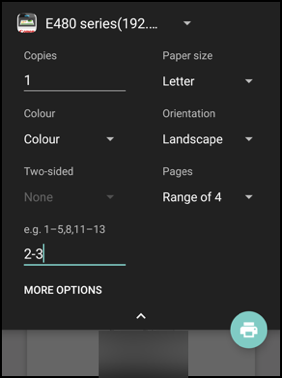
- Select the printer you want to print to. Use the following print options:
- Manually enter the number of copies you want to print.
- Select the paper size from the list.
- Select the color from the list.
- Choose the page orientation as required.
- Select a page or a range of pages and manually enter the page range.
- After setting up the print options, tap the Print icon on the screen.
To print an inline image
- Tap Show pictures within the email and follow the instructions as mentioned in the preceding section To print an email.
To print a calendar event
-
Navigate to calendar and tap an event.
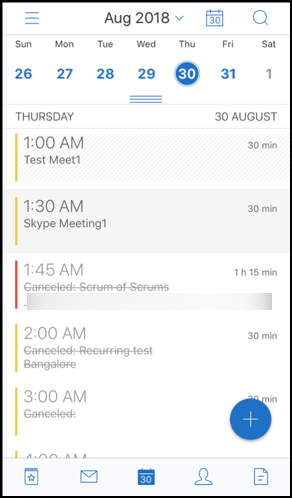
-
Tap the Print icon and then follow the same instructions as mentioned in the preceding section To print an email.
Report phishing emails with ActiveSync headers
In Secure Mail for Android, when a user reports a phishing mail, an EML file is generated as an attachment corresponding to that mail. Admins receive this mail and can view the ActiveSync headers associated with the reported mail.
To enable this feature, an admin must configure the Report Phishing Email Address policy and set the Report Phishing Mechanism as Report Via Attachment in the Citrix Endpoint Management console. For details about configuring MDX policies for Secure Mail, see MDX policies for mobile productivity apps.
Subfolder notifications
In Secure Mail for Android, you can receive mail notifications from subfolders of your mail account.
Note:
- Ensure that the FCM-based push notification is enabled in the Endpoint Management console to get notifications for subfolders. For steps to configure FCM-based push notifications, see Push notifications for Secure Mail.
- The subfolder notification feature is not available for Lotus Notes Server.
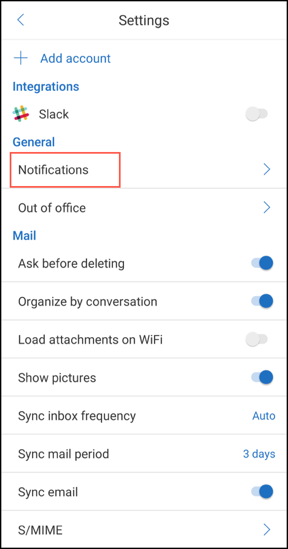
To enable notifications for subfolders
-
Go to Settings and then under General, tap Notifications.
-
In the Notifications screen, tap Mail folders. A list of subfolders within the inbox appears.
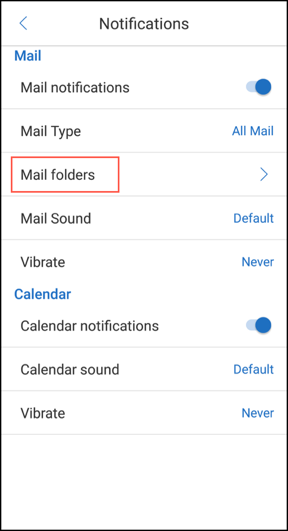
-
Tap to select the subfolders you want to receive notifications from. Inbox is selected by default.
Note:
Enabling notifications for subfolders enables auto sync.
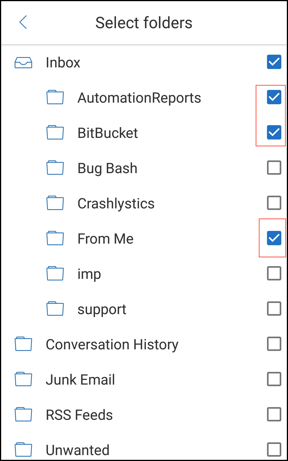
To disable subfolder notifications, clear the check boxes for subfolders you do not want to receive notifications from.
Notification channels
On devices running Android O or later, you can use the notifications channel settings to manage how your email and calendar notifications are handled. This feature allows you to customize and manage your notifications.
To configure notifications for mail or calendar reminders, open Secure Mail and navigate to Settings > Notifications and select the desired notification option.
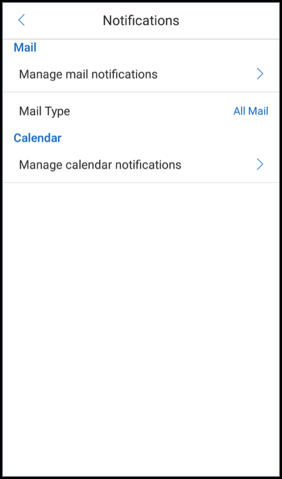
You can then navigate to either Manage mail notifications or Manage calendar notifications to manage your email or calendar notifications respectively.

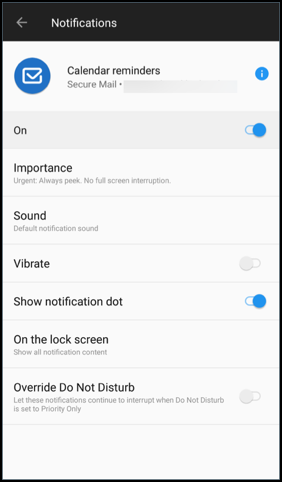
Alternatively, you can long press on the Secure Mail app icon on your device, select App info and then tap Notifications.
If your Vibrate setting was previously set to Only when silent, the Vibrate setting will change to the default vibrate setting (Off) with this feature.
Note:
The notifications on the lock screen are available based on how your admin has configured the Control locked screen notifications MDX policy.
Meeting response buttons within the email
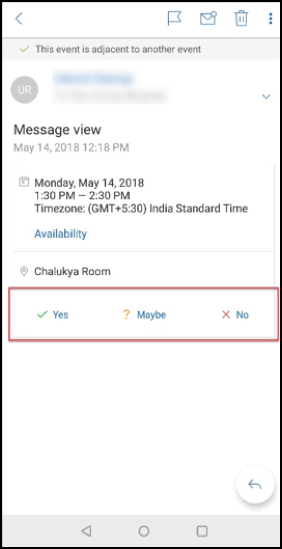
In Secure Mail for Android, meeting response buttons appear within the email. When you receive an email notification about meeting invites, you can respond to the invite by tapping on one of the following options:
- Yes
- Maybe
- No
Enhancement to attachments
In Secure Mail for Android, viewing attachments is simplified. For a better experience, inessential steps are removed, while attachment options that existed in the earlier releases are retained.
You can view attachments within Secure Mail app. The attachment opens directly, if it can be viewed using Secure Mail. If the attachment cannot be viewed using Secure Mail, a list of apps appears. You can select the required app to view the attachment. For user help documentation on this feature, see the Citrix User Help Center article, View and attach files.
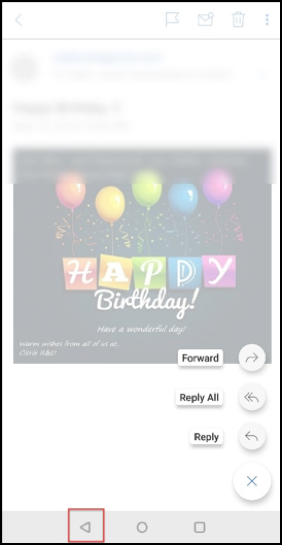
Back button enhancements
In Secure Mail for Android, you can tap the back button on your device to collapse the expanded options of the Floating Action button. This action takes you back to the message or event details view.
Admin steps to enable file attachments from the Gallery in Android
In Secure Mail versions 10.3.5 and later, users can’t attach images directly from the Gallery app if the Inbound document exchange (Open-in) policy is set to Restricted. If you want to keep this policy set to Restricted, but allow users to add photos from the Gallery, follow these steps in the Endpoint Management console.
-
Set Block gallery to Off.
-
Get the Gallery package ID for devices. Some examples:
- LG Nexus 5: com.google.android.gallery3d, com.google.android.apps.photos
- Samsung Galaxy Note 3: com.sec.android.gallery3d, com.sec.android.gallery3d.panorama360view, com.google.android.apps.photos
- Sony Expire: com.sonyericsson.album, com.google.android.apps.photos
- HTC: com.google.android.apps.photos, com.htc.album
- Huawei: com.android.gallery3d, com.google.android.apps.photos
-
Make the hidden policy InboundDocumentExchangeWhitelist visible:
- Download the WorxMail APK file and wrap the file with the MDX Toolkit.
- Find the .mdx file on your computer and change the file suffix to .zip.
- Open the .zip file and find the policy_metadata.xml file
- Search for and change InboundDocumentExchangeWhitelist from
PolicyHidden>true</PolicyHidden>to<PolicyHidden>false</PolicyHidden>. - Save the policy_metadata.xml file.
- Select all the files in that folder and compress to create the .zip file.
Note:
Don’t zip the outer folder. Select all files inside the folder and compress the selected files.
- Click the resulting compressed file.
- Choose Get Info and change the file suffix back to .mdx.
-
Upload the modified .mdx file to the Endpoint Management console and add the list of Gallery package IDs to the now-visible Inbound document exchange whitelist policy.
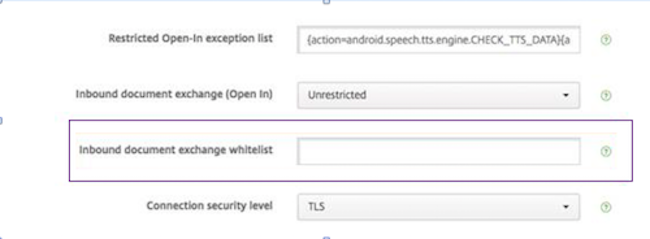
Ensure that the package IDs are comma-separated:
com.sec.android.gallery3d, com.sec.android.gallery3d.panorama360view, com.google.android.apps.photos
-
Save and deploy Secure Mail.
Android users can now attach an image from the Gallery app. For user help documentation on this feature, see the Citrix User Help Center article, View and attach files.
Supported file formats
An X indicates a file format that can be attached, viewed, and opened in Secure Mail.
| Format | iOS | Android |
|---|---|---|
| Video: H.263 AMR NB codec_Mp4 | X | |
| Video: H.263 AMR NB codec_3gp | X | |
| Video: H.264 AAC codec_3gp | X | X |
| Video: H.264 AAC codec_mp4 | X | X |
| Video: H.264 Acclc codec_mp4 | X | X |
| GTM recorded_wmv | X | |
| AVI | X | |
| WAV | X | X |
| MP4 | X | X |
| 3GP | X | X |
| Flac | X | |
| AAC | X | X |
| M4A | X | X |
| 3GP(AMR-NB) | X | X |
| MP3 | X | X |
| WAV | X | X |
| OGG | X | |
| ICO | X | X |
| JPEG | X | X |
| PNG | X | X |
| TIF (single-page only) | X | |
| BMP | X | X |
| GIF | X | X |
| WebP | X | |
| DOT | X | X |
| DOTX | X | |
| X | X | |
| PPT | X | X |
| PPTX | X | X |
| PPS | X | |
| PPSX | X | |
| DOC | X | X |
| DOCX | X | X |
| XLS | X | X |
| XLSM | X | X |
| XLSX | X | X |
| TXT | X | X |
| POT | X | X |
| POTX | X | |
| HTM | X | X |
| HTML | X | X |
| ZIP | X | X |
| EML | X | X |
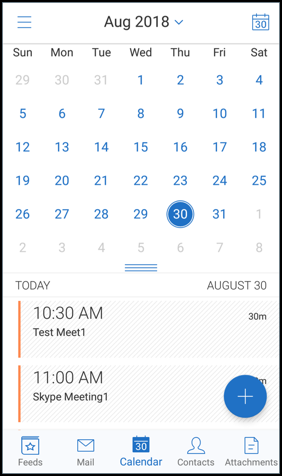
Calendar
The calendar displays all events pertaining to the multiple accounts on your device. You can set colors to individual accounts to differentiate calendars events pertaining to individual accounts.
Note:
The Personal calendar feature is always associated with your primary or default account if enabled.

To set colors to calendar events
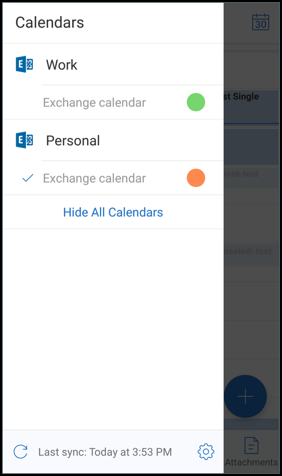
- Tap the Calendar icon in the footer bar and then tap the hamburger icon in the top left. The Calendars screen displays all the accounts you have configured.
- Tap on the default color displayed on the right of an Exchange account. The Colors screen displays the available colors for that account.
- Select a color of your choice and then tap Save.
-
To return to the previous screen, tap Cancel. The selected color is set for all calendar events pertaining to that Exchange account.

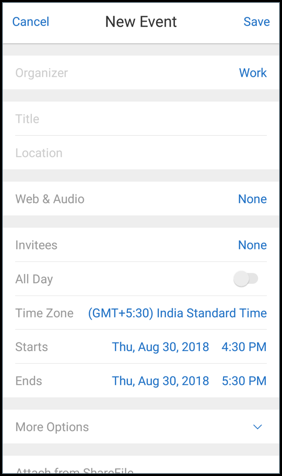
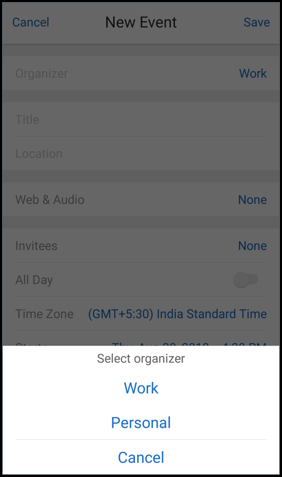
When you are creating a calendar invitation or event, the Organizer field auto-populates with the email address of the default account. To change the mail account, tap this email address and select another account.
Search
You can perform a global search from the Mailboxes or the All Contacts view. This action displays the appropriate results after searching all the accounts in the app.
All searches from within an individual account displays results pertaining to that account only.
Updates to background services
To meet the Google Play Background Execution Limits requirement on devices running Android 8.0 (API level 26) or later, we have upgraded Secure Mail background services. For uninterrupted mail sync and notifications on your device, enable Firebase Cloud Messaging (FCM) service push notifications. For more details about enabling FCM-based push notifications, see Push notifications for Secure Mail
Ensure that you turn on Mail notifications in Secure Mail settings on your device. Limitations:
-
If you have not enabled FCM-based push notifications, background sync occurs once in every 15 minutes. This interval varies depending on whether the app is running in the background or the foreground.
-
When users manually update the time from device settings, the date in the calendar widget does not update automatically.
Android Enterprise in Secure Mail
Secure Mail and Secure Web for Android is compatible with Android Enterprise, formerly known as Android for Work.
Prerequisites
- To be able to use this feature, ensure that your device is running Android 5.0 or later.
- For on-premises deployments, the afw.accounts Endpoint Management property must be set to TRUE.
After you have set up Android Enterprise in Endpoint Management, the mobile productivity apps are available on your device. The Android Enterprise icon identifies the apps, as highlighted in the following image.

Features that are compatible with Android Enterprise
The following table lists the Secure Mail features that are compatible with Android Enterprise.
| Feature | Support |
|---|---|
| Exchange Server auto discovery | X |
| Secure Ticket Authority (STA) | X |
| Export contacts | X |
| Microsoft Information Rights Management | X |
| Lock-screen notifications | X |
| Mail sync | X |
| Email classification | X |
| S/MIME signing and encryption | X |
| Firebase Cloud Messaging (FCM) service | X |
| Modern authentication (OAuth) | |
| Multiple Exchange accounts | X |
| Personal calendar | |
| Export mail settings | X |
| Shared devices | |
| Endpoint Management integration with Microsoft Intune/EMS | |
| Office 365 | X |
| LDAP Exchange Server 2010, 2013, and 2016 | X |
| Certificate based authentication (CBA) | |
| Go ToMeeting | X |
| Skype for Business | |
| Personal distribution list | X |
| Citrix Files compatibility | X |
| Email enrollment with single sign-on | X |
The following table below lists the Secure Web features that are compatible with Android Enterprise.
| Feature | Support |
|---|---|
| Tunneled – Web SSO mode | X |
| Full VPN mode | X |
| All app features | X |
| Compatibility with Secure Mail | X |
Limitations
- If Allow use of the status bar device restrictions policy is set ON for Android Enterprise in Work profile mode then calendar export progress and push notifications in Secure Mail for Android is not displayed in the status bar. However, these notifications are seen on the locked screen when allowed. For more information, see Android Enterprise settings.
In this article
- Create Microsoft Teams meetings in Secure Mail Calendar events
- Two-way contact sync
- Undo sent mails
- Attachments sync in Drafts folder
- In-app view of PDF files
- Use Web SSO for tunneling policy for setups running Modern authentication with Microsoft Office 365
- Drag and drop calendar events
- Support for 64-bit apps for Google Play
- Improvements to the Pull to refresh UI in Secure Mail for Android
- Widget for Calendar agenda
- Network access policy
- Enhancements to Feed cards
- Viewing attachments
- Print emails and calendar events
- Report phishing emails with ActiveSync headers
- Subfolder notifications
- Notification channels
- Meeting response buttons within the email
- Enhancement to attachments
- Back button enhancements
- Admin steps to enable file attachments from the Gallery in Android
- Calendar
- Updates to background services
- Android Enterprise in Secure Mail