Create non-domain-joined Linux VDAs
This article walks you through using Machine Creation Services™ (MCS) to create non-domain-joined Linux VDAs in Citrix DaaS.
Important:
- Non-domain-joined VDAs are supported for Citrix DaaS.
- Your control plane must be deployed over Citrix DaaS.
- You can deploy non-domain-joined VDAs in a public cloud or on-premises data center. Non-domain-joined VDAs are managed by the control plane in Citrix DaaS.
- You can configure Rendezvous V2 to bypass Citrix Cloud Connectors. Otherwise, you must install Cloud Connectors to connect VDAs with your control plane.
- To create non-domain-joined VDAs, you must use MCS.
- Bare metal servers are not supported by MCS.
- The following features are available for non-domain-joined Linux VDAs:
(For Nutanix only) Step 1: Install and register the Nutanix AHV plug-in
Obtain the Nutanix AHV plug-in package from Nutanix. Install and register the plug-in in your Citrix Virtual Apps and Desktops environment. For more information, see the Nutanix Acropolis MCS plug-in installation guide, available at the Nutanix Support Portal.
Step 1a: Install and register the Nutanix AHV plug-in for on-premises Delivery Controllers
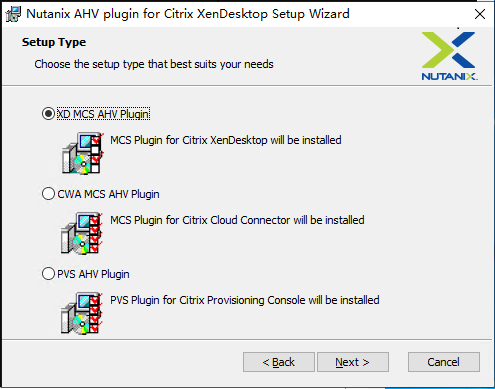
After you install Citrix Virtual Apps and Desktops™, select and install the XD MCS AHV Plugin on your Delivery Controllers.
Step 1b: Install and register the Nutanix AHV plug-in for cloud Delivery Controllers
Select and install the CWA MCS AHV Plugin for Citrix Cloud™ Connectors. Install the plug-in on all Citrix Cloud Connectors that are registered with the Citrix Cloud tenant. You must register Citrix Cloud Connectors even when they serve a resource location without the AHV.
Step 1c: Complete the following steps after installing the plug-in
- Verify that a Nutanix Acropolis folder has been created in
C:\Program Files\Common Files\Citrix\HCLPlugins\CitrixMachineCreation\v1.0.0.0. - Run the
"C:\Program Files\Common Files\Citrix\HCLPlugins\RegisterPlugins.exe" -PluginsRoot "C:\Program Files\Common Files\Citrix\HCLPlugins\CitrixMachineCreation\v1.0.0.0"command. -
Restart the Citrix Host, Citrix Broker, and Citrix Machine Creation Services on your on-premises Delivery Controllers or restart the Citrix RemoteHCLServer Service on Citrix Cloud Connectors.
Tip:
We recommend that you stop and then restart the Citrix Host, Citrix Broker, and Machine Creation Services when you install or update the Nutanix AHV plug-in.
Step 2: Create a host connection
Hosts are hypervisors or cloud services that are in use in your resource locations. This step lets you specify information that DaaS uses to communicate with VMs on a host. Detailed information includes the resource location, host type, access credentials, storage method to use, and which networks the VMs on the host can use.
Important:
The host resources (storage and network) in your resource location must be available before you create a connection.
- Sign in to Citrix Cloud.
- In the upper left menu, select My Services > DaaS.
- From Manage > Full Configuration, select Hosting in the left pane.
- Select Add Connections and Resources in the action bar.
- The wizard guides you through the following pages. Specific page content depends on the selected connection type. After completing each page, select Next until you reach the Summary page.
Step 2a: Connection
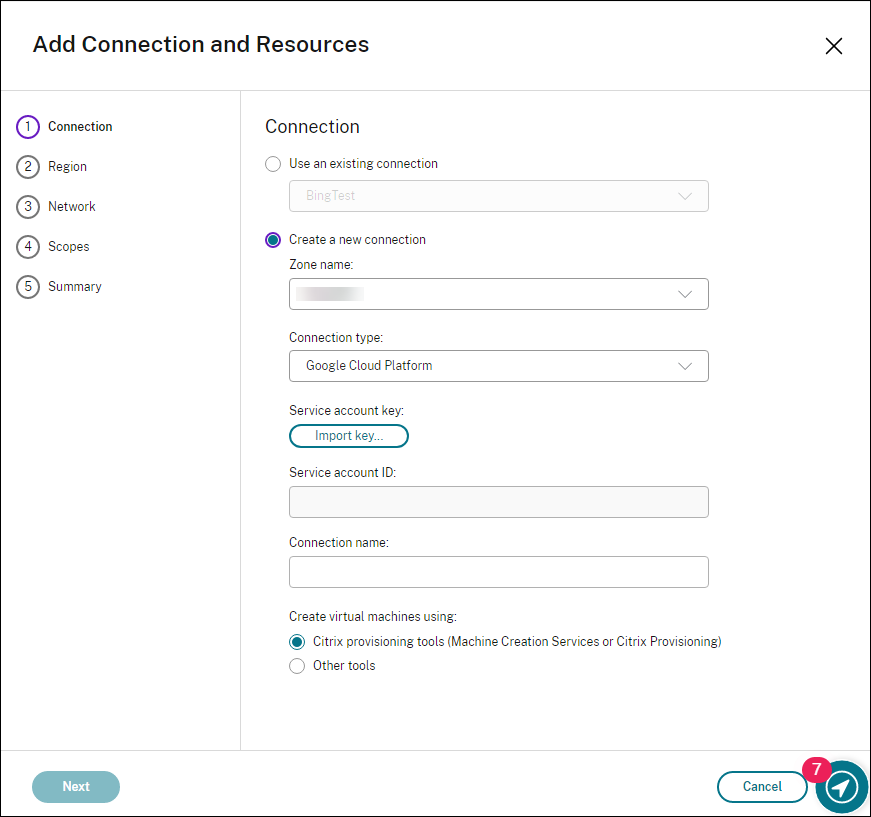
On the Connection page:
- To create a new connection, select Create a new Connection. To create a connection based on the same host configuration as an existing connection, select Use an existing Connection and then choose the relevant connection.
- Select a zone in the Zone name field. The options are all resource locations you configured.
- Select a hypervisor or cloud service in the Connection type field. The options are hypervisors and cloud services that have their plug-ins installed properly in the zone.
Alternatively, you can use the PowerShell command
Get-HypHypervisorPlugin -ZoneUidto get the list of hypervisor plug-ins available with the selected zone. - Enter a connection name. This name appears in the Manage display.
- Choose the tool to create virtual machines: Machine Creation Services or Citrix Provisioning.
Information on the Connection page differs depending on the host (connection type) you’re using. For example, when using Azure Resource Manager, you can use an existing service principal or create a new one.
Step 2b: Storage management
For information about storage management types and methods, see Host storage.
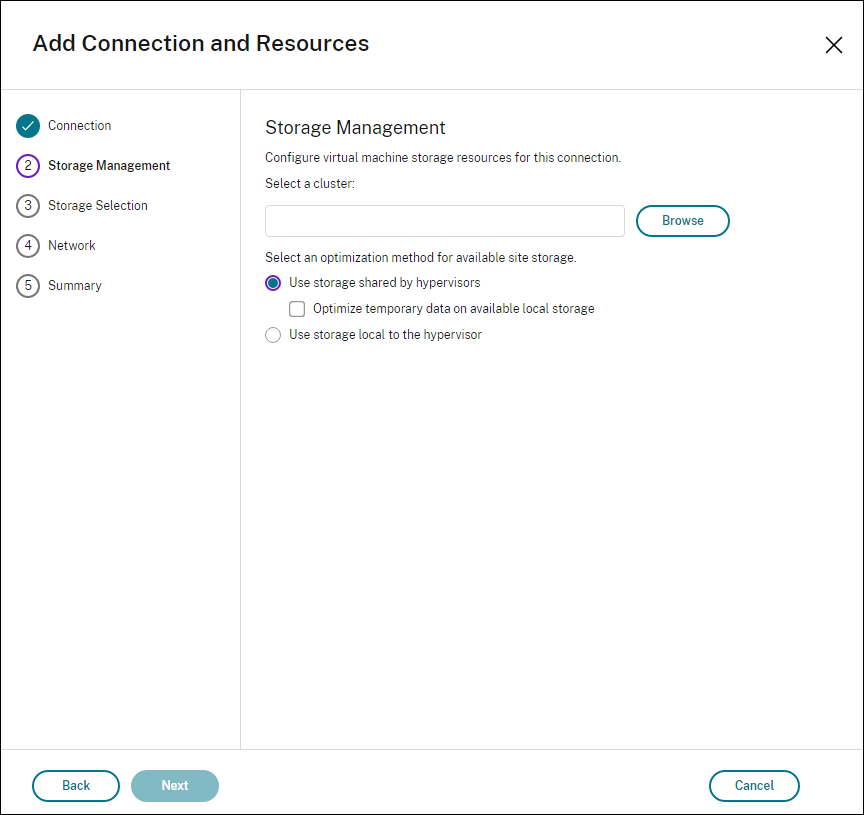
If you are configuring a connection to a Hyper-V or VMware host, browse to and then select a cluster name. Other connection types do not request a cluster name.
Select a storage management method: storage shared by hypervisors or storage local to the hypervisor.
- If you choose storage shared by hypervisors, indicate if you want to keep temporary data on available local storage. (You can specify nondefault temporary storage sizes in the machine catalogs that use this connection.) Exception: When using Clustered Storage Volumes (CSV), Microsoft System Center Virtual Machine Manager does not allow temporary data cache disks to be created on local storage. Attempts to configure that storage management setup in the Manage console fails.
If you use shared storage in a Citrix Hypervisor pool, indicate if you want to use IntelliCache to reduce the load on the shared storage device. See Citrix Hypervisor virtualization environments.
Step 2c: Storage selection
For more information about storage selection, see Host storage.
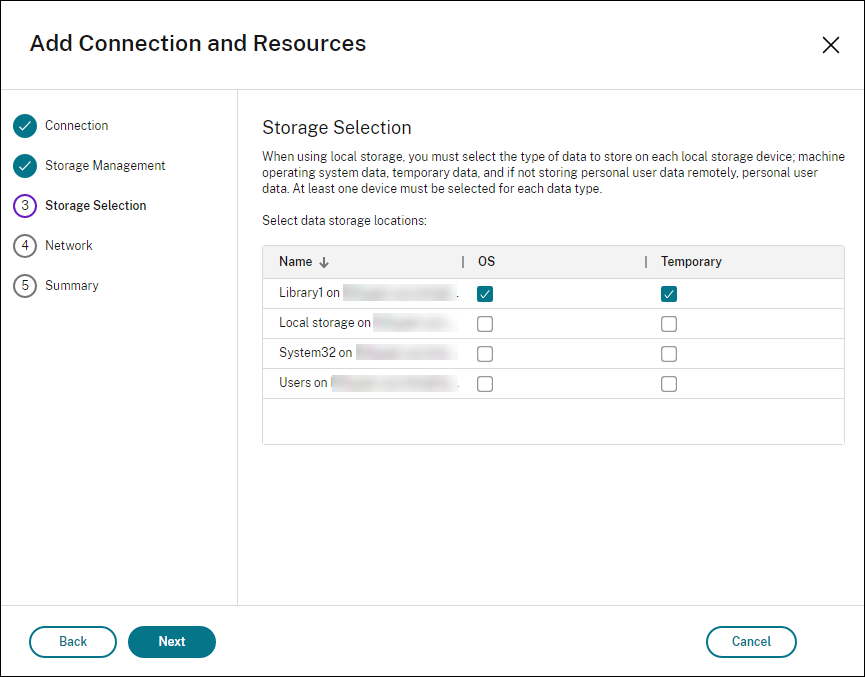
Select at least one host storage device for each available data type. The storage management method that you selected on the previous page affects which data types are available for selection on this page. You must select at least one storage device for each supported data type before you can proceed to the next page in the wizard.
The lower portion of the Storage Selection page contains more configuration options if you chose storage shared by hypervisors and enabled Optimize temporary data on available local storage. You can select which local storage devices (in the same hypervisor pool) to use for temporary data.
The number of currently selected storage devices is shown (in the graphic, “1 storage device selected”). When you hover over that entry, the selected device names appear (unless no devices are configured).
- Select Select to change the storage devices to use.
- In the Select Storage dialog box, select or clear the storage device check boxes, and then select OK.
Step 2d: Region
(Appears only for some host types.) The region selection indicates where VMs will be deployed. Ideally, choose a region close to where users access their applications.
Step 2e: Network
Enter a name for the resources. This name appears in the Manage console to identify the storage and network combination associated with the connection. Select one or more networks that the VMs use.
Some connection types (such as Azure Resource Manager) also list subnets that VMs use. Select one or more subnets.
Step 2f: Summary
Review your selections; if you want to make changes, use return to previous wizard pages. When you complete your review, select Finish.
Remember: If you store temporary data locally, you can configure nondefault values for temporary data storage when you create the catalog containing machines that use this connection.
Note:
A scope is not shown for Full access administrators. For more information, see Administrators, roles, and scopes.
For more information, see Create and manage connections.
Step 3: Prepare a master image
Tip:
You can use a single image for creating both domain-joined and non-domain-joined VDAs.
(For Citrix Hypervisor™ only) Step 3a: Install Citrix VM Tools
Install Citrix VM Tools on the template VM for each VM to use the xe CLI or XenCenter. VM performance can be slow unless you install the tools. Without the tools, you can’t do any of the following:
- Cleanly shut down, restart, or suspend a VM.
- View the VM performance data in XenCenter.
- Migrate a running VM (through
XenMotion). - Create snapshots or snapshots with memory (checkpoints), and revert to snapshots.
- Adjust the number of vCPUs on a running Linux VM.
-
Run the following command to mount Citrix VM Tools named guest-tools.iso.
sudo mount /dev/cdrom /mnt <!--NeedCopy--> -
Run the following command to install the
xe-guest-utilitiespackage based on your Linux distribution.For RHEL/CentOS/Rocky Linux:
sudo rpm -i /mnt/Linux/xe-guest-utilities_{package-version}_all.rpm
<!--NeedCopy-->
For Ubuntu/Debian:
sudo dpkg -i /mnt/Linux/xe-guest-utilities_{package-version}_all.deb
<!--NeedCopy-->
For SUSE:
sudo rpm -i /mnt/Linux/xe-guest-utilities_{package-version}_all.rpm <!--NeedCopy--> -
Check the virtualization state of the template VM on the General tab in XenCenter. If Citrix VM Tools are installed correctly, the virtualization state is Optimized.
(For Azure, AWS, and GCP) Step 3b: Configure cloud-init for Ubuntu 18.04
-
To ensure that a VDA host name persists when a VM is restarted or stopped, run the following command:
echo "preserve_hostname: true" > /etc/cloud/cloud.cfg.d/99_hostname.cfg
<!--NeedCopy-->
Verify that the following lines are present under the system_info section in the /etc/cloud/cloud.cfg file:
system_info: network: renderers: ['netplan', 'eni', 'sysconfig'] <!--NeedCopy--> -
To use SSH for remotely accessing MCS-created VMs on AWS, enable password authentication because no key name is attached to those VMs. Do the following as needed.
-
Edit the
cloud-initconfiguration file, /etc/cloud/cloud.cfg. Ensure that the ssh_pwauth: true line is present. Remove or comment the set-password line and the following lines if they exist.users: - default <!--NeedCopy--> - If you plan to use the default user
ec2-userorubuntucreated bycloud-init, you can change the user password by using thepasswdcommand. Keep the new password in mind for later use to log in to the MCS-created VMs. -
Edit the
/etc/ssh/sshd_configfile to ensure that the following line is present:PasswordAuthentication yes <!--NeedCopy-->Save the file and run the
sudo service sshd restartcommand.
-
Step 3c: Install the Linux VDA package on the template VM
Note:
To use a currently running VDA as the template VM, skip this step.
Before installing the Linux VDA package on the template VM, install .NET Runtime 6.0.
Based on your Linux distribution, run the following command to set up the environment for the Linux VDA:
For RHEL/CentOS/Rocky Linux:
sudo yum –y localinstall <PATH>/<Linux VDA RPM>
<!--NeedCopy-->
Note:
For RHEL and CentOS, install the EPEL repository before you can install the Linux VDA and run
deploymcs.shsuccessfully. For information on how to install EPEL, see the instructions at https://docs.fedoraproject.org/en-US/epel/.
For Ubuntu/Debian:
sudo dpkg –i  <PATH>/<Linux VDA DEB>

apt-get install -f
<!--NeedCopy-->
For SUSE:
sudo zypper –i install <PATH>/<Linux VDA RPM>
<!--NeedCopy-->
Step 3d: Enable repositories to install the tdb-tools package (for RHEL 7 only)
For RHEL 7 server:
subscription-manager repos --enable=rhel-7-server-optional-rpms
<!--NeedCopy-->
For RHEL 7 workstation:
subscription-manager repos --enable=rhel-7-workstation-optional-rpms
<!--NeedCopy-->
Step 3e: (On SUSE) Manually install ntfs-3g
On the SUSE platform, no repository provides ntfs-3g. Download the source code, compile, and install ntfs-3g manually:
-
Install the GNU Compiler Collection (GCC) compiler system and the make package:
sudo zypper install gcc sudo zypper install make <!--NeedCopy--> -
Download the ntfs-3g package.
-
Decompress the ntfs-3g package:
sudo tar -xvzf ntfs-3g_ntfsprogs-<package version>.tgz <!--NeedCopy--> -
Enter the path to the ntfs-3g package:
sudo cd ntfs-3g_ntfsprogs-<package version> <!--NeedCopy--> -
Install ntfs-3g:
./configure
make
make install
<!--NeedCopy-->
Step 3f: Specify a database to use
As an experimental feature, you can use SQLite in addition to PostgreSQL. You can also switch between SQLite and PostgreSQL after installing the Linux VDA package. To do so, complete the following steps:
-
Run
/opt/Citrix/VDA/sbin/ctxcleanup.sh. Omit this step if it is a fresh installation. -
Edit
/etc/xdl/db.confbefore runningdeploymcs.sh.
Note:
- We recommend you use SQLite for VDI mode only.
- For easy install and MCS, you can switch between SQLite and PostgreSQL without having to install them manually. Unless otherwise specified through
/etc/xdl/db.conf, the Linux VDA uses PostgreSQL by default.- You can also use
/etc/xdl/db.confto configure the port number for PostgreSQL.
Step 3g: Configure MCS variables
There are two ways to configure MCS variables:
- Edit the
/etc/xdl/mcs/mcs.conffile. -
Use the easy install GUI. To open the easy install GUI, run the
/opt/Citrix/VDA/bin/easyinstallcommand in the desktop environment of your Linux VDA.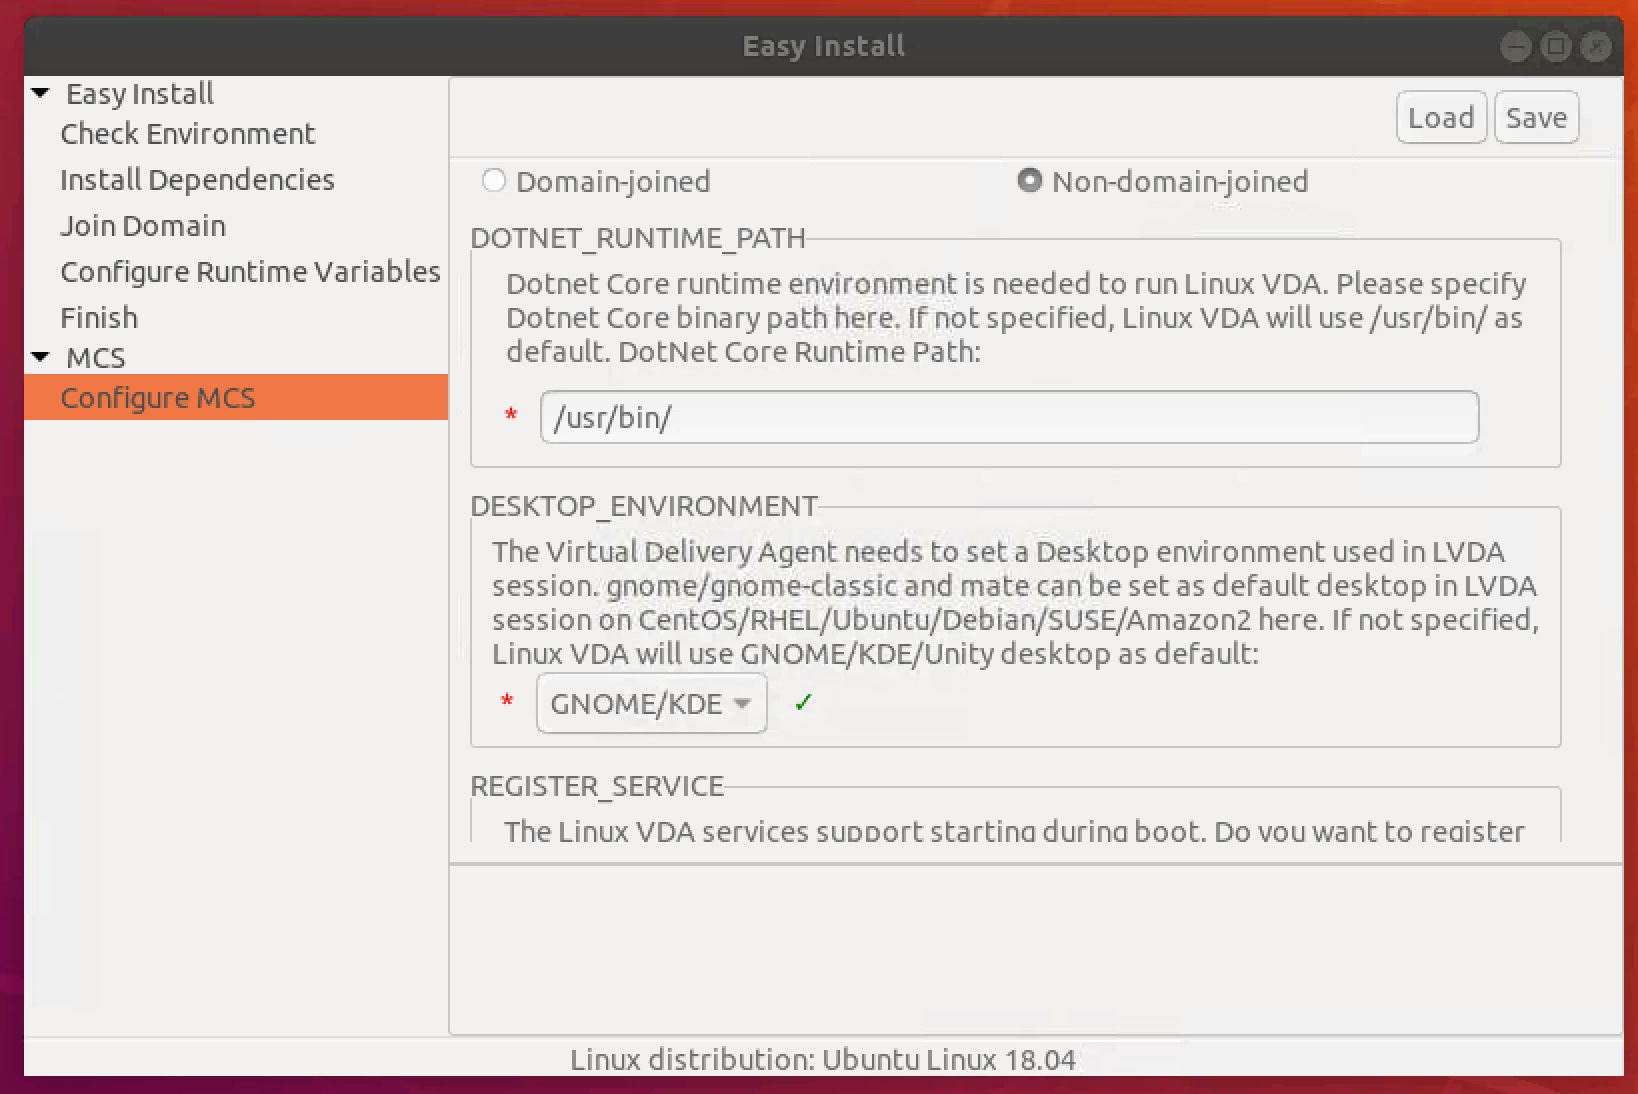
Tip:
Click Save to save variable settings to a local file under the path you specify. Click Load to load variable settings from a file that you specify.
The following are MCS variables that you can configure for non-domain-joined scenarios. You can use the default variable values or customize the variables as required (optional):
DOTNET_RUNTIME_PATH=path-to-install-dotnet-runtime \
DESKTOP_ENVIRONMENT= **gnome | mate \**
REGISTER_SERVICE=**Y | N**
ADD_FIREWALL_RULES=**Y | N**
VDI_MODE=**Y | N**
START_SERVICE=**Y | N**
Step 3h: Write or update registry values for MCS (optional)
On the template machine, add command lines to the /etc/xdl/mcs/mcs_local_setting.reg file for writing or updating registry values as required. This action prevents the loss of data and settings every time an MCS-provisioned machine restarts.
Each line in the /etc/xdl/mcs/mcs_local_setting.reg file is a command for setting or updating a registry value.
For example, you can add the following command lines to the /etc/xdl/mcs/mcs_local_setting.reg file to write or update a registry value respectively:
create -k "HKLM\System\CurrentControlSet\Control\Citrix\VirtualChannels\Clipboard\ClipboardSelection" -t "REG_DWORD" -v "Flags" -d "0x00000003" --force
<!--NeedCopy-->
update -k "HKLM\System\CurrentControlSet\Control\Citrix\VirtualChannels\Clipboard\ClipboardSelection" -v "Flags" -d "0x00000003"
<!--NeedCopy-->
Step 3i: Create a master image
-
If you configure MCS variables by editing
/etc/xdl/mcs/mcs.conf, run/opt/Citrix/VDA/sbin/deploymcs.sh. If you configure MCS variables by using the GUI, click Deploy.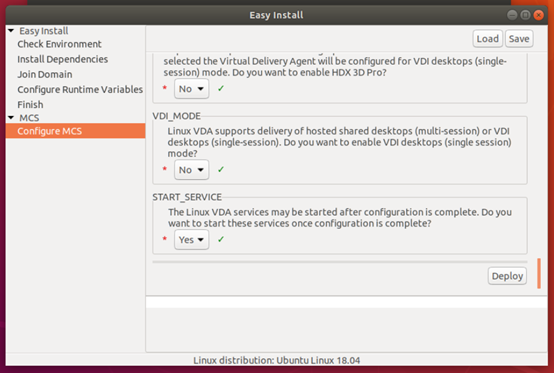
After you click Deploy on the GUI, the variables you set on the GUI override the variables you set in the
/etc/xdl/mcs/mcs.conffile. -
Create and name a snapshot of your master image based on the public cloud you use.
-
(For Citrix Hypervisor, GCP, and VMware vSphere) Install applications on the template VM and shut down the template VM. Create and name a snapshot of your master image.
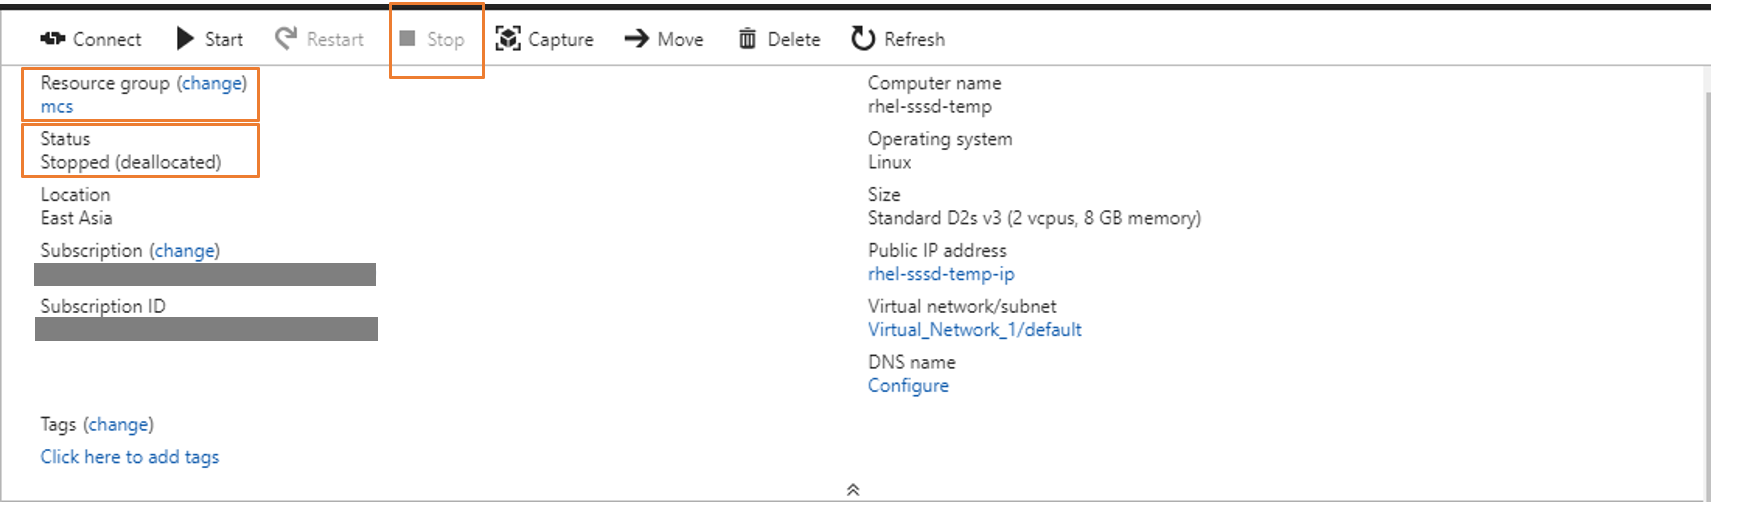
-
(For Azure) Install applications on the template VM and shut down the template VM from the Azure portal. Ensure that the power status of the template VM is Stopped (deallocated). Remember the name of the resource group here. You need the name to locate your master image on Azure.
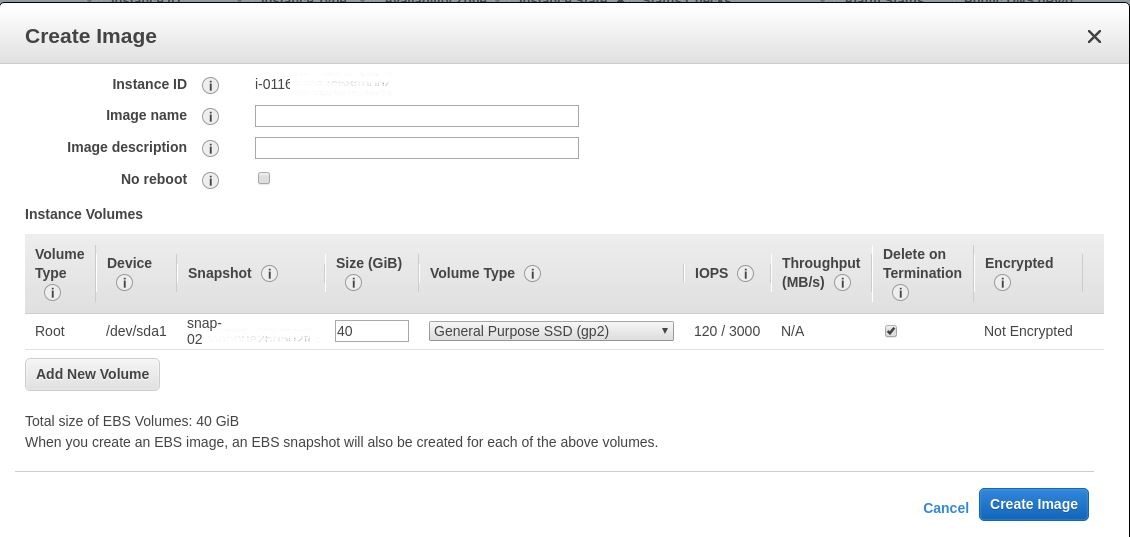
-
(For AWS) Install applications on the template VM and shut down the template VM from the AWS EC2 portal. Ensure that the instance state of the template VM is Stopped. Right-click the template VM and select Image > Create Image. Type information and make settings as needed. Click Create Image.
-
(For Nutanix) On Nutanix AHV, shut down the template VM. Create and name a snapshot of your master image.
Note:
You must prefix Acropolis snapshot names with
XD_for use in Citrix Virtual Apps™ and Desktops. Use the Acropolis console to rename your snapshots when needed. After you rename a snapshot, restart the Create Catalog wizard to obtain a refreshed list.
-
Step 4: Create a machine catalog
- Sign in to Citrix Cloud.
- In the upper left menu, select My Services > DaaS.
- From Manage > Full Configuration, select Machine Catalogs.
-
The wizard guides you to create a machine catalog.
On the Container page that is unique to Nutanix, select the container that you specified for the template VM earlier.
On the Master Image page, select the image snapshot.
On the Virtual Machines page, check for the number of virtual CPUs and the number of cores per vCPU. Select MCS as the machine deployment method and select Non-domain-joined as the identity for machines to be created in the catalog.
Do other configuration tasks as needed. For more information, see Create machine catalogs.
Note:
If your machine catalog creation process on the Delivery Controller™ takes a significant amount of time, go to Nutanix Prism and power on the machine prefixed with Preparation manually. This approach helps to continue the creation process.
Step 5: Create a delivery group
A delivery group is a collection of machines selected from one or more machine catalogs. It specifies which users can use those machines, and the applications and desktops available to those users. For more information, see Create delivery groups.
In this article
- (For Nutanix only) Step 1: Install and register the Nutanix AHV plug-in
- Step 2: Create a host connection
-
Step 3: Prepare a master image
- (For Citrix Hypervisor™ only) Step 3a: Install Citrix VM Tools
- (For Azure, AWS, and GCP) Step 3b: Configure cloud-init for Ubuntu 18.04
- Step 3c: Install the Linux VDA package on the template VM
- Step 3d: Enable repositories to install the tdb-tools package (for RHEL 7 only)
- Step 3e: (On SUSE) Manually install ntfs-3g
- Step 3f: Specify a database to use
- Step 3g: Configure MCS variables
- Step 3h: Write or update registry values for MCS (optional)
- Step 3i: Create a master image
- Step 4: Create a machine catalog
- Step 5: Create a delivery group