Deploy and load balance Session Recording in Azure
Prerequisites
- You already have Citrix Virtual Apps and Desktops™ or Citrix DaaS (formerly Citrix Virtual Apps and Desktops service) installed in Azure.
- You have an Azure account.
Step 1: Upload the Citrix Virtual Apps™ and Desktops installer to Azure
Note:
Skip Step 1 if you use your Citrix account credentials to access the Citrix Virtual Apps and Desktops download page and download the product ISO file to a VM in Azure.
-
In the Azure portal, create a general-purpose v2 storage account and accept the default performance tier, Standard.
All access to Azure Storage goes through a storage account.

-
Navigate to your new storage account and select Containers in the Blob service section to create a container.
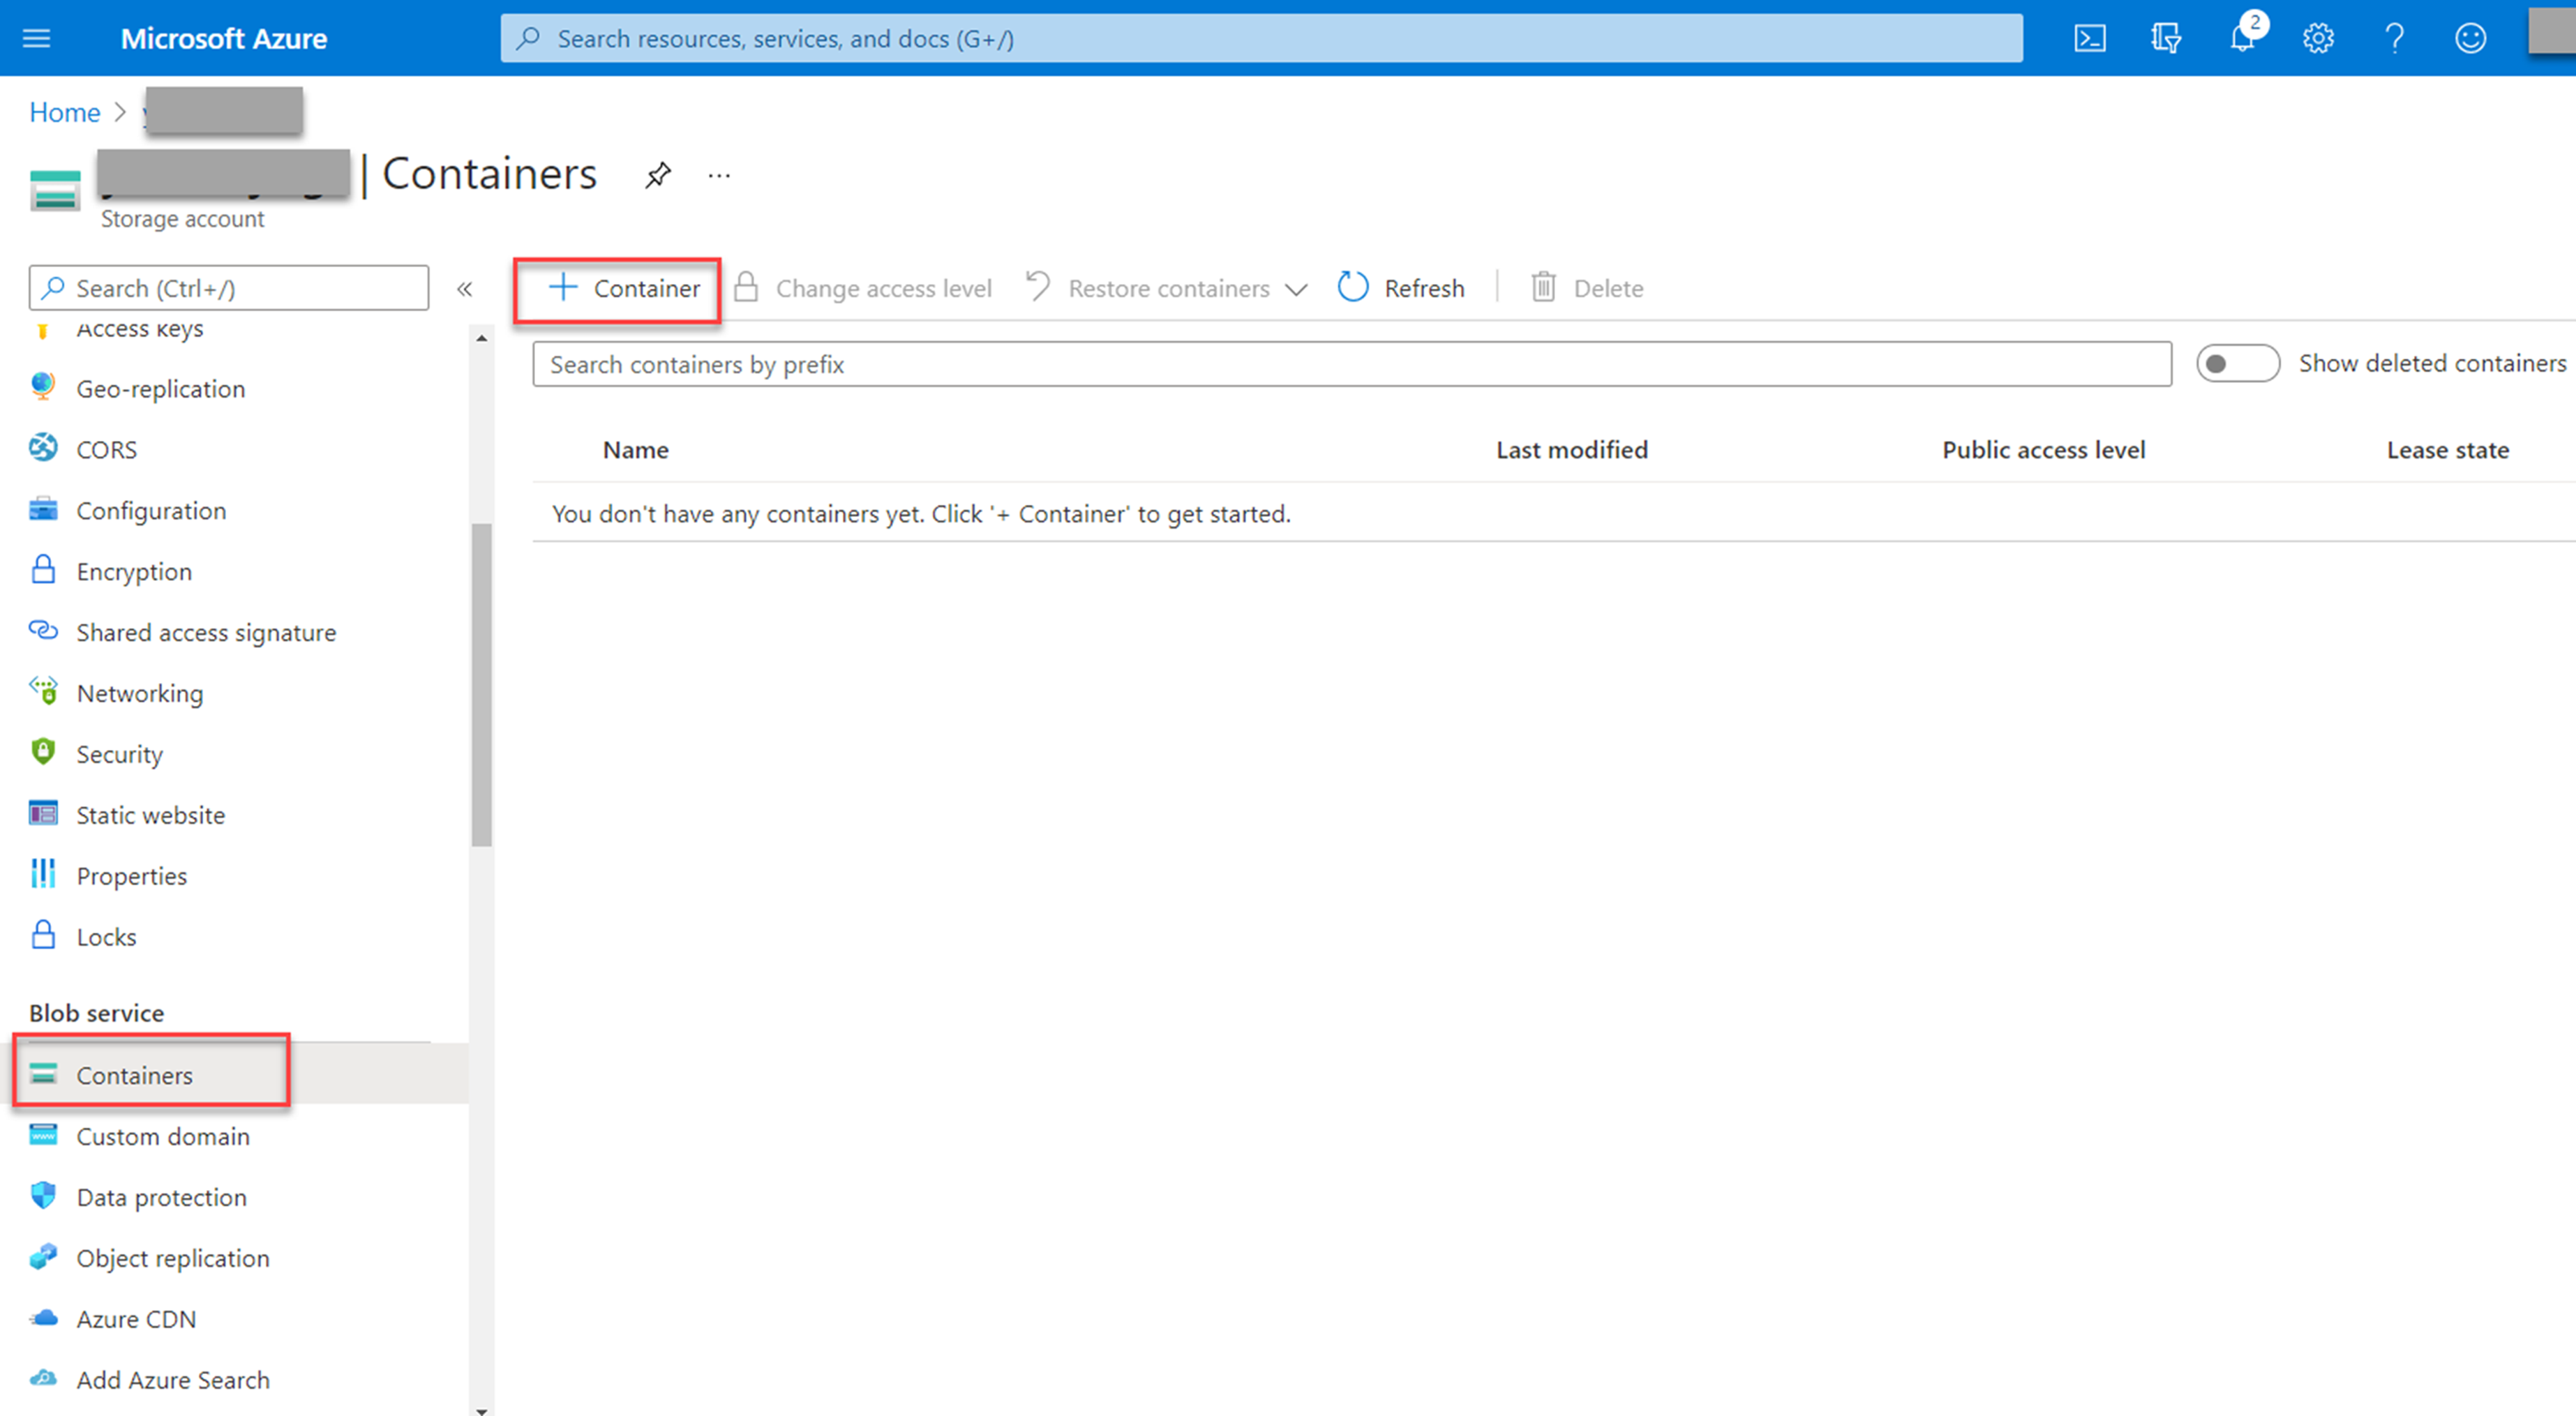
-
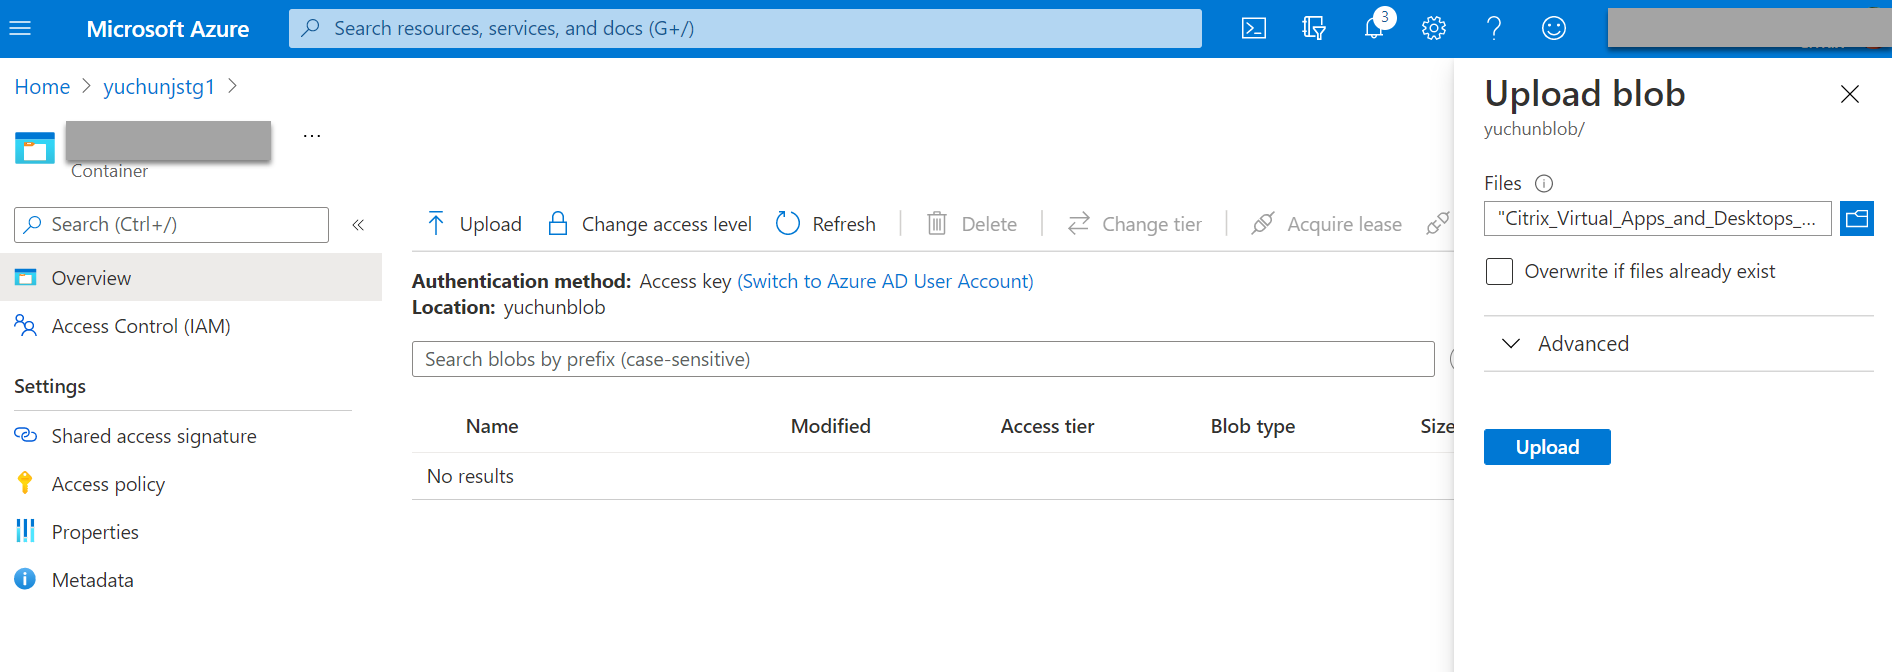
Upload the Citrix Virtual Apps and Desktops installer to the container.
Step 2: Create a SQL managed instance in the Azure portal
For more information, see Create an Azure SQL Managed Instance.
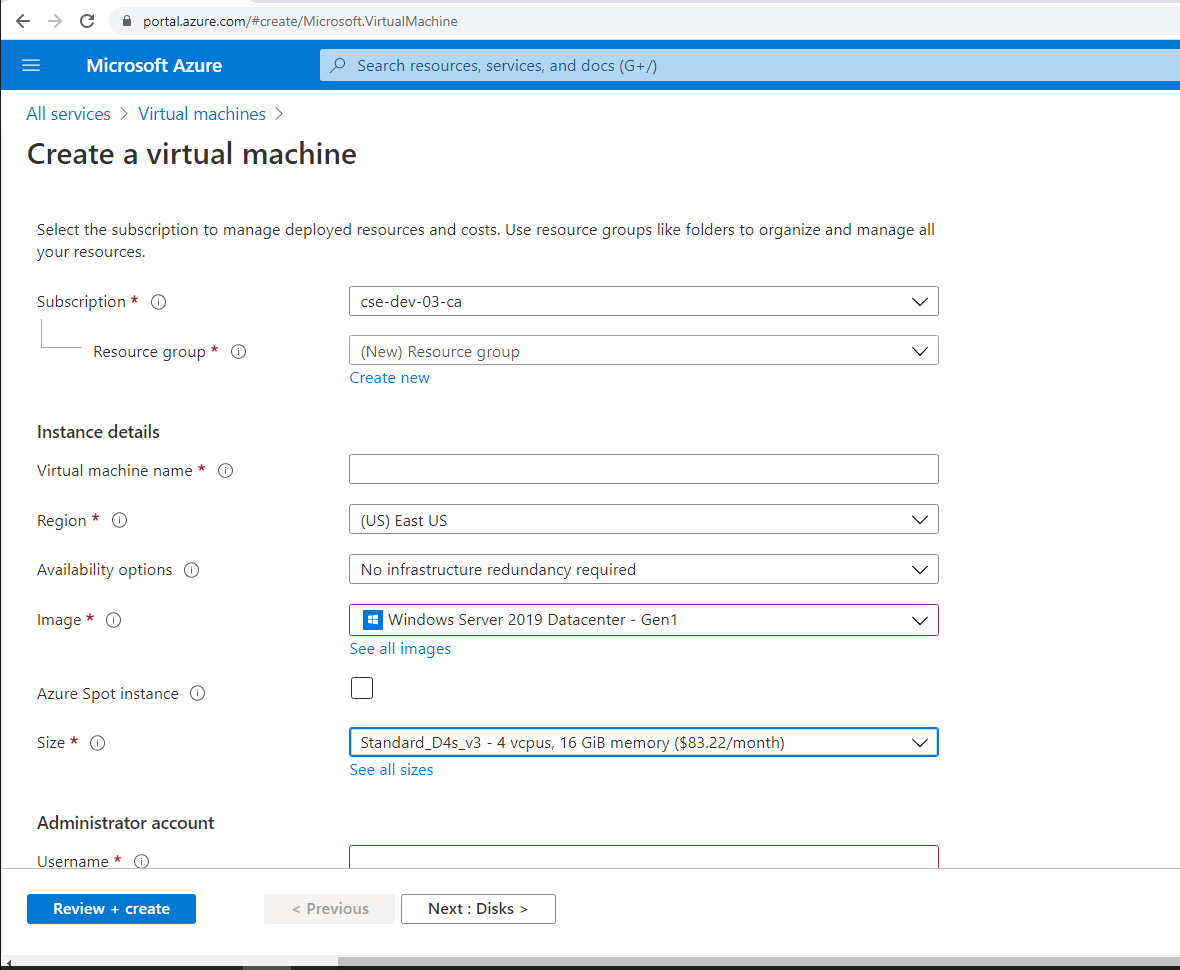
Step 3: Create Azure virtual machines (VMs)
Choose Windows Server 2019 Datacenter – Gen1 for the image and Standard_D4as_v4 – 4 vcpus, 16GiB memory for the size. For more information, see Create a Windows virtual machine in the Azure portal.
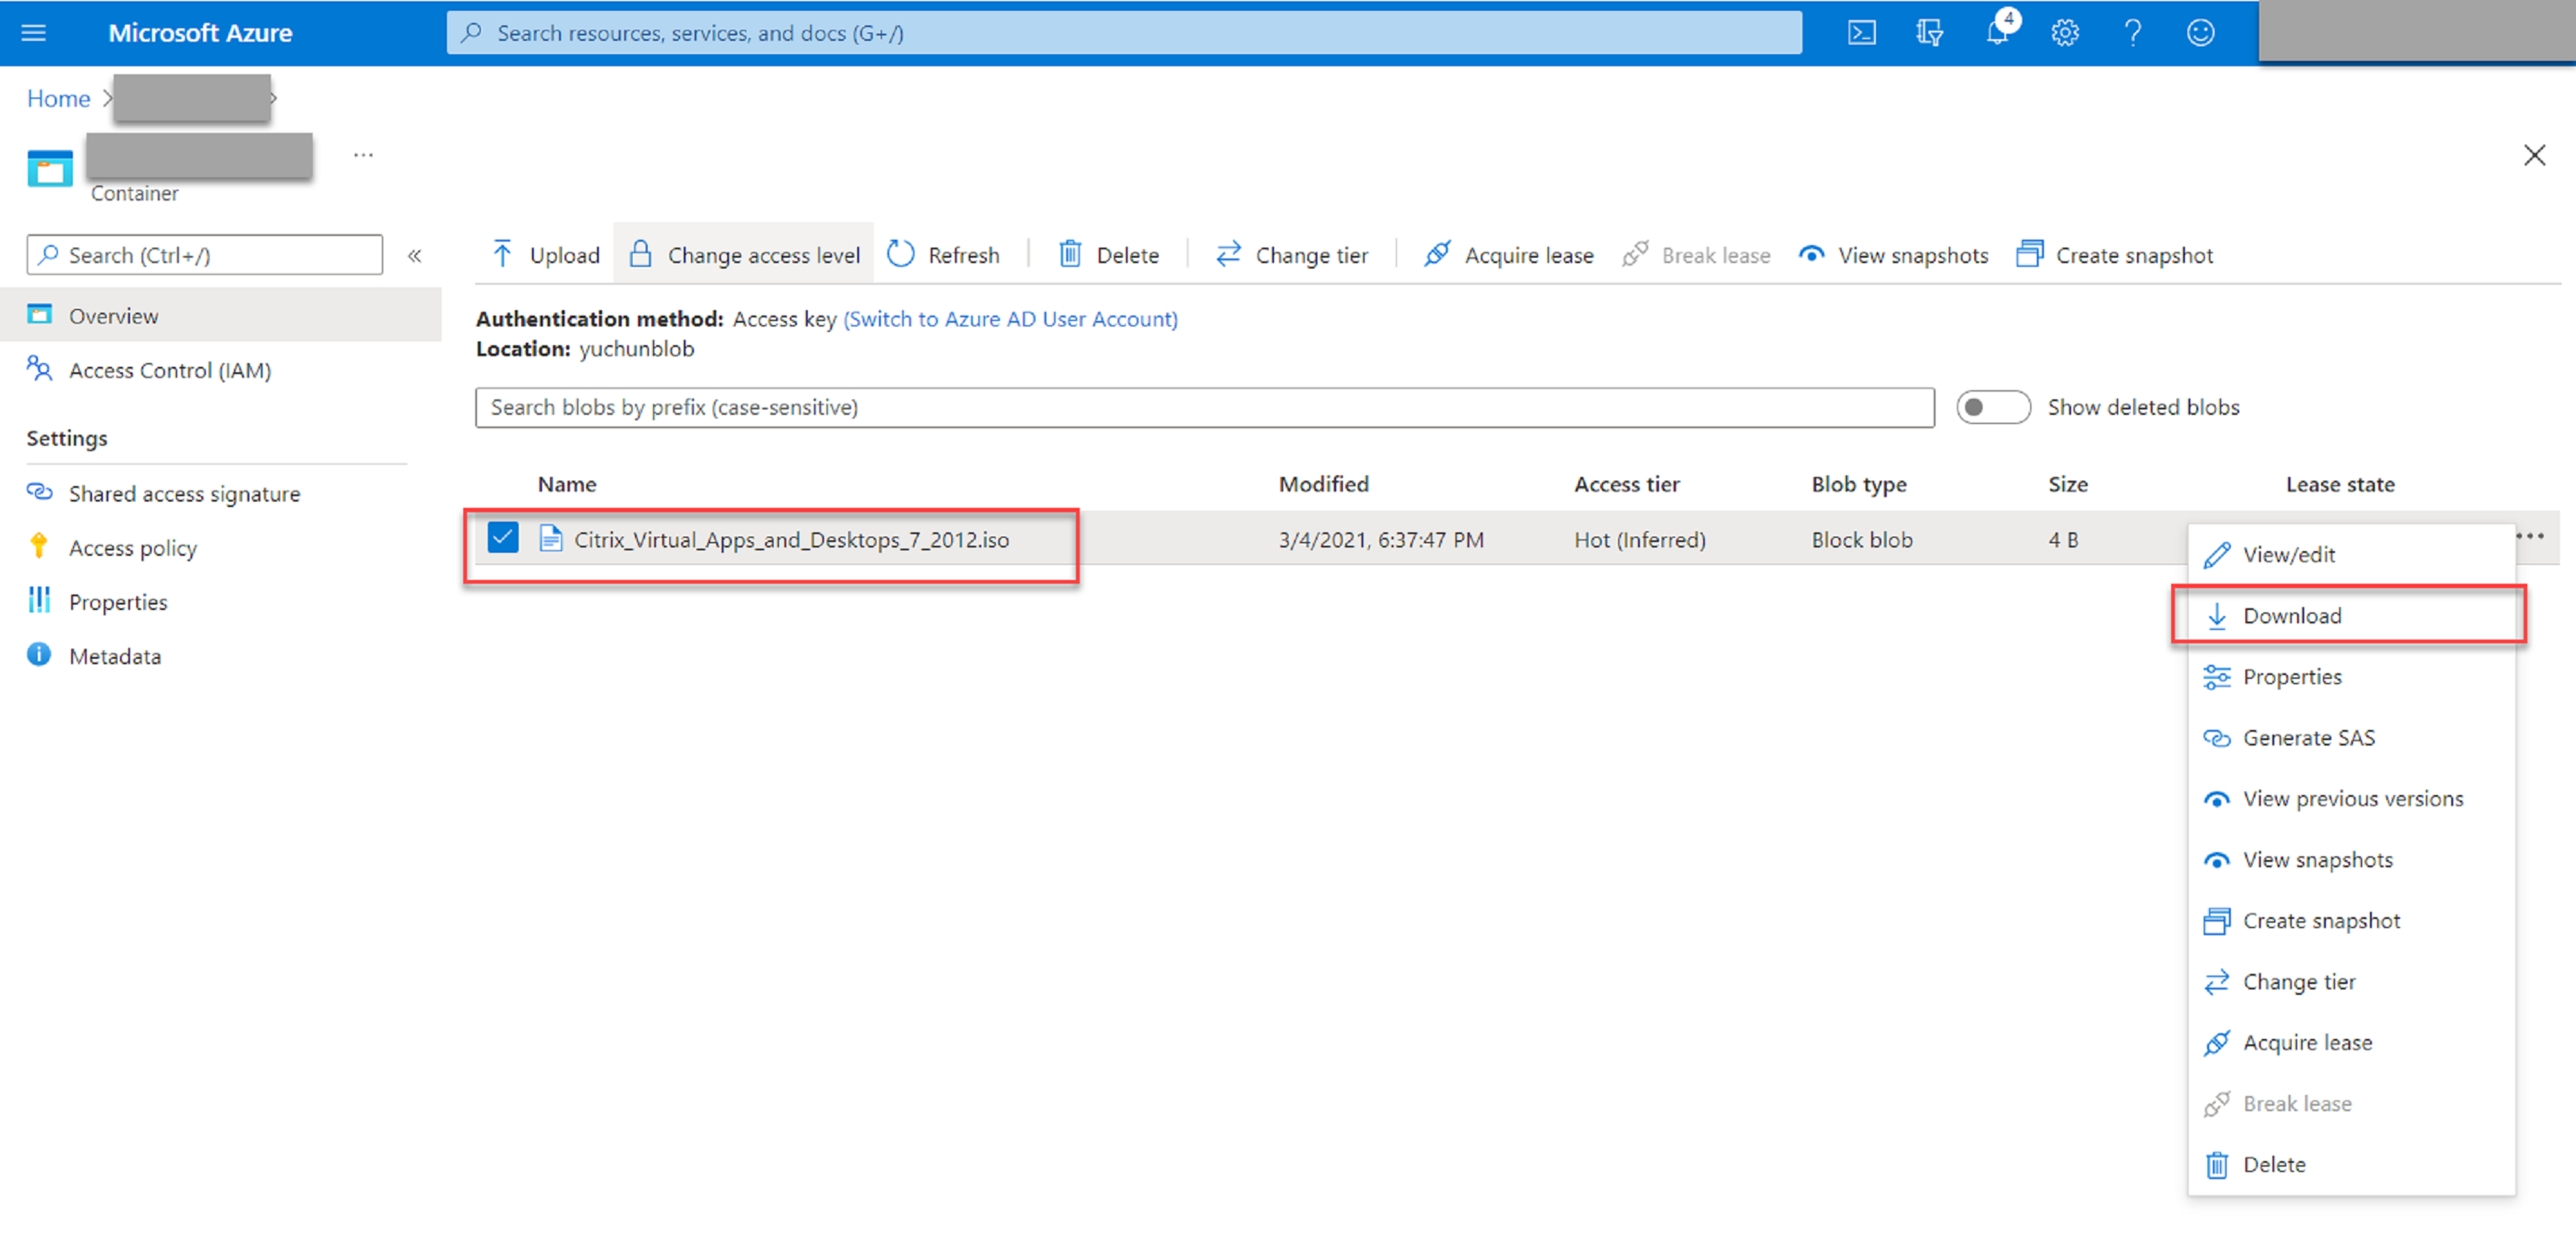
Step 4: Remote desktop and download the Citrix Virtual Apps and Desktops installer to the Azure VMs
Step 5: Run the installer to install Session Recording components on the Azure VMs
For more information, see Install the Session Recording Administration components.
Step 6: Configure an Azure file share to store recordings
To create an Azure file share to store recordings, complete the following steps:
-
In the Azure portal, create a storage account and then create an Azure file share.
For a quick start guide, see Create and manage Azure file shares with the Azure portal. The following table recommends configurations for your consideration.
Recording File Size MB/hour Number of Recorded Sessions Per Day File Share Type File Share Quota (TB) Session Recording Server Quantity Session Recording Server Size < 6.37 < 1,000 HDD Standard (StorageV2) 2 1 Standard D4as_v4 < 6.37 1,000–2,000 SSD Premium 3 1 Standard D4as_v4 < 6.37 2,000–3,000 SSD Premium 5 1 Standard D4as_v4 < 6.37 3,000–4,000 SSD Premium 6 1 Standard D4as_v4 Approx.10 < 1,000 HDD Standard (StorageV2) 3 1 Standard D4as_v4 Approx.10 1,000–2,500 SSD Premium 6 1 Standard D4as_v4 Approx.10 2,500–4,000 SSD Premium 10 2 Standard D4as_v4 The file share quota is calculated based on eight hours per day, 23 working days per month, and a one-month retention period for each recording file.
-
Add the Azure file share credentials to the host where you installed the Session Recording server.
-
Start a command prompt as an administrator and change the drive to the <Session Recording server installation path>\Bin folder.
By default, the Session Recording server is installed in
C:\Program Files\Citrix\SessionRecording\Server. -
Run the SsRecUtils.exe -AddAzureFiles <storageAccountName> <fileShareName> <accesskey> command.
Where,
- <storageaccountname> is the name of your storage account in Azure.
- <filessharename> is the name of the file share contained within your storage account.
- <accesskey> is your storage account key that can be used to access the file share.
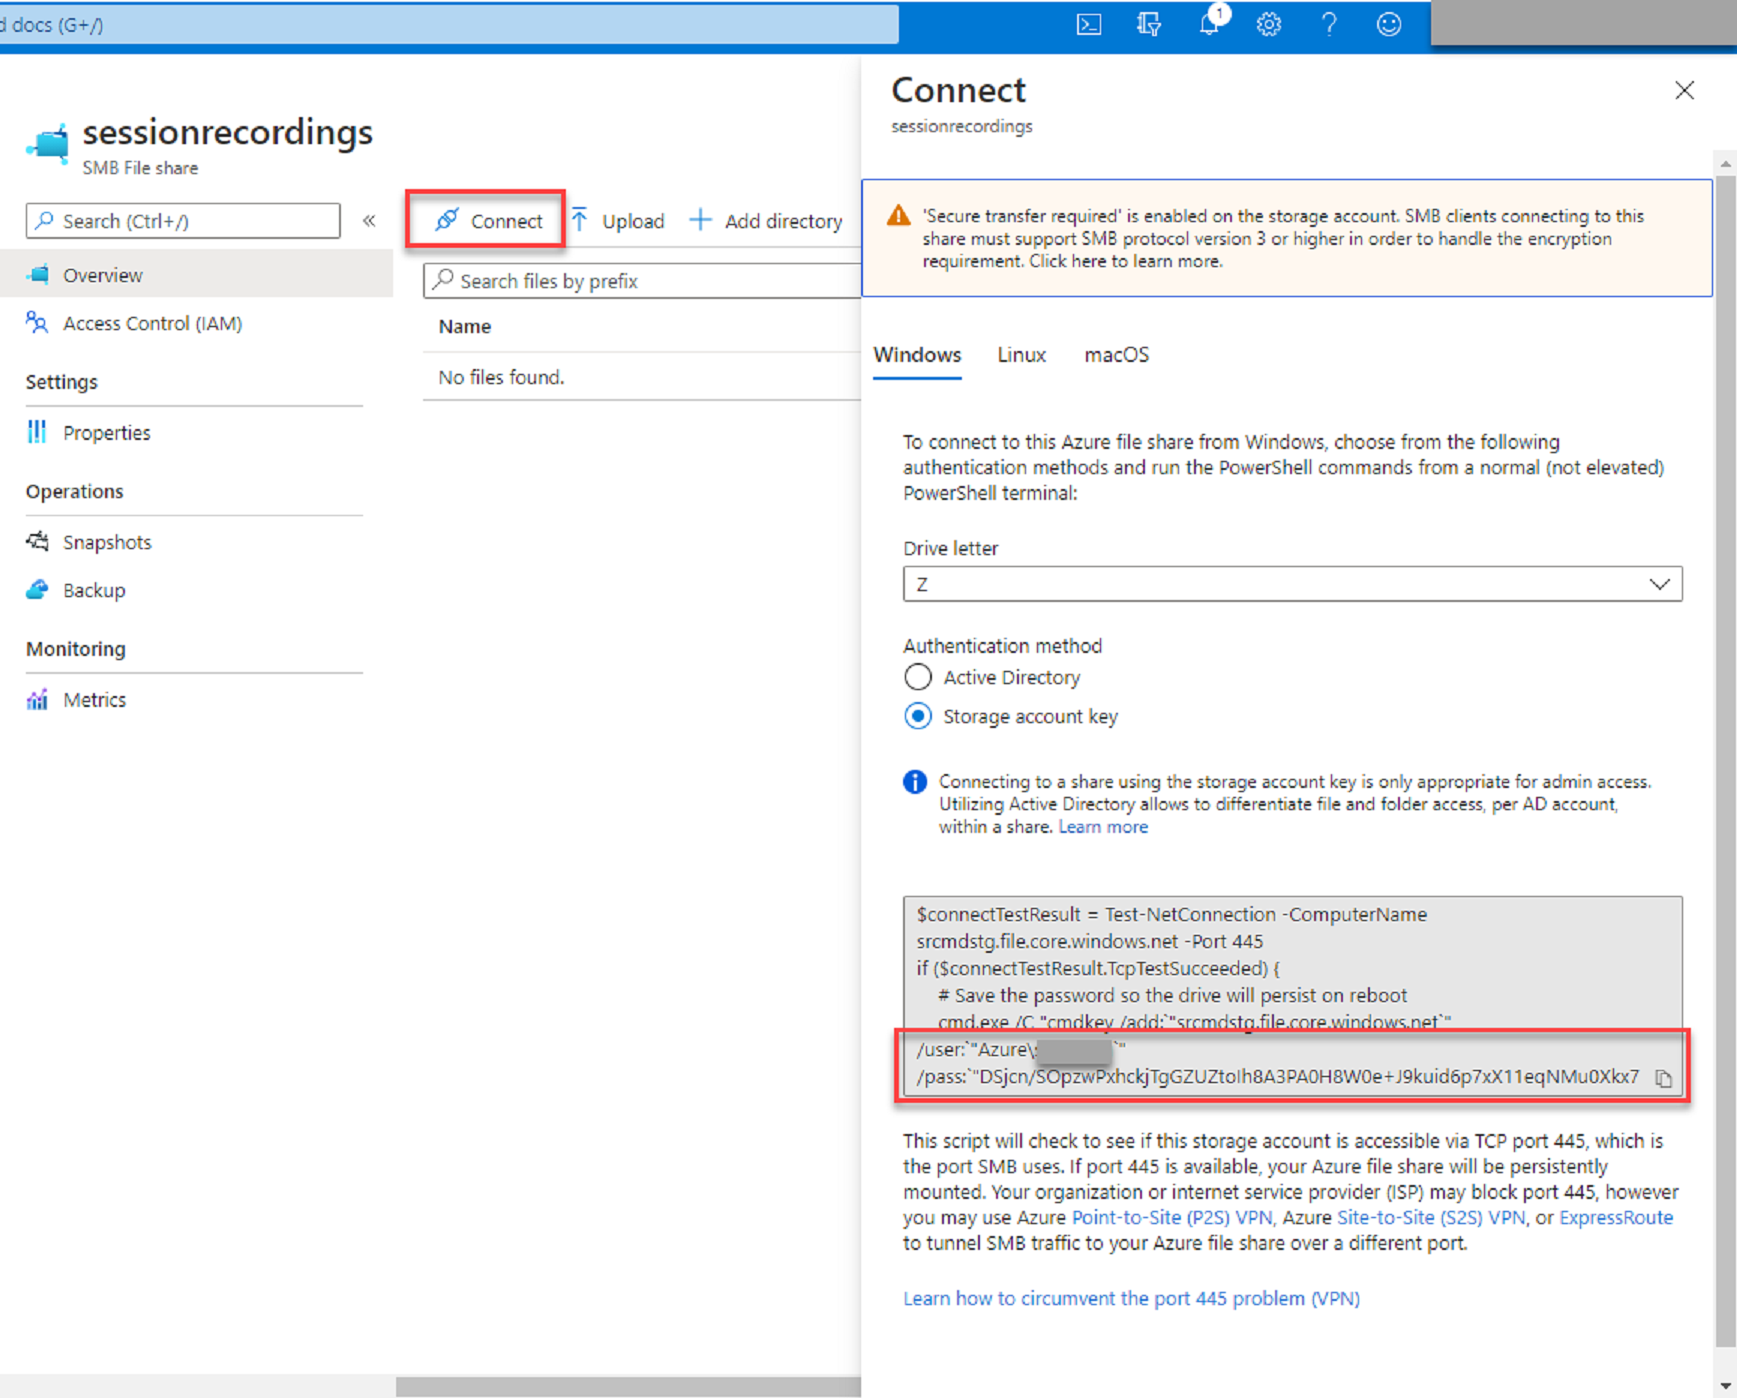
There are two ways to obtain your storage account key:
-
You can obtain your storage account key from the connection string that appears when you click the Connect icon in your file share page.
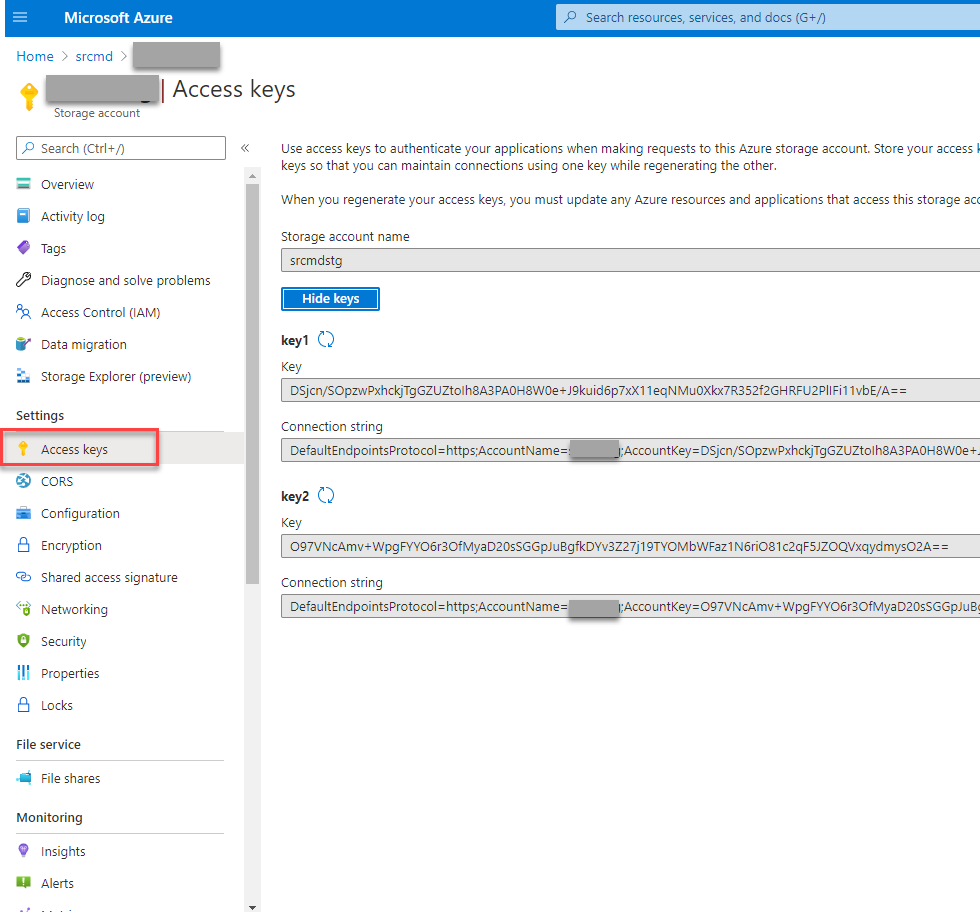
-
You can also obtain your storage account key by clicking Access keys in the left navigation of your storage account page.
-
Mount the Azure file share to the host where you installed the Session Recording server.
- Open Session Recording Server Properties.
- Click Add on the Storage tab.
-
Enter the UNC path in the format of \\<storageaccountname>.file.core.windows.net\<filessharename>\<subfolder>.
Specify a subfolder under the file share to store your recording files. The Session Recording server then automatically creates the subfolder for you.
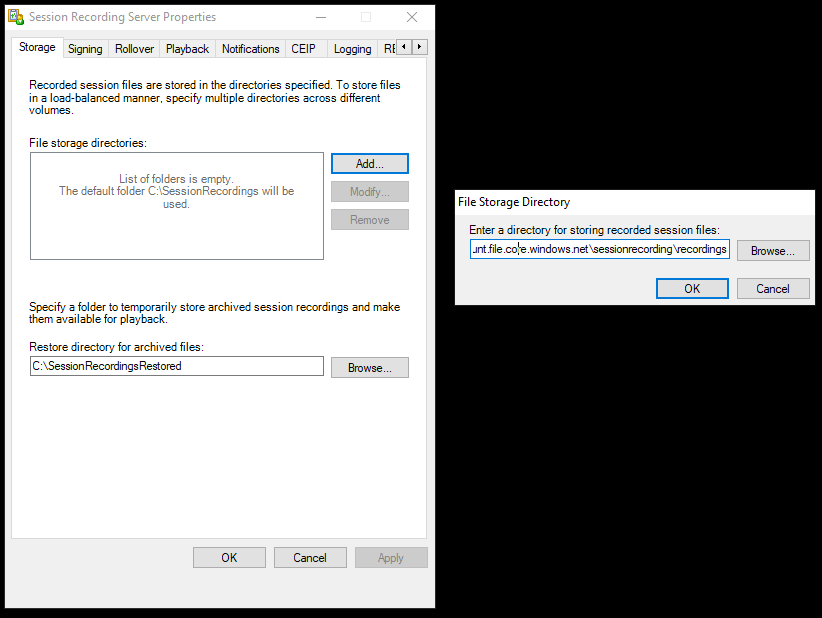
- Click OK in the File Storage Directory dialog box.
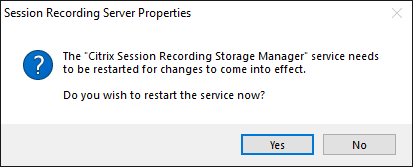
- Click Apply in the Session Recording Server Properties window.
- Click OK after Apply becomes grayed out.
-
Click Yes when you are prompted to restart the Session Recording Storage Manager service.
-
Step 7: Add a load balancer
If there is more than one Session Recording server, we recommend you add a load balancer in front of them. Azure offers many options to load-balance traffic requests. This section walks you through the process of creating Citrix ADC, Azure Load Balancer, and Azure Application Gateway in Azure.
Option 1: Create a Citrix ADC VPX instance in Azure
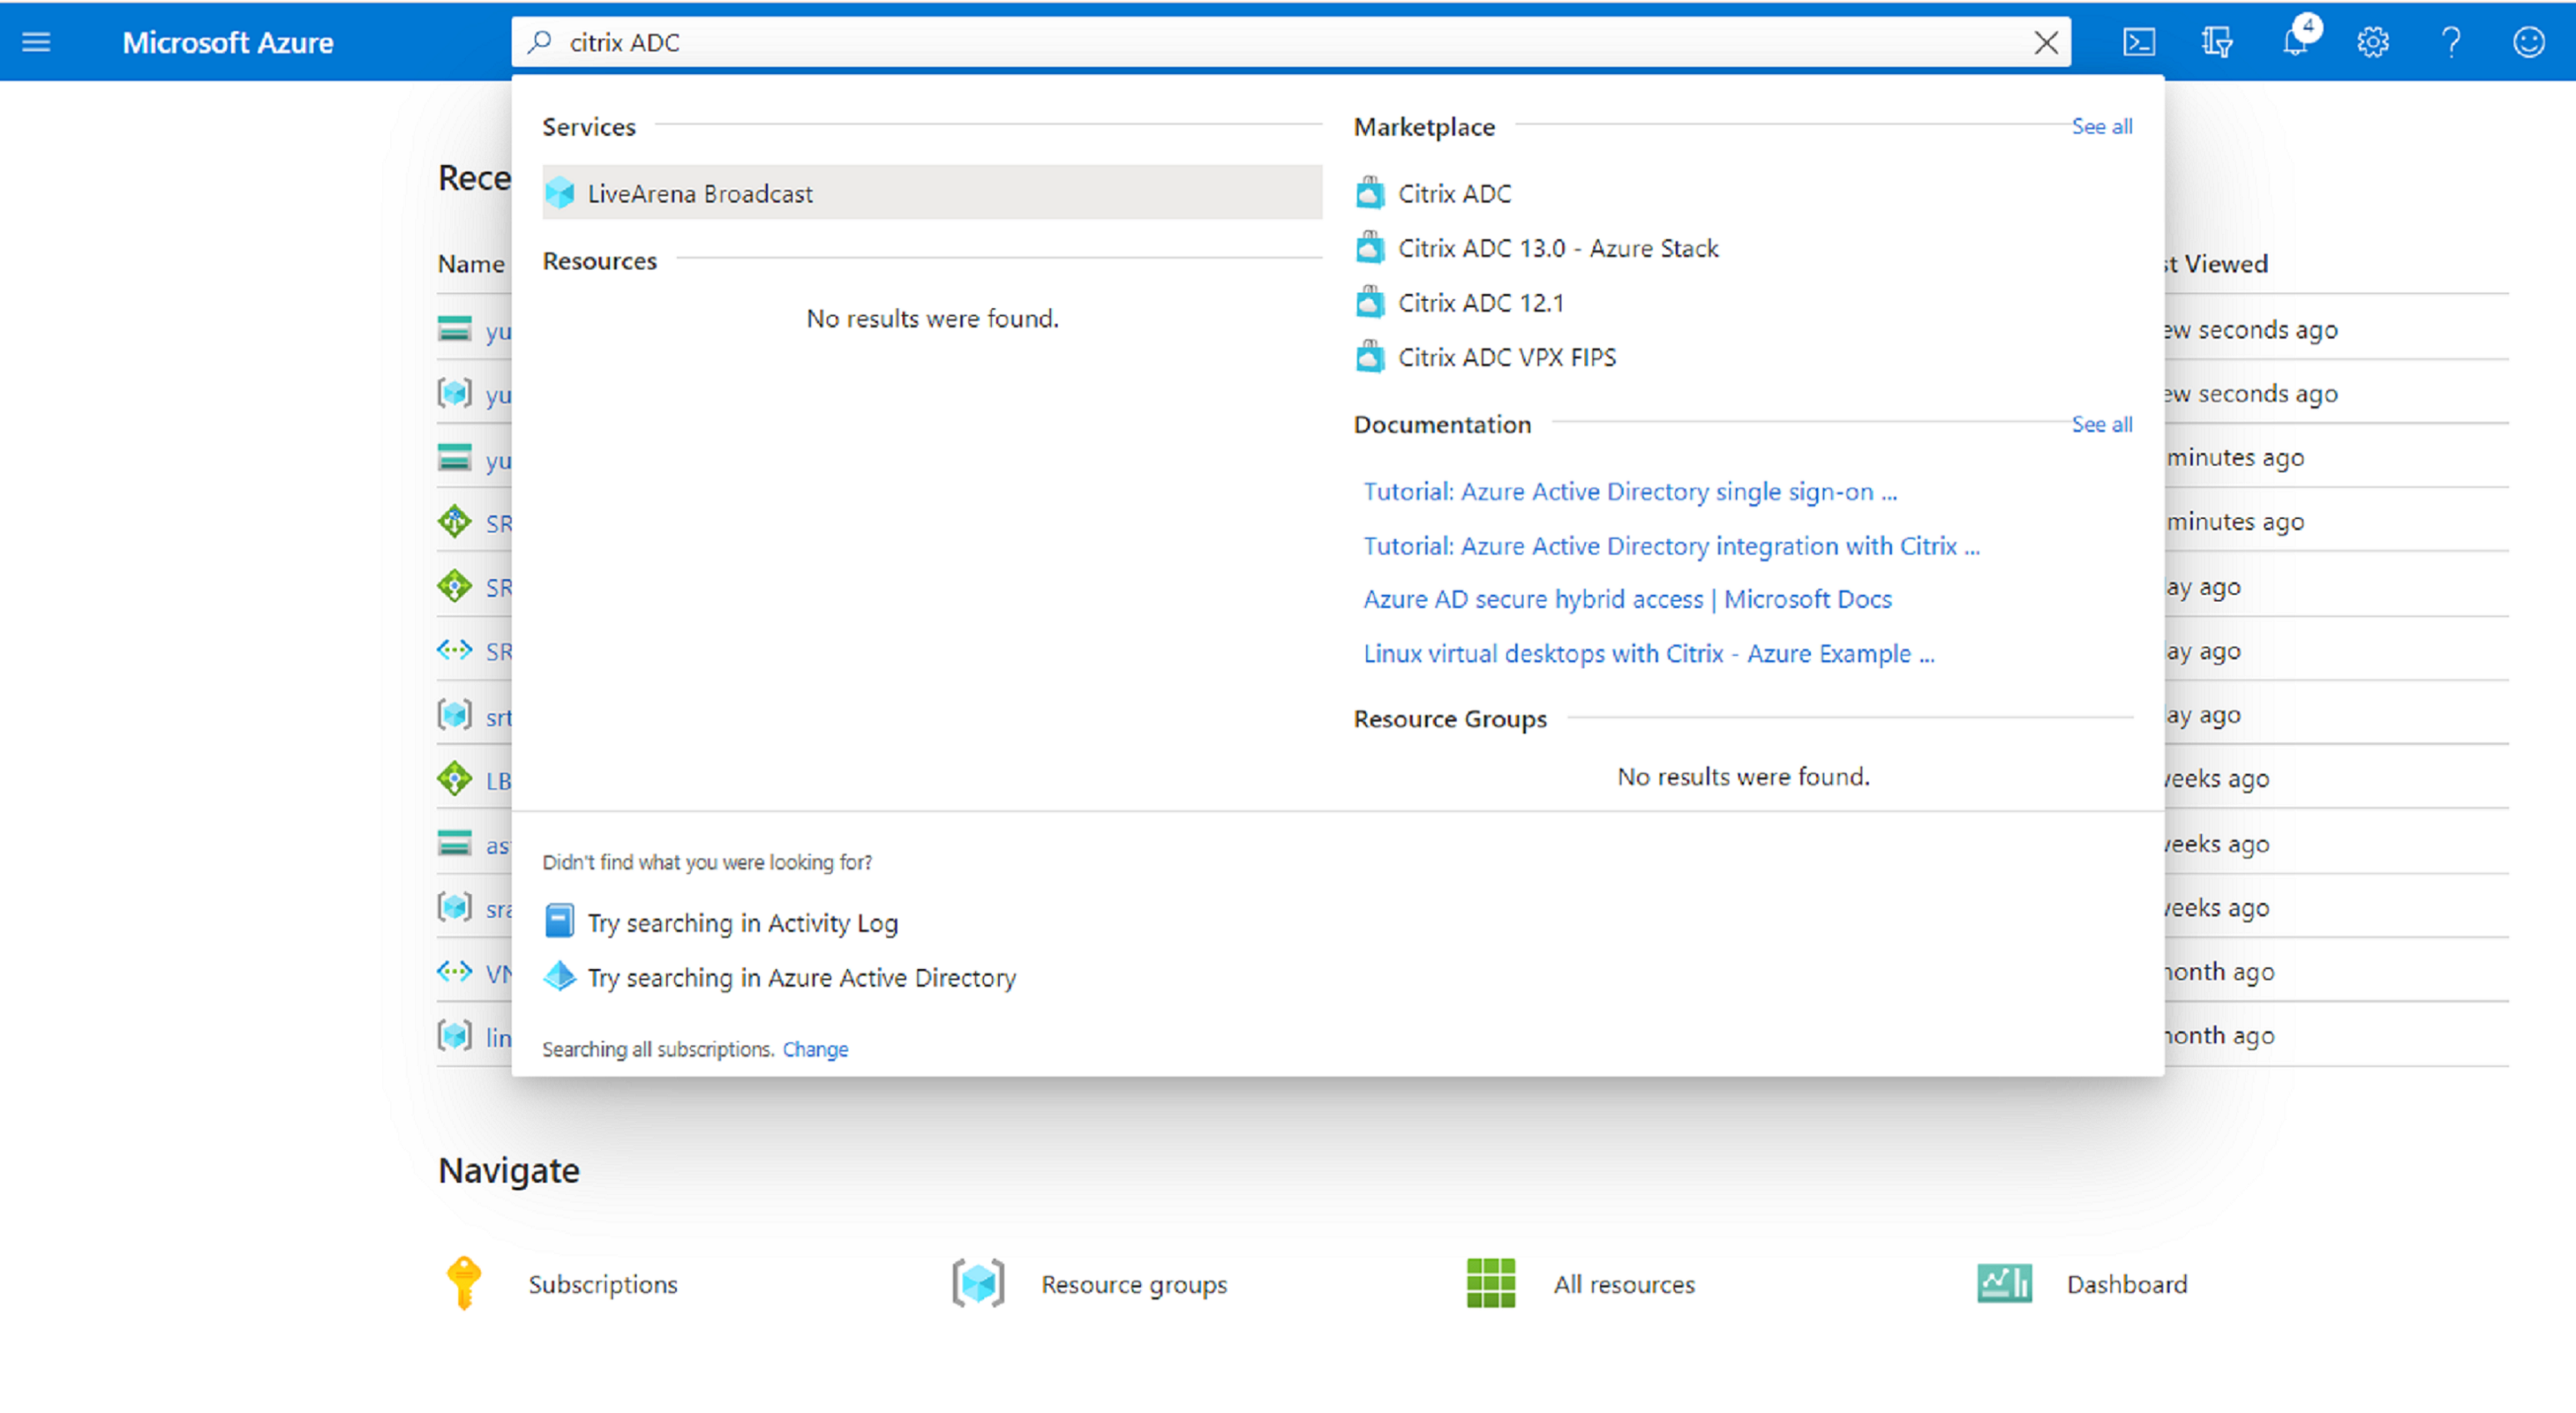
-
In the Azure portal, type Citrix ADC in the search box.
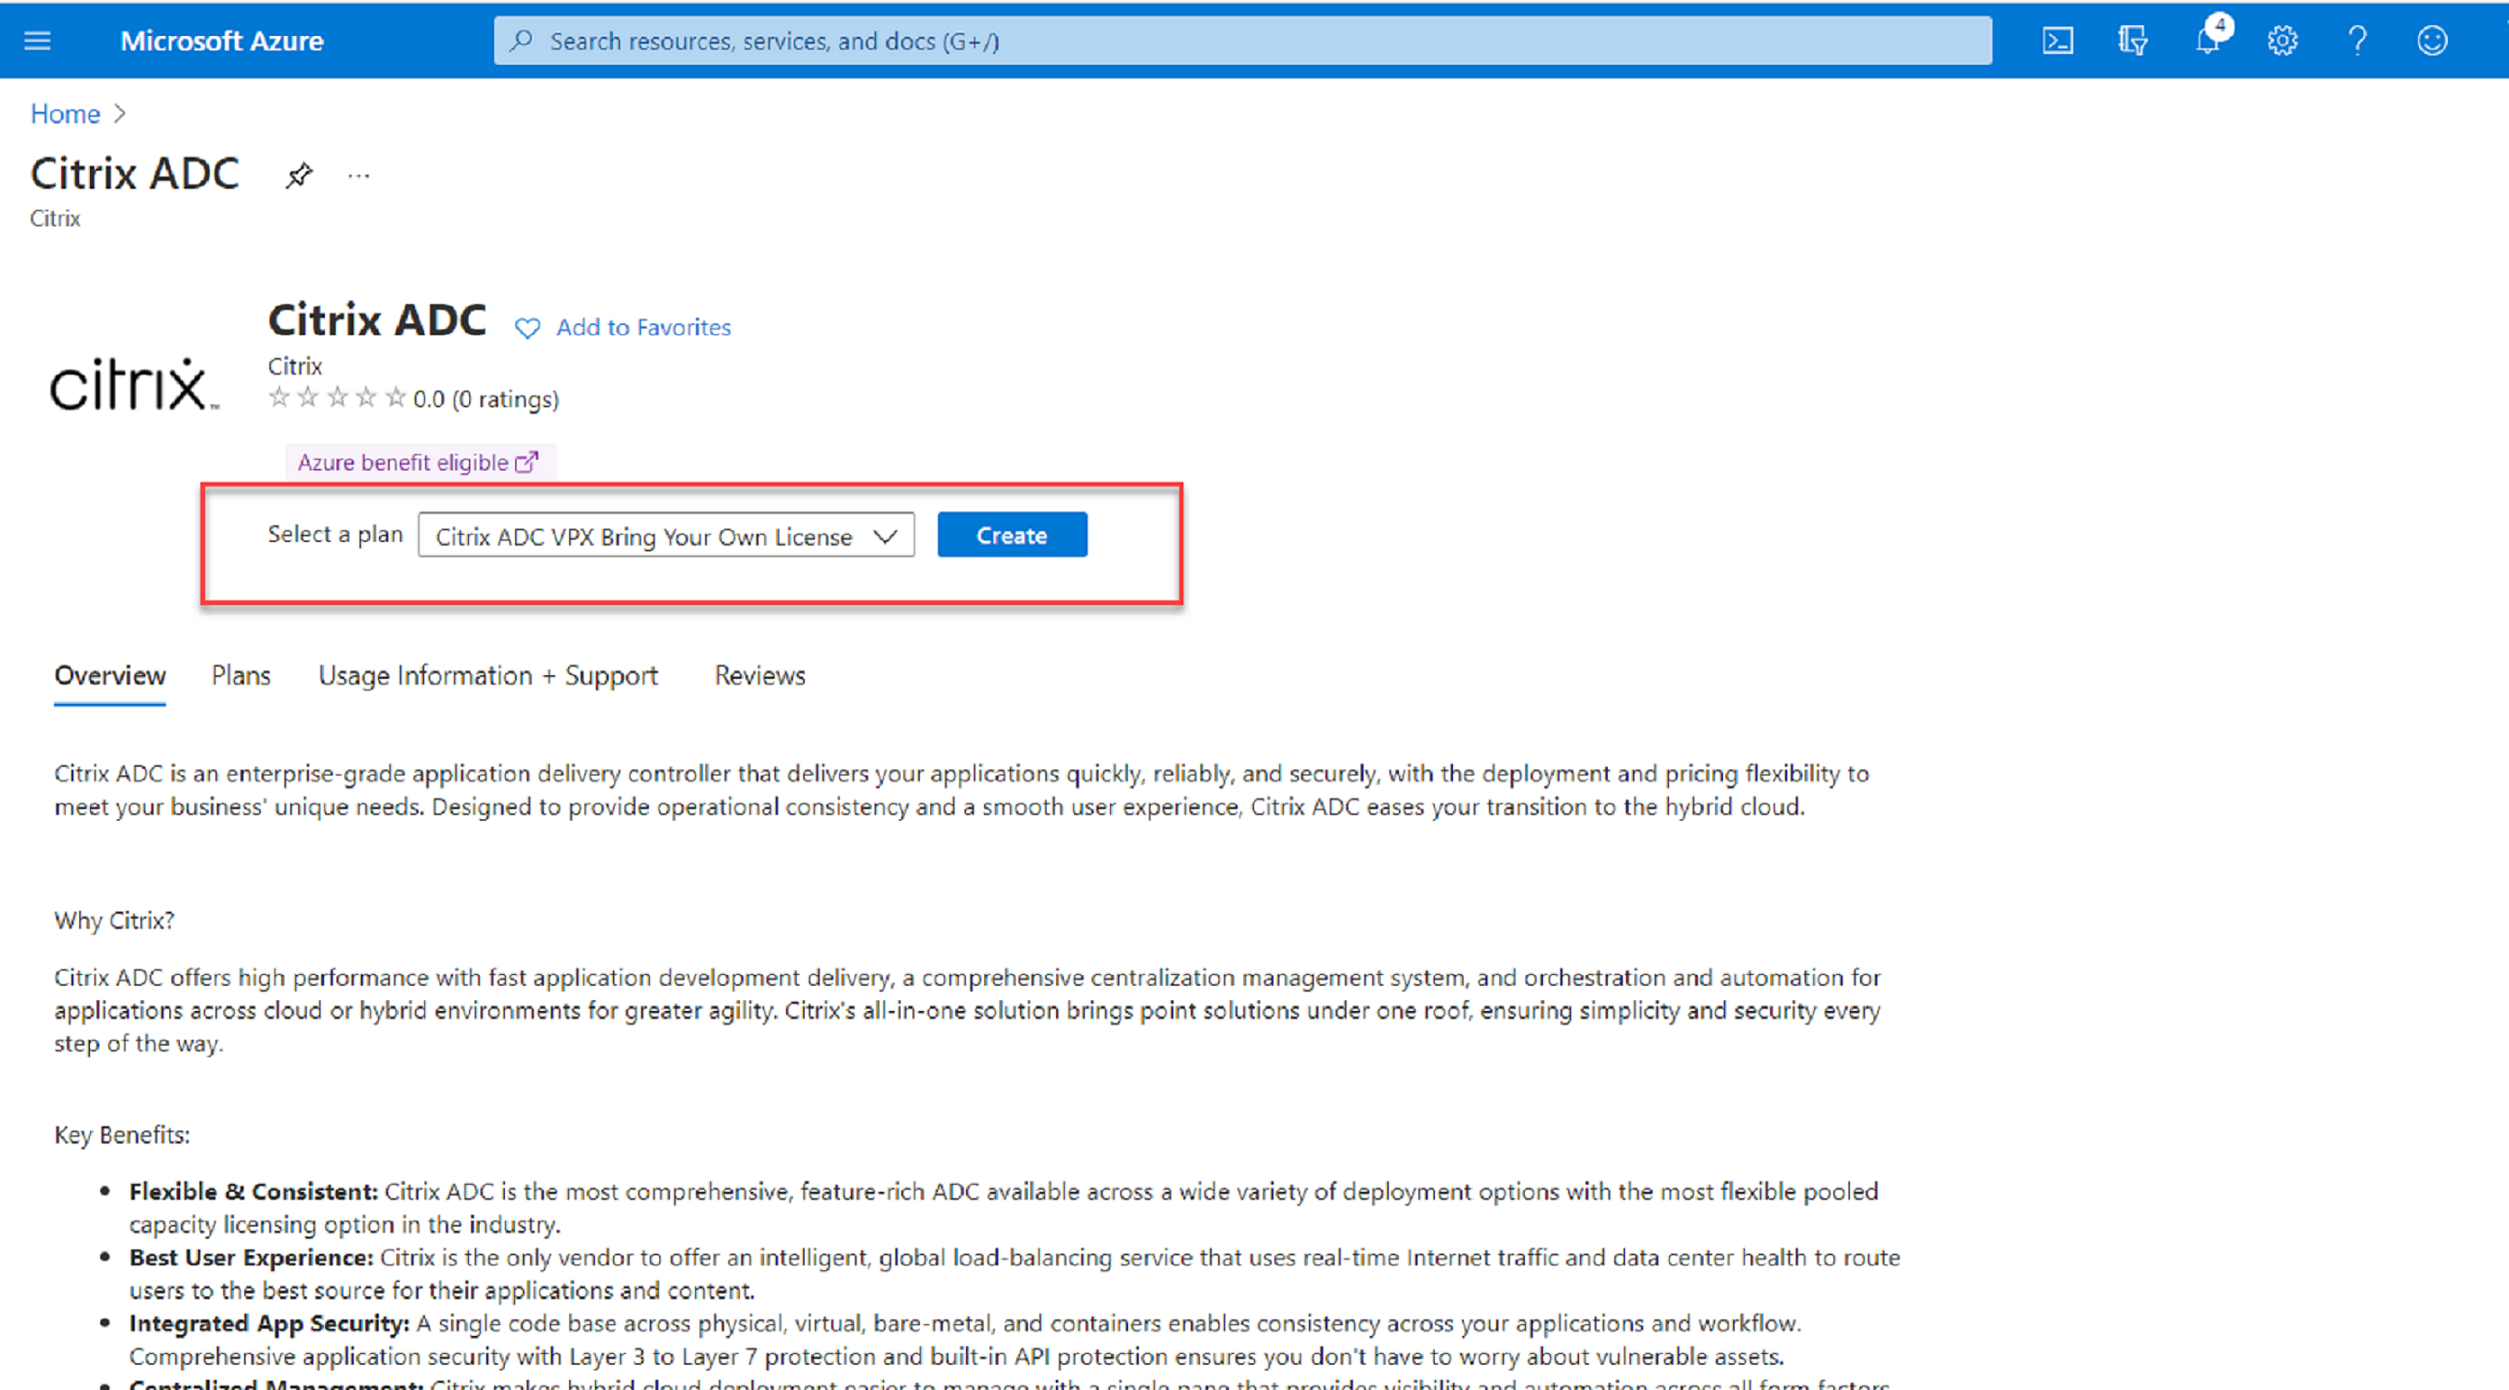
-
Choose the Citrix ADC VPX Bring Your Own License plan and then click Create.
-
Select or create a resource group and set the other settings on the Basics tab.
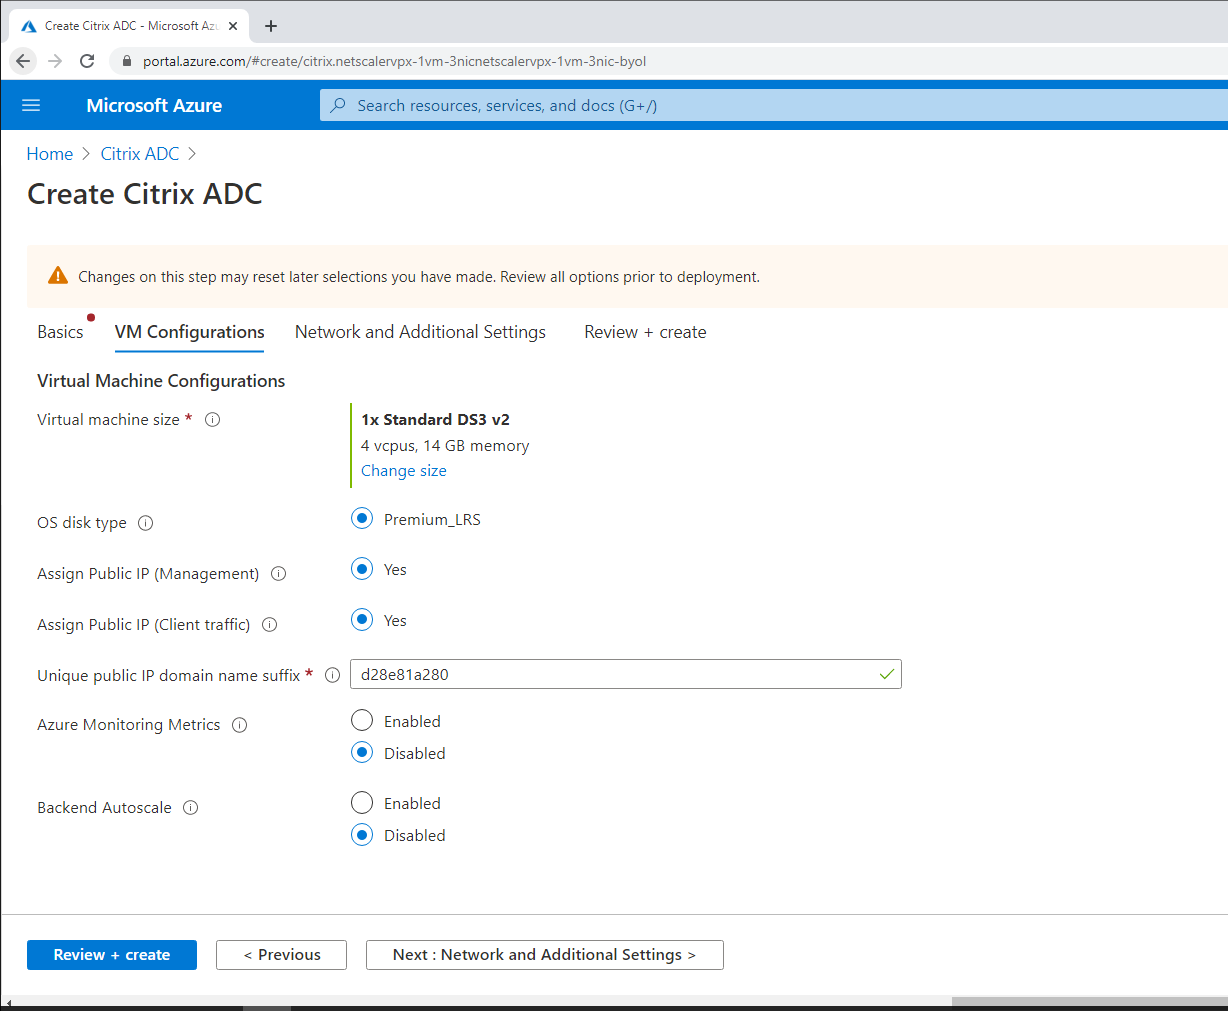
-
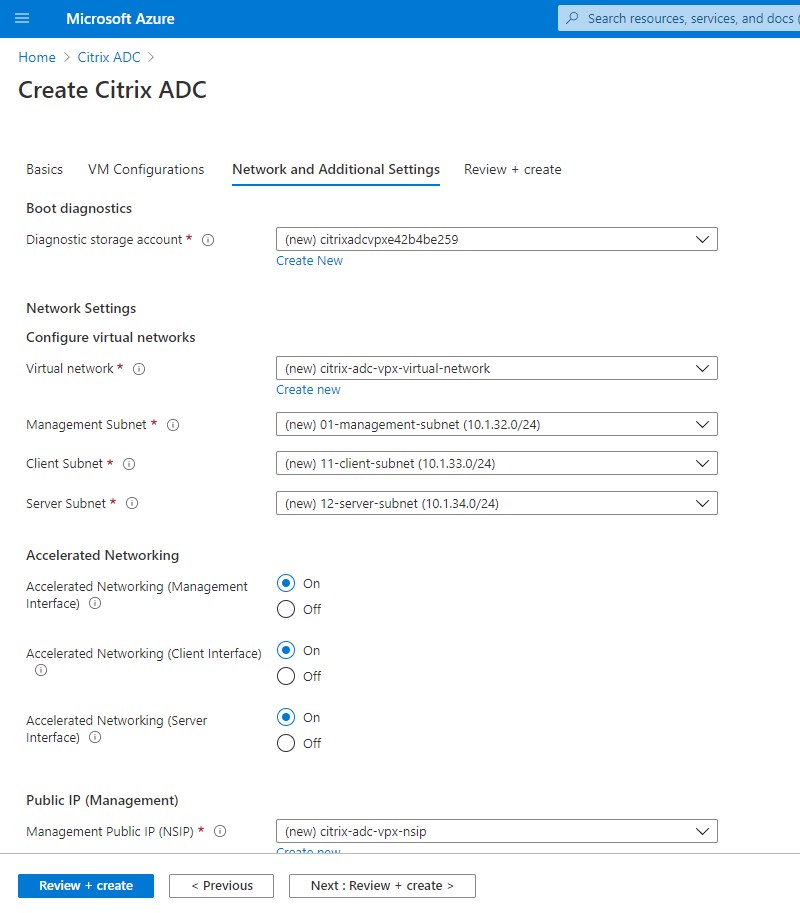
Set VM configurations.
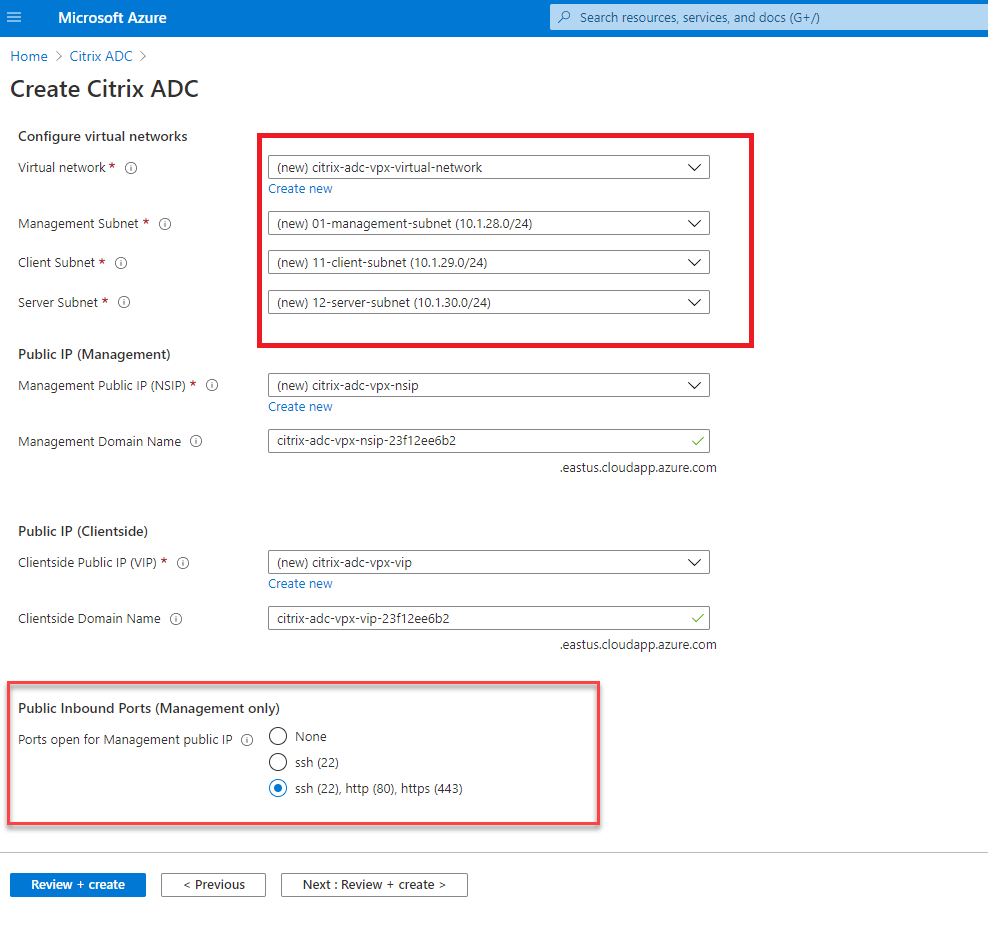
-
Check and modify network settings if necessary. Choose ssh (22), http (80), https (443) for public inbound ports.
A virtual network is automatically created. If you already have a Session Recording environment installed, you can use its virtual network and server subnet settings.
-
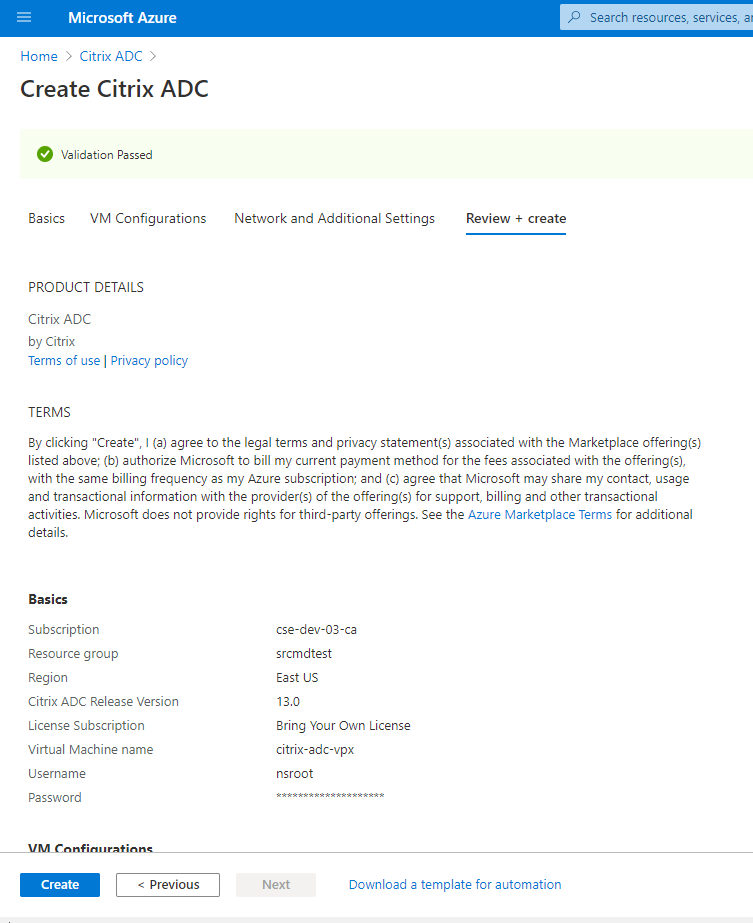
Click Next: Review + create to create the Citrix ADC VPX instance and wait for the deployment to complete.
-
Set the subnet IP (SNIP) address and the Citrix ADC VIP address to be on the same subnet.
The SNIP address and the VIP address must be on the same subnet. In this example, we set the VIP address to be on the subnet of the SNIP address.
- Stop the citrix-adc-vpx virtual machine.
-
Change the subnet of the VIP address.
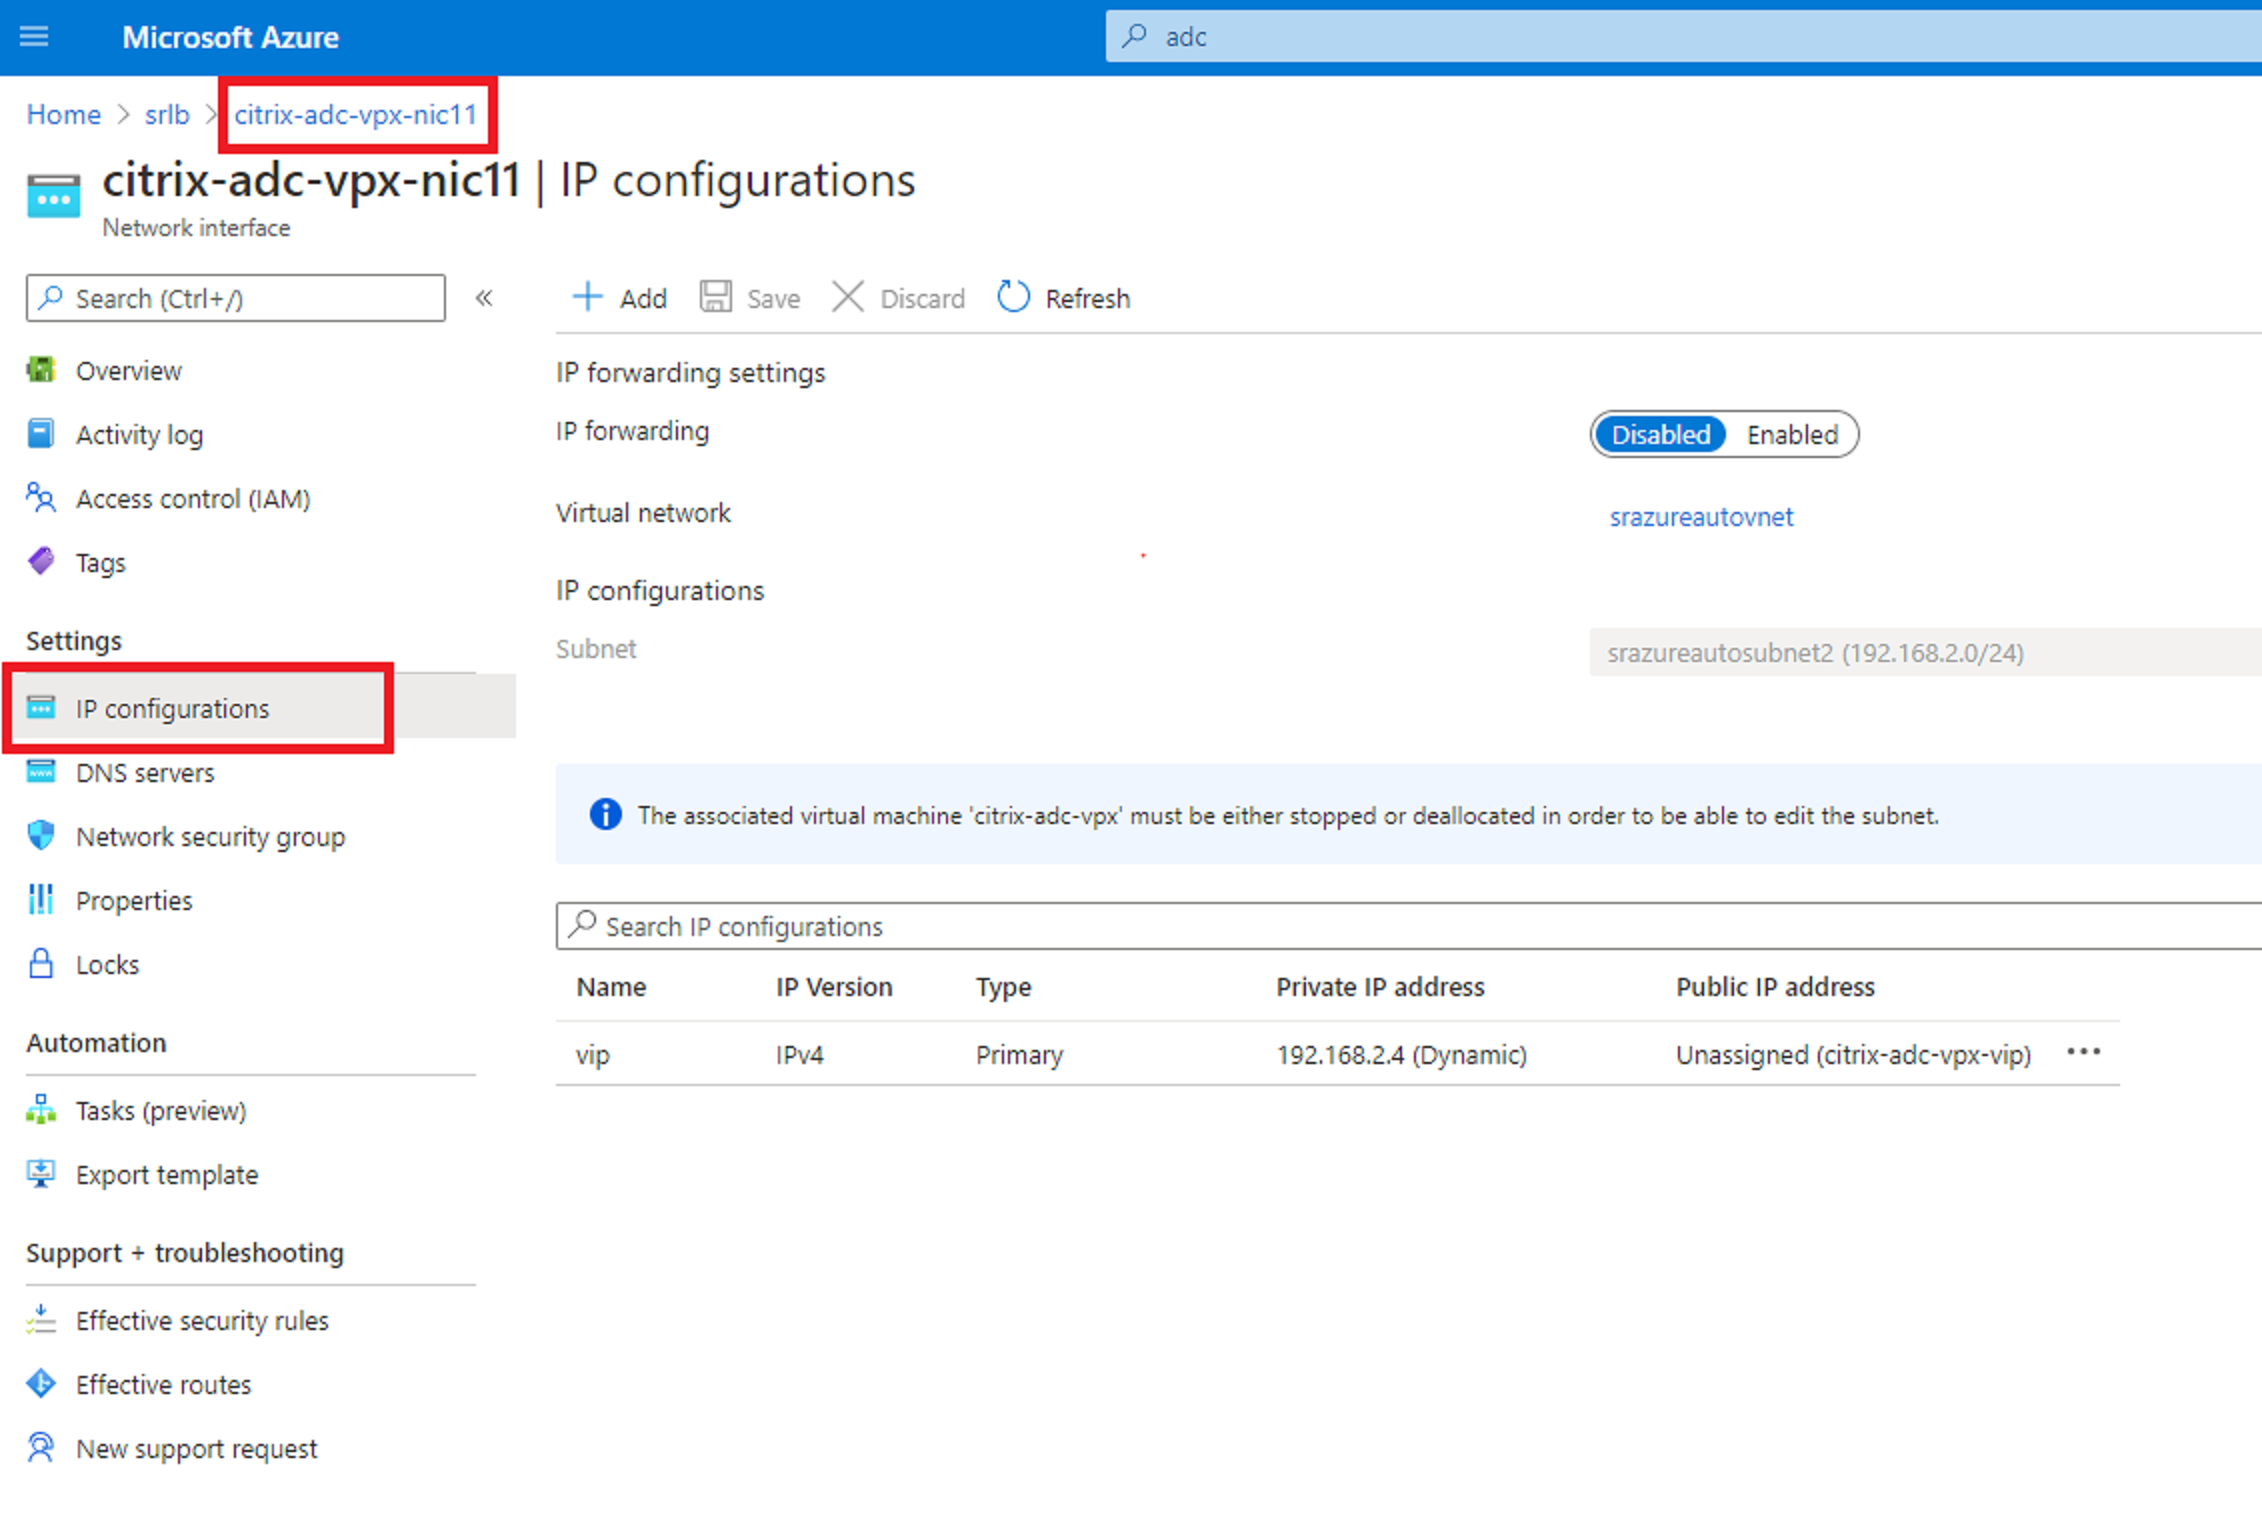
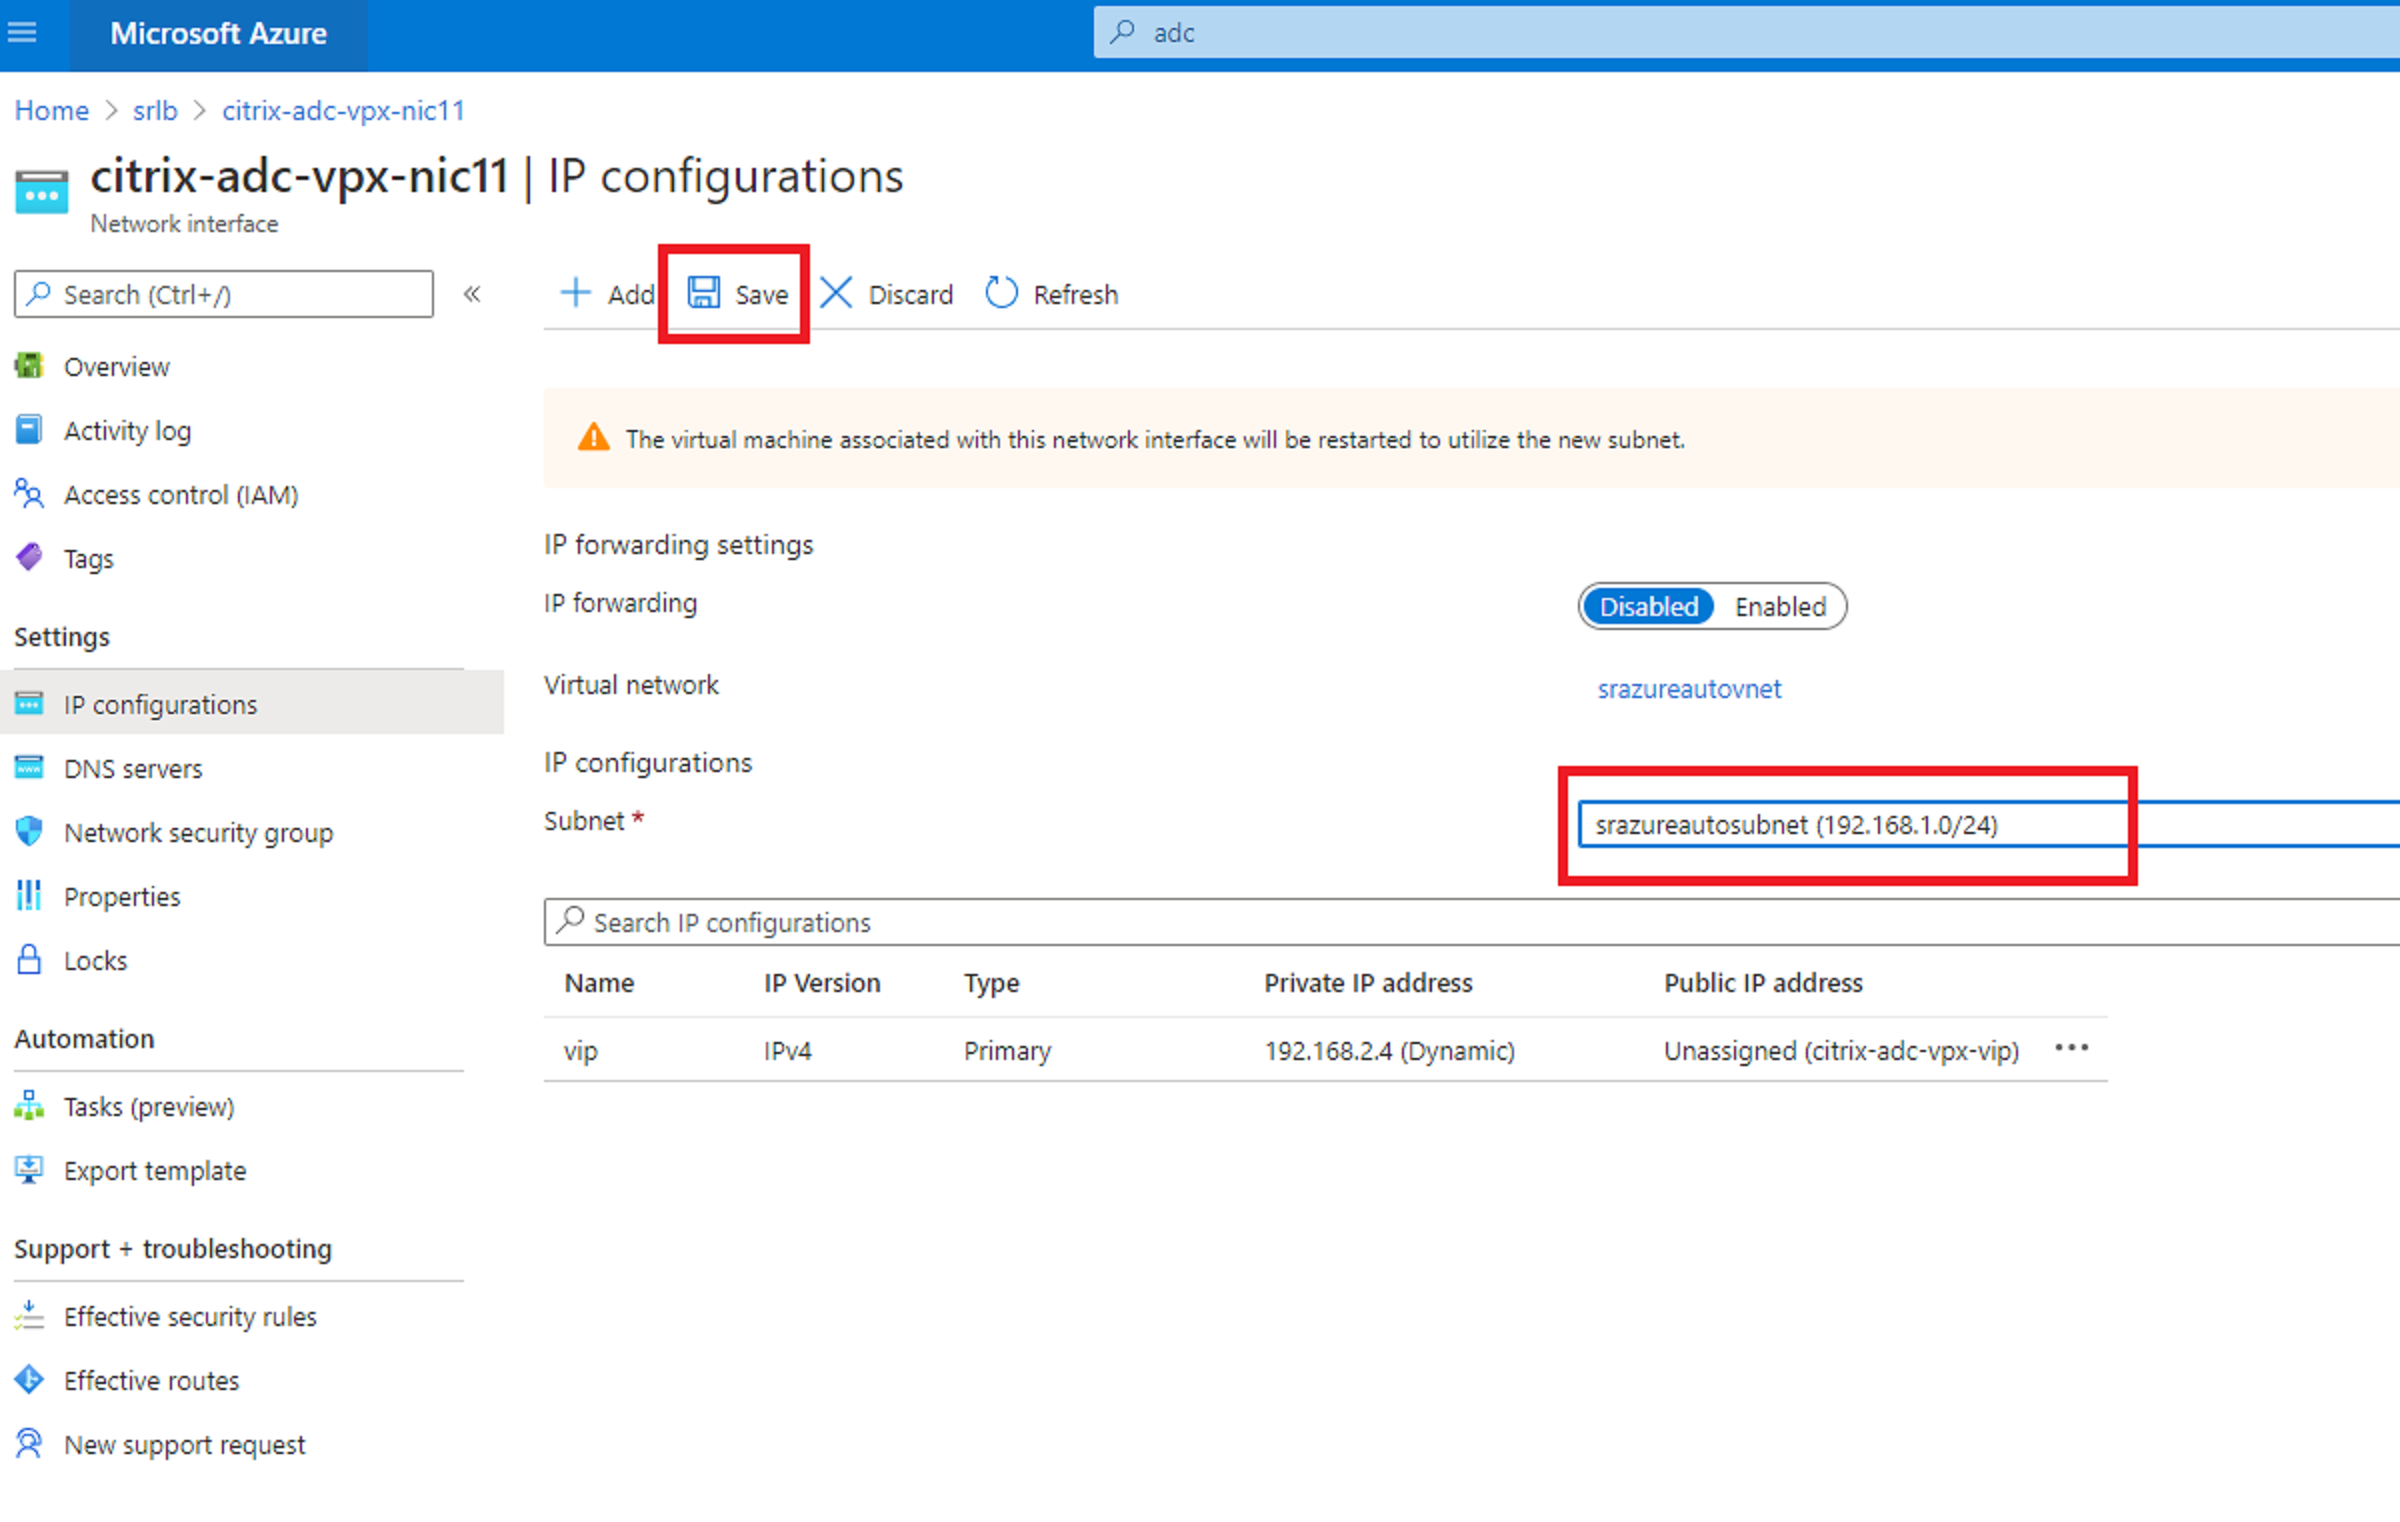
- Start the citrix-adc-vpx virtual machine
Option 2: Create an Azure load balancer
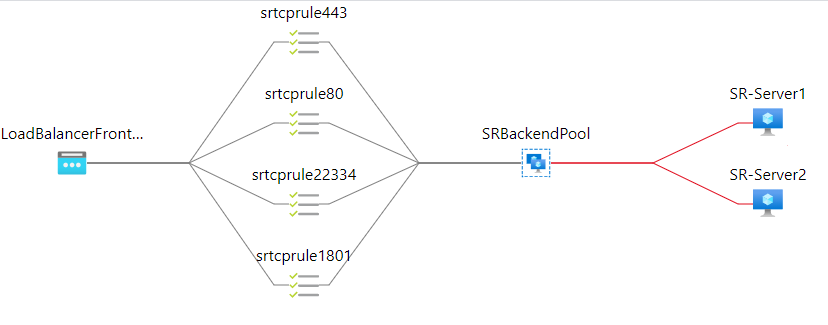
Azure Load Balancer is a TCP passthrough service. The following diagram shows load balancing through TCP passthrough.
- Create an Azure load balancer.
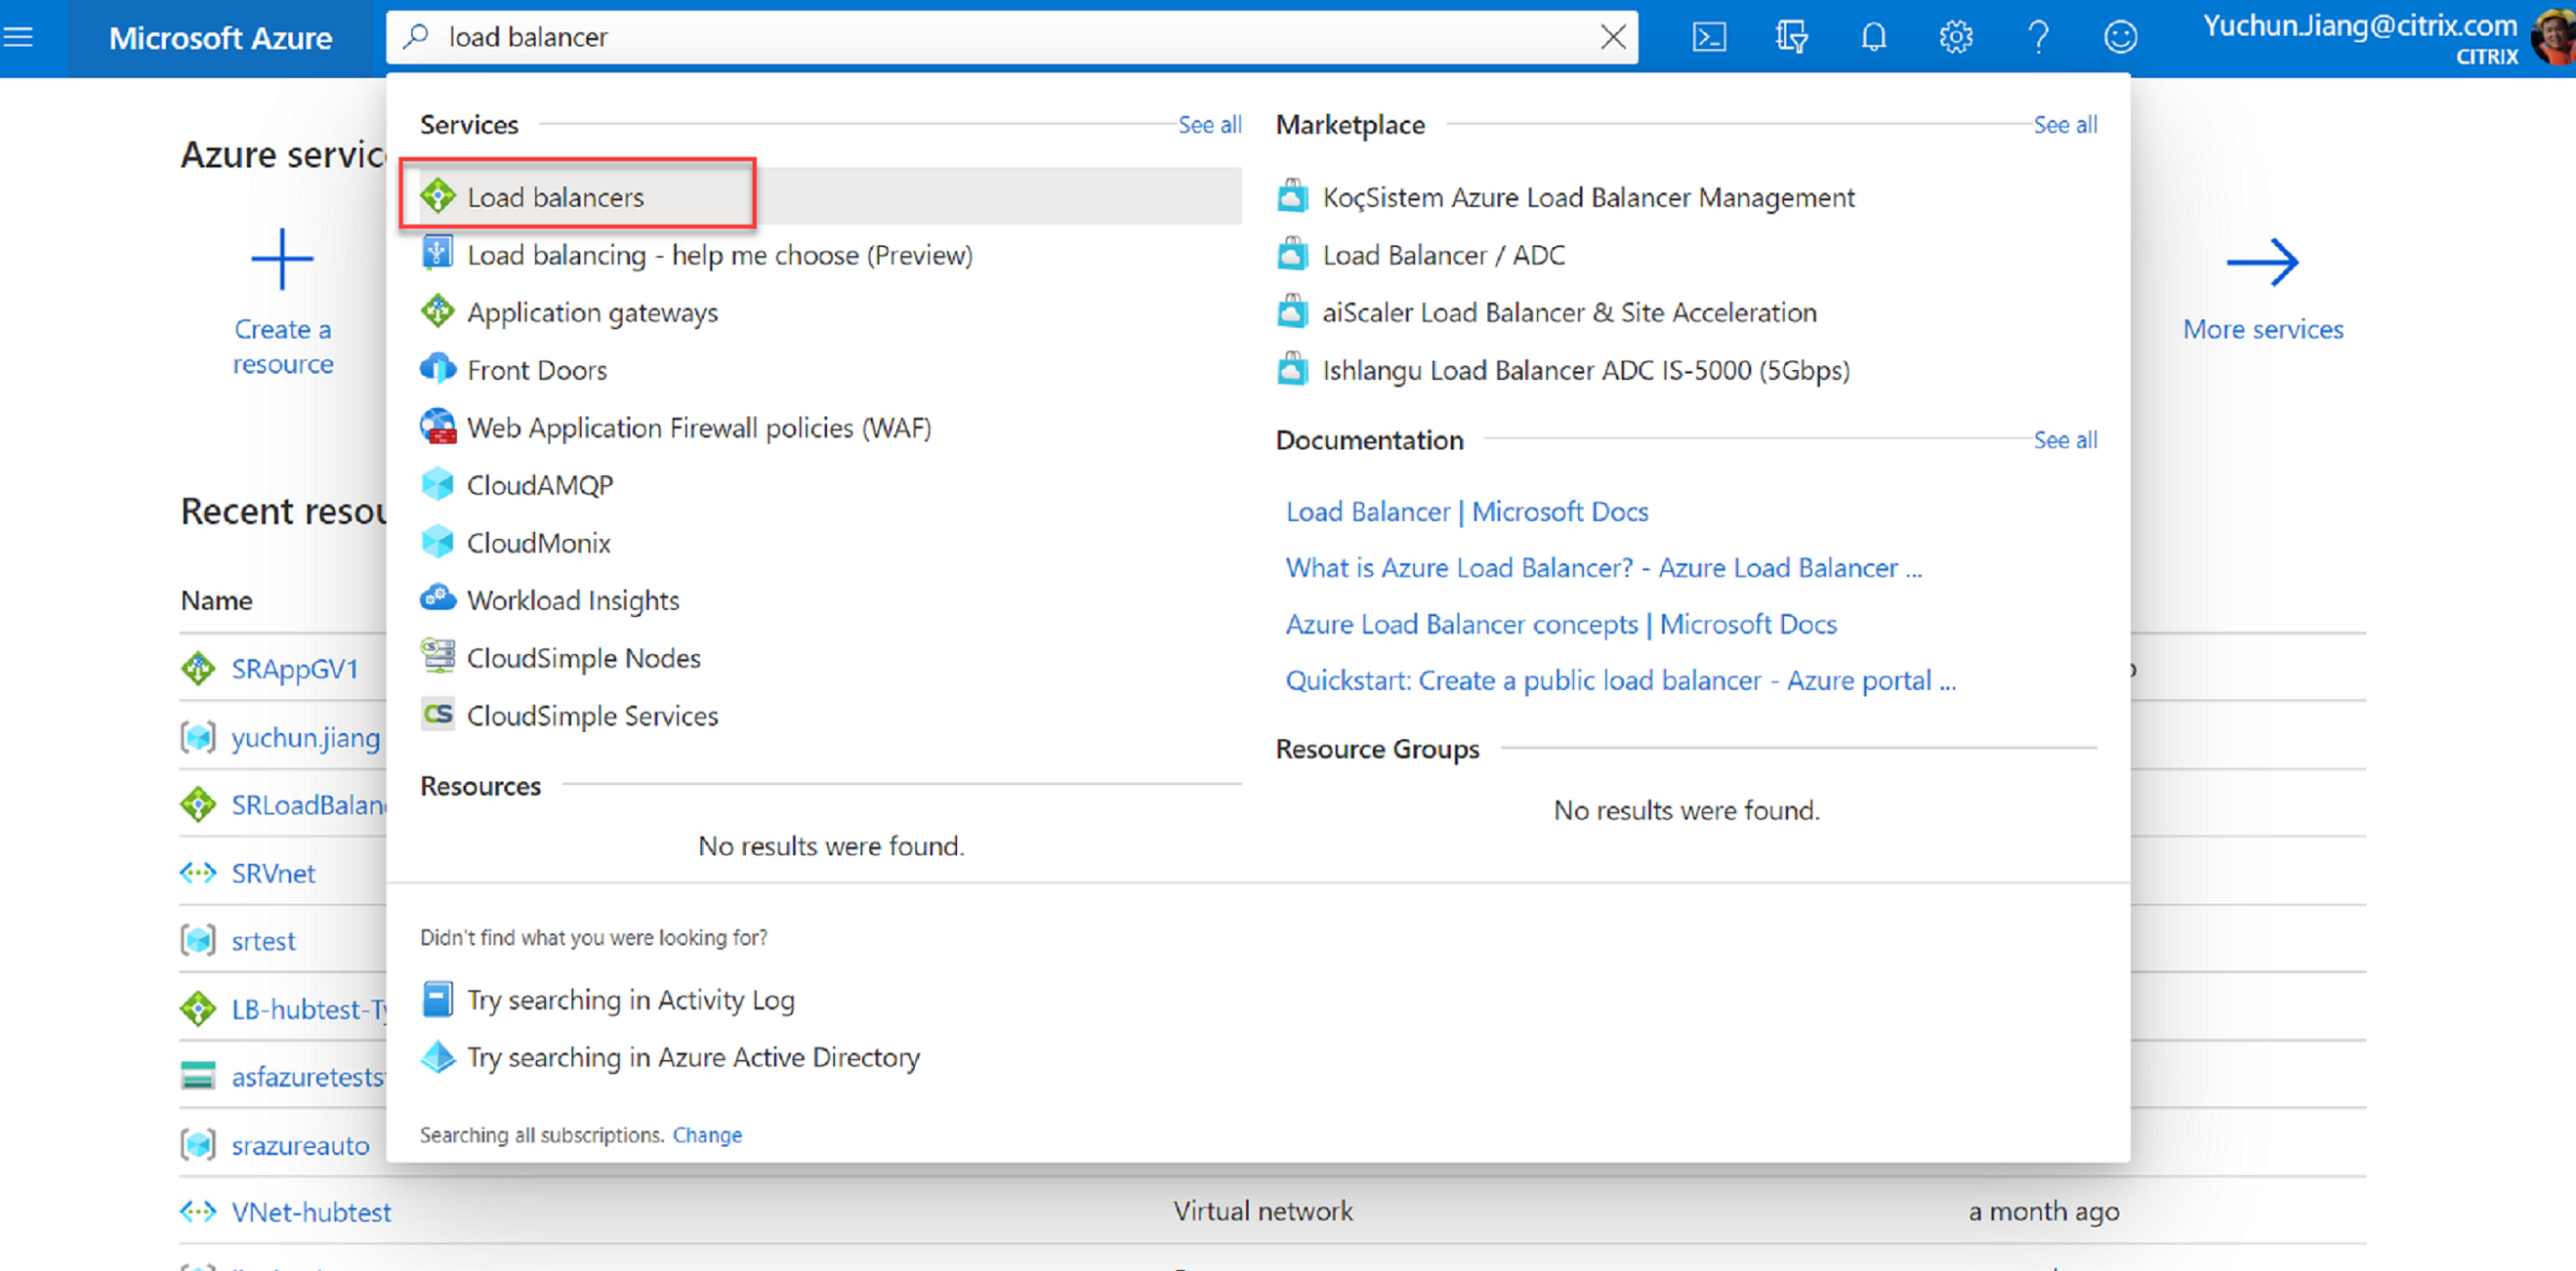
-
Search in the Azure portal and select Load Balancers from the Marketplace.
On the Basics tab of the Create load balancer page, configure settings as described in the following table:
Setting Value Subscription Select your subscription. Resource group For example, select srlbtest created earlier. Name Enter SRLoadBalance. Region Select (US) East US. Type Select Internal. SKU Select Standard Virtual network For example, select srazureautovnet created earlier. Subnet For example, select srazureautosubnet created earlier. IP address assignment Select Dynamic. Availability zone Select Zone-redundant. 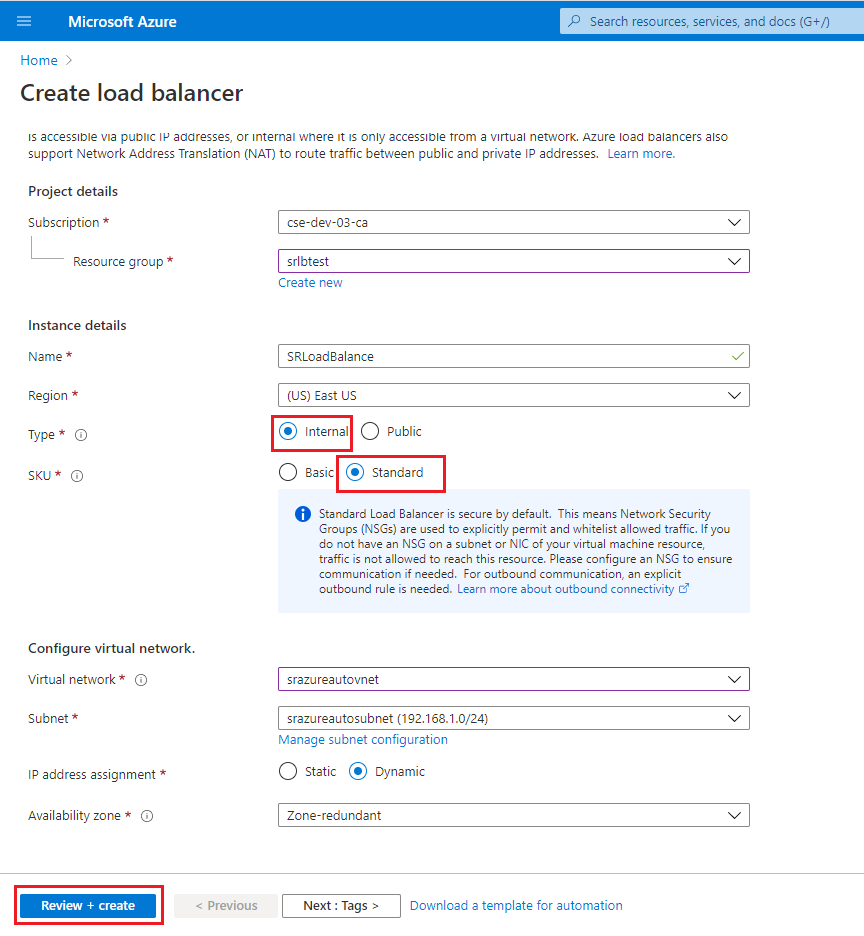
-
Add load balancer resources, including a back-end pool, health probes, and load balancing rules.
-
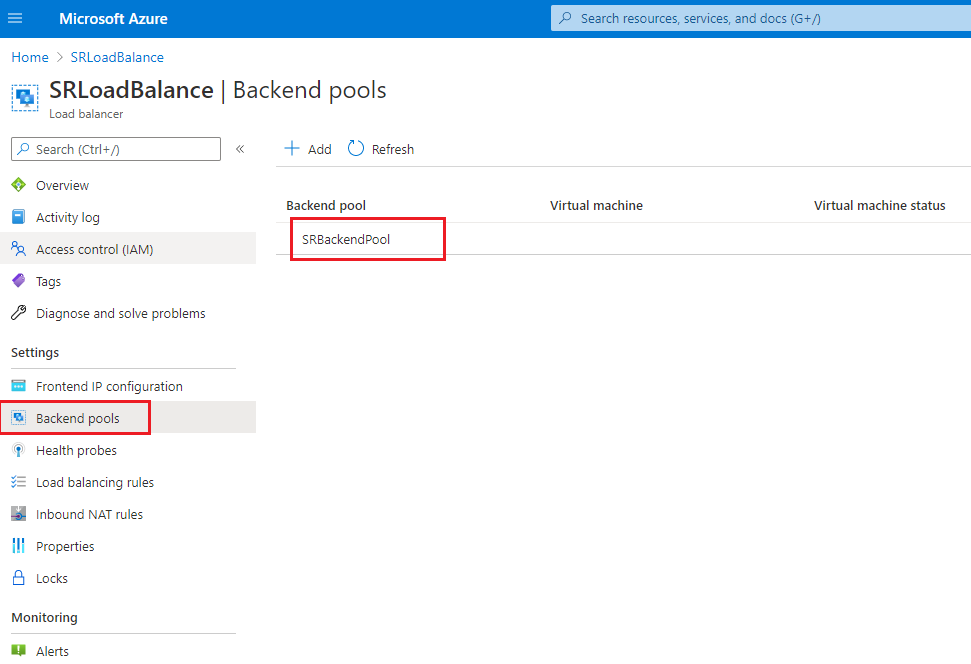
Add a back-end pool.
Select the load balancer you created from the resources list and click Backend pools in the left navigation. Click Add to add a back-end pool.
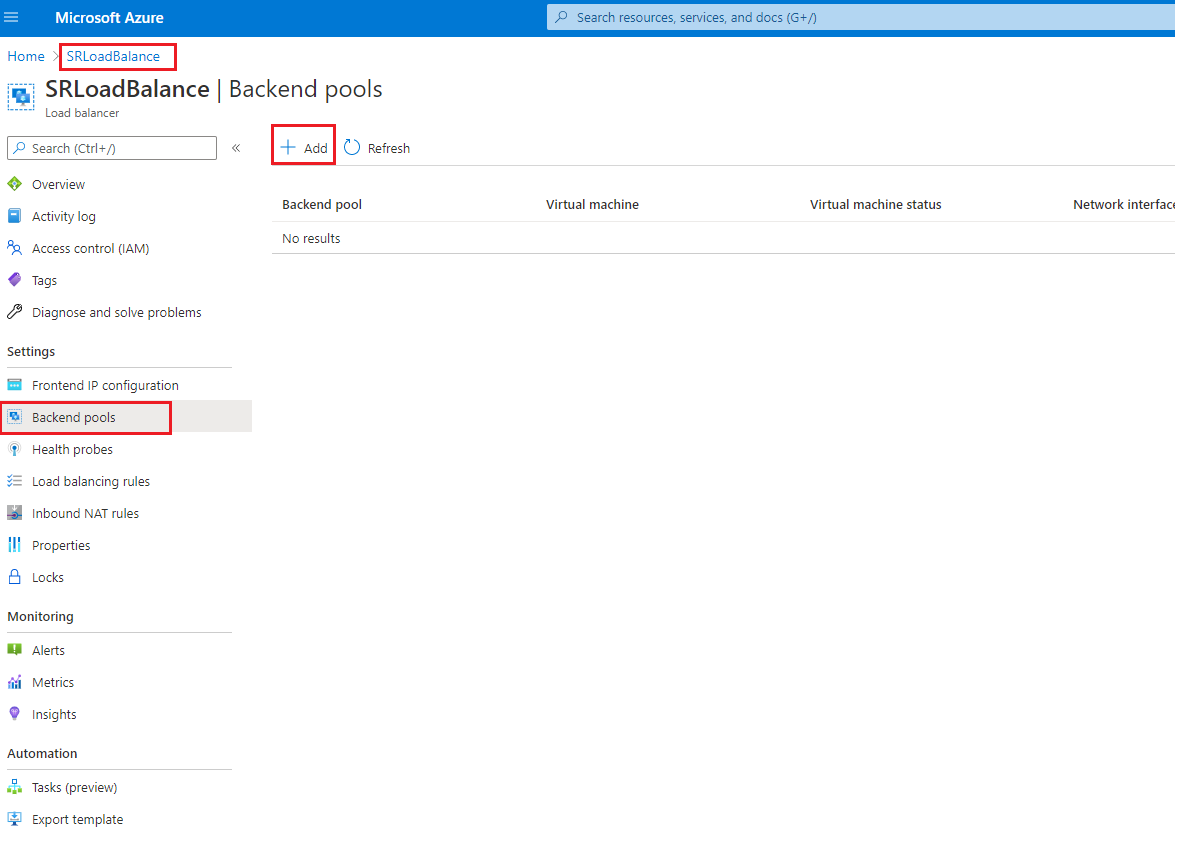
Enter a name for the new back-end pool and then click Add.

-
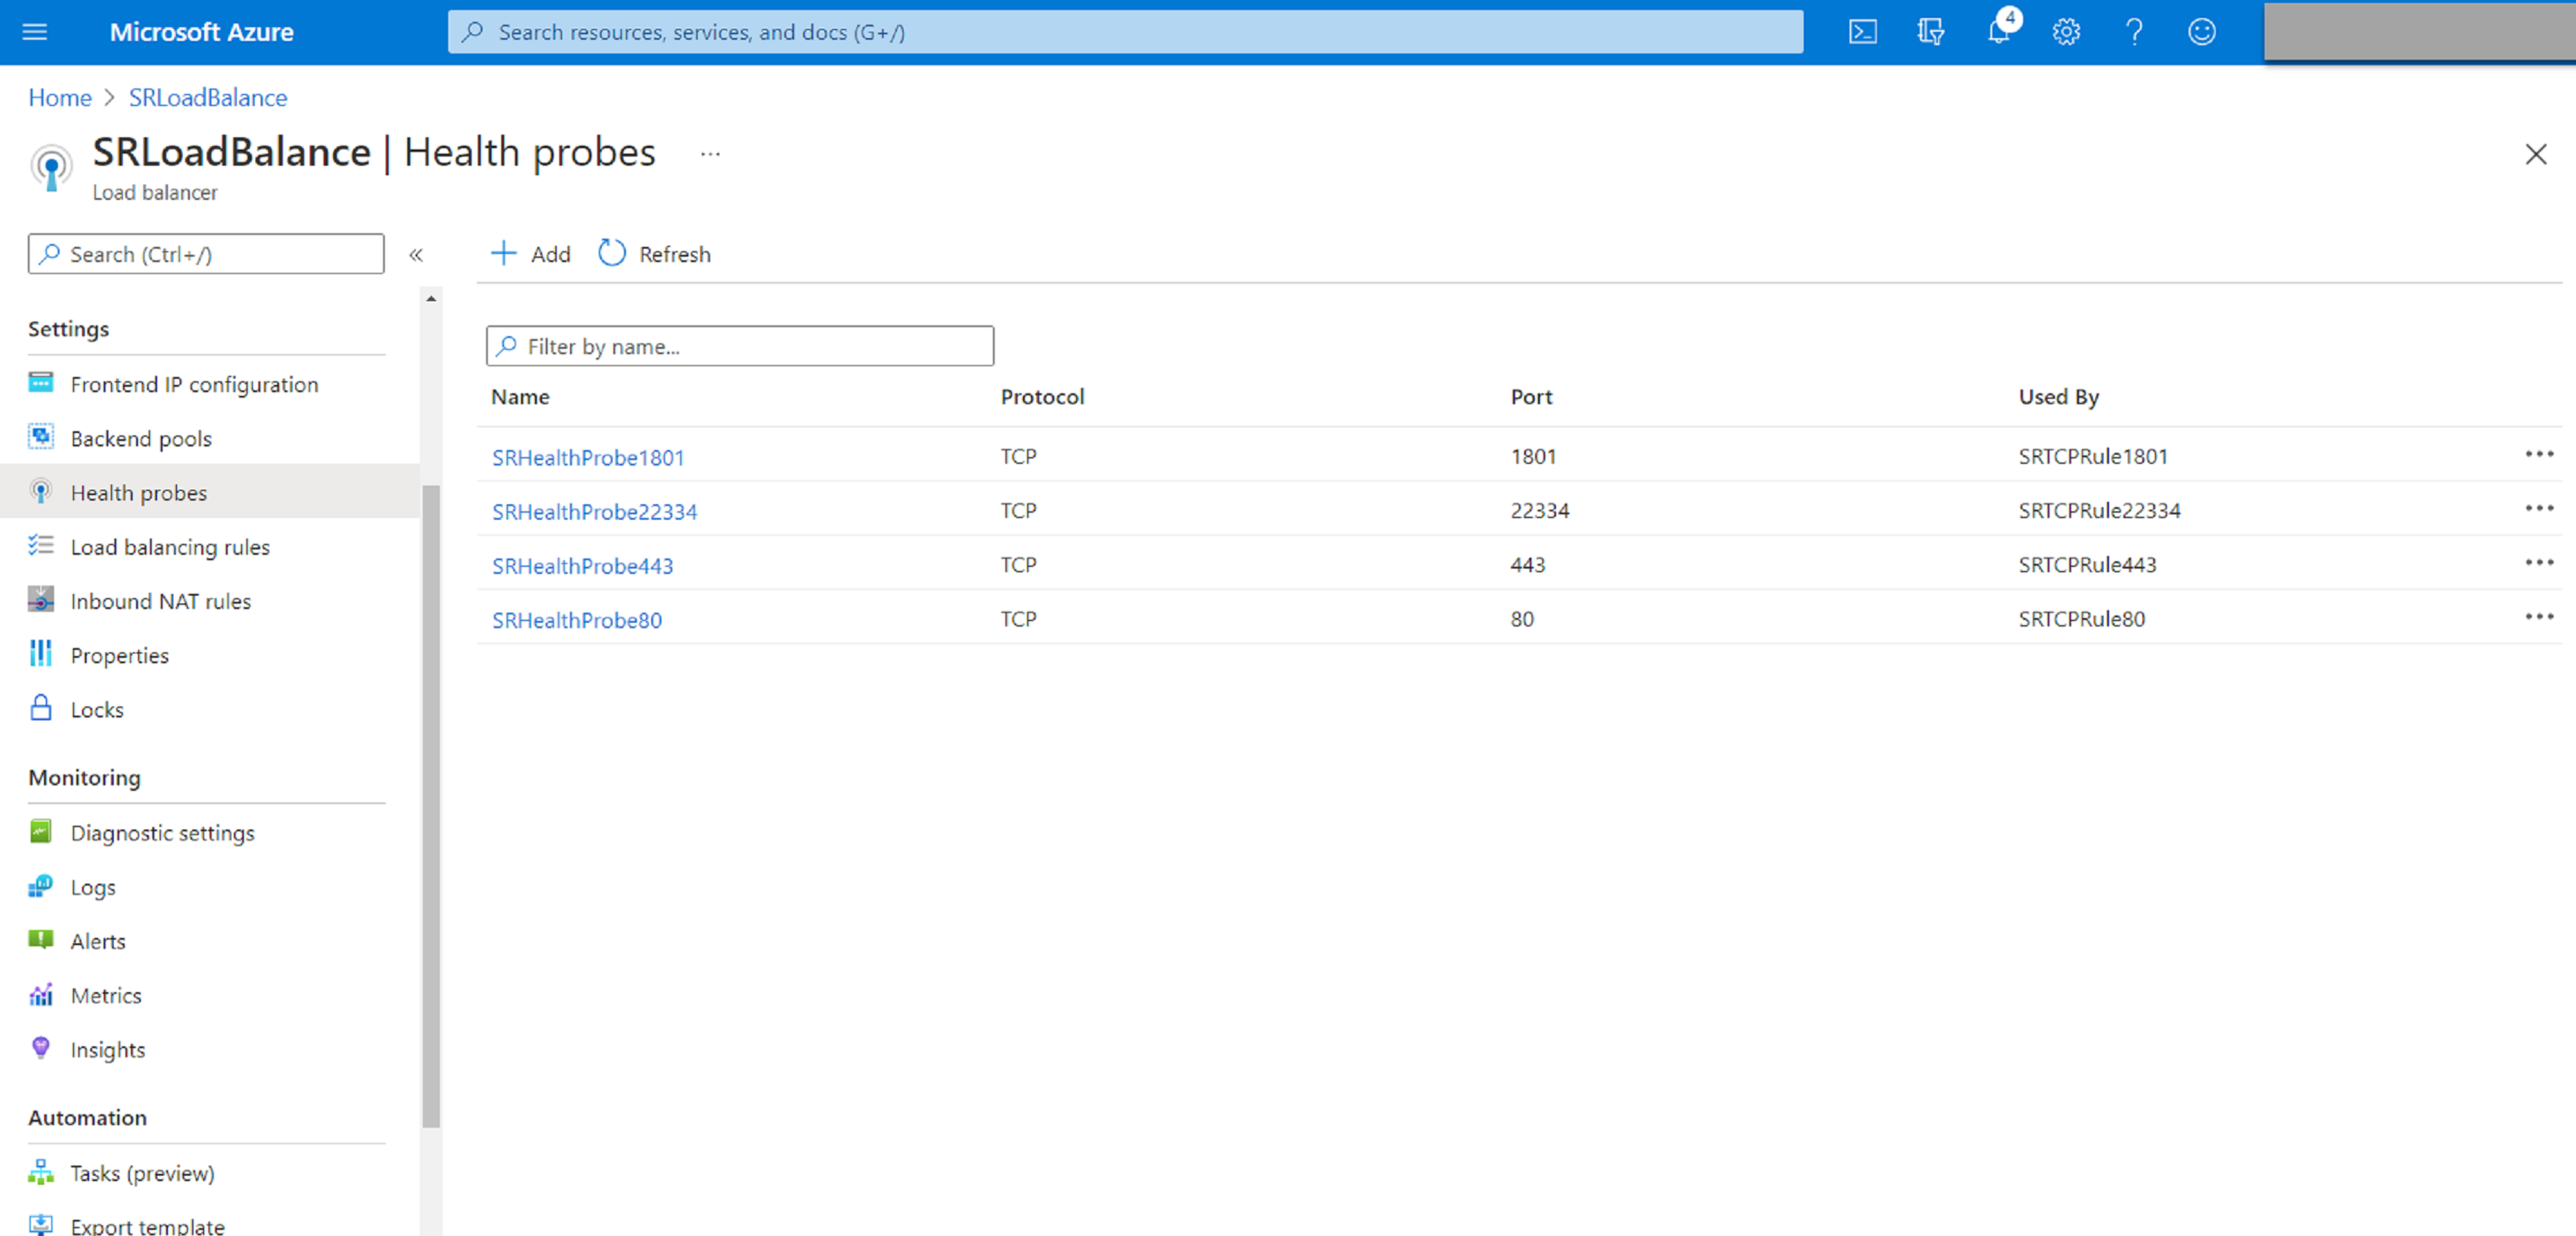
Add health probes.
Select the load balancer you created from the resources list and then click Health probes in the left navigation.
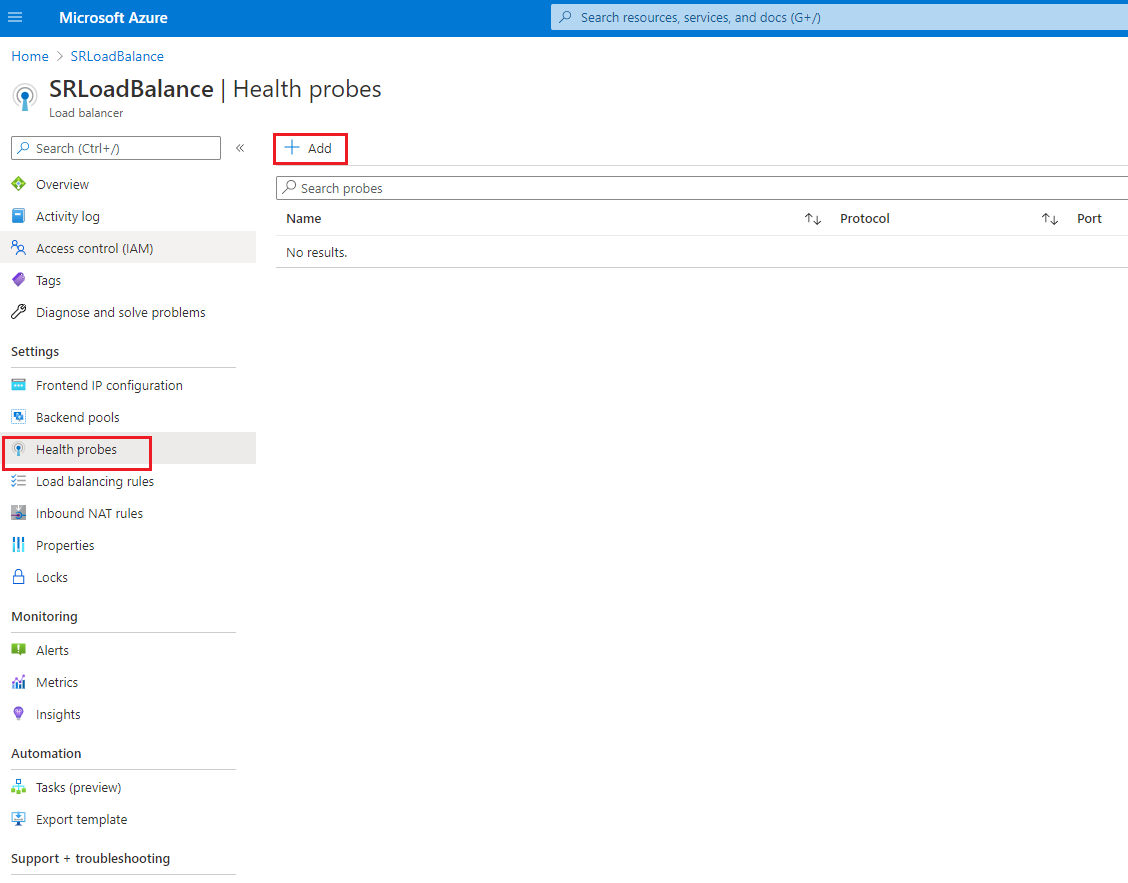
Click Add to add health probes on ports 80, 22334, 1801, and 443.
For example, use the following settings to create a health probe on port 80.
Setting Value Name Enter SRHealthProbe80. Protocol Select TCP. Port Enter 80. Interval 5 Unhealthy threshold Select 2 for the number of unhealthy threshold or consecutive probe failures that must occur before a VM is considered unhealthy. 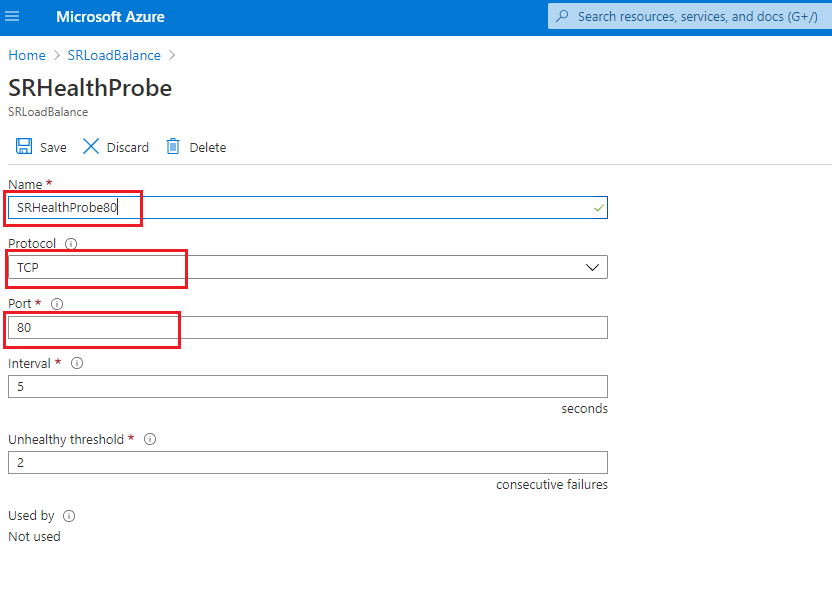
-
Add a load balancing rule.
Select the load balancer you created from the resources list and then click Load balancing rules in the left navigation. Click Add to add a load balancing rule.
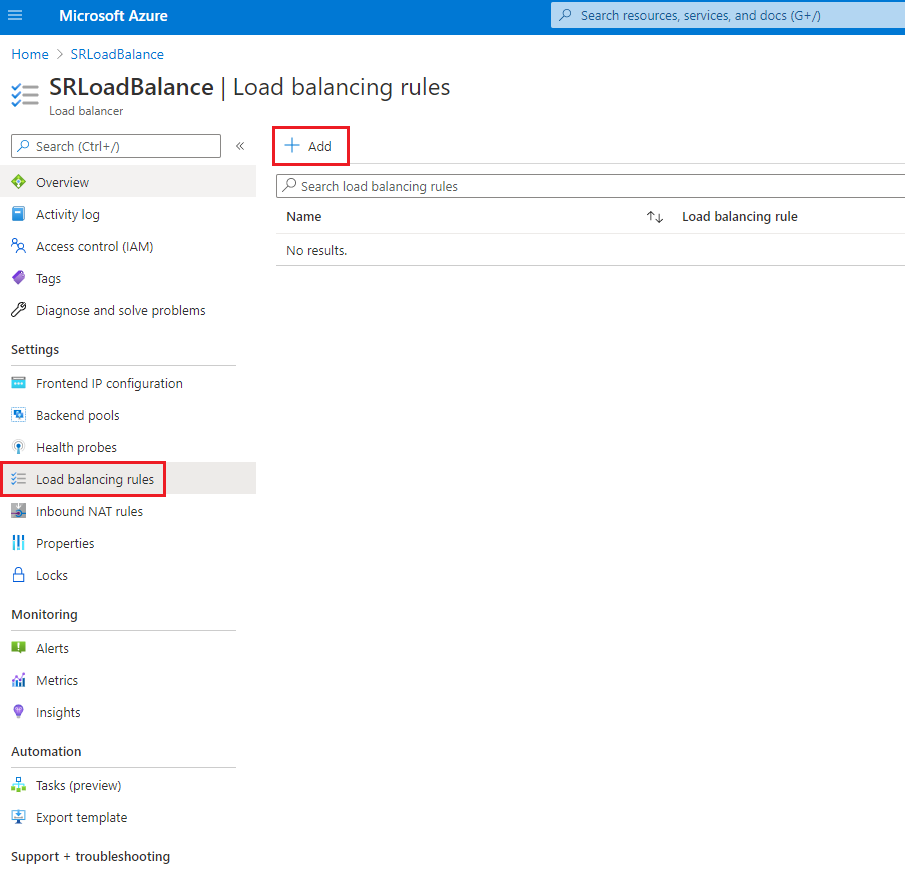
Click Add to add load balancing rules for ports 80, 22334, 1801, and 443.
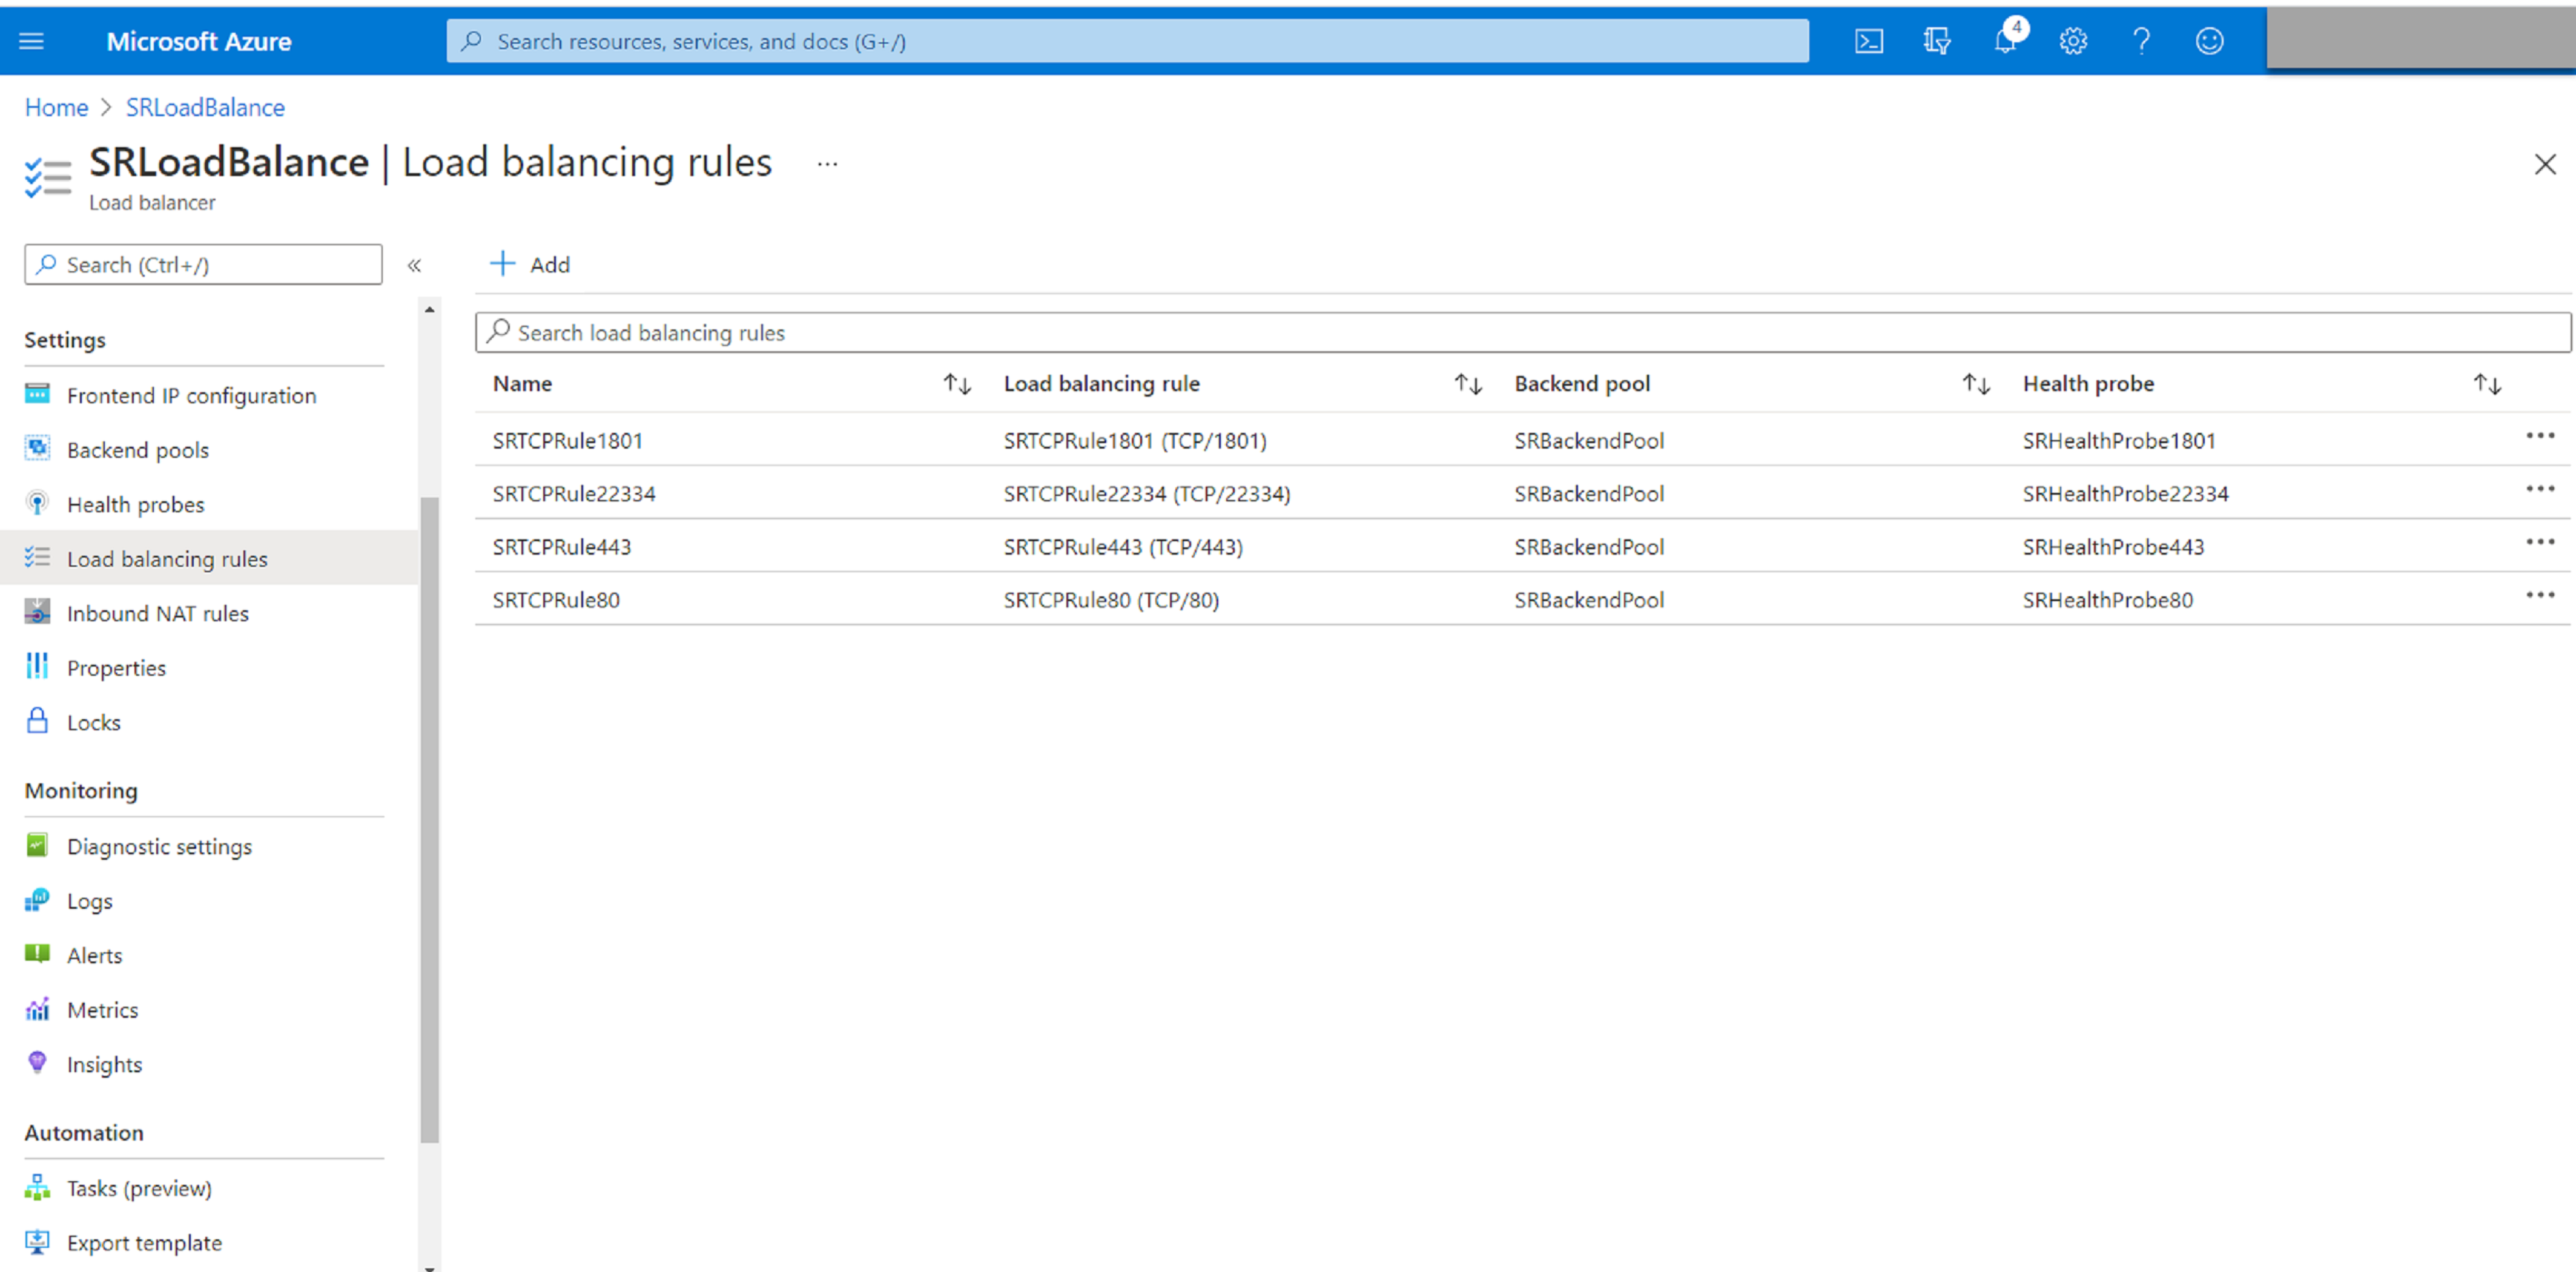
For example, use the following settings to create a load balancing rule for port 80.
Setting Value Name Enter a name, for example, SRTCPRule80. IP Version Select IPv4. Frontend IP address Select LoadBalancerFrontEnd. Protocol Select TCP. Port Enter 80. Backend port Enter 80. Backend pool Select SRBackendPool. Health probe Select SRHealthProbe80. Session persistence Select Client IP. Idle timeout (minutes) Accept the default setting. TCP reset Select Enabled. Outbound source network address translation (SNAT) Select (Recommended) Use outbound rules to provide backend pool members access to the internet. 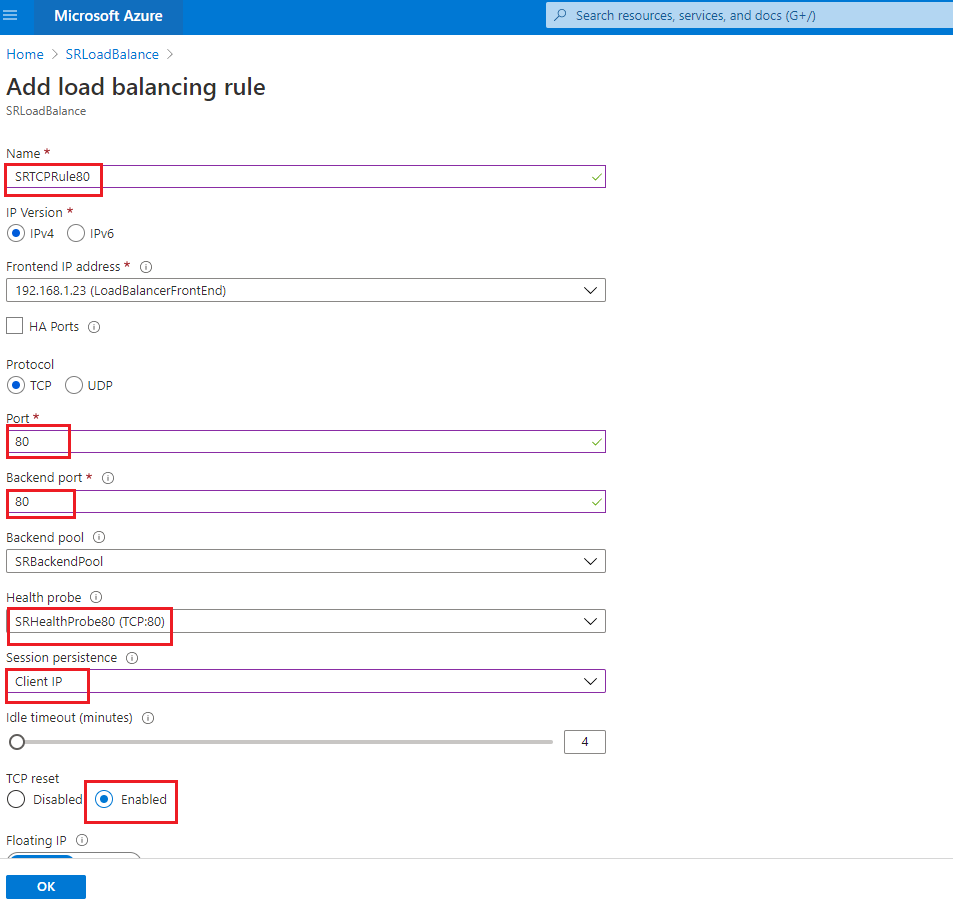
-
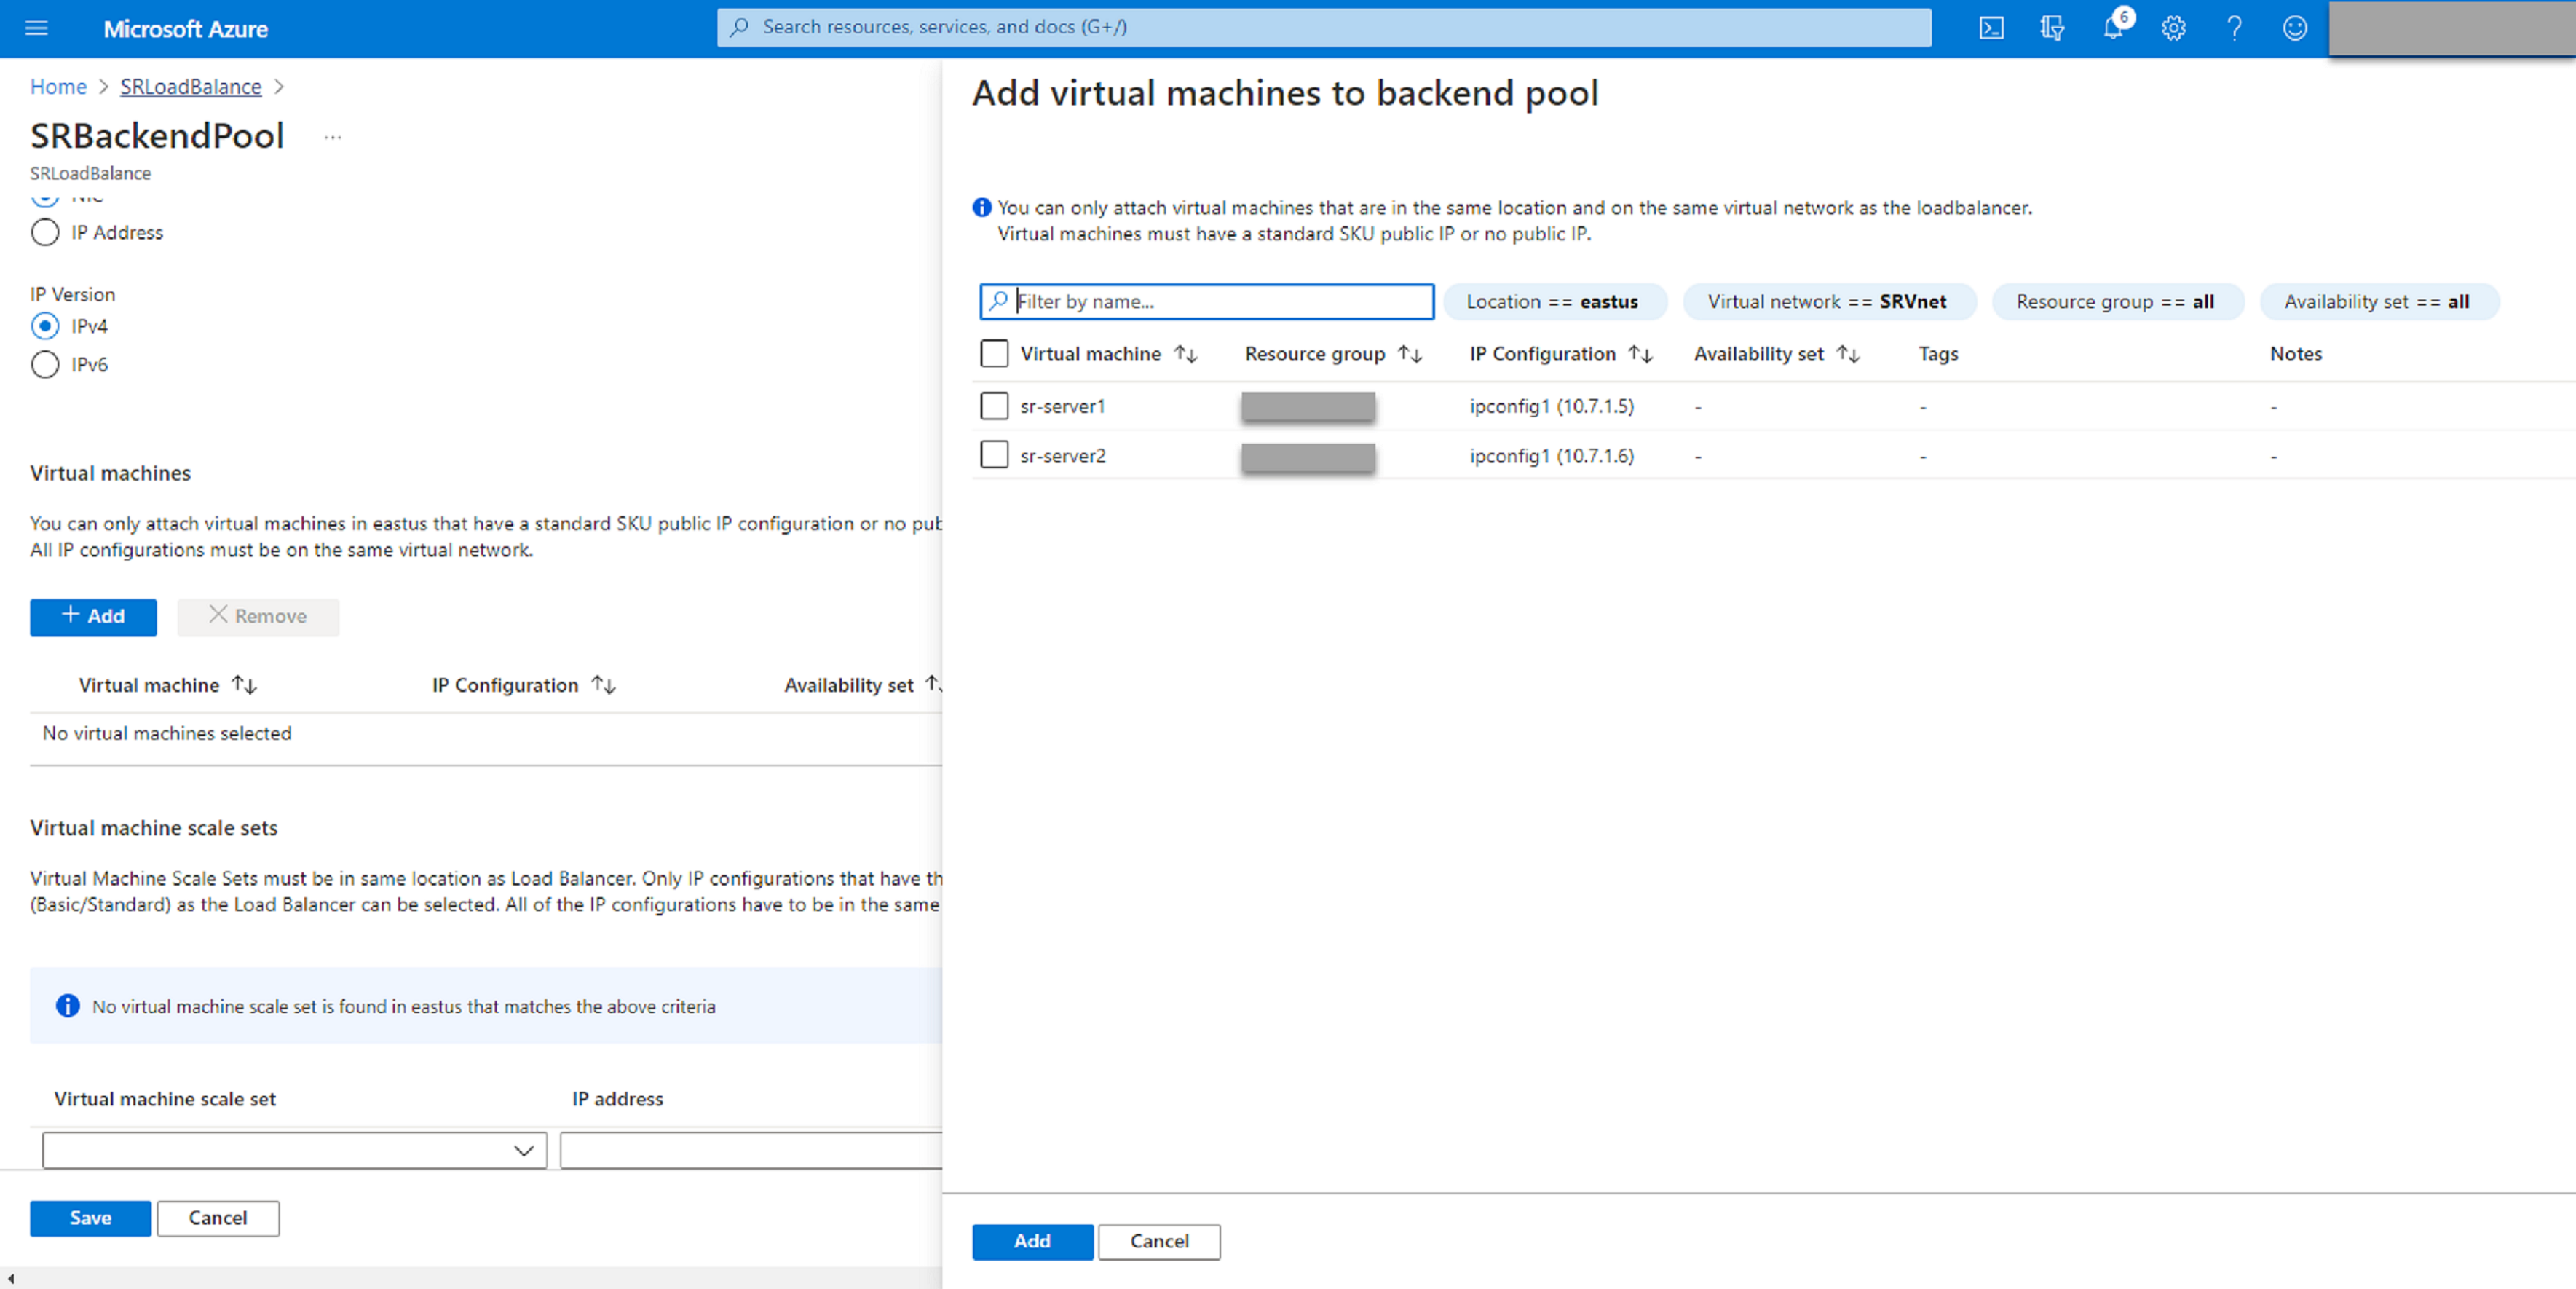
Add the Azure VMs where the Session Recording server is installed to the back-end pool.
-
-
Test the Azure load balancer.
If you cannot add a server to the back-end pool and the following error message appears NetworkInterfaceAndLoadBalancerAreInDifferentAvailabilitySets, disassociate the public IP address of the server network interface.
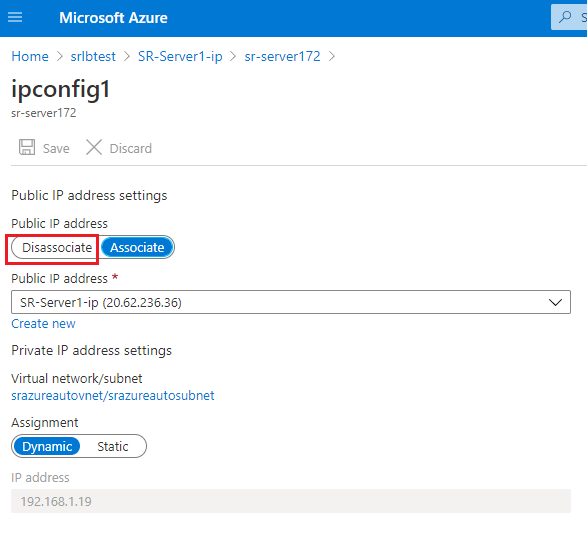
-
Option 3: Create an Azure application gateway
Tip:
Application Gateway V2 does not support routing requests through an NTLM-enabled proxy.
-
Create an Azure application gateway.
Configure the following settings when you create an application gateway.
- On the Basics tab, set Tier to Standard.
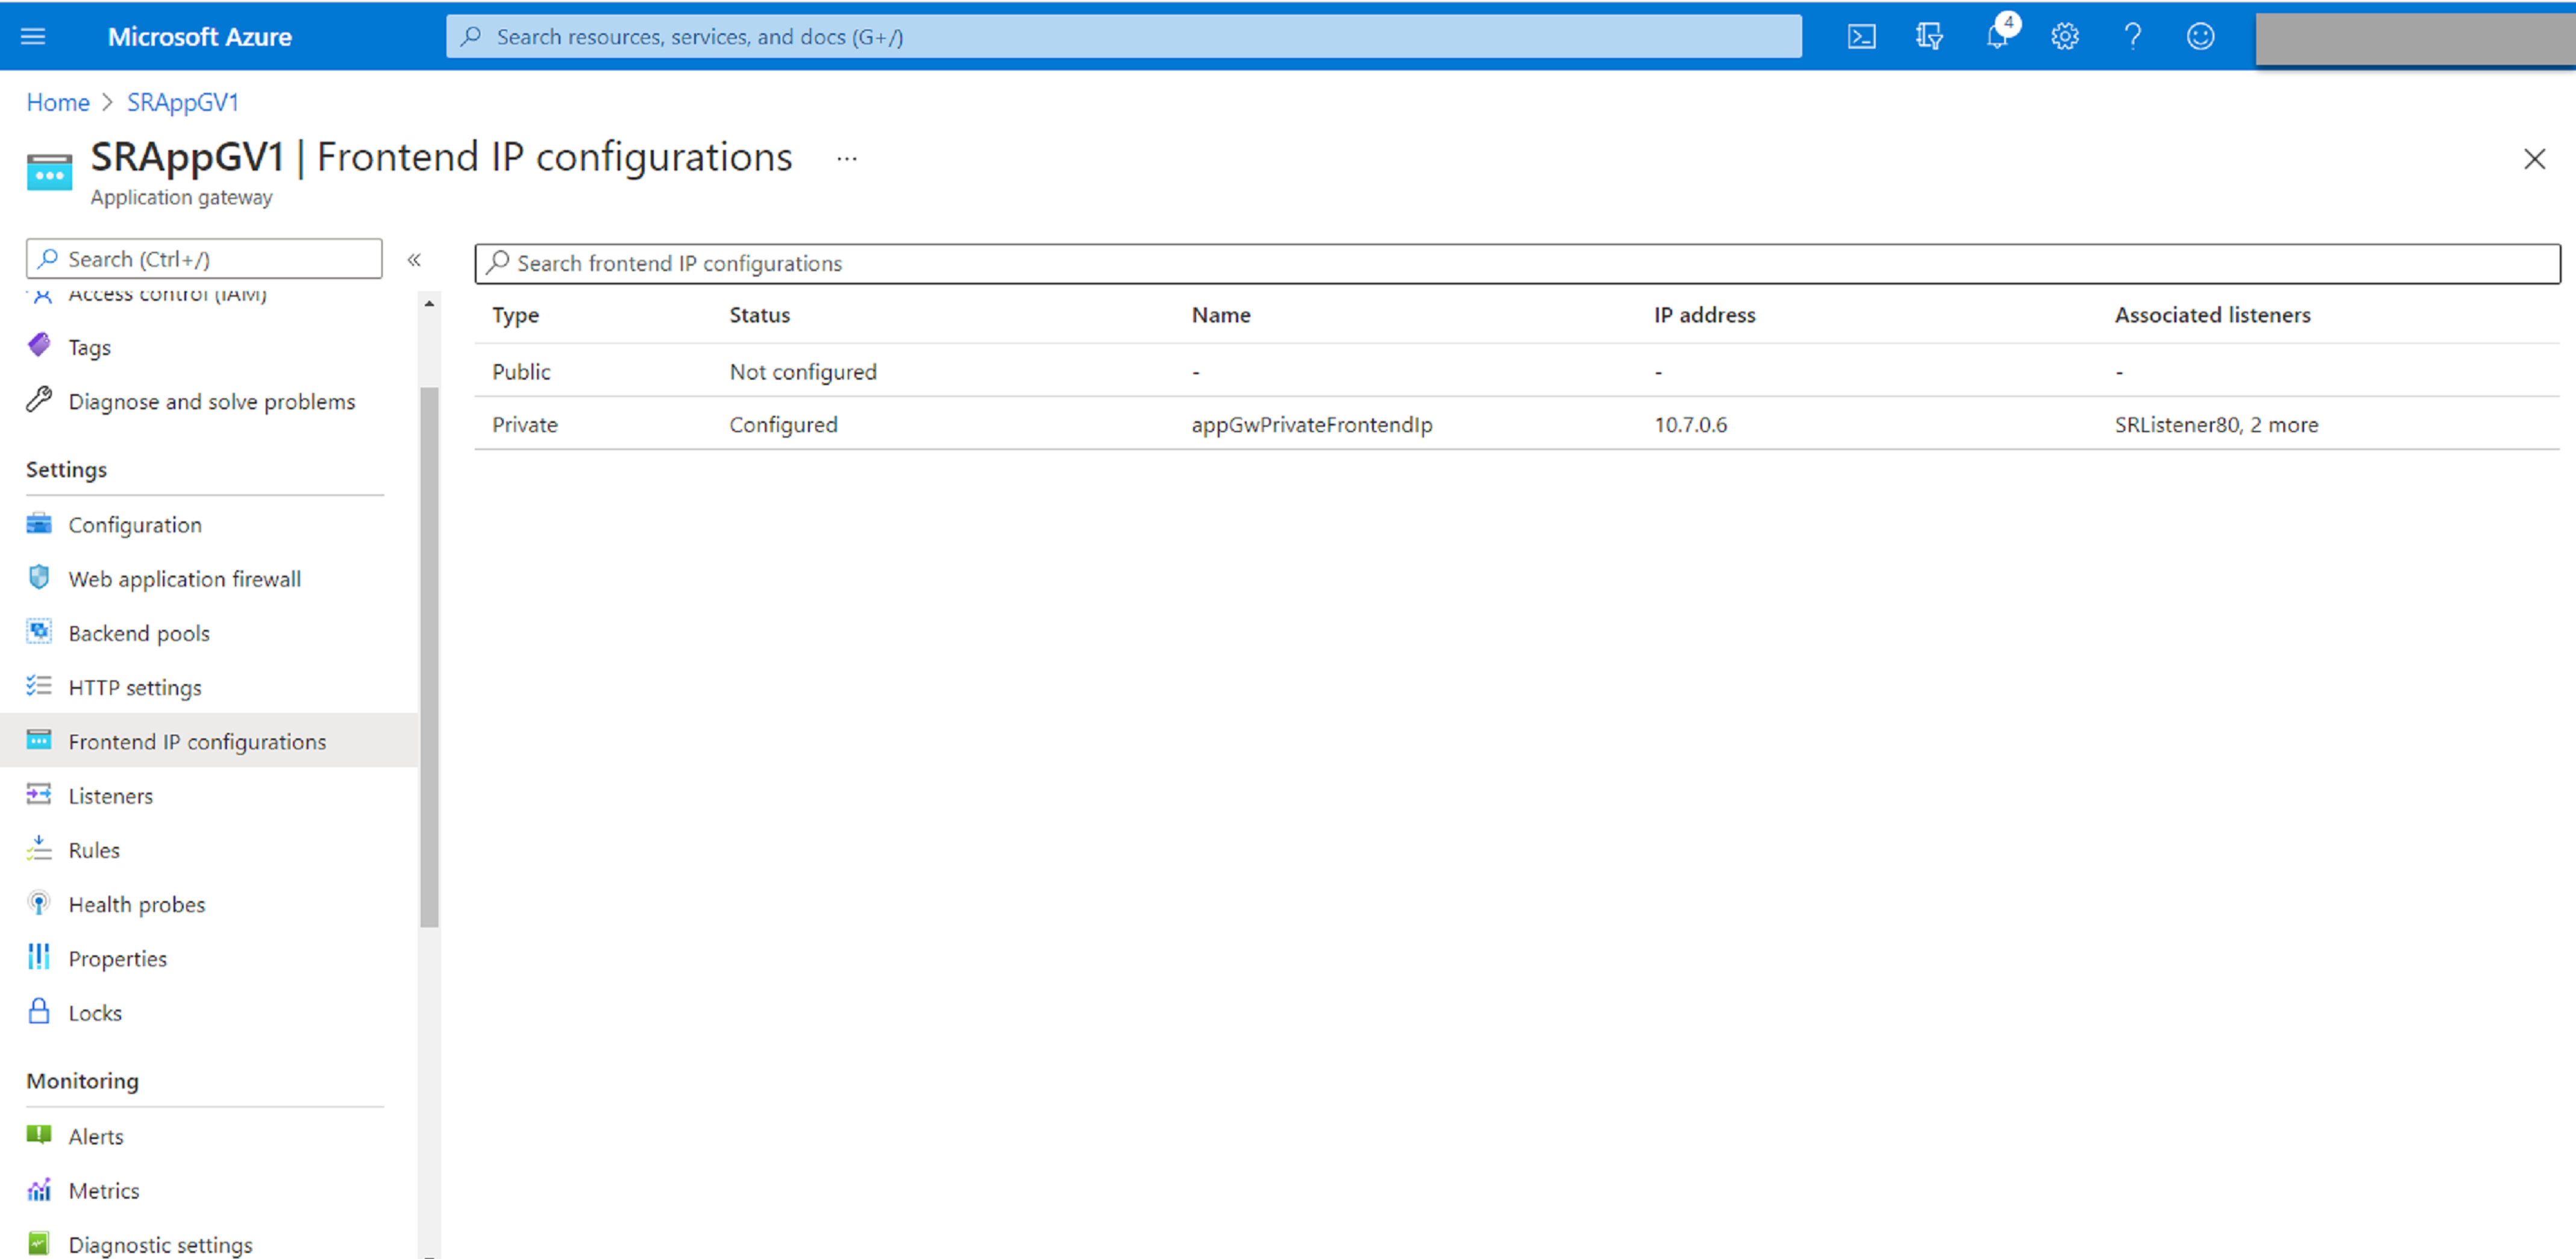
- On the Frontends tab, set Frontend IP address type to Private. The new application gateway is used as an internal load balancer.
-
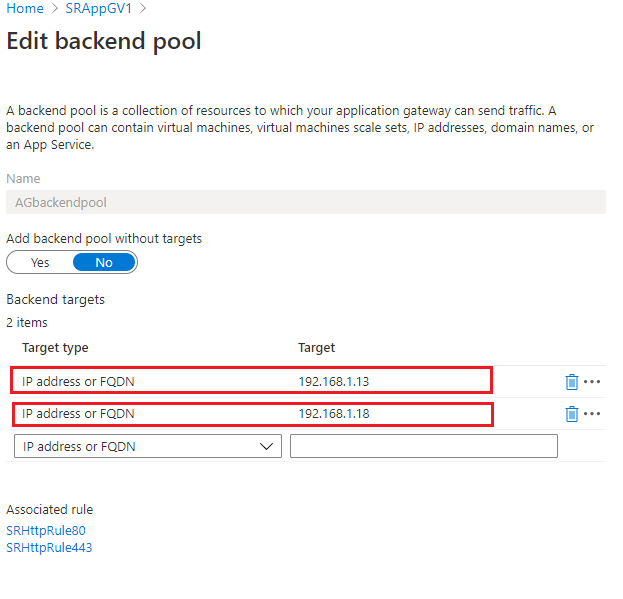
Add a back-end pool.
-
Create HTTP settings.
Azure Application Gateway supports both HTTP and HTTPS for routing requests to back-end servers. Create HTTP settings for ports 80, 443, and 22334.
-
HTTP over port 80
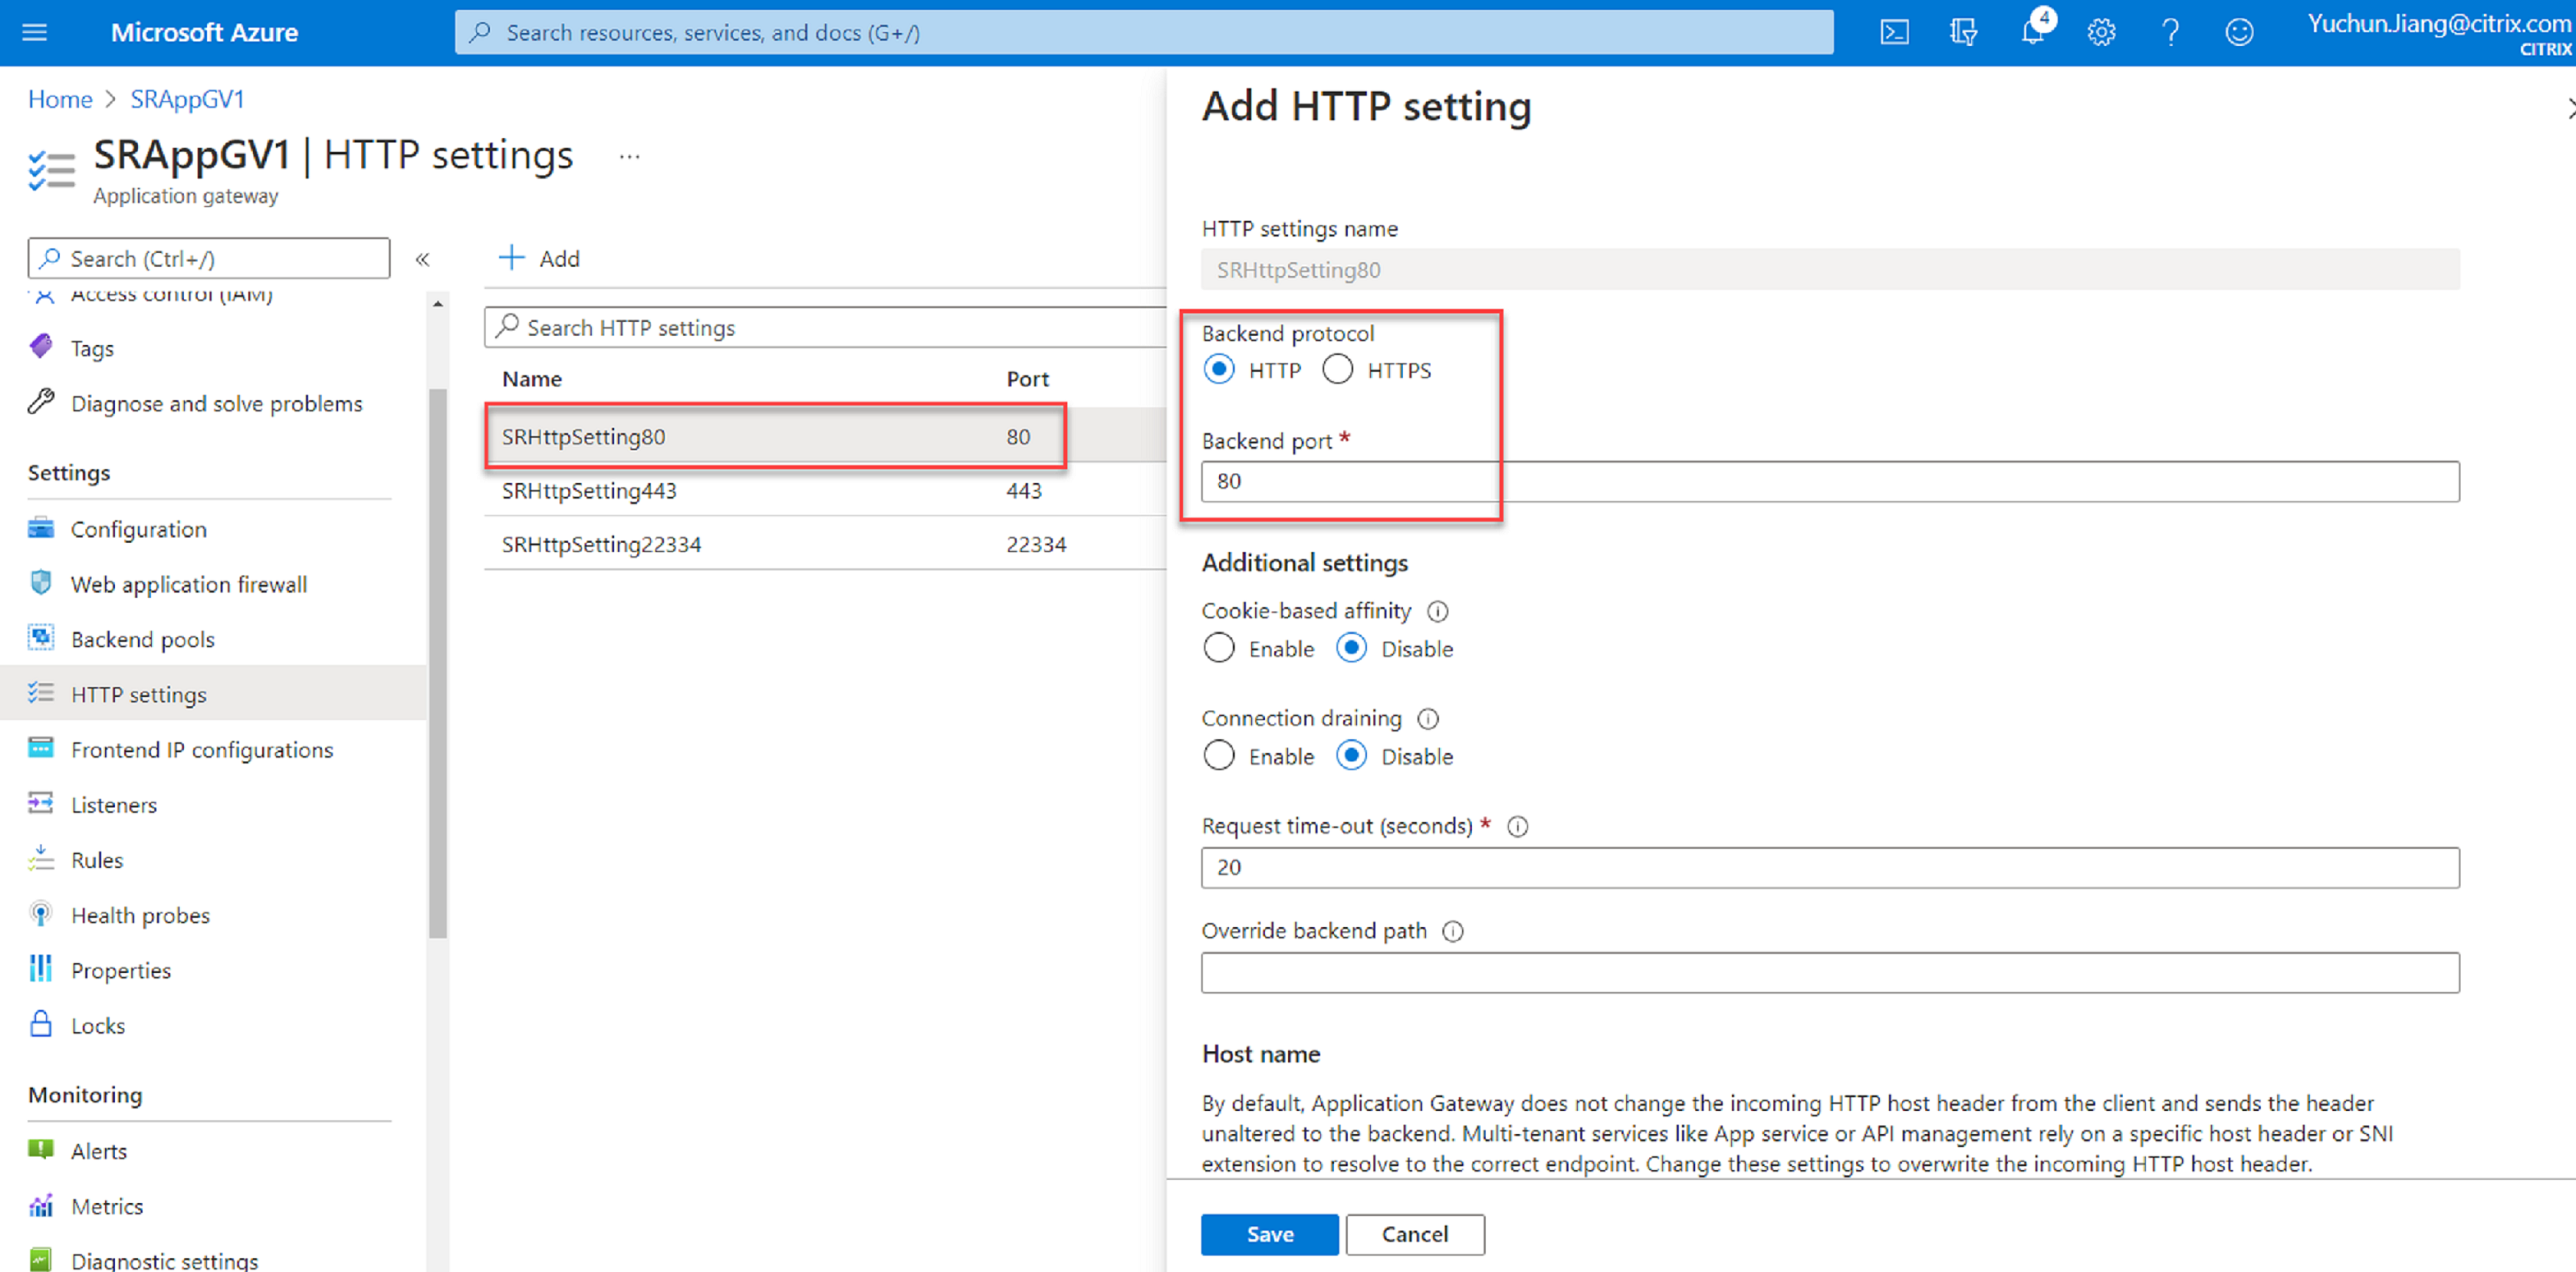
-
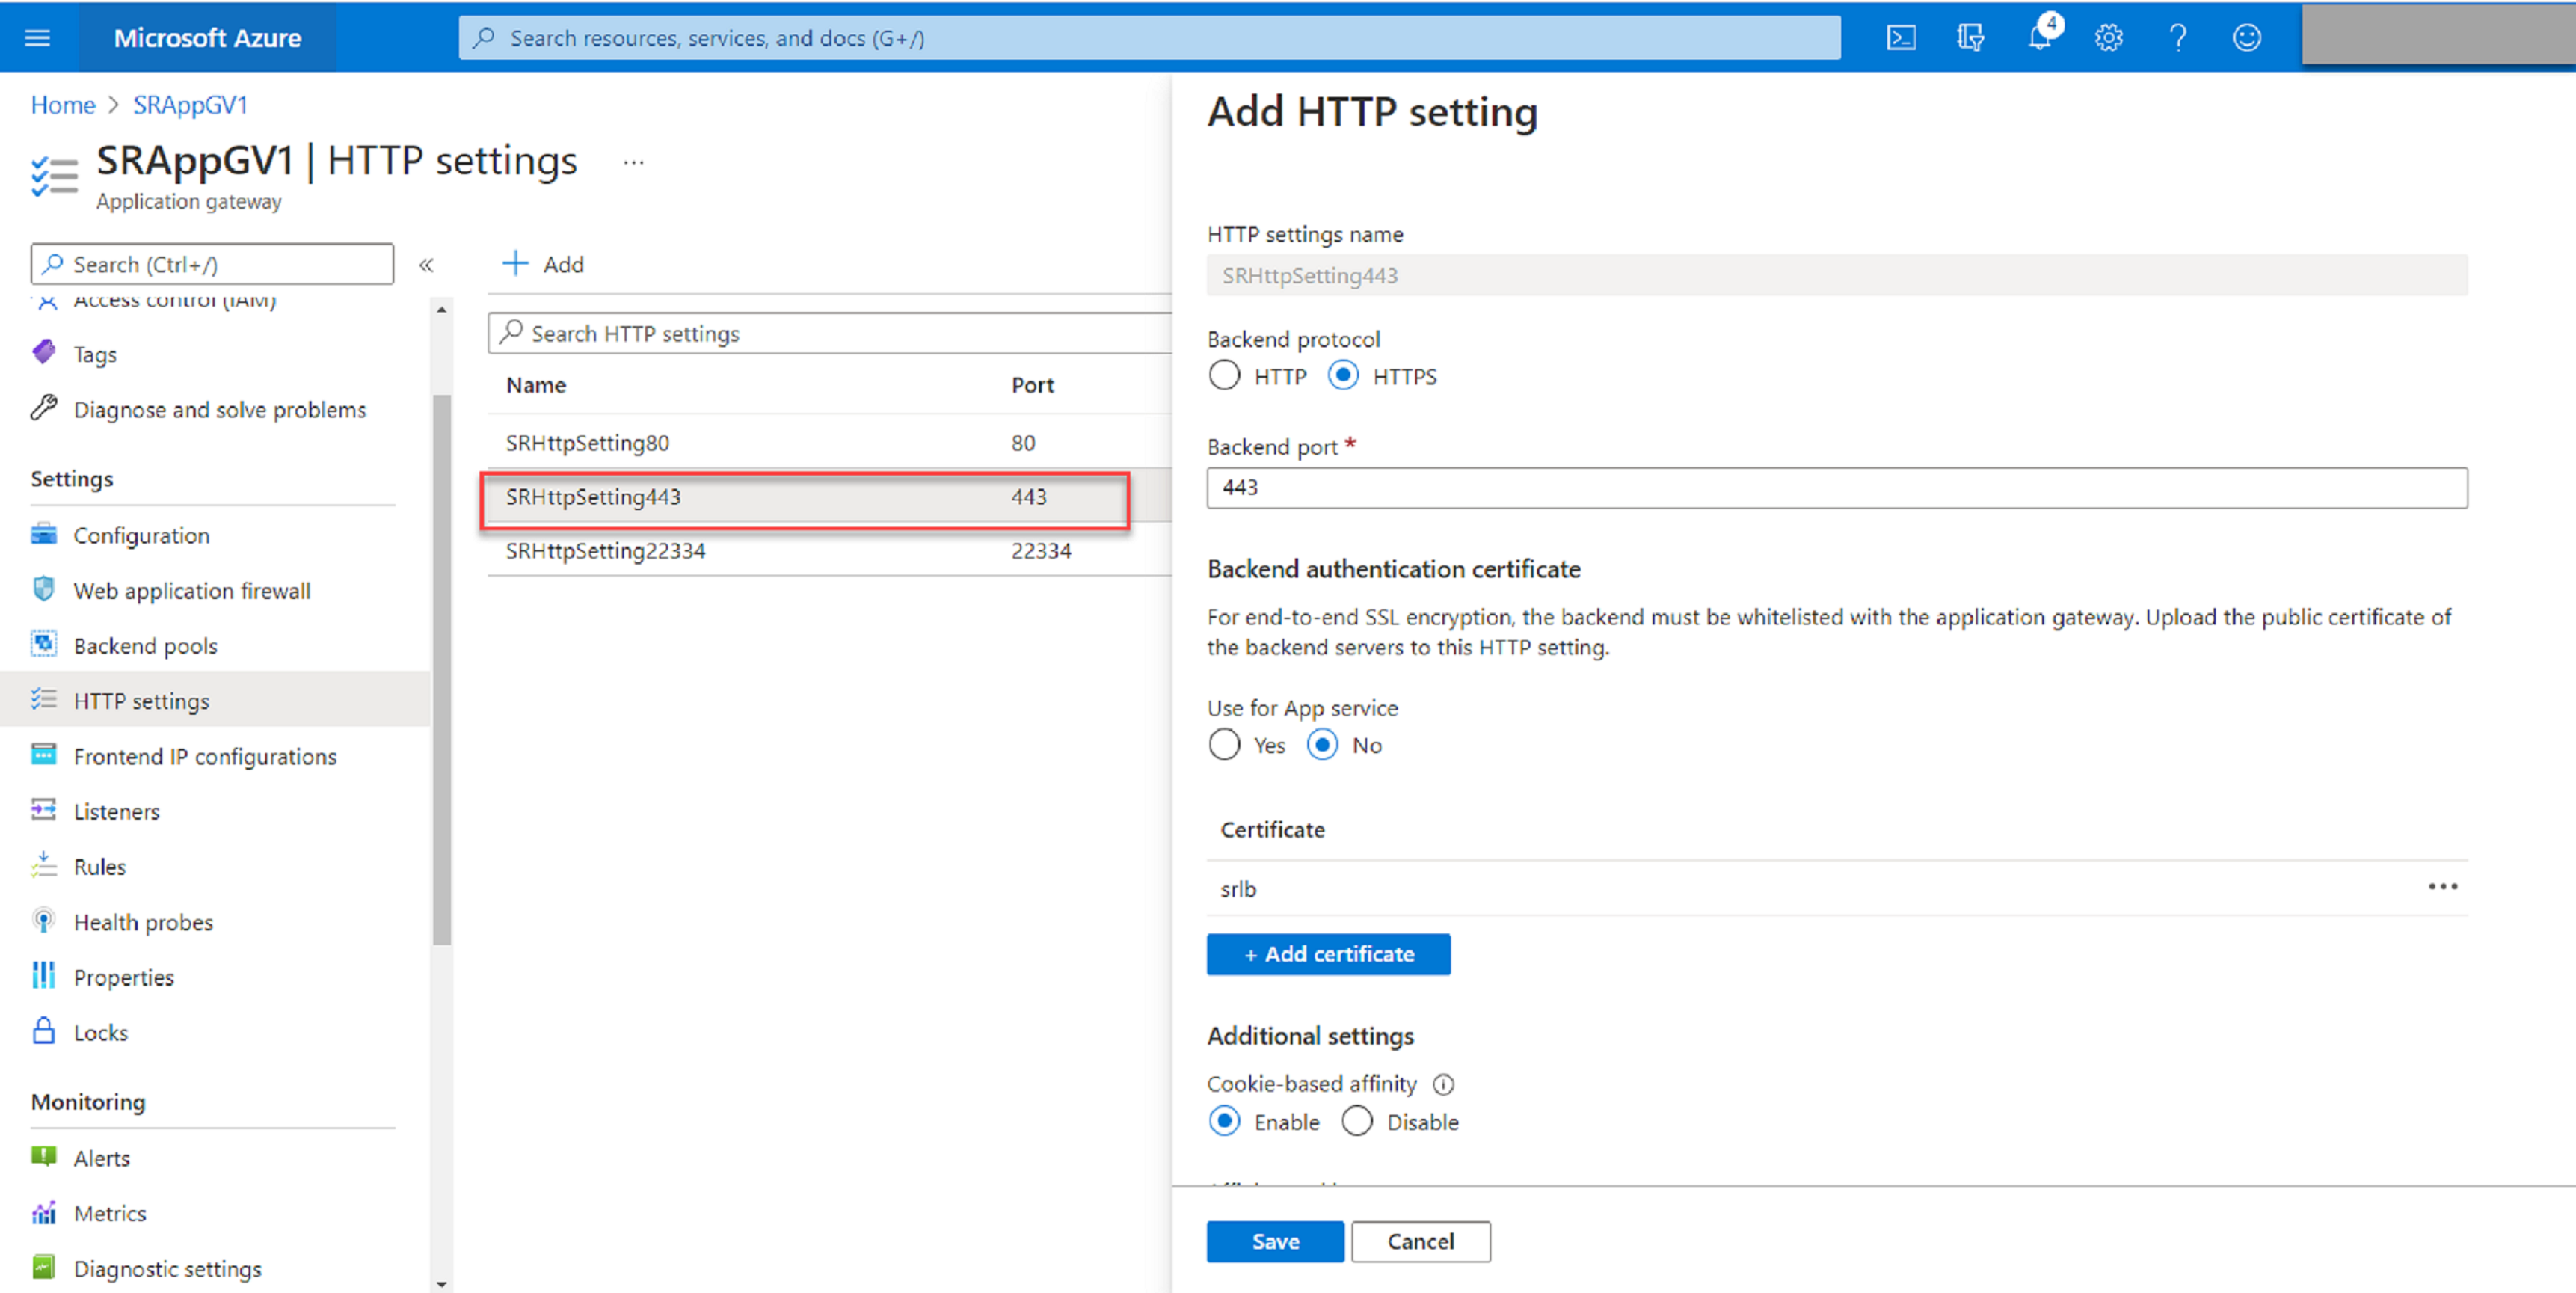
HTTP over port 443
An authentication certificate is required to allow back-end servers in Application Gateway V1. The authentication certificate is the public key of back-end server certificates in Base-64 encoded X.509(.CER) format. For information on how to export the public key from your TLS/SSL certificate, see Export authentication certificate (for v1 SKU).
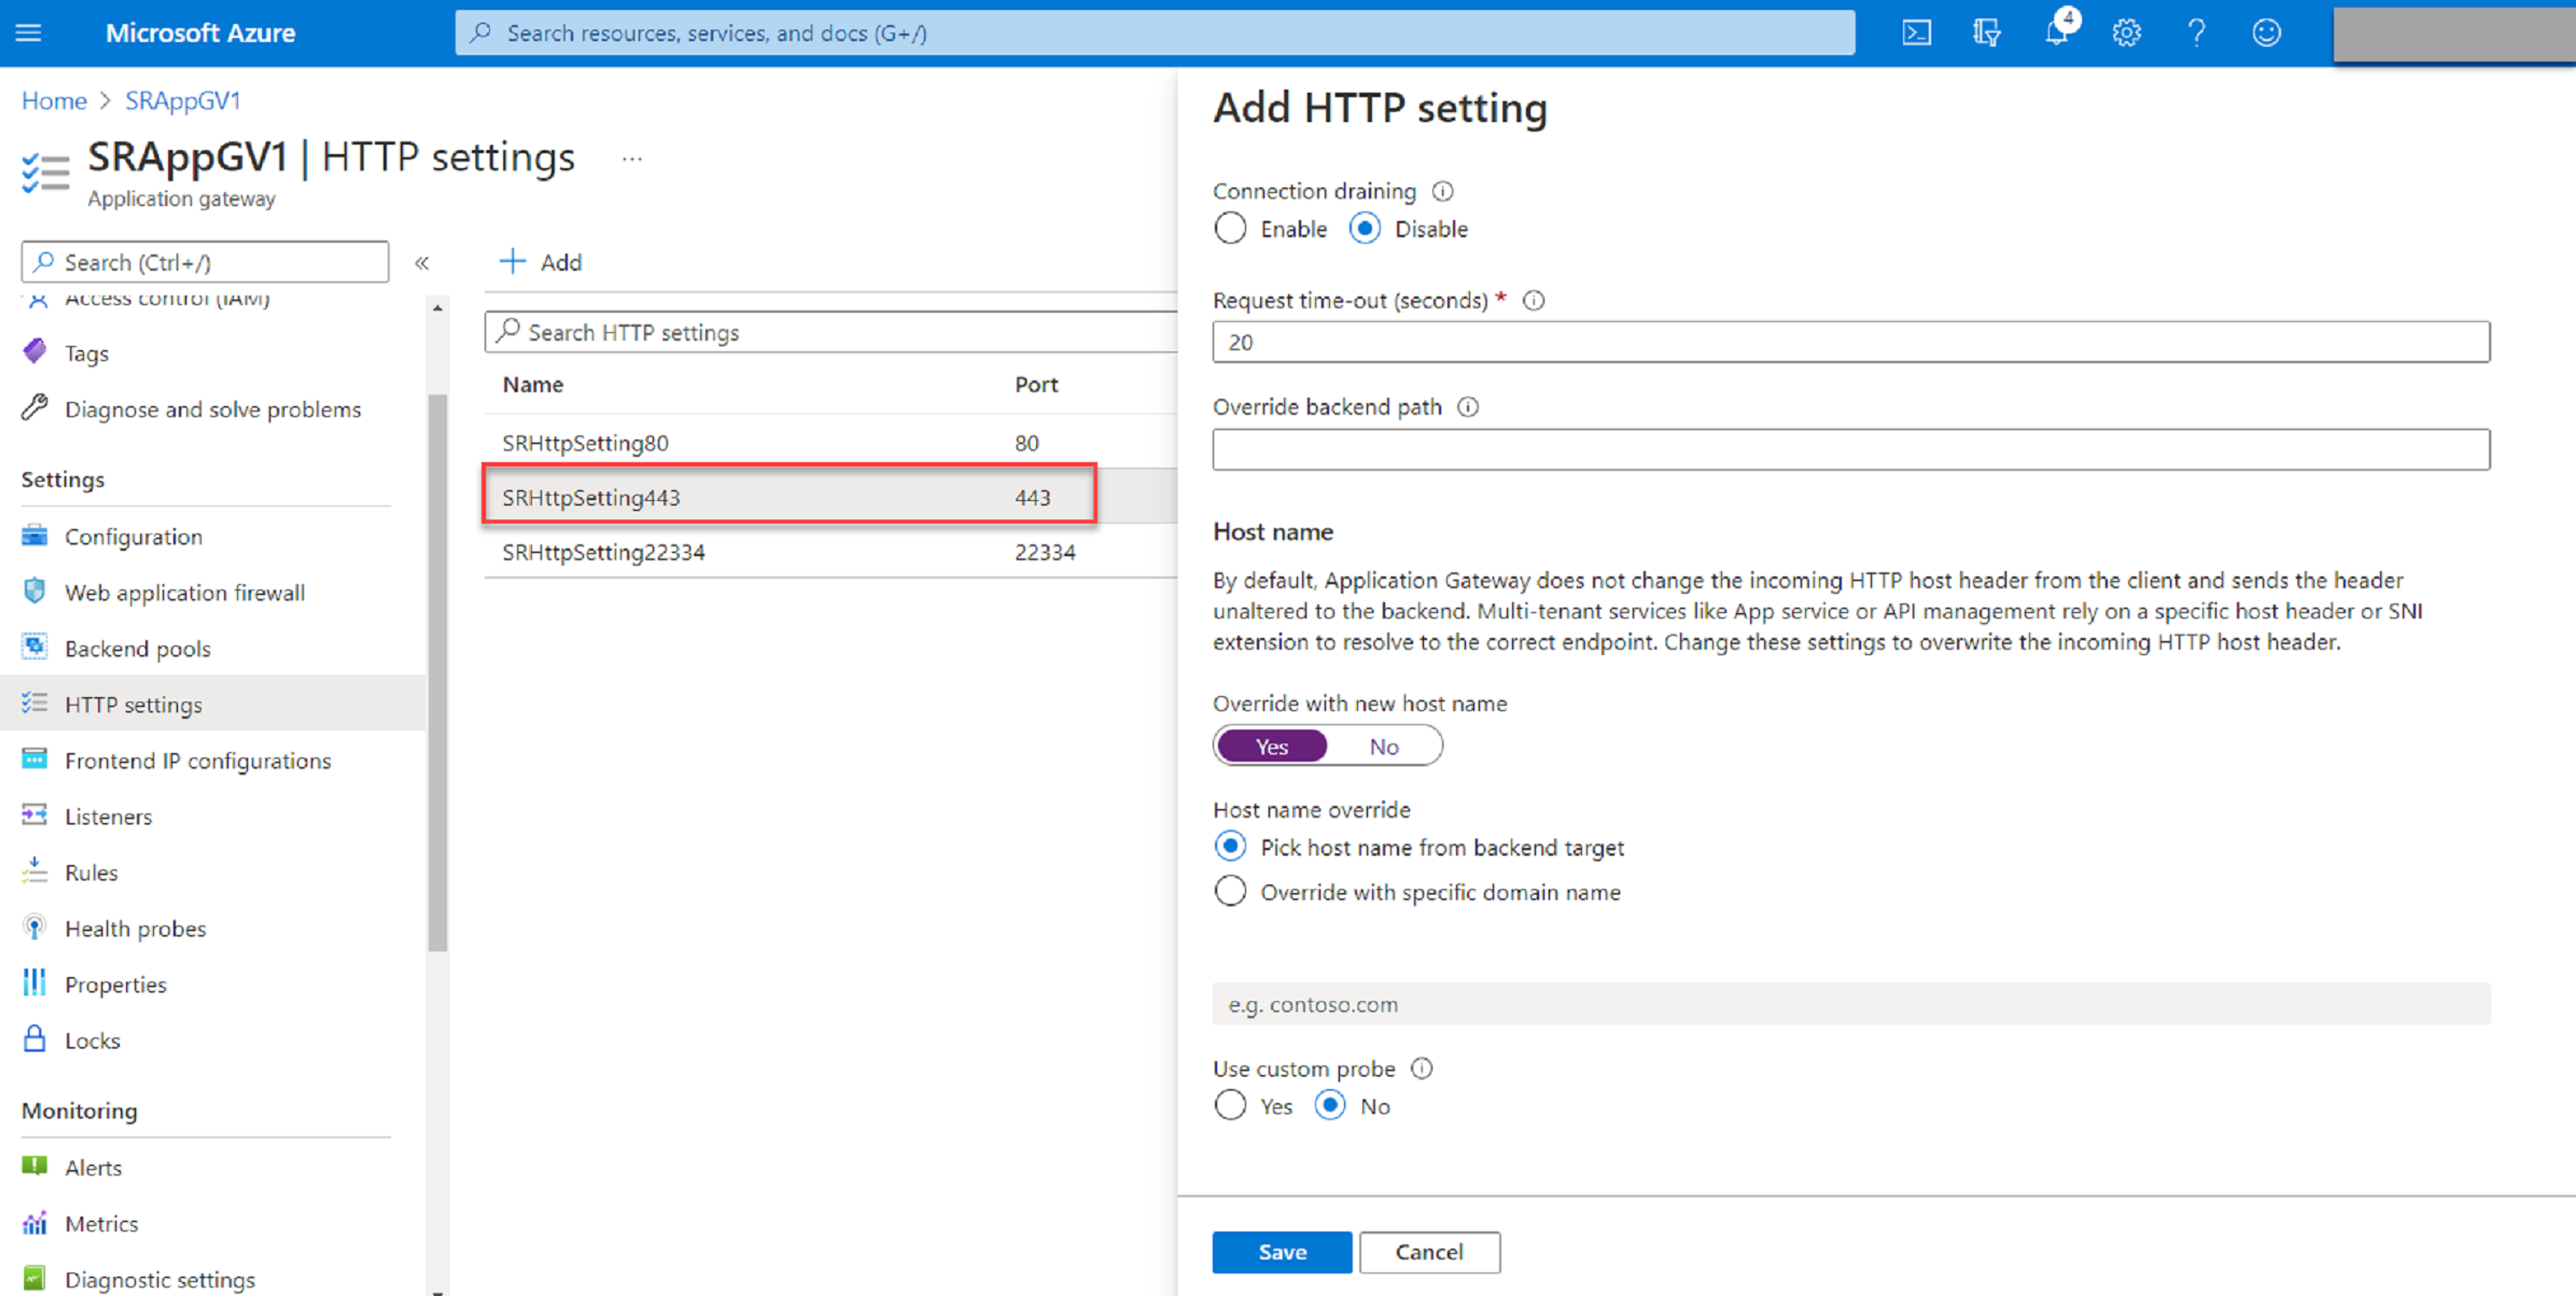
-
HTTP or HTTPS over port 22334
If WebSocket uses HTTP, use the same setting as port 80. If WebSocket uses HTTPS, use the same setting as port 443.
-
-
Add a front-end IP address.
-
Add listeners.
Add listeners on ports 80, 443, and 22334, for example:
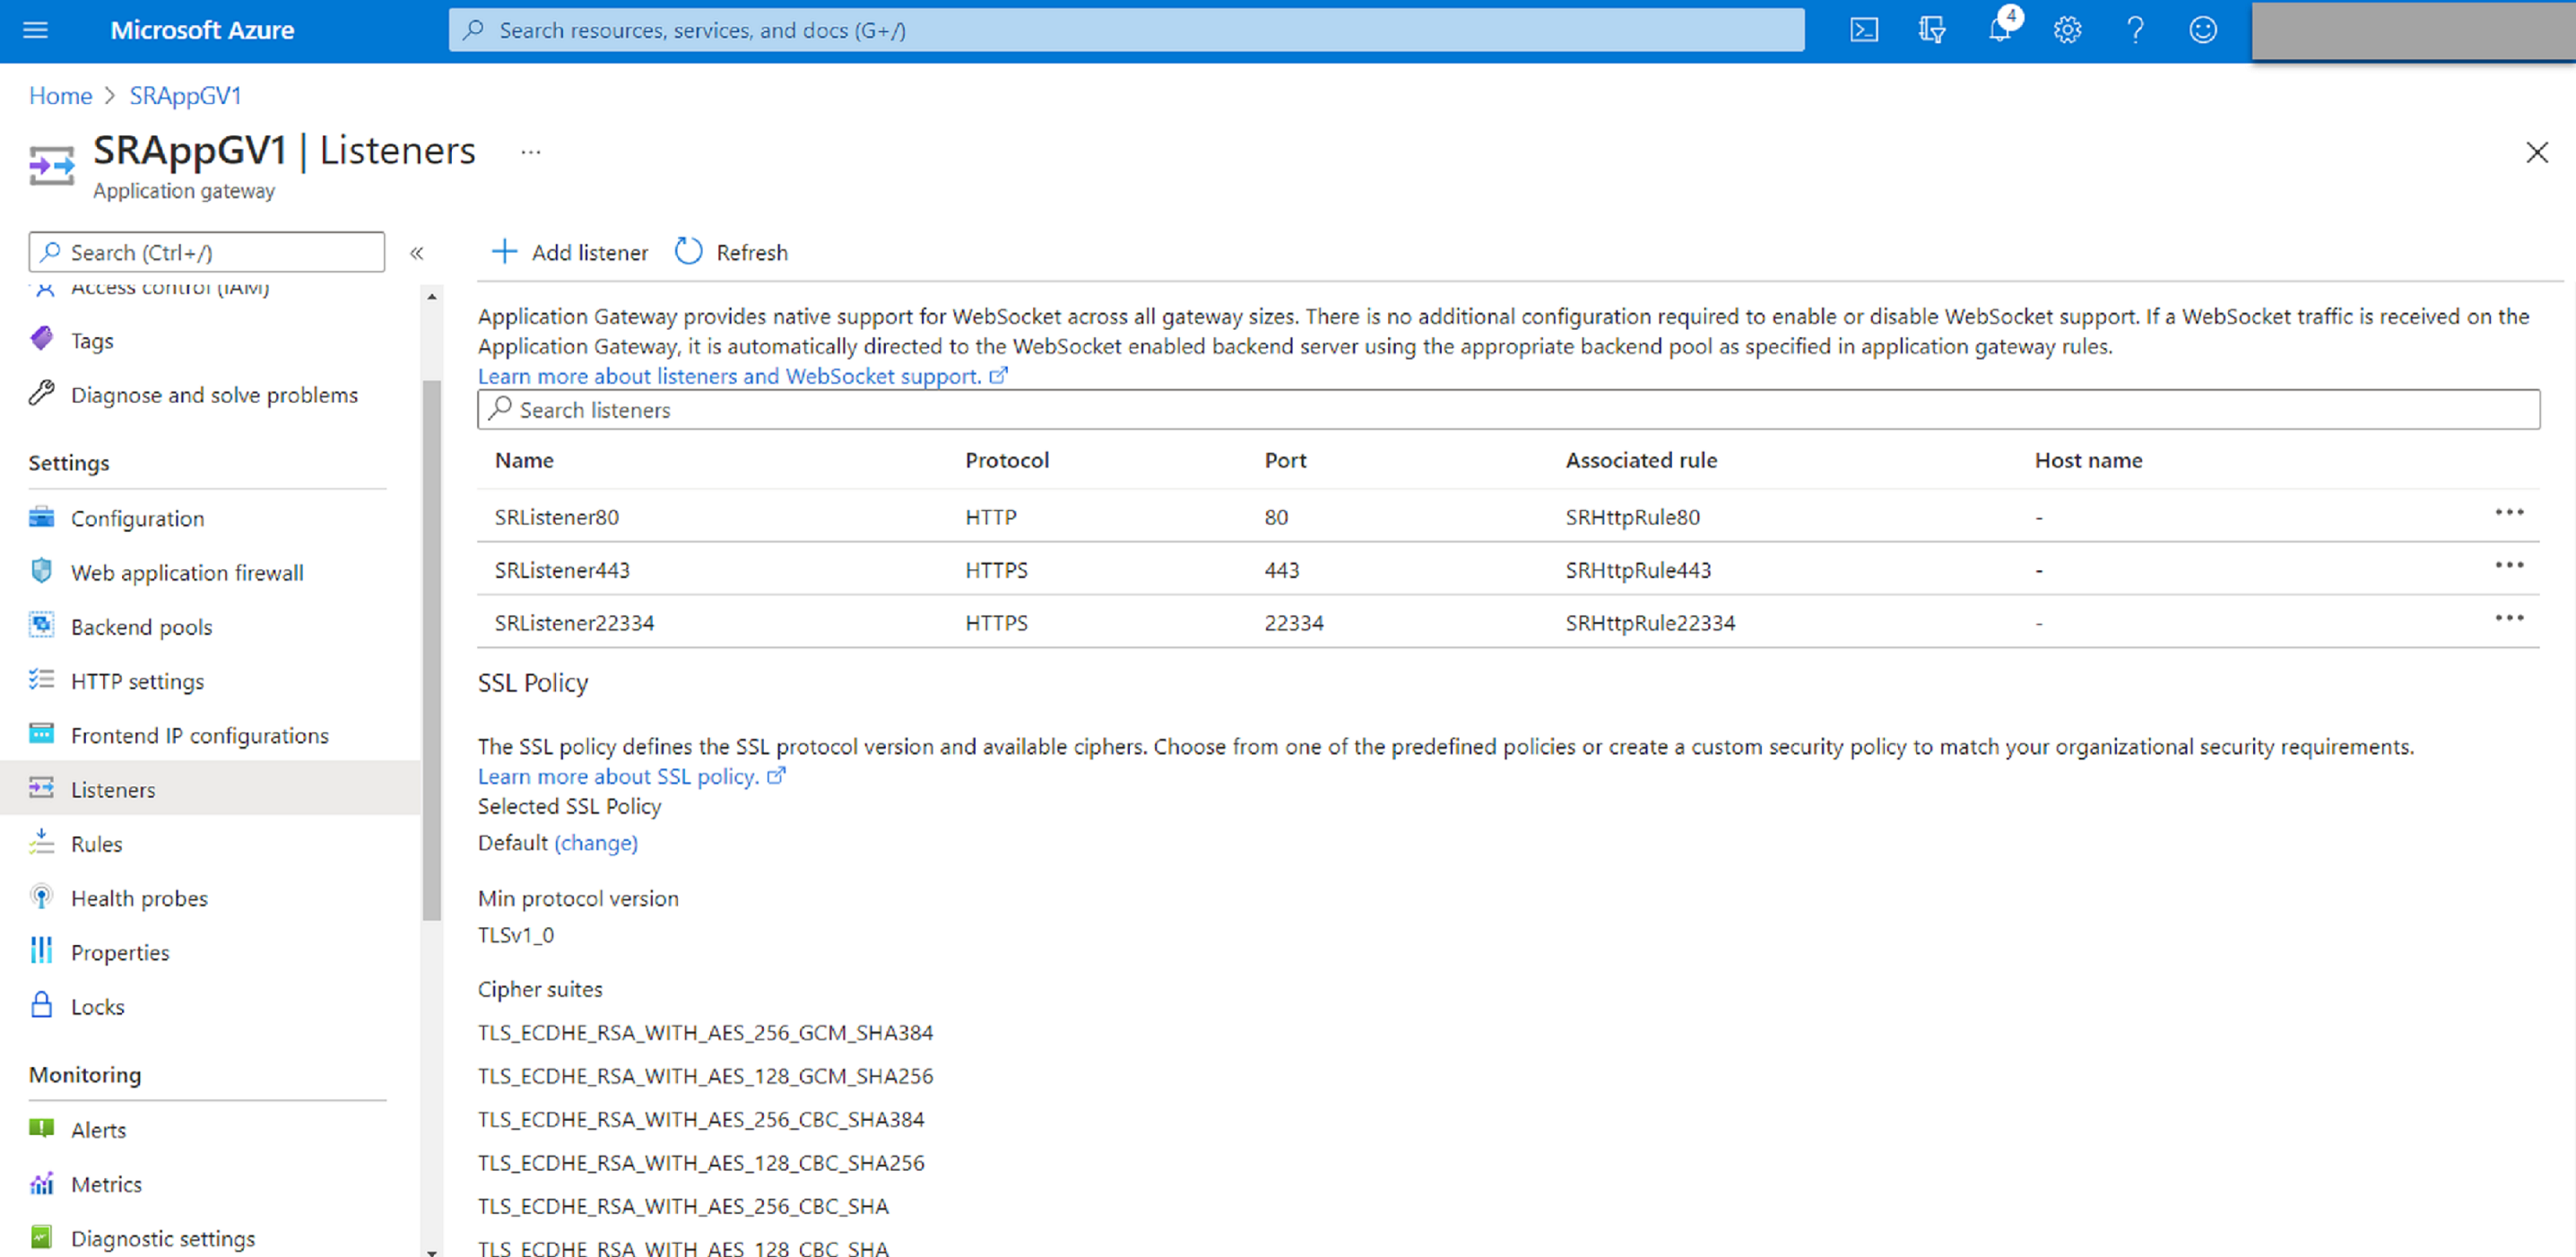
- Listener on port 80
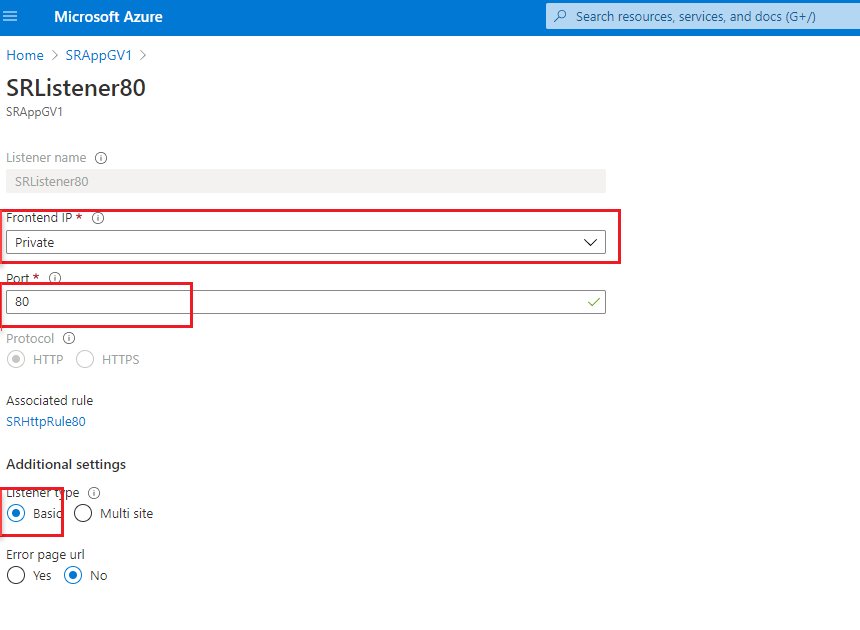
-
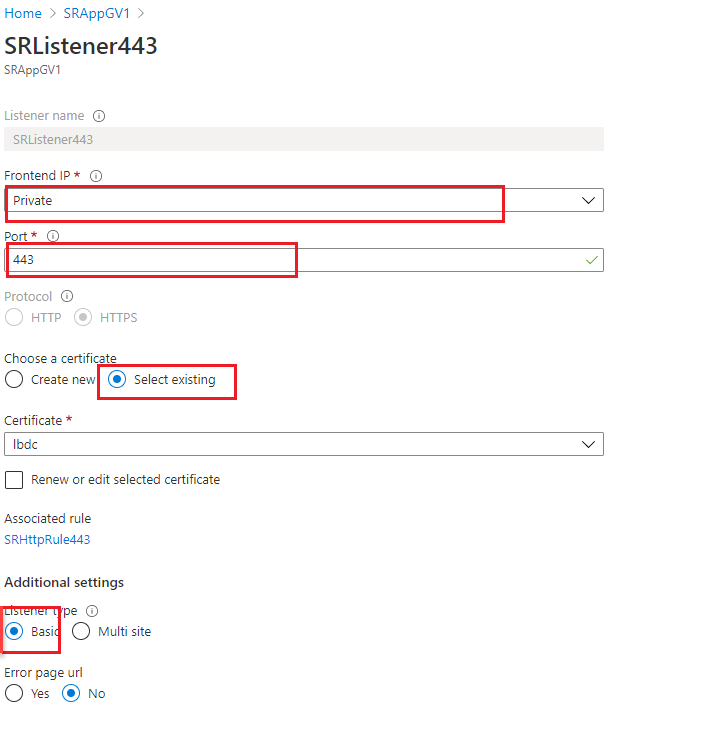
Listener on port 443
Create a self-signed certificate and upload the certificate to the Azure portal when you create the HTTPS listener. For more information, see Certificates supported for TLS termination and Create a self-signed certificate.
-
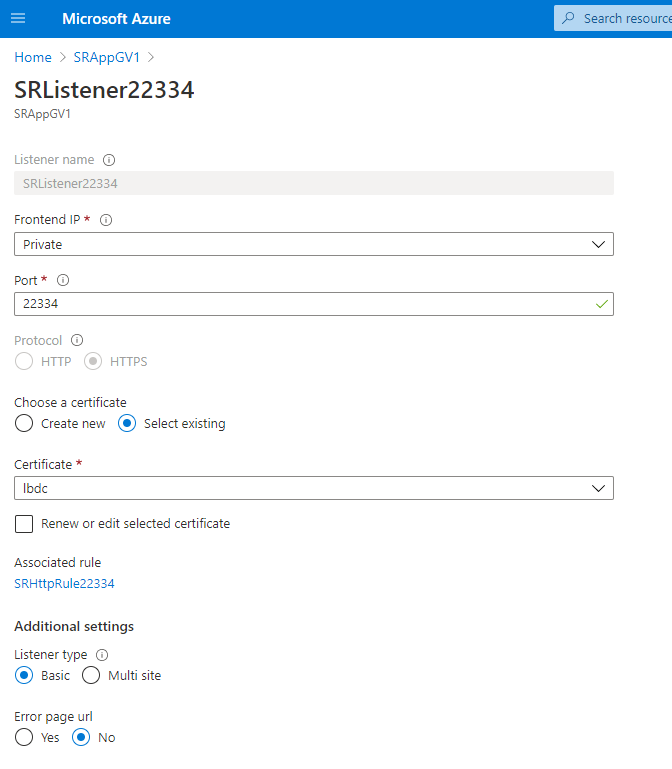
Listener on port 22334
If WebSocket uses HTTP, use the same setting as port 80. If WebSocket uses HTTPS, use the same setting as port 443. The following example shows the setting of an HTTPS listener on port 22334.
-
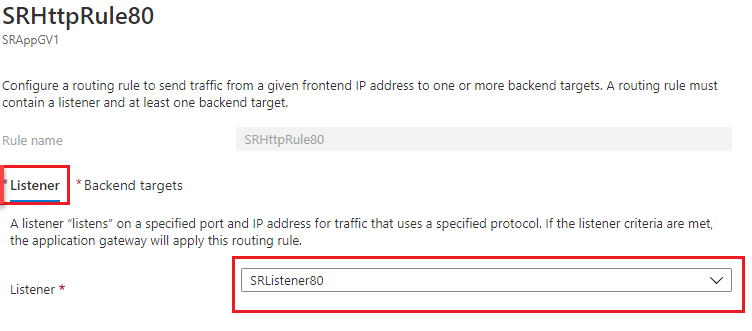
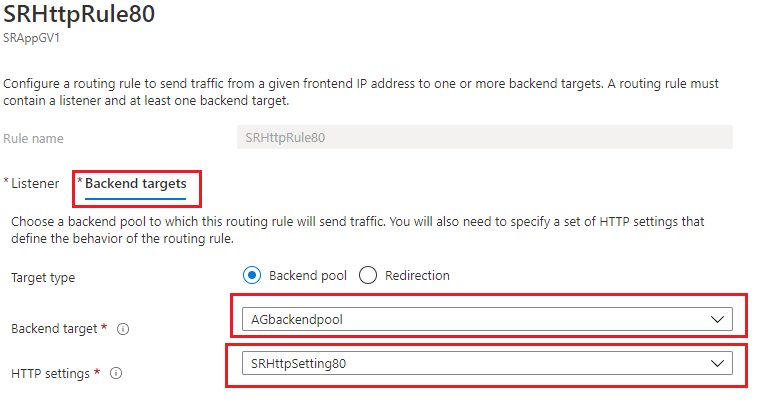
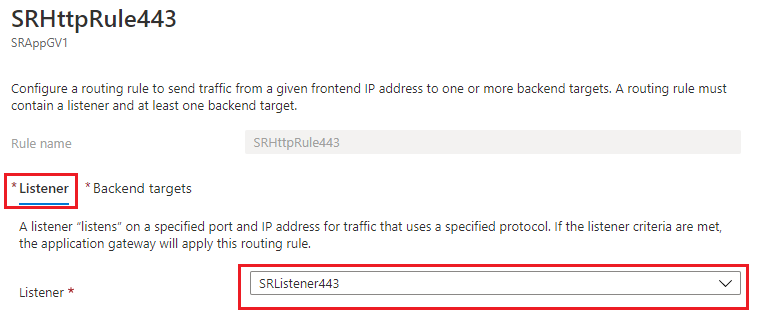
Create request routing rules.
Create rules for ports 80, 443, and 22334, for example:

-
Routing rule for port 80
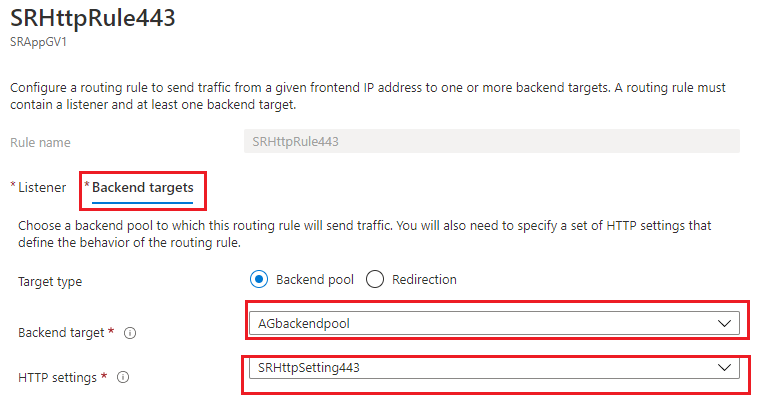
-
Routing rule for port 443
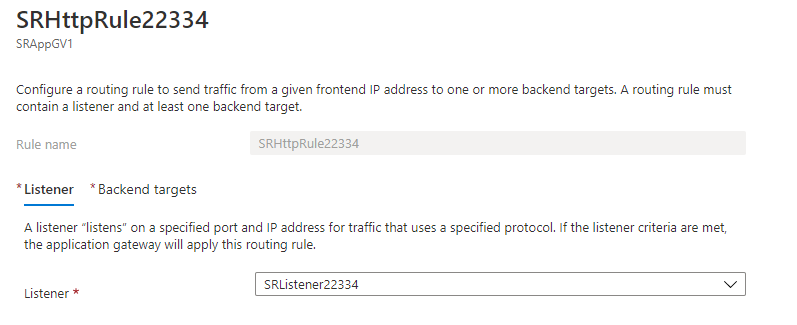
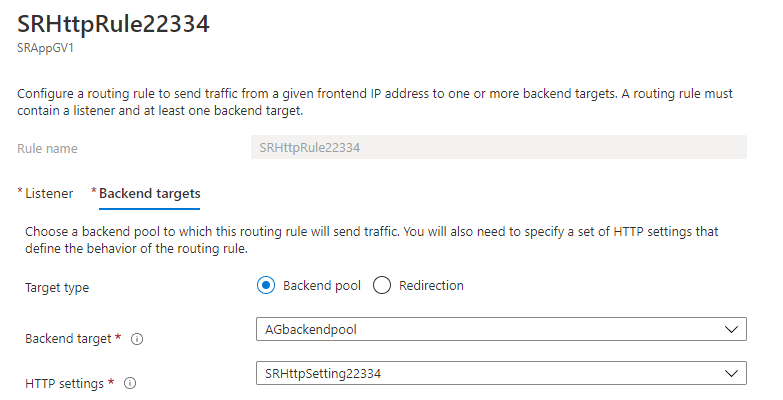
-
Routing rule for port 22334
-
-
Add the Azure VMs where the Session Recording server is installed to the back-end pool.
-
Configure Session Recording servers.
In this article
- Prerequisites
- Step 1: Upload the Citrix Virtual Apps™ and Desktops installer to Azure
- Step 2: Create a SQL managed instance in the Azure portal
- Step 3: Create Azure virtual machines (VMs)
- Step 4: Remote desktop and download the Citrix Virtual Apps and Desktops installer to the Azure VMs
- Step 5: Run the installer to install Session Recording components on the Azure VMs
- Step 6: Configure an Azure file share to store recordings
- Step 7: Add a load balancer