Access the web player
The URL of the web player website is http(s)://<FQDN of Session Recording server>/WebPlayer. To ensure the use of HTTPS, add an SSL binding to the website in IIS and update the SsRecWebSocketServer.config configuration file.
Note:
When logging on to the web player website, domain users do not need to enter credentials while non-domain users must.
Supported browsers include Google Chrome, Microsoft Edge, and Firefox.
To have the web player function properly, make sure you enable WebGL in Firefox.
This article guides you through the process of installing and enabling the web player and the process of configuring HTTPS.
Install the web player
Install the web player on the Session Recording server only. Double-click SessionRecordingWebPlayer.msi and follow the instructions to complete your installation. For more information about installing Session Recording, see Install, upgrade, and uninstall.
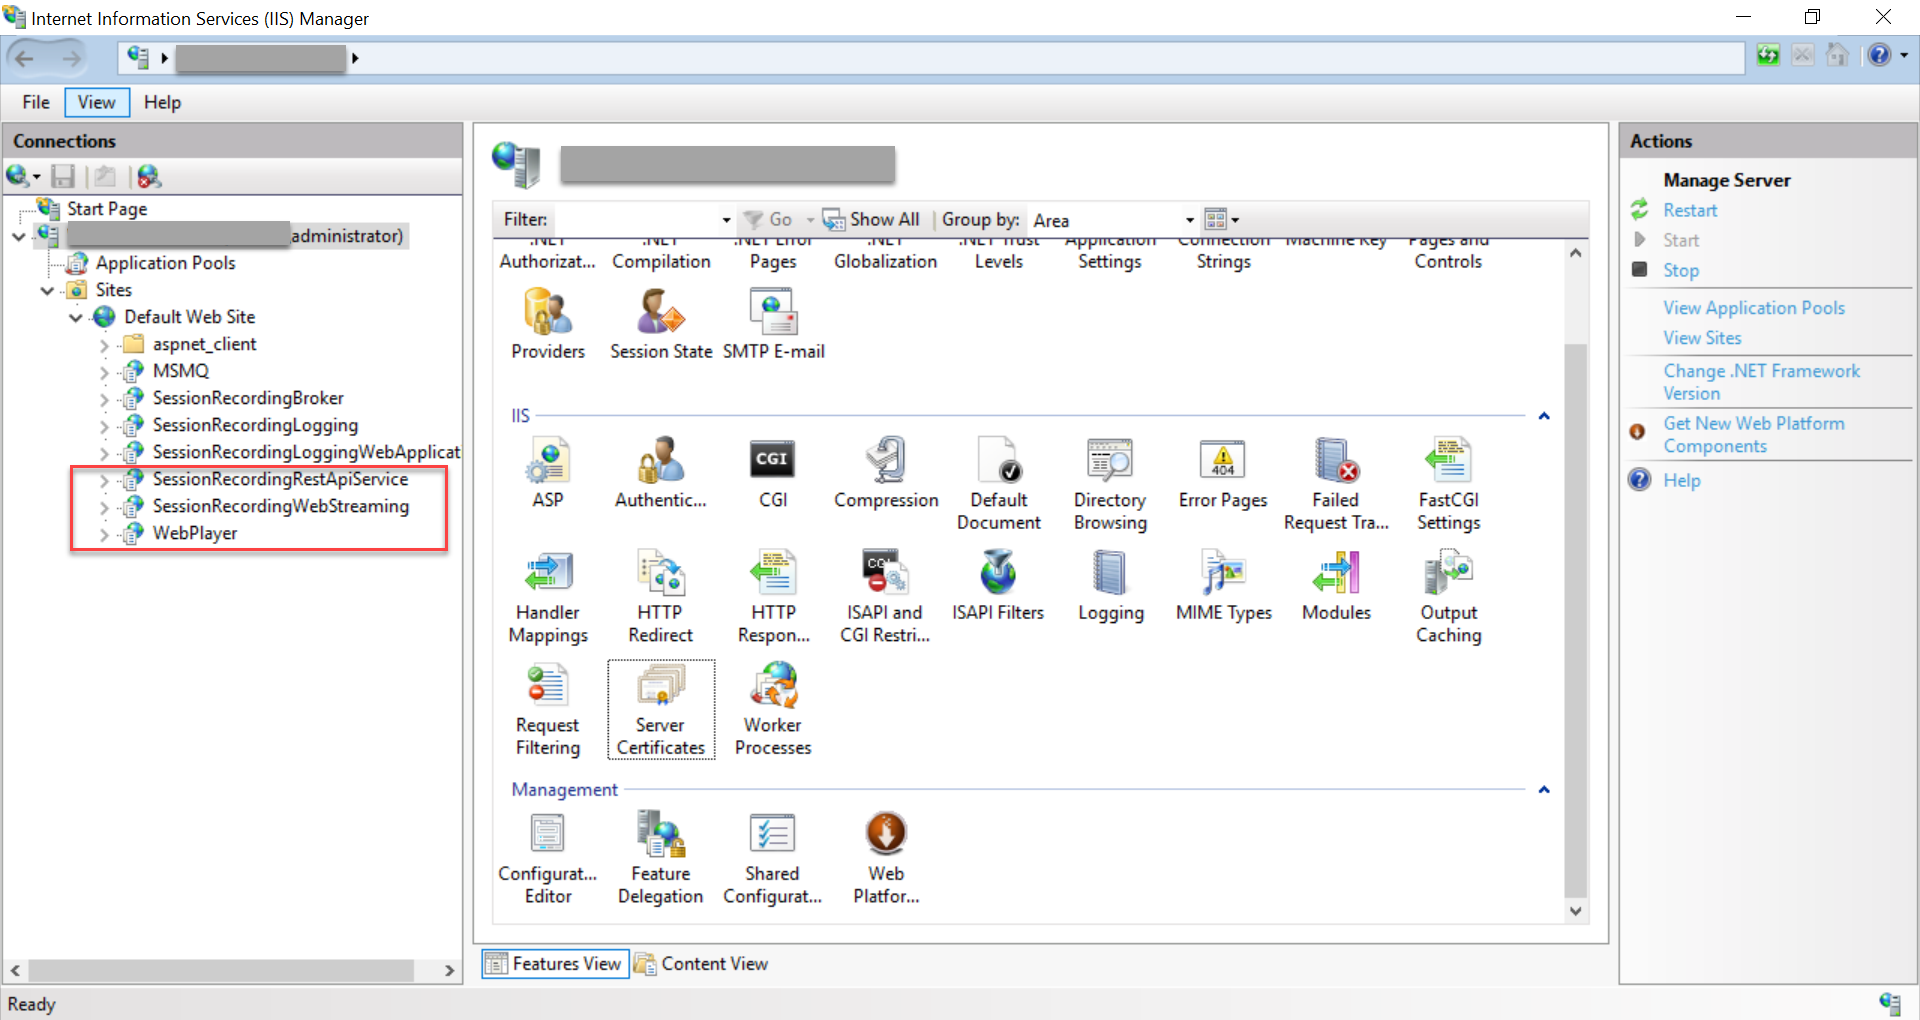
Starting from Version 2103, Session Recording migrates the WebSocket server to IIS. With the web player installed, the SessionRecordingRestApiService, SessionRecordingWebStreaming, and WebPlayer applications appear in IIS.
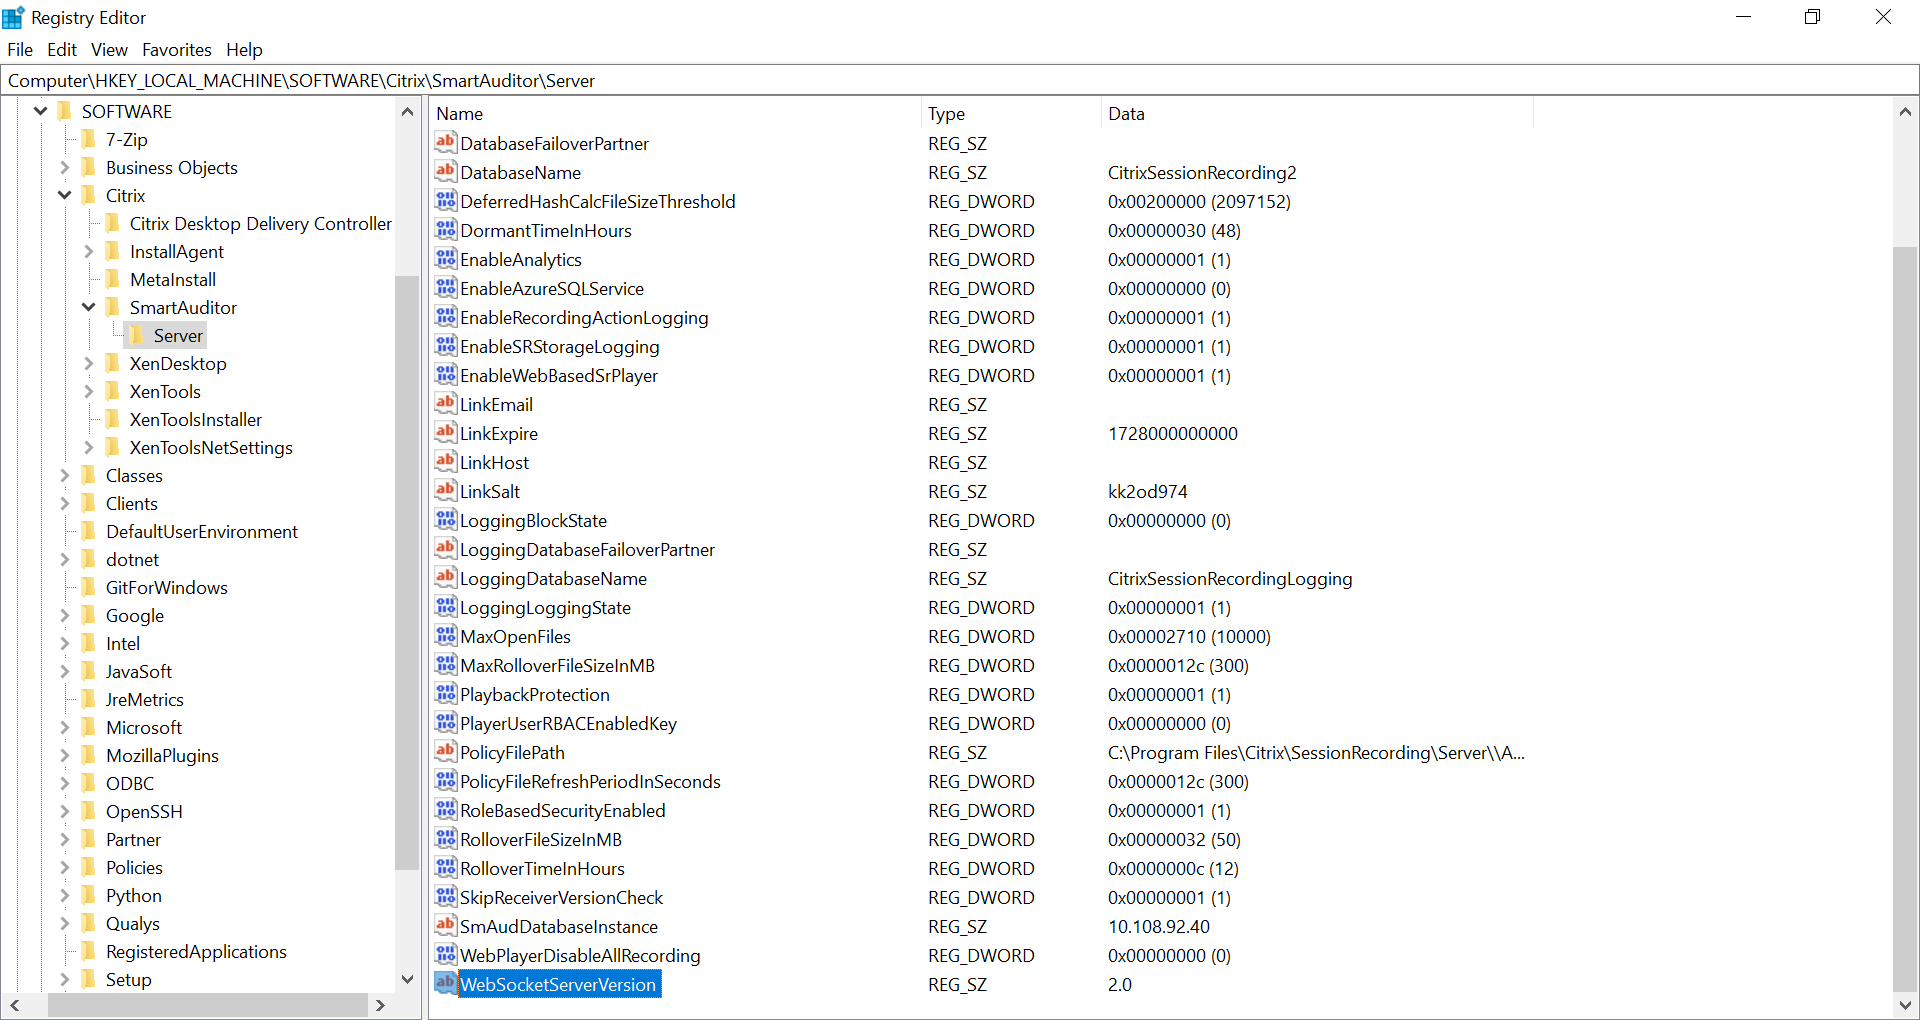
A fresh installation of Session Recording 2103 and later connects your web browser to the WebSocket server hosted in IIS when you access the web player website. The WebSocket server hosted in IIS is versioned 2.0, as indicated by the registry value WebSocketServerVersion under the registry key at HKEY_LOCAL_MACHINE\SOFTWARE\Citrix\SmartAuditor\Server.
An upgrade installation from an earlier version to Session Recording 2103 and later connects your web browser to the Python-based WebSocket server. To connect to the WebSocket server hosted in IIS, run the <Session Recording server installation path>\Bin\SsRecUtils.exe -enablestreamingservice command. To connect back to the Python-based WebSocket server, run the <Session Recording server installation path>\Bin\SsRecUtils.exe - disablestreamingservice command. The Python-based WebSocket server is versioned 1.0.
Enable the web player
The web player is enabled by default.
-
To disable the web player, start a Windows command prompt and run the
<Session Recording Server installation path>\Bin\SsRecUtils.exe –disablewebplayercommand. -
To enable the web player, start a Windows command prompt and run the
<Session Recording Server installation path>\Bin\SsRecUtils.exe -enablewebplayercommand.
Configure HTTPS
The URL of the web player website is http(s)://<FQDN of Session Recording server>/WebPlayer. To ensure the use of HTTPS, add an SSL binding to the website in IIS and update the SsRecWebSocketServer.config configuration file.
Note:
When logging on to the web player website, domain users do not need to enter credentials while non-domain users must.
To use HTTPS to access the web player website, complete the following steps:
-
Add an SSL binding in IIS.
-
Obtain an SSL certificate in PEM format from a trusted Certificate Authority (CA).
Note:
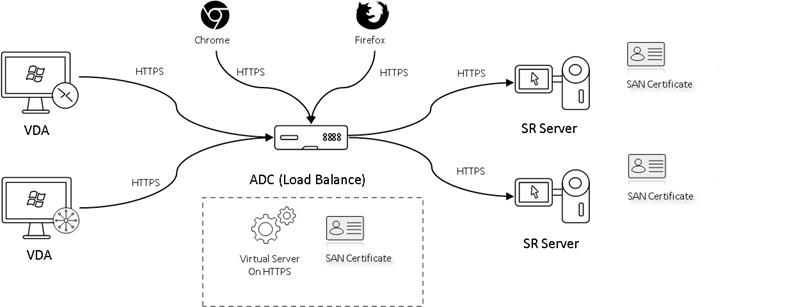
Most popular browsers such as Google Chrome and Firefox no longer support the common name in a Certificate Signing Request (CSR). They enforce Subject Alternative Name (SAN) in all publicly trusted certificates. To use the web player over HTTPS, take the following actions accordingly:
-
When a single Session Recording Server is in use, update the certificate of the Session Recording Server to a SAN certificate.

-
When load balancing is in use, ensure that a SAN certificate is available both on Citrix ADC and on each Session Recording Server.
-
-
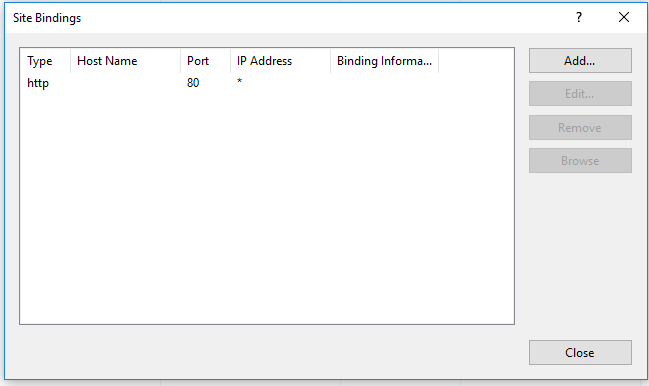
On IIS, right-click the website and select Add Bindings. The Site Bindings dialog box appears.
-
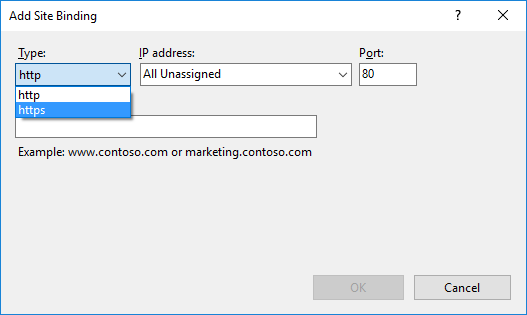
Click Add in the upper right corner. The Add Site Binding dialog box appears.
-
Select https from the Type list and select your SSL certificate.
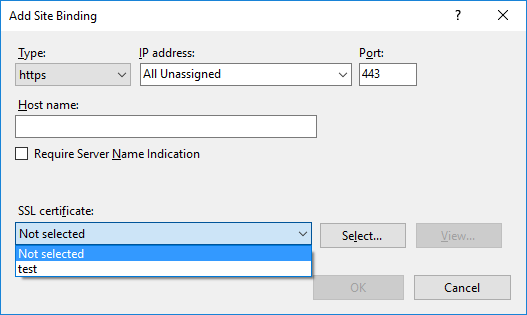
-
Click OK.
-
-
Update the
SsRecWebSocketServer.configconfiguration file.-
Locate and open the
SsRecWebSocketServer.configconfiguration file.The
SsRecWebSocketServer.configconfiguration file is typically located in the<Session Recording Server installation path>\Bin\folder. -
(Optional) For Session Recording 2103 and later that host the WebSocket server in IIS, enable TLS by editing TLSEnable=1 and ignore the ServerPort, SSLCert, and SSLKey fields.
-
(Optional) For Session Recording 2012 and earlier, enable TLS by editing TLSEnable=1, and fill in the paths to the SSL certificate and its key, respectively.
Note:
Only the PEM format of SSL certificates and key files is supported.
The ServerPort field indicates the port number that the web player uses to collect recording files. In the following screen capture, it is set to the default value (22334).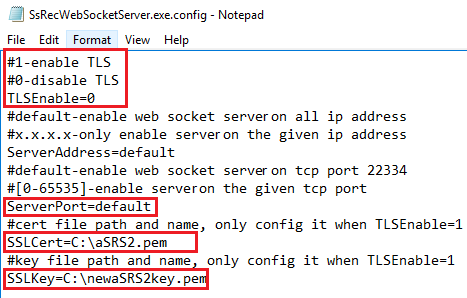
To extract the separate certificate and key files used in the WebSocket server configuration:
-
Ensure that OpenSSL is installed on your Session Recording Server that contains the SSL certificate.
-
Export the SSL certificate as a .pfx file. The .pfx file includes both the certificate and the private key.
-
Open the command prompt and go to the folder that contains the .pfx file.
-
Start OpenSSL from the OpenSSL\bin folder.
-
Run the following command to extract the certificate:
openssl pkcs12 -in [yourfile.pfx] -clcerts -nokeys -out [aSRS2.pem]
<!--NeedCopy-->
Enter the import password that you created when exporting the .pfx file.
-
Run the following command to extract the private key:
openssl pkcs12 -in [yourfile.pfx] -nocerts -out [newaSRS2keyWithPassword.pem]
<!--NeedCopy-->
Enter the import password that you created when exporting the .pfx file. Provide a new password for protecting your key file when prompted for the PEM pass phrase.
-
Run the following command to decrypt the private key:
openssl rsa -in [newaSRS2keyWithPassword.pem] -out [newaSRS2key.pem]
<!--NeedCopy-->
-
-
Save your changes.
-
Check your firewall settings. Allow SsRecWebSocketServer.exe to use the TCP port (22334 by default) and allow access to the web player URL.
-
Run the
SsRecUtils –stopwebsocketservercommand.
-