Specify recording storage locations
You can store recordings on a local drive, a SAN volume, and a location specified by a UNC network path. You can also store recordings in Azure file shares and Amazon Simple Storage Service (Amazon S3).
Note:
- Storing data on a NAS, based on file-based protocols such as SMB and NFS, might have performance and security implications. Use the latest version of the protocol to avoid security implications and perform scale testing to ensure proper performance.
- To archive files or restore deleted files, use the ICLDB command.
This article walks you through the following procedures:
Specify recording storage locations in Session Recording Server Properties
This section provides a general procedure for setting storage locations in Session Recording Server Properties.
- Log on to the machine hosting the Session Recording server.
- From the Start menu, choose Session Recording Server Properties.
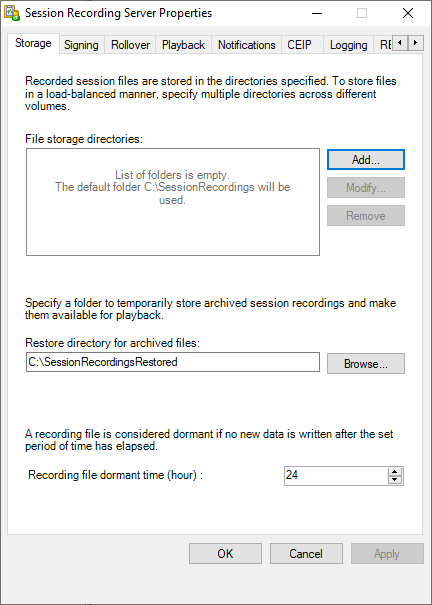
- In Session Recording Server Properties, click the Storage tab.
-
Use the File storage directories list to manage the folders where recordings are stored.
After you select the folders, Session Recording grants its service with Full Control permission to these folders.
By default, recordings are stored in the <drive>:\SessionRecordings folder of the machine hosting the Session Recording server. You can change the folder where you store recordings, add extra folders to load-balance across multiple volumes, or make use of more space. Multiple folders in the list indicate that recordings are load-balanced across the folders. Load balancing cycles through the folders.
-
In the Restore directory for archived files field, specify a folder for restoring archived recordings. You can specify only one folder for restoring archived recordings.
By default, archived recordings are restored in the <drive>:\SessionRecordingsRestore folder of the machine hosting the Session Recording server. You can change the folder.
Store recordings in an Azure file share
To store recordings in an Azure file share, complete the following steps:
-
In the Azure portal, create a storage account and then create an Azure file share.
For a quick start guide, see Create and manage Azure file shares with the Azure portal. The following table recommends configurations for your consideration.
Recording File Size MB/hour Session Quantity File Share Type File Share Quota (TB) Session Recording Server Quantity Session Recording Server Size < 6.37 < 1,000 HDD Standard (StorageV2) 2 1 Standard D4as_v4 < 6.37 1,000–2,000 SSD Premium 3 1 Standard D4as_v4 < 6.37 2,000–3,000 SSD Premium 5 1 Standard D4as_v4 < 6.37 3,000–4,000 SSD Premium 6 1 Standard D4as_v4 Approx.10 < 1,000 HDD Standard (StorageV2) 3 1 Standard D4as_v4 Approx.10 1,000–2,500 SSD Premium 6 1 Standard D4as_v4 Approx.10 2,500–4,000 SSD Premium 10 2 Standard D4as_v4 The file share quota is calculated based on eight hours per day, 23 working days per month, and a one-month retention period for each recording file.
-
Add the Azure file share credentials to the host where you installed the Session Recording server.
-
Start a command prompt as an administrator and change the drive to the <Session Recording Server installation path>\Bin folder.
By default, the Session Recording server is installed in
C:\Program Files\Citrix\SessionRecording\Server. -
Run the SsRecUtils.exe -AddAzureFiles <storageAccountName> <fileShareName> <accesskey> command.
Where,
- <storageaccountname> is the name of your storage account in Azure.
- <filessharename> is the name of the file share contained within your storage account.
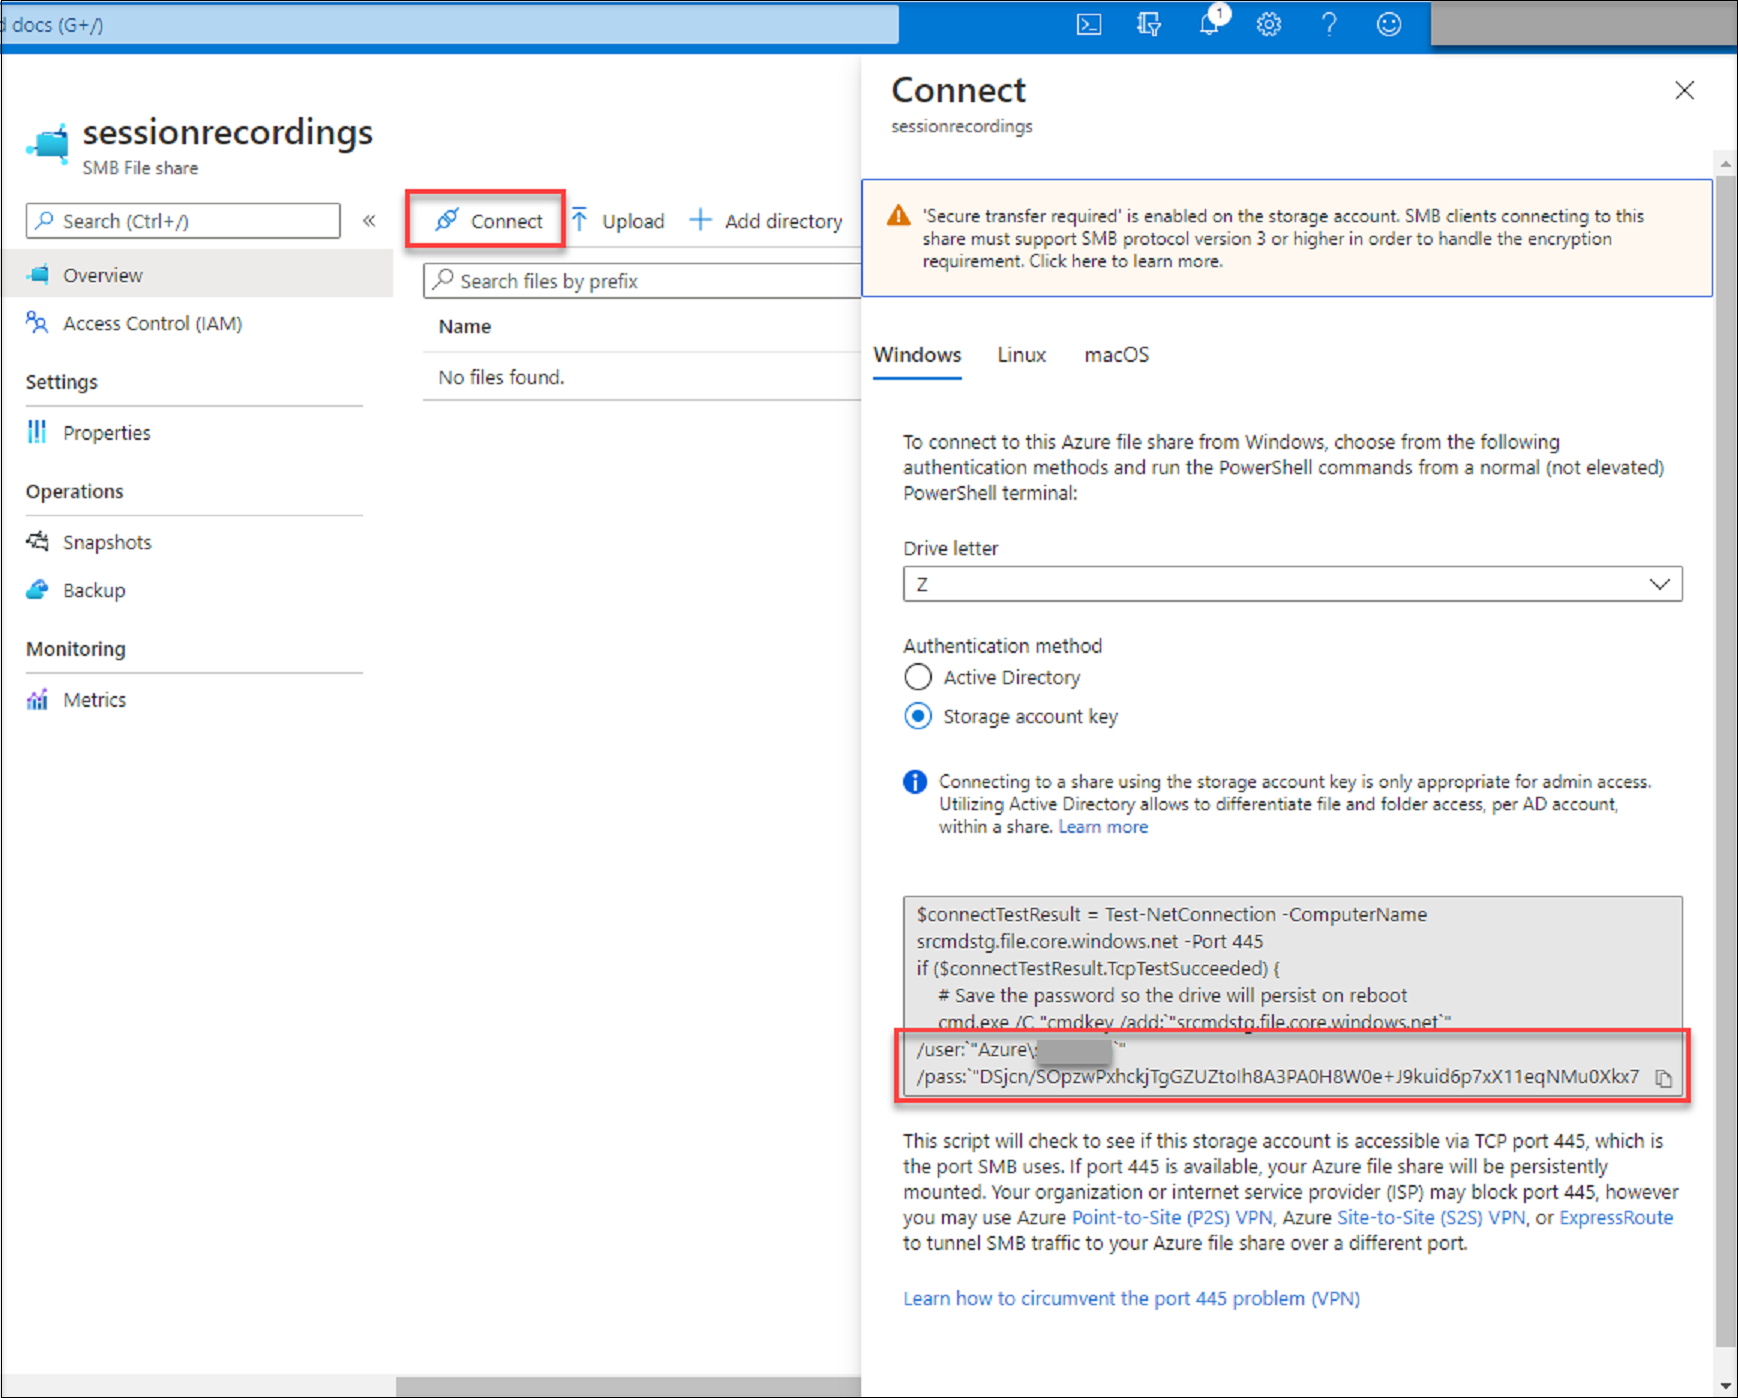
- <accesskey> is your storage account key that can be used to access the file share.
There are two ways to obtain your storage account key:
-
You can obtain your storage account key from the connection string that appears when you click the Connect icon in your file share page.
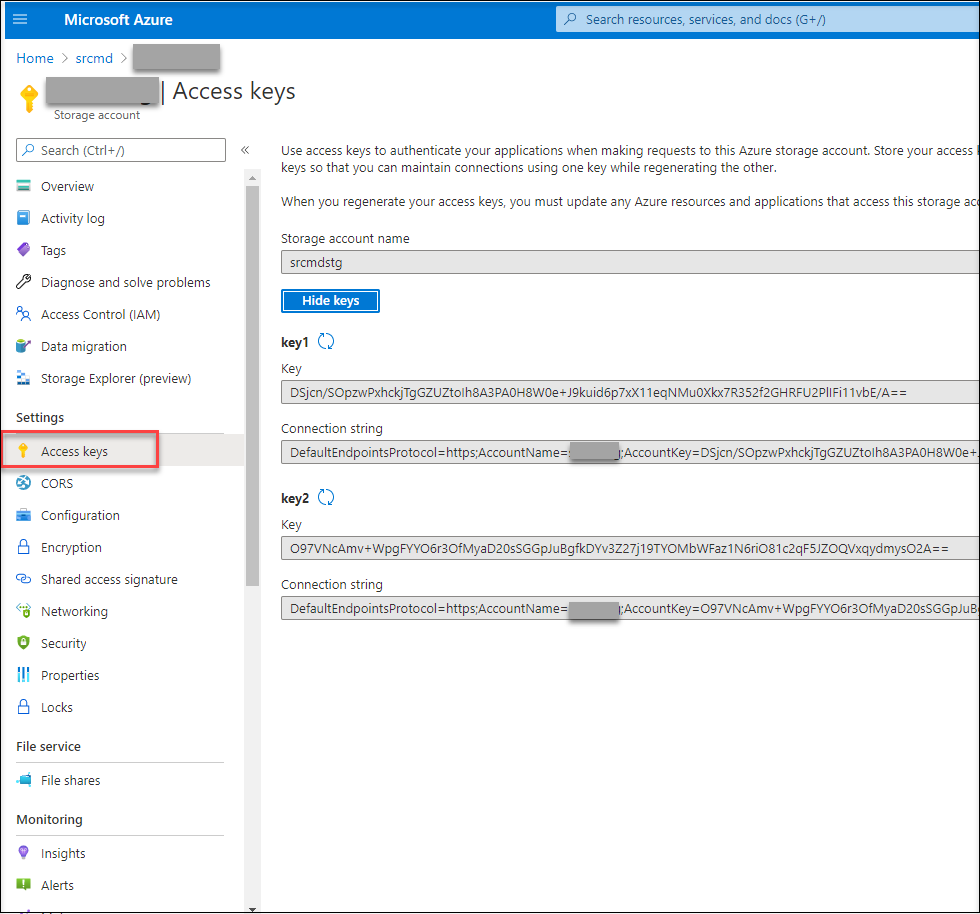
-
You can also obtain your storage account key by clicking Access keys in the left navigation of your storage account page.
-
Mount the Azure file share to the host where you installed the Session Recording server.
- Open Session Recording Server Properties.
- Click Add on the Storage tab.
-
Enter the UNC path in the format of \\<storageaccountname>.file.core.windows.net\<filessharename>\<subfolder>.
Specify a subfolder under the file share to store your recording files. The Session Recording server then automatically creates the subfolder for you.
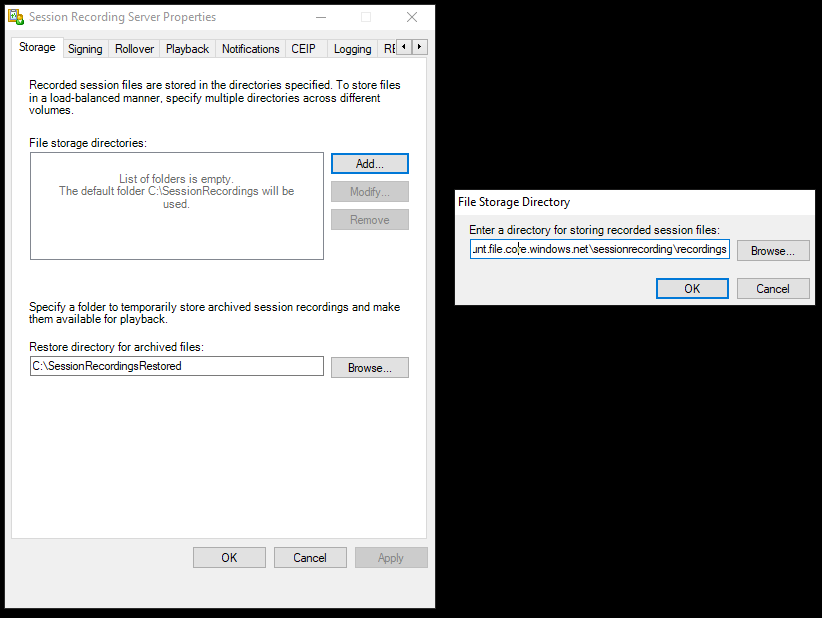
- Click OK in the File Storage Directory dialog box.
- Click Apply in the Session Recording Server Properties window.
- Click OK after Apply becomes grayed out.
-
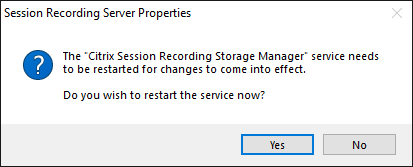
Click Yes when you’re prompted to restart the Session Recording Storage Manager service.
-
Store recordings in Amazon S3
Recommendations
-
Install the Session Recording server on t2.xlarge or other AWS EC2 instances with higher specifications.
-
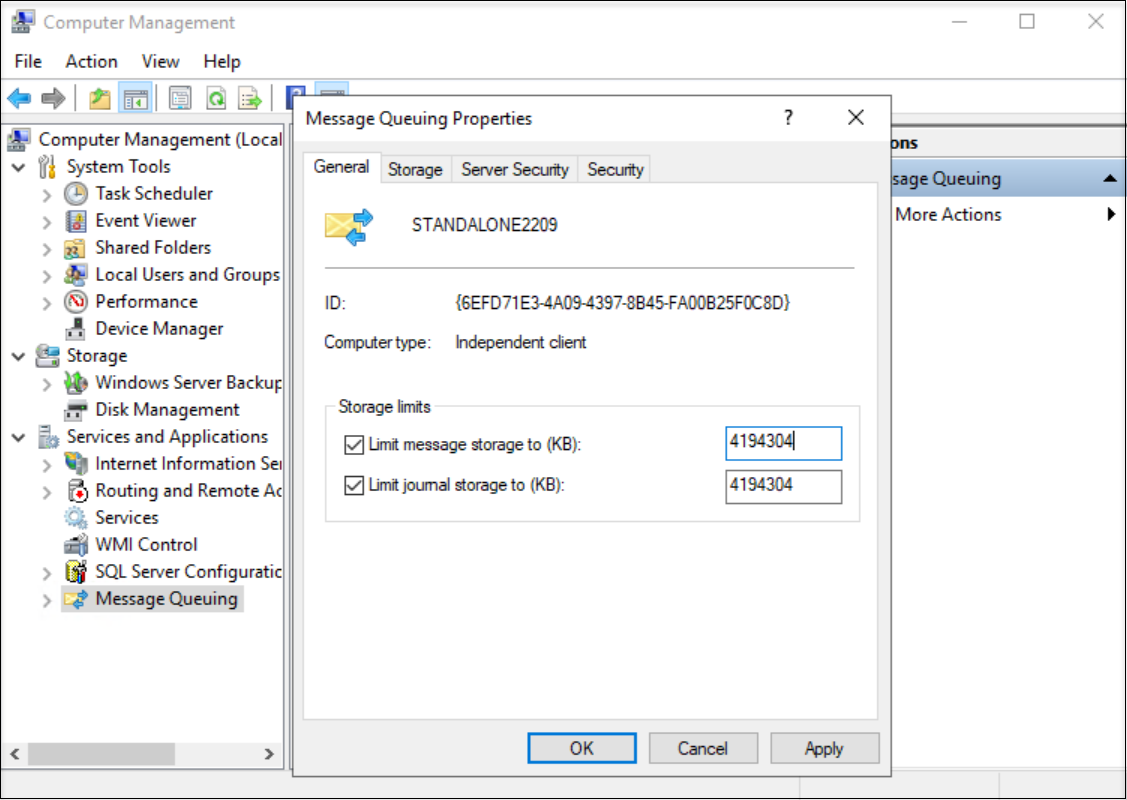
Set the storage limit on Message Queues to a minimum of 4,194,304 KB (4 GB).
-
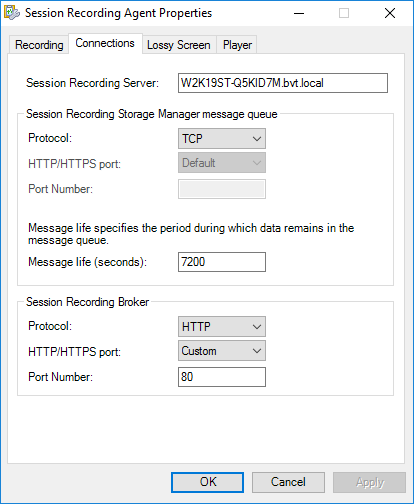
In Session Recording Agent Properties, set the lifetime of the messages on Message Queues to 14,400 seconds (4 hours).
Note:
During the update or maintenance of the AWS Storage Gateway, recording files might not be saved from the Session Recording server to the file share. Data losses can occur.
Steps
To store recordings in Amazon S3, complete the following steps:
-
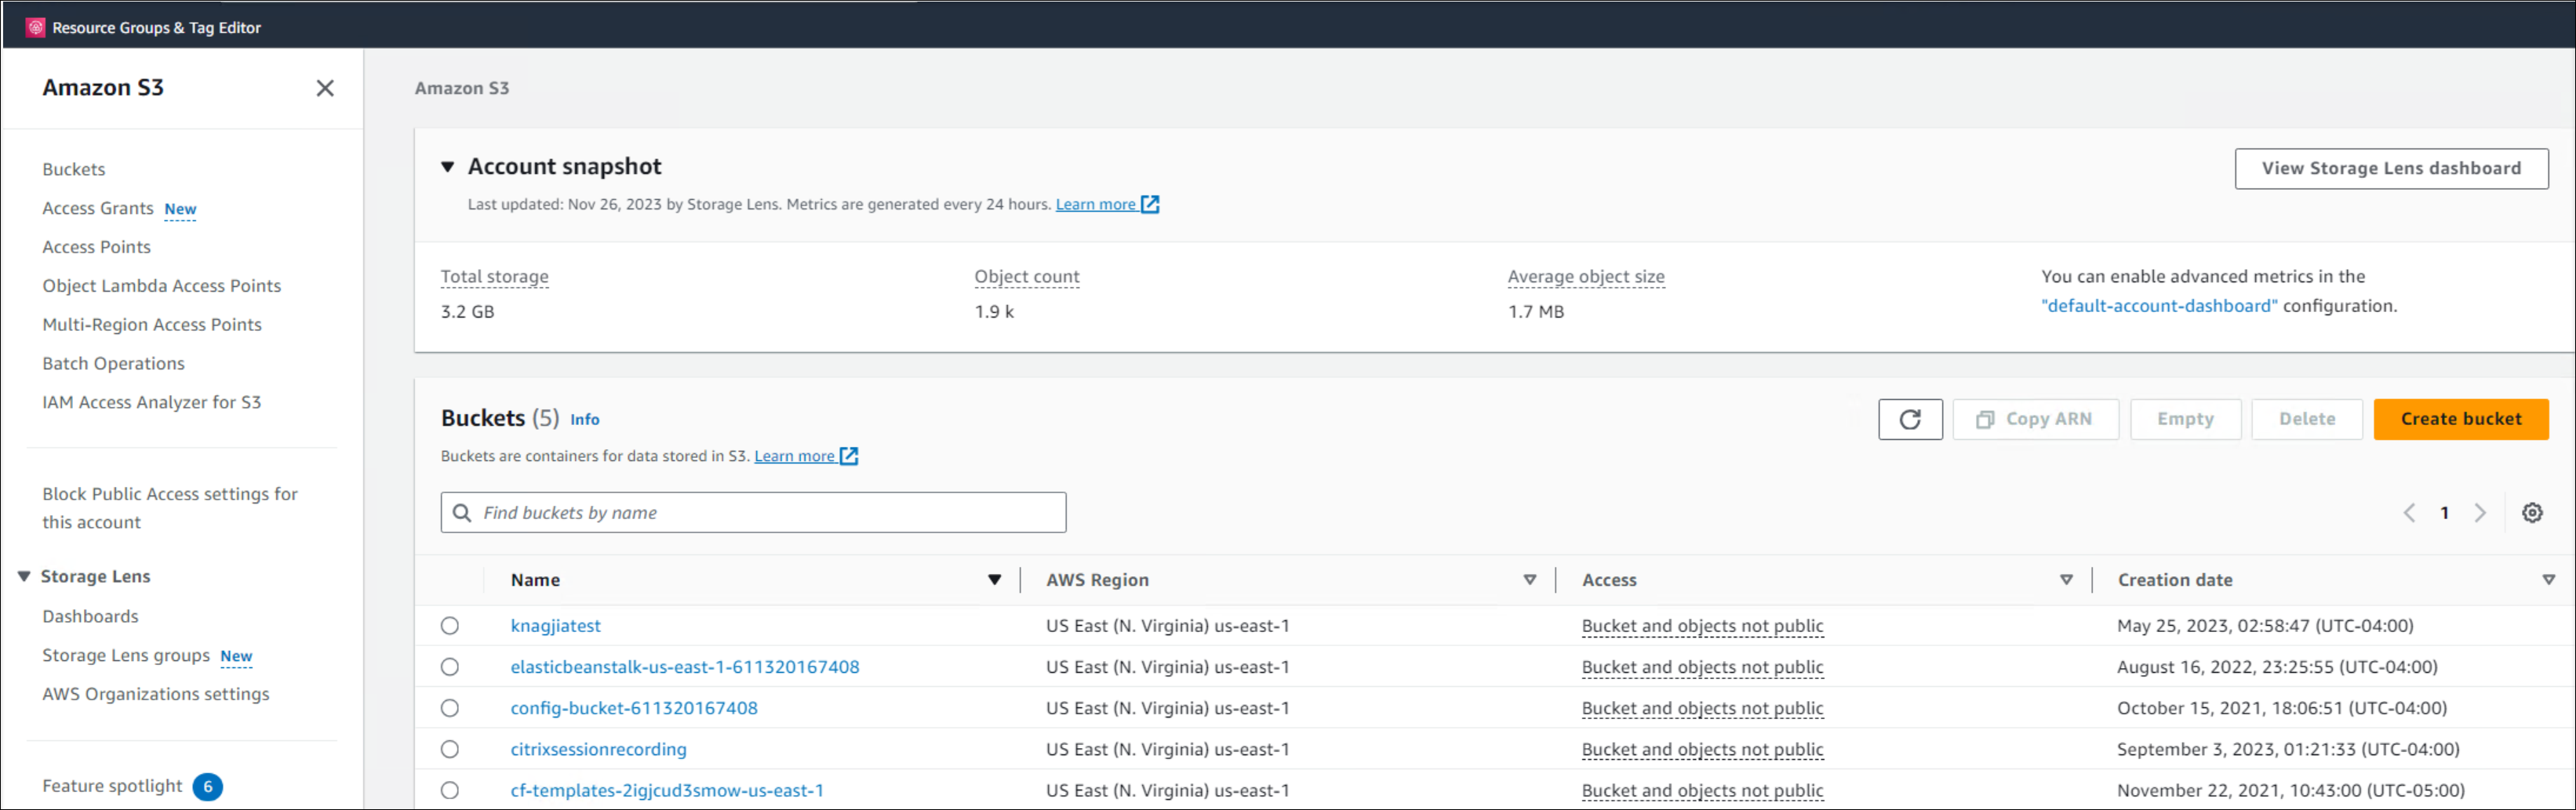
Create an Amazon S3 bucket. For more information, see the Amazon documentation Creating a bucket.
-
Create and activate an Amazon S3 File Gateway. Doing so enables data transfer to and from the Amazon S3 bucket created earlier.
For step-by-step instructions, see the following Amazon documentation:
-
Create a file share with guest access. When creating the file share, select the Amazon S3 File Gateway that you created earlier and connect the file share to your Amazon S3 bucket. For more information, see the Amazon documentation Create a file share.
-
Go to the machine where you installed the Session Recording server and complete the following steps:
-
Add the file share credentials to the Session Recording server. To do so, start a command prompt as an administrator and change the drive to the <Session Recording Server installation path>\Bin folder. By default, the Session Recording server is installed in C:\Program Files\Citrix\SessionRecording\Server. Then run the SsRecUtils.exe -AddAwsS3 <GatewayIPAddress> <S3Path> <GatewayID> <Password> command.
Where,
- <GatewayIPAddress> is the IP address of your Amazon S3 File Gateway.
- <S3Path> is the name of your Amazon S3 bucket.
- <GatewayID> is the ID of your Amazon S3 File Gateway.
- <Password> is the guest password that you set when creating the file share.
All the information except for the guest password is available on the file share page similar to the following. As for the guest password, you must keep a careful record yourself.

-
Set the file share as the location for storing your recordings.
- Open Session Recording Server Properties.
- Click Add on the Storage tab.
- Enter the UNC path in the format of \\<GatewayIPAddress>\<S3Path>\<subfolder>. Specify a subfolder under the file share to store your recording files. The Session Recording server then automatically creates the subfolder for you.
-
Store recordings in a network shared folder
Note:
For an accessible network shared folder, the Session Recording server accesses it through SMB by default.
Storing data on a NAS, based on file-based protocols such as SMB and NFS, might have performance and security implications. Use the latest version of the protocol to avoid security implications and perform scale testing to ensure proper performance.
Steps
To store recordings in a network shared folder, complete the following steps:
-
Create an account with read and write permissions for the network shared folder to be created later. To do so, use the Windows GUI or run a PowerShell command similar to the following:
New-LocalUser -Name "YourUserName" -Password (ConvertTo-SecureString -String "YourPassword" -AsPlainText -Force) <!--NeedCopy--> -
Create a network shared folder and ensure that the shared folder is accessible to the Session Recording Server. To do so, use the Windows GUI or run the PowerShell commands similar to the following:
New-SmbShare -Name "YourShareName" -Path "YourSharePath" -FullAccess "YourUserName" Grant-SmbShareAccess -Name "YourShareName" -AccessRight Change -AccountName "YourUserName" <!--NeedCopy--> -
Go to the machine where you installed the Session Recording server and complete the following steps:
-
Add the credentials for the created account to the Session Recording server. To do so, start a command prompt as an administrator and change the drive to the <Session Recording Server installation path>\Bin folder. By default, the Session Recording server is installed in C:\Program Files\Citrix\SessionRecording\Server. Then run the SsRecUtils.exe -AddSharedFolder <IPAddress> <ShareName> <Protocol> <Username> <Password> command.
Where,
- <IPAddress> is the IP address of the machine where the shared folder resides.
- <ShareName> is the share name.
- <Protocol> is fixed to SMB.
- <Username> is the user name that you set for the shared folder.
- <Password> is the password that you set for the shared folder.
For example, if \\10.100.100.100\myshare is your shared folder, you can run a command similar to SsRecUtils -AddSharedFolder 10.100.100.100 myshare SMB myusername mypassword.
-
Set the shared folder as the location for storing your recordings.
- Open Session Recording Server Properties.
- Click Add on the Storage tab.
- Enter the UNC path in the format of \\<IPAddress>\<ShareName>\<subfolder>. Specify a subfolder under the shared folder to store your recording files. The Session Recording server then automatically creates the subfolder for you.
-