Configure Citrix Gateways
Use Citrix Gateways to provide authentication and remote access to StoreFront and your Virtual Delivery Agents (VDAs). Citrix Gateways run on a hardware or software NetScaler ADCs.
For more information about configuring your Gateway, see Integrate NetScaler Gateway with StoreFront.
You must configure your gateway within StoreFront before StoreFront allows access through that gateway.
View Gateways
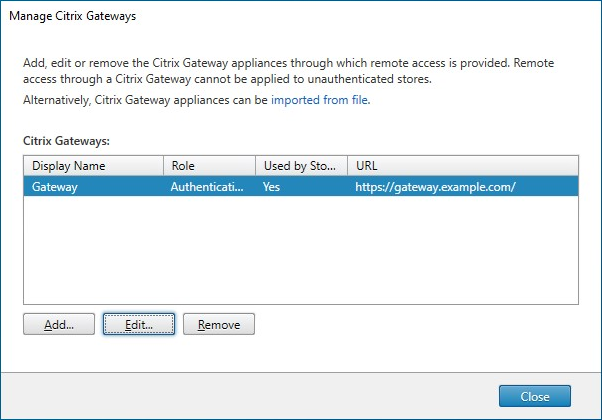
To view the gateways configured within StoreFront, select the Stores node in the left pane of the Citrix StoreFront management console and pane, click Manage Citrix Gateways. This displays the Manage Citrix Gateways window.
PowerShell
To get a list of gateways and their configuration call Get-STFRoamingGateway.
Add Citrix Gateway
-
In the Manage Citrix Gateways window click Add.
-
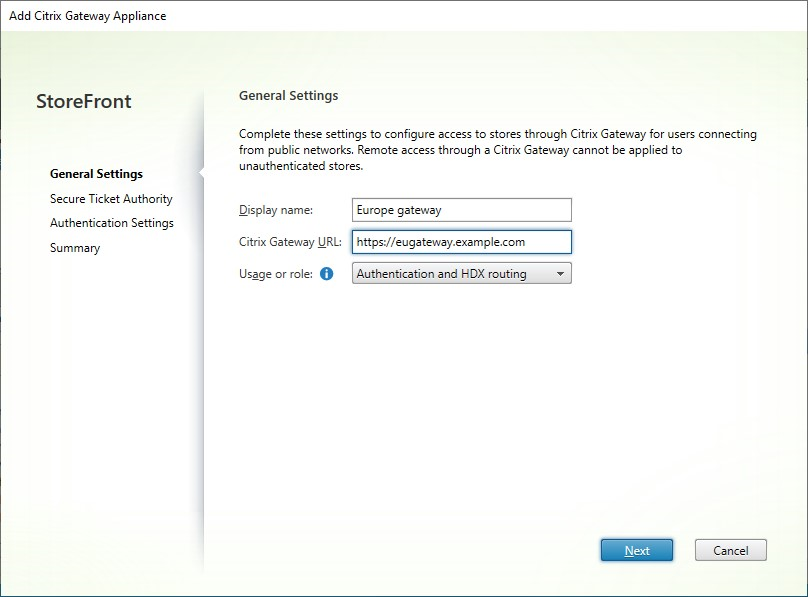
On the General Settings tab enter the settings then press Next.
-
Specify a Display name for the Citrix Gateway deployment that will help users to identify it.
Users see the display name you specify in Citrix Workspace app, so include relevant information in the name to help users decide whether to use that deployment. For example, you can include the geographical location in the display names for your Citrix Gateway deployments so that users can easily identify the most convenient deployment for their location.
-
Enter the URL of the gateway.
The fully qualified domain name (FQDN) for your StoreFront deployment must be unique and different from the Citrix Gateway virtual server FQDN. Using the same FQDN for StoreFront and the Citrix Gateway virtual server is not supported. The gateway adds the URL to the
X-Citrix-ViaHTTP header. StoreFront uses this header to determine which gateway is in use.Using the GUI it is only possible to add a single gateway URL. If a gateway can be access by multiple URLs then you need to add the same gateway twice with identical configuration apart from the URL. To simply configuration, you can configure a secondary URL used to access the gateway. This option is not available using the GUI so you must configure this using PowerShell. You should close the management console before running any PowerShell commands. For example if you have multiple gateways behind a global server load balancer, typically it is useful to add both the GSLB URL and a URL that can be used to access each specific regional gateway, for example for testing or troubleshooting purposes. Once you have created the gateway you can add an additional URL using
Set-STFRoamingGateway, using the-GSLBurlparameter for the secondary URL. Although the parameter is calledGSLBurlthis can be used for any situation where you wish to add a second URL. For example:Set-STFRoamingGateway -Name "Europe Gateway" -GSLBurl "eugateway.example.com" -GatewayUrl "gslb.example.com"Note:
Counterintuitively in this example, the
GSLBurlparameter contains the regional URL while theGatewayUrlparameter contains the GSLB URL. For most purposes the URLs are treated identically and if the store is only accessed through a web browser they can be configured either way around. However when accessing StoreFront through Citrix Workspace app, it reads theGatewayUrlfrom StoreFront and subsequently uses it for remote access and it is preferable for it to be configured to always connect to the GSLB URL.If you need more than two URLs then you will need to configure this as a separate gateway.
-
Select the Usage or Role:
Usage or role Description Authentication and HDX routing Use the gateway for both providing remote access to StoreFront and to access the VDAs. Authentication only Select this if the gateway is used only for remote access to StoreFront. This option prevents Citrix Workspace launcher from working. Therefore, if you need to use hybrid launches, choose Authentication and HDX routing even when the gateway will only be used for authentication. HDX routing only Select this if the gateway is used only for providing HDX access to VDAs, e.g. at a site that does not have a StoreFront instance.
-
-
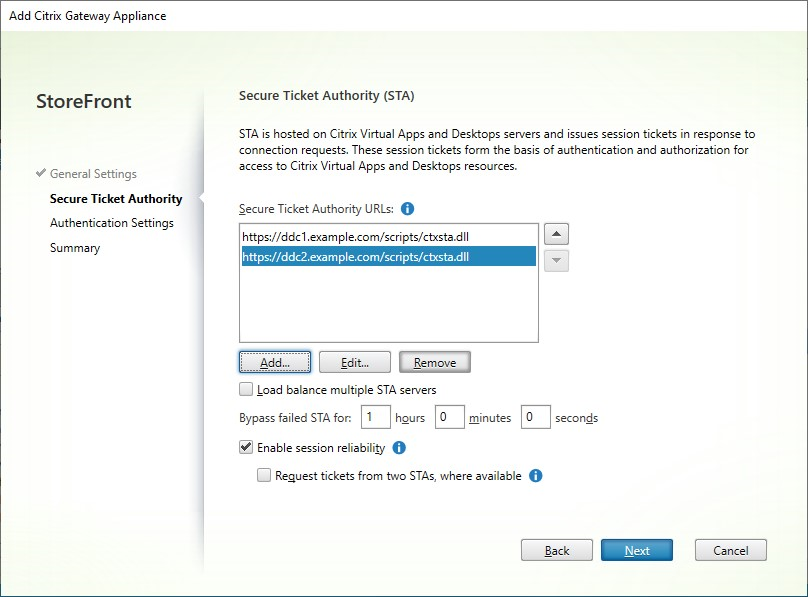
Fill out the settings on the Secure Ticketing Authority tab.
The secure ticketing authority issues session tickets in response to connection requests. These session tickets form the basis of authentication and authorization for Citrix Workspace app detection and access to VDAs.
-
Enter at least one Secure Ticket Authority server URL. If you are using Citrix Virtual Apps and Desktops then you can use the delivery controller as a STA. If you are using Citrix Desktop as a Service then you can enter the cloud connectors, which proxy requests to the Citrix cloud ticketing authority. The entries on this list must exactly match the list configured in the Citrix Gateway. It is not possible to add security keys using the GUI, see the later step for adding them using PowerShell.
-
Tick Load balance multiple STA servers to distribute requests between the STA servers. If unticked then StoreFront will try the servers in the order in which they are listed.
-
If StoreFront cannot reach an STA server then it avoids using that server for a period of time. By default this is 1 hour but you can customize this value.
-
If you want Citrix Virtual Apps and Desktops to keep disconnected sessions open while Citrix Workspace app attempts to reconnect automatically, select Enable session reliability.
-
If you configured multiple STAs and want to ensure that session reliability is always available, select Request tickets from two STAs, where available.
When Request tickets from two STAs, where available is selected, StoreFront obtains session tickets from two different STAs so that user sessions are not interrupted if one STA becomes unavailable during the course of the session. If, for any reason, StoreFront is unable to contact two STAs, it falls back to using a single STA.
Once you have completed filling out the settings press Next
-
-
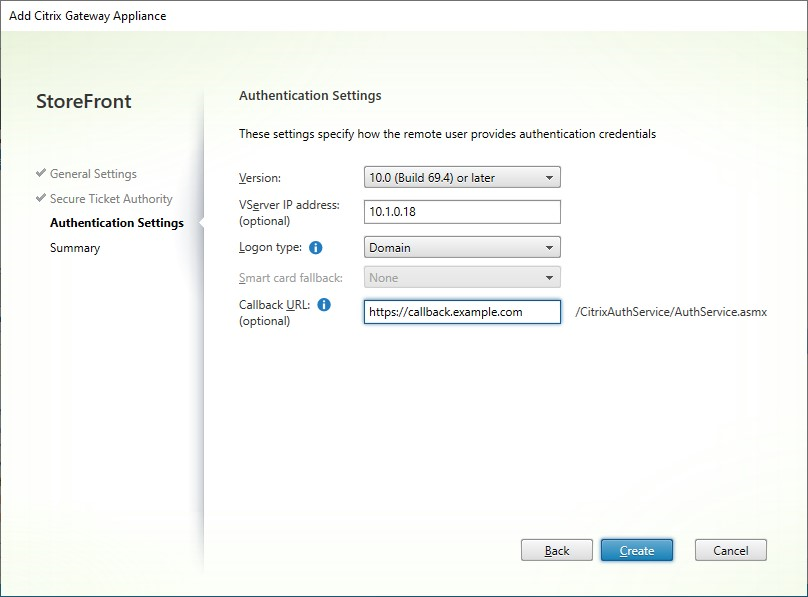
Fill out settings on the Authentication Settings tab.
-
Choose the NetScaler version.
-
If there are multiple gateways with the same URL (typically when using a global server load balancer), and you have entered a callback URL then you must enter the VIP of the gateway. This allows StoreFront to determine which gateway the request came from and hence which server to contact using the Callback URL. Otherwise you can leave this blank.
-
Select from the Logon type list the authentication method you configured on the appliance for Citrix Workspace app users.
The information you provide about the configuration of your Citrix Gateway appliance is added to the provisioning file for the store. This enables Citrix Workspace app to send the appropriate connection request when contacting the appliance for the first time.
- If users are required to enter their Microsoft Active Directory domain credentials, select Domain.
- If users are required to enter a tokencode obtained from a security token, select Security token.
- If users are required to enter both their domain credentials and a tokencode obtained from a security token, select Domain and security token.
- If users are required to enter a one-time password sent by text message, select SMS authentication.
- If users are required to present a smart card and enter a PIN, select Smart card.
If you configure smart card authentication with a secondary authentication method to which users can fall back if they experience any issues with their smart cards, select the secondary authentication method from the Smart card fallback list.
- Optionally, enter the internally accessible URL of the gateway in the Callback URL box. This allows StoreFront to contact the Citrix Gateway authentication service to verify that requests received from Citrix Gateway originate from that appliance. It is required for smart access and for password-less authentication scenarios such as Smart Card or SAML otherwise you can leave it blank. If you have multiple Citrix Gateways with the same URL then this URL must be for the specific gateway server.
Once you have completed filling out the settings press Next
-
-
Click Create to apply the configuration.
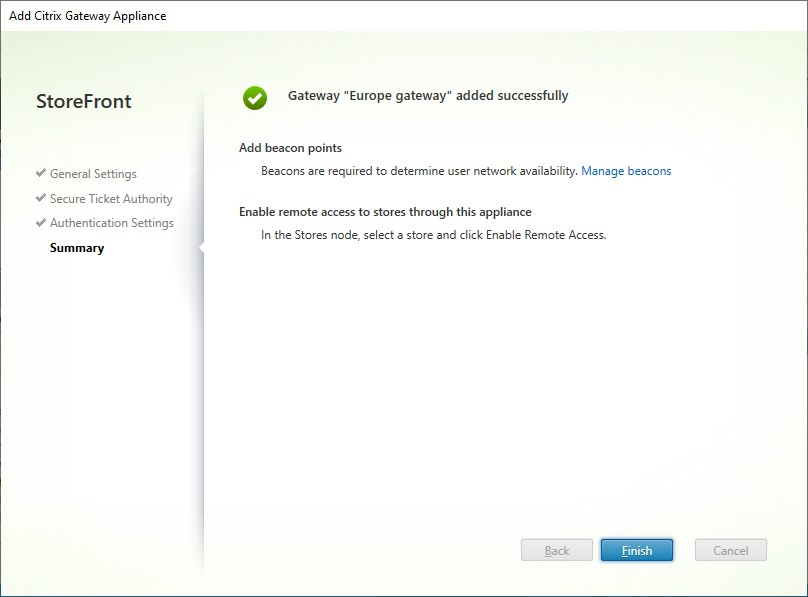
-
Once the deployment has been applied, click Finish.
-
If you have configured Security keys (recommended) then you must close the management console and configure them using PowerShell. For example:
$gateway = Get-STFRoamingGateway -Name [Gateway name] $sta1 = New-STFSecureTicketAuthority -StaUrl [STA1 URL] -StaValidationEnabled $true -StaValidationSecret [secret] $sta2 = New-STFSecureTicketAuthority -StaUrl [STA2 URL] -StaValidationEnabled $true -StaValidationSecret [secret] Set-STFRoamingGateway -Gateway $gateway -SecureTicketAuthorityObjs $sta1,$sta2 -
To enable users to access your stores through the Gateway, configure remote user access.
PowerShell SDK
To add a gateway using the PowerShell SDK call cmdlet New-STFRoamingGateway.
Edit Citrix Gateway
-
In the Manage Citrix Gateways window, click on the gateway you wish to change and press Edit.
For a description of the parameters, see Add Citrix Gateway
-
Press Save to save your changes.
PowerShell SDK
To modify gateway configuration using the PowerShell SDK call cmdlet Set-STFRoamingGateway.
Remove Citrix Gateway
-
In the Manage Citrix Gateways window, click on the gateway you wish to change and press Remove.
-
In the confirmation window press Yes.
PowerShell SDK
To remove the gateway using the PowerShell SDK call Remove-STFRoamingGateway.