-
-
-
-
-
-
uberAgent Config & Support Tool
-
Quickstart 1.1.x
-
This content has been machine translated dynamically.
Dieser Inhalt ist eine maschinelle Übersetzung, die dynamisch erstellt wurde. (Haftungsausschluss)
Cet article a été traduit automatiquement de manière dynamique. (Clause de non responsabilité)
Este artículo lo ha traducido una máquina de forma dinámica. (Aviso legal)
此内容已经过机器动态翻译。 放弃
このコンテンツは動的に機械翻訳されています。免責事項
이 콘텐츠는 동적으로 기계 번역되었습니다. 책임 부인
Este texto foi traduzido automaticamente. (Aviso legal)
Questo contenuto è stato tradotto dinamicamente con traduzione automatica.(Esclusione di responsabilità))
This article has been machine translated.
Dieser Artikel wurde maschinell übersetzt. (Haftungsausschluss)
Ce article a été traduit automatiquement. (Clause de non responsabilité)
Este artículo ha sido traducido automáticamente. (Aviso legal)
この記事は機械翻訳されています.免責事項
이 기사는 기계 번역되었습니다.책임 부인
Este artigo foi traduzido automaticamente.(Aviso legal)
这篇文章已经过机器翻译.放弃
Questo articolo è stato tradotto automaticamente.(Esclusione di responsabilità))
Translation failed!
uberAgent® Config & Support Tool - 1.1.x
The uberAgent Config & Support Tool simplifies the configuration process for uberAgent, allowing you to set up a proof-of-concept installation with minimal effort.
System Requirements
- Windows 10 version 1607 or later
- Windows Server 2016 or later
Download and Installation
- Install uberAgent before proceeding.
- Download the uberAgent Config & Support Tool from the Citrix Observability website.
- Once the download has finished, launch the tool.
Main Dialog Options
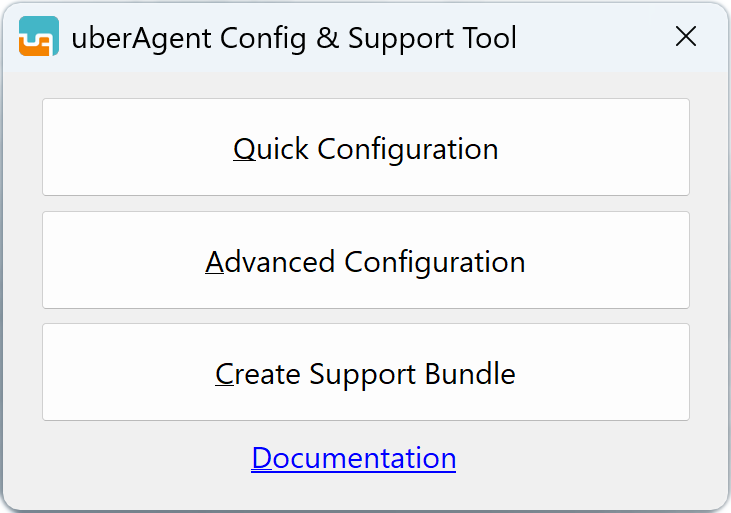
The tool provides three options:
- Quick Configuration: Streamlined configuration process for basic uberAgent setup - perfect for proof-of-concept installations.
- Advanced Configuration: Extended configuration options with maximum flexibility.
- Create Support Bundle: Collects log files and settings for troubleshooting.
Quick Configuration
The Quick Configuration option provides a streamlined approach to configuring uberAgent with predefined templates and simplified settings. This option maintains the same functionality as described in the Quickstart 1.0.x documentation, including:
- Configuration source selection (Web/GitHub or Local)
- Data volume optimization options
- Receiver type configuration (Splunk, Elasticsearch, OMS Log Analytics, Kafka, Azure Event Hubs)
- License file selection
- Apply configuration or create config archive options
For detailed instructions on using Quick Configuration, refer to the Quickstart 1.0.x documentation.
Advanced Configuration
The Advanced Configuration option provides enhanced flexibility for managing uberAgent configurations with extended configuration source options.
Note
If uberAgent is not installed, the configuration cannot be applied locally.
Supported Configuration Sources
The Advanced Configuration supports three configuration sources:
Web/GitHub
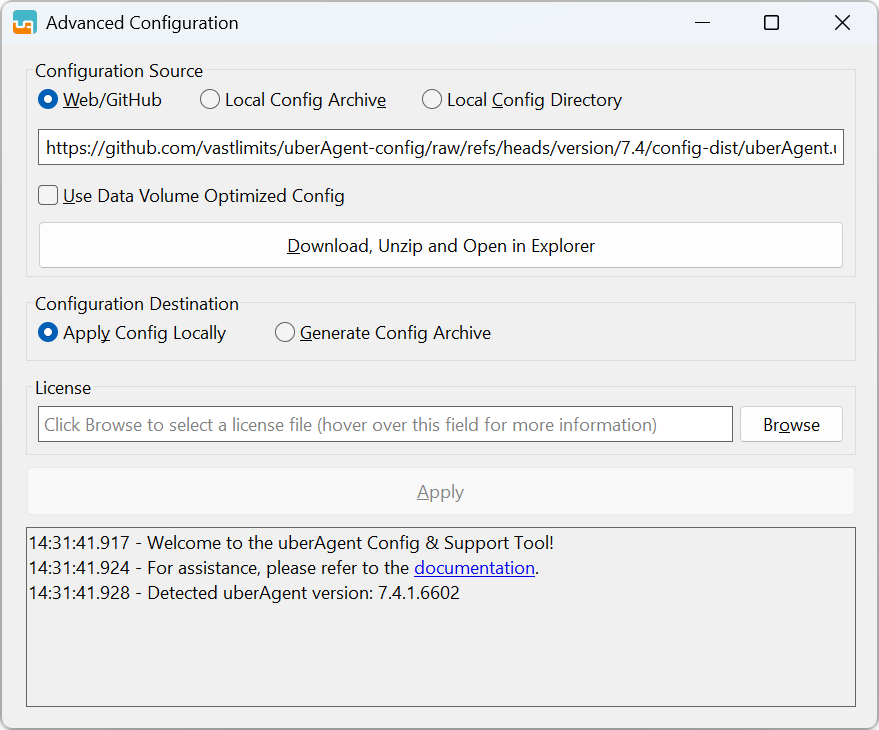
Downloads configuration templates from specified URLs, typically from the uberAgent config GitHub repository.
Local Config Archive

Uses a configuration archive from the local disk. This is particularly helpful for configuring machines without internet access or for editing existing configuration archives and repackaging them.
Local Config Directory
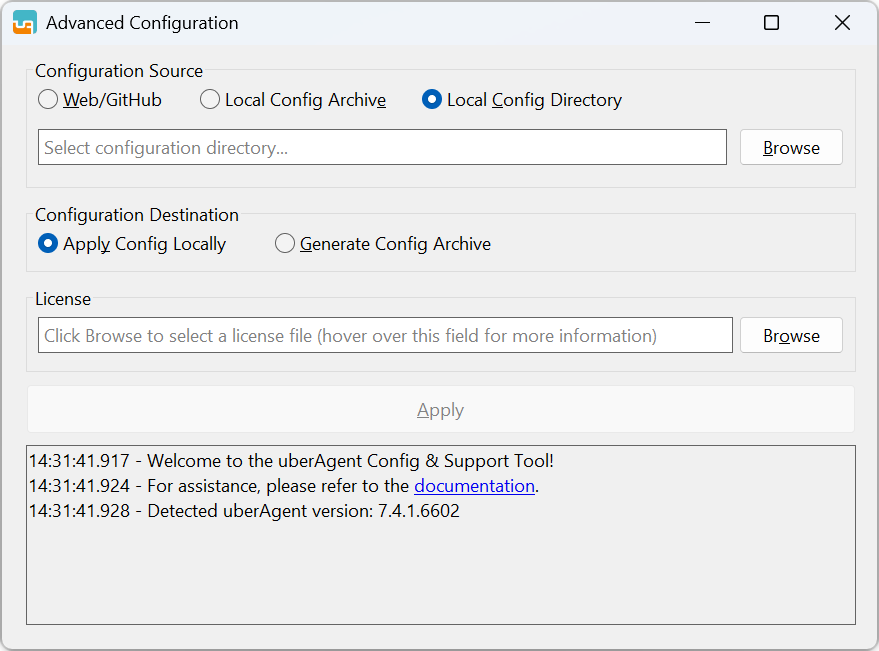
Works with a local configuration directory structure. This is particularly helpful for creating configuration archives for Central Config File Management.
Note
When using the uberAgent configuration directory (
C:\ProgramData\vast limits\uberAgent\Configuration) as source, only creating a config archive is available.
Advanced Configuration Workflow
The workflow is identical for all Advanced Configuration options:
- Select Source: Choose your configuration source (Web/GitHub, Local Config Archive, or Local Config Directory)
- Load Configuration: If available, click the Load button to load the configuration files
- Edit Configuration: The working directory with config files automatically opens in File Explorer. Make your changes using any text editor of your choice (e.g., Notepad, Notepad++, VSCode)
- Select Destination: Choose whether to apply the configuration locally or create a config archive
- Apply Changes: Click the Apply button to execute the selected process
Creating a Support Bundle
To generate an uberAgent support bundle, select the “Create Support Bundle” button from the main dialog. Upon completion, you’ll receive a notification, and the bundle will be saved to your desktop.
Share
Share
This Preview product documentation is Citrix Confidential.
You agree to hold this documentation confidential pursuant to the terms of your Citrix Beta/Tech Preview Agreement.
The development, release and timing of any features or functionality described in the Preview documentation remains at our sole discretion and are subject to change without notice or consultation.
The documentation is for informational purposes only and is not a commitment, promise or legal obligation to deliver any material, code or functionality and should not be relied upon in making Citrix product purchase decisions.
If you do not agree, select I DO NOT AGREE to exit.