Web console service
The web console service provides HTTPS services to support the Workspace Environment Management (WEM) web console and communicate with the WEM infrastructure service.
Account: A specified domain user account that has the WEM global full access, and belongs to the administrator user group on the web console server where the web console service runs.
We recommend installing the web console service on the machine where the WEM infrastructure service runs.
Install the web console service
To install the web console service, run Citrix Workspace Environment Management Web Console.exe. By default, the infrastructure services install into the following folder: C:\\Program Files (x86)\\Citrix\\Workspace Environment Management Web Console.
You can customize your installation using the following arguments:
ApiLocation: The directory to install the web console service.
You can choose a silent installation or an upgrade of the infrastructure services. For example:
-
.\Citrix Workspace Environment Management Web Console.exe
/quiet ApiLocation="C:\WEM\webconsole" -
.\setup.exe /quiet ApiLocation="path:\to\install" /log="path:\to\log"- setup.exe. Lets you replace it with the file name of the installer.
-
/quiet. Indicates that no user interface appears during the installation. -
/log. Indicates logging file location. -
ApiLocation="path:\to\install". Specifies where to install the web console service.
Configure the Web console service
You must configure the web console service by using the following tool in the installation path: WEM Web Console Configuration.exe.
Prerequisites
This release of web console service is compatible with WEM 2303 deployments and later.
For deployments earlier than 2303, first, upgrade to 2303 and then configure the web console service.
Configure and start the Web console service
To configure and start the web console service, complete the following steps.
-
Launch the
WEM Web Console Configuration.exetool in the web console service folder and click Next.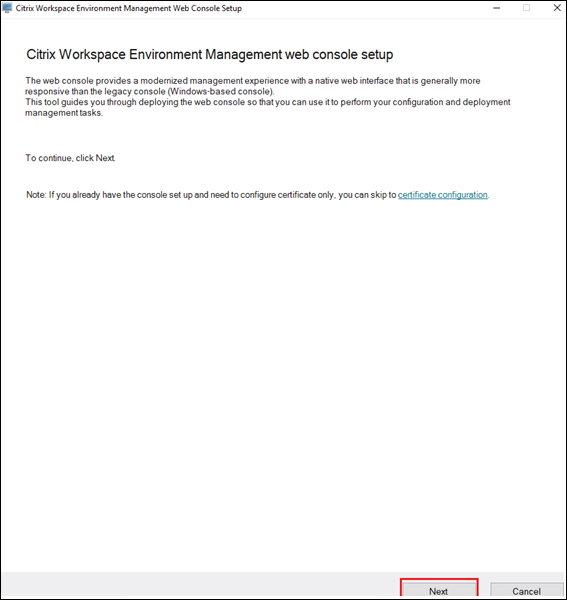
-
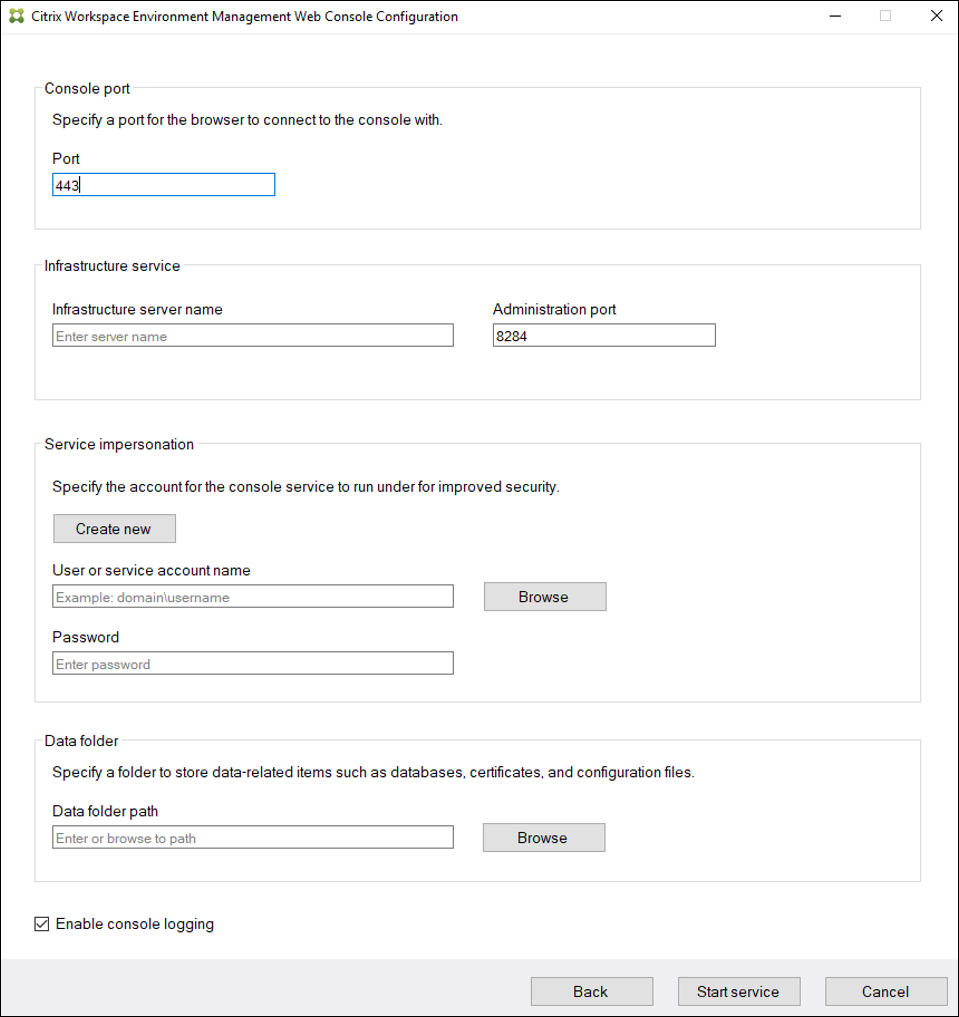
Configure the console port by specifying a port for the browser to connect to the console. The default port is 443.
-
Configure the Infrastructure service by specifying the Infrastructure service information.
-
For the Infrastructure server name, type the machine name, fully qualified domain name, or IP address of the WEM infrastructure server.
-
For the Administration port, type the port on which the web console connects to the infrastructure service. The default port is 8284.
-
-
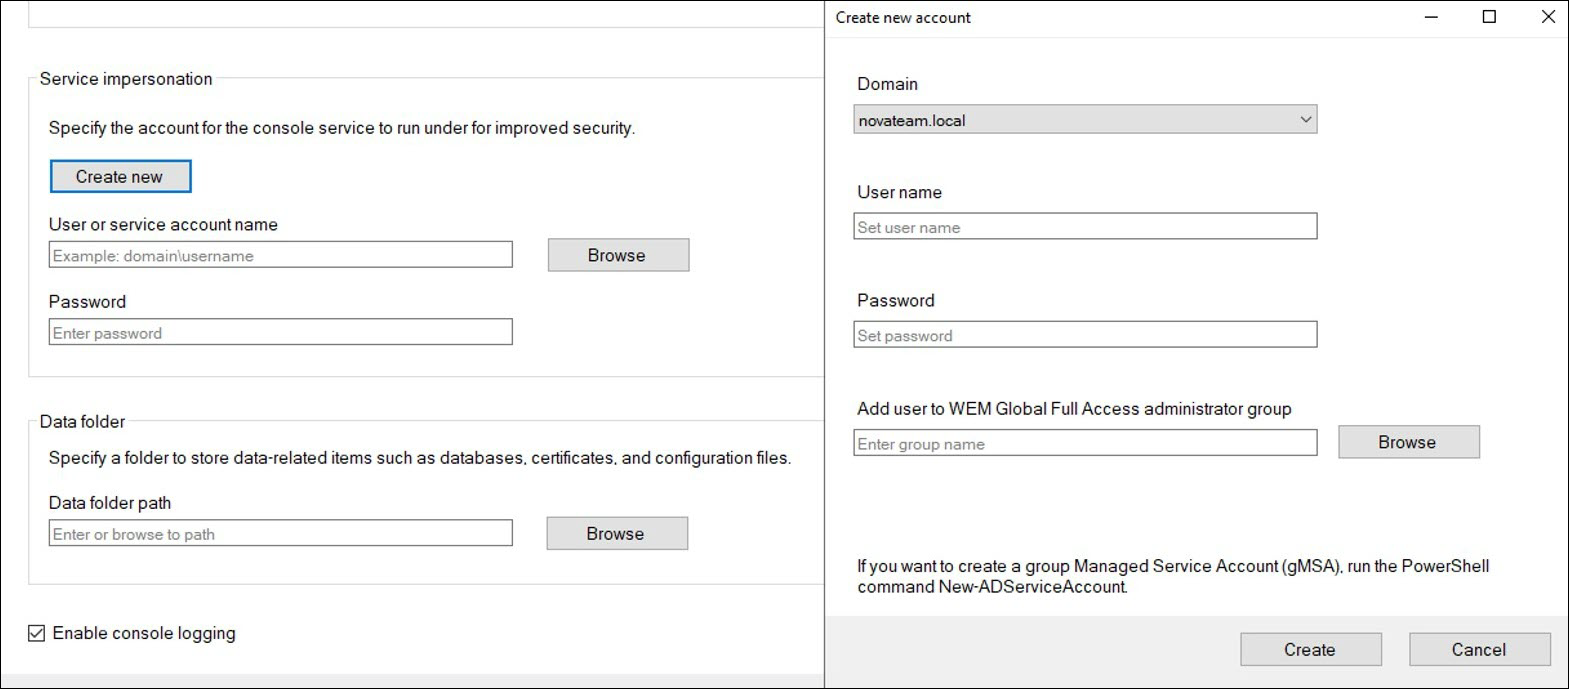
Configure Service impersonation when the web console service impersonates the specific account to improve security. You can create a new user or select an existing user.
- Create a new user and add the user to the WEM global full-access administrator group.
- Select an existing user from the WEM global full-access administrator group.

-
Configure the Data folder by specifying a folder to share data-related items such as databases, and configuration files.

-
Click Start service.
-
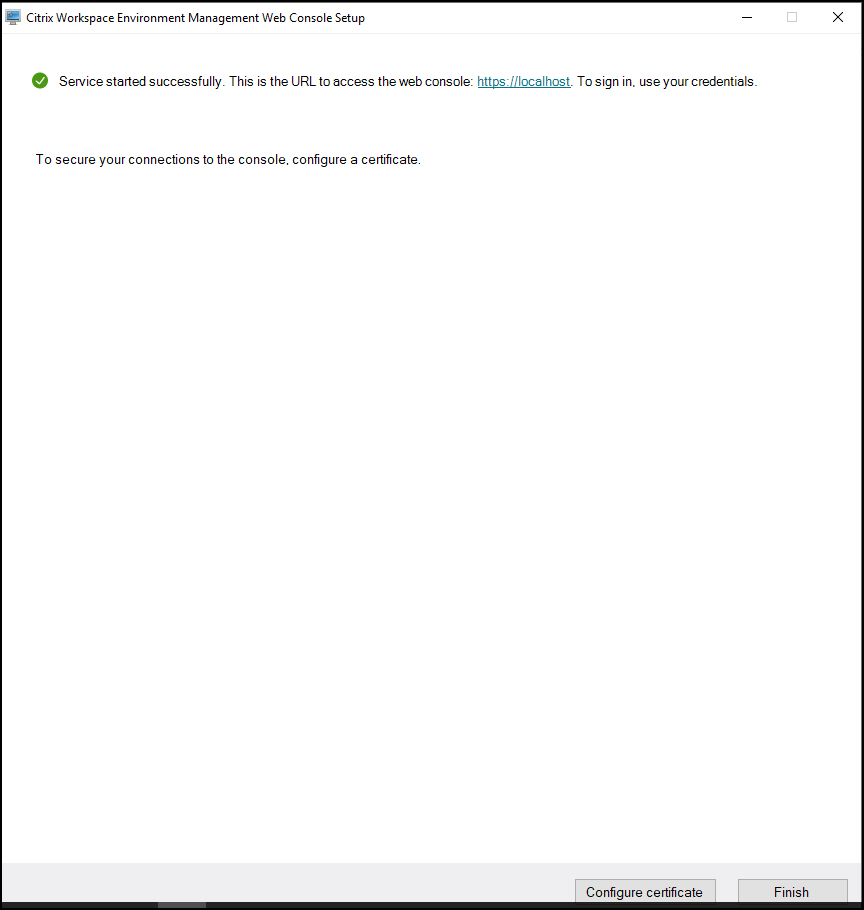
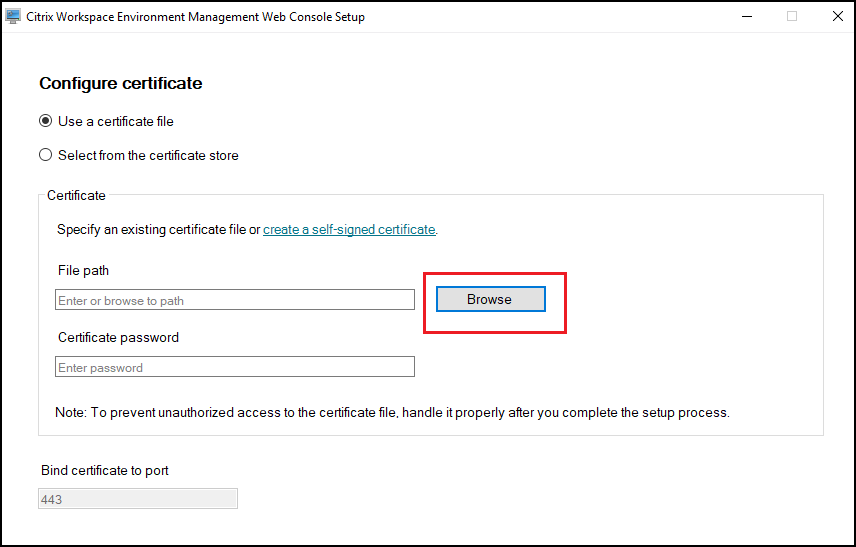
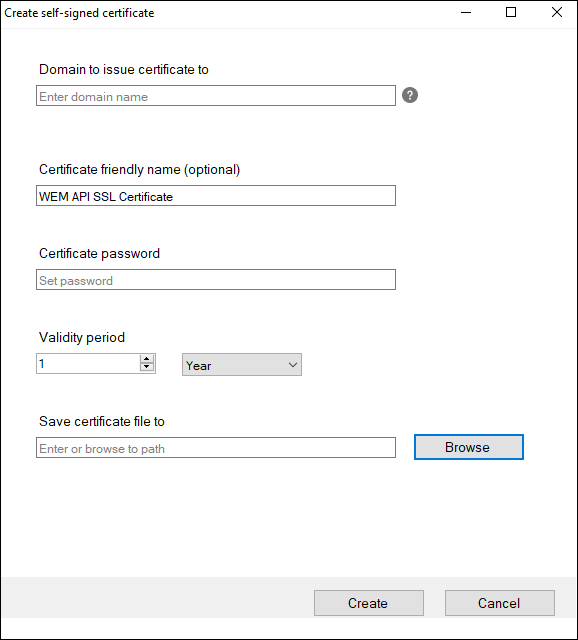
After the successful start of the web console service, click Configure certificate to configure the certificate. There are two methods to configure the certificate.
- To use a certificate file, click Browse.
- To create a self-signed certificate, click Create self-signed certificate.
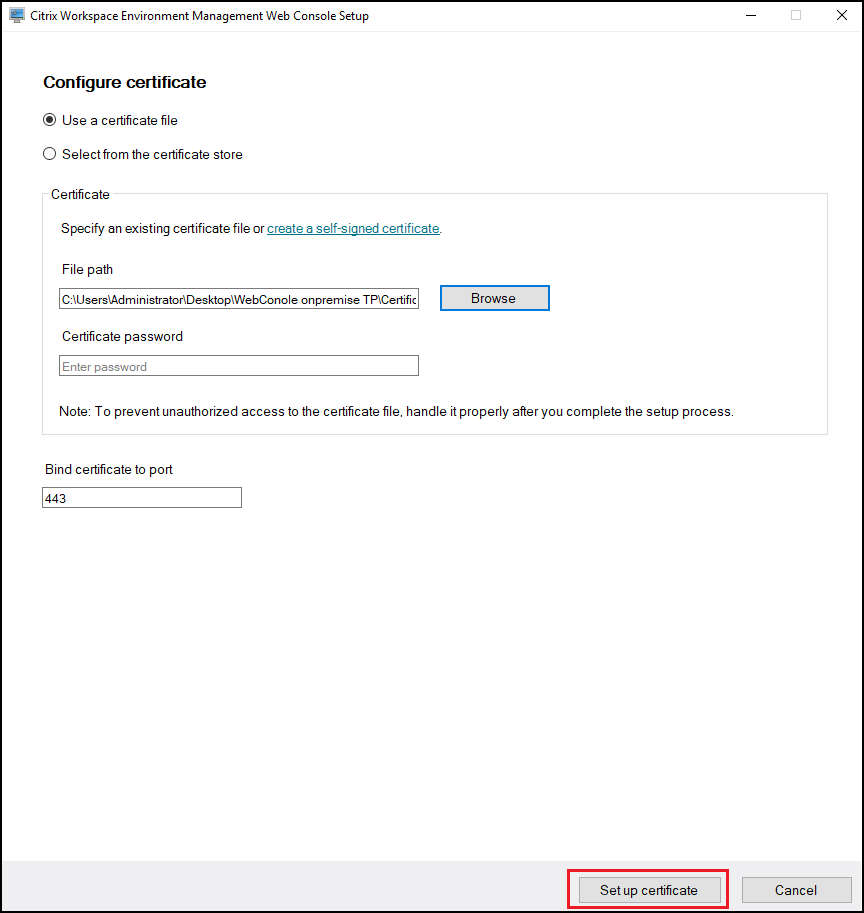
- Click Set up certificate.
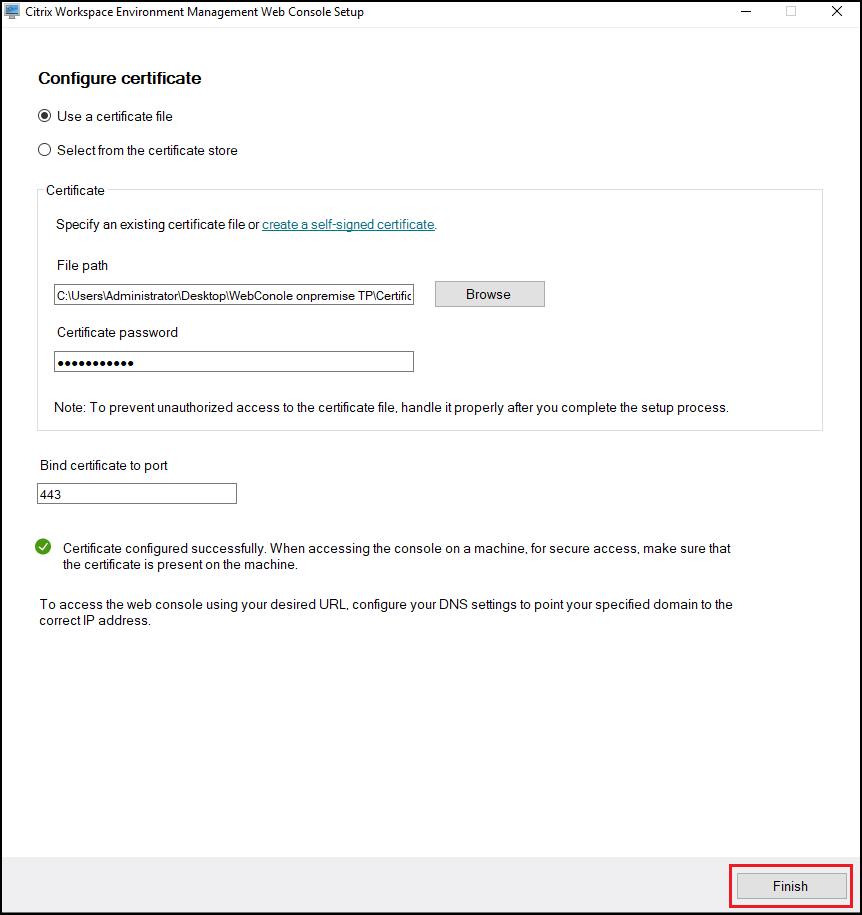
- After configuring the certificate successfully, click Finish.
-
To use a certificate from the certificate store, select the desired certificate.
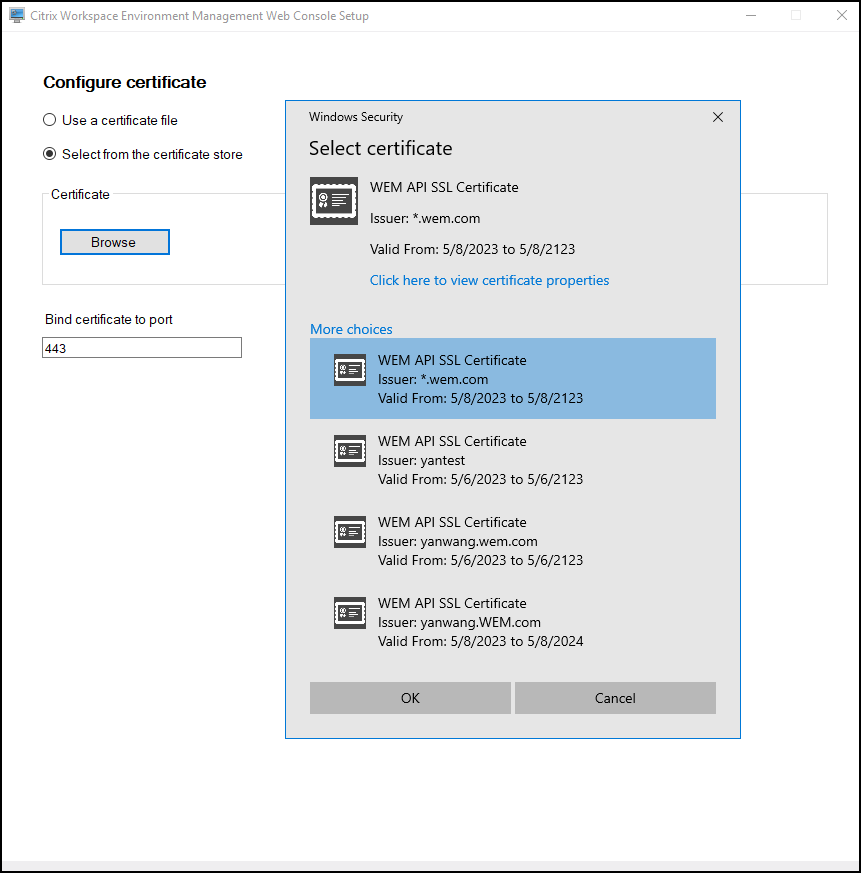
-
Click Set up certificate.
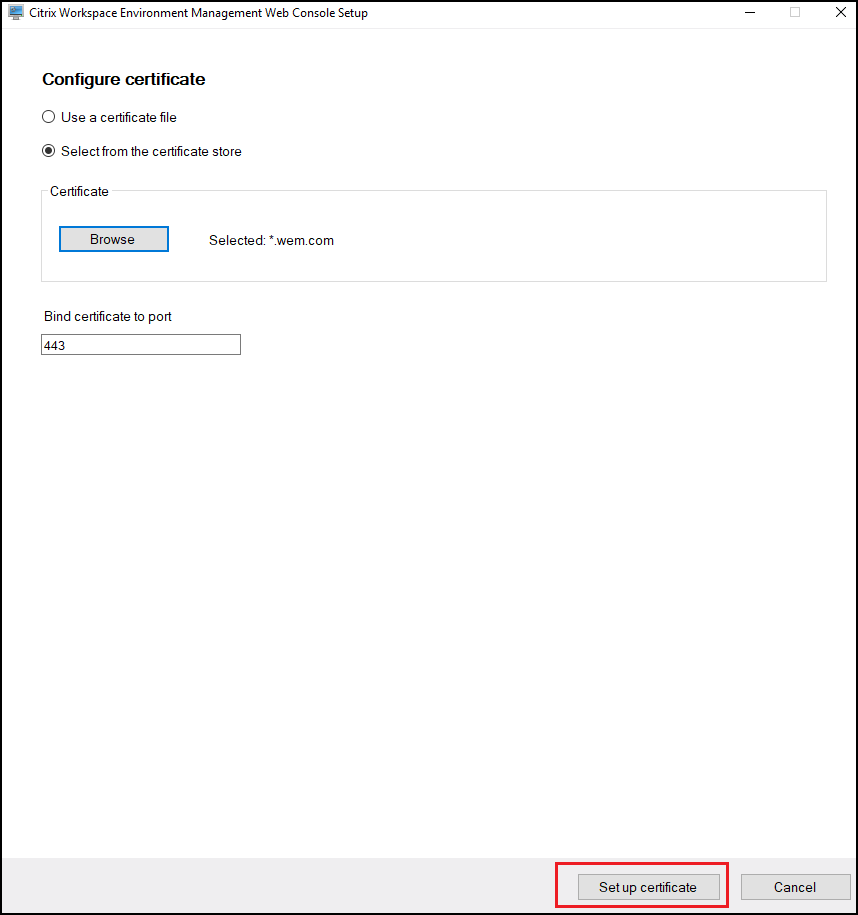
-
After configuring the certificate successfully, click Finish.
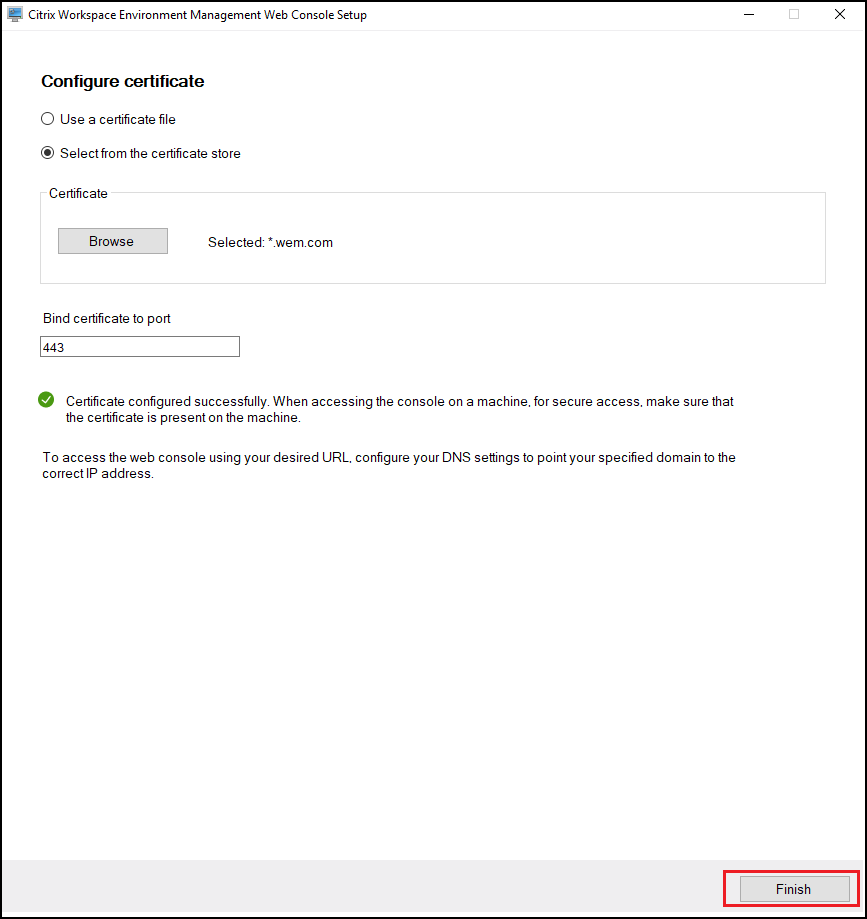
-
To create a global full-access account, go to the legacy console, and click Administration to manage permissions.
Note:
The Windows domain account must be a global full-access account.
You must log in using a Windows domain account before using the web console.
For more information about the WEM web console, see Manage (web console).
-
To use Template based GPO, Scripted task, Backup and restore, and files, you must set up a shared storage folder.
Note:
To set the permissions for the shared folder, follow these guidelines:
- Ensure that at least one user has full access to the shared folder, excluding the permissions to change permissions or take ownership.
- Verify that the shared folder is accessible from the machine hosting the web console service.
- If the configured user is the same user impersonated by the web console service, you can omit the credentials when configuring the shared folder in the web console. Otherwise, credentials must be specified. Using the impersonated user is the recommended approach.
To enhance security and minimize access, limit the number of accounts with permissions to the shared folder as much as possible.
Go to the web console, click your account name in the top-right corner, click Storage folder, and configure the shared SMB path.