Invitation
Lets you send enrollment invitations to users. Each invitation includes an invitation code and the steps needed to complete the enrollment.
Introduction
You have the flexibility to determine how to enroll your Workspace Environment Management™ (WEM) agents. There are two ways:
-
Enroll by invitation. This requires the web console. Users can be invited to participate in the enrollment process.
-
Enroll with the bearer token or API secure client. This doesn’t require the web console and doesn’t require users to participate in the enrollment process. For more information, see Enroll with the bearer token or API secure client.
A general workflow to enroll by invitation is as follows:
-
In Manage > Web Console > Enrollment > Invitation, enable Enroll by invitation and then click Generate to generate an enrollment key.
-
On the agent machine, install the enrollment key using the enrollment tool.
- Open the command prompt as the administrator.
-
Run the following command. (Replace
<enrollment key>with the actual key.)Citrix.Wem.Agent.EnrollmentUtility.exe configenrollmentkey -k <enrollment key>
Tip:
The enrollment tool, Citrix.Wem.Agent.EnrollmentUtility.exe, is available in the agent installation folder. For more information, see Enrollment tool.
-
In Manage > Web Console > Enrollment > Invitation, create an invitation or send enrollment invitations to users.
-
Perform the following steps as needed:
- If you do not want to send enrollment invitations through WEM, create an invitation and then do either of the following:
- Go to the agent and enroll it with the invitation code.
- Share the invitation code with your user. Then, your user logs on to the agent and enrolls it with the invitation code.
- If you want to send enrollment invitations through WEM, no further action is required on your part. After the users receive the invitation email, they can enroll their agents using the invitation code.
For information about how to enroll the agent with an invitation code, see Enroll the agent with an invitation code.
- If you do not want to send enrollment invitations through WEM, create an invitation and then do either of the following:
After an agent enrolls, it becomes managed and appears in Enrollment > Enrolled Agents. You can add it to a desired configuration set for precise management. For more information, see Manage the enrolled agent.
Enroll by invitation
Controls whether to open the invitation-based enrollment.
When enabled, you can generate an enrollment key and send invitations. When disabled, agents can’t be enrolled using invitations.
Enrollment key
Lets you generate an enrollment key. You then install the key on the agent, using the enrollment tool, Citrix.Wem.Agent.EnrollmentUtility.exe, available in the agent installation folder. Without the key, the agent can’t enroll using invitations.
The generated key expires in 180 days. After generating a key, you can perform the following operations:
-
Copy. Copies the key to the clipboard.
-
Download. Downloads a .txt file that contains the key.
-
Regenerate. Regenerates the key.
Important:
Regenerating a key automatically invalidates the current one. For unenrolled agents, make sure that the valid key is installed before sending invitations.
Enrollment invitation
Lists all invitations. You can perform the following operations:
-
Create an invitation
-
Invite users
-
Refresh the list
-
View the details of an invitation
-
Resend an invitation
-
Delete an invitation
-
Clear expired invitations
Create an invitation
You create an invitation by generating an invitation code. The code supports enrolling up to 5 devices and expires after 48 hours.
With the code, you can do the following as needed:
-
Use the code yourself. Go to the agent and enroll it with the code.
-
Share the code with your user. Then, your user logs on to the agent and enrolls it with the code.
Important:
WEM audits activities associated with an invitation code on a per code basis, for example, who does the enrollment, when the enrollment occurs, and which device is enrolled. So, we recommend that you do not share the same code with multiple users.
To create an invitation, perform the following steps:
-
In the action bar, select Create invitation. The Create invitation wizard appears.
-
Select Generate code.
-
After the code is generated, select Copy to clipboard.
Invite users
You can send enrollment invitations to your users. Each invitation includes an invitation code and the steps needed to complete the enrollment.
Consider the following when inviting users:
-
You can invite up to 100 users.
-
An invitation code is created for each user. The code supports enrolling up to 5 devices and expires after 48 hours.
-
Users with a registered email address will receive the invitation code by email. For users without a registered email address, you can share the invitation code with them using other methods.
-
Enrolling an agent requires local administrator permissions. When enrolled, non-domain-joined devices are automatically associated with invited users.
To invite users, perform the following steps:
-
In the action bar, select Invite user. The Invite user wizard appears.
-
Select an identity provider.
-
Select the domain of the users you want to add. Select Users and Security groups as needed.
-
In the Select box, enter the name of the user or the group you want to invite.
Note:
The search returns only the top 50 results. Refine your search if necessary.
-
Select desired users or user groups from the list. Selected users and user groups are shown under Search.
-
After you have finished, click Invite to send the invitation.
The users will receive the following invitation email:
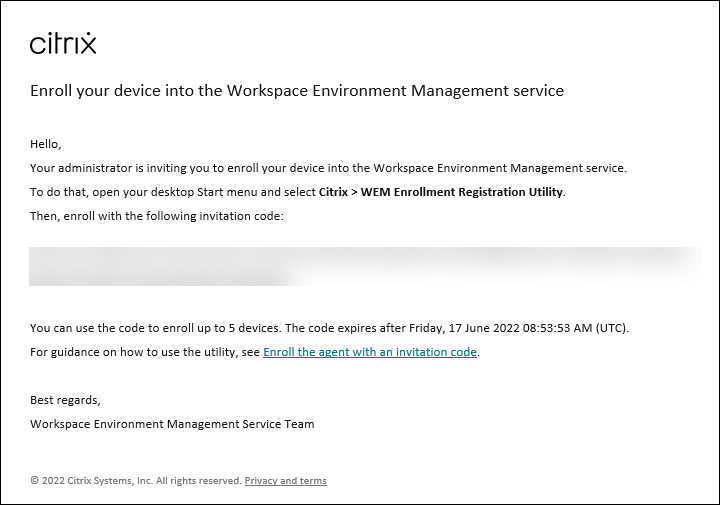
If you have installed the enrollment key on the users’ agents using the enrollment tool, no further action is required on your part. Your users need to complete the enrollment using the invitation code.
View the details of an invitation
To view details of an invitation, select the invitation and then select View details in the action bar. The View details window appears, displaying the following information:
-
Invitation code
-
Time when the invitation was created
-
Expiration date
-
Recipient — who received the invitation email
-
Display name of the recipient
-
Email address of the recipient
-
Delivery status
Possible values:
- Delivered. Indicates that the invitation email was delivered to the user successfully.
- Failed. Indicates that attempts to send the invitation email failed.
- Pending. Indicates that the invitation email hasn’t yet been delivered.
Resend an invitation
To resend an invitation, select the invitation and then select Resend email in the action bar.
This action does not extend the expiration time of the invitation code.
Delete an invitation
To delete an invitation, select the invitation and then select Delete in the action bar. You can delete multiple invitations at a time.
Deleting an invitation invalidates the invitation code sent to or shared with users. As a result, those users can’t enroll their agents with the code.
Clear expired invitations
To delete all expired invitations, select Clear expired invitations in the action bar. The Clear expired invitations button appears only when there are expired invitations.