Analyze logon duration using scripted tasks
Long logon times decrease user productivity and result in a poor user experience. As an administrator, you might want to get a detailed overview of logon times to identify processes that cause slow logons so that you can take remedial action accordingly.
To achieve this goal, you can use the script analyzeLogonDuration.ps1. It is a PowerShell script that queries the event log for every major event relating to the logon process. The script offers the following benefits and more:
- It gives you a logon duration breakdown of a user’s most recent logon.
- It displays all major sequential phases of the logon process and makes it easy to see which phase is slowing down the logon.
- It lets you check whether there is a delay between the end of one phase and the start of the next.
To see more benefits, go to https://www.controlup.com/script-library-posts/analyze-logon-duration/.
Workspace Environment Management™ (WEM) provides you with a scripted task feature that automates the running of the script for you. All you need to do is configure a scripted task. A general workflow is as follows:
- Prepare relevant scripts.
- Signature of the script is mandatory when the scripted task is granted full access.
- Add a scripted task.
- Configure the scripted task.
- View the task execution report.
Prepare relevant scripts
Prepare a zip file that contains the following two scripts:
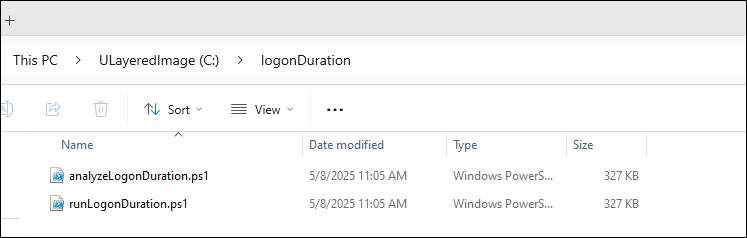
-
analyzeLogonDuration.ps1. You can get this script from https://www.controlup.com/script-library-posts/analyze-logon-duration/. -
runLogonDuration.ps1. As the logon duration script requires the domain name and the username, we provide a wrapper script to pass the domain and user name to it. For example, we provide a way to get the domain name and the user name under the service account. But, this wrapper script requires one user session.
In this example, the script runLogonDuration.ps1 contains the following content:
$User = tasklist /v /FI "IMAGENAME eq explorer.exe" /FO list | find "User Name:"
$User = $User.Substring(14)
$UserName = $User.Split("\")[1]
$DomainUser = "$env:userdomain\$UserName"
&.\analyzeLogonDuration.ps1  -DomainUser $DomainUser
<!--NeedCopy-->
Sign the script
The scripted task needs to run with full access. You need to add a signature for the entry point script: runLogonDuration.ps1. We recommend you use an official certificate, If you have an official certificate you can skip step 1 through step 3. If you don’t have a certificate, you can use a Self-Signed SSL Certificate only for your test. Self-signed SSL Certificates are risky because they have no validation from a third-party authority, which is usually a Trusted SSL Certificate Company.
Step 1: Create a Self-Signed certificate
- Open PowerShell as an Administrator. Right-click the Start button, and choose
Windows PowerShell (Admin)orWindows Terminal (Admin). - Use the
New-SelfSignedCertificatecmdlet to create a self-signed certificate. Specify parameters like the certificate’s name (friendly name), its validity period, and its usage (KeyUsage).
$cert = New-SelfSignedCertificate -Type CodeSigningCert -DnsName "MyTestCertificate.com" -CertStoreLocation "cert:\LocalMachine\My" -NotAfter (Get-Date).AddYears(10) -KeyUsage DigitalSignature -FriendlyName "MyTestCertificate"
<!--NeedCopy-->
This command creates a new certificate with one year validity and labels it as MyTestCertificate. This certificate is stored in the personal store of the local machine.
When the certificate is created successfully, the following details are displayed:
Step 2: Export the Self-Signed certificate
Export the certificate with a private key, if needed. To use the certificate for signing, you must export it with its private key. This is essential to use the certificate on another machine, or to safeguard the key. Run the following command:
$pwd = ConvertTo-SecureString -String "YourStrongPassword" -Force -AsPlainText
Export-PfxCertificate -cert $cert -FilePath "C:\MyTestCertificate.pfx" -Password $pwd
<!--NeedCopy-->
Replace YourStrongPassword with a strong password of your choice. This command exports the certificate to a .pfx file, which includes the private key.
Step 3: Install the certificate
If you have already exported the certificate and need to install it on the same or on a different machine, you can import it back into the certificate store. Copy the *.pfx file to the target machine, and then use the Import-PfxCertificate cmdlet.
$pwd = ConvertTo-SecureString -String "YourStrongPassword" -Force -AsPlainText

Import-PfxCertificate -FilePath "C:\MyTestCertificate.pfx" -CertStoreLocation "Cert:\LocalMachine\Root" -Password $pwd
<!--NeedCopy-->
Step 4: Sign a file using the certificate
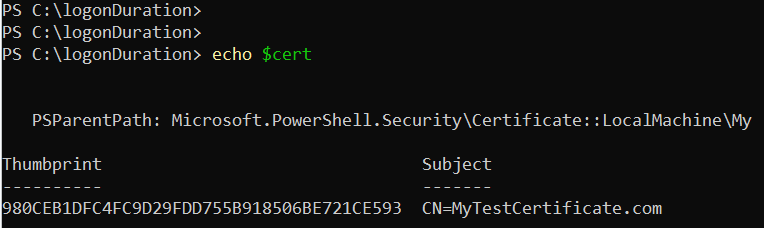
If you use an official certificate, you need to input the right CN value. In this example, we use MyTestCertificate.com. To find the certificate, use the cmdlet:
$cert = ls Cert:\LocalMachine\Root| where {$_.subject -eq CN=MyTestCertificate.com"}
<!--NeedCopy-->
Use the Set-AuthenticodeSignature cmdlet to sign a PowerShell script or any other file that supports digital signatures.
Set-AuthenticodeSignature -FilePath "C:\logonDuration\runLogonDuration.ps1" $cert -IncludeChain all -HashAlgorithm SHA1 -TimestampServer http://timestamp.digicert.com
<!--NeedCopy-->
This command applies a digital signature to runLogonDuration.ps1 using the certificate created earlier.
Step 5: Verify the signature
To verify that the file has been signed correctly, you can use the following command:
Get-AuthenticodeSignature -FilePath "C:\logonDuration\runLogonDuration.ps1"
<!--NeedCopy-->
If the script’s signature is valid, the following details are displayed:

Add a scripted task
The following information is supplemental to the guidance in Add a scripted task. To create a task that analyzes logon duration, follow the general guidance in that article, minding the details below.
In Web Console > Scripted Tasks, add the task as follows:
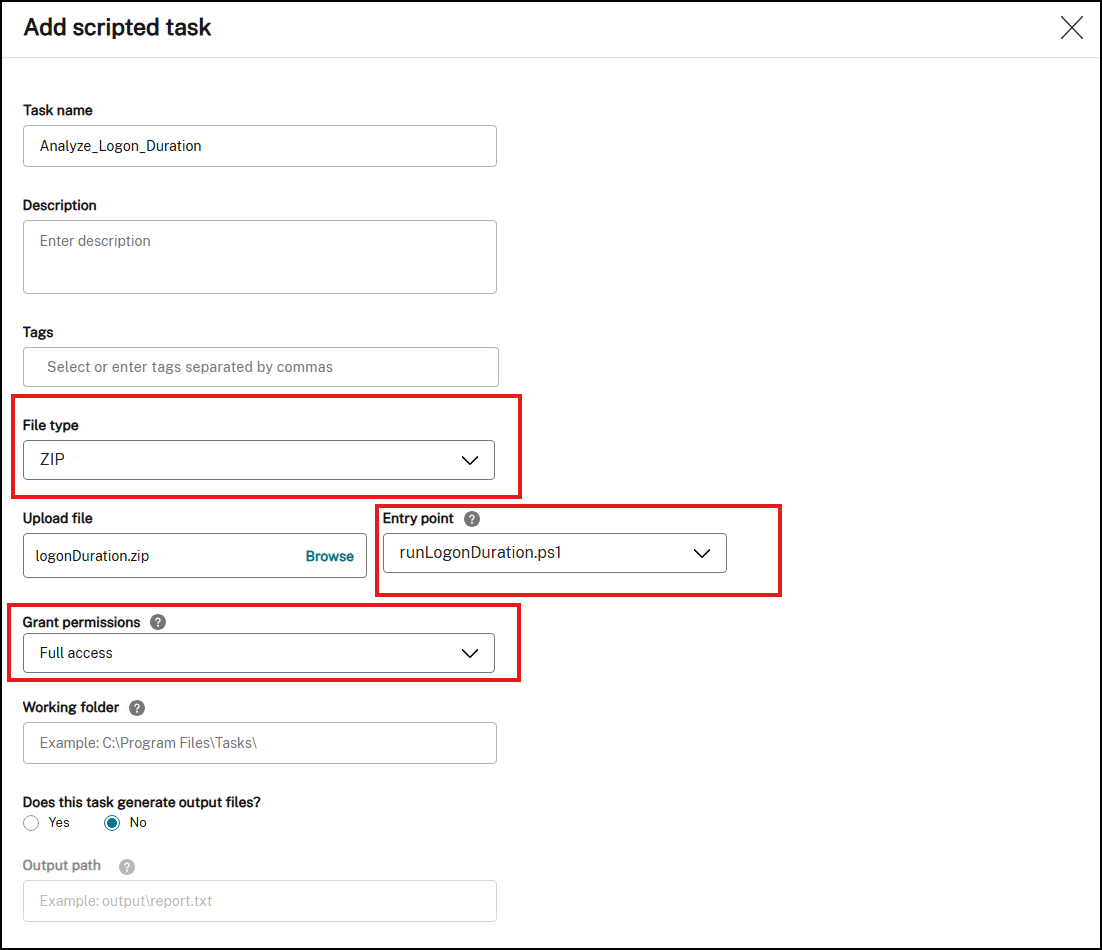
-
For File type, select ZIP.
-
Create a zip file that contains the following two scripts.
analyzeLogonDuration.ps1runLogonDuration.ps1
-
Browse to the zip file to upload it and set the script
runLogonDuration.ps1as the entry point. -
The Grant permissions option is designed to add an extra layer of security to protect against attacks originating from untrusted scripts, which might otherwise pose security risks. The Analyze_Logon_Duration task must run in full access.
Configure the scripted task
The following information is supplemental to the guidance in Configure a scripted task. To configure the Analyze_Logon_Duration task, follow the general guidance in that article, minding the details below.
-
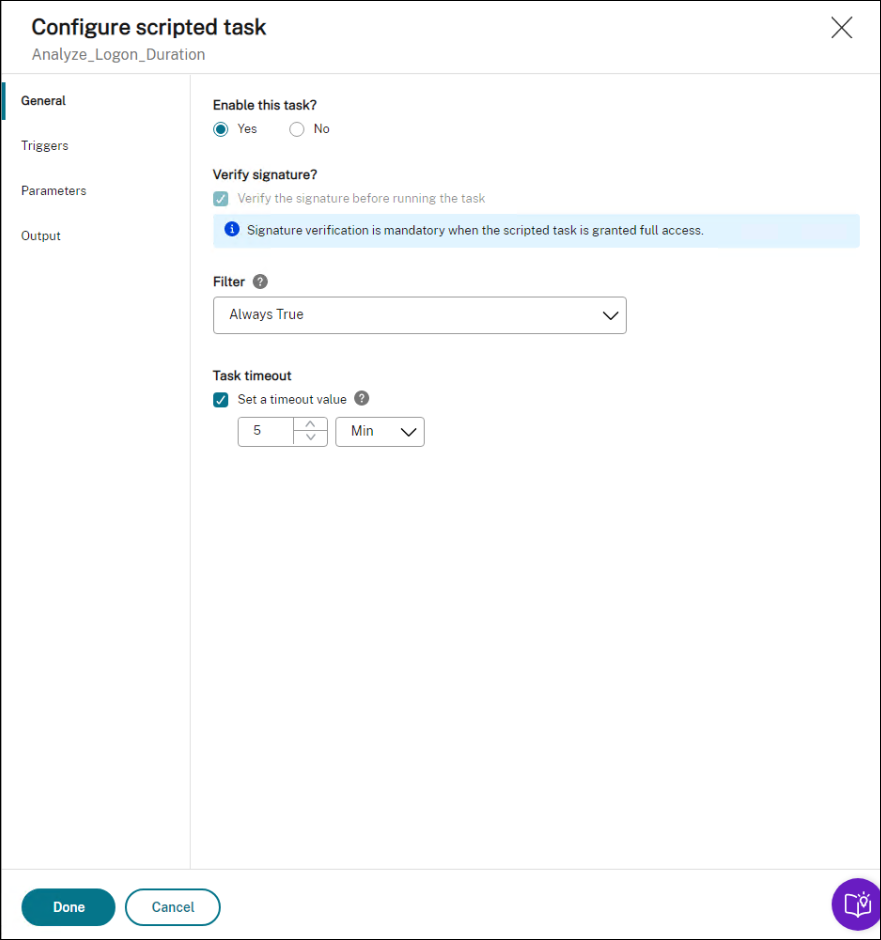
Go to the relevant configuration set, navigate to Scripted Task Settings, and configure the Analyze_Logon_Duration task in General as follows:
- WEM lets you decide whether to verify the signature before running the task. Signature verification is mandatory when the scripted task is granted full access. This ensures security by protecting the scripts from being compromised. The Filter and Task timeout settings are optional.
-
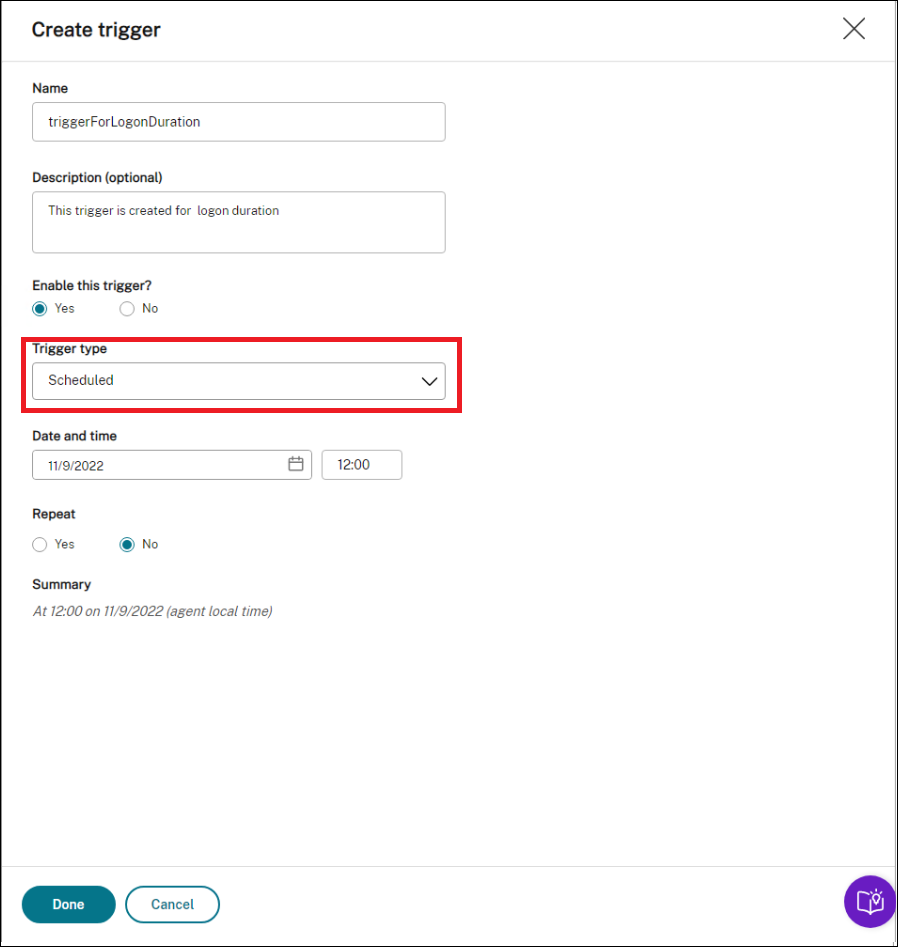
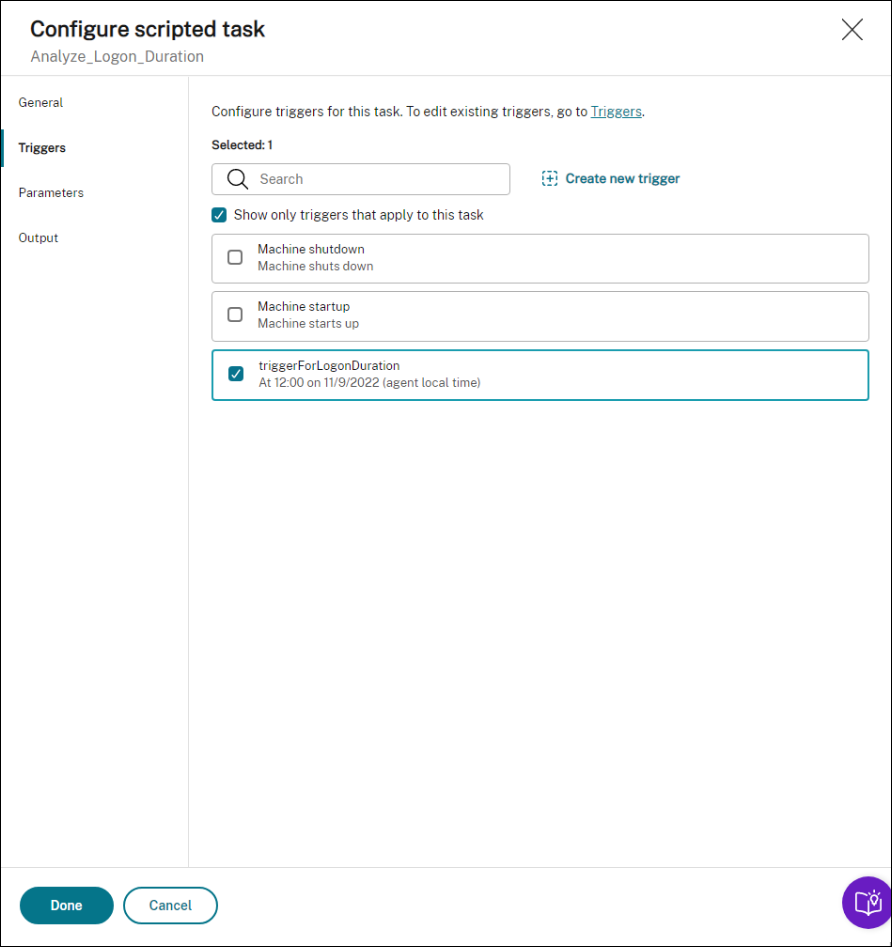
In Triggers, configure triggers for the task.
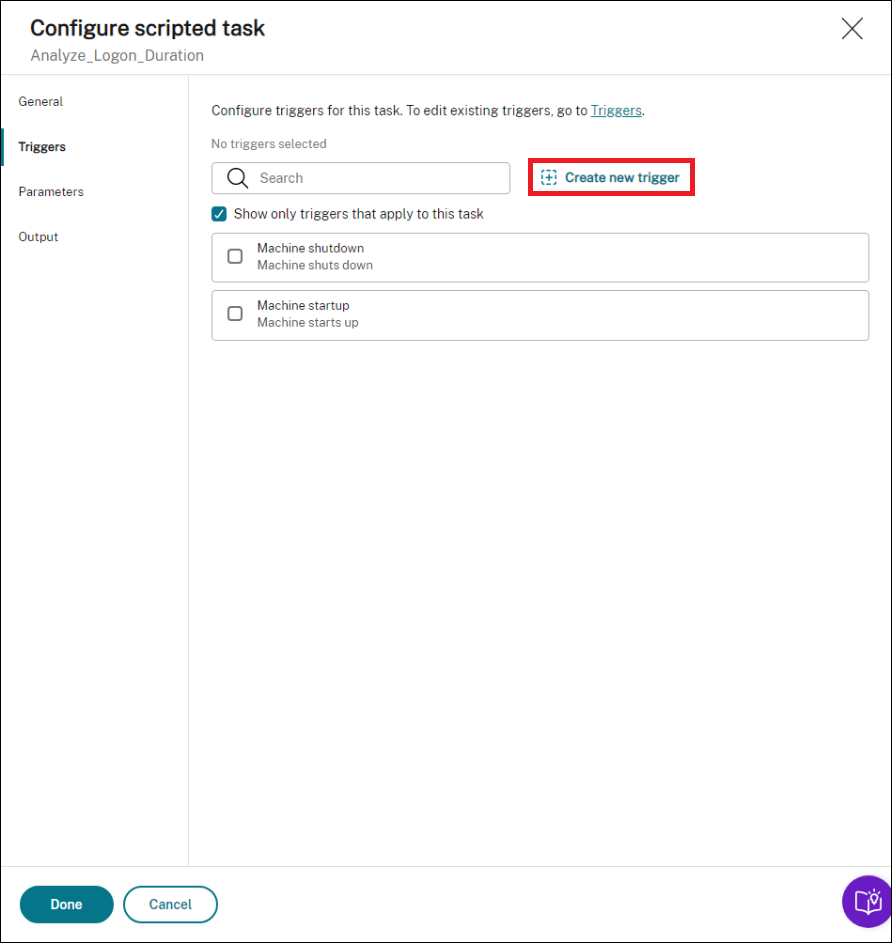
-
Use triggers to control when to run the task. For example, you can create a “scheduled” trigger to schedule the running of the task and then associate the trigger with the task.
-
-
In Parameters, choose whether to pass parameters to the task. In this example, you can skip this step.
-
In Output, configure settings as follows. Set the regular expression value:
((?<Key>[a-zA-Z]+\s+)+(?<value>\d+.\d+)\s)
<!--NeedCopy-->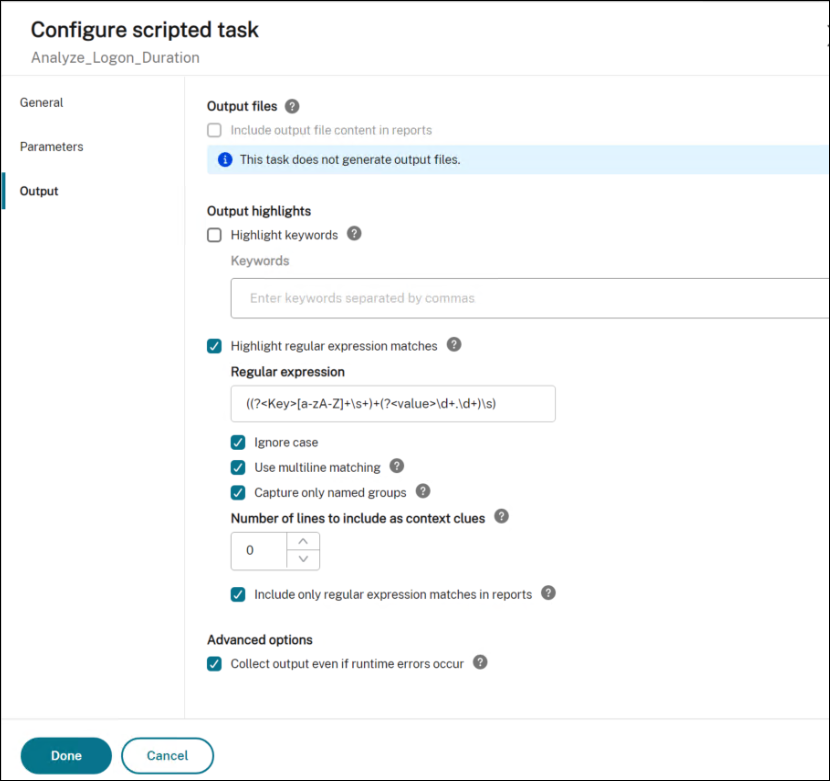
View the task execution report
After the task runs successfully, you can view the results by checking the reports. For more information, see Reports. In this example, you can see the following report:

You can use filters to narrow your view to relevant reports and then export them. For information about exporting reports, see Export reports. Based on the exported data, you can perform further analysis.
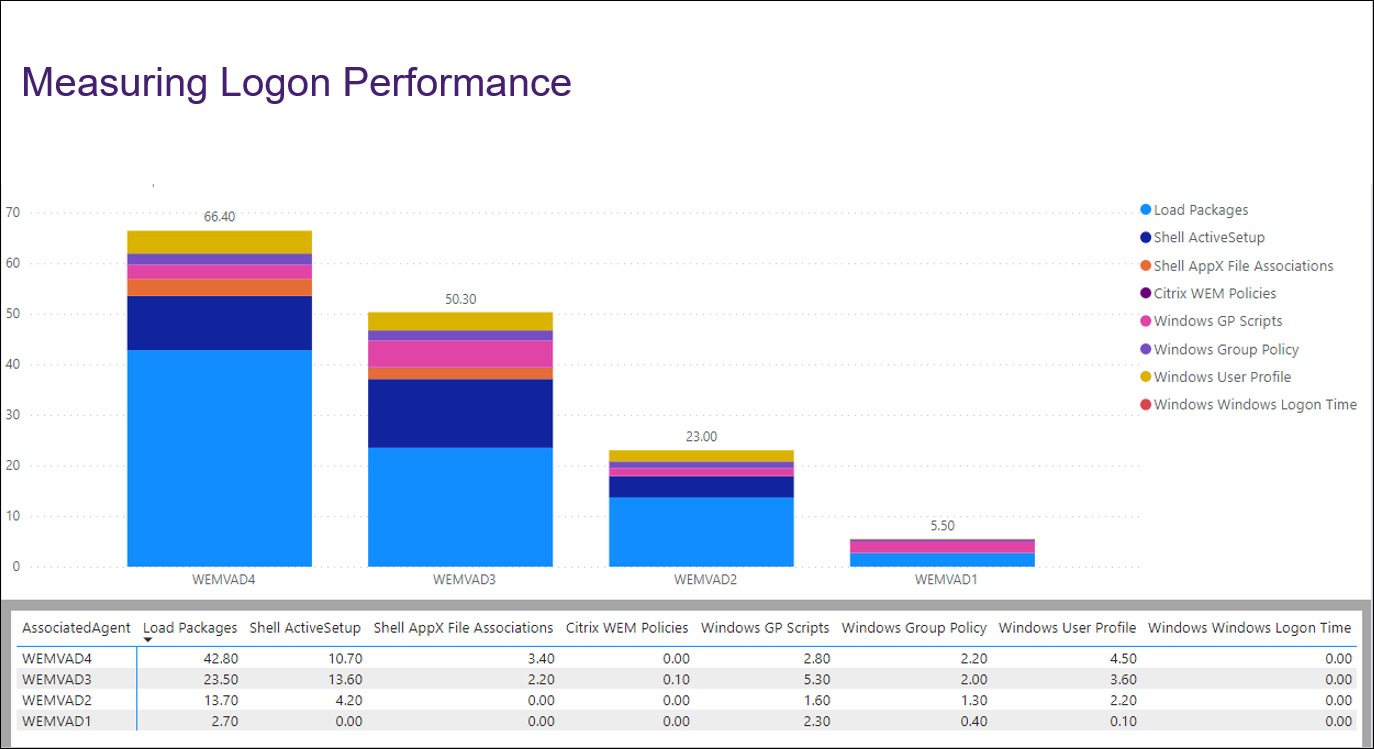
The following is an example of visualizing data of interest in Power BI. It shows a breakdown of the user’s logon duration.
Tip:
Logon performance optimization is one of the highlights of the Workspace Environment Management service. The feature can change the overall logon process to drastically reduce logon times. See Logon Optimization.