Configure Citrix® StoreFront Cloud
The following steps are to be done in the Citrix Cloud™ administrative console:
Note
If you are integrating Windows 365 with an existing Citrix Cloud tenant in which you already configured StoreFront Cloud, please make sure to review the Supported Configurations for the Citrix Integration for Windows 365 to ensure your current configuration will work with your Windows 365 deployment.
-
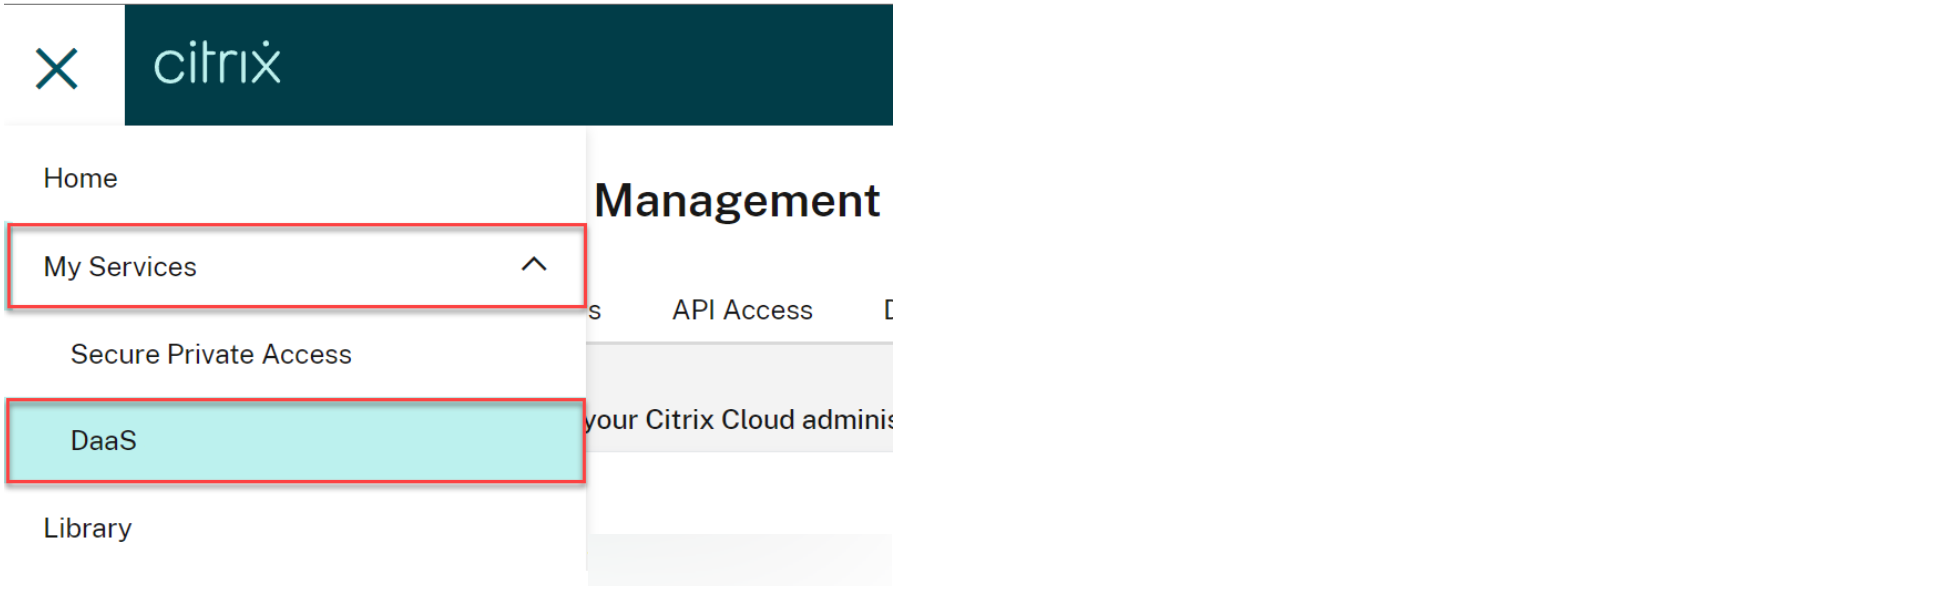
Select the options menu on the upper left corner, expand My Services, and select DaaS.
-
Hover over the Manage tab to expand the menu and select Full Configuration.
-
Select Quick Deploy.
-
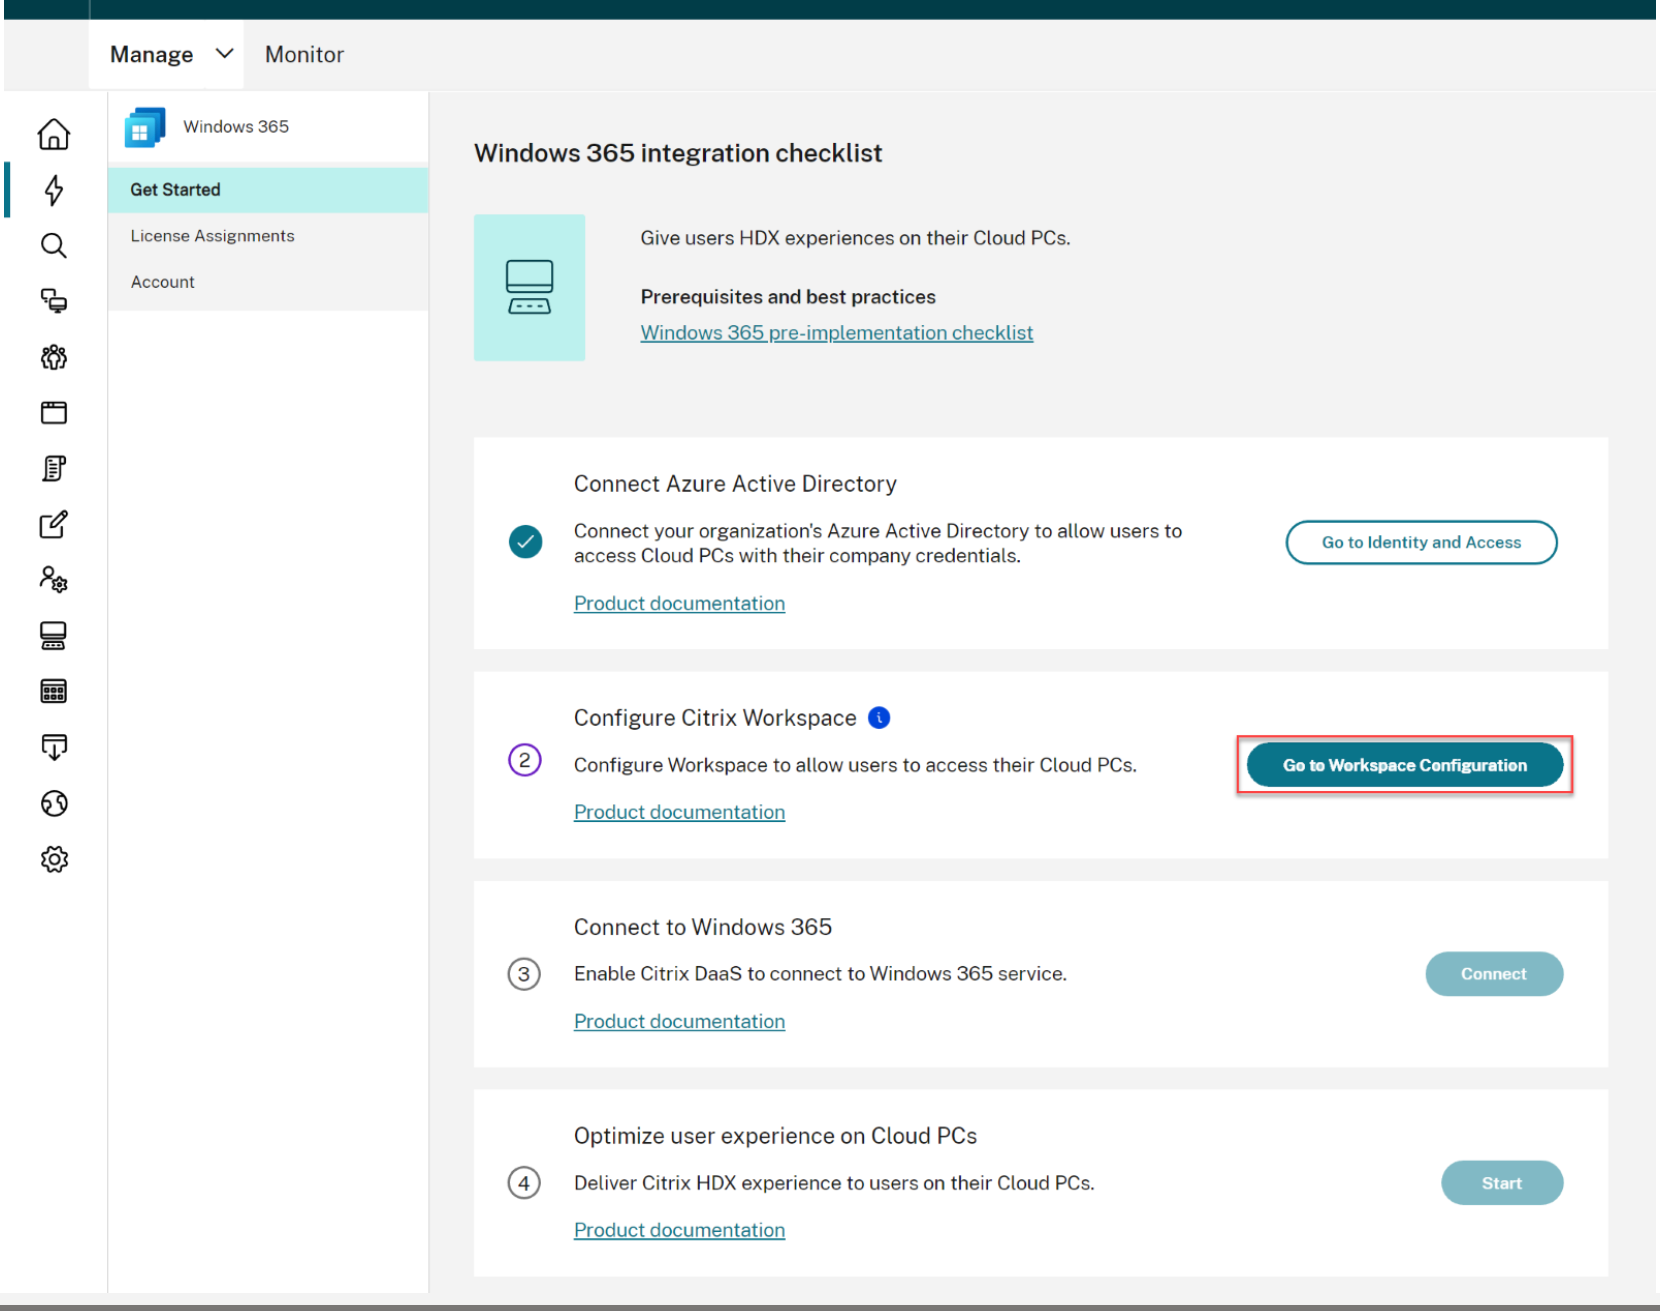
Select Go to Workspace Configuration next to Configure Citrix Workspace.
-
Select the Access tab. Note your store URL. This is the address that your users use to access their Cloud PCs. By default, it’s set to
CitrixCustomerID.cloud.com. You can customize the cloud URL or add a custom URL.
-
Select the Authentication and choose a suitable authentication method. For more information, see [StoreFront Cloud Authentication](/en-us/citrix-workspace/authentication) -
If you want the Cloud PC session to launch automatically after users log into their store website, configure [StoreFront Cloud Automatically launch desktop](/en-us/citrix-workspace/experience/user-interface#automatically-launch-desktop). -
[OPTIONAL] Disable Always prompt end users for their credentials:
- Your users’ client devices are Entra joined or Entra hybrid joined, and you want single sign-on into the store (IdP must be Entra ID).
- Your users will use the Windows 365 web portal instead of accessing their store directly, and you want single sign-on into the store to avoid prompting users for credentials a second time. Note that this is only relevant if your Azure and StoreFront Cloud IdPs are the same.
For more information, see [StoreFront Cloud Always prompt end users for their credentials](/en-us/citrix-workspace/experience/sessions#always-prompt-end-users-for-their-credentials). - Proceed to Connect Windows 365 to Citrix Cloud.