This content has been machine translated dynamically.
Dieser Inhalt ist eine maschinelle Übersetzung, die dynamisch erstellt wurde. (Haftungsausschluss)
Cet article a été traduit automatiquement de manière dynamique. (Clause de non responsabilité)
Este artículo lo ha traducido una máquina de forma dinámica. (Aviso legal)
此内容已经过机器动态翻译。 放弃
このコンテンツは動的に機械翻訳されています。免責事項
이 콘텐츠는 동적으로 기계 번역되었습니다. 책임 부인
Este texto foi traduzido automaticamente. (Aviso legal)
Questo contenuto è stato tradotto dinamicamente con traduzione automatica.(Esclusione di responsabilità))
This article has been machine translated.
Dieser Artikel wurde maschinell übersetzt. (Haftungsausschluss)
Ce article a été traduit automatiquement. (Clause de non responsabilité)
Este artículo ha sido traducido automáticamente. (Aviso legal)
この記事は機械翻訳されています.免責事項
이 기사는 기계 번역되었습니다.책임 부인
Este artigo foi traduzido automaticamente.(Aviso legal)
这篇文章已经过机器翻译.放弃
Questo articolo è stato tradotto automaticamente.(Esclusione di responsabilità))
Translation failed!
Install VDAs using Microsoft Intune
Overview
This article describes how to deploy VDAs using Microsoft Intune. For more information, see the Microsoft documentation.
Note:
The following article describes only recommendations based on how Citrix® has tested the environment. You can customize these steps according to your needs. Citrix is not responsible for any updates or tweaks needed to this to fit customer needs.
Key steps to deploy VDA using Microsoft Intune
- Prepare installation for the Citrix VDA.
- Set up Microsoft 365 Developer Program Subscriber.
- Add and assign an app.
- Install the app on the enrolled device.
Step 1: Prepare installation for the Citrix VDA
- Download the updated IntuneWinAppUtil.exe from GitHub.
- Run the
IntuneWinAppUtil.exefile using Run as administrator. -
Enter the following data:
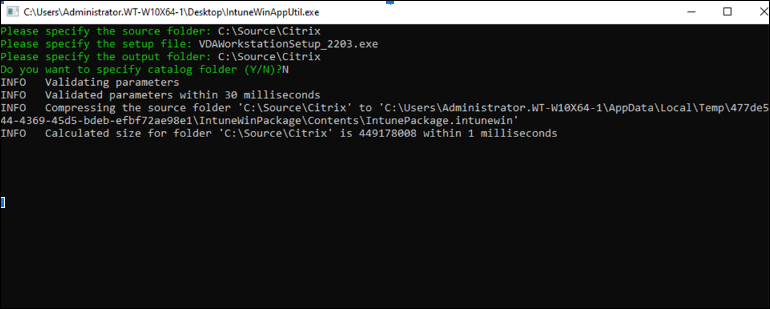
- Please specify the source folder: Enter the folder that contains your application setup files. For example, C:\source\Citrix.
- Please specify the setup file: Enter the setup file name (such as setup.exe or setup.msi). For example, VDAWorkstationSetup_2203.exe.
- Please specify the output folder: Enter the path of the output folder to generate the .intunewin file. For example, C:\source\Citrix.
- Do you want to specify catalog folder (Y/N): Type N.
Note:
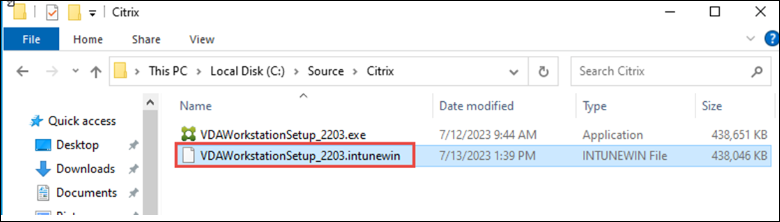
Wait a few minutes while Win32 Content Prep Tool is running. Once it generates the
.intunewinfile, the status indicates 100% at the bottom of the command prompt. -
Once the process completes, go to the output folder (In this example,
C:\source\Citrix) to get the Microsoft Intune deployment file. -
Sign up for a Microsoft Intune free trial.
Step 2: Set up Microsoft 365 Developer Program Subscriber
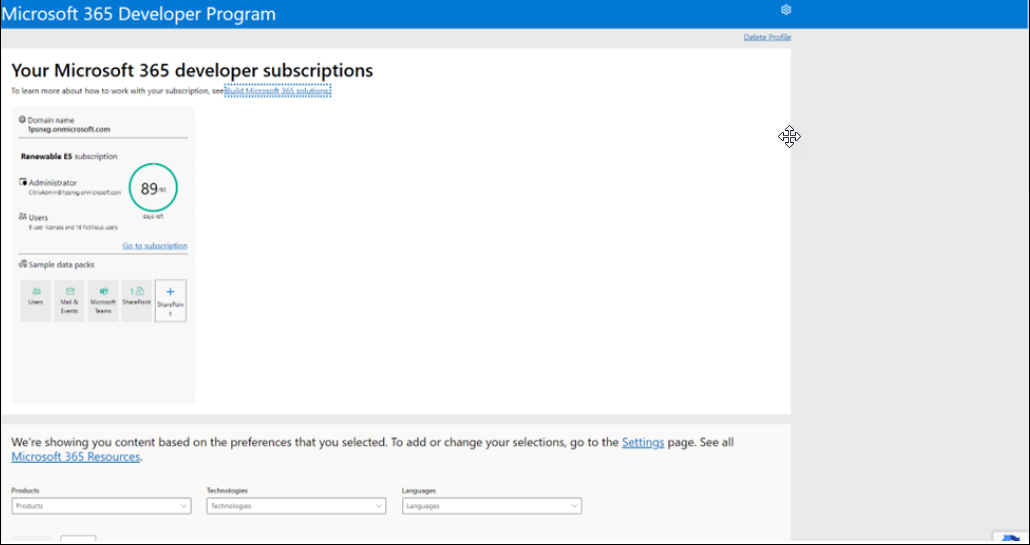
-
Create the Instant sandbox to activate your subscription. To get your developer sandbox, go to your Microsoft 365 Developer Program dashboard and select Add a new subscription.
-
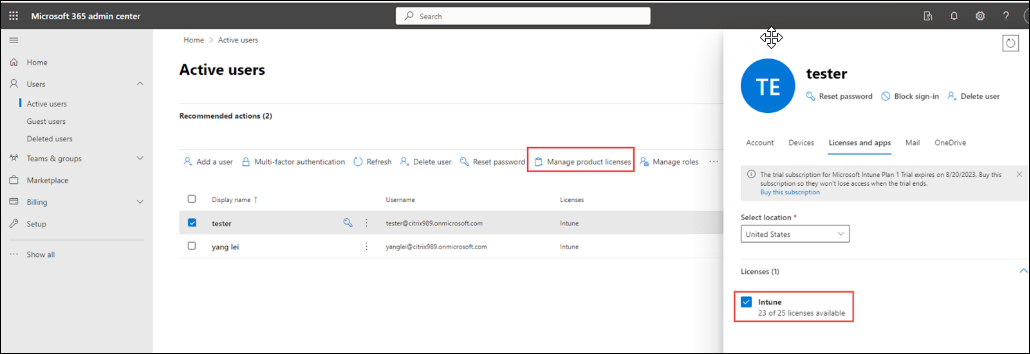
Create a user in the Microsoft 365 Admin center and assign a license to the user.
-
Create a group.
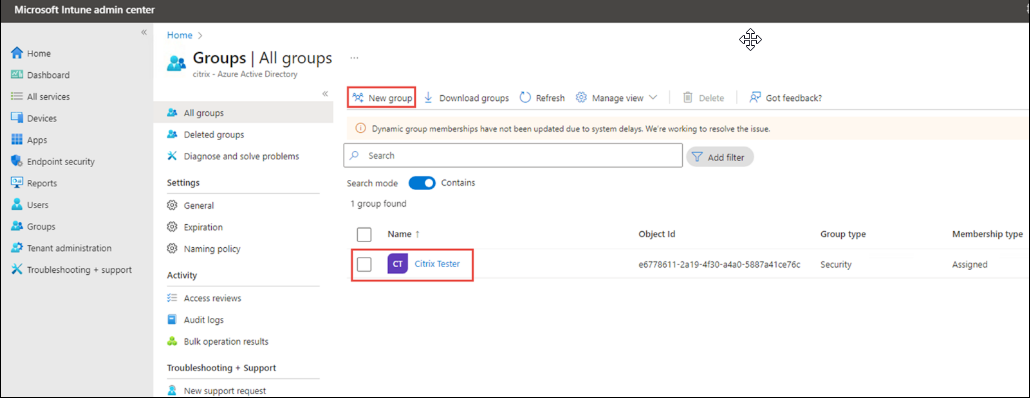
- Once the group is created, you must provide the MDM authority to the group. Set up automatic enrollment. It can take a minute to activate.
Or you can manually add the MDM authority to the group by completing the following steps:
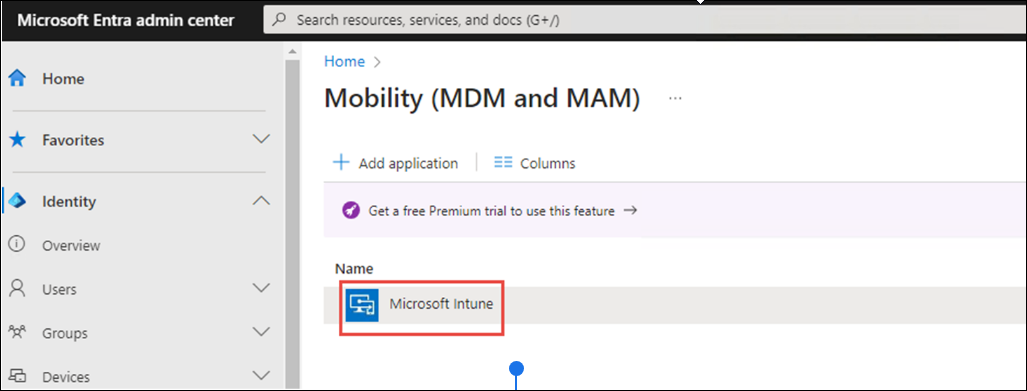
- Go to All services > Microsoft Entra.
- Go to settings > Mobility and select Microsoft Intune.
- Select the group you have just created. This opens a page with the MDM user scope.
- Click Save.
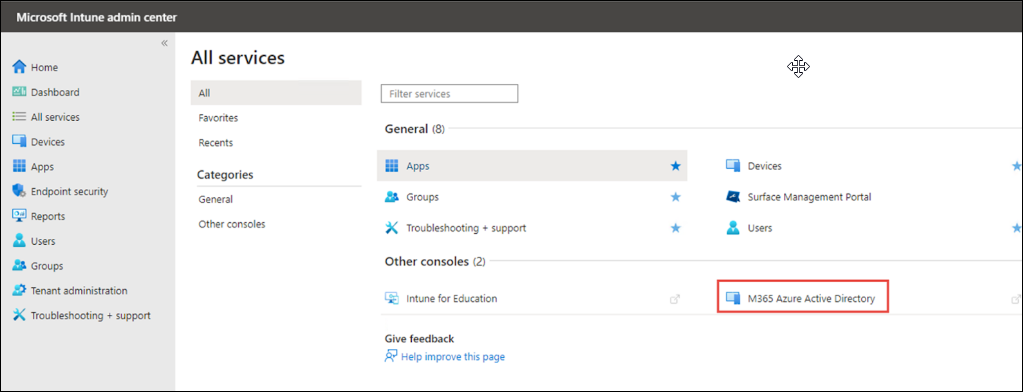
-
In the All Services tab, click M365 Azure Active Directory.
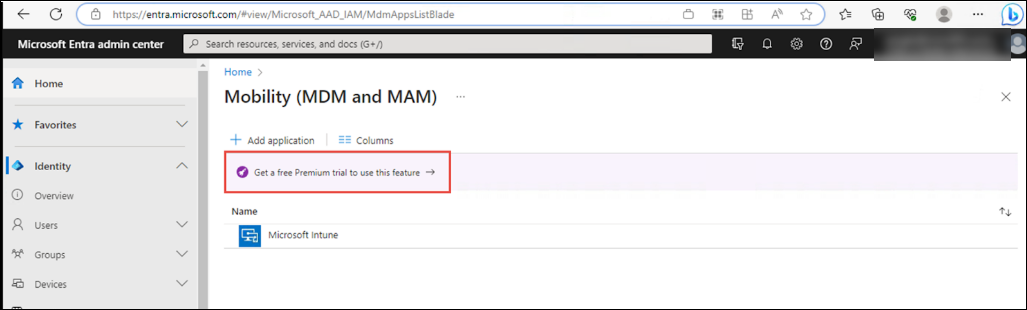
-
Click Get a free Premium trial to use this feature.
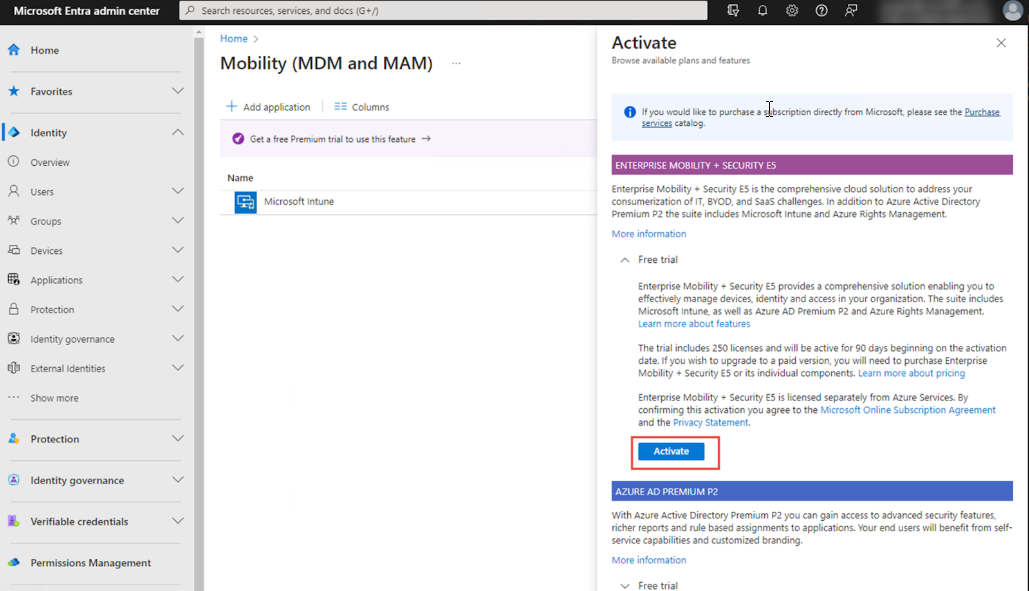
-
Click Activate.
-
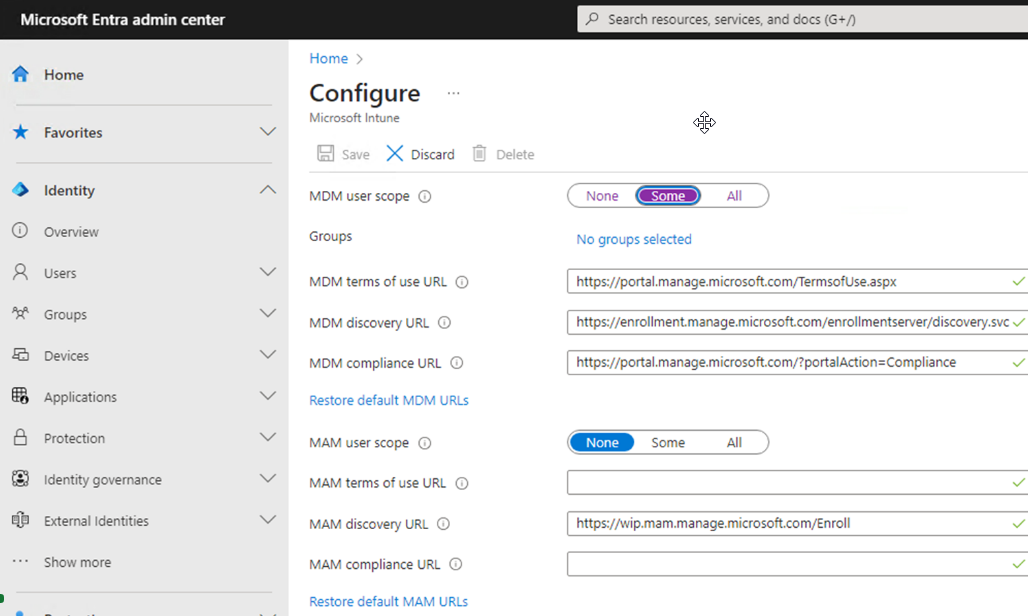
Now, click Microsoft Intune.
-
In the Configure tab, enter the required configurations.
-
To add a group, click No groups selected.

-
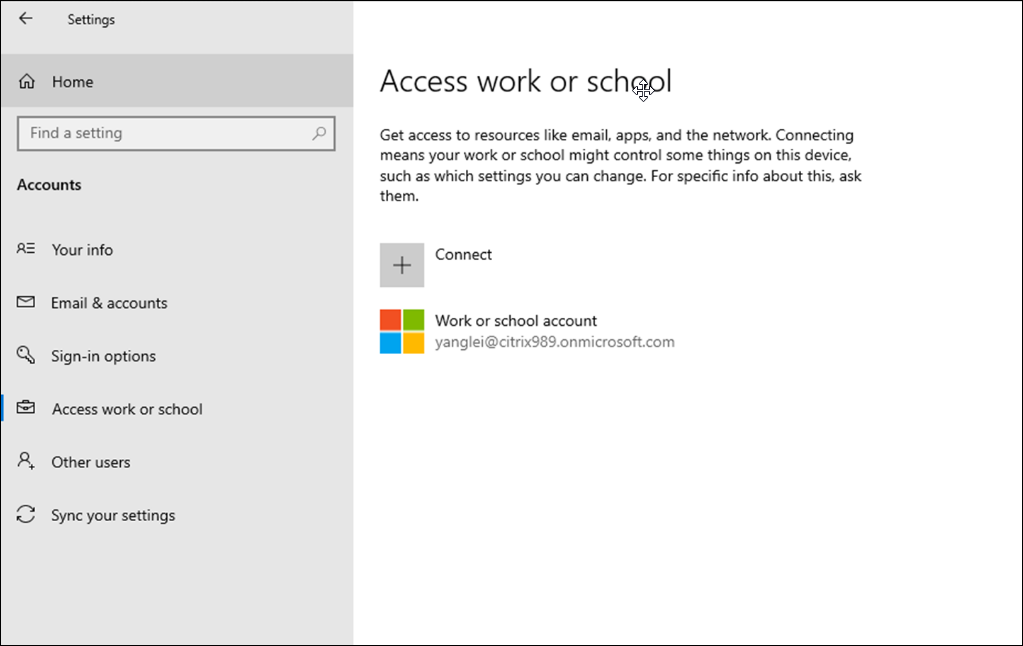
Enroll your device.
-
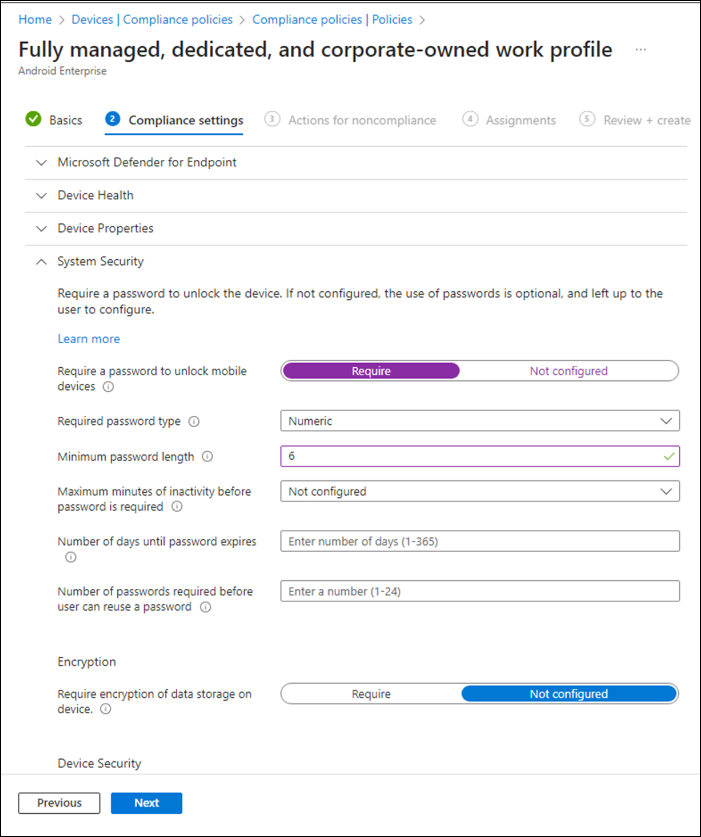
Create a device compliance policy to change your newly created Device’s compliance to
Compliant.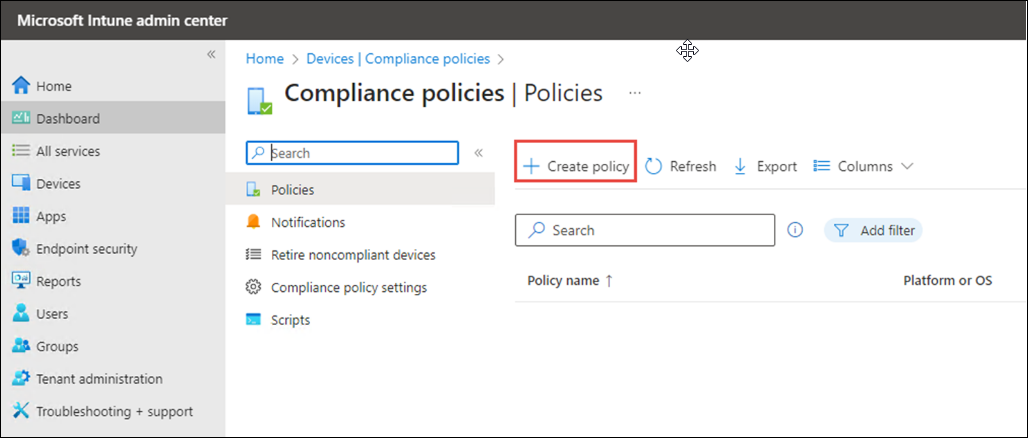
-
Go to the Assignments tab to add the newly created group.
-
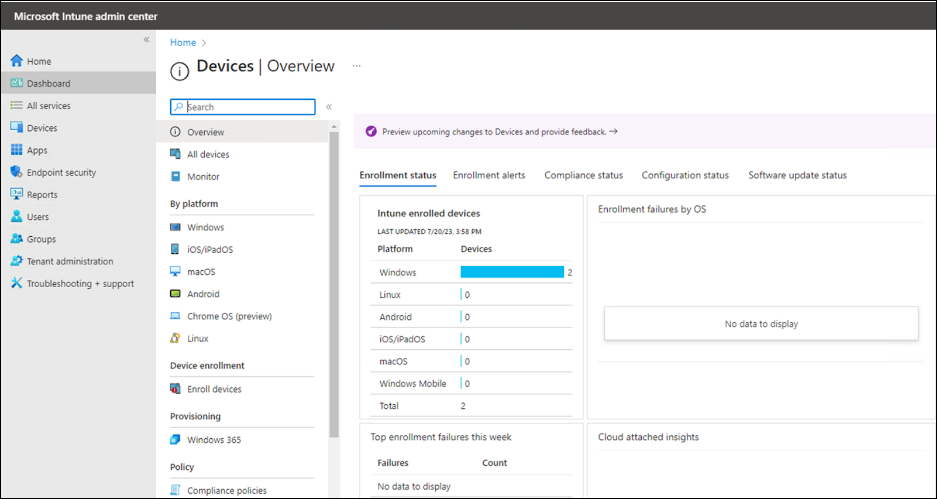
Confirm the device enrollment.
For detailed information, see Microsoft 365 developer program.
Step 3: Add and assign an app
-
Sign in to Microsoft Intune admin center.
-
Select Apps > All apps > Add or go to Apps > Windows > Windows Apps.
-
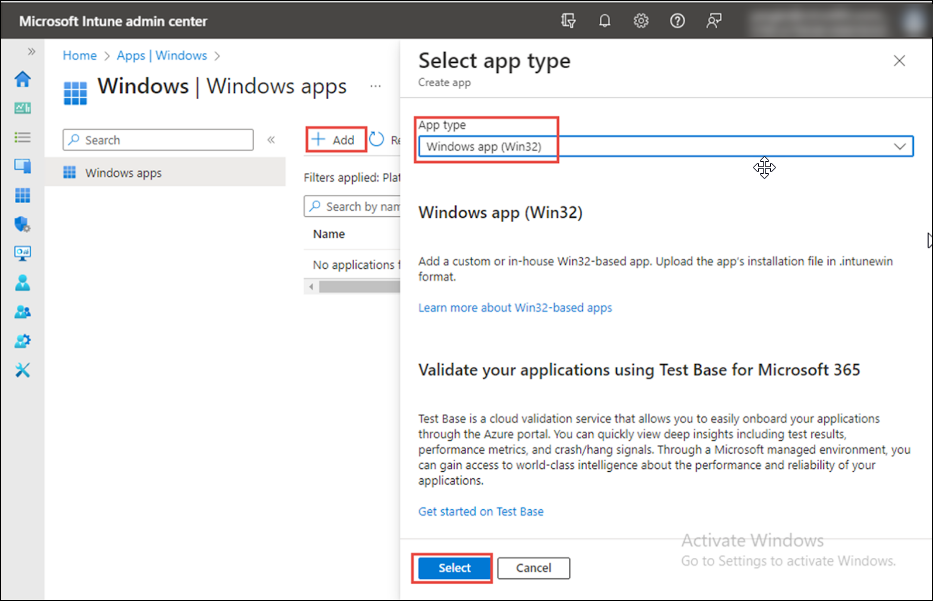
On the Select app type pane, select Other app types > Windows app (Win32) and click Select.
-
On the Add app pane, click Select app package file. Click browse.
-
Select the prepared file with the extension
.intunewin. The prepared file is created during the Prepare installation for the Citrix VDA step. A page containing detailed information about the app is displayed.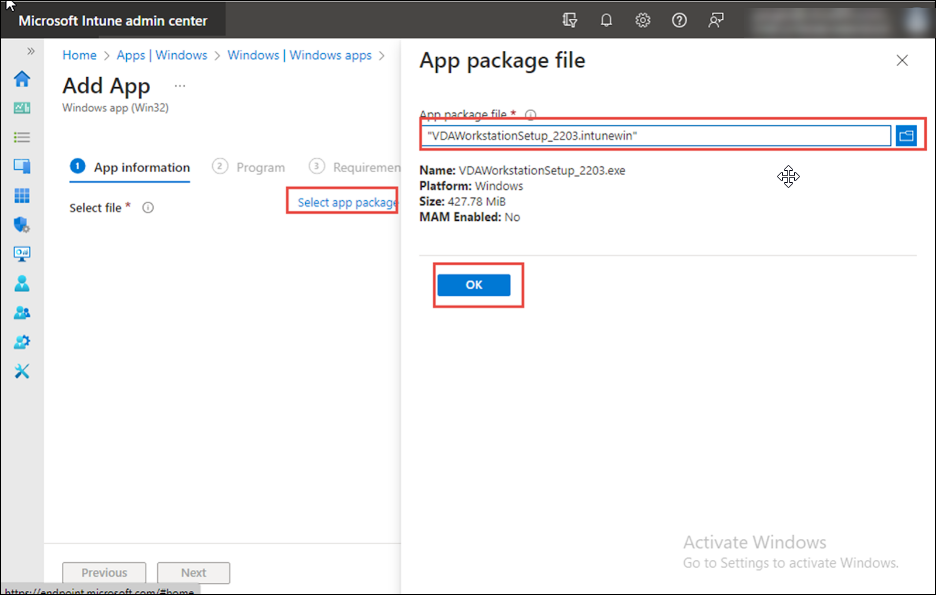
Note:
- If you are using a server-core machine, you must use the VDA workstation core.
- If you are using a Windows 10 desktop OS, you must use the VDA workstation.
- If you are using a server OS (For example, Windows 2022), you must use the VDA server setup.
- In this example, we are using the 2203 version but this is applicable for all versions.
-
Click OK on the App package file pane.
-
In the following screen, under the App Information tab, enter the Name of the App, and enter the Description of the Windows App. Enter the Publisher name as
Citrix, and you can specify the additional app information here. Click Next.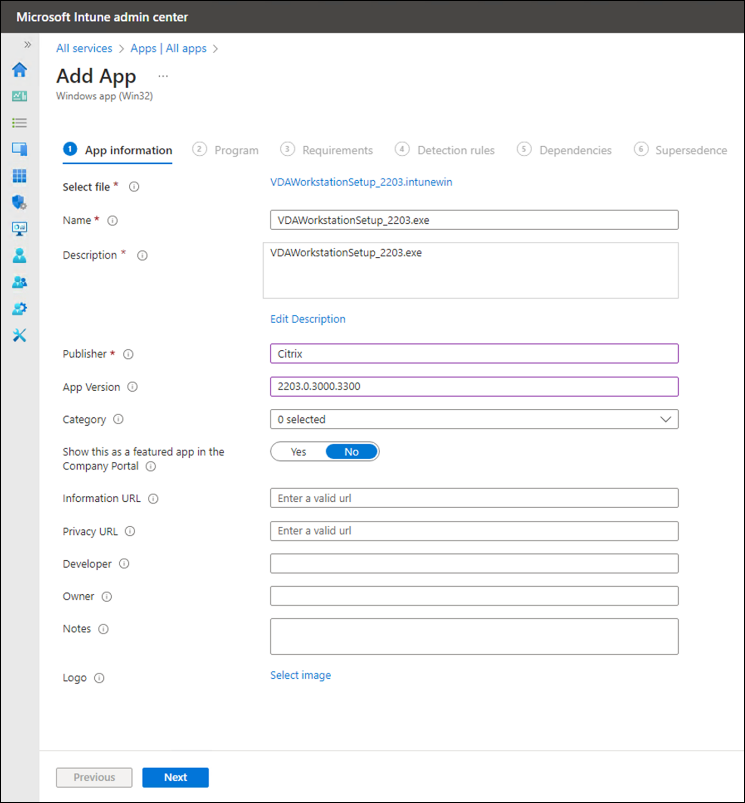
-
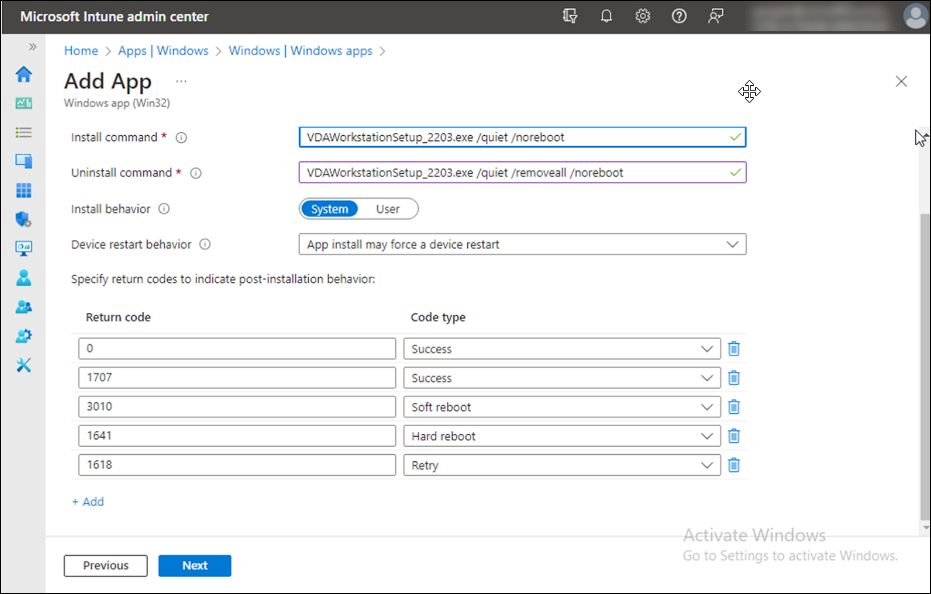
On the next screen, enter the following values:
-
Install command:
VDAWorkstationSetup_2203.exe /quiet /noreboot -
Uninstall command:
VDAWorkstationSetup_2203.exe /quiet /removeall /noreboot -
Install behavior:
- System: Select this option to install the app on all the devices in the group.
- User: Select this option to install the app only on a specific user device in the group.
-
Install command:
-
Click Next.
Note:
- This example uses the 2203 version, but you can use it with any version.
- Adding
/norebootto a command doesn’t mean there won’t be any reboots during installation or deployment, but only enforces mandatory reboots. For more information on scripts, see Command-line options for installing a VDA. - For Device restart behavior, select Intune will force a mandatory device restart.
- In the Return code text box, enter
0,3and8for post-installation success. For information on other return codes, see Citrix installation return codes.
-
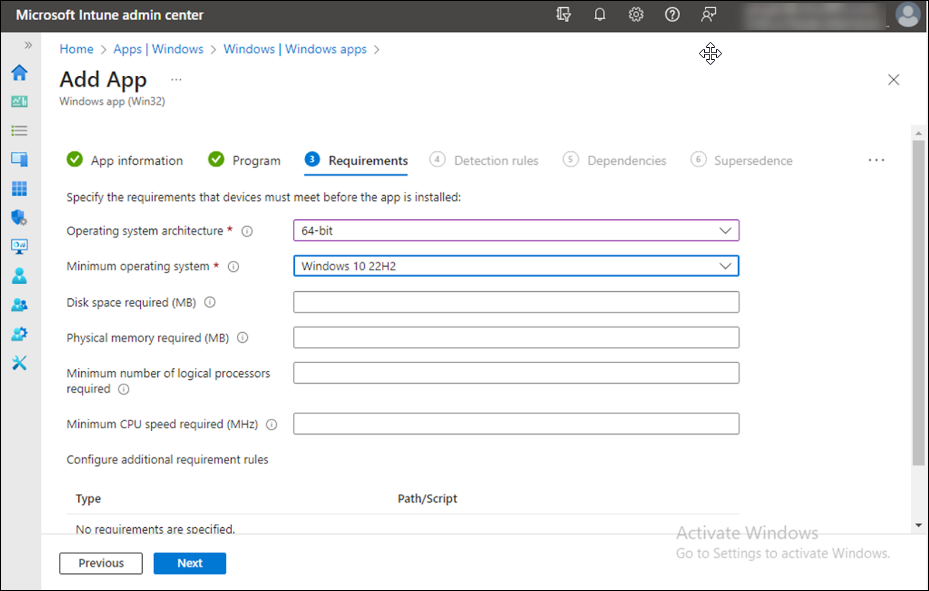
In the following screen, under the Requirements tab, enter the required values. Click Next.
-
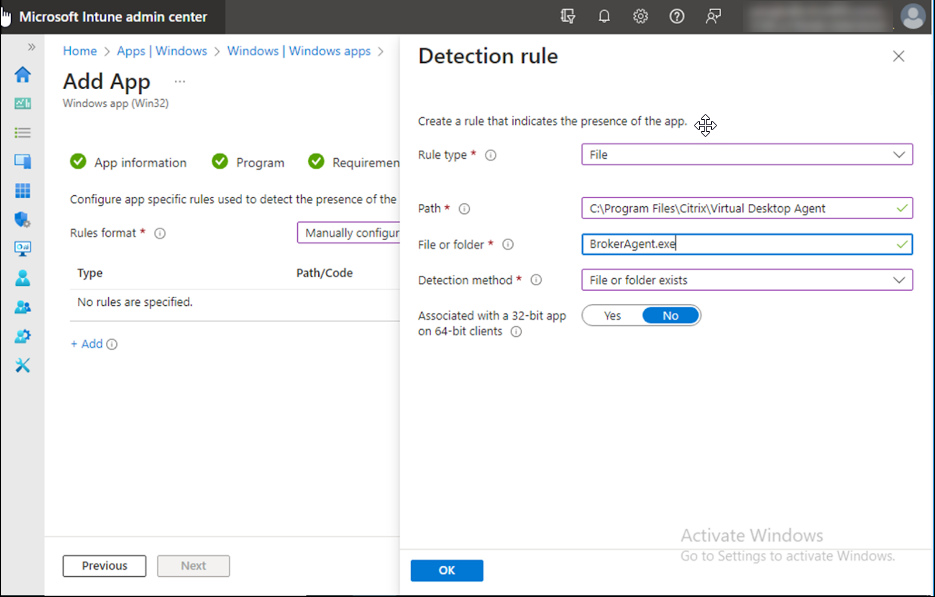
In the following screen, under the Detection rule tab, add Detection rule to add the Broker agent. Click OK.
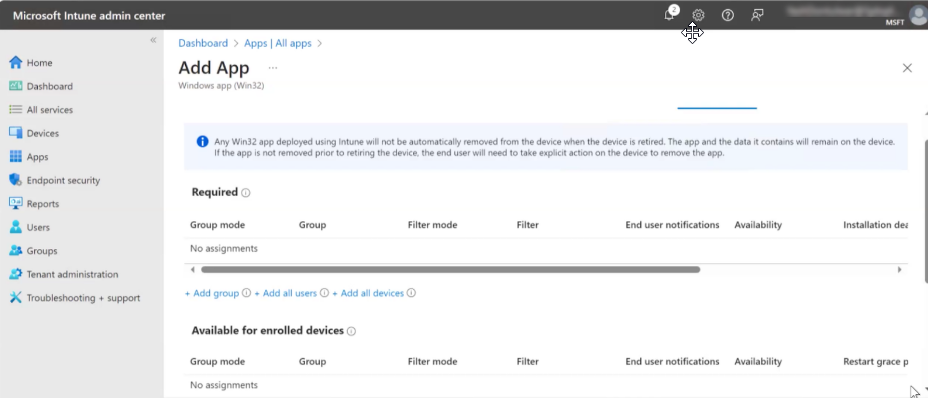
- In the Assignments tab, you can add the devices in the following:
- Required: The devices for which updates occur automatically.
- Available for enrolled devices: The devices for which updates occur manually.
-
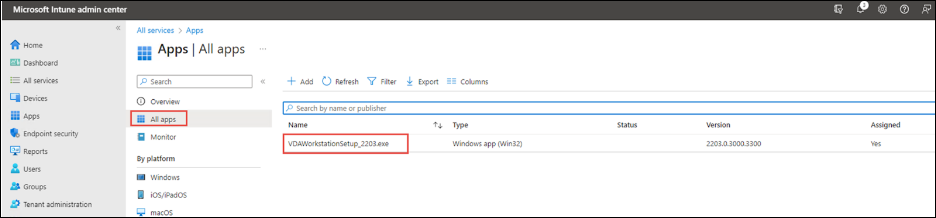
Review the details and click Create.
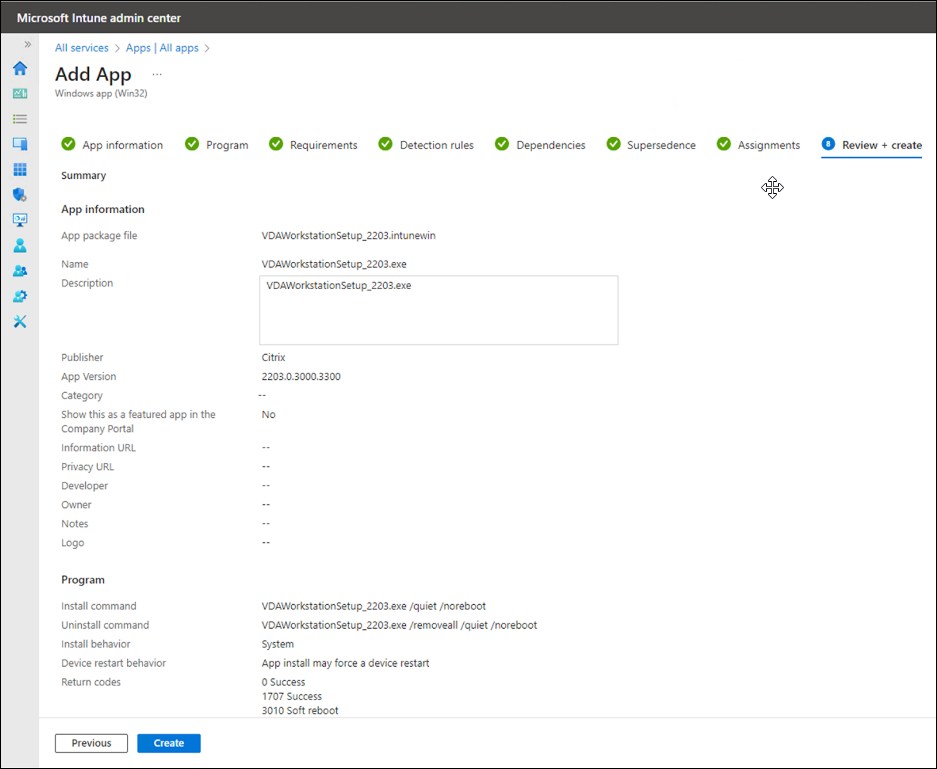
The app is assigned successfully.
For detailed information, see Add and assign an app.
Step 4: Install the app on the enrolled device
-
Sign in to your enrolled Windows 10 Desktop device. The device must be enrolled with Microsoft Intune. Also, you must sign in to the device using an account contained in the group you assigned to the app. For more information, see the Microsoft documentation.
-
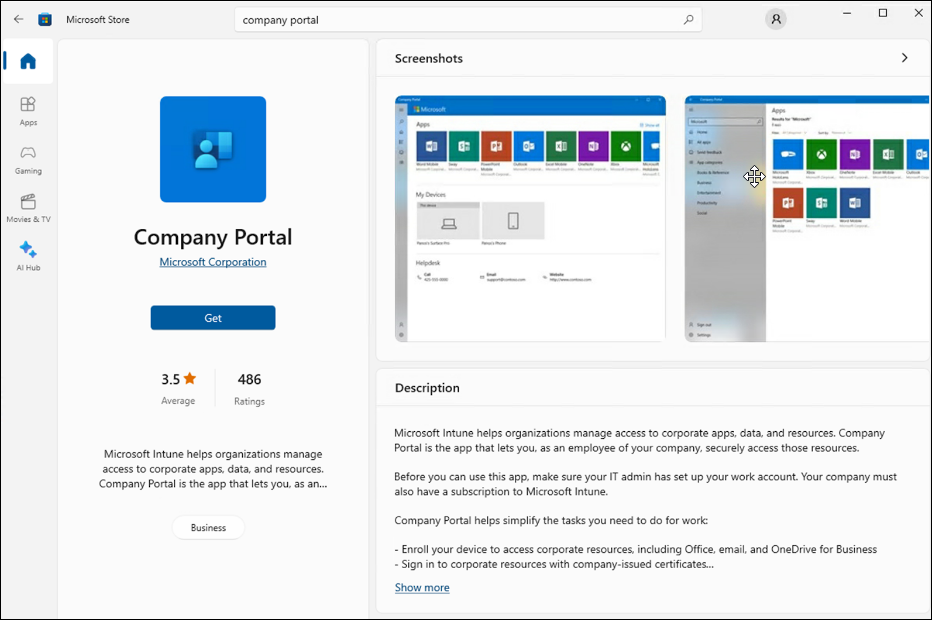
From the Start menu, open Microsoft Store.
-
Browse for the Company Portal app and install it.
-
Run the Company Portal app.
-
Click the app that you added using Microsoft Intune. If you did not successfully assign any apps to the Intune user, the following message is displayed:
Your IT administrator did not make any apps available to you. -
Click Install.
Share
Share
In this article
This Preview product documentation is Citrix Confidential.
You agree to hold this documentation confidential pursuant to the terms of your Citrix Beta/Tech Preview Agreement.
The development, release and timing of any features or functionality described in the Preview documentation remains at our sole discretion and are subject to change without notice or consultation.
The documentation is for informational purposes only and is not a commitment, promise or legal obligation to deliver any material, code or functionality and should not be relied upon in making Citrix product purchase decisions.
If you do not agree, select I DO NOT AGREE to exit.