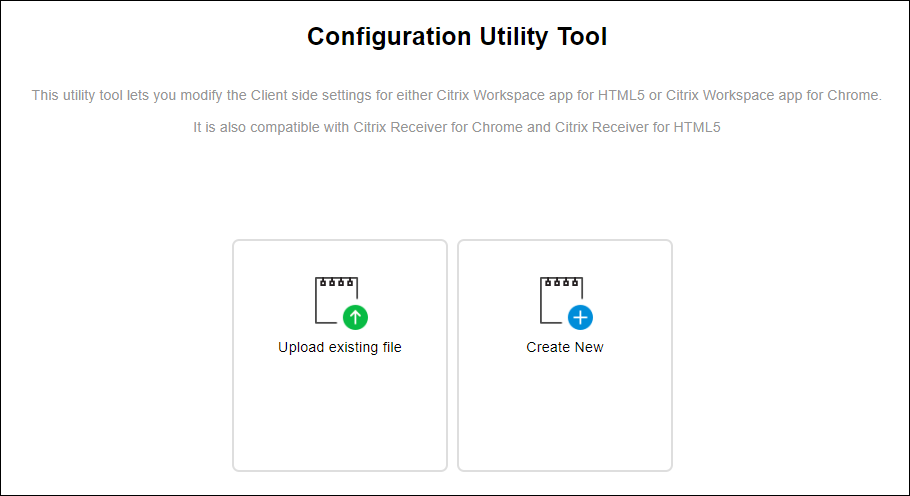
Configuration utility tool
There are four options to customize Citrix Workspace app for ChromeOS:
- configuration.js
- web.config
- default.ica
- Google Policy
The four options are available on the configuration utility, which is a UI-based configuration webpage.
Download the Configuration utility tool from the Downloads page.
How to use the configuration utility tool
-
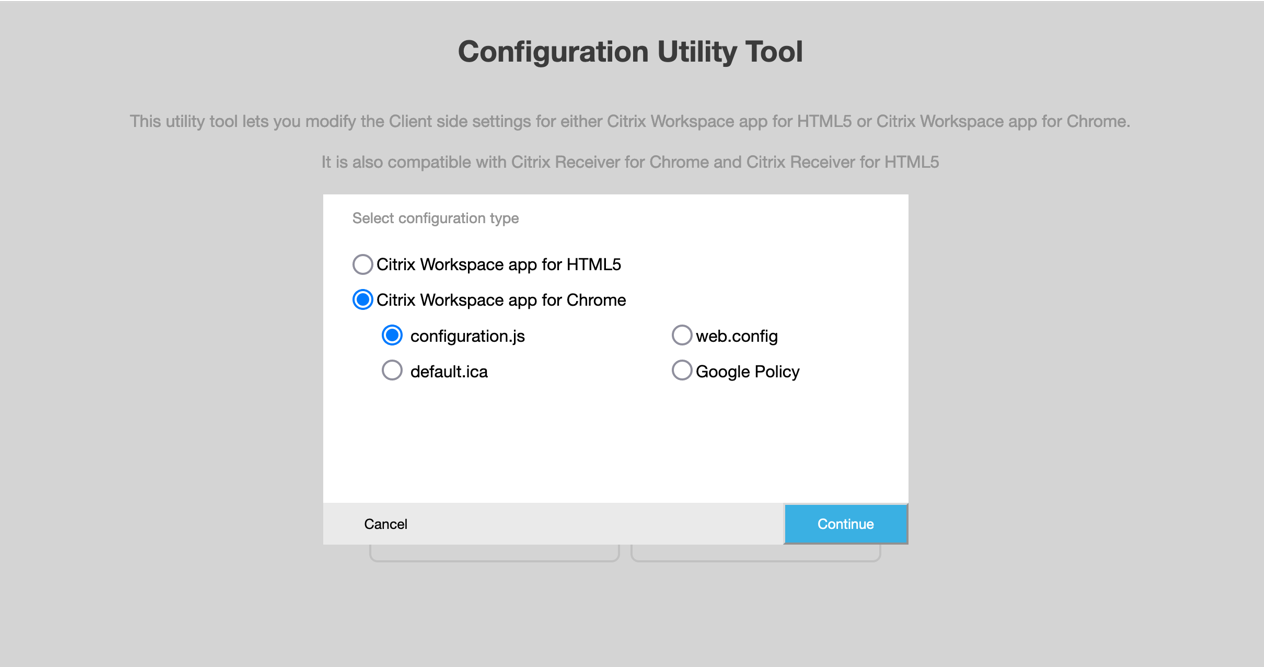
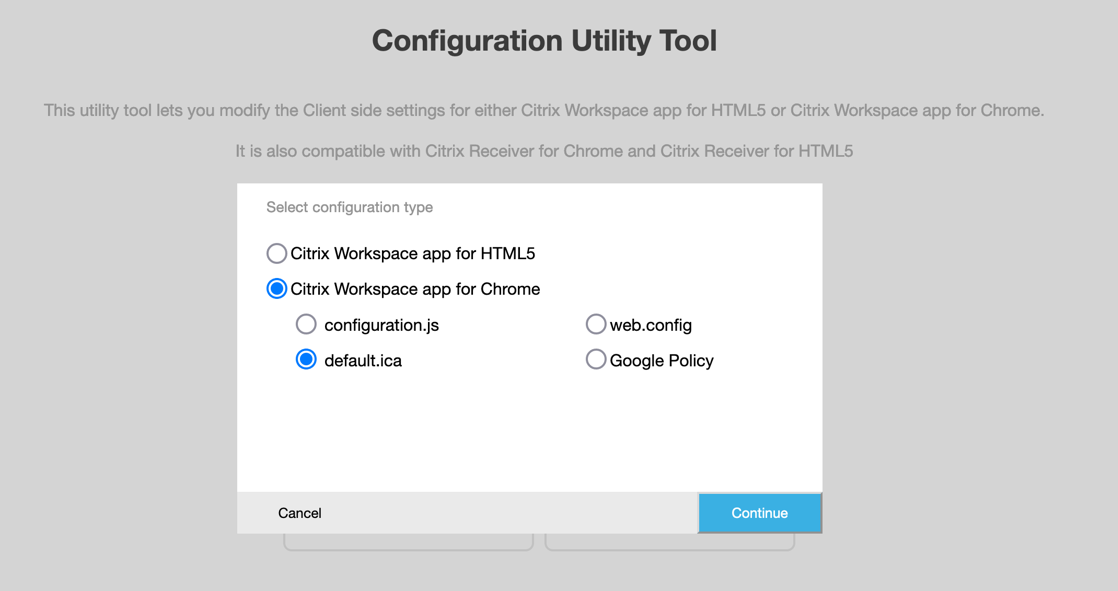
Click Creat New.
-
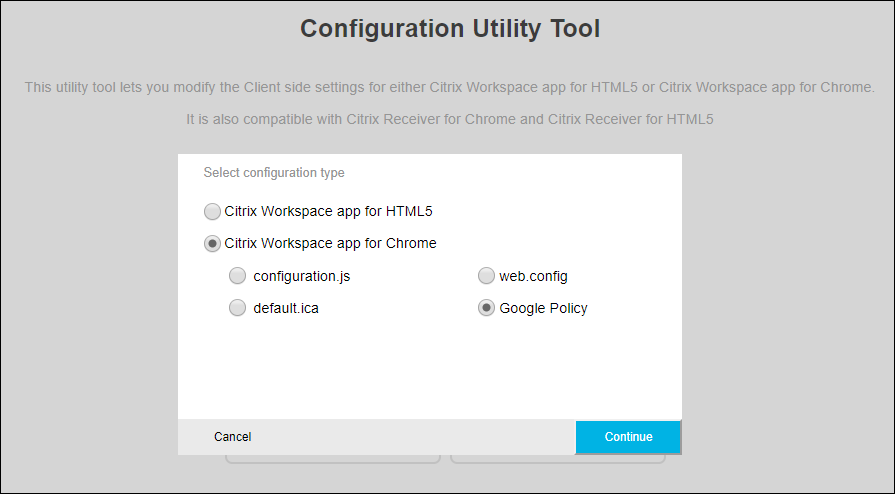
Select Citrix Workspace app for Chrome and choose one of the four configuration options. Then, click Continue to move ahead or Click Cancel to go back to the home page.
For configuration.js
To create a configuration,
-
After selecting configuration.js, click Continue to configure or click Cancel to go back to the home page.
-
On the Configuration Utility Tool, select the features you want and choose their appropriate values.

-
Click Download to download the configuration.js file.
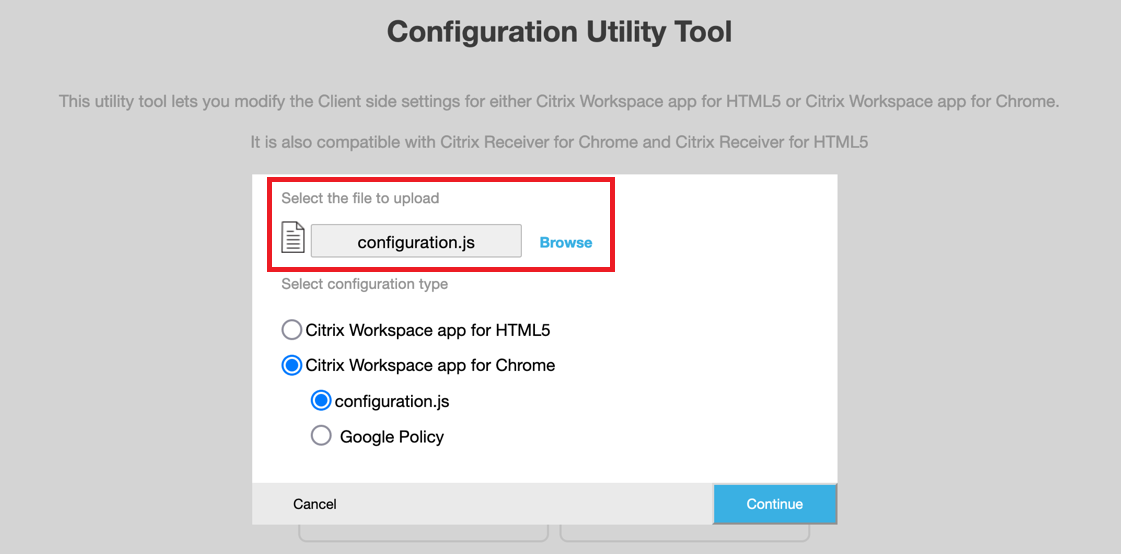
To edit a configuration,
-
Click Upload existing file.
-
Select Citrix Workspace app for Chrome and select configuration.js.
-
Click Browse and navigate to the location of the configuration.js file to select and upload the file.
- Click Continue to configure or Cancel to go back to the home page.
- Select the features that you want and choose their appropriate values.
- Click Download to download the configuration.js file.
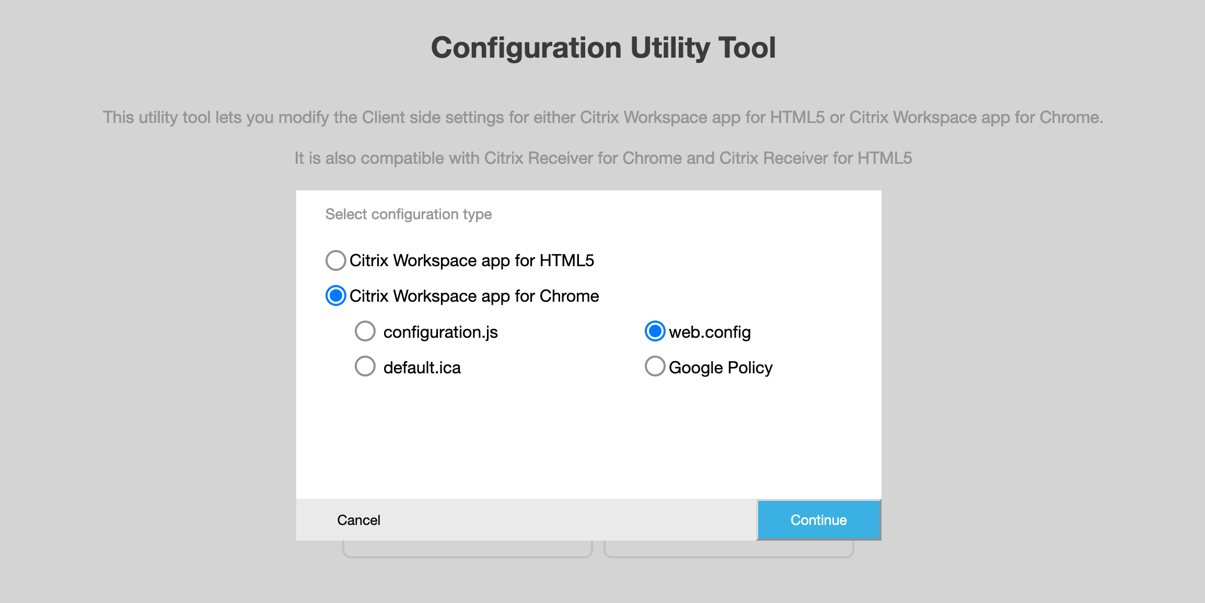
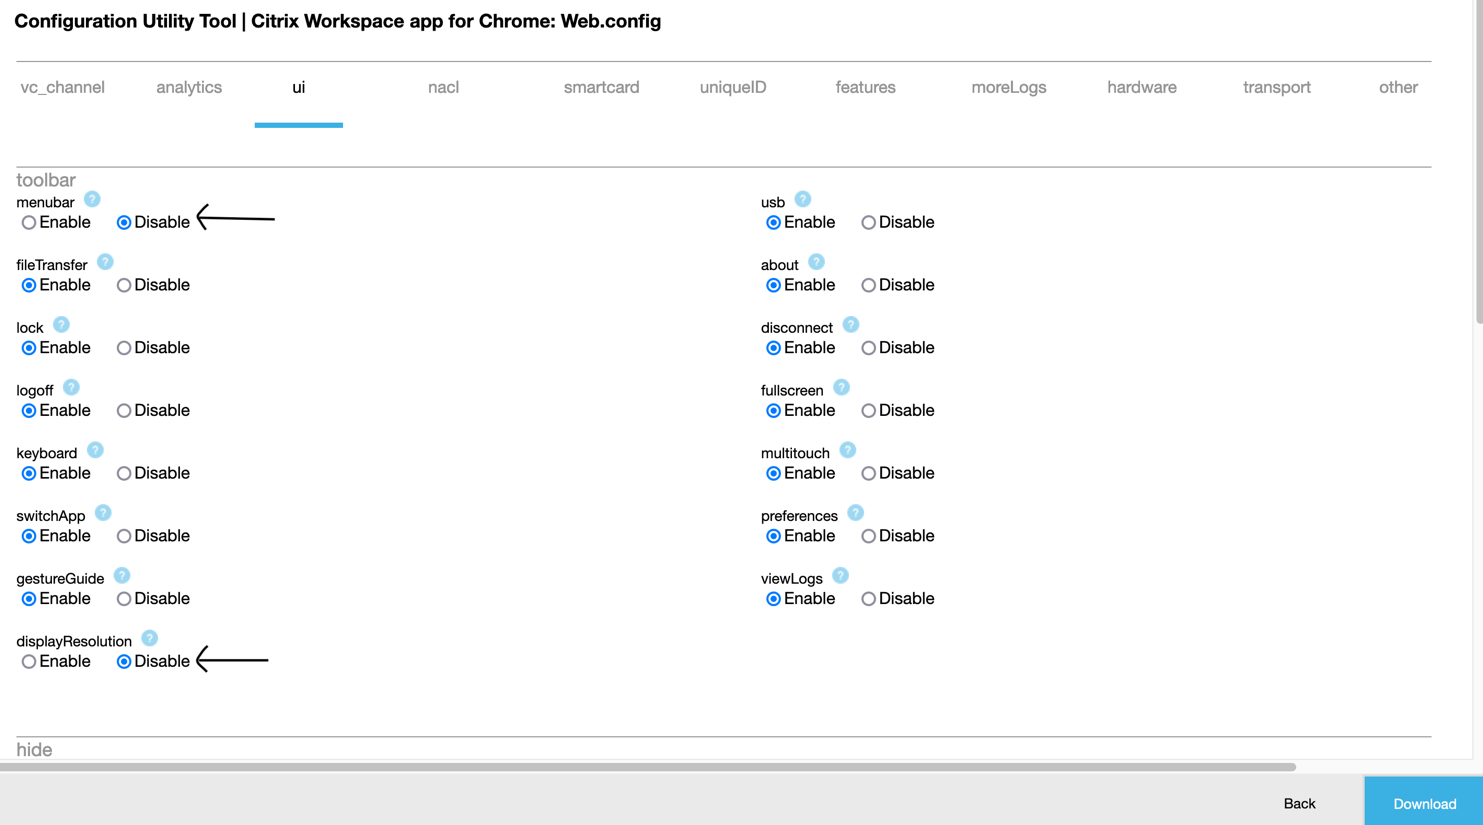
For web.config (in StoreFront)
-
After selecting web.config, click Continue to configure or click Cancel to go back to the home page.
-
Select the settings that you want and their appropriate values and click Download (for example, select menubar: disable; displayResolution : disable)
-
Copy the contents in the dialog box.
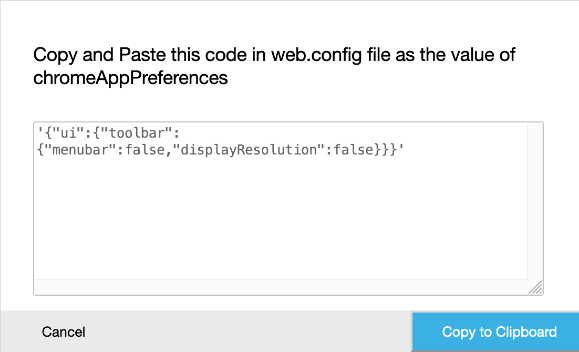
- Open the web.config file for the Citrix Receiver for Web site. This file is typically at C:\inetpub\wwwroot\Citrix\storenameWeb, where a store name is the name specified for the store when it was created.
- Locate the chromeAppPreferences field in the file and set its value with the JSON string copied from the dialog box.
     chromeAppPreferences = '{
          "ui":{
               "toolbar":{
                    "menubar":false,"displayResolution":false
                    }
                    }
                    }'
<!--NeedCopy-->

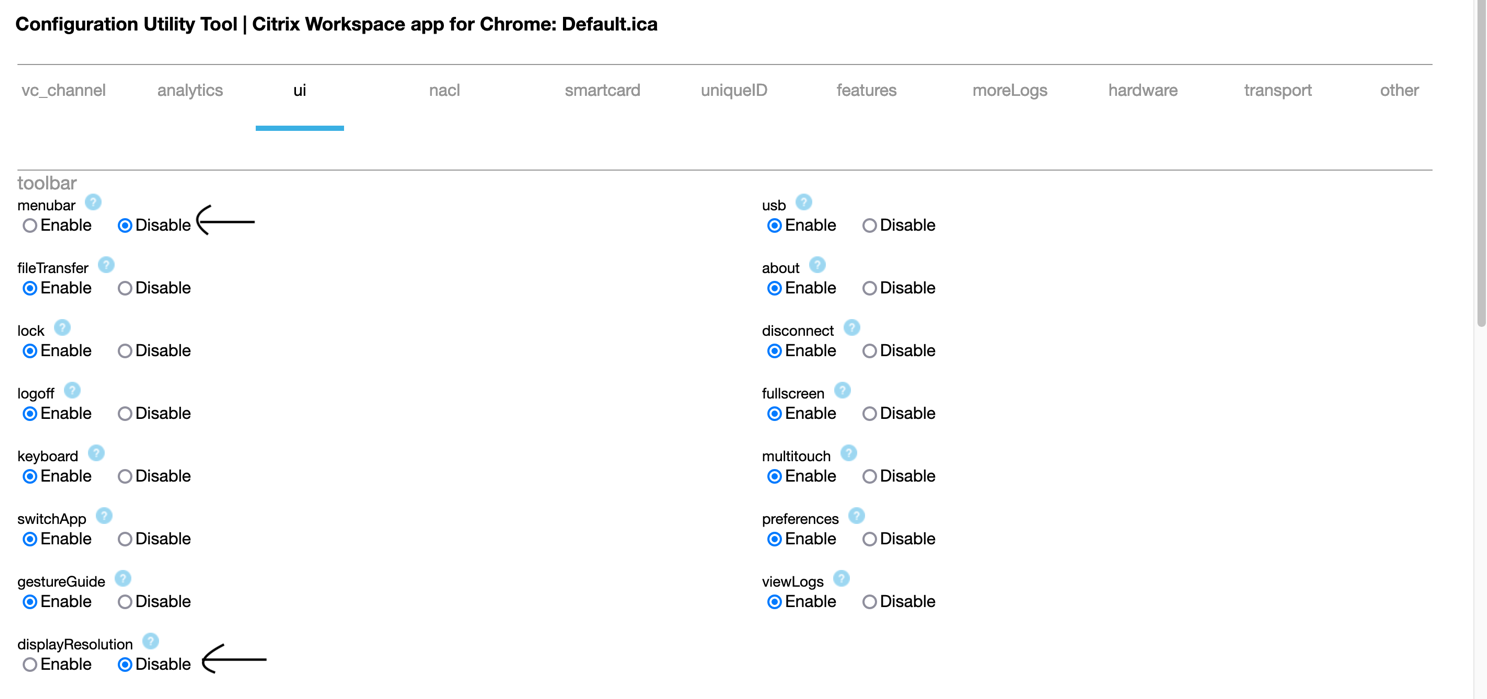
For default.ica
-
After selecting default.ica, click Continue to configure or click Cancel to go back to the home page.
-
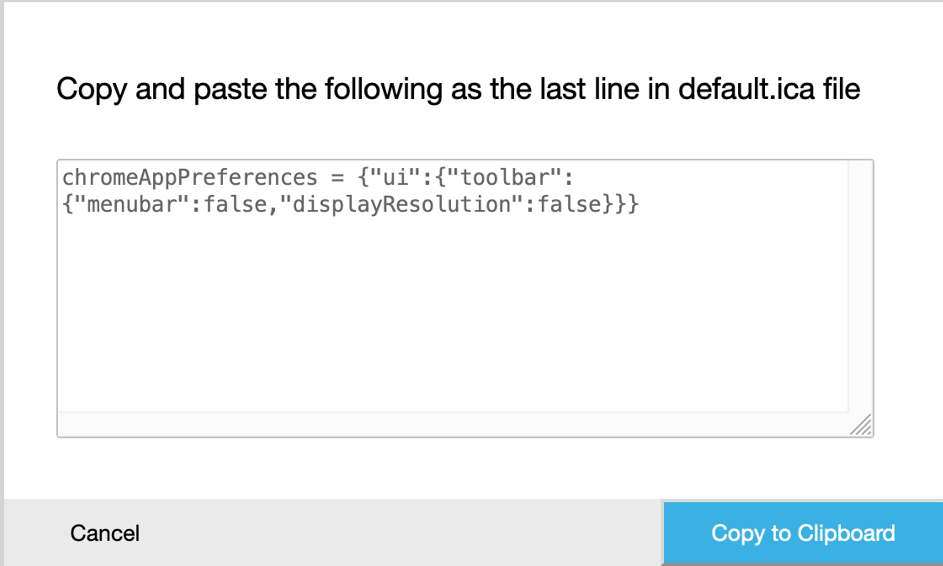
Select the settings that you want and their appropriate values and click Download (for example, select menubar > disable and displayResolution > disable).
-
Copy the contents in the dialog box.
-
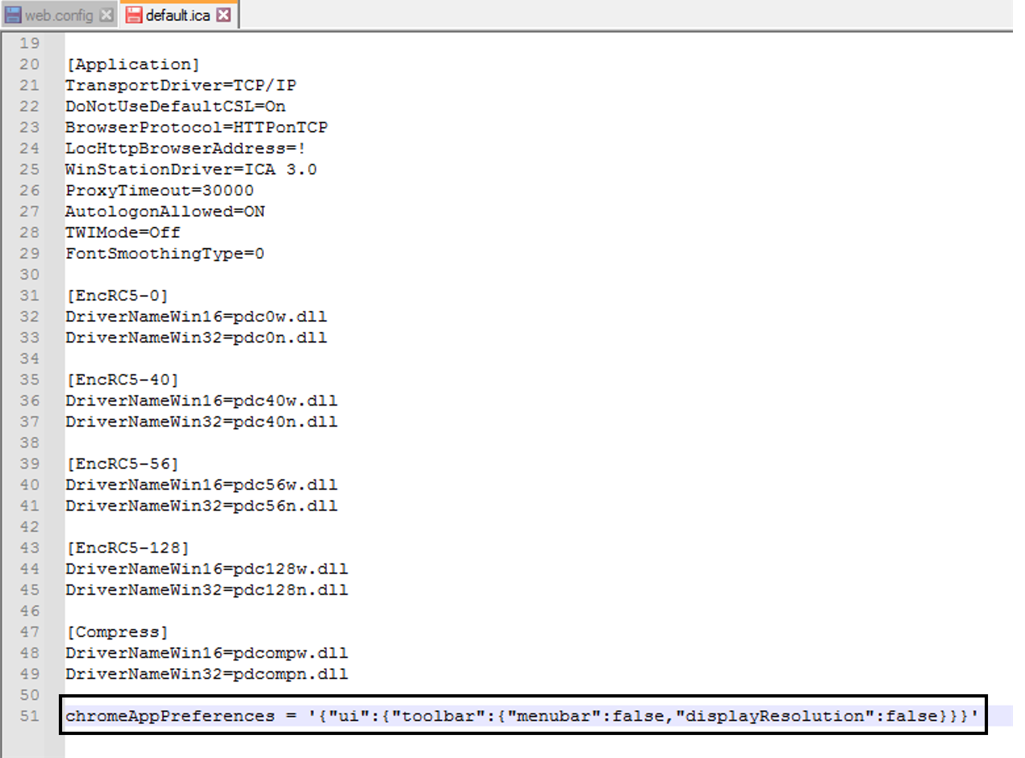
Open the default.ica file typically at C:\inetpub\wwwroot\Citrix\<site name>\conf\default.ica for Web interface customers, where the sitename is the name specified for the site when it was created. For StoreFront customers, the default.ica file is typically at C:\inetpub\wwwroot\Citrix\<Storename>\App_Data\default.ica, where a store name is the name specified for the store when it was created.
-
Add the content in the last line of the default.ica file as shown.
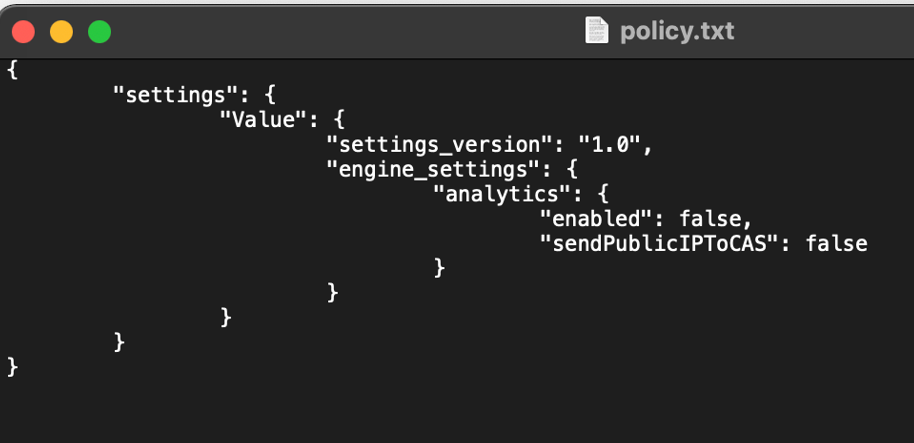
For Google policy
How to create a configuration
-
After selecting Google Policy, click Continue to configure or click Cancel to go back to the home page.
-
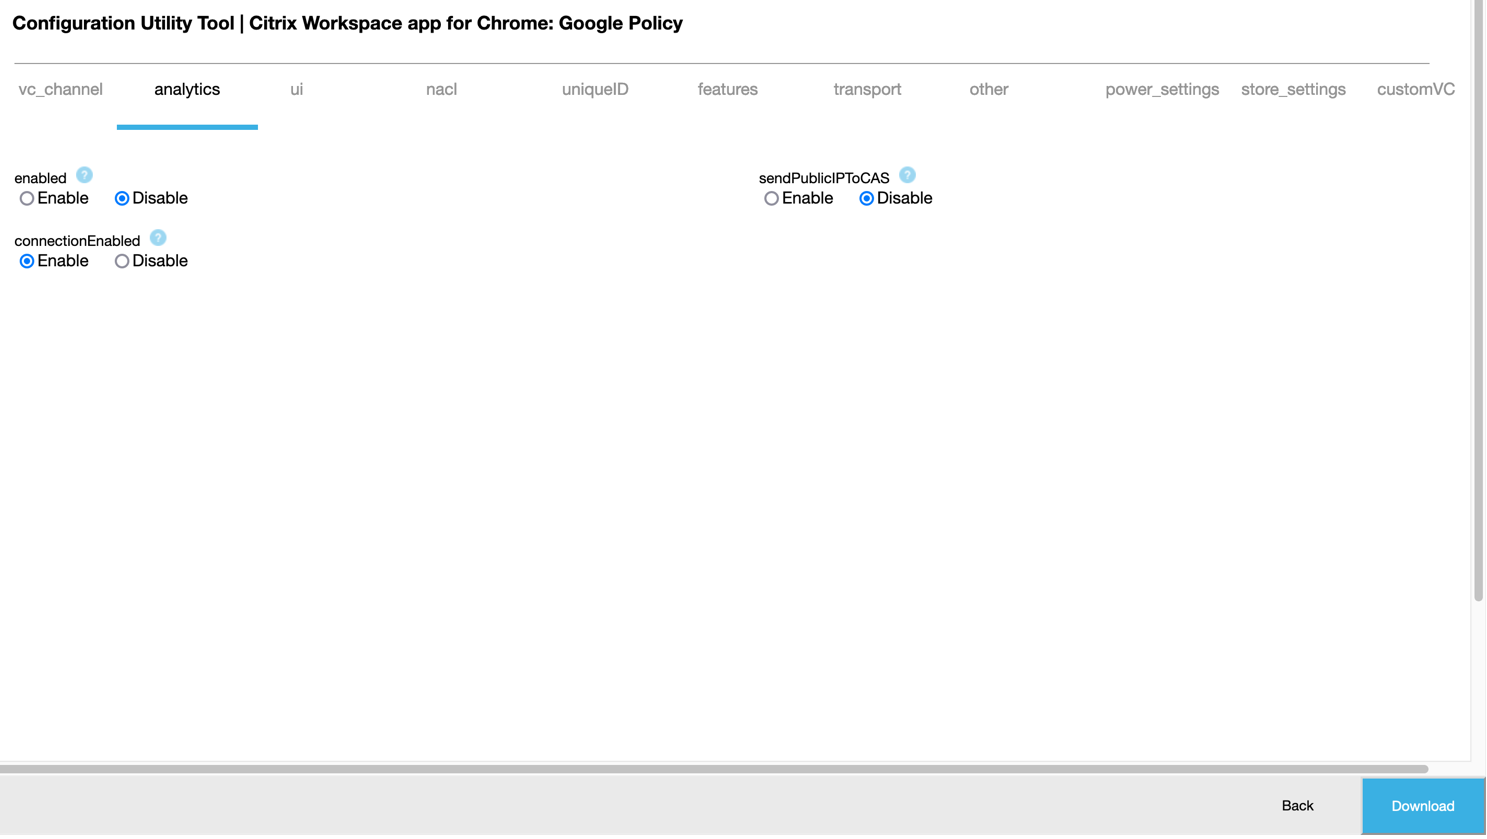
Select the settings that you want and their appropriate values and click Download (for example, select sendPublicIPToCas: disabled)
-
When you click Download, a policy.txt file is created.
How to edit a configuration
Known limitations in the feature:**
You can edit only the settings and the values that are present in the upload file (policy.txt). If you require to edit other policies, create a policy file to include the settings. For more information, see How to create a configuration.
-
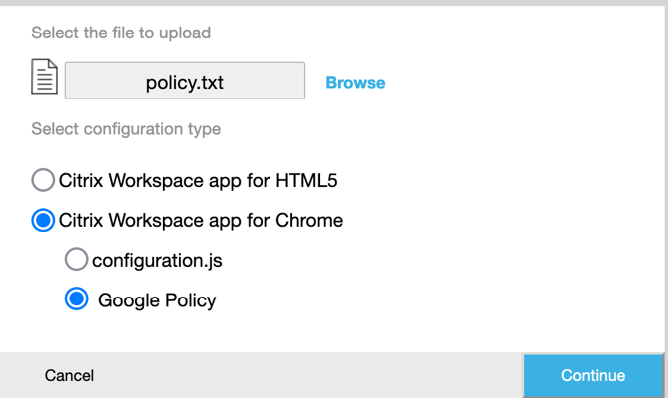
Click Upload existing file.
-
Select Citrix Workspace app for Chrome and select policy.txt.
-
Click Browse and navigate to the location of the policy.txt file to select and upload the file.
-
Click Continue to edit or click Cancel to go back to the home page.
-
Edit the settings by choosing their appropriate values.
-
Click Download to download the updated policy.txt file.