Authenticate
Enhanced Citrix® security with pre-populated user name
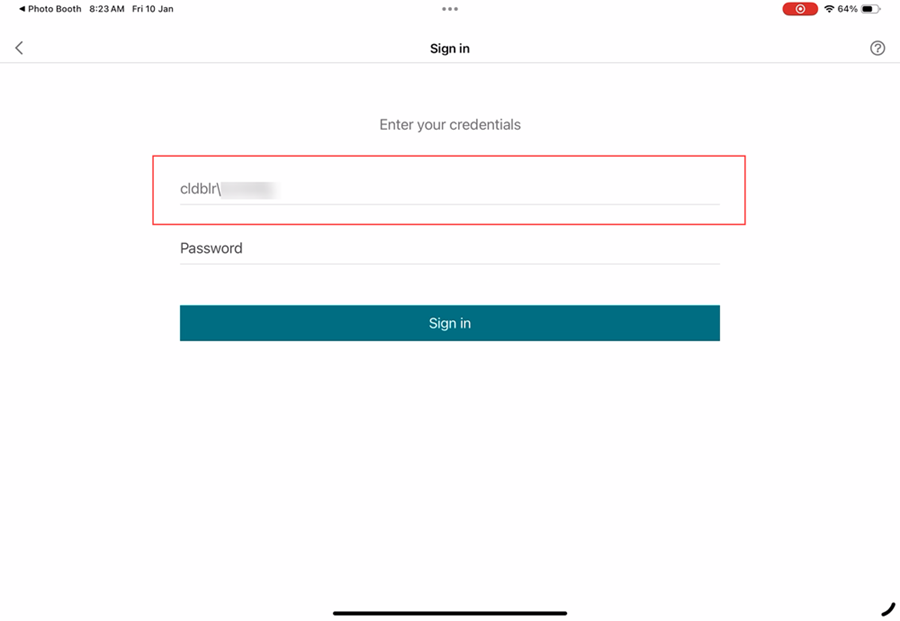
Starting with version 25.1.0, you can use Unified Endpoint Management (UEM) to push the user name in a specific format to manage devices. On iOS, Citrix Workspace app reads this configuration, retrieves the user name, and pre-populates it within the authentication prompt, making it read-only. This ensures that only the registered device owner can authenticate and access the app on that specific device.
Administrators gain the ability to manage user authentication efficiently across multiple iOS devices from a central location, while ensuring only authorized users can sign in.
This feature also simplifies the login process by eliminating the need for users to manually enter their credentials, reducing the risk of errors and enhancing the overall user experience. By combining robust access control with a seamless login flow, Citrix Workspace™ app for iOS supports both enhanced security and improved usability.
You can configure this feature through UEM using the following settings:
Note:
This example uses Microsoft Intune as the UEM solution for demonstration. The steps and UI may vary depending on your UEM provider.
- Sign in to your UEM provider.
- Add the Citrix Workspace app to your UEM provider for management. Upload it through the UEM portal or link it to the App Store.
- Create an app configuration policy for your app.
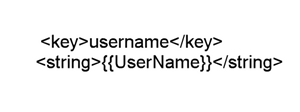
- Add a key and value pair to the XML property list and fill in the following values:
-
key:
username -
value type:
String - value: Payload variable which is documented in Microsoft Intune portal.
-
key:
Microsoft Intune:
For more information, see - iOS and iPadOS device settings to use common iOS/iPadOS features in Intune.
Jamf:
<key>username</key>
    <string>$USERNAME</string>

<!--NeedCopy-->
For more information, see - Payload Variables for Configuration Profiles.
Limitation:
The system supports only the Native Login page. For web-based login, pre-filling the user name is not supported.
Fast smart card
Starting with version 24.12.0, Citrix Workspace app for iOS introduces smart card enhancements for improved authentication performance and usability. This update brings significant improvements to smart card support, making the user experience smoother and more efficient. With the integration of concurrent protocol support and fast smart card protocol, users can expect faster authentication and seamless use of smart card readers. The fast smart card is compatible with CNG (Crypto Next Generation) API on the Windows desktop.
Note:
Contact Citrix Help Desk to activate this feature.
Limitations:
- Concurrency is not fully supported in Citrix Workspace app iOS.
- Plug and Play is not supported.
Enforcing Citrix access using Citrix Workspace app
Starting with version 24.12.0, admins can mandate users on iOS devices to access Citrix Workspace exclusively through the native app. When this feature is enabled, users attempting to access the store URL and third-party browsers are automatically redirected to the Citrix Workspace app. This ensures they can take advantage of all the native app’s capabilities and enjoy a seamless user experience. Additionally, this feature gives admins greater control over the user environment and enhances security by keeping the authentication process within the native app, eliminating the need to download ICA files.
Admins can enable this feature using their Citrix Cloud account. This feature is currently supported for Cloud stores only. For more information, see Mandate end users to authenticate and access apps and desktops through native app.
Skip enable biometrics prompt
Previously, end users were prompted to choose whether to use biometrics Touch ID or Face ID for authentication in the Citrix Workspace app. Starting with version 24.9.0, administrators can now skip this prompt, streamlining the login process for users.
When biometrics are enabled, user passwords are securely stored in the keychain and protected by biometric authentication. Upon expiration of the authentication token, users are automatically prompted for biometric verification. If biometrics are not configured on the device, users need to manually enter their credentials when the token expires.
This feature is currently supported only for on-premise stores using Lightweight Directory Access Protocol (LDAP) authentication.
Configuration
The following methods can be used to enable the biometric authentication:
- Mobile Device Management (MDM)
- Global App Configuration service (GACS)
To enable biometric authentication through MDM, admins must use the following setting:
- Key:
settings_skip_consent_for_biometric_protected_password_saving - Value:
true/false -
Default value:
false– If set to
true, biometric re-login feature is automatically applied for end users, without providing them an option to select or decline it.– If set to
false, biometric re-login feature is optional, and users can choose to accept or decline it.
To enable biometric authentication through GACS, admins must use the following steps:
- Navigate to Workspace Configuration > App Configuration > Configure in Citrix Cloud.
- Under Citrix Workspace app, select Security and Authentication.
- Under Authentication, enable Skip use biometrics prompt.
For more information, see Support for configuring Citrix Workspace app settings through UEM.
Support for enforcing biometric authentication to access Citrix Workspace app
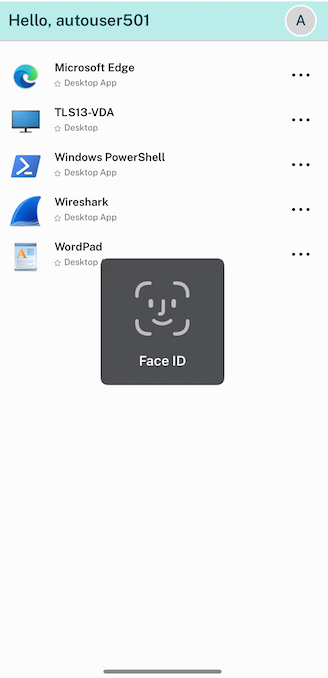
Administrators can now enforce a device’s biometric authentication to access Citrix Workspace app for their users. With this feature, when you open Citrix Workspace app after dismissing it or bring it to the forefront after minimizing it, a prompt for Face ID or Touch ID verification appears to unlock and sign in. If the device does not support biometric authentication, the password or passcode authentication method is used to access the app. If the passcode is not enabled on the device, the account is signed out, requiring the user to sign in again to access the Citrix Workspace application.
Administrators can configure this feature using the unified endpoint management solution with the following key value pairs:
- key: verify_biometric_on_app_foreground_transition
- value type: Boolean
-
value: true or false
- If set to true, biometric authentication is required for end users to access Citrix Workspace app.
- If set to false, biometric authentication is not enforced to access Citrix Workspace app. Users have the option to disable biometric authentication.
Support for authentication using FIDO2 when connecting to an on-premises store
Starting with the 24.7.0 version, users can authenticate to Citrix Workspace app for iOS using FIDO2-based password‑less authentication when connecting to an on-premises store. FIDO2 offers a seamless authentication method, allowing enterprise employees to access Citrix Workspace app for iOS without the need to enter user name or password. This feature supports both roaming (USB only) and platform authenticators (PIN code, Touch ID, and Face ID only).
You can configure this feature using the Global App Configuration Service and unified endpoint management.
Note:
This feature is supported only on the system browser.
Using Global App Configuration Service
To configure using Global App Configuration service, do the following steps:
- Sign in to Citrix Cloud with your credentials.
- Navigate to Workspace Configuration > App configuration.
- On the App configuration page, select the store and then tap Configure.
- On the Workspace URL page, navigate to Security and Authentication > Authentication.
-
Under Authentication browser type, select iOS and then select system from the drop-down menu.

- Tap Publish Drafts to publish the settings for the selected store.
For more information about Global App Configuration service, see Configure settings for on-premises stores in the Global App Configuration service documentation.
Using the unified endpoint management solutions
To configure using unified endpoint management, do the following steps:
- Sign in to your Unified Endpoint Management (UEM) provider.
- Add the Citrix Workspace app that you want to manage by your UEM provider. You can upload the app by using your UEM provider’s portal to enable management by your UEM provider. Alternatively, you can link to the app in the App Store.
- Create an app configuration policy for your app.
- Add the key and value pair to the XML property list and fill in the following values:
  <dict>
                    <key>category</key>
                    <string>authentication</string>
                    <key>userOverride</key>
                    <false/>
                    <key>settings</key>
                    <array>
                        <dict>
                            <key>name</key>
                            <string>settings_auth_web_browser</string>
                            <key>value</key>
                            <string>system</string>
                        </dict>
                    </array>
    </dict>
<!--NeedCopy-->
For more information, see Configure Workspace app using Unified Endpoint Management solutions.
Client certificate authentication
Important:
- When using StoreFront, Citrix Workspace app supports:
- Citrix Access Gateway Enterprise Edition Version 9.3
- NetScaler Gateway Version 10.x through Version 11.0
- Citrix Gateway Version 11.1 and later
- Citrix Workspace app for iOS supports client certificate authentication.
- Only Access Gateway Enterprise Edition 9.x and 10.x (and later releases) support client certificate authentication.
- Double-source authentication types must be CERT and LDAP.
- Citrix Workspace app also supports optional client certificate authentication.
- Only P12 formatted certificates are supported.
Users signing in to a Citrix Gateway virtual server can also be authenticated based on the attributes of the client certificate that is presented to the virtual server. Client certificate authentication can also be used with another authentication type, LDAP, to provide double-source authentication.
Administrators can authenticate end users based on the client-side certificate attributes as follows:
- the client authentication is enabled on the virtual server.
- the virtual server requests for a client certificate.
- to bind a root certificate to the virtual server on Citrix Gateway.
When users sign in to the Citrix Gateway virtual server, after authentication, users can extract the user name and domain information from the SubjectAltName:OtherName:MicrosoftUniversalPrincipalName field in the certificate. It is in the format username@domain.
The authentication is completed when the user extracts the user name and domain, and provides the required information (such as password). If the user does not provide a valid certificate and credentials, or if the username/domain extraction fails, authentication fails.
You can authenticate users based on the client certificate by setting the default authentication type to use the client certificate. You can also create a certificate action that defines what is to be done during the authentication based on a client SSL certificate.
To configure the XenApp® farm
Create a XenApp farm for mobile devices in the Citrix Virtual Apps™ console or Web Interface console. The console depends on the version of Citrix Virtual Apps that you’ve installed.
Citrix Workspace app uses a XenApp farm to get information about the applications a user has rights to. The same information is shared to the apps that are running on the device. This method is similar to the way that you use the Web Interface for traditional SSL-based Citrix Virtual Apps connections, where you can configure the Citrix Gateway.
Configure the XenApp farm for Citrix Workspace app for mobile devices to support connections from the Citrix Gateway as follows:
- In the XenApp farm, select Manage secure client access > Edit secure client access settings.
- Change the Access Method to Gateway Direct.
- Enter the FQDN of the Citrix Gateway appliance.
- Enter the Secure Ticket Authority (STA) information.
To configure the Citrix Gateway appliance
For client certificate authentication, configure Citrix Gateway with two-factor authentication using the Cert and LDAP authentication policies. To configure the Citrix Gateway appliance:
-
Create a session policy on Citrix Gateway to allow incoming Citrix Virtual Apps connections from Citrix Workspace app. Specify the location of your newly created XenApp farm.
-
Create a session policy to identify that the connection is from Citrix Workspace app. As you create the session policy, configure the following expression and choose Match All Expressions as the operator for the expression:
REQ.HTTP.HEADER User-Agent CONTAINS CitrixWorkspace -
In the associated profile configuration for the session policy, on the Security tab, set Default Authorization to Allow.
On the Published Applications tab, if the setting isn’t a global setting (you selected the Override Global checkbox), verify if the ICA® Proxy field is set to ON.
In the Web Interface Address field, enter the URL including the config.xml for the XenApp farm that the device users use, for example:
- /XenAppServerName/Citrix/PNAgent/config.xml or
- /XenAppServerName/CustomPath/config.xml.
-
Bind the session policy to a virtual server.
-
Create authentication policies for Cert and LDAP.
-
Bind the authentication policies to the virtual server.
-
Configure the virtual server to request client certificates in the TLS handshake. To do so, navigate to the Certificate > open SSL Parameters > Client Authentication > set Client Certificate to Mandatory.
Important:
- If the server certificate that is used on the Citrix Gateway is a part of a certificate chain. For example, if it is an intermediate certificate, then install the certificates on the Citrix Gateway. For information about installing certificates, see the Citrix Gateway documentation.
- The user needs to manually import the certificate if the client certificate is set to mandatory before authentication can be done.
-
To configure the mobile device
If client certificate authentication is enabled on Citrix Gateway, users are authenticated based on certain attributes of the client certificate. After authentication, you can extract the user name and domain from the certificate. You can apply specific policies for each user.
- From Citrix Workspace app, open the Account, and in the Server field, type the matching FQDN of your Citrix Gateway server. For example, GatewayClientCertificateServer.organization.com. Citrix Workspace app automatically detects that the client certificate is required.
- Users can either install a new certificate or choose one from the already installed certificate list. For iOS client certificate authentication, download and install the certificate from Citrix Workspace app only.
- After you select a valid certificate, the user name and domain fields on the sign-in screen is prepopulated using the user name from the certificate. An end user can type other details, including the password.
- If client certificate authentication is set to optional, users can skip the certificate selection by pressing Back on the certificates page. In this case, Citrix Workspace app proceeds with the connection and provides the user with the logon screen.
- After users complete the initial sign-in, they can start applications without providing the certificate again. Citrix Workspace app stores the certificate for the account and uses it automatically for future logon requests.
Support to switch web browser for authentication
Starting with the 23.2.0, administrators can now switch the browser being used for the authentication process from embedded browser to system browser on iOS or iPad devices, when an advanced authentication policy is configured on the on-premises Citrix Gateway and StoreFront Deployment.
Configure Rewrite policy for authentication process
Administrators can switch the browser being used for the authentication process from embedded browser to system browser. It is only possible when an advanced authentication policy is configured on the on-premises Citrix Gateway and StoreFront Deployment. To configure an advanced authentication policy, configure the NetScaler Rewrite policy by using the NetScaler command line:
enable ns feature REWRITEadd rewrite action insert_auth_browser_type_hdr_act insert_http_header X-Auth-WebBrowser "\"System\""add rewrite policy insert_auth_browser_type_hdr_pol "HTTP.REQ.URL.EQ(\"/cgi/authenticate\")" insert_auth_browser_type_hdr_actbind vpn vserver <VPN-vserver-Name> -policy insert_auth_browser_type_hdr_pol -priority 10 -gotoPriorityExpression END -type AAA_RESPONSE
Moving to the system browser provides more capabilities such as:
- Better experience with certificate-based authentication.
- Ability to use an existing user certificate from the device keystore during the authentication process.
- Support for few third-party authenticators like SITHS eID.
Embedded browser is used as the default browser for authentication if the administrator hasn’t configured the above Rewrite policy.
This table lists the browsers that are used for authentication based on the configuration on the NetScaler® Gateway and Global App Config Service:
| NetScaler Gateway | Global App Configuration Service | Browser used for authentication |
|---|---|---|
| System | System | System |
| System | Embedded | System |
| Embedded | System | System |
| Embedded | Embedded | Embedded |
| No Configuration | System | System |
| No Configuration | Embedded | Embedded |
Support certificate-based authentication for on-premises stores
End users can now handle certificate-based authentication where, the certificates are saved onto the device keychain. While signing in, Citrix Workspace app detects the list of certificates on your device, and you can choose a certificate for authentication.
Important:
After you choose the certificate, the selection persists for the next Citrix Workspace app launch. To choose another certificate, you can “Reset Safari” from iOS device settings or reinstall Citrix Workspace app.
Note:
This feature supports on-premises deployments.
To configure:
- Navigate to the Global App Configuration Store Settings API URL and enter the cloud store URL.
For example,
https://discovery.cem.cloud.us/ads/root/url/<hash coded store URL>/product/workspace/os/ios. - Navigate to API Exploration > SettingsController > postDiscoveryApiUsingPOST > click POST.
- Click INVOKE API.
-
Enter and upload the payload details. Select one of the following values:
- “Embedded”: you can use WKWebView. This option is set by default.
- “system”: you can use the Safari view controller.
For example,
"category": "Authentication",
"userOverride": false,
"settings": [
{ "name": "Web Browser to use for Authentication", "value": "*Embedded*/*System*" },
<!--NeedCopy-->
On iOS or iPad devices, administrators can switch the browser being used for the authentication process. You can switch from embedded browser to system browser, when an advanced authentication policy is configured on the on-premises Citrix Gateway and StoreFront Deployment. For more information, see Configure Rewrite policy for authentication process.
- Click EXECUTE to push the service.
Smart cards
Citrix Workspace app supports SITHS smart cards for in-session connections only.
If you’re using FIPS Citrix Gateway devices, configure your systems to deny SSL renegotiations. For details, see Knowledge Center article CTX123680.
The following products and configurations are supported:
- Supported readers:
- Precise Biometrics Tactivo for iPad Mini Firmware version 3.8.0
- Precise Biometrics Tactivo for iPad (fourth generation) and Tactivo for iPad (third generation) and iPad 2 Firmware version 3.8.0
- BaiMobile® 301MP and 301MP-L Smart Card Readers
- Thursby PKard USB reader
- Feitian iR301 USB reader
- Type-C CCID-compliant readers
- Twocanoes smart card utility reader
- Supported VDA Smart Card Middleware
- ActiveIdentity
- Supported smartcards:
- PIV cards
- Common Access Card (CAC)
- Supported configurations:
- Smart card authentication to Citrix Gateway with StoreFront 2.x and XenDesktop 7.x or later or XenApp 6.5 or later
To configure Citrix Workspace app to access apps
-
If you want to configure Citrix Workspace app automatically to access apps when you create an account, in the Address field, type the matching URL of your store. For example:
- StoreFront.organization.com
- netscalervserver.organization.com
-
Select the Use Smartcard option when you’re using a smart card to authenticate.
Note:
Logons to the store are valid for about one hour. After that time, users must log on again to refresh or launch other applications.
Support for Type C-based Generic Readers
Starting with the 23.12.0 version, Citrix Workspace app for iOS now supports Type-C CCID compliant readers for Smart Card authentication. Previously, only lightning port-based readers were supported. The inclusion of Type-C smart card readers within the Citrix Workspace app offers dual advantages: users can authenticate through Citrix Workspace app and seamlessly use the smart card within their virtual desktop sessions.
Support for the Twocanoes smart card utility reader
Starting with the 24.3.5 version, Citrix Workspace app for iOS supports the Twocanoes smartcard utility readers. For more information about supported smart card readers, see Smart Cards.
Note:
The Twocanoes smart card utility USB-C reader is supported for both Citrix Workspace app login and virtual session login. However, the Twocanoes smart card utility Bluetooth reader is supported only for Citrix Workspace app login and not for virtual session login.
To configure the Twocanoes smart card utility Bluetooth reader, do the following steps:
- Download and install the Smart Card Utility app from the App store. For more information, see Smart Card Utility Bluetooth Reader Quick Start in the Twocanoes knowledge base.
- Make sure that the Bluetooth on your device is turned on and the smart card is inserted into the reader.
-
Open the Smart Card Utility app.
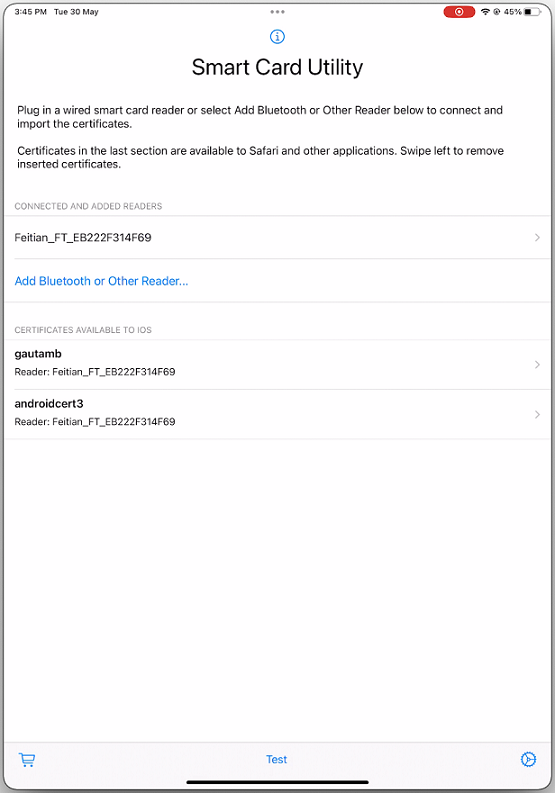
- If you are using the Bluetooth reader, then tap Add Bluetooth or Other Reader… and select your reader to connect.
Note:
If the reader is enabled with pin pairing, then you must enter the PIN when prompted. The PIN is available on the backside of the reader.
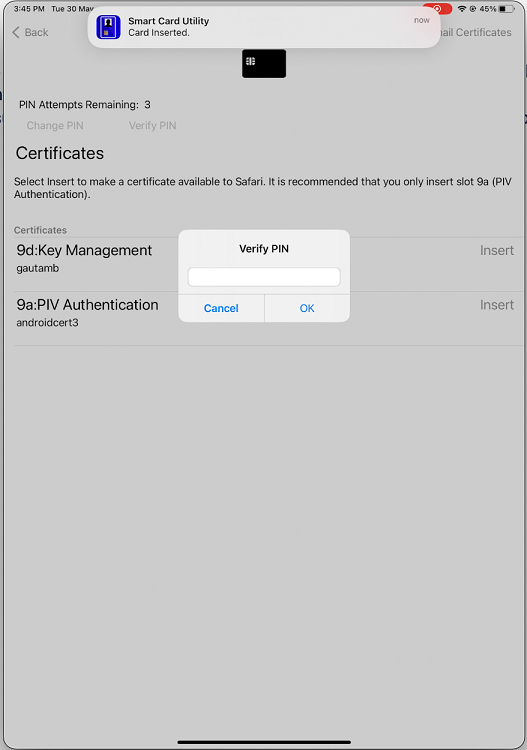
- Tap Insert on the required certificate to copy it to the keychain interface.
Note:
The Smart Card Utility app has implemented a cryptokit extension provided by Apple to write certificates to the keychain interface in the form of tokens. For more information, see Configure Smart Card Authentication in the Apple developer documentation.
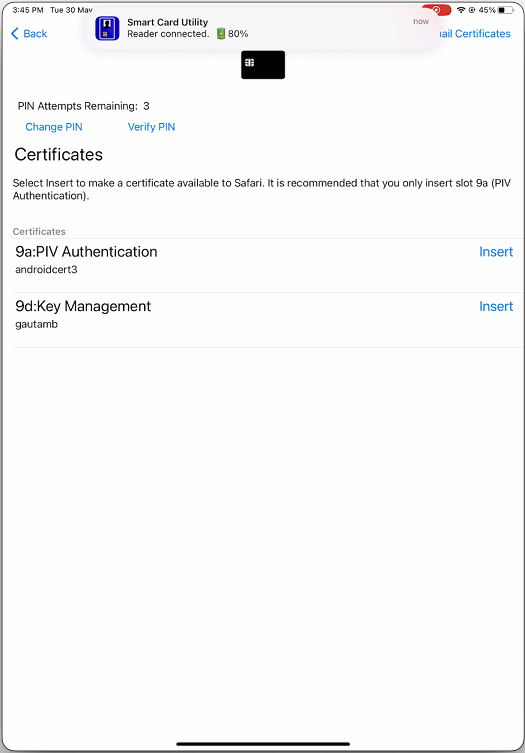
- Make sure that the reader remains connected to the device.
-
Open Citrix Workspace app and enter the store URL that is configured with smart card authentication.
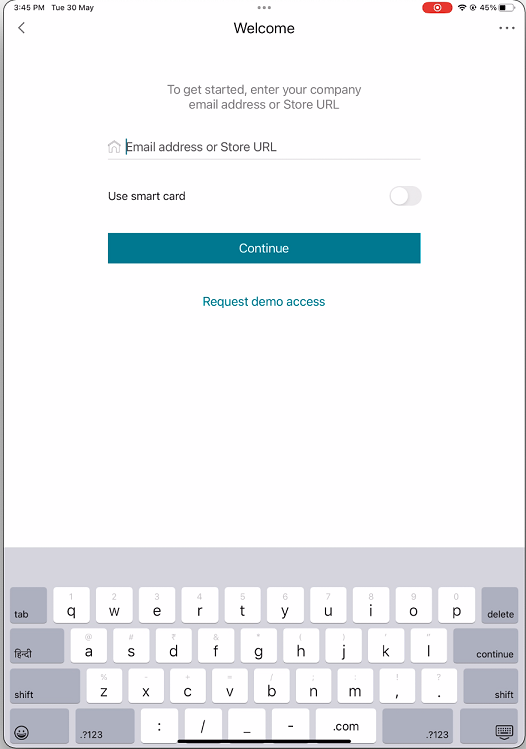
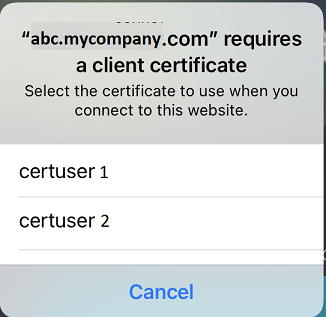
-
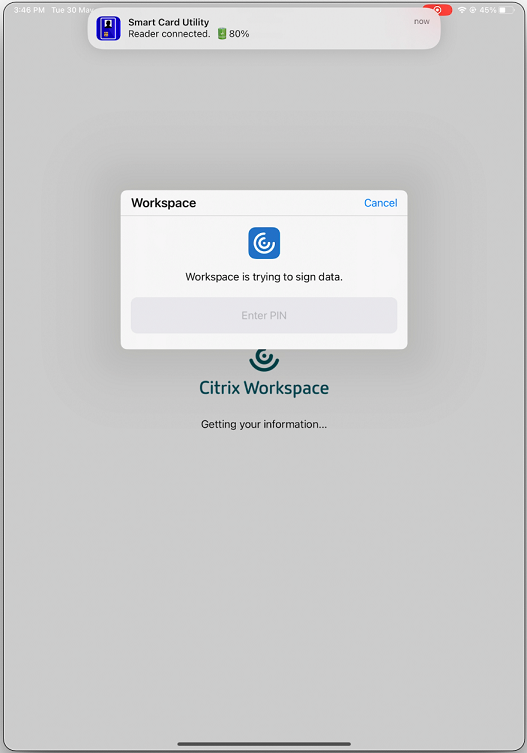
On the Certificates screen, select the required certificate and enter the smart card PIN provided by your IT administrator to sign in.
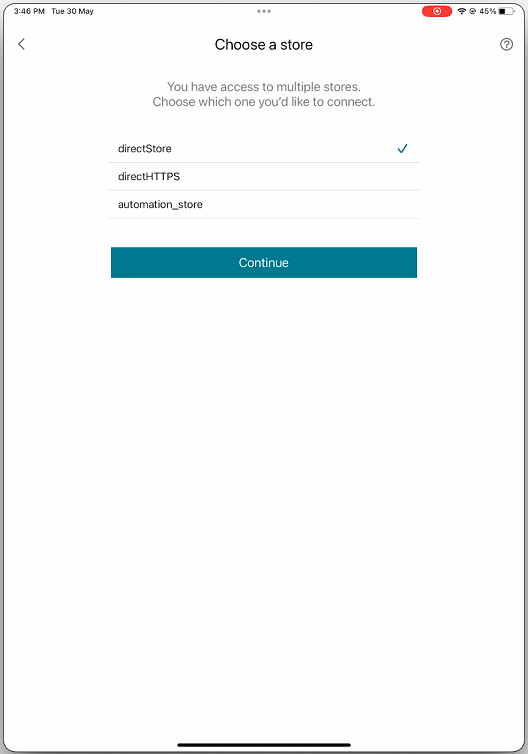
-
If you have access to multiple stores, then select the required store and tap Continue.
- After successful authentication, you are signed in to the Citrix Workspace app.
YubiKey support for smart card authentication
Starting with the 23.12.0 version, you can now perform smart card authentication using YubiKey. This feature provides a single-device authentication experience for Citrix Workspace app and for the virtual sessions and published apps in the VDA session. It eliminates the need to connect smart card readers or other external authenticators. It simplifies the end-user experience as YubiKey supports a wide variety of protocols, such as OTP, FIDO and so on.
To sign in to Citrix Workspace app, end users need to insert the YubiKey into their iPhone or iPad, turn on the Smart card toggle, and provide their Store URL.
Note:
This feature supports only direct connection to Citrix Workspace app on StoreFront deployments and not through Citrix Gateway. The YubiKey support for smart card authentication through Citrix Gateway will be available on the future release. Citrix Workspace app for iOS supports only the YubiKey 5 series. For more information on YubiKey, see YubiKey 5 series.
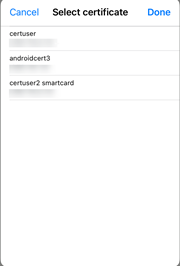
Support for multiple certificates in smart card authentication
Previously, Citrix Workspace app for iOS displayed the certificate available on the first slot of the connected smart card.
Starting with the 24.1.0 version, Citrix Workspace app for iOS displays all the certificates available on the smart card. This feature allows you to select the required certificate while authenticating through smart card authentication.
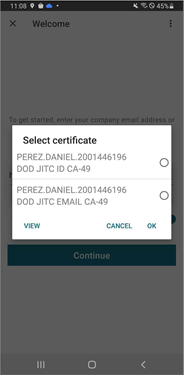
View all certificates available on smart card
Starting with the 23.7.5 version, Citrix Workspace app for iOS now displays multiple certificates available on the smart card and allows you to select the certificate for smart card-based authentication. The required certificate can be selected from the Select certificate page once the smart card toggle has been enabled.
RSA SecurID authentication
Citrix Workspace app supports RSA SecurID authentication for Secure Web Gateway configurations. The configurations are through the Web Interface and for all Citrix Gateway configurations.
URL scheme required for the software token on Citrix Workspace app for iOS: The RSA SecurID software token used by Citrix Workspace app registers the URL scheme com.citrix.securid only.
If end users have installed both the Citrix Workspace app and the RSA SecurID app on their iOS device, users must select the URL scheme com.citrix.securid to import the RSA SecurID Software Authenticator (software token) to Citrix Workspace app on their devices.
To import an RSA SecurID soft token
To use an RSA Soft Token with the Citrix Workspace app, as an administrator, ensure that the end users follow:
- the policy for PIN length
- the type of PIN (numeric only and alphanumeric)
- the limits on PIN reuse
After the end user is successfully authenticated to the RSA server, the end user needs to set up the PIN only once. After the PIN verification, they’re also authenticated with the StoreFront server. After all the verification, the Workspace app displays available published applications and desktops.
To use an RSA soft token
-
Import the RSA soft token provided to you by your organization.
-
From the email with your SecurID file attached, select Open in Workspace as the import destination. After the soft token is imported, Citrix Workspace app opens automatically.
-
If your organization provided a password to complete the import, enter the password provided to you by your organization and click OK. After clicking OK, you’ll see a message that the token was successfully imported.
-
Close the import message, and in Citrix Workspace app, tap Add Account.
-
Enter the URL for the Store provided by your organization and click Next.
-
On the Log On screen, enter your credentials: user name, password, and domain. For the Pin field, enter 0000, unless your organization has provided you with a different default PIN. The PIN 0000 is an RSA default, but your organization might have changed it to follow with their security policies.
-
At the top left, click Log On. A message appears to create a PIN.
- Enter a PIN that is 4 to 8 digits long and click OK. A message appears to verify your new PIN.
- Enter your PIN again and click OK. You can now access your apps and desktops.
Next Token Code
Citrix Workspace app supports the next token code feature when you configure Citrix Gateway with RSA SecurID authentication. If you enter three incorrect passwords, an error message appears on the Citrix Gateway plug-in. To sign in, wait for the next token. The RSA server can be configured to disable a user’s account if a user logs on too many times with an incorrect password.
Derived credentials
Support for Purebred derived credentials within Citrix Workspace app is available. When connecting to a Store that allows derived credentials, users can log on to Citrix Workspace app using a virtual smart card. This feature is supported only on on-premises deployments.
Note:
Citrix Virtual Apps and Desktops™ 7 1808 or later are required to use this feature.
To enable derived credentials in Citrix Workspace app:
- Go to Settings > Advanced > Derived Credentials.
- Tap Use Derived Credentials.
To create a virtual smart card to use with derived credentials:
- In Settings > Advanced > Derived Credentials, tap Add New Virtual Smart Card.
- Edit the name of the virtual smart card.
- Enter an 8-digit numeric-only PIN and confirm.
- Tap Next.
- Under Authentication Certificate, tap Import Certificate…
- The document picker displays. Tap Browse.
- Under Locations, select Purebred Key Chain.
- Select the suitable authentication certificate from the list.
- Tap Import Key.
- Repeat steps 5–9 for the Digital Signature Certificate and the Encryption Certificate, if wished.
- Tap Save.
You can import three or less certificates for your virtual smart card. The authentication certificate is required for the virtual smart card to work properly. The encryption certificate and digital signature certificate can be added for use in a VDA session.
Note:
When connecting to an HDX™ session, the created virtual smart card is redirected into the session.
Known limitations
- Users can only have one active card at a time.
- Once a virtual smart card is created, it can’t be edited. Delete and create the card.
- A PIN can be invalid up to ten times. If it is invalid after ten tries then the virtual smart card gets deleted.
- When you select derived credentials, the virtual smart card overrides a physical smart card.
User-Agent
Citrix Workspace app sends a User-Agent string in network requests that can be used to configure authentication policies including redirection of authentication to other Identity Providers (IdPs).
Note
The version numbers mentioned as part of the User-Agent in the following table are examples and it is automatically updated based on the versions that you are using.
| Scenario | iOS (WkWebView) | iOS (Safari View Controller) | iPadOS (WkWebView) | iPadOS (Safari View Controller) |
|---|---|---|---|---|
| Cloud store | Mozilla/5.0 (Macintosh; Intel Mac OS X 10_15_7) AppleWebKit/605.1.15 (KHTML, like Gecko) Mobile/15E148 CWA/24.7.0 iOS/18.0 X1Class CWACapable 302RedirectionCapable CFNetwork Darwin CWA-iPhone AuthManager/24.7.0.1 | Default Safari User-Agent string. | Mozilla/5.0 (Macintosh; Intel Mac OS X 10_15_7) AppleWebKit/605.1.15 (KHTML, like Gecko) Mobile/15E148 CWA/24.7.0 iOS/18.0 X1Class CWACapable 302RedirectionCapable CFNetwork Darwin CWA-iPad AuthManager/24.7.0.1. | Default Safari User-Agent string. |
| Cloud store - SaaS and Web app
|
Default WKWebview User-Agent string.
|
Default Safari User-Agent string.
|
If isFeatureUseSafariUserAgentForSaasWebviewEnabled is enabled, then following User-Agent is sent
Mozilla/5.0 (Macintosh; Intel Mac OS X 10_15) AppleWebKit/605.1.15 (KHTML, like Gecko) / Version/13.4 If Safari/605.1.15 shouldTunnelWebViewTraffic is set to True, then following User-Agent is sent Mozilla/5.0 (Macintosh; Intel Mac OS X 10_15) AppleWebKit/605.1.15 (KHTML, like Gecko) / Version/13.4 Safari/605.1.15/CitrixReceiver/24.5.0/ X1Class CWACapable |
Default Safari User-Agent string.
|
| On-premises store | Default WKWebview User-Agent string. | Default Safari User-Agent string. | — | Default Safari User-Agent string. |
| On-premises store with NetScaler Gateway | Default WKWebview User-Agent string. | Default Safari User-Agent string. | Mozilla/5.0 (Macintosh; Intel Mac OS X 10_15_7) AppleWebKit/605.1.15 (KHTML, like Gecko) Mobile/15E148 CWA/24.7.0 iOS/18.0 X1Class CWACapable 302RedirectionCapable CFNetwork Darwin CWA-iPad AuthManager/24.7.0.1 | Default Safari User-Agent string. |
| On-premises store with NetScaler Gateway and nFactor authentication | Mozilla/5.0 (Macintosh; Intel Mac OS X 10_15_7) AppleWebKit/605.1.15 (KHTML, like Gecko) Mobile/15E148 CWA/24.7.0 iOS/18.0 X1Class CWACapable 302RedirectionCapable CFNetwork Darwin CWA-iPhone AuthManager/24.7.0.1 | Default Safari User-Agent string. | Mozilla/5.0 (Macintosh; Intel Mac OS X 10_15_7) AppleWebKit/605.1.15 (KHTML, like Gecko) Mobile/15E148 CWA/24.7.0 iOS/18.0 X1Class CWACapable 302RedirectionCapable CFNetwork Darwin CWA-iPad AuthManager/24.7.0.1 | Default Safari User-Agent string. |
User-agent string for WKWebView
Starting with the 23.3.5 version, the user-agent string used during some of the network requests initiated through WKWebView now includes the Citrix Workspace app identifier by default.
Therefore, it has been changed from:
Mozilla/5.0 (iPhone; CPU iPhone OS 15_2 like Mac OS X) AppleWebKit/605.1.15 (KHTML, like Gecko) Mobile/15E148 AuthManager/3.2.4.0
To one of the following:
Mozilla/5.0 (iPhone; CPU iPhone OS 15_0 like Mac OS X) AppleWebKit/605.1.15 (KHTML, like Gecko) Mobile/15E148 CWA/23.3.0 iOS/15.0 X1Class CWACapable 302RedirectionCapable CFNetwork Darwin CWA-iPhone (iPhone example)
Or
Mozilla/5.0 (iPhone; CPU iPhone OS 15_0 like Mac OS X) AppleWebKit/605.1.15 (KHTML, like Gecko) Mobile/15E148 CWA/23.3.0 iOS/15.0 X1Class CWACapable 302RedirectionCapable CFNetwork Darwin CWA-iPad (iPad example)
nFactor authentication
Support for multi-factor (nFactor) authentication
Multifactor authentication enhances the security of an application by requiring users to provide multiple proofs of identification to gain access. Multifactor authentication makes authentication steps and the associated credential collection forms configurable by the administrator.
Native Citrix Workspace app can support this protocol by building on the Forms logon support already implemented for StoreFront. The web logon page for Citrix Gateway and Traffic Manager virtual servers also consumes this protocol.
For more information, see SAML authentication, and Multi-Factor (nFactor) authentication.
Limitations:
- With nFactor support enabled, you can’t use biometric authentication such as Touch ID and Face ID.
nFactor Advanced authentication policy support
We now support certificate-based authentication on Citrix Workspace app when configured through nFactor Advanced authentication policies on Citrix Gateway. nFactor authentication helps configure flexible and agile multi-factor schemas.
User-agent string:
While performing advanced (nFactor) authentication for Citrix Workspace app an iPhone or iPad, the authentication process is redirected to an embedded WebView. The resultant user agent string might vary slightly based on the OS version, the CWA build version, the device model, and the AuthManager version. For example, consider the following user agent strings for iPhone and iPad.
For iPhone:
Mozilla/5.0 (iPhone; CPU iPhone OS 16_2 like Mac OS X) AppleWebKit/605.1.15 (KHTML, like Gecko) Mobile/15E148 CWA/23.5.0 iOS/16.2 X1Class CWACapable 302RedirectionCapable CFNetwork Darwin CWA-iPhone AuthManager/3.3.0.0
For iPad:
Mozilla/5.0 (Macintosh; Intel Mac OS X 10_15_6) AppleWebKit/605.1.15 (KHTML, like Gecko) Mobile/15E148 CWA/23.5.0 iOS/15.0 X1Class CWACapable 302RedirectionCapable CFNetwork Darwin CWA-iPad AuthManager/3.3.0.0
Note:
- The version or device model information might vary based on the environment.
- To apply Citrix Workspace app for iOS-specific user agent-based policies during authentication, use the following keywords:
- iOS
- CWA
- CWACapable
Support for FIDO2-based authentication when connecting to HDX session
Starting with the 23.9.0 version, Citrix Workspace app for iOS now supports password-less authentication within a Citrix Virtual Apps and Desktops session using FIDO2-based authentication methods. This feature allows users to sign in to a WebAuthn-supported website in browsers such as Google Chrome or Microsoft Edge using FIDO2-supported Yubico security keys. Simply opening a WebAuthn-supported website triggers password-less authentication. Only lightning port-based devices are supported (devices with USB-C or USB 4 ports aren’t supported). Signing in to the Citrix Workspace app or desktop session using password-less authentication isn’t supported.
For more information about the prerequisites, see Local authorization and virtual authentication using FIDO2 in the Citrix Virtual Apps and Desktops documentation.
Support for authentication using FIDO2 when connecting to a cloud store
Starting with the 24.5.0 version, users can authenticate to Citrix Workspace app using FIDO2-based password‑less authentication when connecting to a cloud store. FIDO2 offers a seamless authentication method, allowing enterprise employees to access apps and desktops within virtual sessions without the need to enter user name or password. This feature supports both roaming (USB only) and platform authenticators (PIN code, Touch ID, and Face ID only). This feature is enabled by default.
Note:
FIdO2 authentication is supported with the Chrome custom tabs by default. If you are interested in using FIDO2 authentication with WebView, register your interest using this Podio form.
Support for configuring storage of authentication tokens on the on-premises deployment
Citrix Workspace app for iOS now provides an option to configure the storage of authentication tokens on the local disk for on-premises stores. With this feature, you can disable the storage of the authentication token for the enhanced security. After disabling, when the system or session restarts, you need to authenticate again to access the session.
To disable the storage of authentication tokens on the on-premises deployment using the administration config file, do the following:
- Use a text editor to open the web.config file, which is typically at
C:\inetpub\wwwroot\Citrix\Roaming directory. - Locate the user account element in the file (store is the account name of your deployment).
For example:
<account id=... name="Store"> - Before the
</account>tag, navigate to the properties of that user account and add the following:
    <properties>
        <property name="TokenPersistence" value="false" />
    </properties>
<!--NeedCopy-->
The following is an example of the web.config file:
    <account id="#########################################" name="Store Service"
        description="" published="true" updaterType="None" remoteAccessType="StoresOnly">
        <annotatedServices>
            <clear />
            <annotatedServiceRecord serviceRef="1__Citrix_Store">
                <metadata>
                    <plugins>
                        <clear />
                    </plugins>
                    <trustSettings>
                        <clear />
                    </trustSettings>
                    <properties>
                        <clear />
                        <property name="TokenPersistence" value="false" />
                     </properties>
                </metadata>
            </annotatedServiceRecord>
        </annotatedServices>
        <metadata>
        <plugins>
          <clear />
        </plugins>
        <trustSettings>
          <clear />
        </trustSettings>
        <properties>
        </properties>
     </metadata>
    </account>
<!--NeedCopy-->
Reauthentication after session timeout
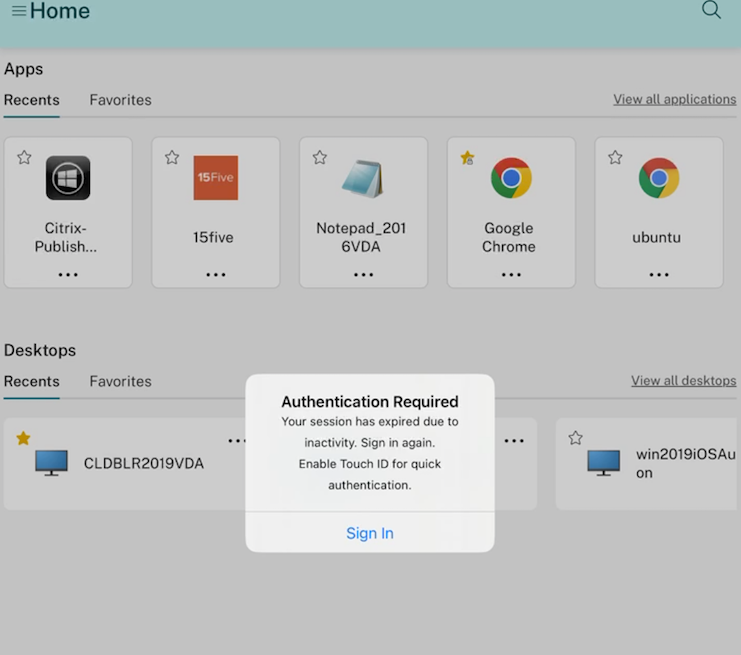
Starting with the 23.3.0 version, you are now prompted to reauthenticate to the Citrix Workspace app if your session has expired since your last sign-in. You are prompted for two-factor authentication or a username and password when connecting to the Citrix Workspace app from the web or a native client.
In this article
- Enhanced Citrix® security with pre-populated user name
- Fast smart card
- Enforcing Citrix access using Citrix Workspace app
- Skip enable biometrics prompt
- Support for authentication using FIDO2 when connecting to an on-premises store
- Client certificate authentication
- Smart cards
- YubiKey support for smart card authentication
- Support for multiple certificates in smart card authentication
- View all certificates available on smart card
- RSA SecurID authentication
- Derived credentials
- User-Agent
- User-agent string for WKWebView
- nFactor authentication
- Support for FIDO2-based authentication when connecting to HDX session
- Support for authentication using FIDO2 when connecting to a cloud store
- Support for configuring storage of authentication tokens on the on-premises deployment
- Reauthentication after session timeout