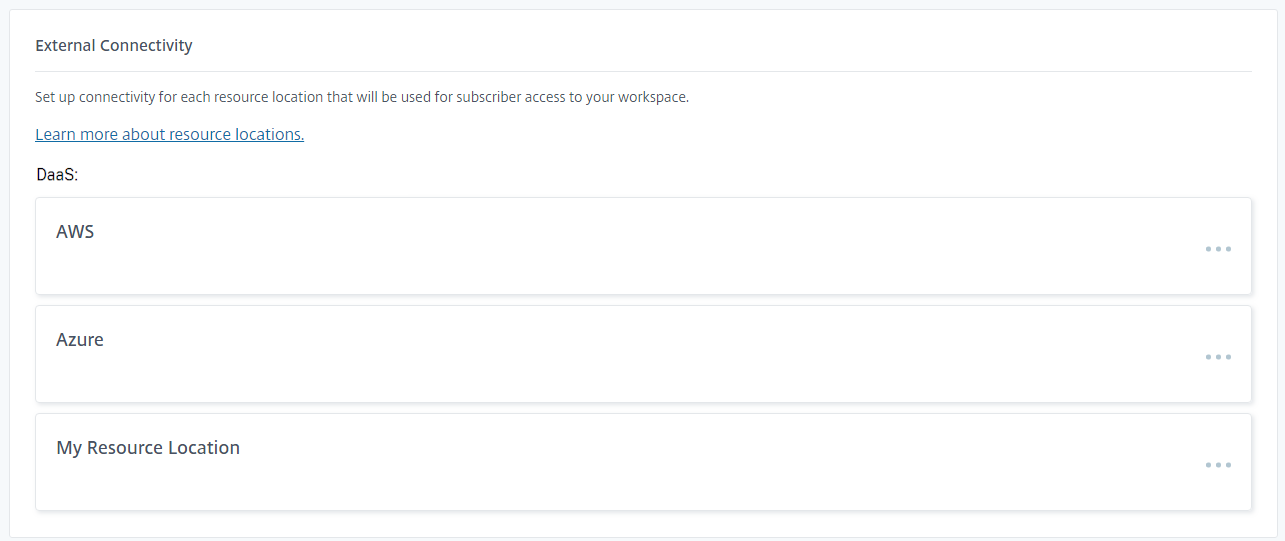
Connectivity to DaaS resources
Devices that are not on the same network as the VDAs hosting your virtual apps and desktops must connect via Citrix Gateway Service or a NetScaler Gateway. The Exernal connectivity panel lists each resource locations and allows you to configure how users connect to DaaS resources in those locations.
The experience depends on whether Adaptive access is enabled.
Connectivity options when Adaptive access is disabled
If Adaptive access is disabled then you can define a single Gateway for each resource location. The system uses this gateway unless:
- The device’s public IP address matches a Network location. When Adaptive access is disabled, Network Locations do not have a connectivity type; all network locations are considered to be internal.
- If your end users use a web browser to open apps and desktops, the client uses Websockets to connect to the VDA which requires the VDAs are configured for TLS. If the VDA does not have TLS enabled, Citrix® StoreFront Cloud always routes launches through a gateway, even for internal network locations.
- When defining network locations, it is not possible to distinguish networks that share the same public IP address. For instance if your corporate network and guest wi-fi both use the same public IP address, and you create a Network location for this IP, this will prevent the gateway from being used for the guest wi-fi which may not be desired.
- HDX direct is enabled and the client determines that it can bypass the gateway and connect directly to the resource. When using HDX direct, there is no need to define network locations to allow direct connectivity.
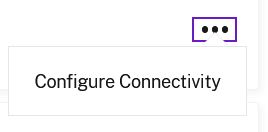
To edit the connectivity options:
-
Select … to open the menu
-
Select Configure Connectivity.
-
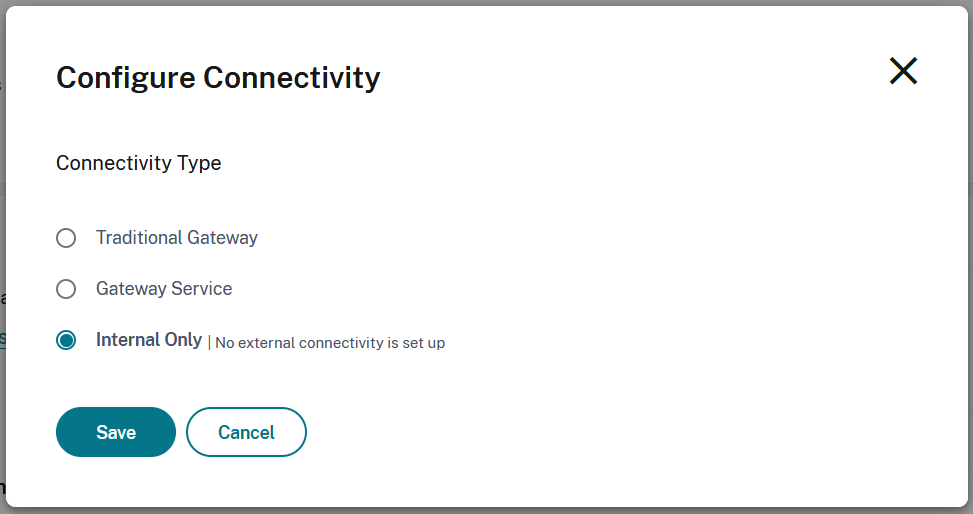
Choose and configure the desired connectivity option.
-
Select Save.
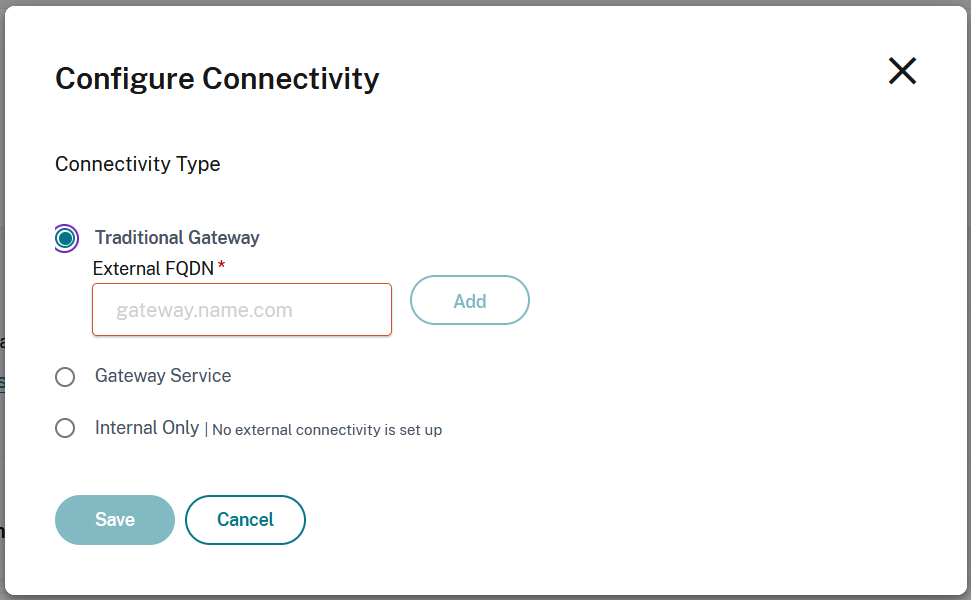
Traditional Gateway
You can use a NetScaler gateway for HDX routing.
Warning
Service continuity is not available when using a NetScaler Gateway. It is recommended that you use Citrix Gateway Service.
-
On the Configure Connectivity screen, select Traditional Gateway.
-
Enter the address of the gateway and select Add.
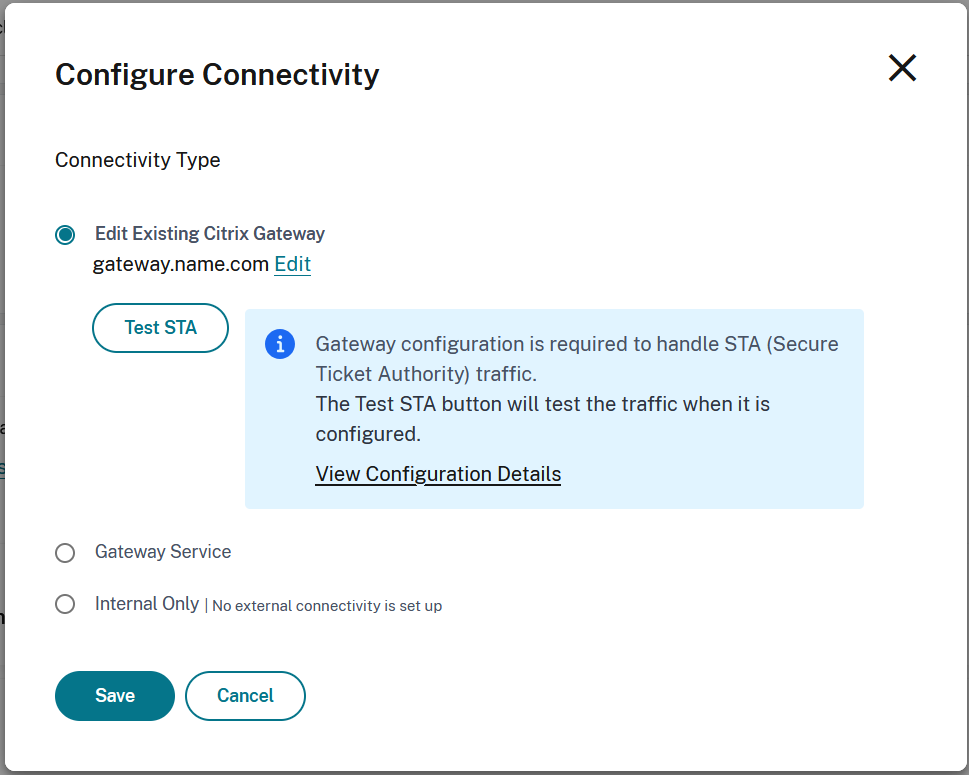
-
In the NetScaler Virtual Server configuration STA server list, add all of the Cloud Connectors for the resource location. Currently STA tickets are created by the cloud ticketing authority as long as the NetScaler Gateway can connect to one active Cloud Connector then it can reach the cloud ticketing authority. However in the future STA tickts will be created by a randomly assigned connector in the resource location so it is important that the NetScaler Gateway is configured with the complete list of all connectors in the resoure location.
-
Select Test STA to check connectivity.
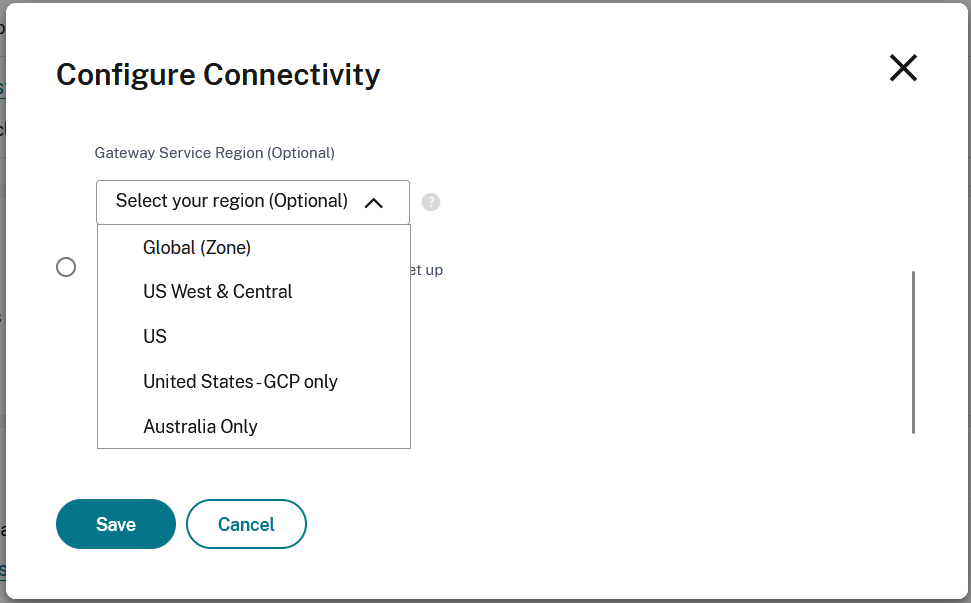
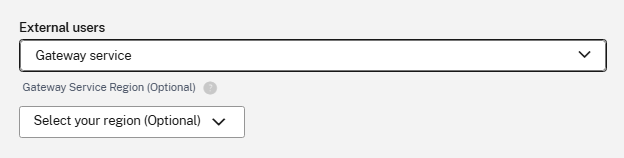
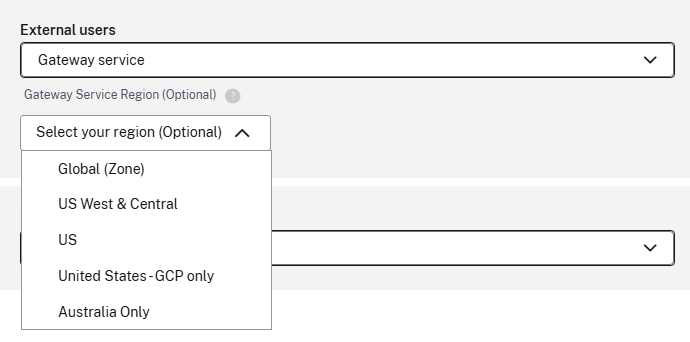
Gateway Service
You can use the Citrix Gateway Service to provide connectivity to resources without needing to deploy any infrastructure other than Cloud Connectors. Endpoints connect to one of the Citrix Gateway Service points of presence and HDX traffic is routed via the cloud connector to the VDA.

By default Citrix Gateway Service uses the point of presence nearer to the user. You can optionally choose a specific Gateway Service region.
Internal only
If you select Internal only then clients can only connect to resources if they have direct network connectivity.
Connectivity options when Adaptive access is enabled
If Adaptive access is enabled, you can configure different connectivity depending on whether the device’s public IP address maps to a Network location whose Connectivity type is Internal or External, or is Undefined (meaning it does not map to a Network location).
Notes:
It is not possible to distinguish between different networks with the same public IP address. For instance if your corporate network and guest wi-fi both use the same public IP address, they will map to the same Network location so use the same configuration.
The HTML5 HDX client must connect to the VDA using a secure TLS connection. If an HTML5 HDX client tries to connect to a resource hosted on a VDA not configured for TLS, Citrix® StoreFront Cloud always uses the configuration specified for Undefined network locations, regardless of the device’s actual location.
Regardless of the connectivity configuration, if you have enabled HDX direct, then the client will use a direct connection if possible.
To edit the connectivity options:
-
Select … to open the menu
-
Select Configure Connectivity.
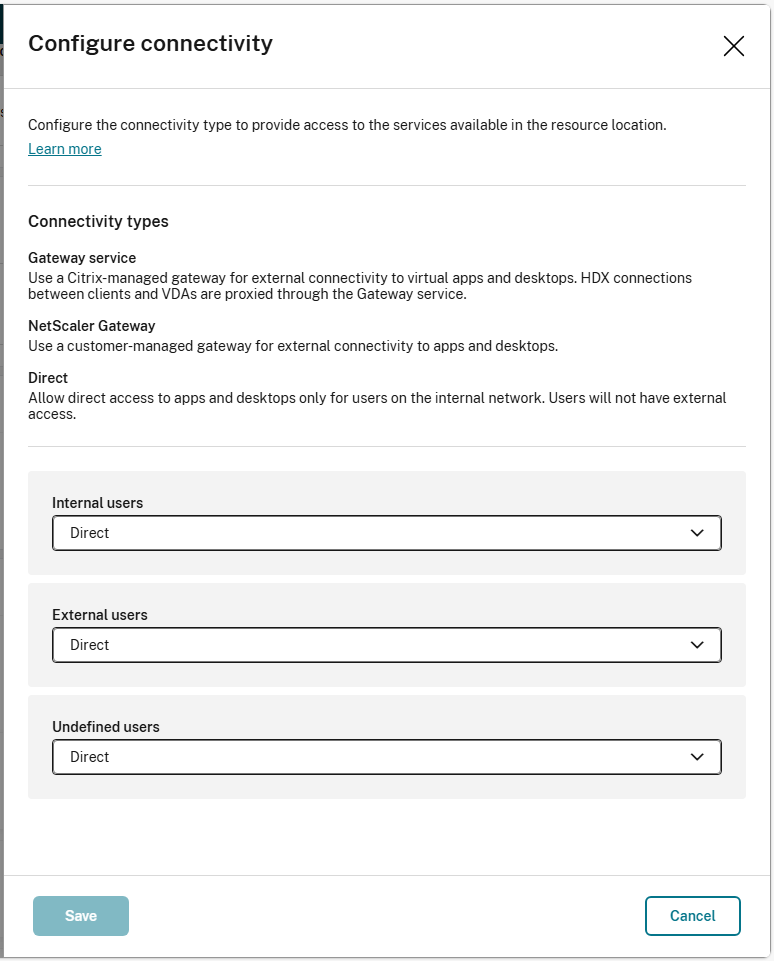
-
For each connectivity type, choose and configure the desired connectivity option.
-
Select Save.
NetScaler Gateway
You can use a NetScaler gateway for HDX routing.
Warning:
There is no service continuity when using a NetScaler Gateway.
-
On the Configure Connectivity screen, select NetScaler Gateway.

-
Enter the address of the gateway and select Add.
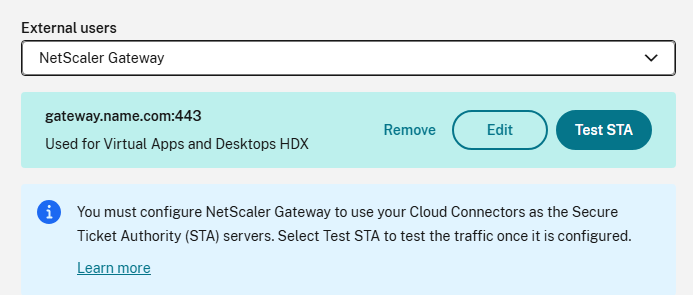
-
In the NetScaler Virtual Server configuration STA server list, add all of the Cloud Connectors for the resource location. Currently STA tickets are created by the cloud ticketing authority as long as the NetScaler Gateway can connect to one active Cloud Connector then it can reach the cloud ticketing authority. However in the future STA tickets will be created by a randomly assigned connector in the resource location so it is important that the NetScaler Gateway is configured with the complete list of all connectors in the resource location.
-
Select Test STA to check connectivity.
Gateway Service
You can use the Citrix Gateway Service to provide connectivity to resources without needing to deploy any infrastructure other than Cloud Connectors. Endpoints connect to one of the Citrix Gateway Service points of presence and HDX traffic is routed via the cloud connector to the VDA.
By default Citrix Gateway Service uses the point of presence nearer to the user. You can optionally choose a specific Gateway Service region.
Direct
If you select Direct then clients can only connect to resources if they have direct network connectivity.

Troubleshooting
To verify that launches being routed as expected, use one of the following methods:
- View VDA connections through Monitor.
- Use ICA® file logging to verify the correct addressing of the client connection.
Citrix Montior
From Citrix Monitor, search for a user with an active session. In the Session Details section of the console, direct VDA connections display as UDP connections while gateway connections display as TCP connections.
If you don’t see UDP on the DaaS Console then you must enable the HDX™ Adaptive Transport Policy for the VDAs.
ICA file logging
Enable ICA file logging on the client computer as described in Citrix Workspace app for Windows documentation. After launching sessions, examine the Address and SSLProxyHost entries in the logged ICA file.
Direct VDA connections
For direct VDA connections, the Address property contains the VDA’s IP address and port.
Here’s an example of an ICA file when a client launches an application using the NLS:
[Notepad++ Cloud]
Address=;10.0.1.54:1494
SSLEnable=Off
<!--NeedCopy-->
The SSLProxyHost property isn’t present in this file. This property is included only for launches through a gateway.
Gateway connections
For gateway connections, the Address property contains the Citrix Cloud STA ticket, the SSLEnable property is set to On, and the SSLProxyHost property contains the gateway’s FQDN and port.
Here’s an example of an ICA file when a client has a connection through the Citrix Gateway service and launches an application:
[PowerShell ISE Cloud]
Address=;40;CWSSTA;027C02199068B33889A40C819A85CBB4
SSLEnable=On
SSLProxyHost=global.g.nssvcstaging.net:443
<!--NeedCopy-->
Here’s an example of an ICA file when a client has a connection through an on-premises gateway and launches an application using an on-premises gateway that is configured within the resource location:
[PowerShell ISE Cloud]
Address=;40;CWSSTA;027C02199068B33889A40C819A85CBB5
SSLEnable=On
SSLProxyHost=onpremgateway.domain.com:443
<!--NeedCopy-->
Note:
On-premises gateway virtual servers that are used to launch virtual apps and desktops must be VPN virtual servers, not nFactor authentication virtual servers. The nFactor authentication virtual servers are for user authentication only and don’t proxy resource HDX and ICA launch traffic.
VDA launch failures
If VDA sessions are failing to launch, verify you’re using public IP address ranges from the correct network. When configuring your network locations, you must use the public IP address ranges of the network where your internal users are connecting from to reach the Internet.
Internal VDA launches still routed through the gateway
If VDA sessions launched internally are still being routed through the gateway as if they were external sessions, verify you’re using the correct public IP address that your internal users are connecting from to reach their store. The public IP address listed in the NLS site must correspond to the address that the client launching the resources uses to access the Internet. To obtain the correct public IP address for the client, log on to the client machine, visit a search engine, and enter “what is my ip” in the search bar.
All clients that launch resources within the same office location typically access the Internet using the same network egress public IP address. These clients must have an internet network route to the subnets where the VDAs reside, which isn’t blocked by a firewall.