Configure settings for cloud stores
Overview
You can configure Citrix Workspace™ app settings for cloud stores using the Global App Configuration service (GACS). It helps admins configure and manage Citrix Workspace app for end users on both managed and unmanaged devices. This service is supported on Windows, Mac, Android, iOS, HTML5, and ChromeOS platforms.
Prerequisites
-
The addresses
<https://discovery.cem.cloud.us>,<https://gacs-discovery.cloud.com>, and<https://gacs-config.cloud.com>must be contactable. It’s required for the functioning of email-based discovery and Global App Configuration service. -
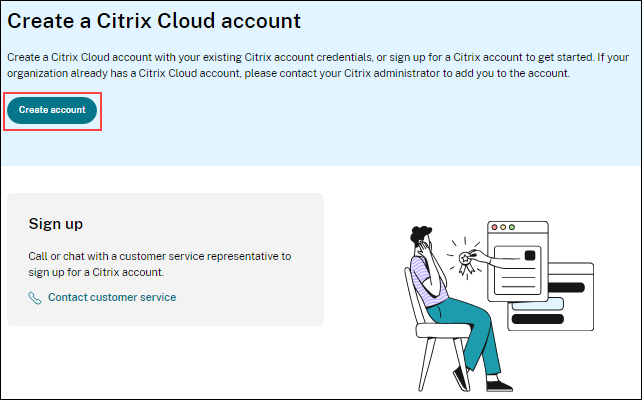
Verify that you have access to a Citrix Cloud account. If not, you can create an account from https://onboarding.cloud.com/. For more information, refer to Sign up for Citrix Cloud.
-
Verify that you have a Citrix® StoreFront Cloud subscription.
Get started with configuration
You can sign in to your Citrix Cloud™ account and configure settings from StoreFront Cloud > App configuration. Before proceeding, verify if you have the following permissions.
-
store subscription: The Citrix® StoreFront Cloud subscription is required to create a store URL. If you don’t have a subscription, you can’t add and configure cloud stores. You’ll only be presented with an option to configure on-premises stores.
-
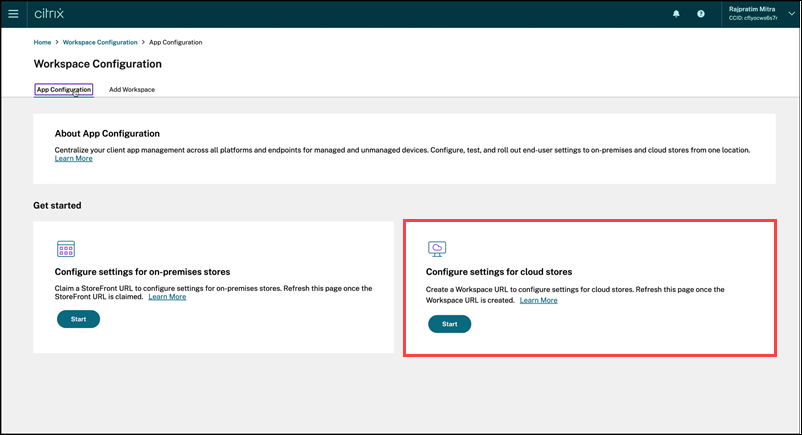
store URL: If you have a Citrix® StoreFront Cloud subscription but haven’t added your URL yet, you are presented with the following screen.
Configure settings
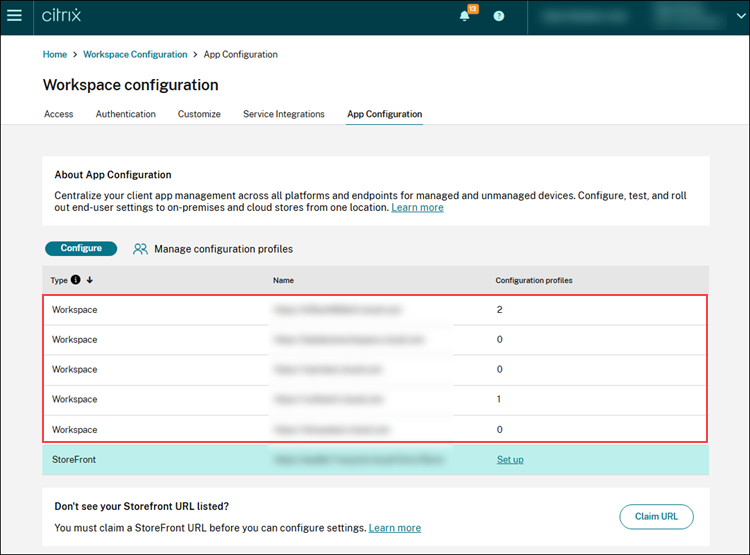
You can configure settings for Citrix Workspace app from the Citrix Cloud portal. If multiple stores have been configured for your organization, you can configure each of the stores separately.
- Sign in to Citrix Cloud.
- Navigate to StoreFront Cloud > App configuration.
-
From the list of configured store URLs, select the store for which you want to map settings and then click Configure.
-
Modify the settings for your preferred platforms as per your requirement.
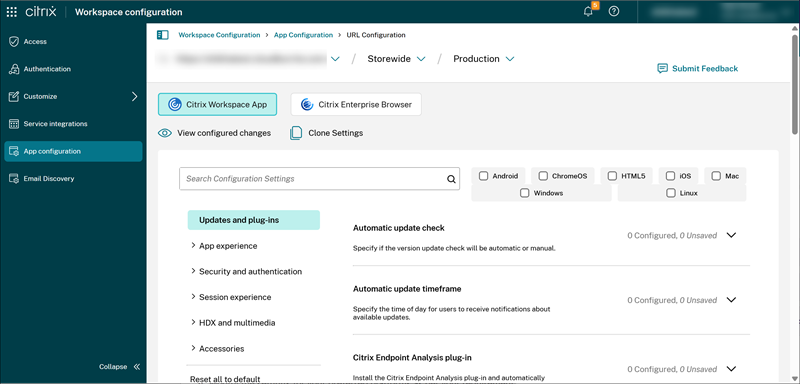
- Click Publish Drafts to save the settings.
Note:
It might take a few hours for the settings to be updated to the Citrix Workspace app clients. For more information, see Frequency of fetching updated settings.
Manage settings for user group using configuration profiles
This section explains how administrators can use the configuration profile feature in the Global App Configuration service (GACS) to configure settings for user groups who use cloud stores of Citrix Workspace app.
To get started with this feature, administrators need to verify that their Citrix Workspace app version is compatible, as shown in the following table:
| Citrix Workspace app platform | Minimum supported version |
|---|---|
| Windows | 2405 |
| Mac | 2405.11 |
Configuration
For instructions on leveraging configuration profile to assign settings to a user group, see Manage settings for user group using configuration profile.