End user experience
This article highlights some of the main features that end users see when they sign in to their stores and how you can configure them.
To access their store, users must either add their store URL to Citrix Workspace app, or open the URL in their web browser. For more information, see User access.
Before log in dialog
Before authenticating, a dialog may be displayed to the user. For more information, see Configure a custom dialog to be displayed after log in.
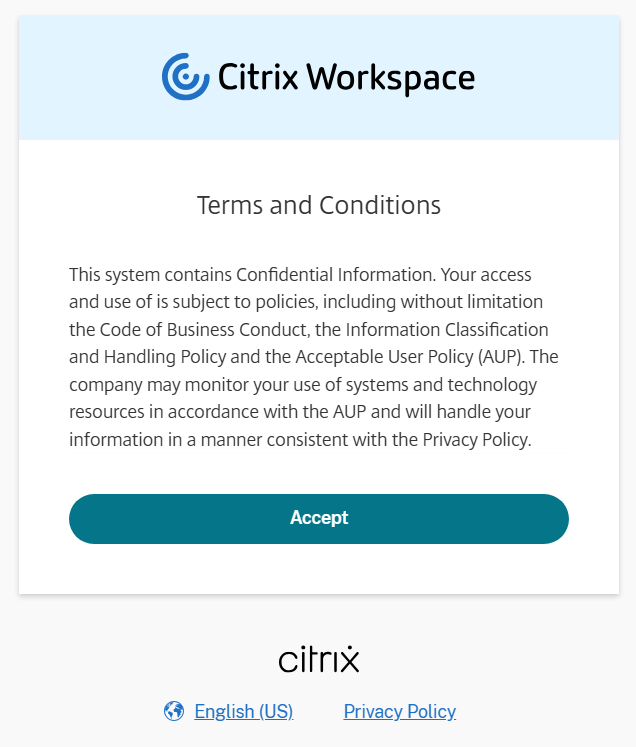
The user must accept the dialog before proceeding to authentication.
Authentication
When a user opens the store website in their browser or in Citrix Workspace app, they might need to authenticate. The authentication flow varies depending on the identity provider.
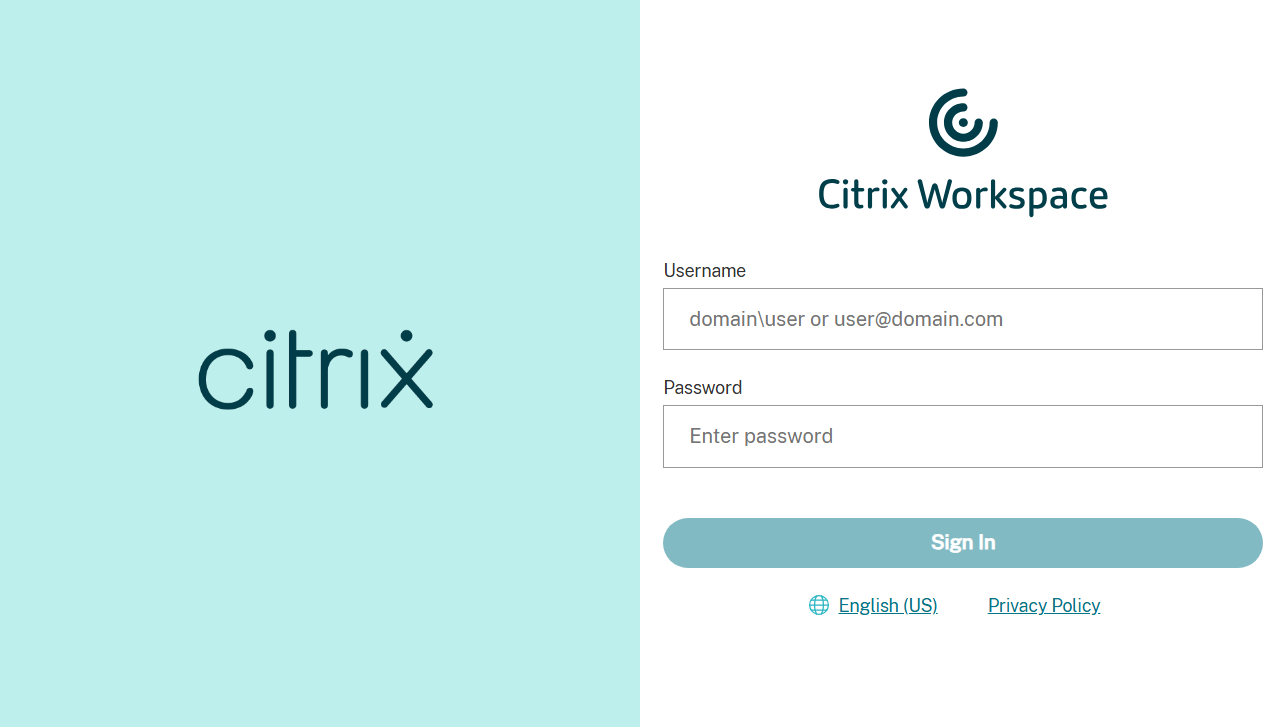
For information on different authentication methods, see Configure authentication.
Two-factor authentication (optional)
If you have enabled Active Directory plus Token authentication then before end users can use two-factor authentication to their store, they must register their device. During registration, store presents a QR code for the end user to scan with an authentication app. The authentication app must follow the Time-Based One-Time Password (TOTP) standard, such as Citrix SSO.
Note:
For a smooth registration process, Citrix recommends downloading and installing Citrix SSO on the target device beforehand.
To register for two-factor authentication, guide the end user to:
- Open a browser, navigate to the store sign-in page, and select Don’t have a token?
- Enter their user name in the
domain\usernameformat or their company email address and select Next. Citrix Cloud then sends the end user an email with a temporary verification code. -
Enter the verification code and Active Directory account password when prompted and select Next.
IMPORTANT:
The verification code is a temporary token with a 24-hour validity period and is only used to register the end user’s device. The end user mustn’t use this code to sign into their store with two-factor authentication.
- From the authenticator app, scan the QR code or enter the verification code manually.
- Select Finish and Sign In to complete the registration.
After completing registration, end users can return to the log on page and enter their Active Directory credentials along with the token displayed in their authentication app.
Only verification codes that are generated from an authentication app on an enrolled device are supported tokens for two-factor authentication. End users mustn’t use the temporary email token sent during the registration process.
Prompt for permission to Say Signed in
After the user completes authentication, they might see a message asking for permission to Stay Signed in.
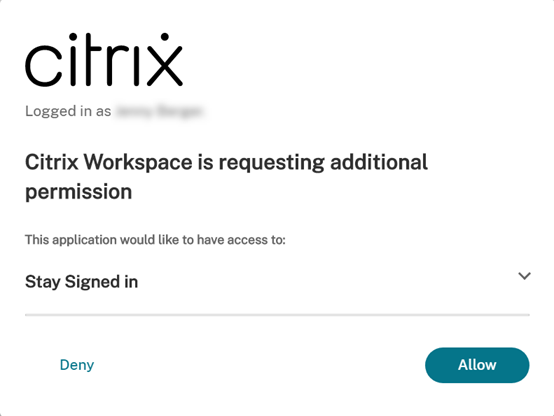
This is displayed when:
- Using Citrix Workspace app, not a web browser.
- The reauthentication period is greater than one day.
- The admin has not provided consent on behalf of the user.
This consent is required for Citrix Workspace app to use a refresh token to obtain new access tokens when the existing ones expire. The user must consent to proceed.
If the user selects the Allow option, log in completes and the user stays logged in during the reauthentication period, unless:
- The user does not use Citrix Workspace app for the inactivity period.
- The user changes their password.
- The user logs out of Citrix Workspace app.
If the users selects Deny, they are returned to the log in screen. If the user logs in again, they are not prompted for consent and must re-authenticate after 24 hours have passed.
Citrix Workspace app required screen
If the user opens the store in web browser but the store is configured to require Citrix Workspace app then the user is directed to install and configure Citrix Workspace app. For more information, see Require Citrix Workspace app.
Citrix Workspace app detection
The first time the user opens the store in a web browser, or after clearing cookies, depending on configuration, the web page may display the Welcome screen, which prompts the user to detect Citrix Workspace app. For more information, see Citrix Workspace app detection screen.
If Citrix Web Extension is installed and has detected Citrix Workspace app then it skips this step and defaults to launching in Citrix Workspace app. Users can change the launch method from the Settings page.
After log in dialog
After logging in, a dialog may be displayed to the user. For more information, see Configure a custom dialog to be displayed after log in.
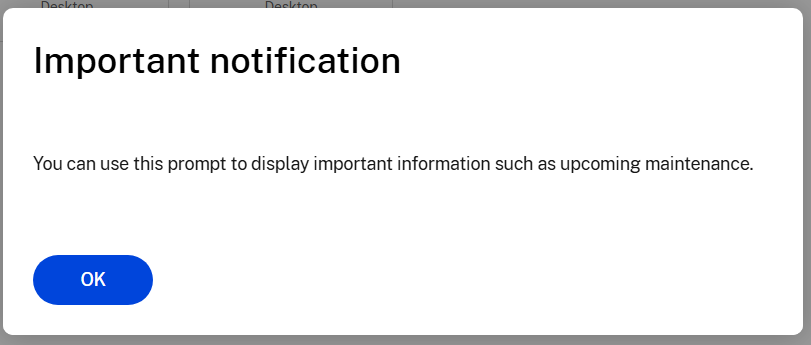
The user must press accept the message before accessing their resources. You can configure how frequently the message is displayed.
First-time user experience
When accessing the UI, for the first time, users are prompted with a pop-up where they can favorite multiple apps in one easy single step.
The first-time user experience is activated when users have more than 20 apps, and haven’t added any of them to Favorites. The experience is supported on all browsers and native clients (Mac, Windows, Linux, and ChromeOS), and mobile devices (iOS and Android). You’re able to see it the first time you sign in.
The recommended or mandatory apps appear on the Recommended tab of the first-time user screen, as set by admins on the DaaS console for Citrix Virtual Apps and Desktops™, and on the Secure Private access console for Web and SaaS apps. Mandatory apps are selected by default and check disabled. Recommended and auto-favorite apps are selected by default and check enabled for users. End users can also select other apps to subscribe to, or add to Favorites from all tabs. All selected apps are automatically added to Favorites, and reflected on the home page.
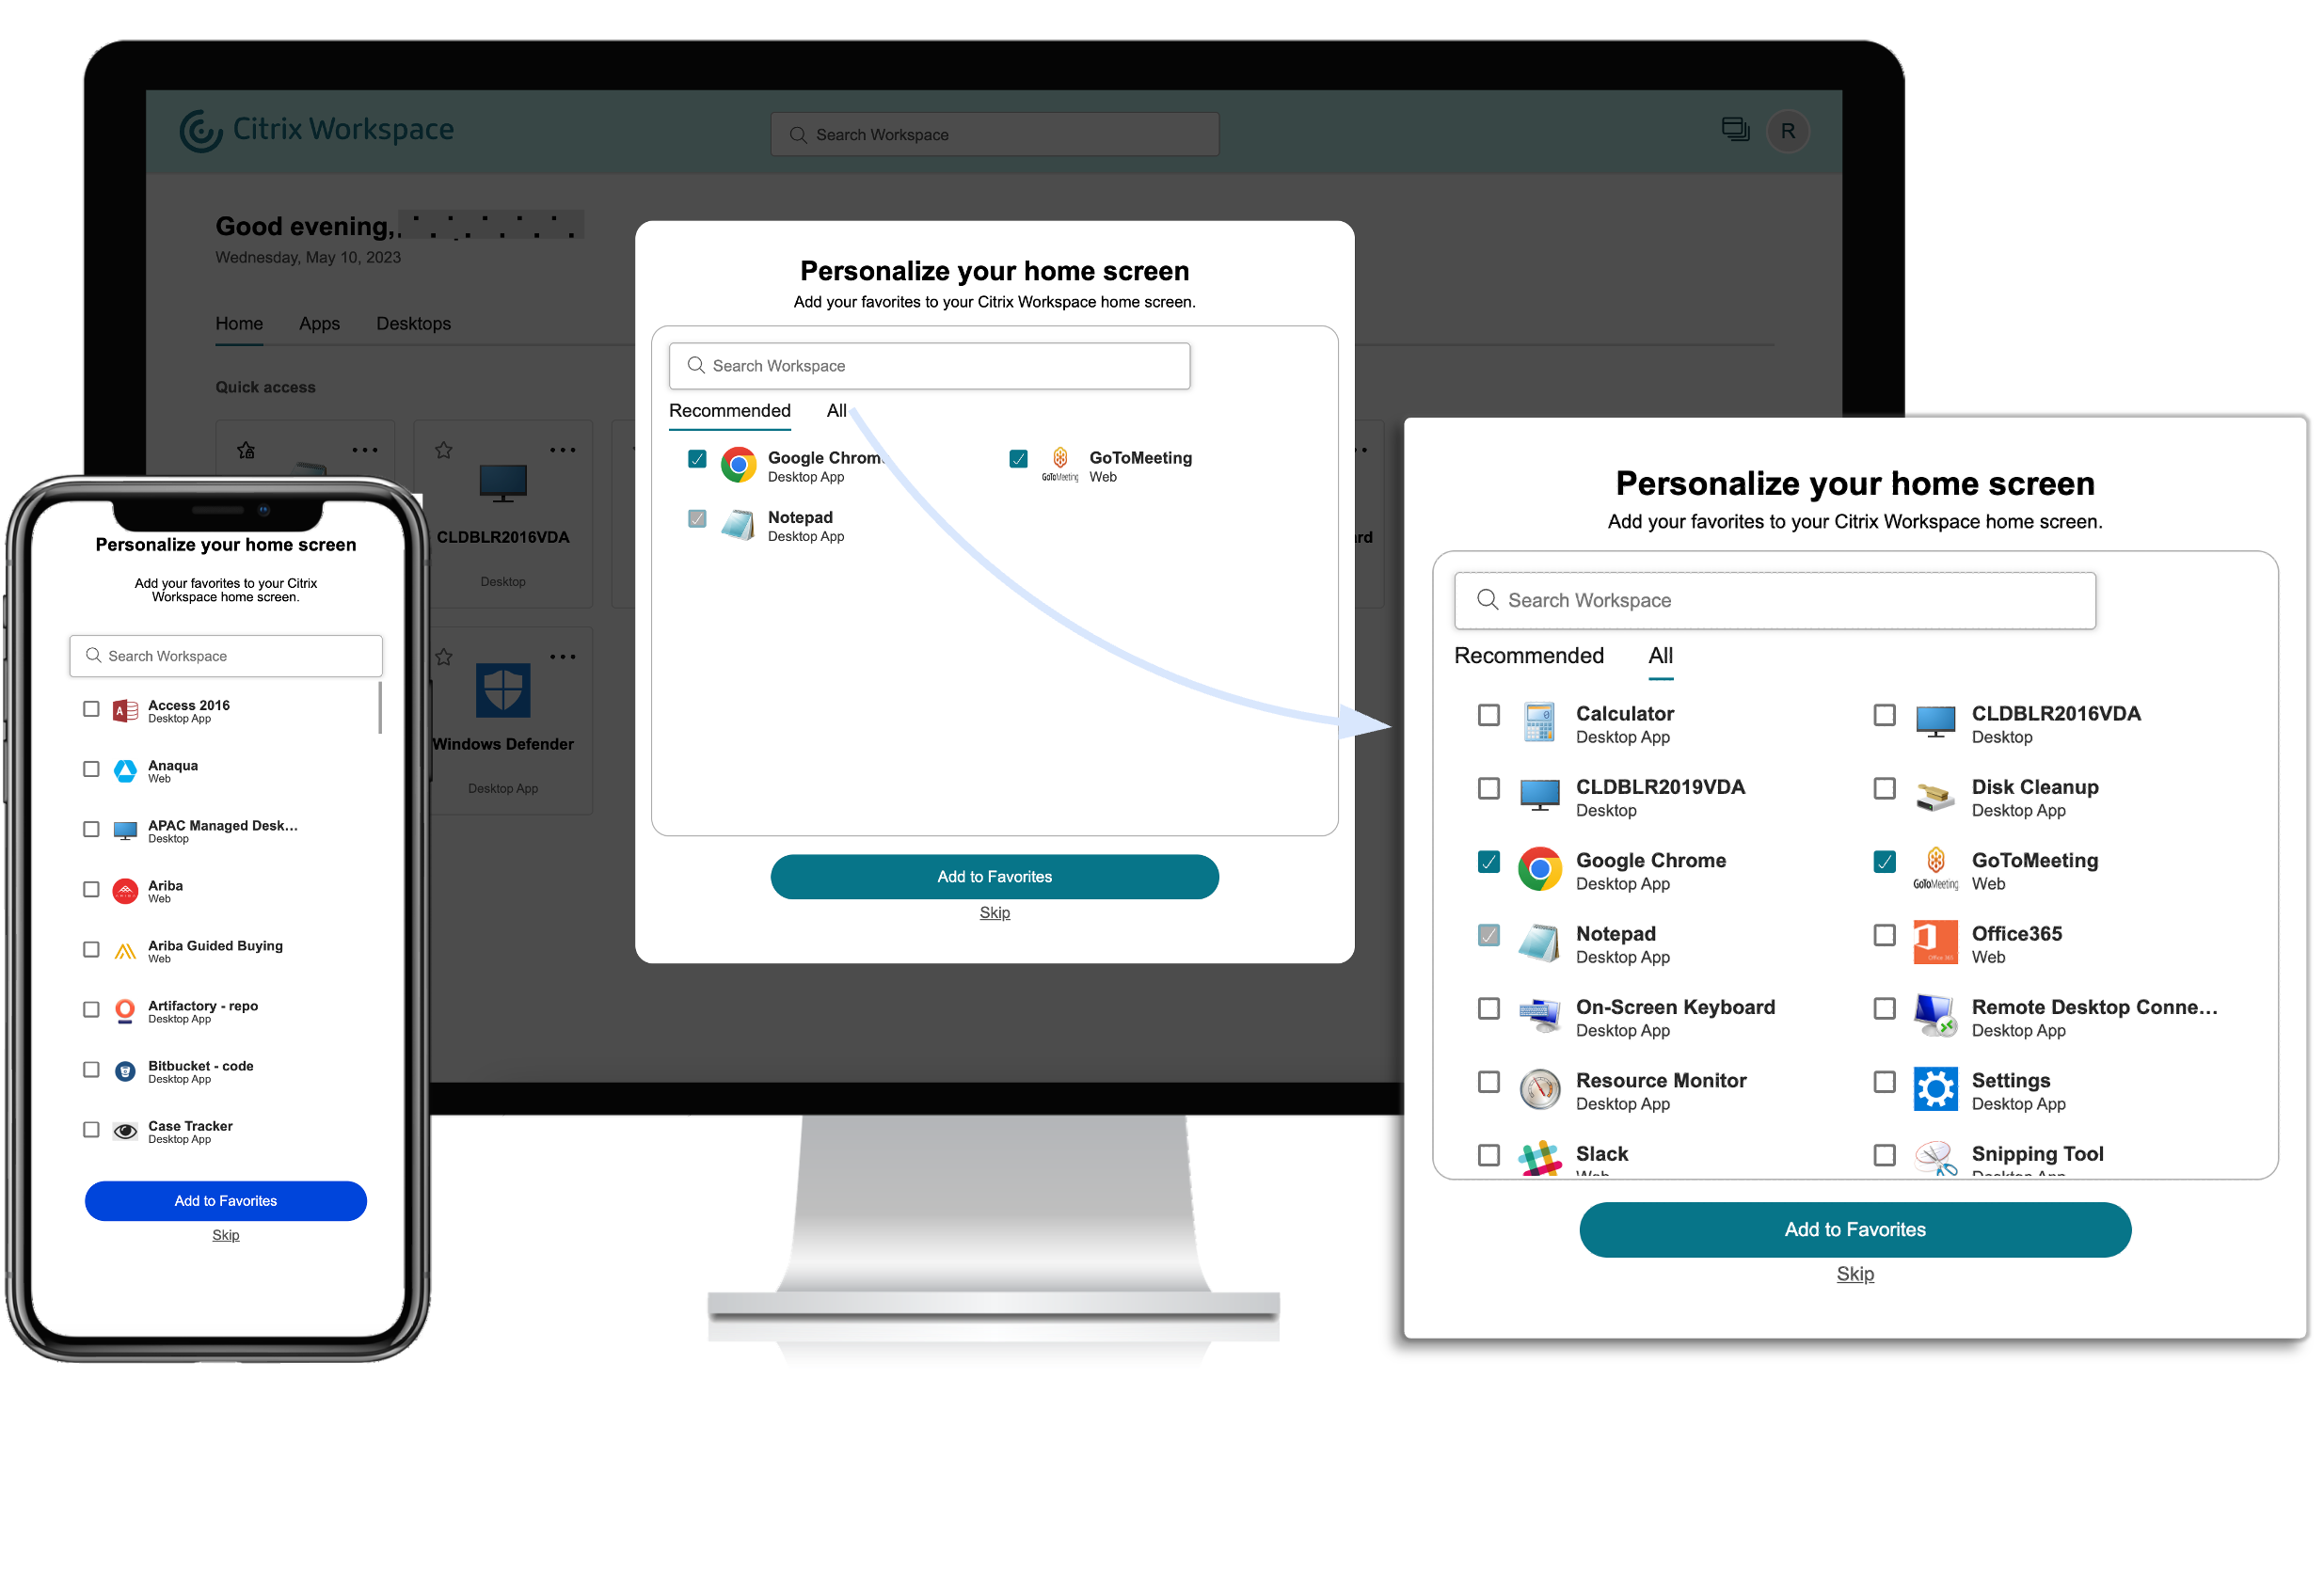
On Citrix Workspace app for Windows if you have five or fewer apps, the quick access desktop shortcut appears. All the apps are added as favorites, and corresponding desktop shortcuts are created.
Limitations
- The Personalization screen appears once per device and browser, and every time for incognito mode unless users mark a favorite.
- If the admin removes the mandatory or recommended tag from the apps, the apps in Favorites won’t have any impact.
-
If the end-user has not added any apps to Favorites, the Personalization screen appears each time the workspace app is opened. To avoid this:
- End users can add one or more apps to Favorites. This prevents the personalization screen from appearing every time they start the app.
- Administrators can add one or more apps to Favorites. For more information, see Customize store interactions.
Navigation tabs
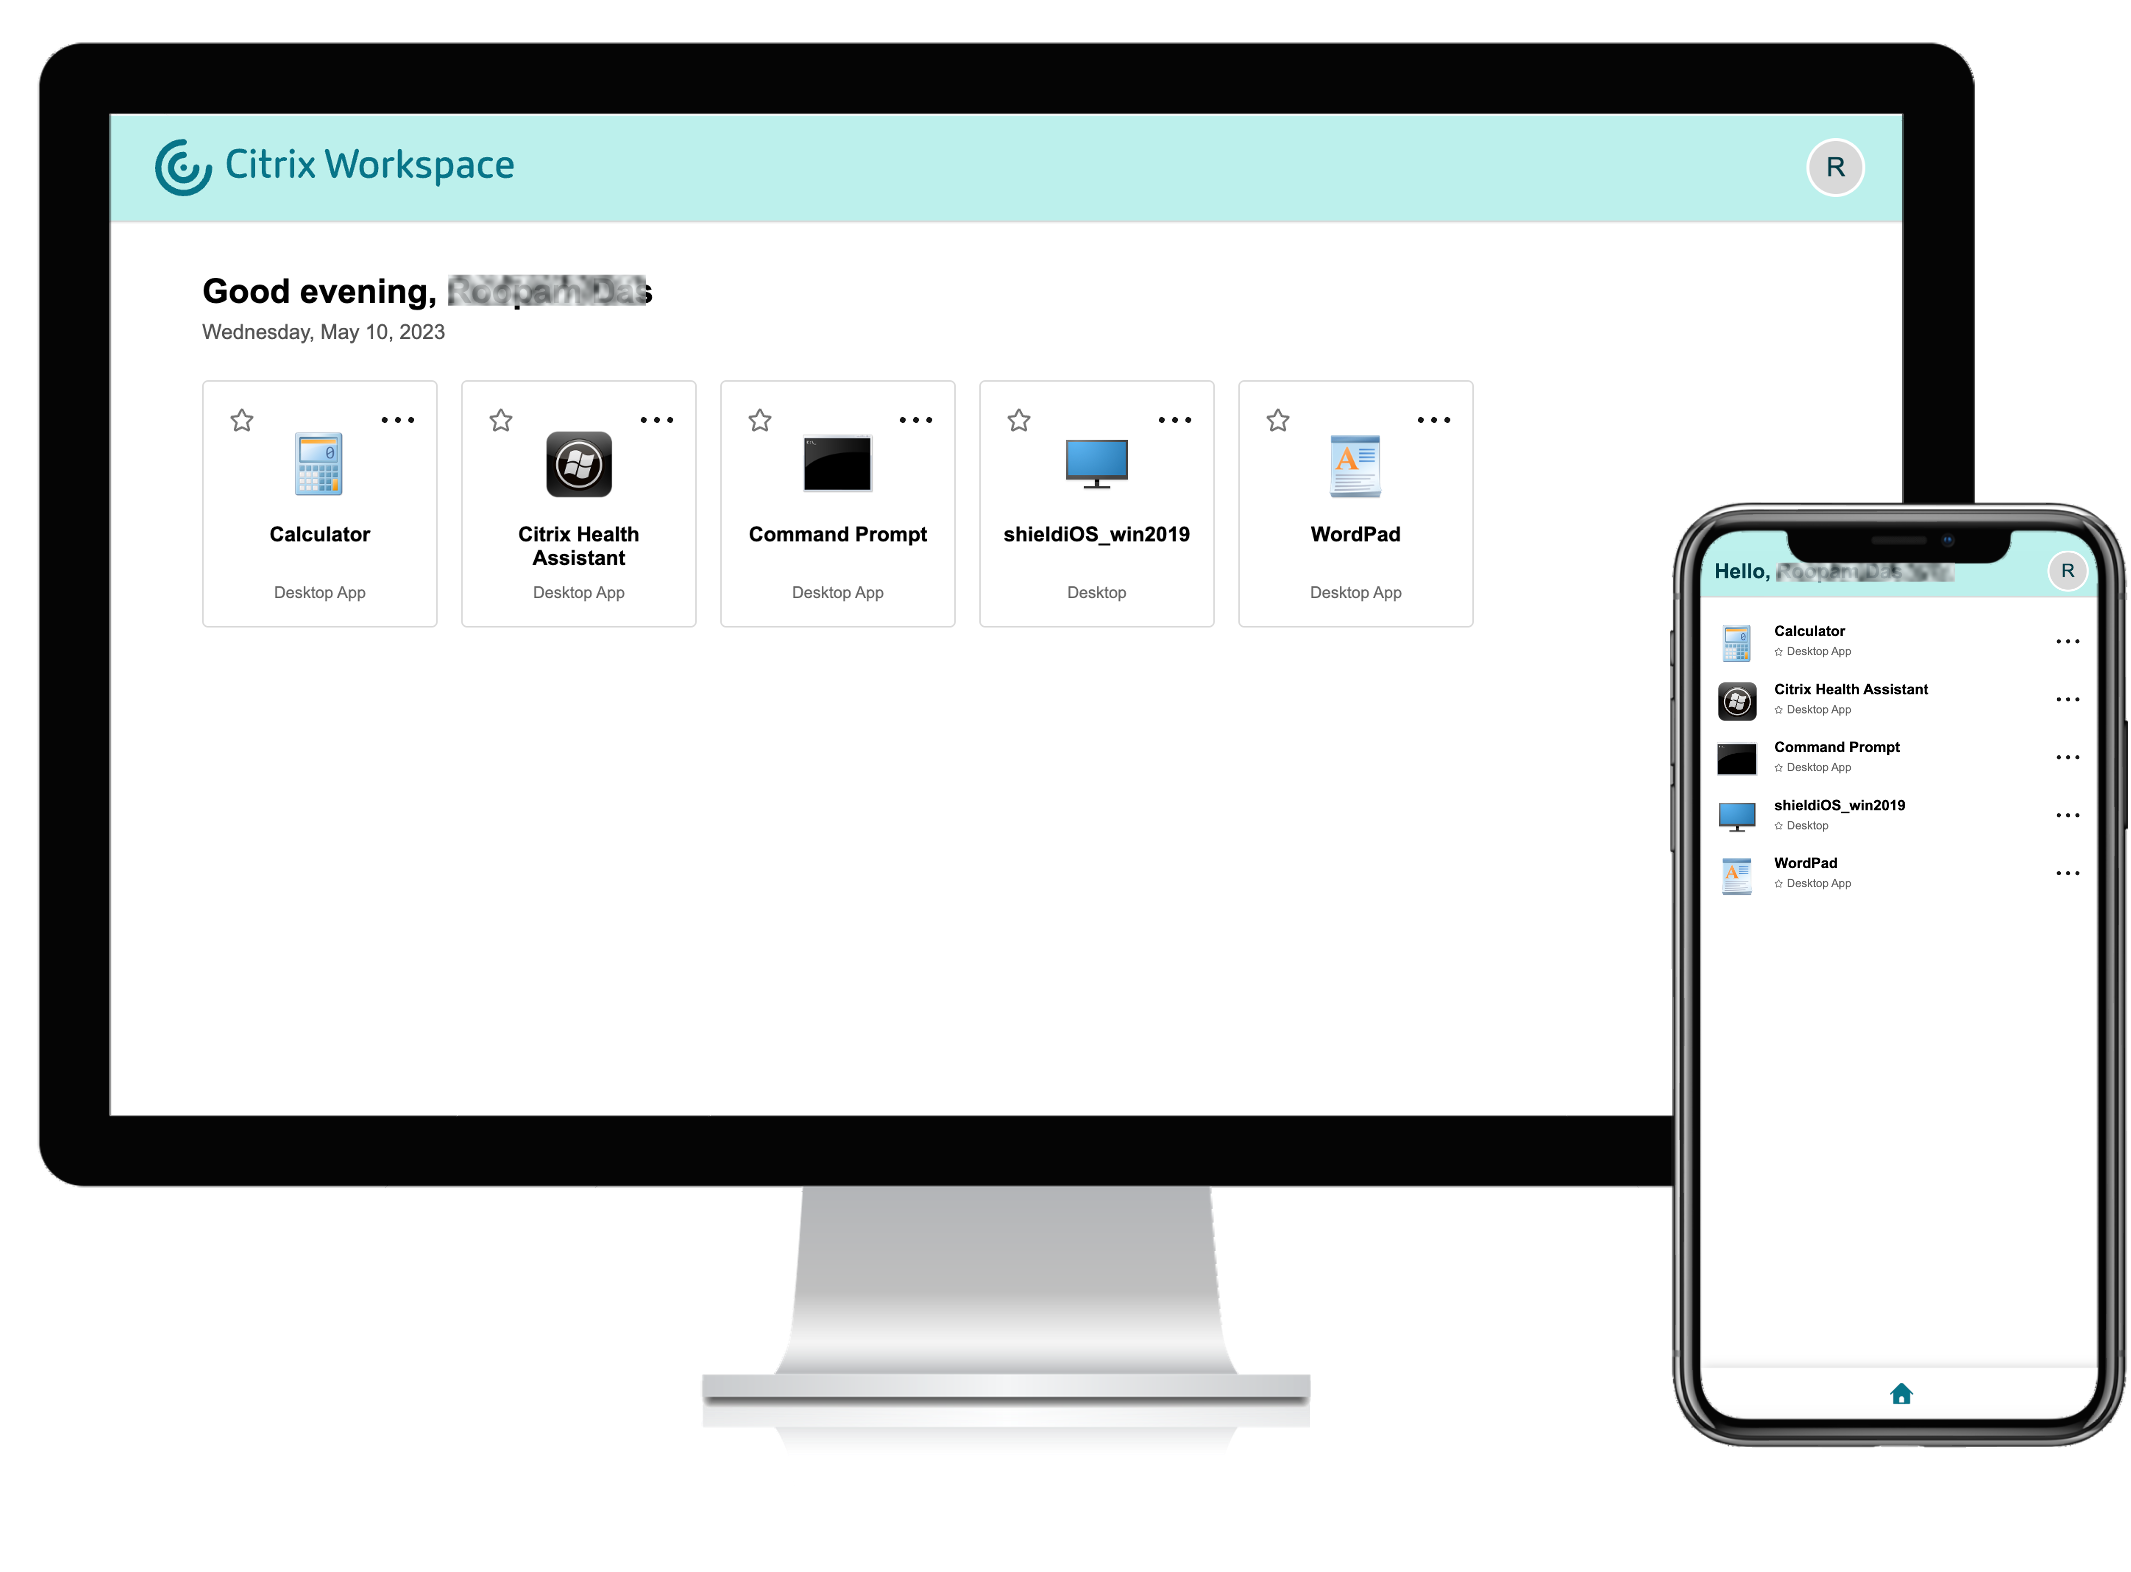
Simple view
If users have fewer than 20 resources, by default, they land on the screen with Simple View that doesn’t have any tabs or categories. All the apps and desktops appear on the same page. On this screen, their favorites show up first, followed by all the other apps in an alphabetical order.
You can configure the store to Always display navigation tabs, which disables simple view.
Full view
If users have more than 20 resources, or the store website is configured to Always display navigation tabs, then up to three tabs are displayed - Home, Apps and Desktops. By default when a user logs in they land on the Home tab if it exists, otherwise the Apps tab. You can configure whether the home tab appears and the default tab.
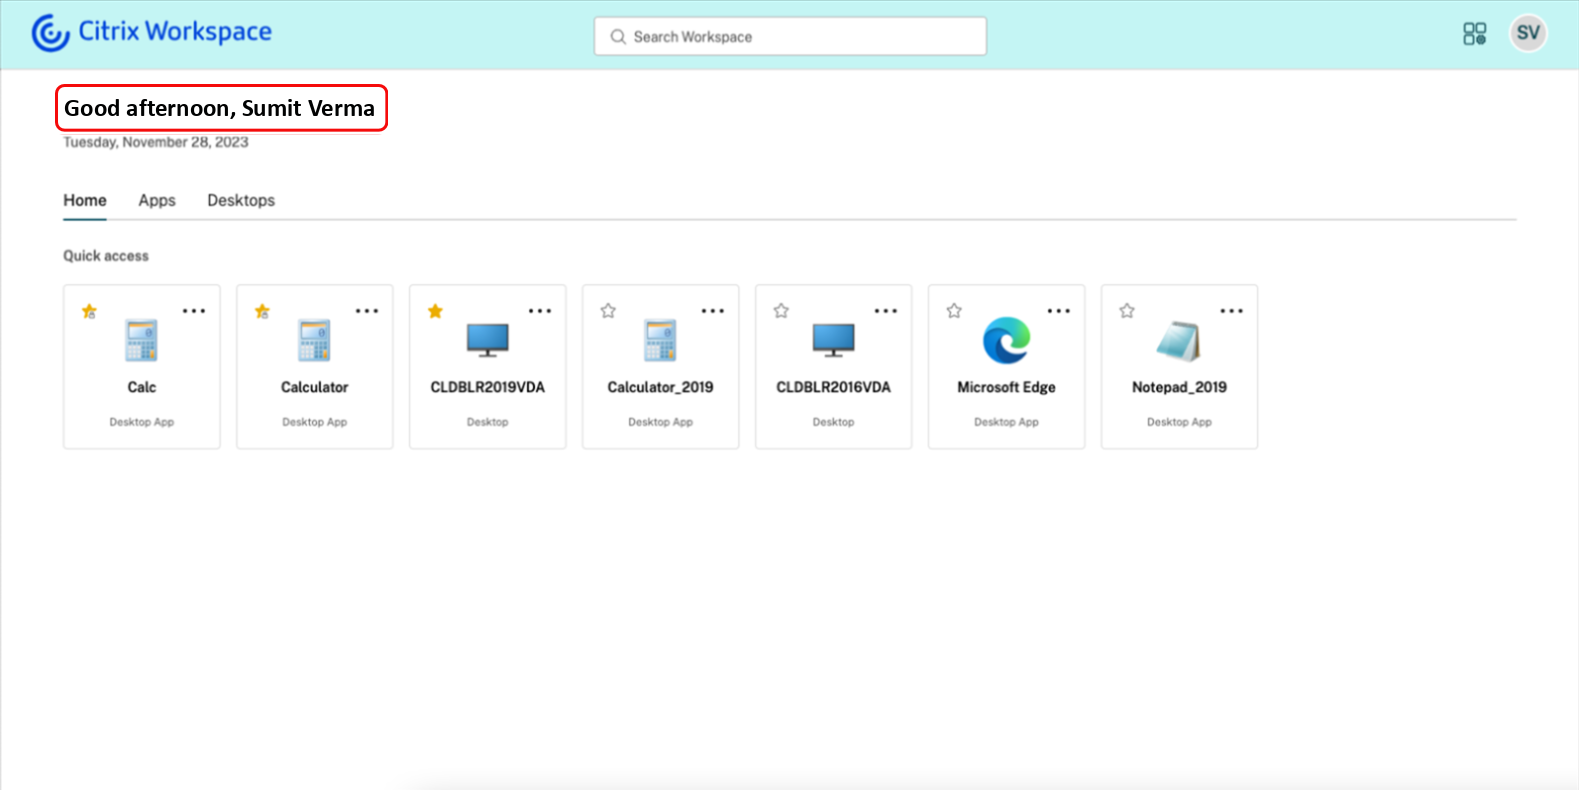
Home tab
On the home tab, mandatory and favorite apps appear first, followed by the five most recently used apps. The star icons for the Mandatory apps are locked, and users can’t remove them from Favorites.
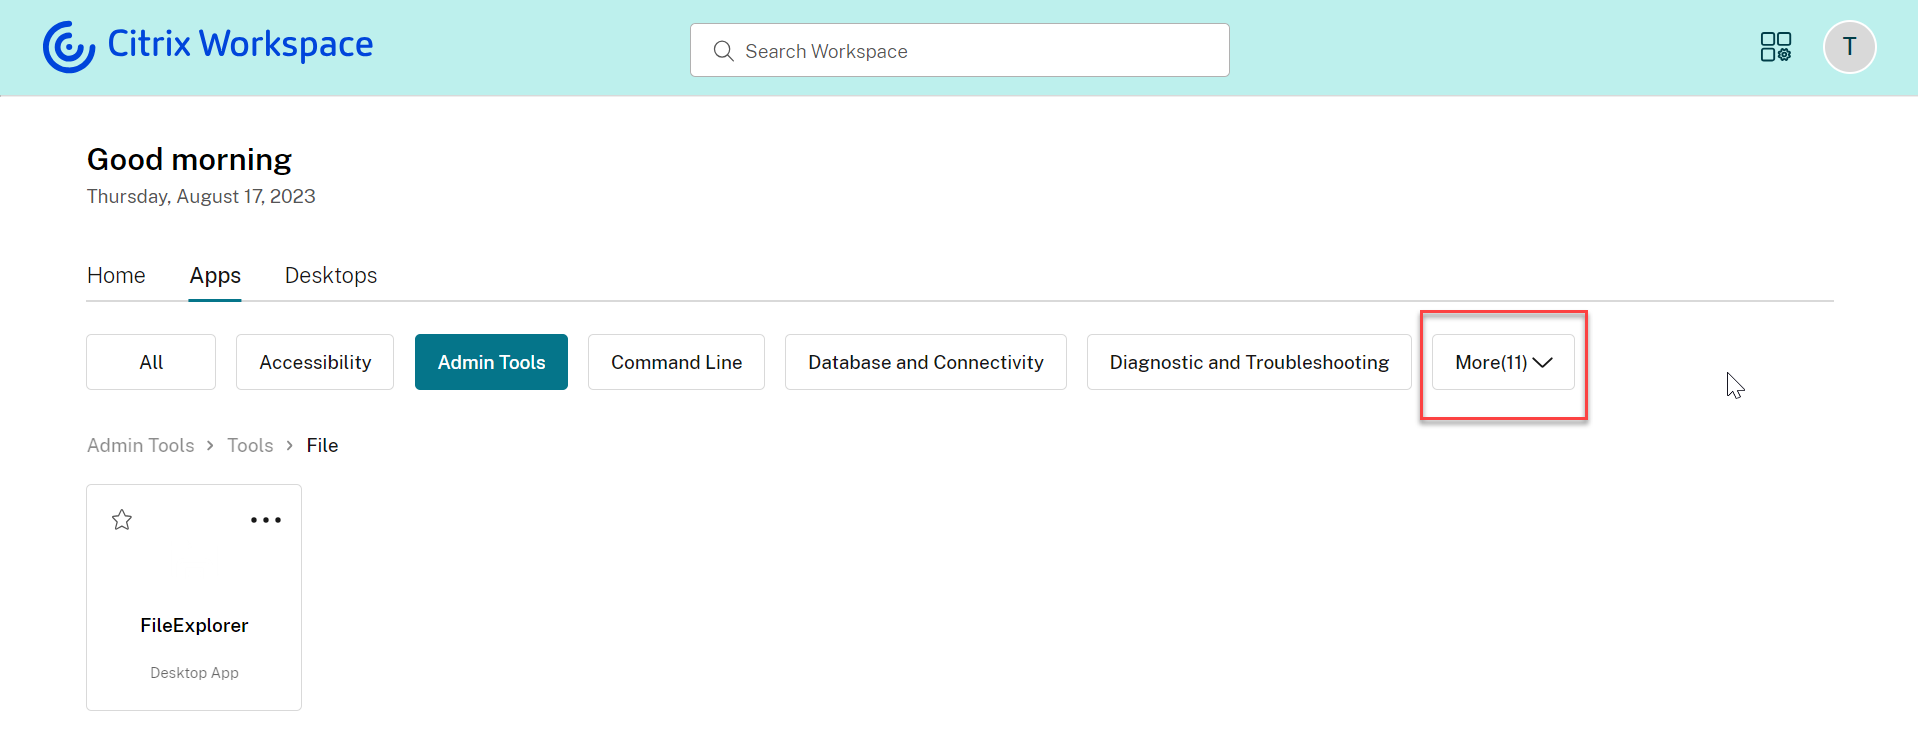
Apps tab
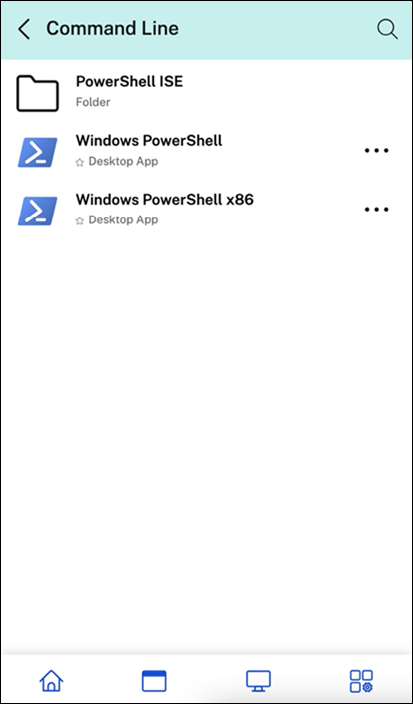
On the Apps tab, favorites appear first, followed by all the other apps in an alphabetical order. If the admin has created categories and attached the apps to them, then the various categories appear, and users can select the category of the apps that they want to view.
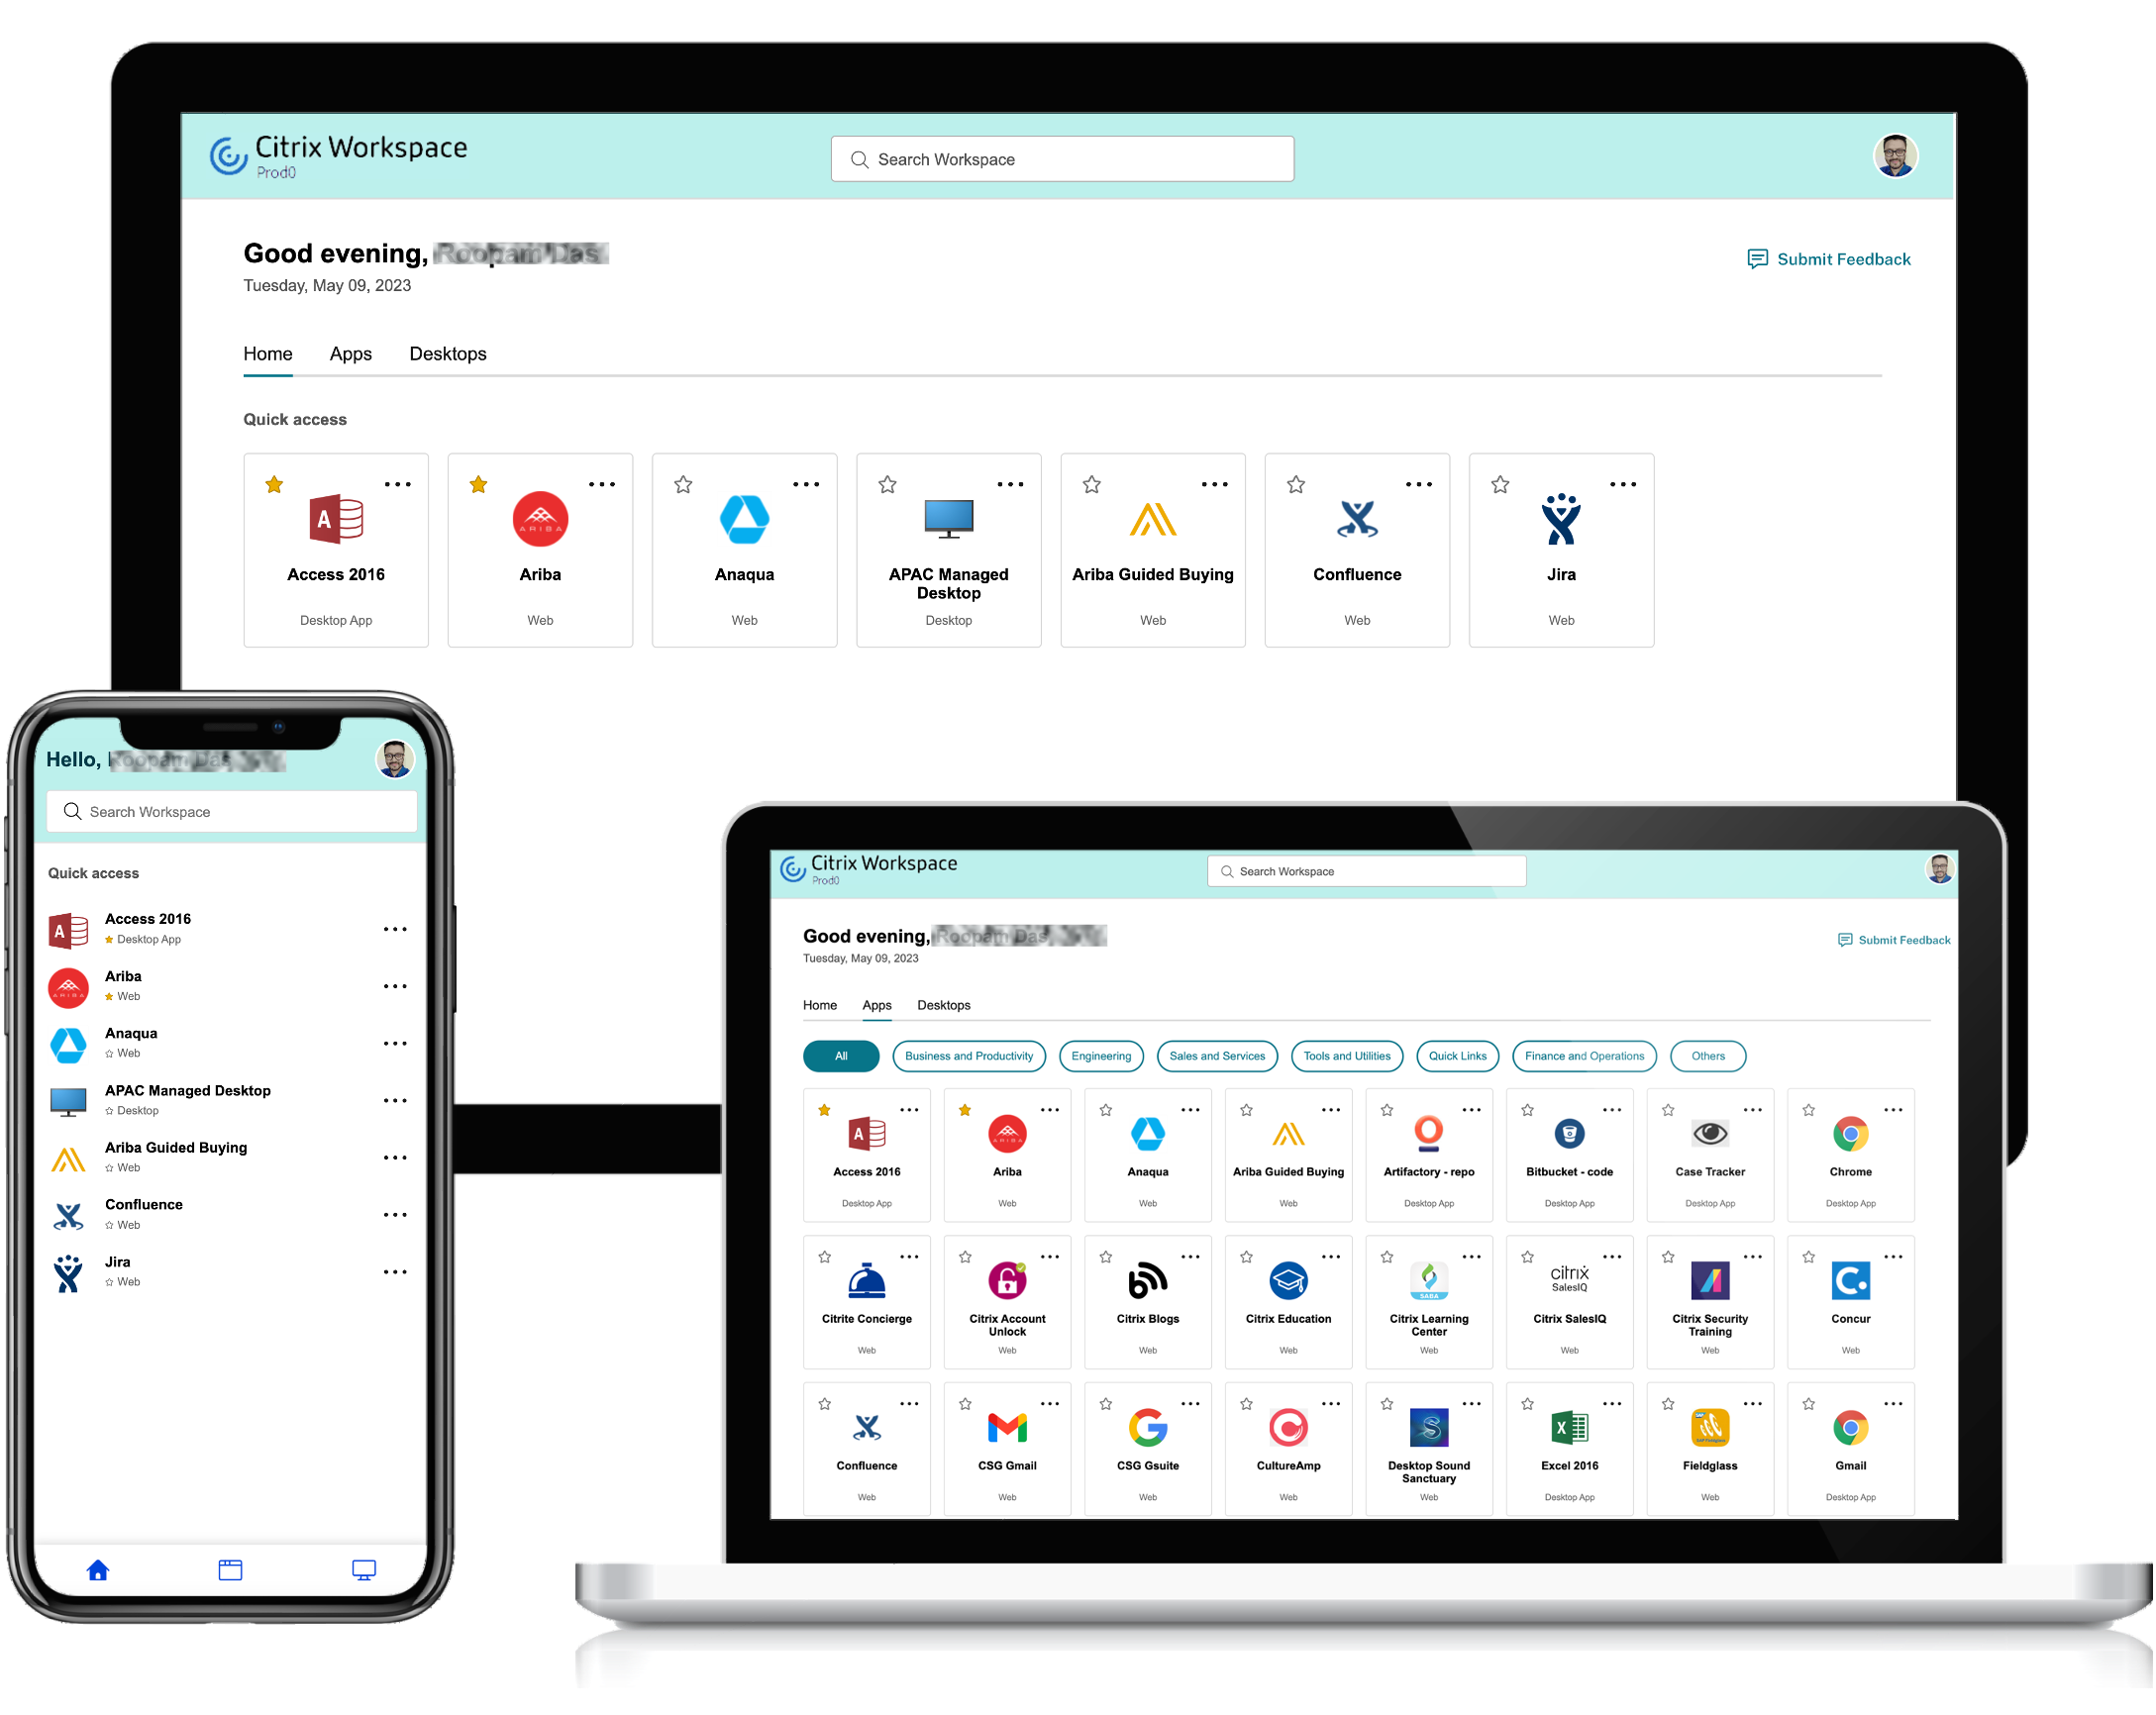
For each application you can define a category. The category represents the folder structure that appears on the screen for end users. For example, consider an app for which the folder is defined as Optimisation tools/Cleaning. Now, to access this app, end users must go to Optimisation tools > Cleaning, where Optimisation tools is a category and Cleaning is it’s sub-category. For more information about configuring categories, see Applications.
When the number of primary categories created by the admins exceeds the available space on the user’s screen, the user interface adjusts based on the screen size, and dynamically moves categories under the More dropdown. The navigation breadcrumbs are also displayed to the users.
On mobile platforms, navigate to the Apps tab and click the Categories dropdown to view a list of available categories. Sub-categories are displayed as folders that might contain further sub-folders or applications as per the admin configuration.
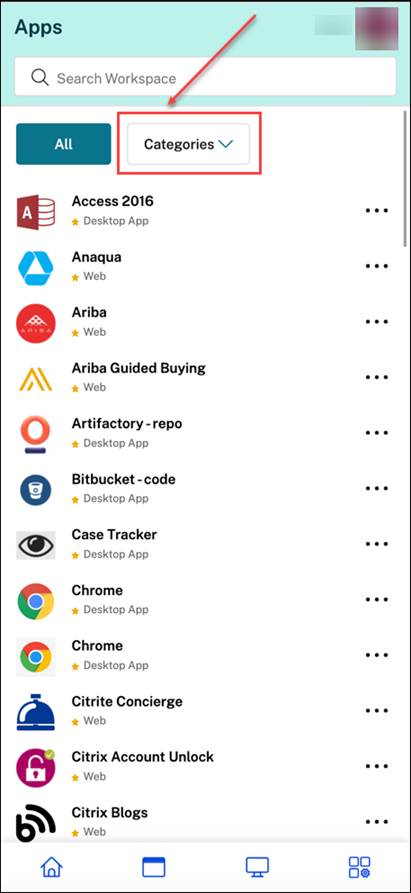
Select the relevant category, a list of available sub-categories and applications is displayed based on the configuration made by the admin.
Desktops tab
The Desktops tab displays all available virtual desktops.
Favorite and mandatory apps
By default, users can create and remove favorites by selecting the star icon on the tile.
Administrators can also configure the following using keywords keywords:
- auto - apps are automatically created as favorites but they can be removed by the user.
- mandatory - apps are always favorites and cannot be removed by the user.
To disable favorites see Allow favorites. If favorites are disabled, all apps appear on the Home tab.
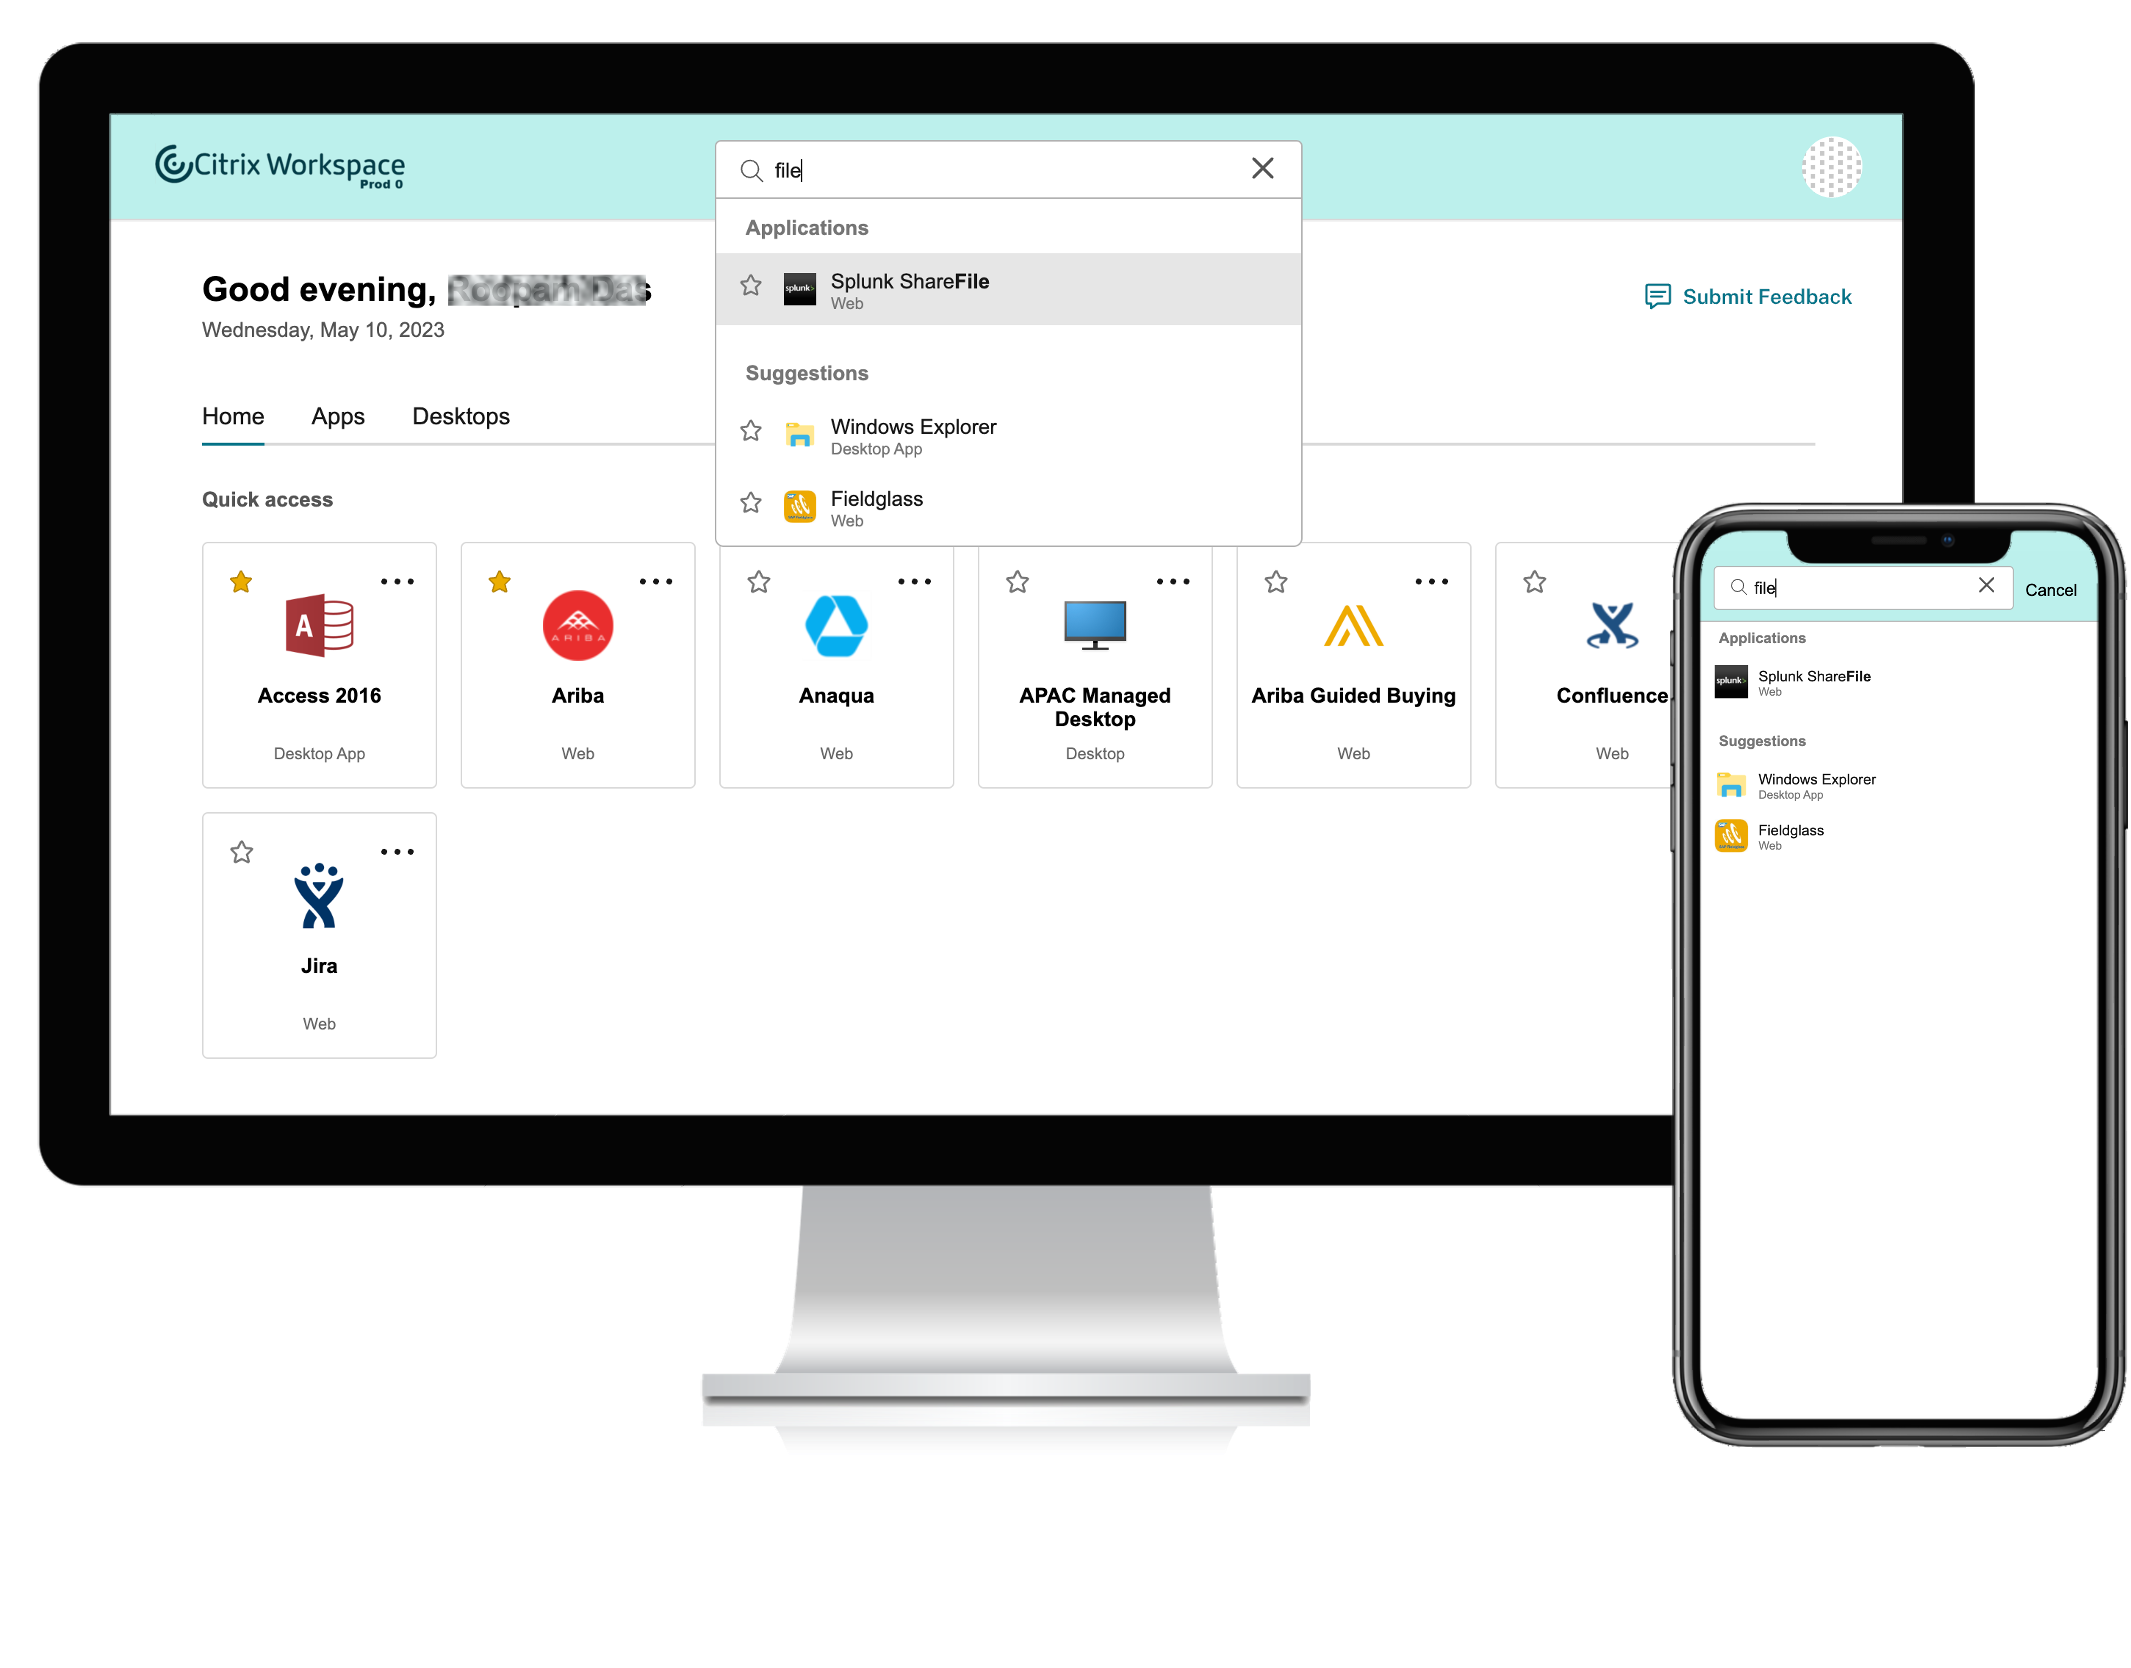
Search for apps and desktops
Users can enter search terms to search for apps and desktops by name and category. Favorites appear at the top of the list.
Activity Manager
Users can manage their sessions using Activity manager.
App and desktop tiles
The tile displays the application name and name as configured within Studio. Users can click the tile to launch the application.
For assigned desktops, in addition the power state is displayed. For more information, see Power status.
Tile actions
The More options menu (ellipsis icon) on the tile provides users with access to relevant actions. The options presented are context-sensitive.
These actions might include:
- Open Desktop or Open App - Launch or reconnect to the app or desktop. If the destop is powered off or in hibernation then this first powers on the desktop before launching the session.
- Add to favorites - Adds to favorites so it appears on the Home tab. This has the same effect as clicking the Star. Only enabled if favorites is enabled.
- Show Details - Opens a pop-up window containing the description of the app or desktop.
- For assigned desktops, additional power management actions may be available. For more information, see Power actions.
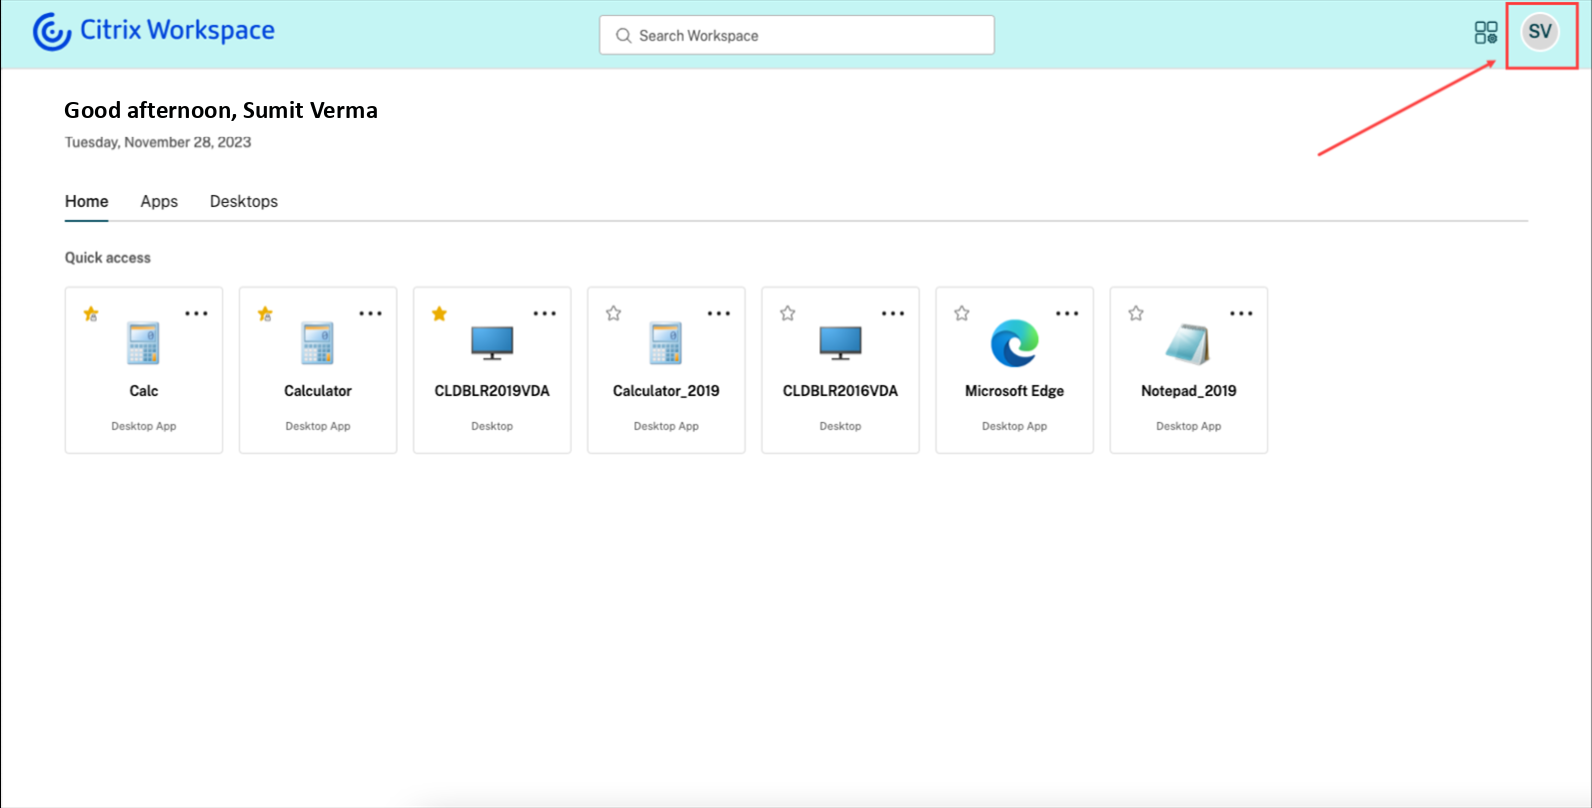
User’s display name and profile picture
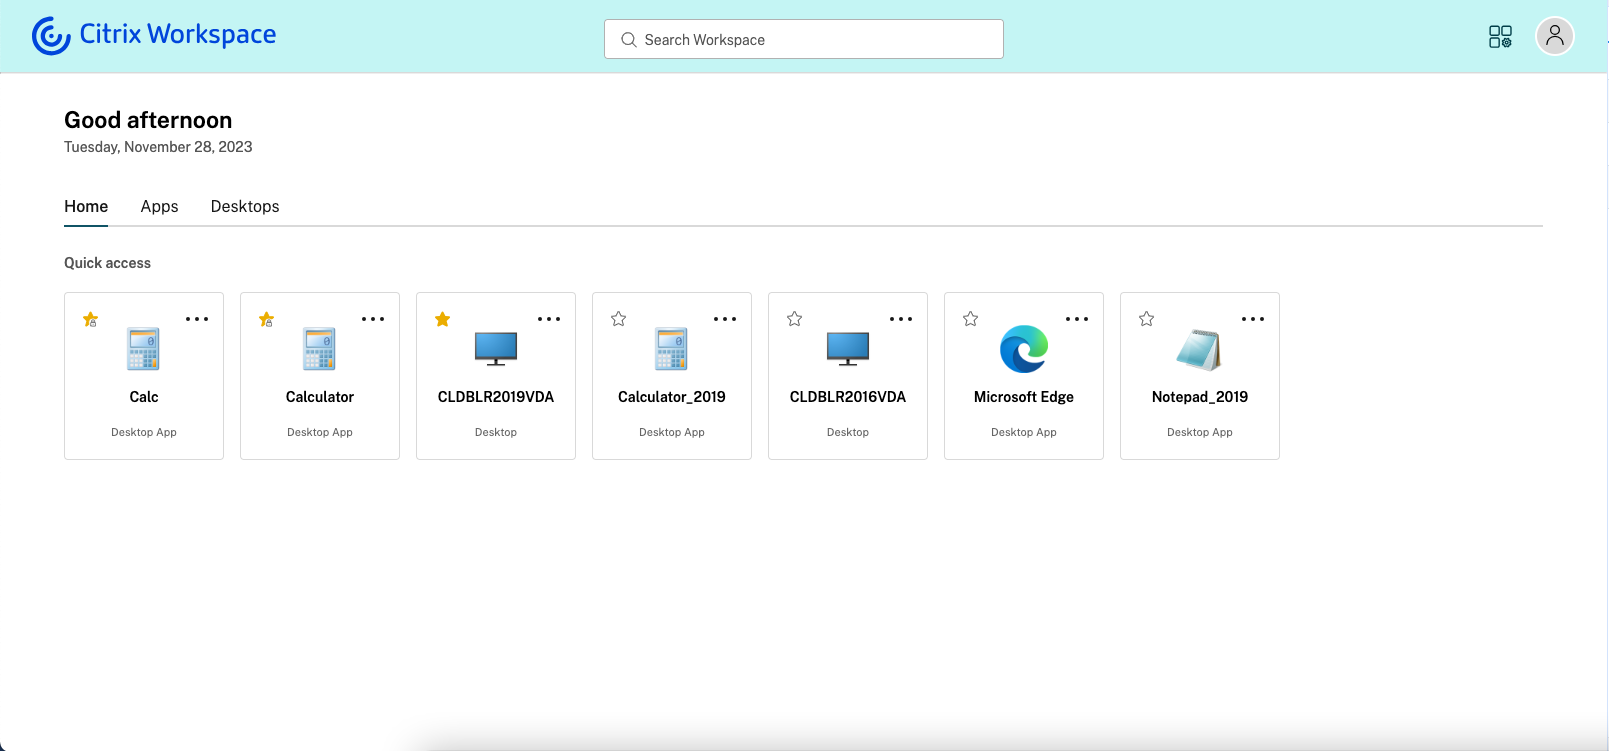
The user’s display name is shown along with a greeting within the store UI. The UI shows the user’s display name only if retrieves a display name from the identity provider.
Users can see only the greeting if Citrix® StoreFront Cloud can fetch a valid display name for the user.
Users can view their profile picture, initials, or a generic image depending on the following criteria:
- The user’s profile picture is displayed if they have uplaoded a picture on the Edit profile screen.
-
The user’s initials are displayed if a picture can’t be found but the identity provider returns the user’s display name.
-
A generic image is displayed if neither the profile picture nor the user’s display name are available.
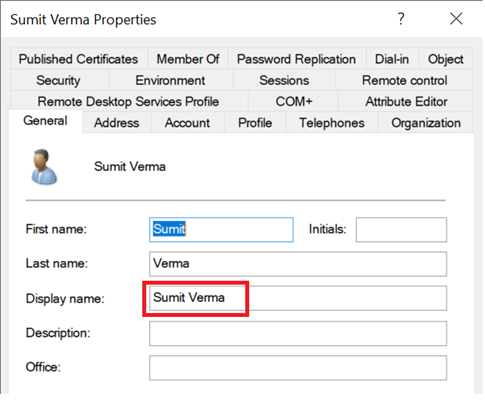
Configuring Display Name
-
If using Active Directory, the name from the Display Name field is used.
-
If using SAML, the SAML assertion displayName field (case sensitive) is used. For more information see Connect SAML as an identity provider to Citrix Cloud. Otherwise it falls back to the Active Directory Display Name field.
Log out
To log out, click the profile picture the click Log Out.
If using SAML authentication and single log-out is configured, this also logs off the identity provider.
Settings
To access settings:
- Select the profile picture in the upper right corner.
- Select Account Settings.
The following options may be available:
- Edit Profile
- Regional Settings
- Security & Sign In
- [Tools]
- Advanced
Edit profile
From the edit profile screen you can choose a profile picture.

To upload a profile picture, select Upload and browse for an image in .jpg or .png format.
Regional Settings
These settings are not used.
Security & Sign in
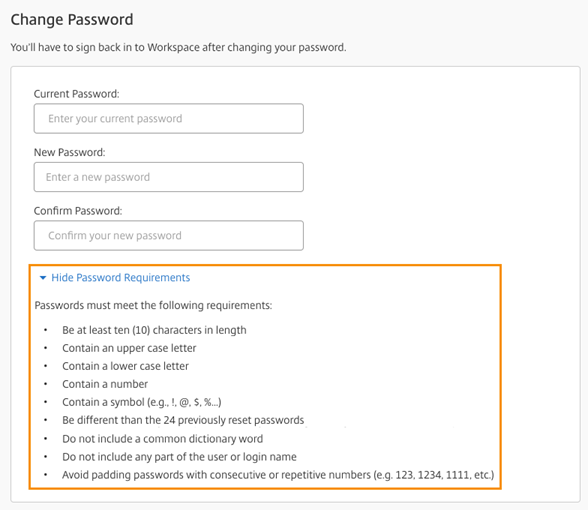
If the authentication method is Active Directory or Active Directory and Token authentication, and you have enabled changing passwords then users can change their password. The user can select View Password Requirements to display any configured password requirements.
After changing their password, users are automatically logged out and must log in again with their new password.
Tools
This tab displays links to download Citrix Workspace app.
Advanced

Apps and Desktops Launch Preference
When using a web browser, this displays whether apps launch in the web browser, in Citrix Workspace app, or by downloading and ICA file that the user can open in Citrix Workspace app.
The user can select Verify connection to open the Citrix Workspace app detection screen.
The user can select Use Web Browser to open launch apps within their web browser.
Configure Citrix Workspace app
When using a web browser, users can download a file that they can open with Citrix Workspace app to configure it to connect to the store.
In this article
- Before log in dialog
- Authentication
- Prompt for permission to Say Signed in
- Citrix Workspace app required screen
- Citrix Workspace app detection
- After log in dialog
- First-time user experience
- Navigation tabs
- Favorite and mandatory apps
- Search for apps and desktops
- Activity Manager
- App and desktop tiles
- User’s display name and profile picture
- Log out
- Settings