This content has been machine translated dynamically.
Dieser Inhalt ist eine maschinelle Übersetzung, die dynamisch erstellt wurde. (Haftungsausschluss)
Cet article a été traduit automatiquement de manière dynamique. (Clause de non responsabilité)
Este artículo lo ha traducido una máquina de forma dinámica. (Aviso legal)
此内容已经过机器动态翻译。 放弃
このコンテンツは動的に機械翻訳されています。免責事項
이 콘텐츠는 동적으로 기계 번역되었습니다. 책임 부인
Este texto foi traduzido automaticamente. (Aviso legal)
Questo contenuto è stato tradotto dinamicamente con traduzione automatica.(Esclusione di responsabilità))
This article has been machine translated.
Dieser Artikel wurde maschinell übersetzt. (Haftungsausschluss)
Ce article a été traduit automatiquement. (Clause de non responsabilité)
Este artículo ha sido traducido automáticamente. (Aviso legal)
この記事は機械翻訳されています.免責事項
이 기사는 기계 번역되었습니다.책임 부인
Este artigo foi traduzido automaticamente.(Aviso legal)
这篇文章已经过机器翻译.放弃
Questo articolo è stato tradotto automaticamente.(Esclusione di responsabilità))
Translation failed!
Your first workspace
Developer
This tutorial takes you from an empty SecurSpaces console to a running Citrix SecurSpaces™ workspace with your project code in it, ready to work in.
By the end, you will have:
- Created a workspace from a template your project owner prepared
- Opened it in the Cloud IDE and run a command in it
- Confirmed your project repository was cloned
- Learned which of your changes survive a restart
It takes about 10 minutes. Work through the steps in order.
Before you begin
You need:
- A completed account setup — profile, integrations, and credentials. If you haven’t done this, start with Set up your account.
- A workspace template for your project. Your project owner prepares these. If you don’t know which template to use, ask them before you start.
How you’ll connect
This tutorial uses the Cloud IDE (VS Code for Web) because it opens in a browser tab and needs nothing installed.
The Cloud IDE is not your only option, and for day-to-day work it may not be your preferred one. SecurSpaces also supports connecting from a locally installed IDE over SSH, so your editor runs on your machine while the code, tools, and compute stay in the workspace. Many developers prefer this. You’ll set it up after you finish here — see Other ways to connect at the end.
Step 1: Create a workspace from a template
A workspace is your personal cloud development environment: your code, tools, and dependencies, already configured. Templates carry that configuration, so you don’t assemble it yourself.
- From the SecurSpaces home page, select Create Workspace, then Create from Template.
- Select the template your project owner told you to use.
- Review the configuration summary.
- Select Launch.
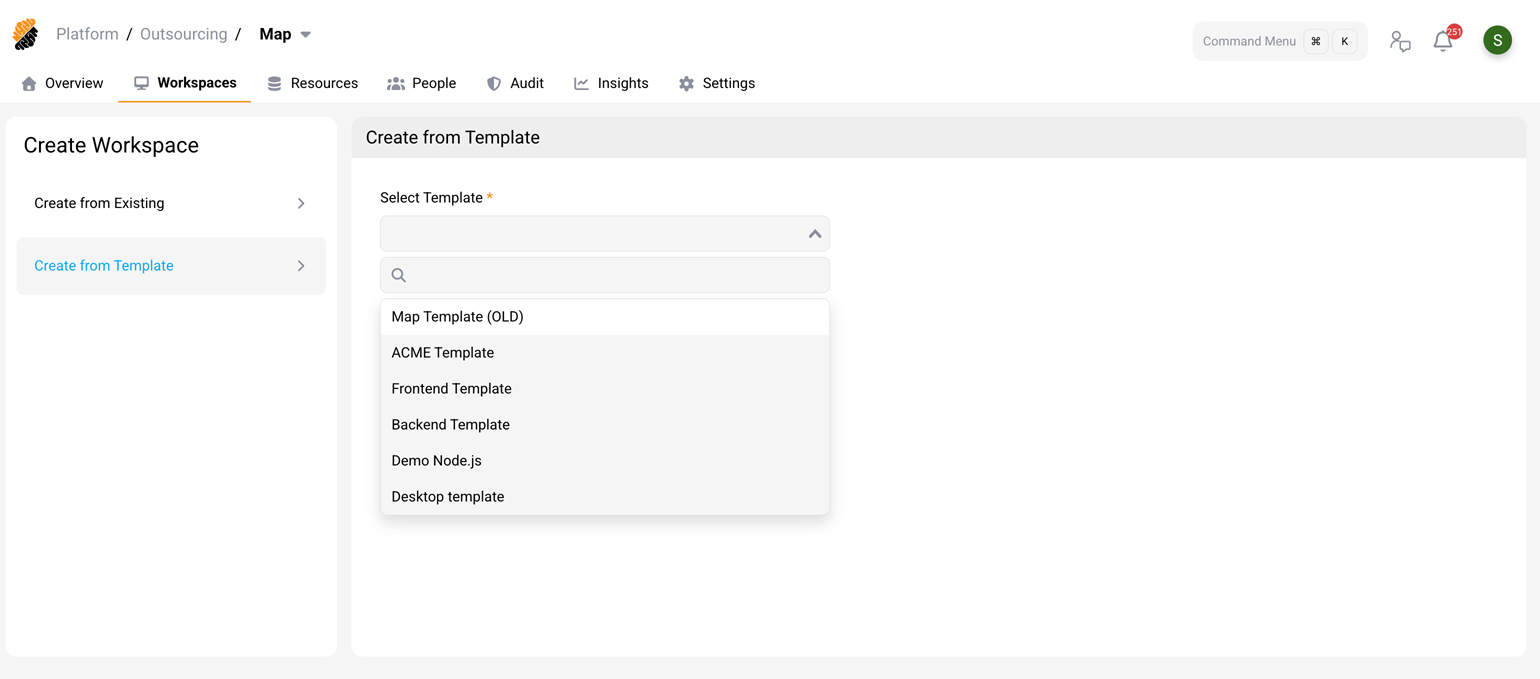
Deployment takes about 30 to 90 seconds, and a progress indicator shows while it initializes. Wait until the status shows Running.
Step 2: Open the Cloud IDE
- On the workspace card, select Open.
- VS Code for Web opens in a new browser tab, already connected to your workspace.
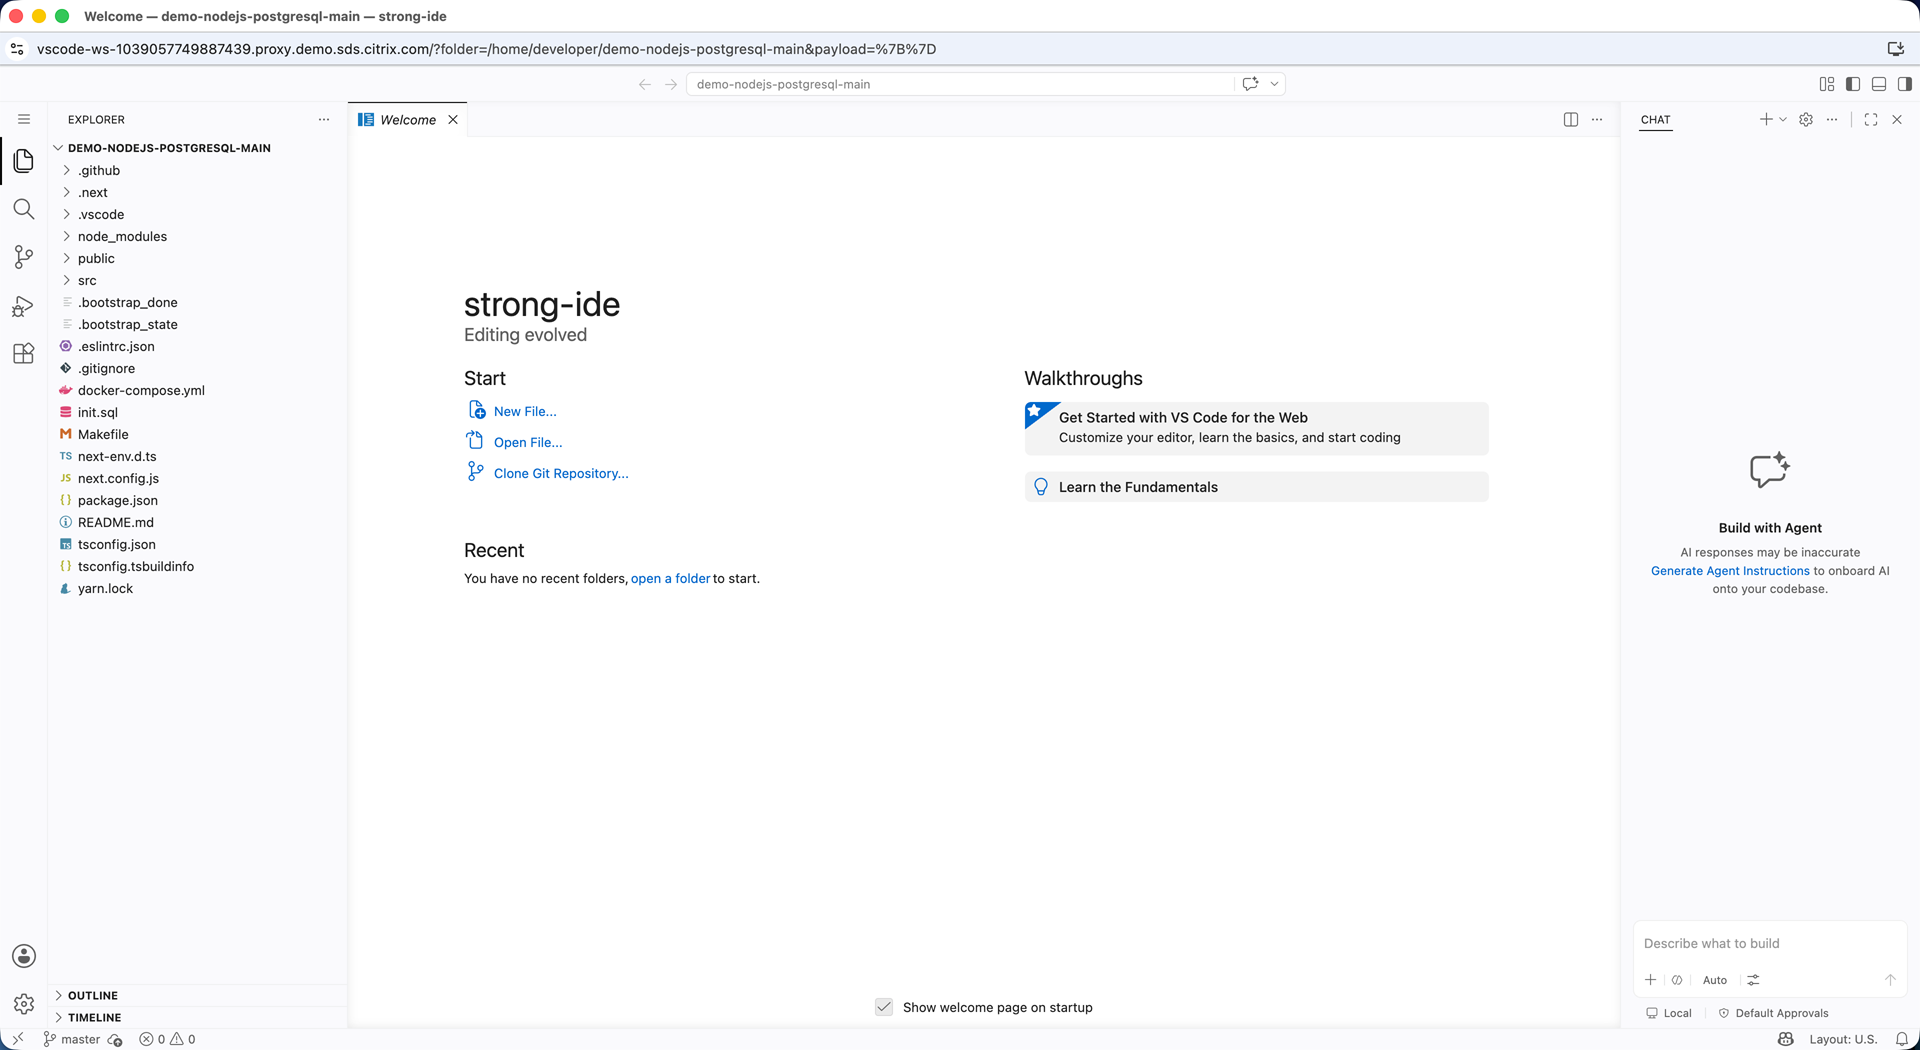
Open a terminal in the Cloud IDE and run:
whoami
<!--NeedCopy-->
It prints developer. You’re running commands inside the workspace, not on your own machine — the browser tab
is only the window onto it.
Step 3: Check your project code
If your template includes repositories, they were cloned while the workspace started. Confirm that:
ls /home/developer
<!--NeedCopy-->
Your project folder appears in the list. Open it and check the repository is intact:
cd /home/developer/my-project
git status
<!--NeedCopy-->
Git reports the current branch and a clean working tree. Your credentials came from your profile integrations, so you didn’t sign in to anything.
If your project folder isn’t there, your template may not include a repository, or your Git credentials may need attention. Ask your project owner which to expect, and see If a repository is missing.
Step 4: Learn what persists
Workspaces are non-persistent by default, and this is the thing most likely to surprise you later. Create a file in your home directory:
echo "notes" > /home/developer/scratch.txt
<!--NeedCopy-->
Anything under /home/developer — your code, this file, your node_modules — survives a pause or restart.
Anything outside it does not. A package you install system-wide with apt is gone when the workspace next
starts.
That’s the rule: keep your work under /home/developer. When you need a system-level tool permanently,
use a startup script or ask your project owner to add it to the template image. For more information, see
What persists in a SecurSpaces Workspace.
What you have learned
You have a running workspace with your project code in it, and you’ve run commands inside it from a browser.
Along the way you saw that the template supplied the environment, your profile supplied the credentials, and
/home/developer is the boundary between what persists and what doesn’t.
Other ways to connect
The Cloud IDE got you started without installing anything. For longer sessions, most developers switch to their own IDE, connected to the same workspace over SSH.
| IDE | Connection method |
|---|---|
| VS Code Desktop, Cursor, Windsurf, Kiro | One-click, using the Citrix Secure Developer Spaces - Remote SSH extension |
| JetBrains Gateway | SSH configuration through the Gateway interface |
| Other SSH-capable editors | Manual SSH key pair |
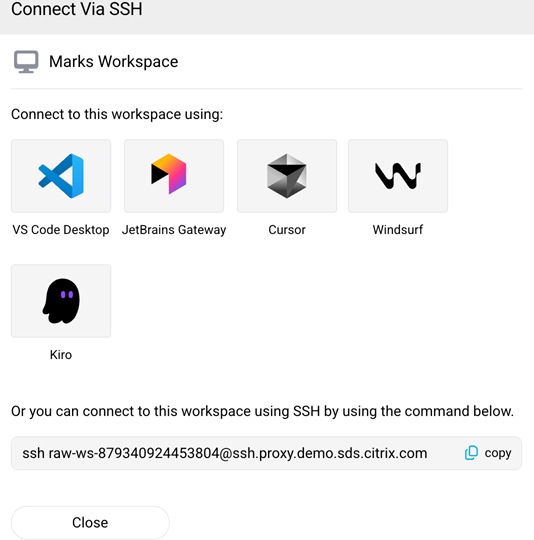
SSH has to be enabled for your project and on the workspace itself, and you need an SSH key pair in your profile. For the prerequisites and the steps for each IDE, see Connect to a workspace via SSH.
What to do next
| Goal | Guide |
|---|---|
| Connect from your own IDE over SSH | Connect to a workspace via SSH |
| Practice the development loop on a self-contained app | Hello World workspace |
| Create a workspace without a template, and configure it yourself | Create a Workspace |
| Share a running application with your team | Workspace Apps |
| Understand pausing, resuming, and automatic start | Manage Workspaces |
Get help
- Ask your project owner about templates, repositories, and project resources.
- Contact your platform administrator for account access, network, or platform-level issues.
- Browse the SecurSpaces documentation for detailed guides.
Share
Share
This Preview product documentation is Citrix Confidential.
You agree to hold this documentation confidential pursuant to the terms of your Citrix Beta/Tech Preview Agreement.
The development, release and timing of any features or functionality described in the Preview documentation remains at our sole discretion and are subject to change without notice or consultation.
The documentation is for informational purposes only and is not a commitment, promise or legal obligation to deliver any material, code or functionality and should not be relied upon in making Citrix product purchase decisions.
If you do not agree, select I DO NOT AGREE to exit.