Integrate with Citrix HDX™ plus for Windows 365 in a Session Recording deployment
This article walks you through the procedures of creating a Session Recording site through a host connection and then integrating the Session Recording service with Citrix HDX plus for Windows 365.
Requirements for using this solution
To successfully implement the solution, the following requirements must be fulfilled:
Citrix requirements
- Citrix Cloud tenant with Citrix HDX Plus for Windows 365 entitlement
- Citrix Cloud™ administrator account with full administrator rights.
- The deployed environment must have access to:
- https://*.citrixworkspacesapi.net (provides access to Citrix Cloud APIs that the services use)
- https://*.cloud.com (provides access to the Citrix Cloud sign-in interface)
- https://*.blob.core.windows.net (provides access to Azure Blob Storage, which stores updates for the Session Recording cloud client)
Microsoft requirements
- Azure administrator account:
- Azure AD Global administrator
Supported Configurations
The Session Recording service supports Windows 365 deployments with Entra joined, and Entra hybrid joined Cloud PCs.
Step 1: Add a host connection to your Azure subscription
For a step-by-step guide, see Add a host connection.
Step 2: Create and deploy a Session Recording site through the host connection
You can create a site to deploy the following Session Recording resources to your Azure subscription from within the Session Recording service:
- Session Recording servers
- Databases
- Storage
- Load balancer
You can also get recommended VM and storage configurations, predict costs, and view the actual monthly costs for using Azure from within the Session Recording service.
For an existing site deployed on Azure, you can add resources including servers and storage to it and change the IP addresses that are allowed to access the load balancer.
This article guides you through the following procedures:
-
Select Configuration > Server Management from the left navigation of the Session Recording service.
-
On the Server Management page, click Create site. The Create Site page appears.

-
Select Create and deploy a site through a host connection. The main steps are listed in the left navigation.

-
Enter a site name and description, select the host connection that you added in Step 1, and specify a region. Azure Government regions aren’t supported.
-
After completing the site information, click Next to continue.
-
(Optional) To get recommendations for VM and storage configurations, provide information about your recording needs.
You can skip this step by clicking I’m good, skip this step or by clicking Next with nothing selected.
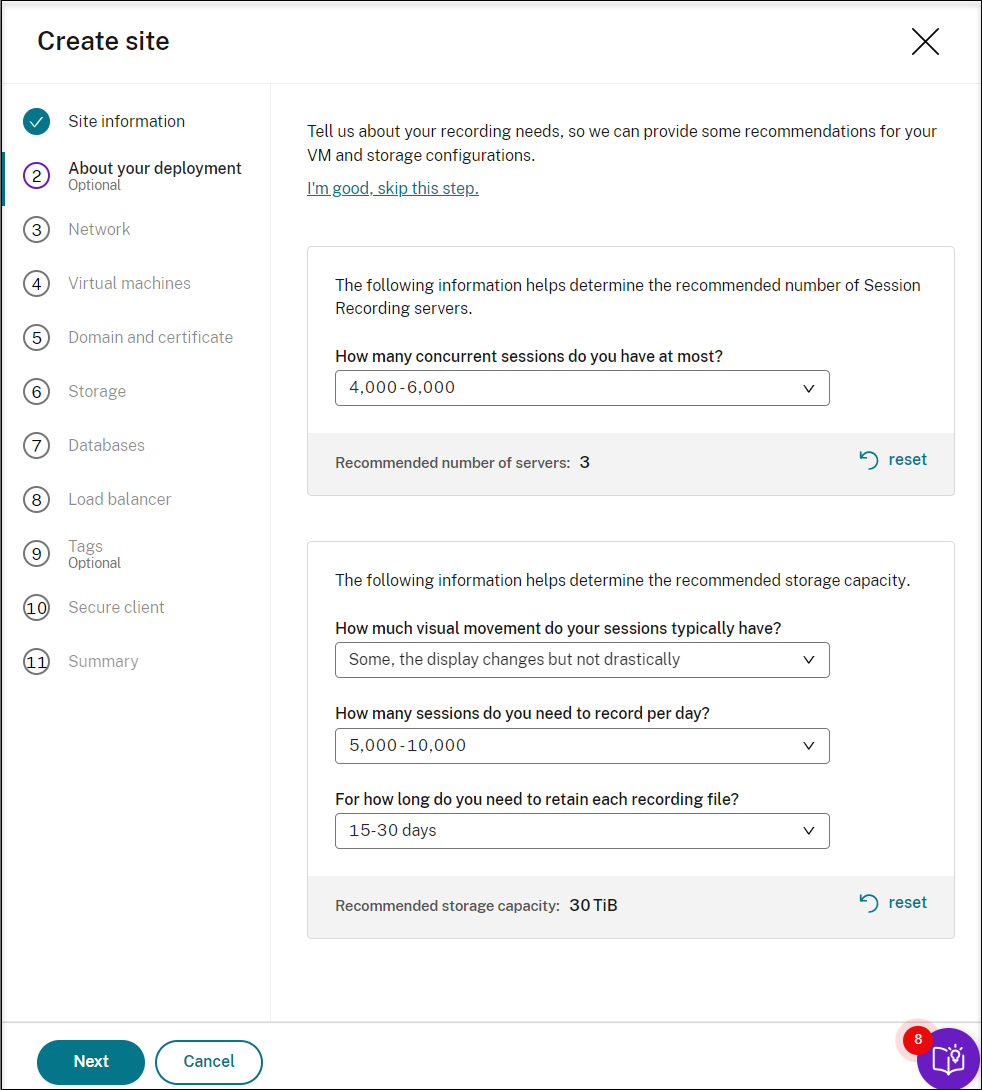
When you select an option from the drop-down list, a recommendation is presented according to your selection. A reset button is available next to the recommendation. It lets you clear your selections and the corresponding recommendation in that section.
-
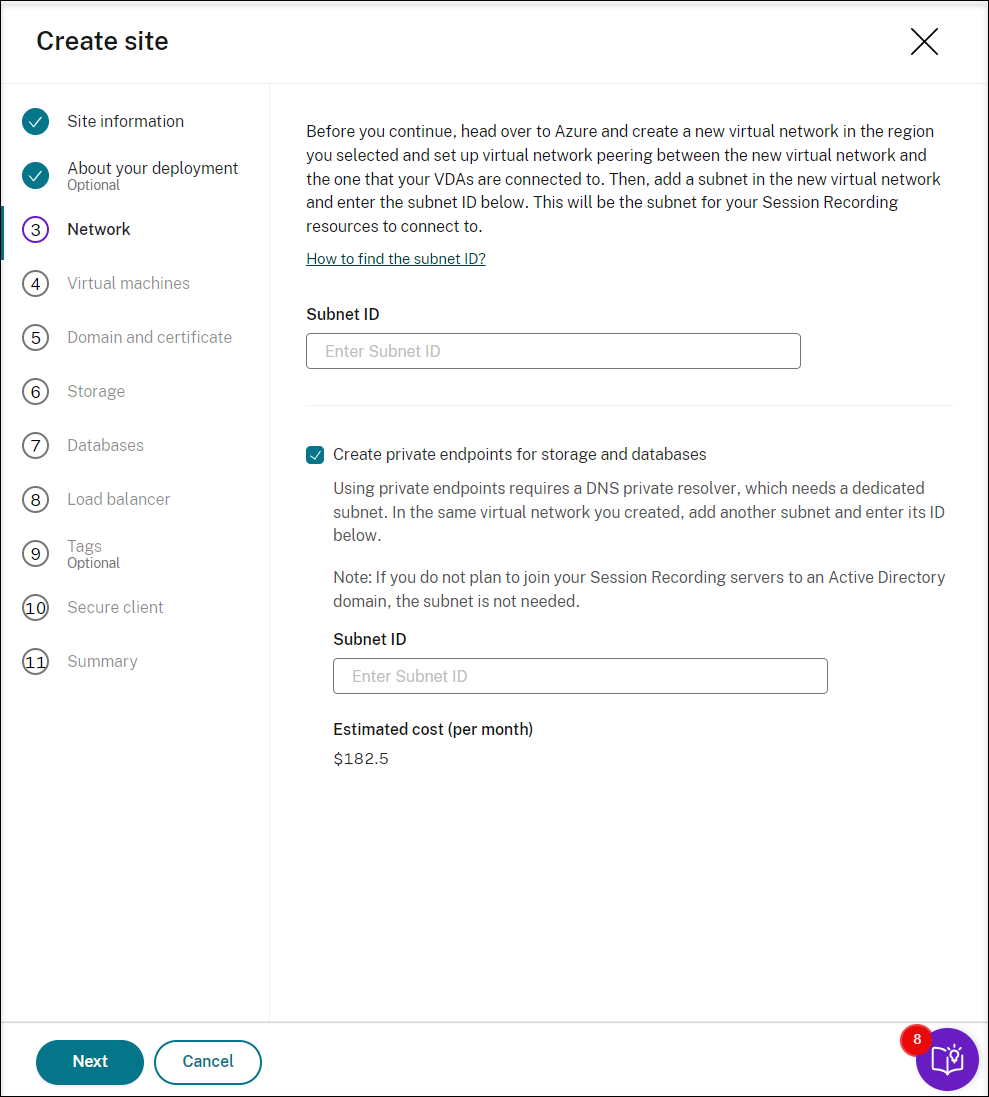
Go to the Azure portal and create a new virtual network in the region you selected and set up virtual network peering between the new virtual network and the one that your VDAs are connected to. Then, add a subnet in the new virtual network. Find and enter the subnet ID below.
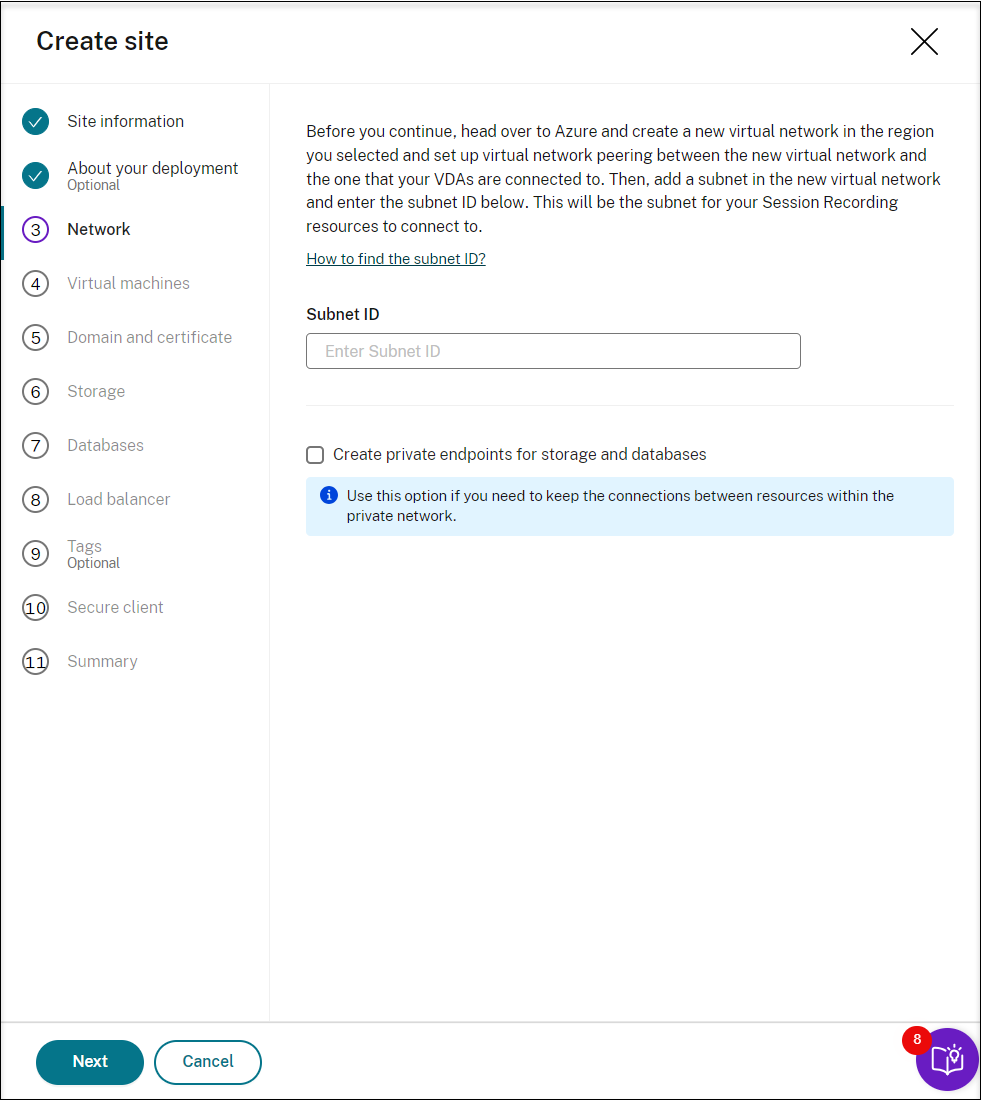
To keep the connections between resources within the private network, select the Create private endpoints for storage and databases check box.
After you select the Create private endpoints for storage and databases check box, decide on whether to enter another subnet ID by taking the following into consideration:
- If you do not plan to join your Session Recording servers to an Active Directory domain, the subnet is not needed and thus leave the subnet ID field empty.
- If you leave the subnet ID field empty, you are joining your Session Recording servers to an Azure Active Directory domain.
-
Create virtual machines (VMs) as your Session Recording servers.
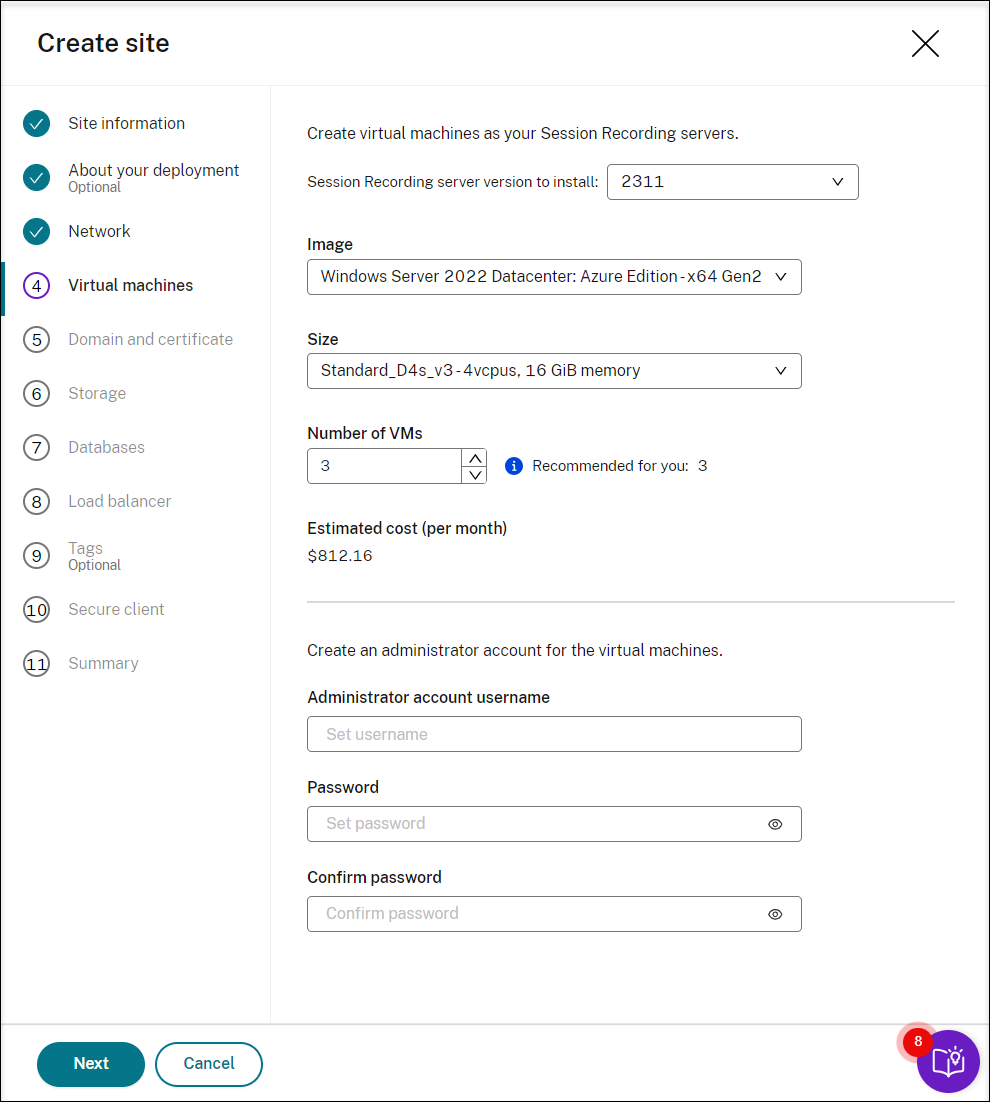
Note:
- The Number of VMs field is prefilled with the recommended number if there’s one. Change the number as needed.
- Estimated costs are based on standard pricing and don’t take discounts into consideration. You can expect lower actual costs than estimated.
-
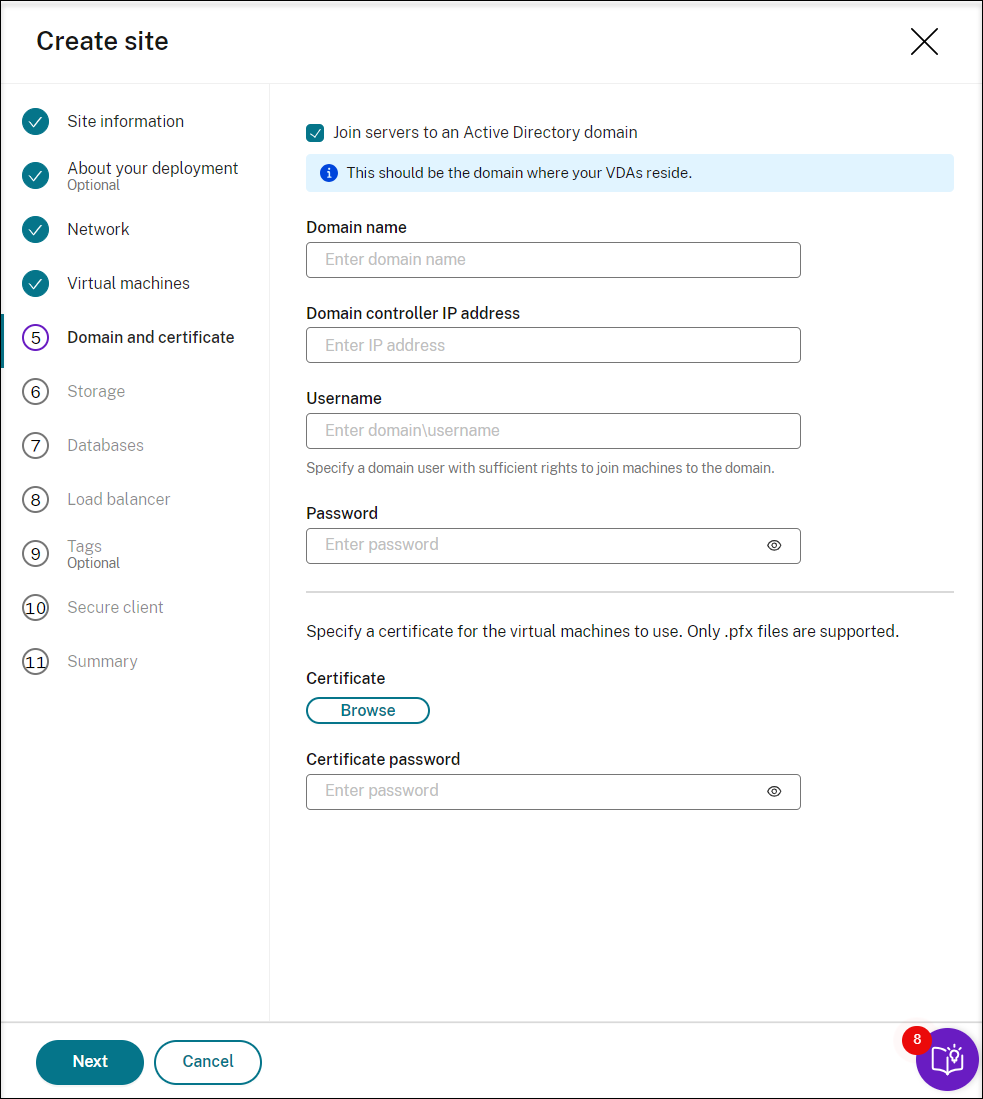
Join the Session Recording servers to the same domain with your VDAs and specify a certificate for the Session Recording servers.
-
If your VDAs connect to an Active Directory domain, select the Join servers to an Active Directory domain check box and enter the relevant information. By selecting the Join servers to an Active Directory domain check box, you are configuring the deployment for a hybrid scenario, integrating on-premises Active Directory with Azure AD.
-
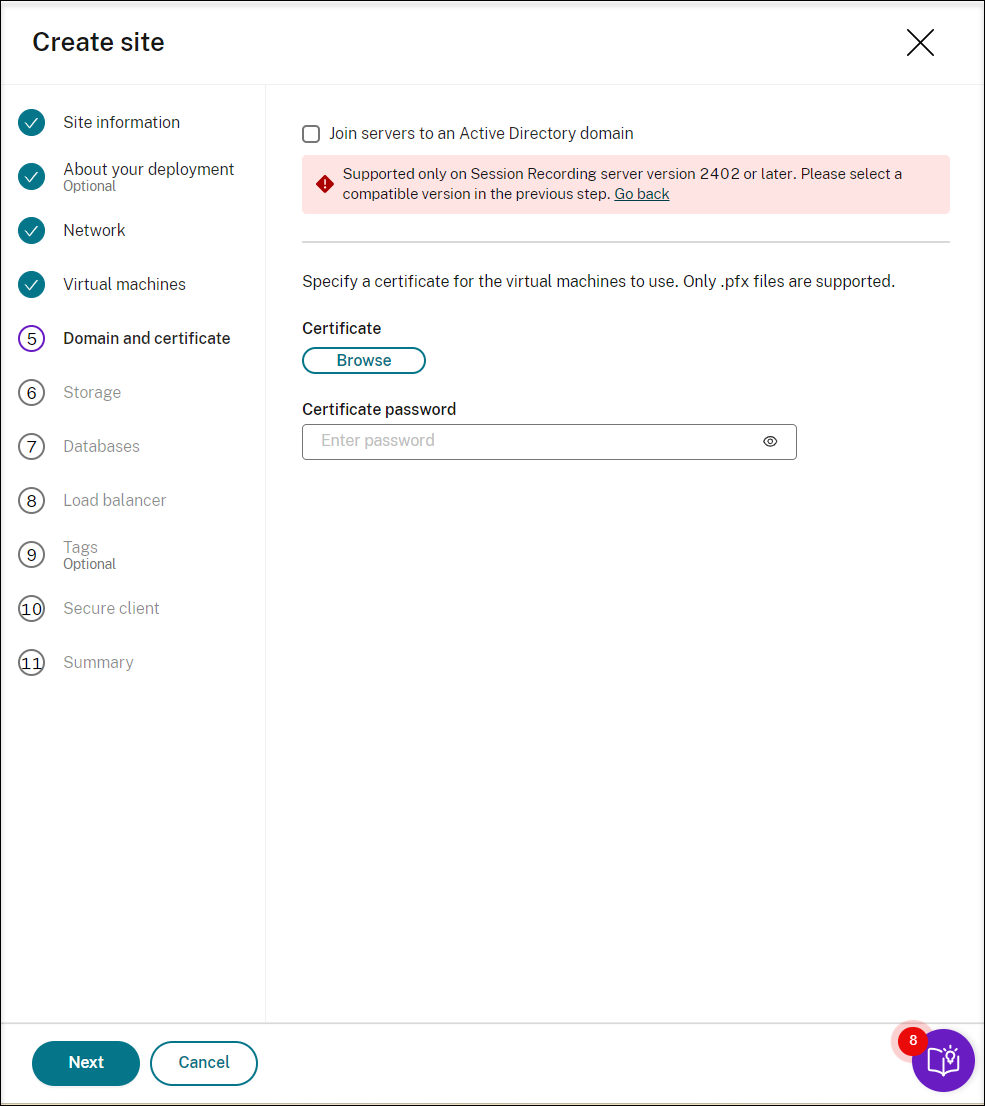
If your VDAs connect to an Azure Active Directory (Azure AD) domain, clear the Join servers to an Active Directory domain check box. After you complete creating the current site, make sure to manually join the Session Recording servers to the same Azure AD domain. Notice that pure Azure AD deployment is available only for Session Recording 2402 and later.
Note:
Since July 2023, Microsoft has renamed Azure Active Directory (Azure AD) to Microsoft Entra ID. In this document, any reference to Azure Active Directory, Azure AD, or AAD now refers to Microsoft Entra ID.
-
-
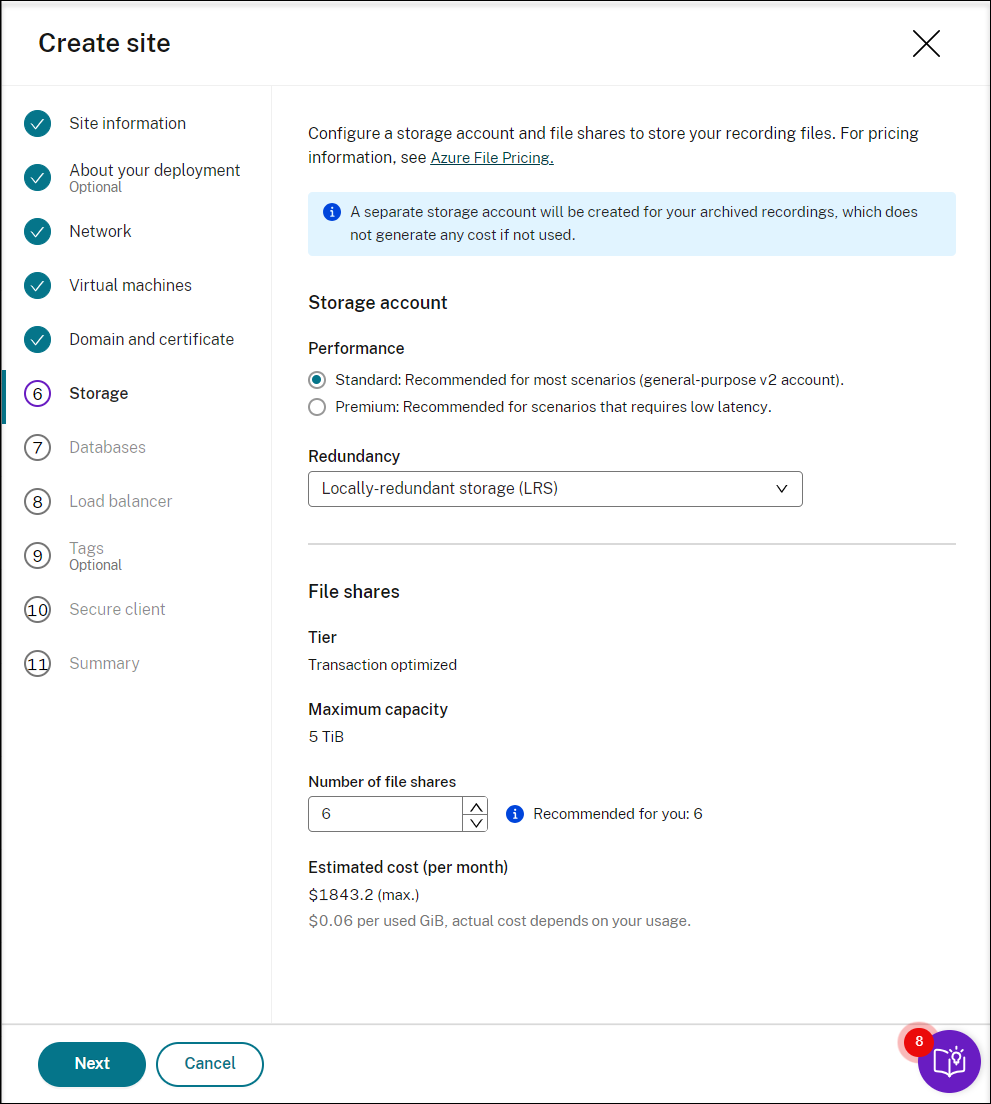
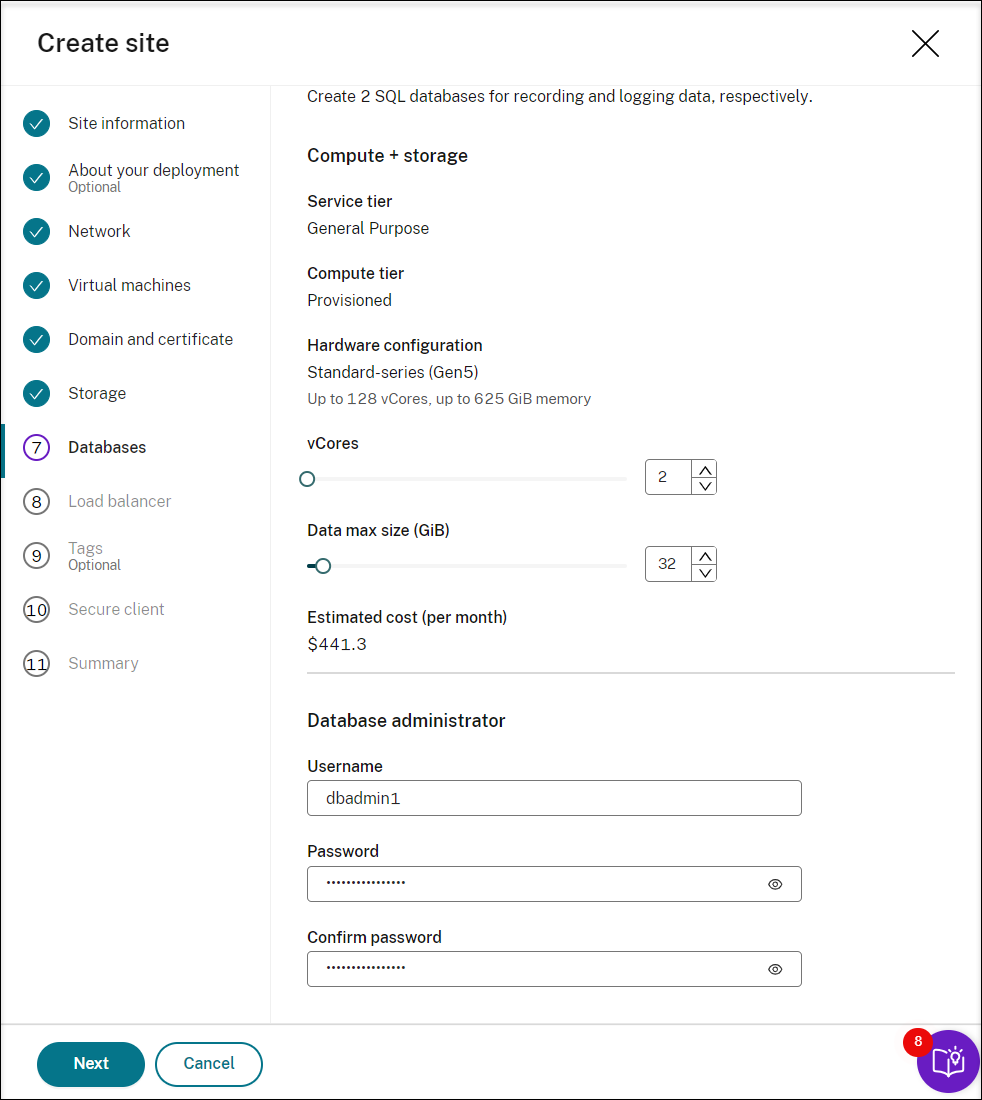
Configure an Azure storage account and file shares to store your recording files. For pricing information, see Azure Files pricing.
-
Create two SQL databases in Azure. One is used as the Session recording database (named sessionrecording) and the other as the administrator logging database (named sessionrecordinglogging).
-
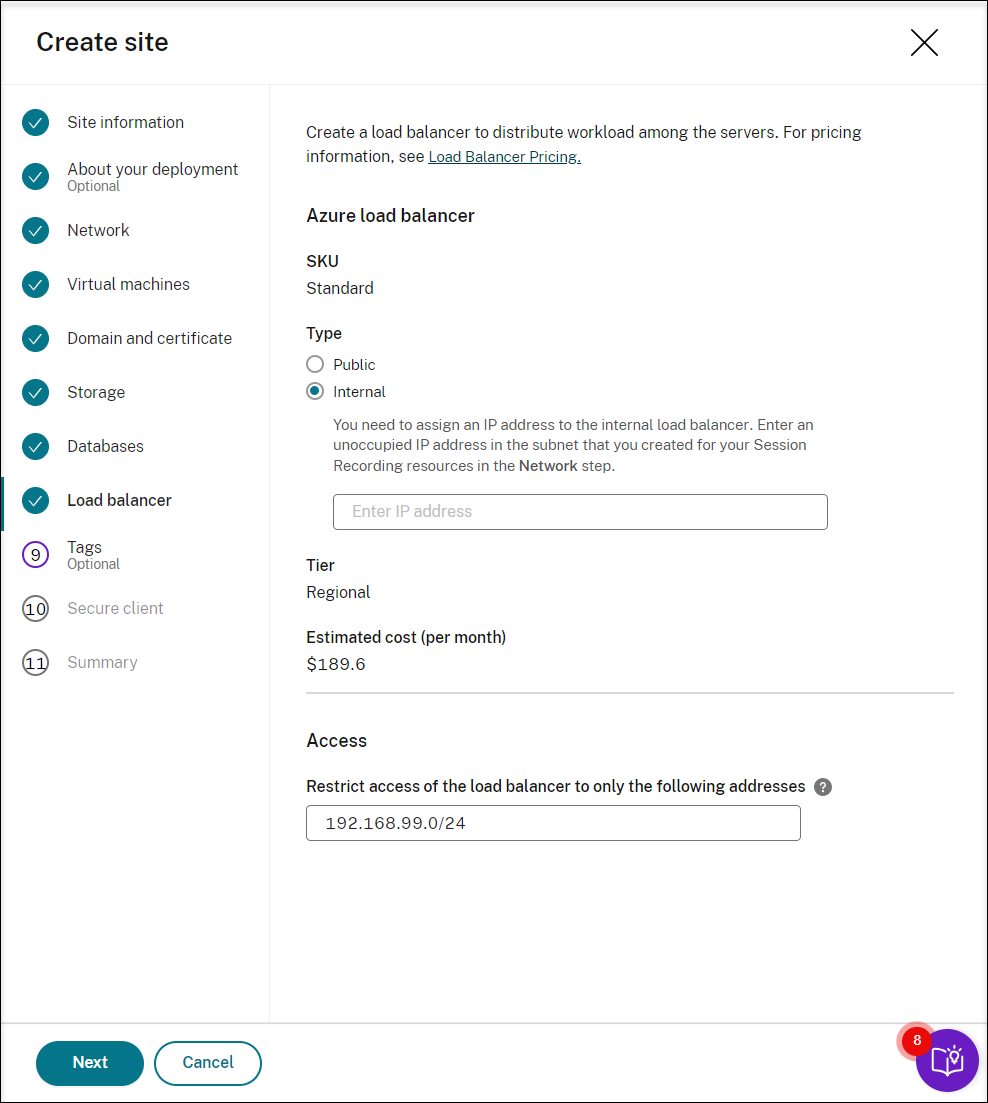
Create a load balancer to distribute workload among the Session Recording servers. Enter the IP addresses or ranges of your VDAs and separate them by a comma (,) in the Restrict access of the load balancer to only the following addresses field. For pricing information, see Load Balancer pricing.
-
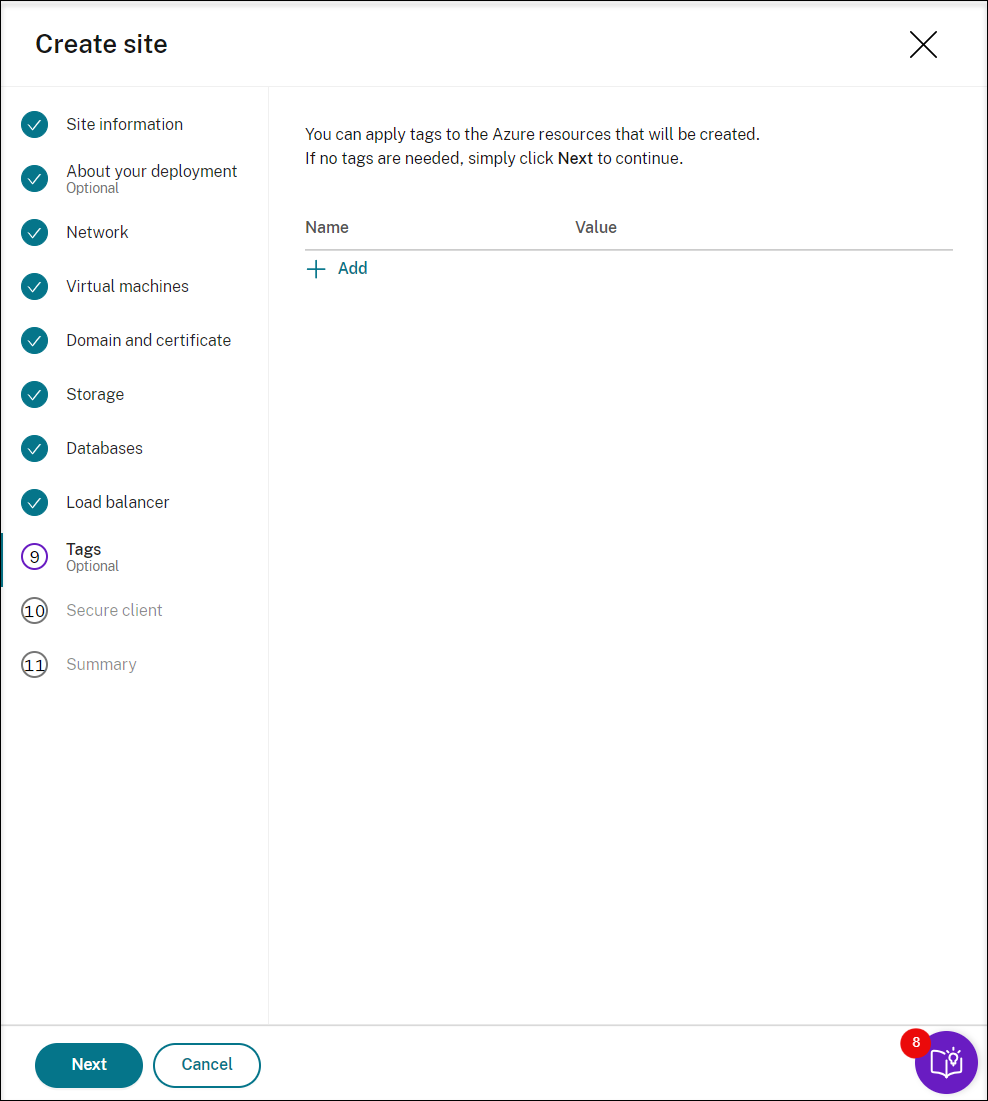
(Optional) Apply tags to the Azure resources to be created.
-
Create a secure client to onboard the Session Recording servers to the Session Recording service.
Click Create client to let Citrix create a secure client on your behalf. Alternatively, you can create a secure client through the Identity and Access Management > API Access tab of the Citrix Cloud console and then fill in the information below.

-
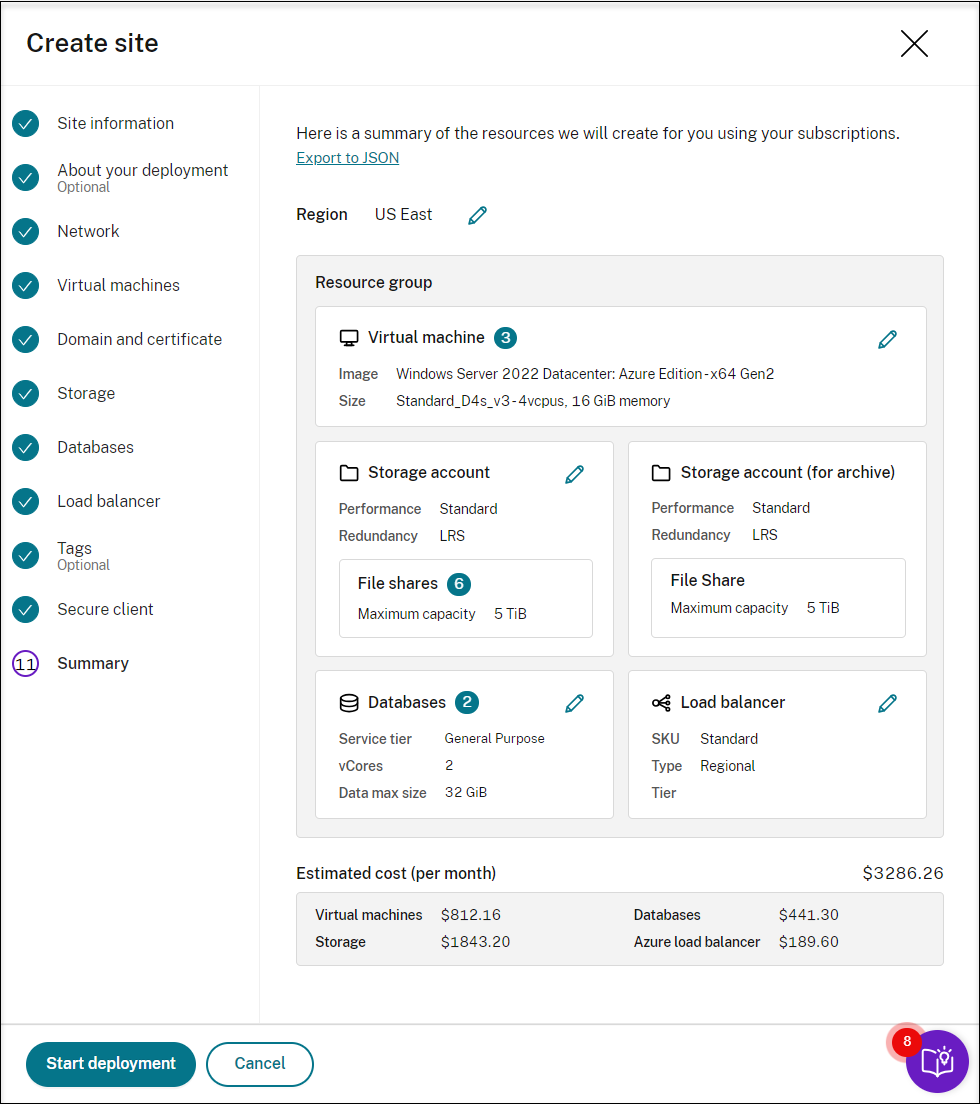
View the summary about the site to be created. Click the pencil icon to edit your settings if needed or click the button to start deployment.
The following are examples of the deployment process:
Deployment in progress:
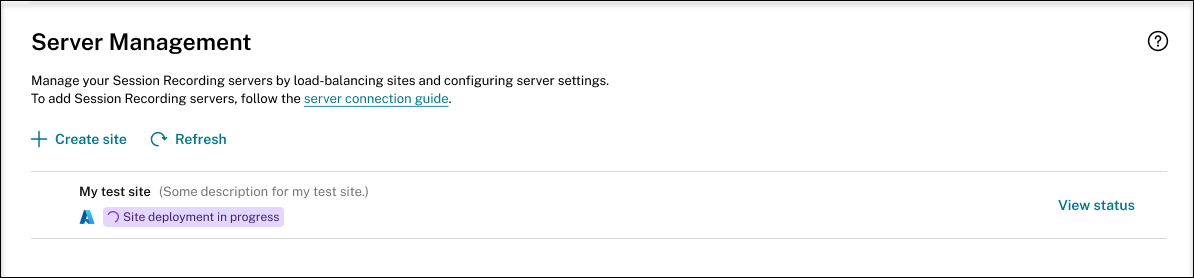
While a site deployment is in progress, you can click View status to view the progress.
Deployment failed:
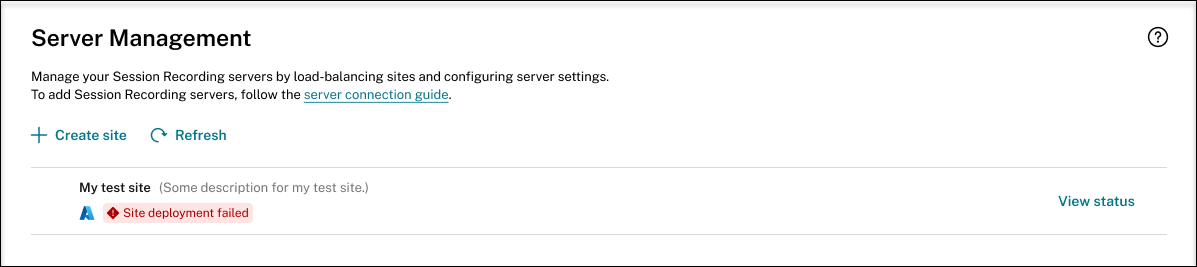
If errors occur during the deployment process, click View status to view the error details. For an example of the error details:
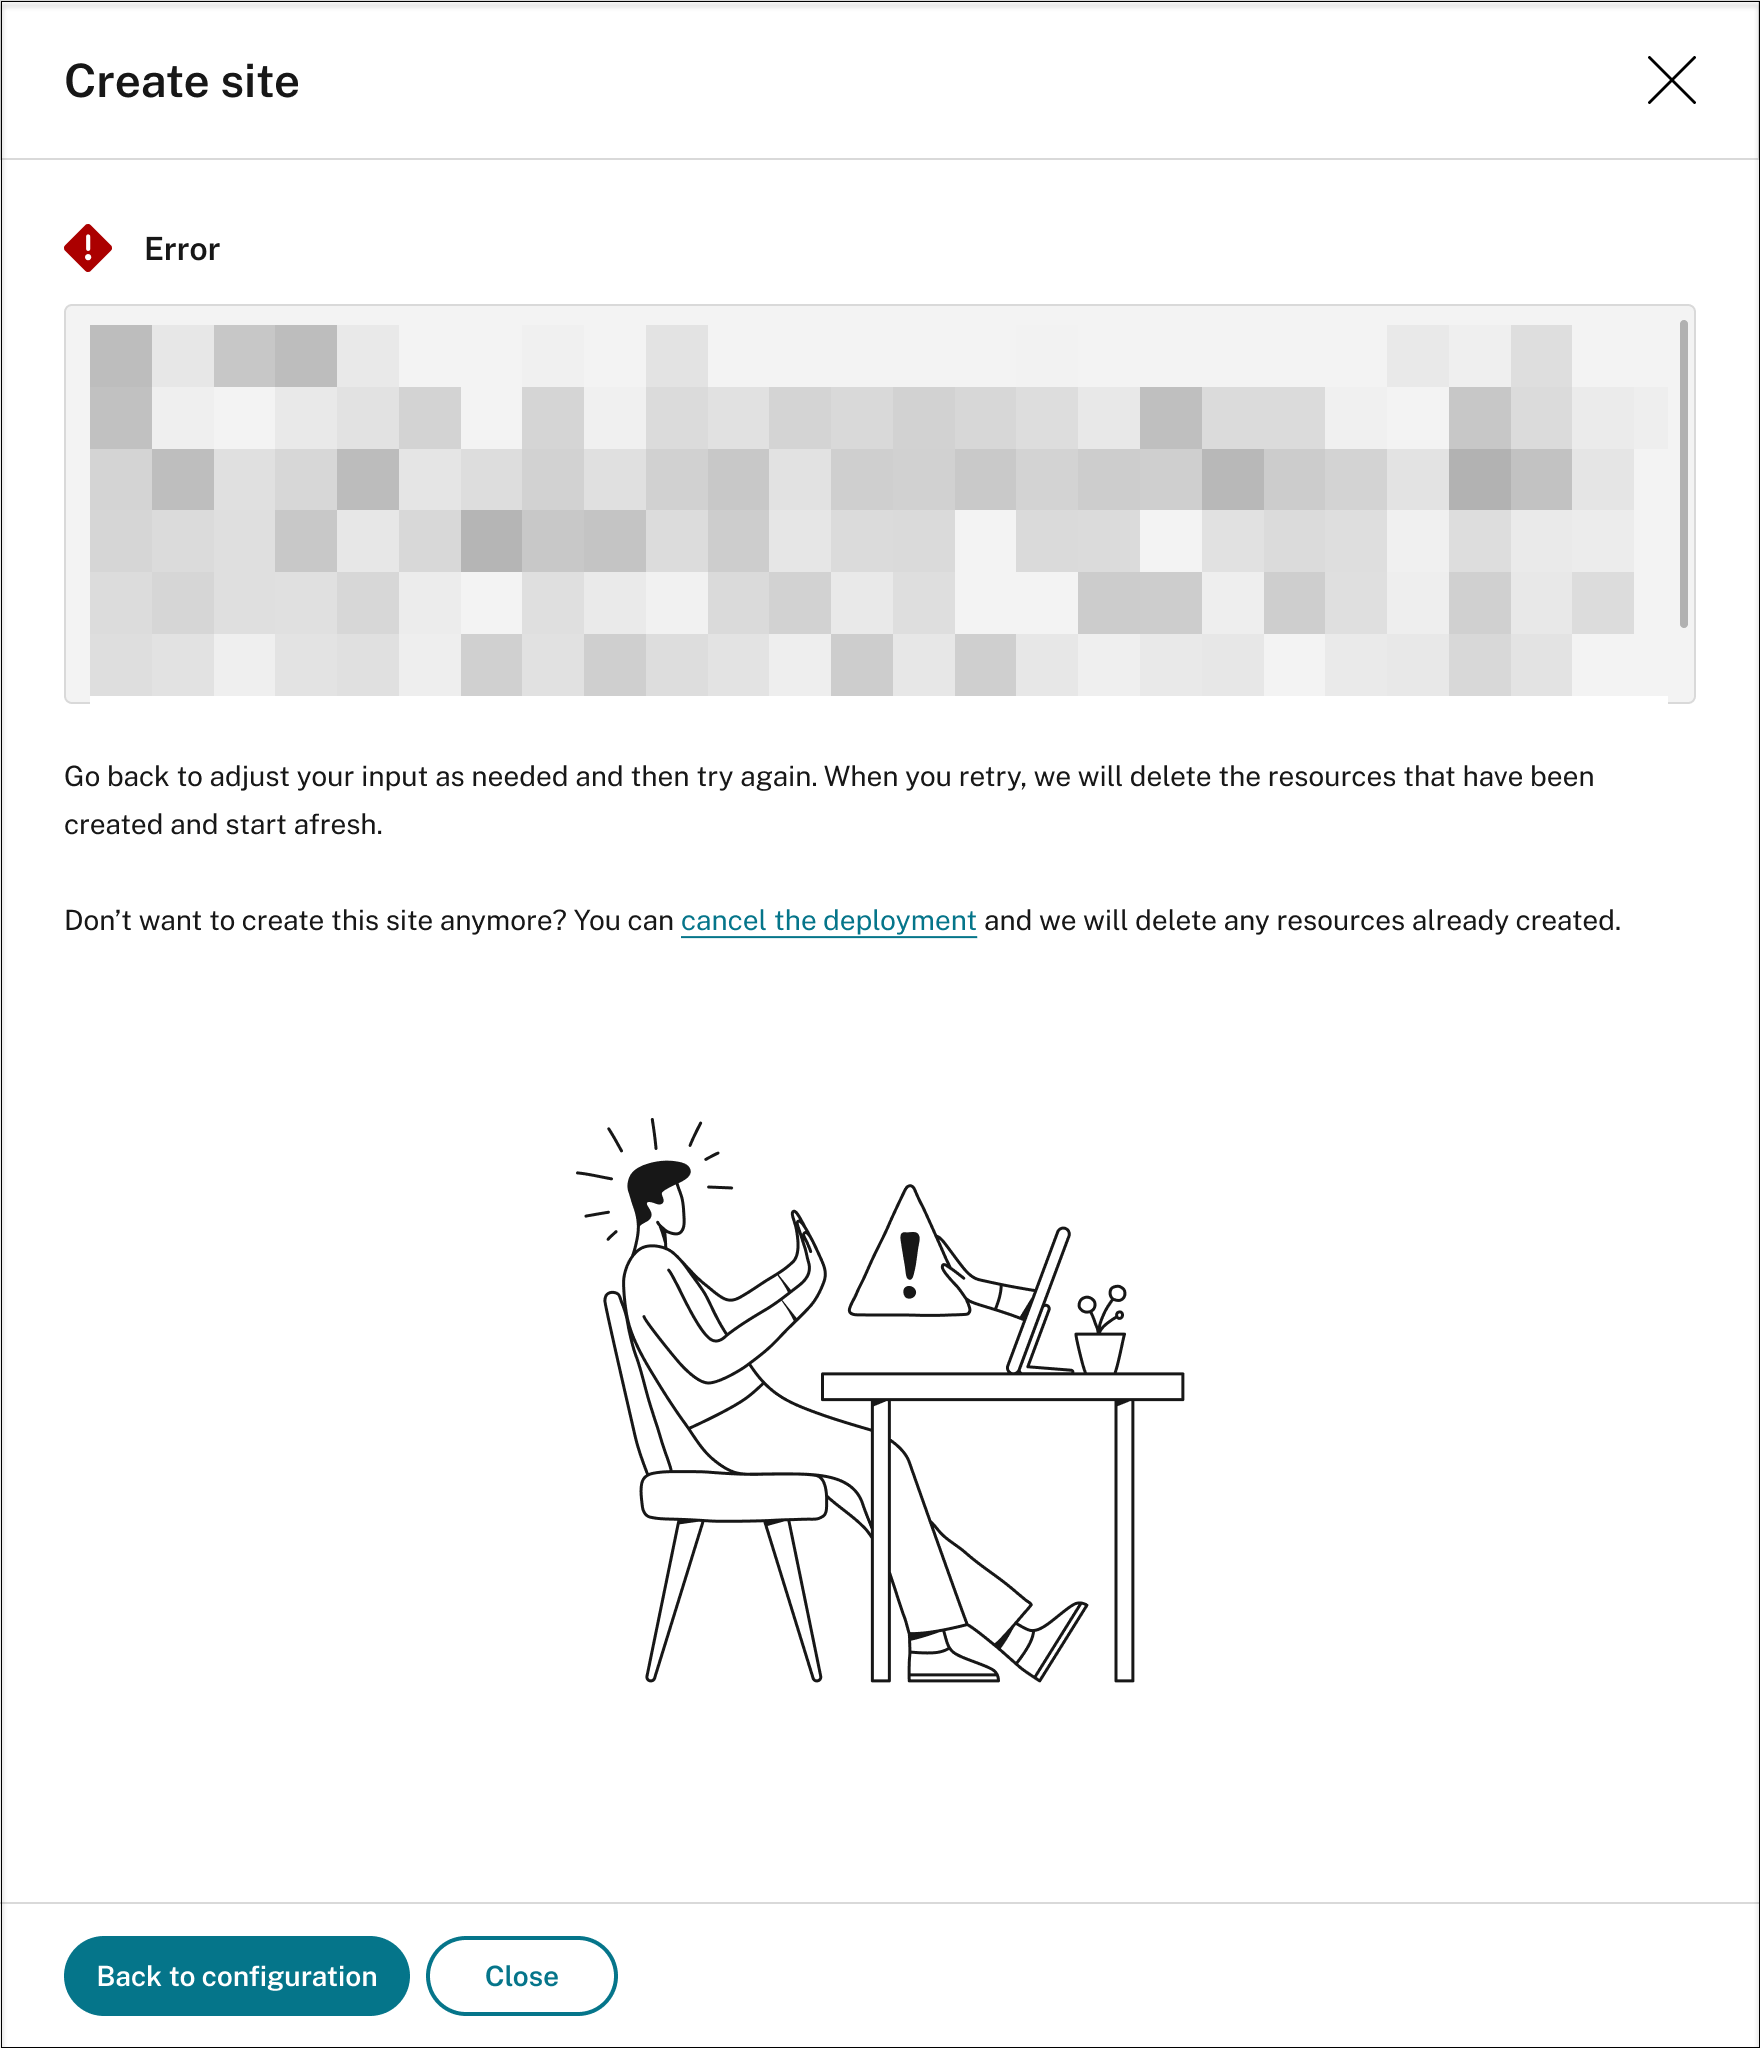
You can click Back to configuration or cancel the deployment. If you click Back to configuration, you’re taken back to the Create Site page where you can alter your configurations and try again. If you’re sure to cancel the deployment, follow the wizard to remove the site and the Azure resources created for the site. For example:

Deployment success:
When a site deployment is complete, you can expand the site and view and manage the resources created under it. The View status button changes to Settings. An Azure icon is available to represent sites deployed on Azure. For information about site settings, see Site and server settings.
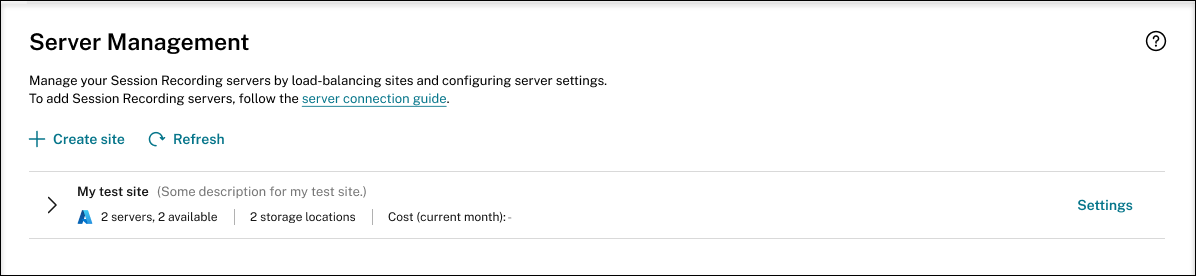
Keep a record of the storage location and the DNS name listed in the load balancer section. The DNS name will serve as the Session Recording server name that you need to fill in later for communicating with the VDAs.
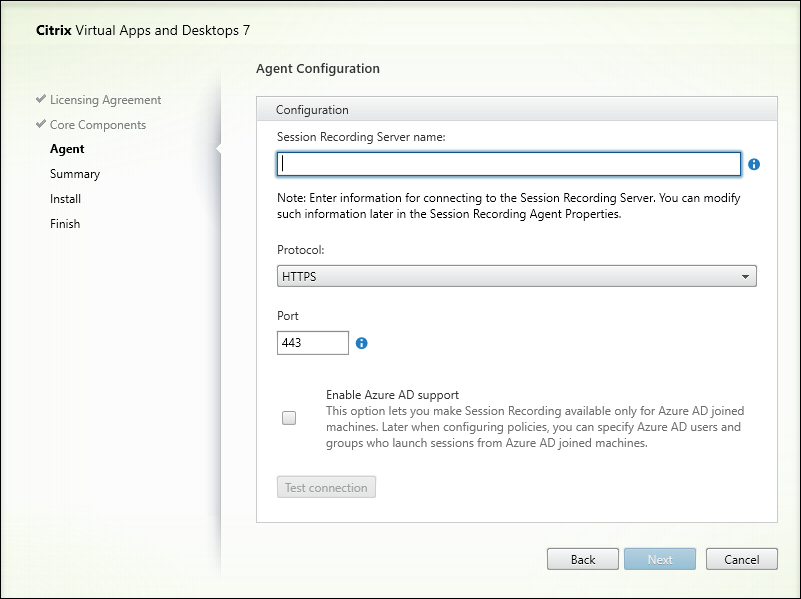
Step 3: Install and configure the Session Recording agent on Windows 365 cloud PCs
On the target Windows 365 cloud PCs, install the Session Recording agent. During the agent installation, make sure that you complete the following steps on the Agent configuration page:
-
Enter the DNS name you previously recorded in the Session Recording Server name text box.
-
If you are installing the Session Recording agent on an Azure AD joined machine, select Enable Azure AD support. Otherwise, clear the check box. By clearing the check box, you are configuring the deployment for a hybrid scenario, integrating on-premises Active Directory with Azure AD.
Step 4: Configure policies
The Session Recording service lets you view and configure session recording, event detection, and event response policies for a specific site. Each policy you create or activate applies to all Session Recording servers of a site.
For more information, see:
- Configure session recording policies
- Configure event detection policies
- Configure event response policies
Step 5: Replay recorded sessions
To replay recorded sessions, go to the All Recordings and Archived pages. each recording has a play button on the right side. You can play live and completed recordings. For more information, see the View recordings chapter.
In this article
- Requirements for using this solution
- Supported Configurations
- Step 1: Add a host connection to your Azure subscription
- Step 2: Create and deploy a Session Recording site through the host connection
- Step 3: Install and configure the Session Recording agent on Windows 365 cloud PCs
- Step 4: Configure policies
- Step 5: Replay recorded sessions