PoC Guide: ZTNA to Private Web Apps (Agentless)
Overview
With remote work, users need access to internal web-based applications. Providing a better experience means avoiding a VPN deployment model, which often results in the following challenges:
- VPN Risk 1: Are difficult to install and configure
- VPN Risk 2: Require users install VPN software on endpoint devices, which might utilize an unsupported operating system
- VPN Risk 3: Require the configuration of complex policies to prevent an untrusted endpoint device from having unrestricted access to the corporate network, resources, and data
- VPN Risk 4: Difficult to keep security policies synchronized between VPN infrastructure and on-premises infrastructure
To improve the overall user experience, organizations must be able to unify all sanctioned apps and simplify user login operations while still enforcing authentication standards.
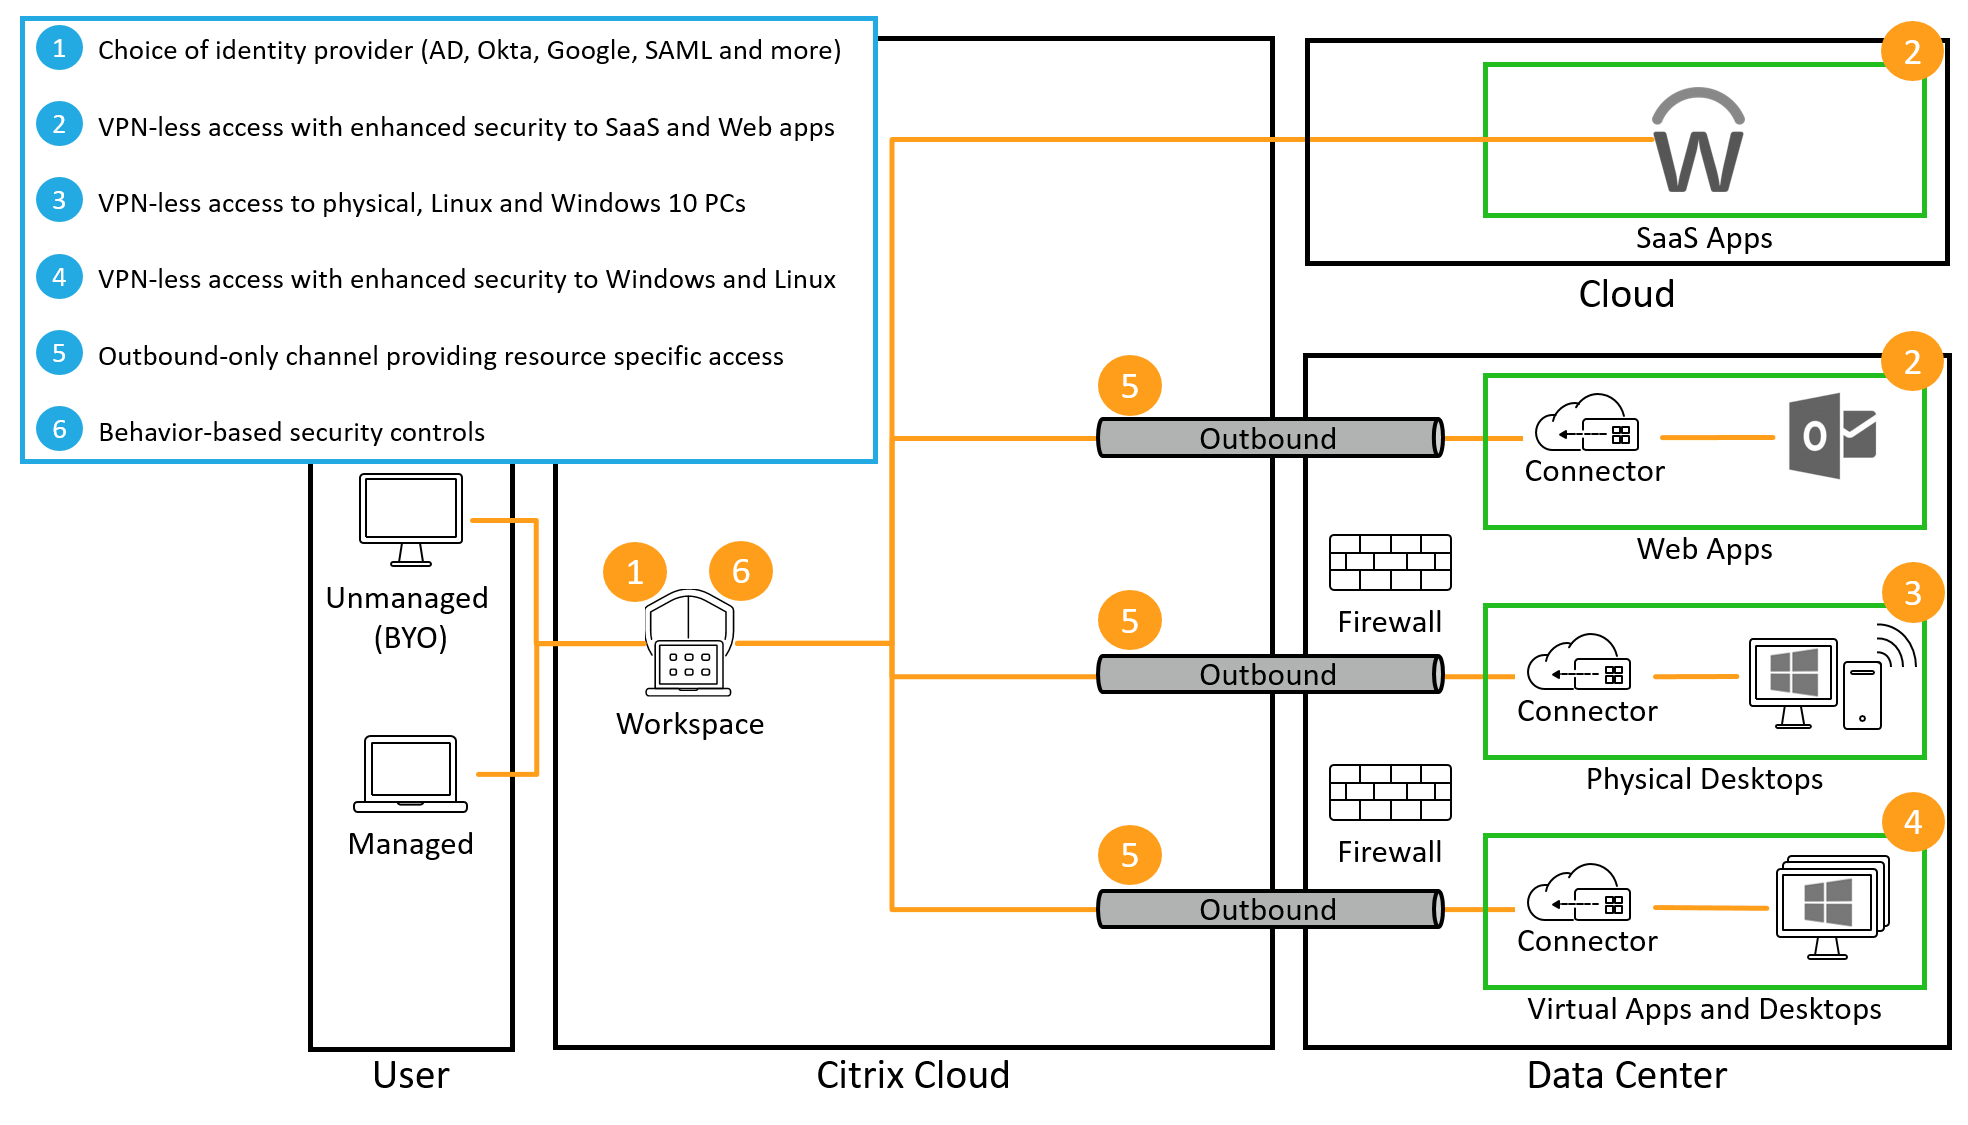
Organizations must deliver and secure SaaS, web, Windows, Linux applications, and desktops even though some of these resources exist beyond the confines of the data center and can access resources outside of the data center. Citrix Secure Private Access service provides organizations with secure, VPN-less access to user-authorized resources, through Citrix Workspace.
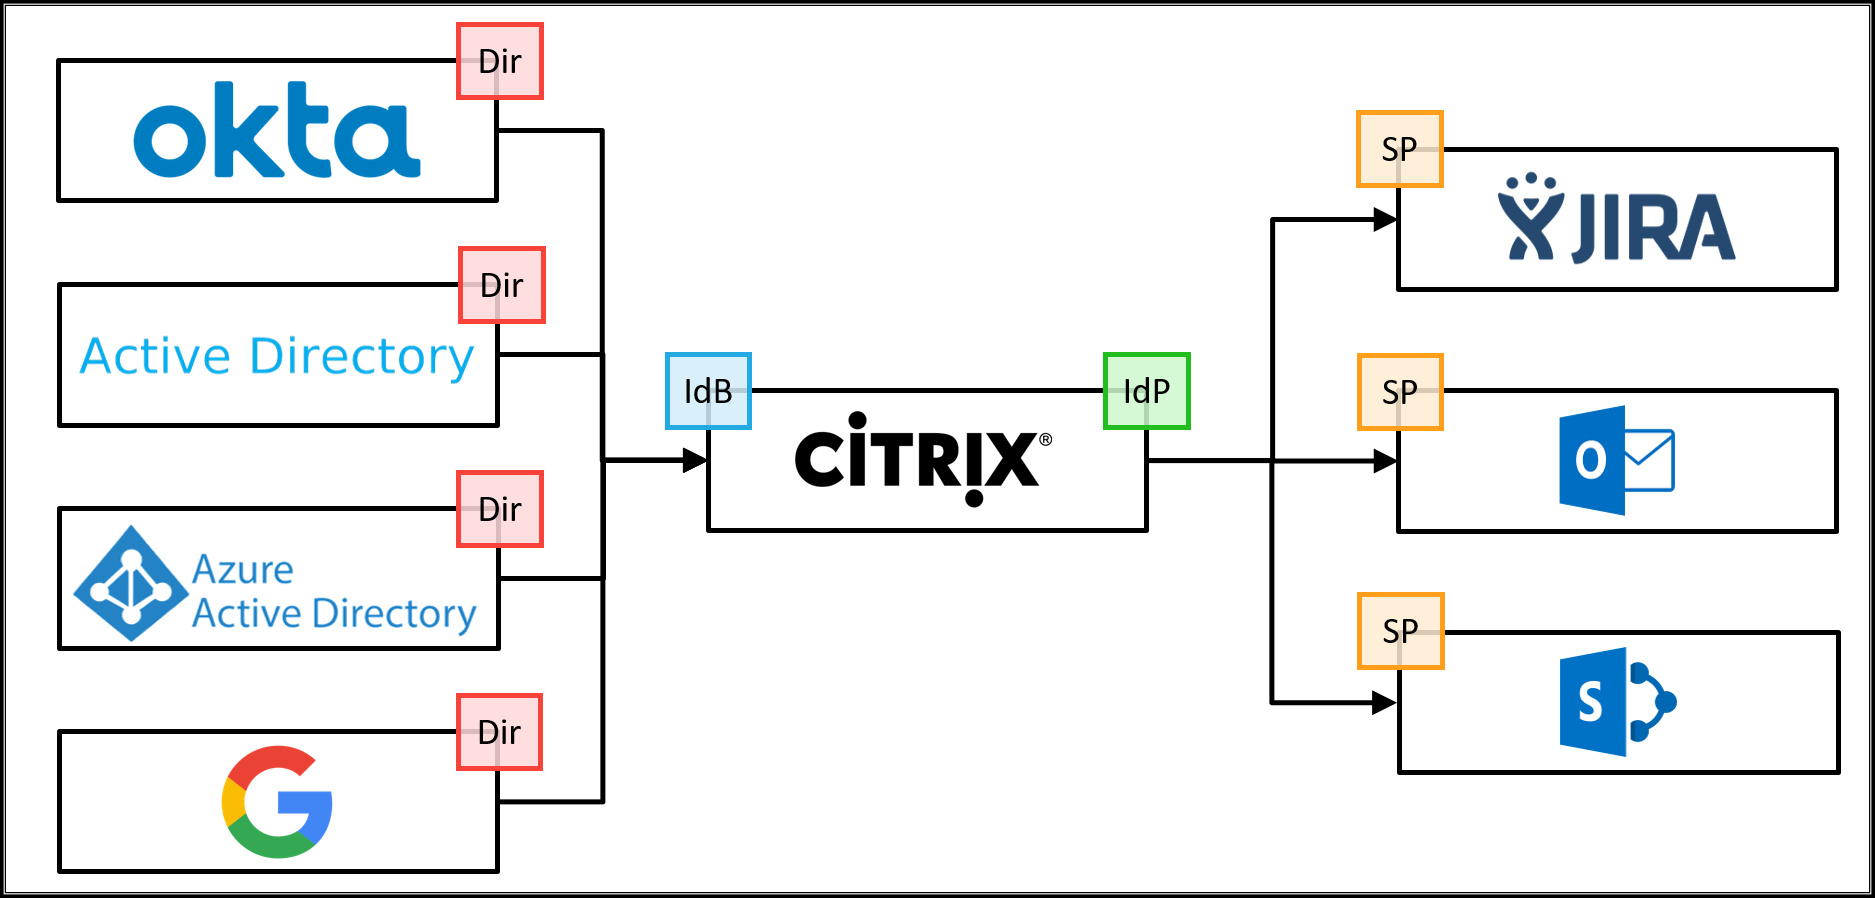
In this proof of concept scenario, a user authenticates to Citrix Workspace using Active Directory, Azure Active Directory, Okta, Google, Citrix Gateway, or a SAML 2.0 provider of their choice as the primary user directory. Citrix Workspace provides single sign-on services for a defined set of enterprise web applications.
If the Citrix Secure Private Access service is assigned to the Citrix subscription, enhanced security policies, ranging from applying screen-based watermarks, restricting printing/downloading actions, screen grabbing restrictions, and keyboard obfuscation are applied on top of the web applications.
The animation shows a user accessing an internal Sharepoint web application with Citrix-provided SSO and secured with Citrix Secure Private Access service.
This demonstration shows a flow where the user launches the application from Citrix Workspace, which uses the VPN-less connection to the data center. Because the user accesses an internal web application from an external device, the access request must come from within Citrix Workspace.
This proof of concept guide demonstrates how to:
- Setup Citrix Workspace
- Integrate a primary user directory
- Incorporate Single sign-on for a Sharepoint web application, which is located within the data center
- Validate the configuration
Setup Citrix Workspace
The initial steps for setting up the environment is to get Citrix Workspace prepared for the organization, which includes
- Once you establish Citrix Secure Private Access service entitlement with your Citrix account team, you will find the Citrix Secure Private Access icon under My Services. For more information see.
- Set up the Workspace URL
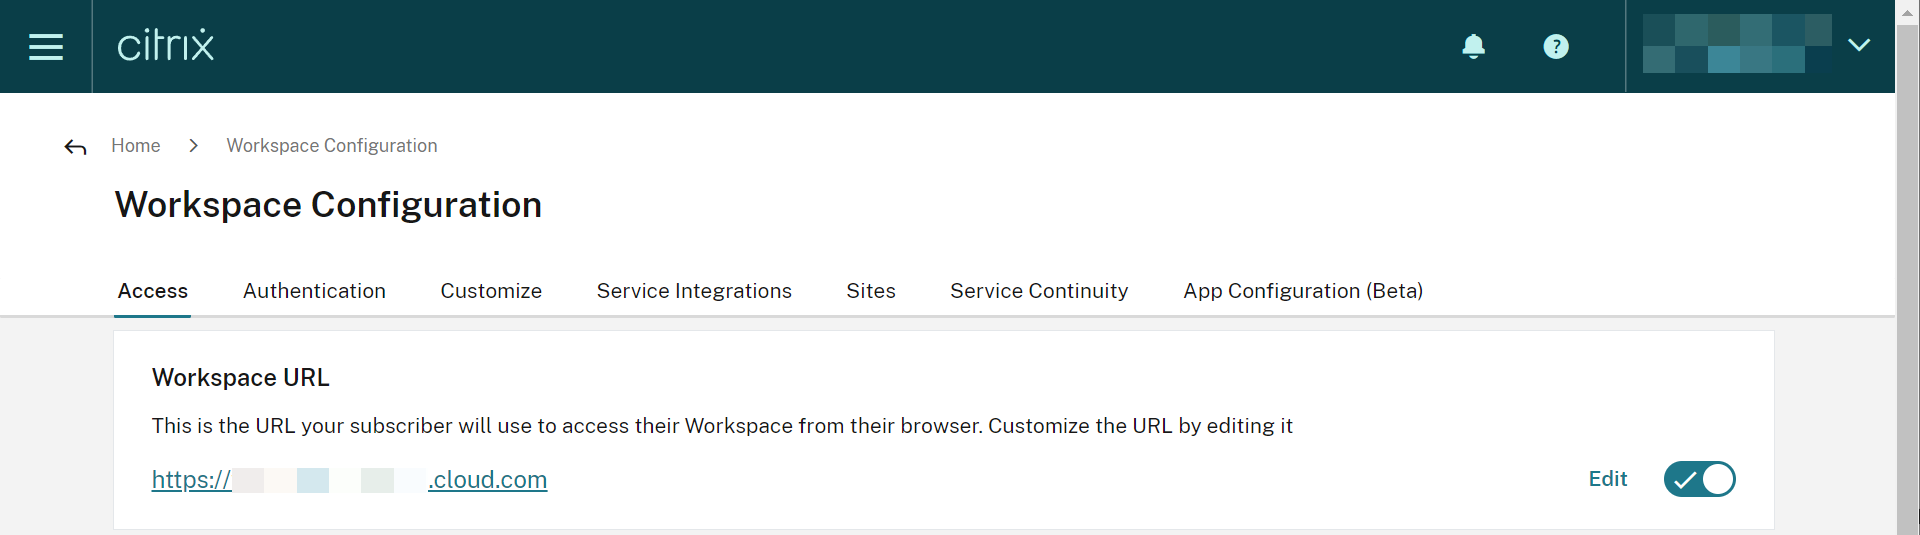
Set Workspace URL
- Connect to Citrix cloud and log in as your administrator account
- Within Citrix Workspace, access Workspace Configuration from the upper-left menu
- From the Access tab, enter a unique URL for the organization and select Enabled
Integrate a Primary User Directory
Before users can authenticate to Workspace, a primary user directory must be configured. The primary user directory is the only identity the user requires as all requests for apps within Workspace utilize single sign-on to secondary identities.
An organization can use any one of the following primary user directories:
- Active Directory: To enable Active Directory authentication, a cloud connector must be deployed within the same data center as an Active Directory domain controller by following the Cloud Connector Installation guide.
- Active Directory with Time-Based One Time Password: Active Directory-based authentication can also include multifactor authentication with a Time-based One Time Password (TOTP). This guide details the required steps to enable this authentication option.
- Azure Active Directory: Users can authenticate to Citrix Workspace with an Azure Active Directory identity. This guide provides details on configuring this option.
- Citrix Gateway: Organizations can utilize an on-premises Citrix Gateway to act as an identity provider for Citrix Workspace. This guide provides details on the integration.
- Okta: Organizations can use Okta as the primary user directory for Citrix Workspace. This guide provides instructions for configuring this option.
- SAML 2.0: Organizations can use the SAML 2.0 provider of choice with their on-premises Active Directory (AD). This guide provides instructions for configuring this option.
Configure Single Sign-on
To successfully integrate web apps with Citrix Workspace, the administrator needs to do the following:
- Deploy Connector Appliance
- Configure Web app
- Authorize Web App and configure enhanced security
Deploy Connector Appliance
- Within Citrix cloud™, select Resource Locations from the menu bar
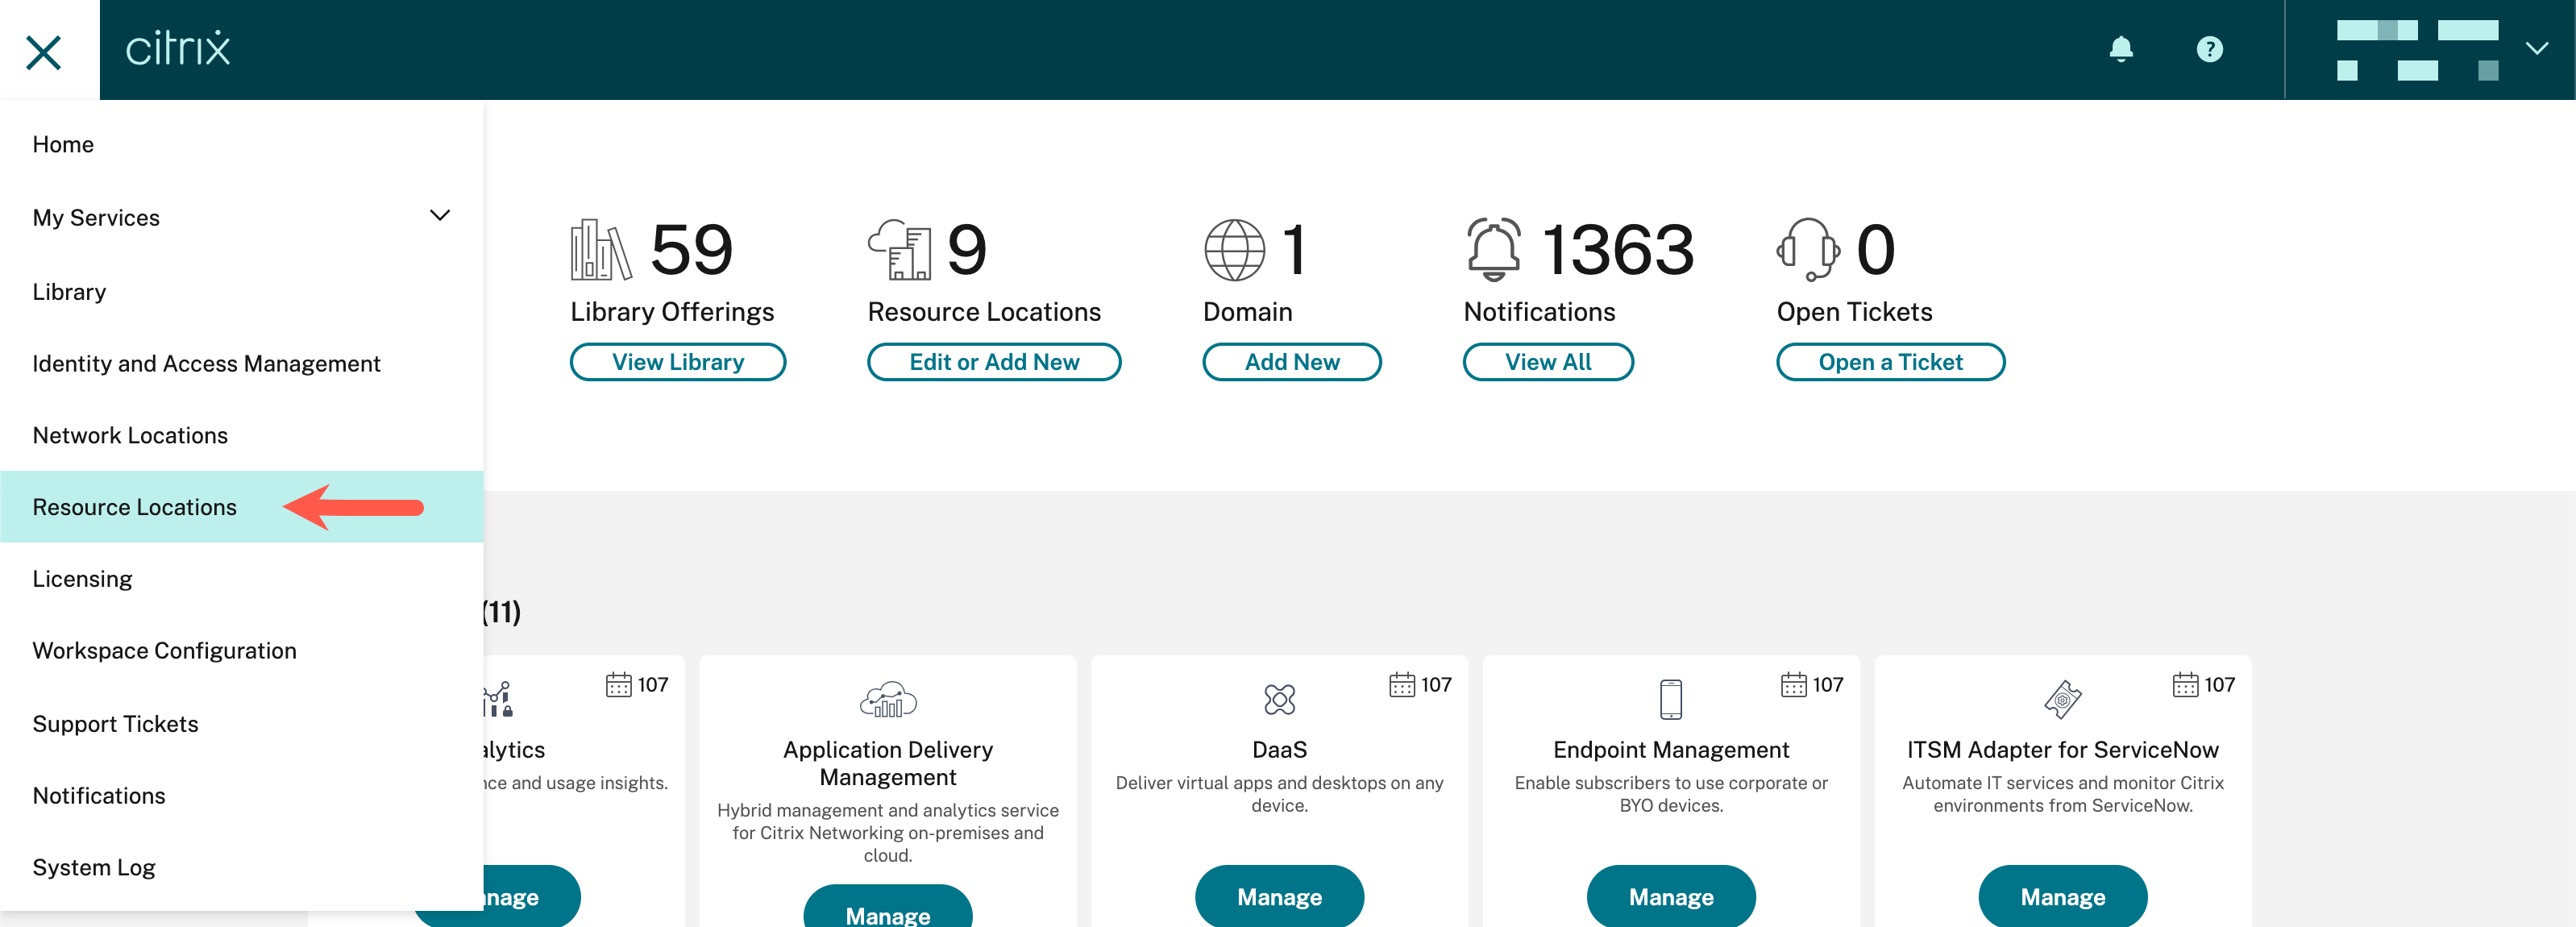
- Within the resource location associated with the site containing the web app, select Connector Appliances

- In the Add a Connector Appliance dialog, download the image associated with the appropriate hypervisor and leave this browser window open
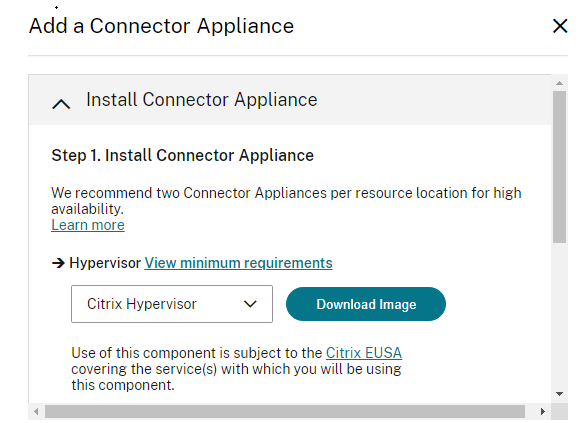
- Once downloaded, import the image into the hypervisor
- When the image starts, it will provide the URL to use to access the console
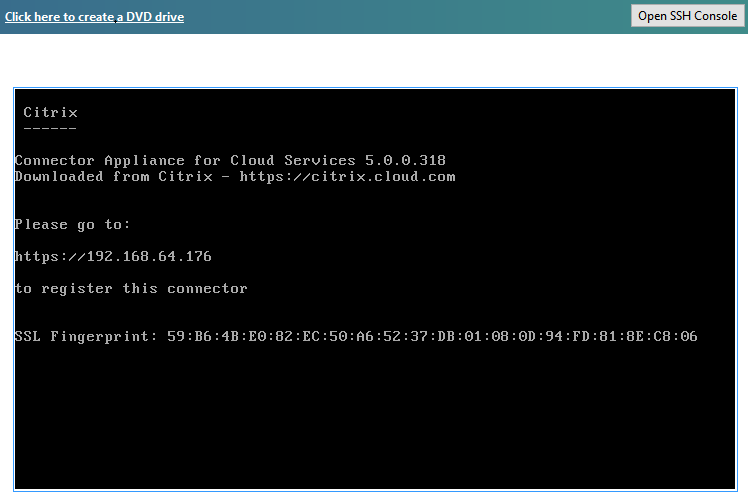
- Log into the Connector and change the admin password, and set the network IP address
- Give the appliance a name and login to the domain for that resource location
- Select Register and copy the registration code
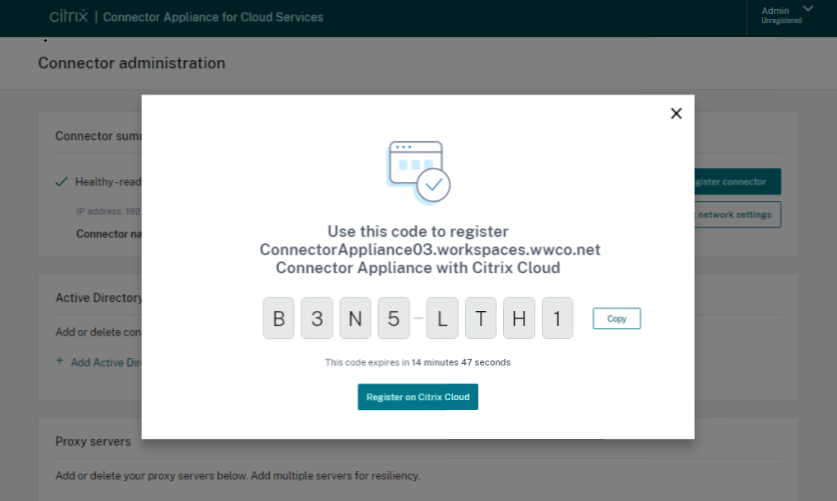
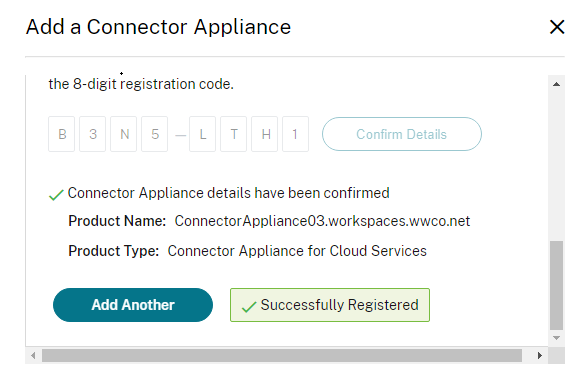
- Return to the Citrix Cloud page and submit the registration code to complete the Connector Appliance setup
Configure Web app
- Within Citrix cloud, select Manage from the Secure Private Access tile
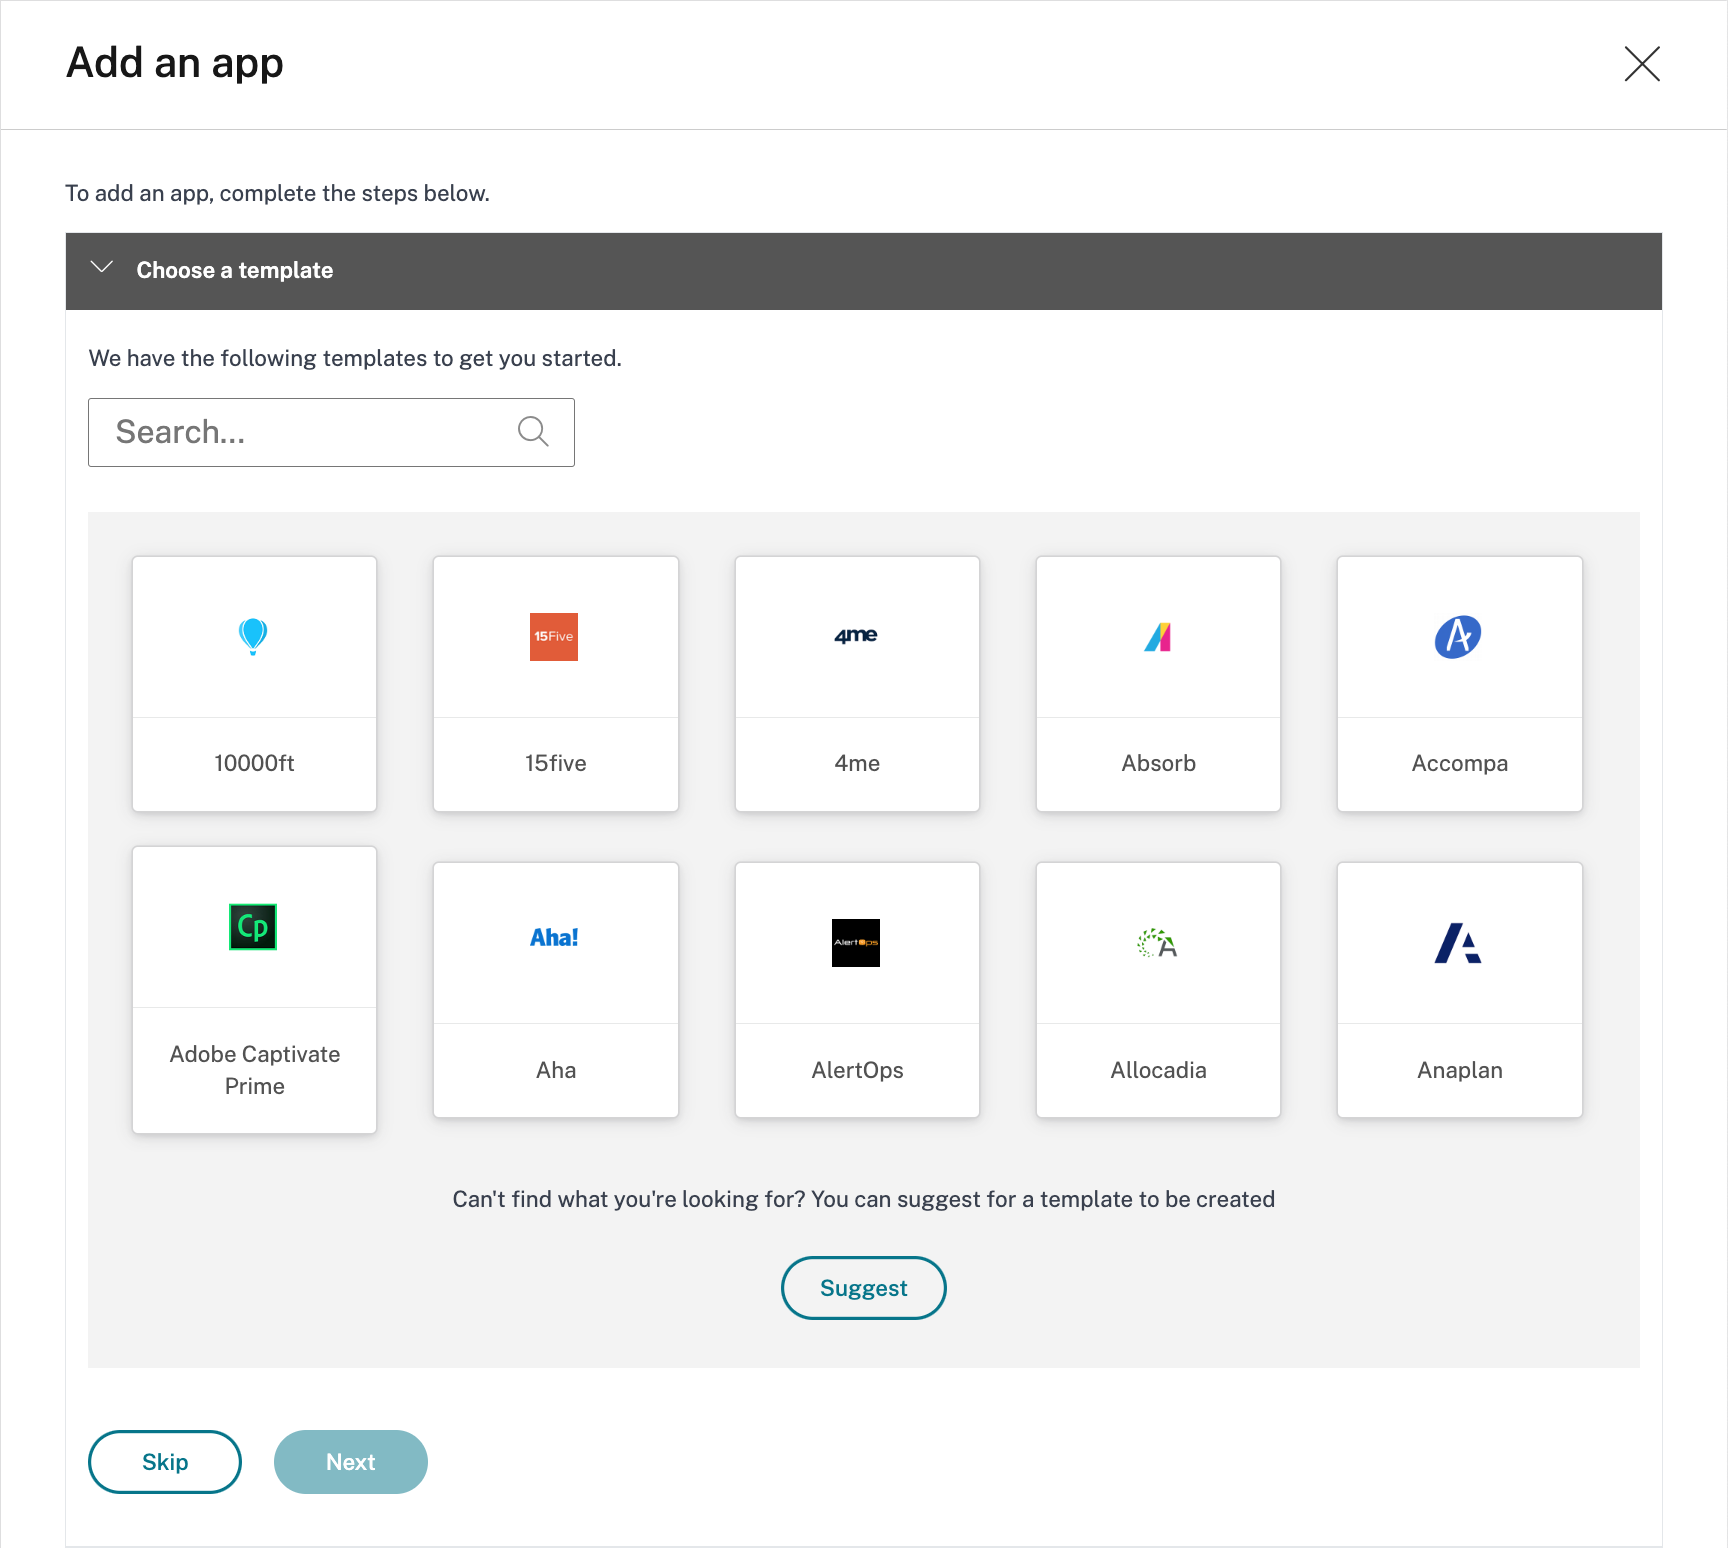
- Select Applications followed by Add an App
- In the Choose a template wizard, select Skip
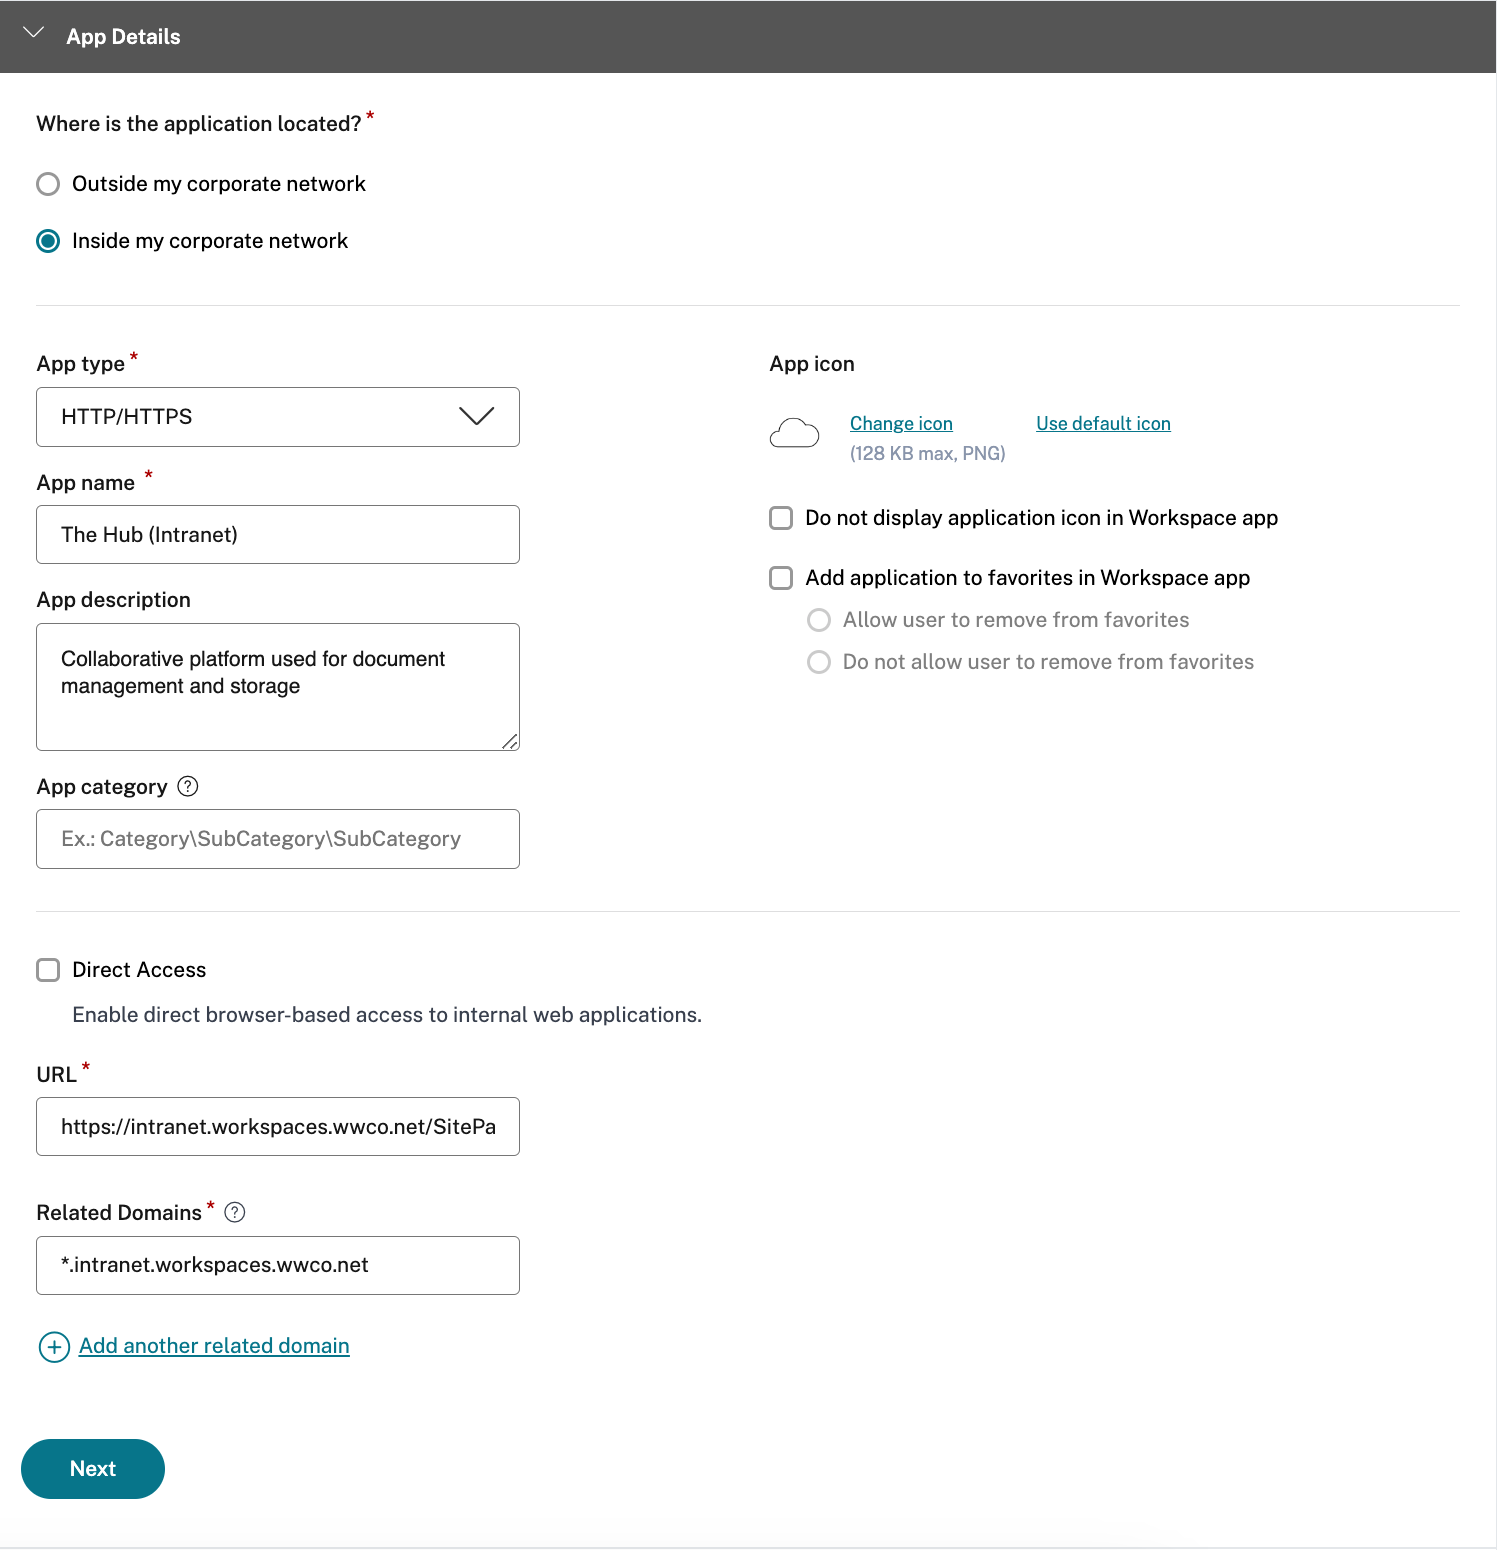
- In the App details window, select Inside my corporate network
- Specify HTTP/HTTPS as the App Type
- Provide a App name and description for the application
- (optionally) Select Direct Access to enable access directly via an FQDN resolvable via the public Internet. If selected, you will need to upload the pertinent SSL certificate in .pfx or .pem format. Also, you will need to map a CNAME record for the site FQDN to the Citrix Gateway service
- Enter the URL for the web application
- Add additional related domains as necessary for the web application
- Add a custom App icon if desired
- Select Next
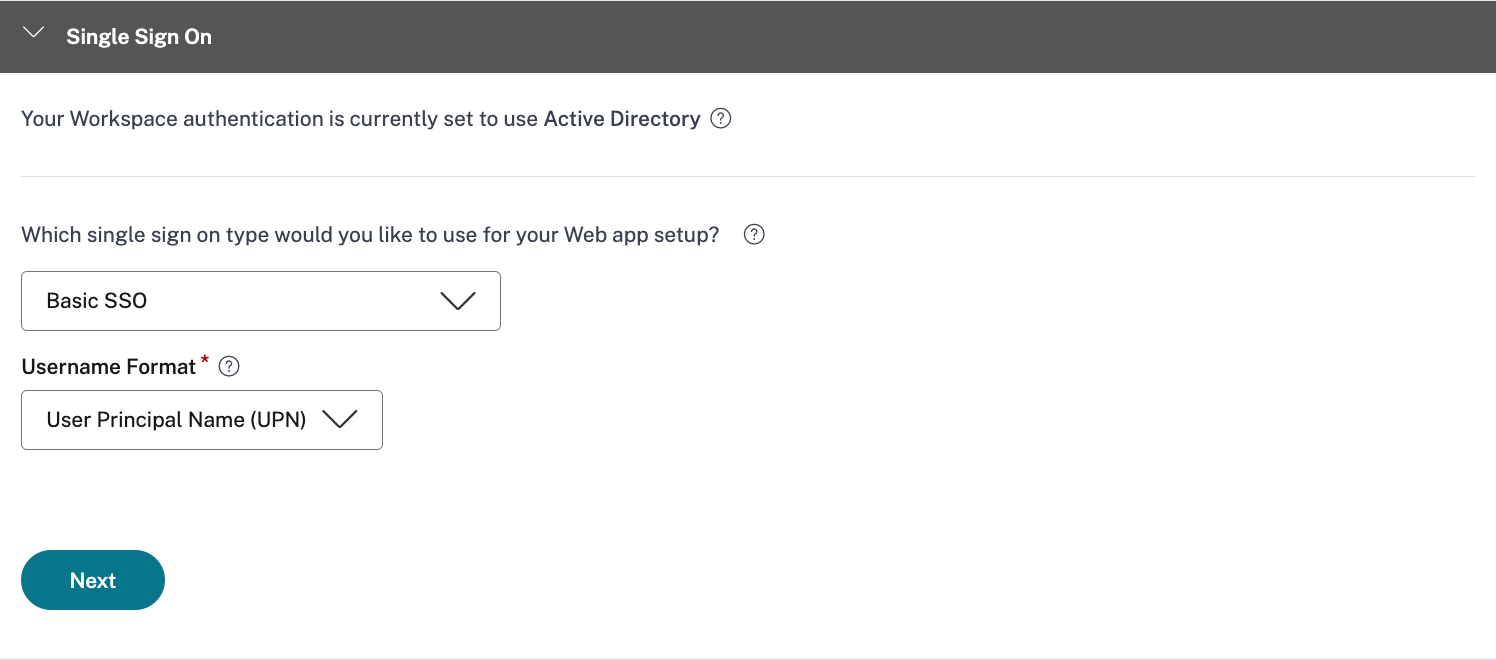
- In the Single Sign-On window, select the appropriate SSO option for the web application.
This often requires help from the web app owner.
You will have 5 SSO choices to choose from:
- Basic: If your backend server presents you with a basic-401 challenge, choose Basic SSO
- Kerberos: If your backend server presents you with negotiate-401 challenge, choose Kerberos SSO
- Form-Based: If your backend server presents you with an HTML form for authentication, choose Form-based SSO
- SAML: Choose SAML for SAML-based SSO into web applications. Enter the configuration details for SAML SSO type.
- No SSO: Use no SSO option when you do not need to authenticate the user on the backend server
- Select Basic SSO and User Principal Name (UPN) as username format
- Select Next
- In the App Connectivity window, select the Resource Location, where you installed the Connector Appliance earlier, for the URL and Related Domain entries (and verify that your connectors are up)
- Select Save

- Select Finish
Authorize Web App and configure enhanced security
- Within Secure Private Access menu, select Access Policies
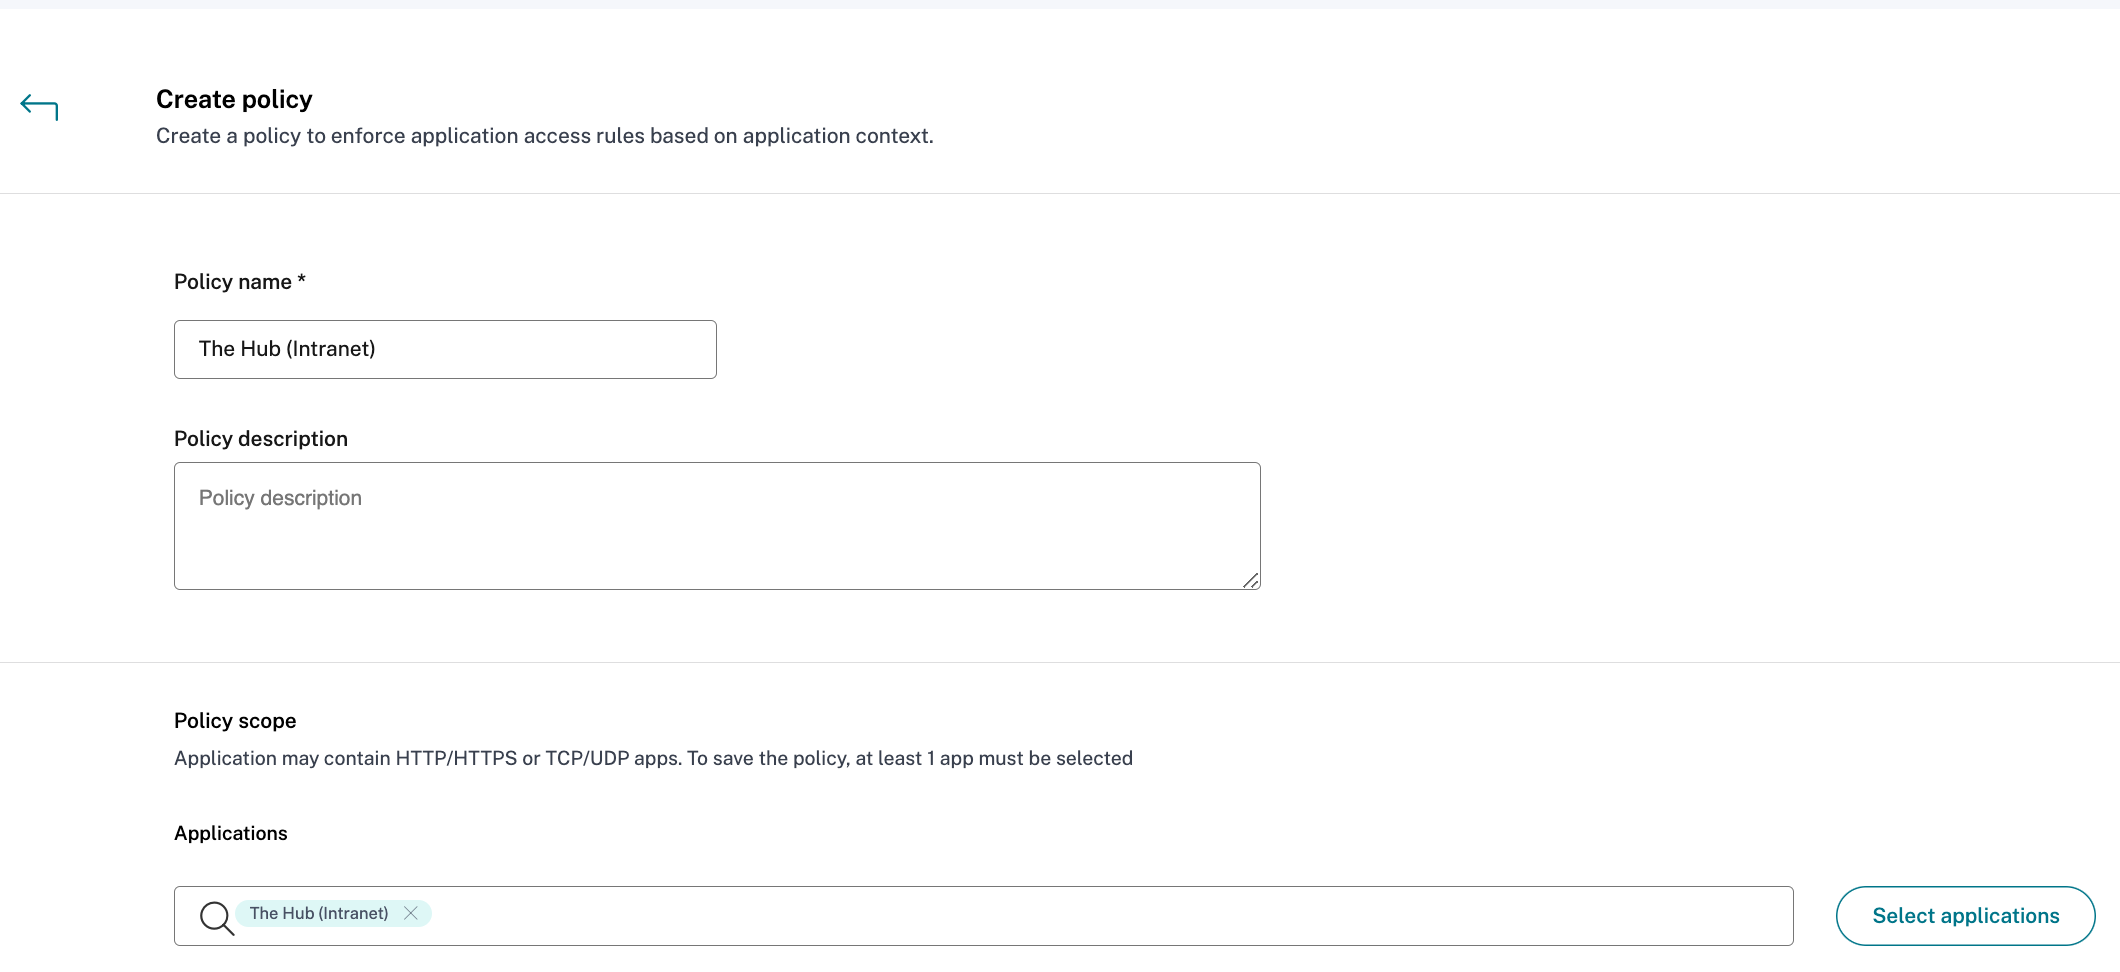
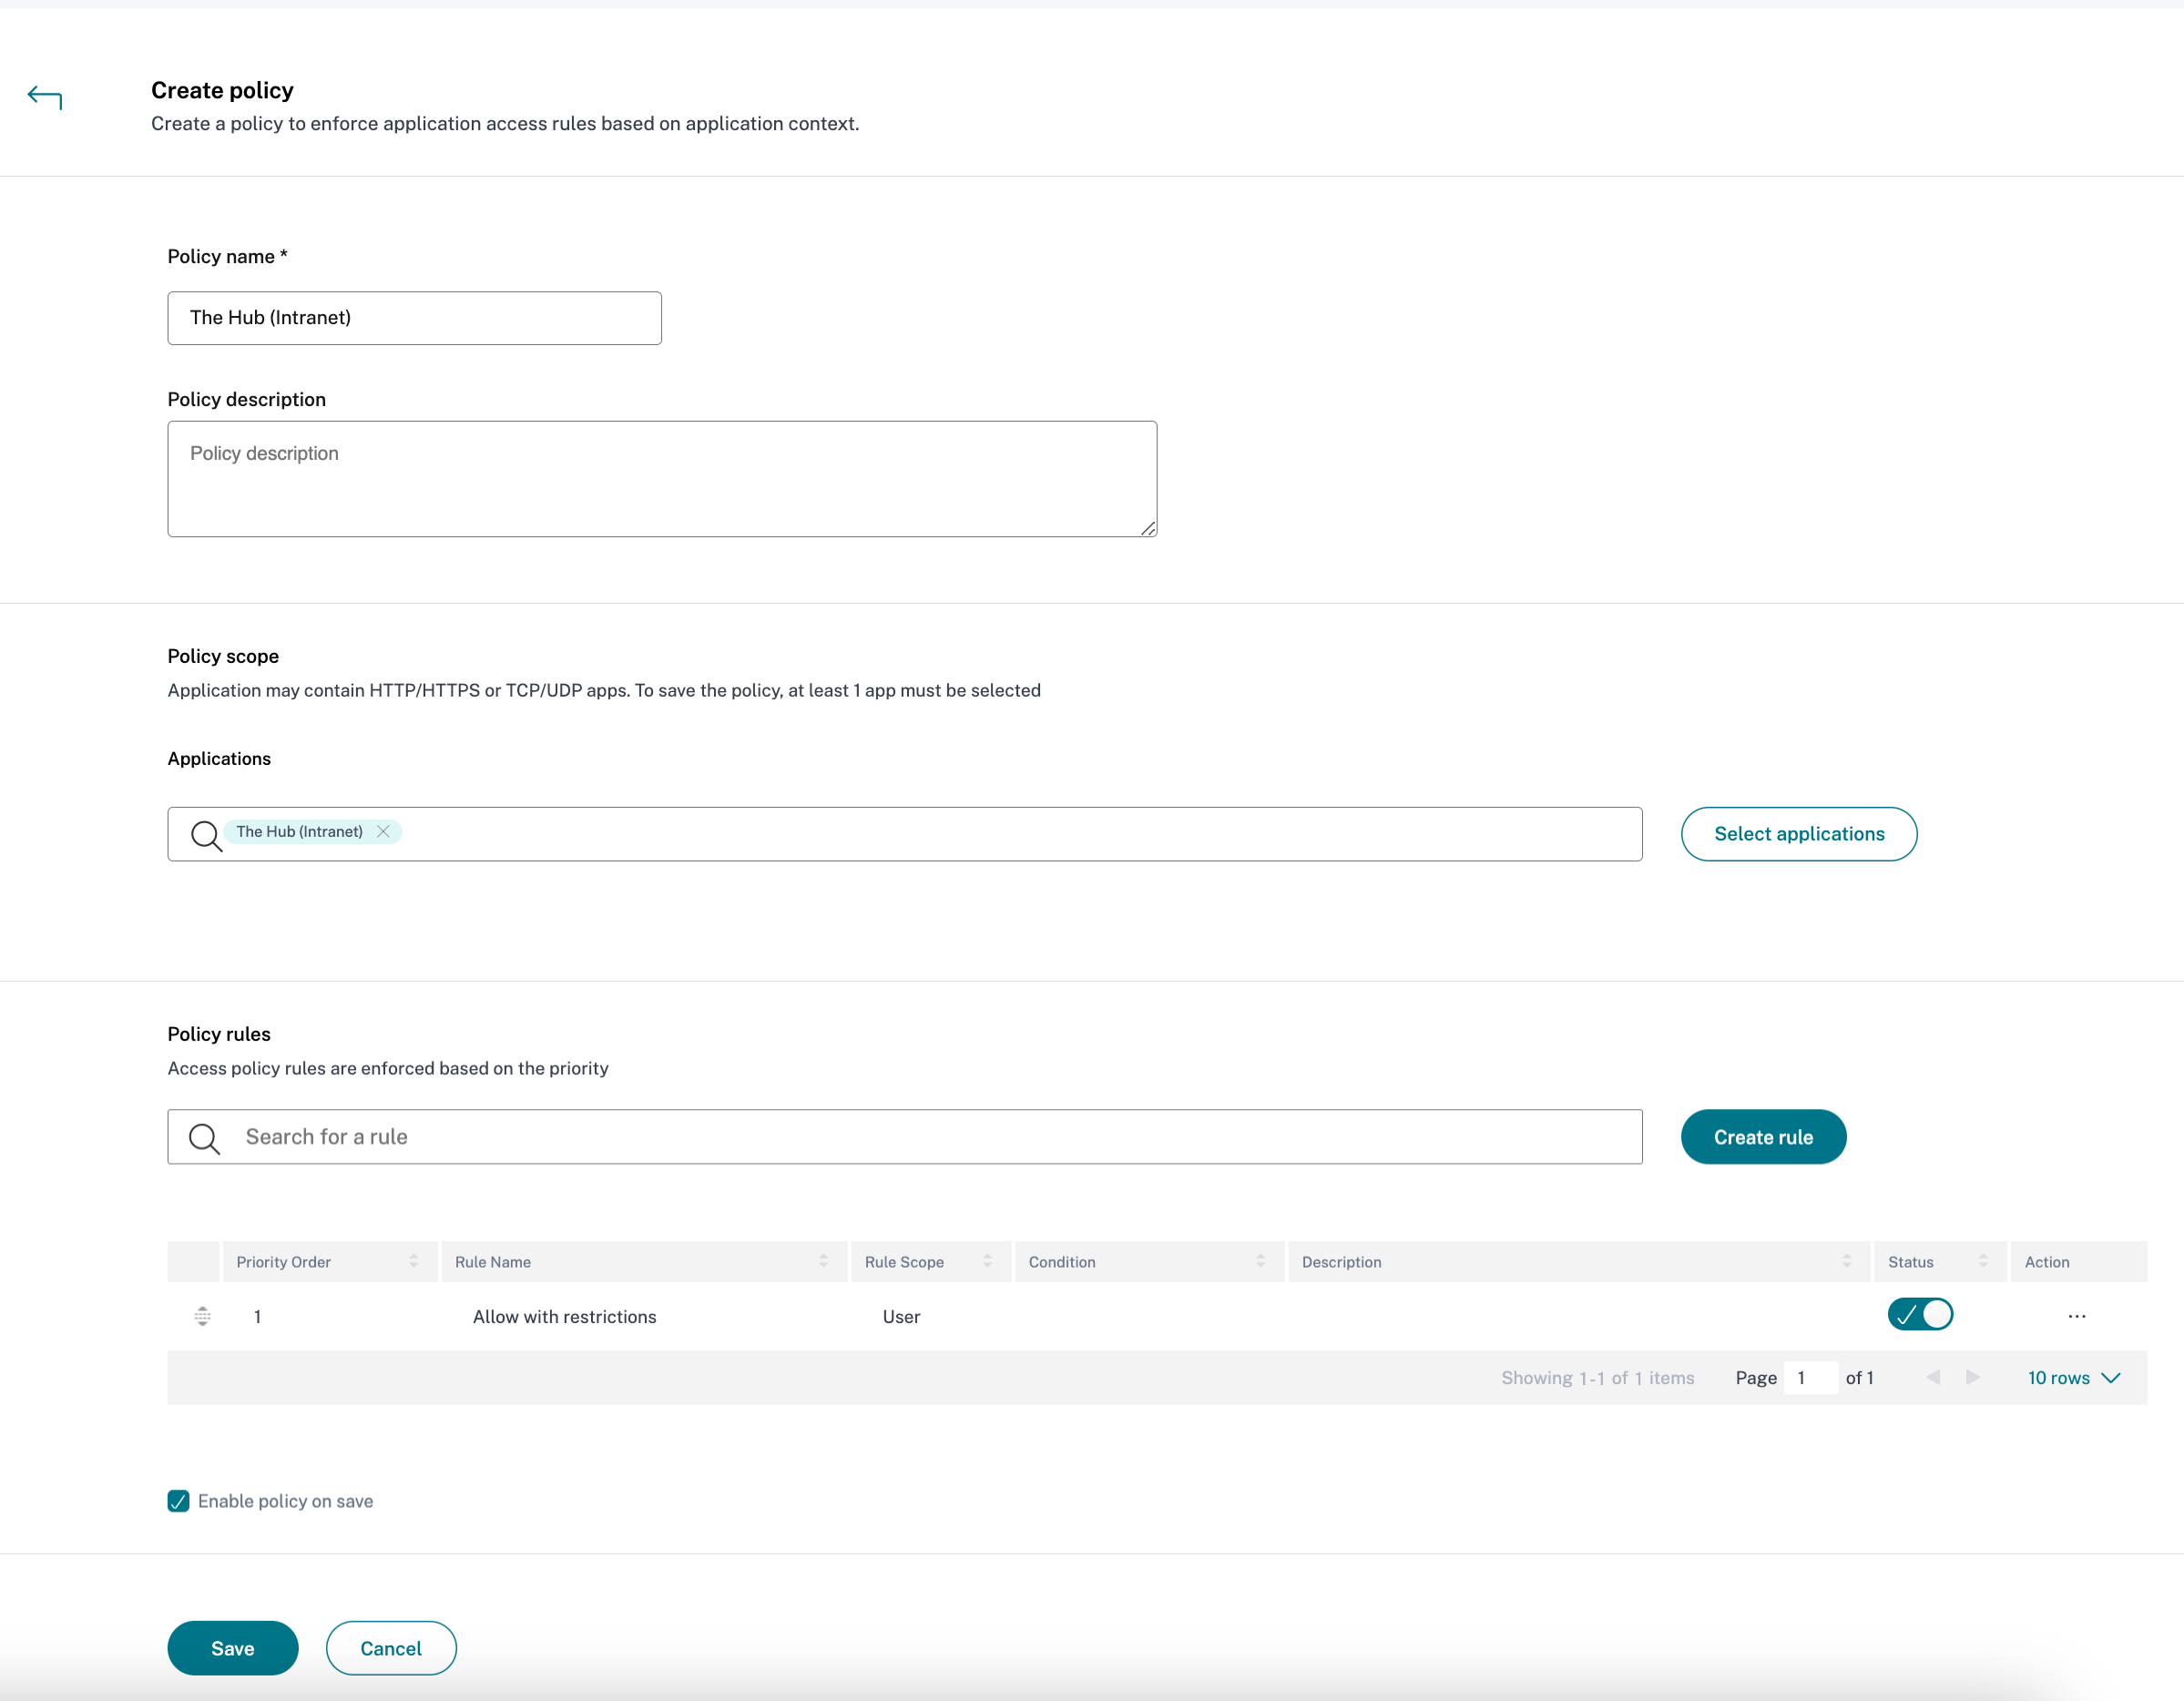
- In the Access Policy section, select Create policy
- Enter the Policy name and a brief Policy description
- In the Applications drop-down list, search for “The Hub (Intranet)” and select it
Note
You can create multiple access rules and configure different access conditions for different users or user groups within a single policy. These rules can be applied separately for both HTTP/HTTPS and TCP/UDP applications, all within a single policy. For more information on multiple access rules, see Configure an access policy with multiple rules.
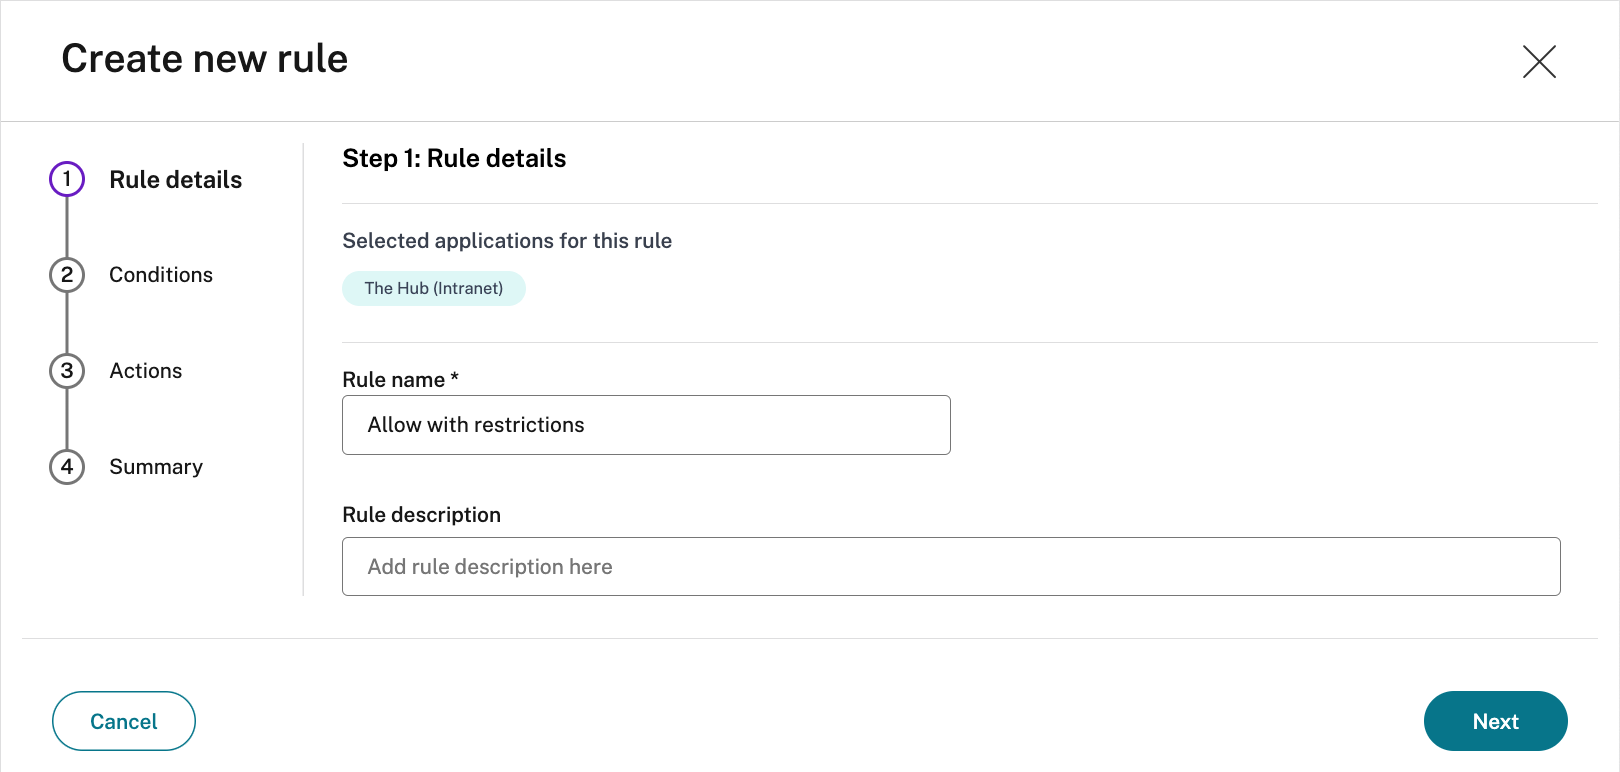
- Select Create Rule to create rules for the policy
- Enter the rule name and a brief description of the rule, and select Next
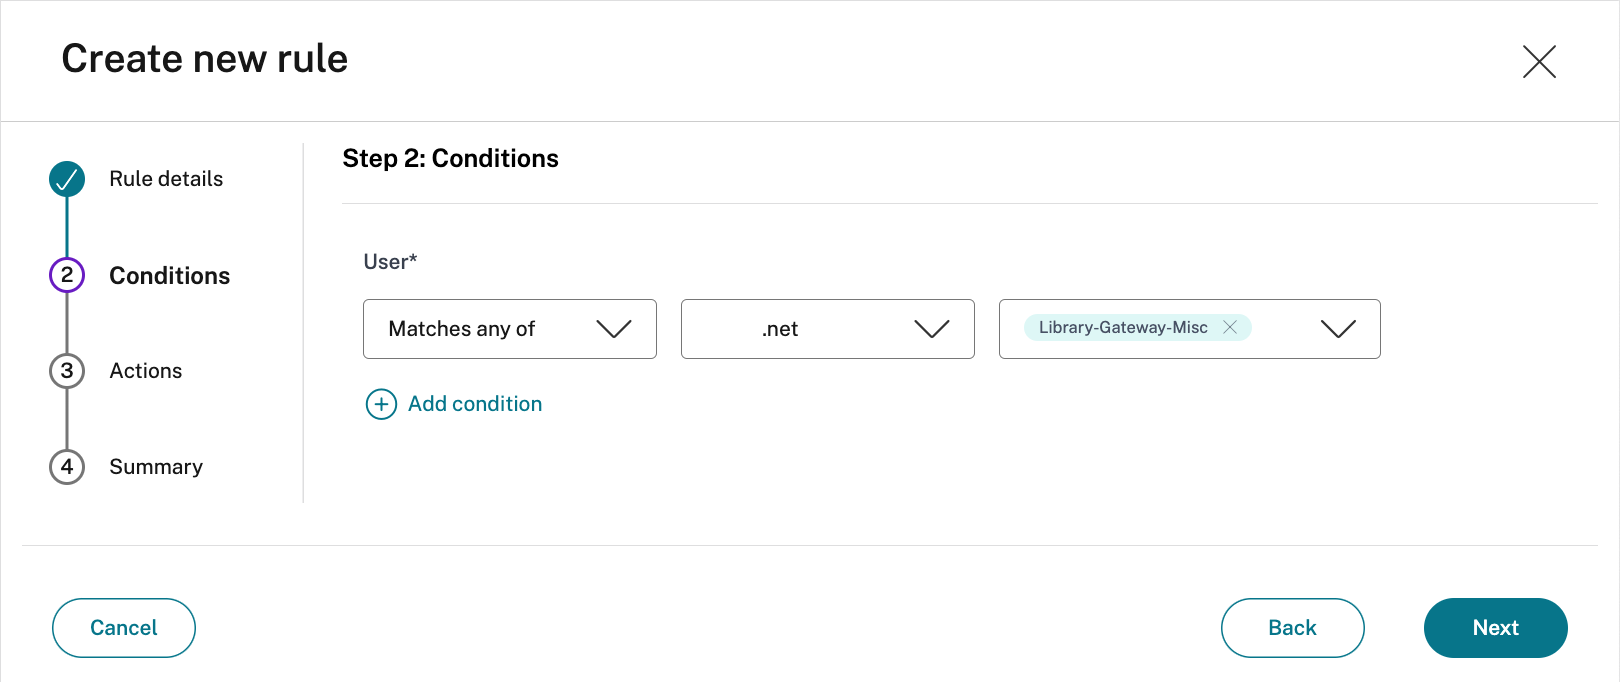
- Add the appropriate users/groups who are authorized to launch the app, and select Next
Note
Click + to add multiple conditions based on the context.
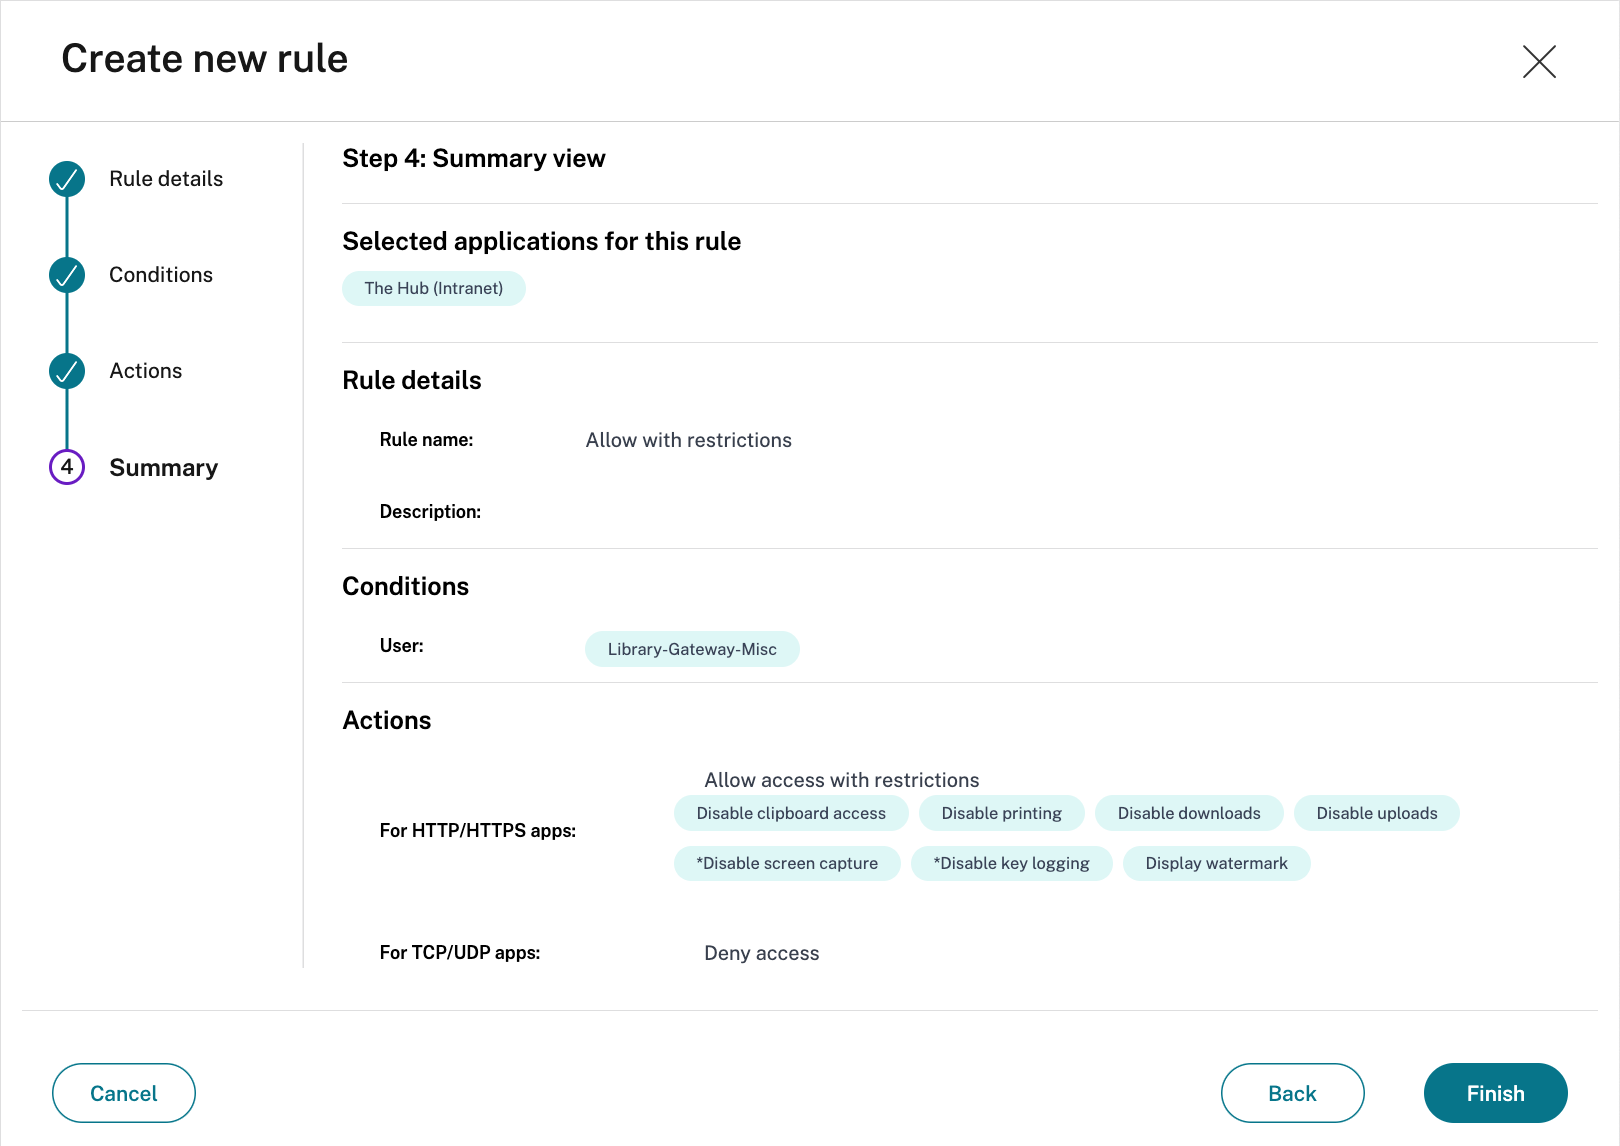
- Specify if the HTTP/HTTPS app can be accessed with or without restrictions
The below screenshot has all restrictions configured.
Please note that Anti Key-logging and Anti Screen-Capturing require Citrix Workspace desktop clients. - Specify the TCP/UDP apps action
The below screenshot denies access to TCP/UDP apps. - Select Next

- The Summary page displays the policy rule details
Verify the details and select Finish
- In the Create policy dialog, verify that Enable policy on save is checked, and select Save.
Validate
- Log into Citrix Workspace as a user
- Select the configured web application
- The user automatically signs in to the app
- The appropriate enhanced security policies are applied
Troubleshooting
Enhanced Security Policies Failing
Users might experience the enhanced security policies (watermark, printing, or clipboard access) fail. Typically, this happens because the web application uses multiple domain names. Within the application configuration settings for the web app, there was an entry for Related Domains.
The enhanced security policies are applied onto those related domains. To identify missing domain names, an administrator can access the web app with a local browser and do the following:
- Navigate to the section of the app where the policies fail.
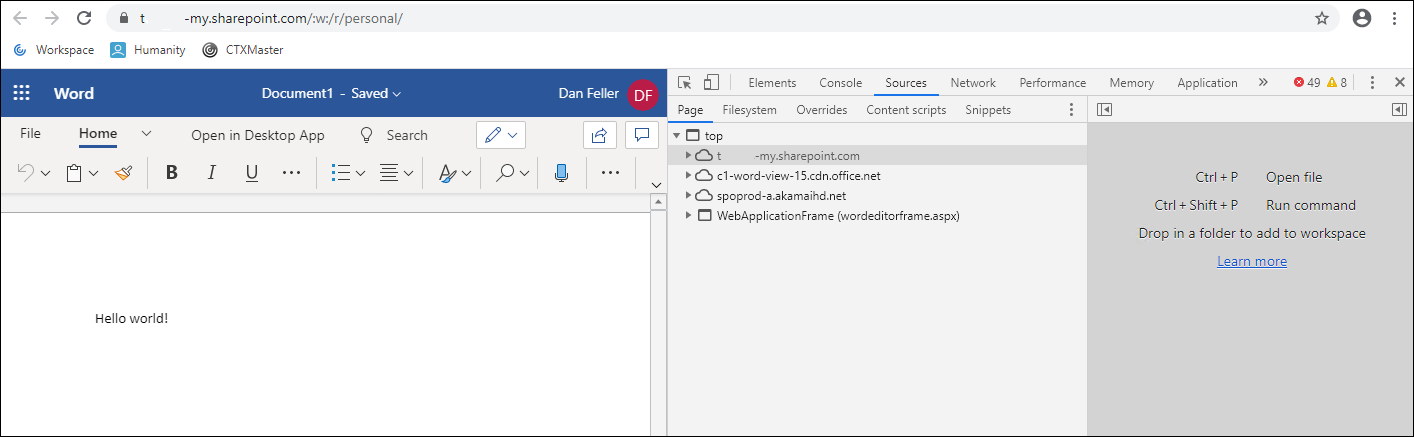
- In Google Chrome and Microsoft Edge (Chromium version), select the three dots in the upper right side of the browser to show a menu screen.
- Select More Tools.
- Select Developer Tools
- Within the developer tools, select Sources. This provides a list of access domain names for that section of the application. In order to enable the enhanced security policies for this portion of the app, those domain names must be entered into the related domains field within the app configuration. Related domains are added like the following
*.domain.com