PoC Guide - ZTNA to Client-Server Apps (Agent-Based)
Overview
With remote work, users need access to internal applications. Providing a better experience means avoiding a VPN deployment model, which often results in the following challenges:
- VPN Risk 1: Are difficult to install and configure
- VPN Risk 2: Require users to install VPN software on endpoint devices, which might utilize an unsupported operating system
- VPN Risk 3: Require the configuration of complex policies to prevent an untrusted endpoint device from having unrestricted access to the corporate network, resources, and data
- VPN Risk 4: Difficult to keep security policies synchronized between VPN infrastructure and on-premises infrastructure
To improve the overall user experience, organizations must be able to unify all sanctioned apps and simplify user login operations while still enforcing authentication standards.
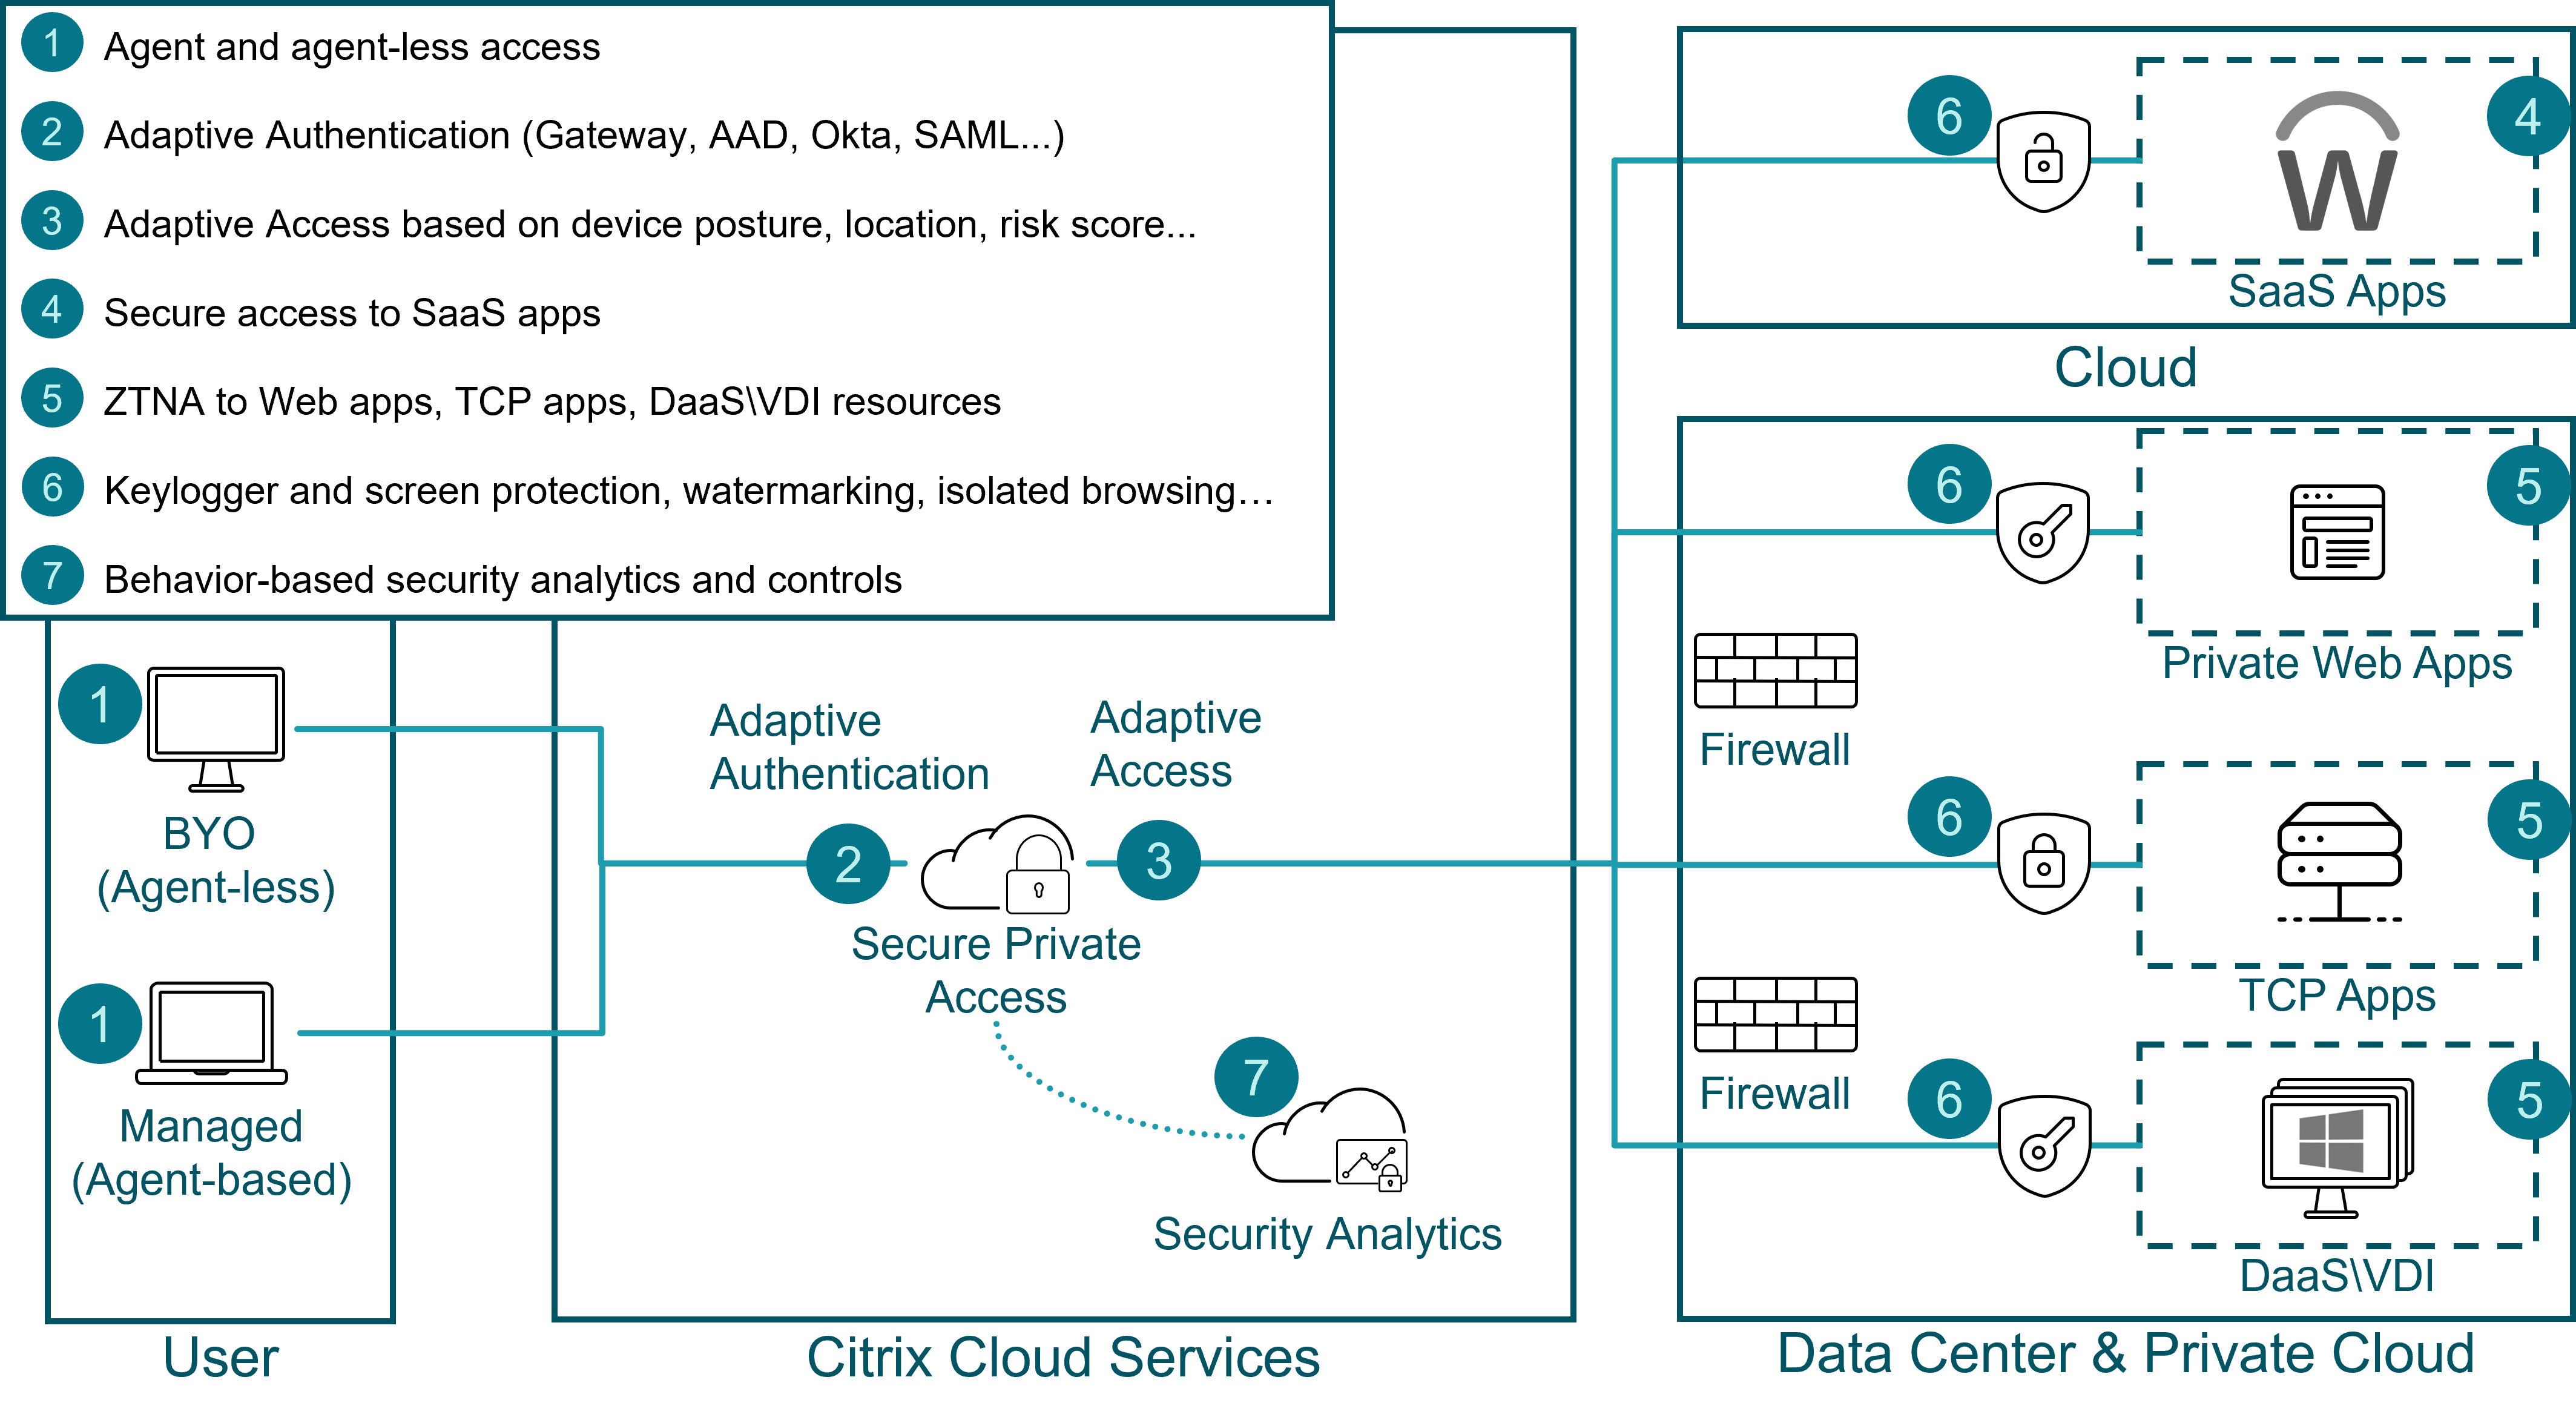
Organizations must deliver and secure SaaS, web, Windows, Linux applications, desktops, and native TCP applications even though some of these resources exist beyond the confines of the data center and can access resources outside of the data center. Citrix Secure Private Access service provides organizations with secure, VPN-less access to user-authorized resources.
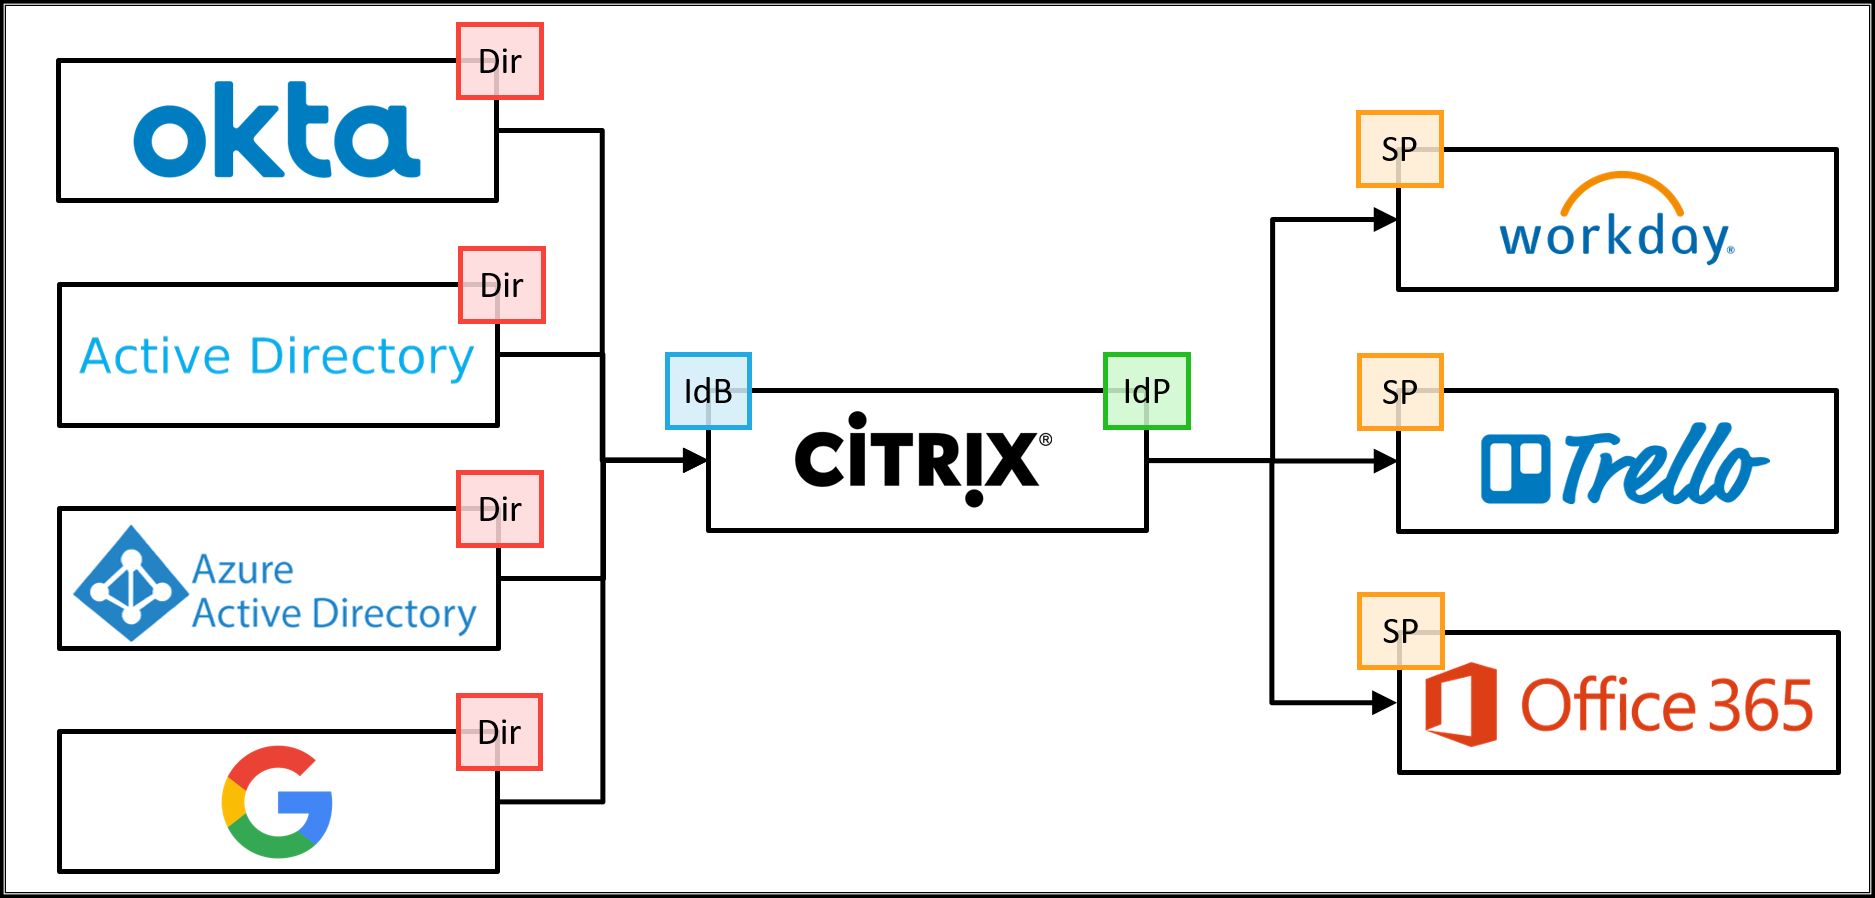
In this proof of concept scenario, a user authenticates to Citrix Cloud using Active Directory, Azure Active Directory, Okta, Google, Citrix Gateway, or a SAML 2.0 provider of their choice as the primary user directory. Citrix Secure Private Access provides connectivity to Client-Server apps.
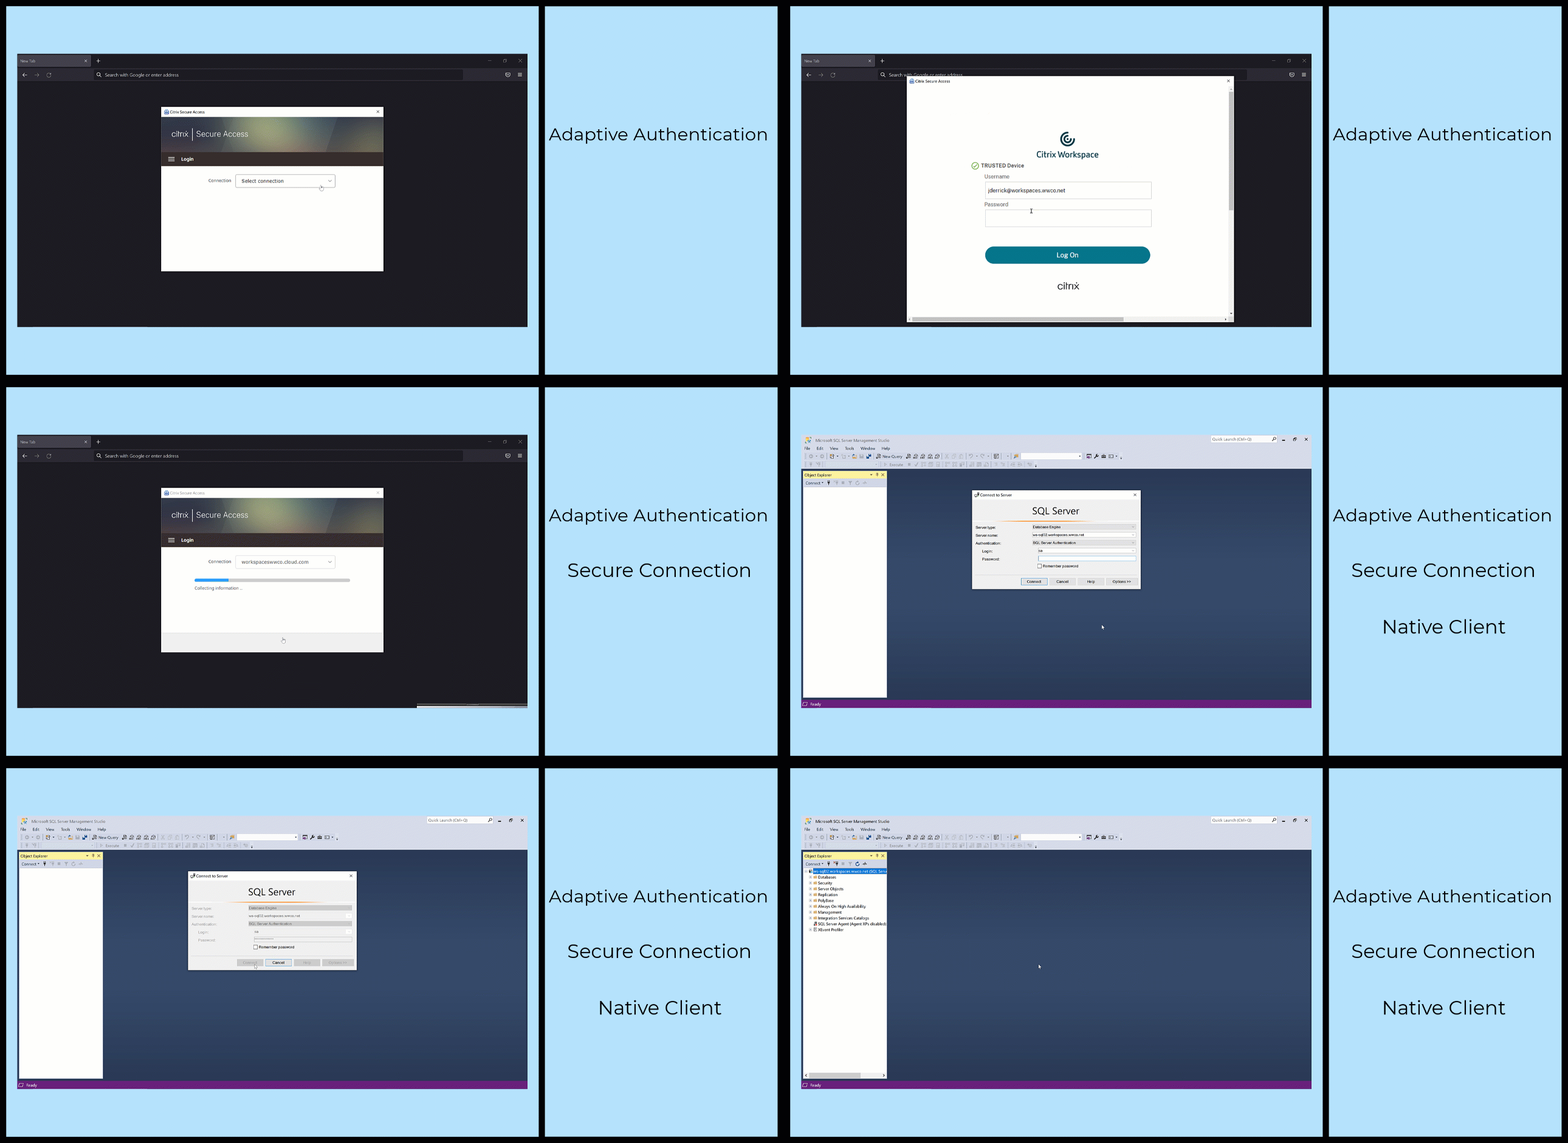
The animation below shows a user accessing an internally hosted Microsoft SQL (MSSQL) database from their remote endpoint.
This demonstration shows a flow where the user launches the Citrix Secure Access™ agent. The user is prompted for adaptive authentication credentials. A secure connection to Citrix Cloud is established. Then the user can reach the MSSQL database via a Connector Appliance in the Resource Location where the database is hosted, using the Microsoft SQL Server Management Studio client.
This proof of concept guide demonstrates how to:
- Setup Citrix Workspace™
- Integrate a primary user directory
- Setup TCP access to the MSSQL database
- Configure the endpoint
- Validate the configuration
Setup Citrix Workspace
Once you establish Citrix Secure Private Access service entitlement with your Citrix account team, you will find the Citrix Secure Private Access icon under My Services upon login to Citrix Cloud. For more information, see Get started with Citrix Secure Private Access. After you are logged in, you can set your Workspace URL.
Set Workspace URL
- Connect to Citrix cloud and log in as your administrator account
- Within Citrix Workspace, access Workspace Configuration from the upper-left menu
- From the Access tab, enter a unique URL for the organization and select Enabled
Integrate a primary user directory
Before users can authenticate to Workspace, a primary user directory must be configured. The primary user directory is the only identity the user requires as all requests for apps within Workspace utilize single sign-on to secondary identities.
An organization can use any one of the following primary user directories
- Active Directory: To enable Active Directory authentication, a cloud connector must be deployed within the same data center as an Active Directory domain controller by following the Cloud Connector Installation guide.
- Active Directory with Time-Based One Time Password: Active Directory-based authentication can also include multifactor authentication with a Time-based One Time Password (TOTP). This guide details the required steps to enable this authentication option.
- Azure Active Directory: Users can authenticate to Citrix Workspace with an Azure Active Directory identity. This guide provides details on configuring this option.
- Citrix Gateway: Organizations can utilize an on-premises Citrix Gateway to act as an identity provider for Citrix Workspace. This guide provides details on the integration.
- Okta: Organizations can use Okta as the primary user directory for Citrix Workspace. This guide provides instructions for configuring this option.
- SAML 2.0: Organizations can use the SAML 2.0 provider of choice with their on-premises Active Directory (AD). This guide provides instructions for configuring this option.
In this scenario we chose Citrix Gateway. For more information regarding its implementation see Tech Insight: Authentication - Citrix Gateway
Setup TCP access to the MSSQL database
To successfully Setup TCP access to the MSSQL database, the administrator needs to do the following
- Deploy Connector Appliance
- Configure Client-Server app
Deploy Connector Appliance
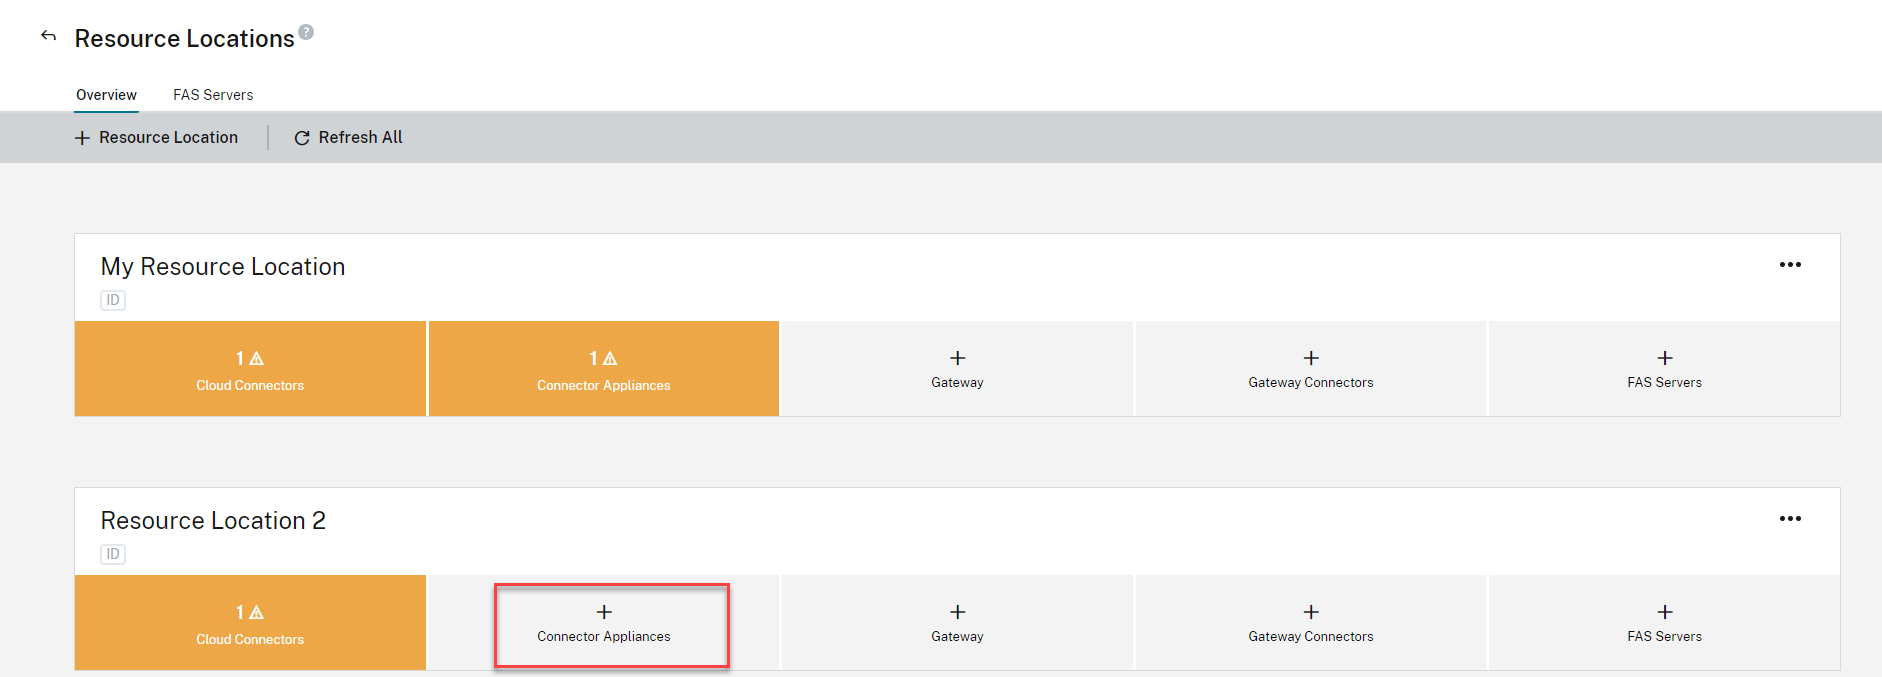
- Within Citrix cloud™, select Resource Locations from the menu bar
- Within the resource location associated with the site containing the web app, select Connector Appliances
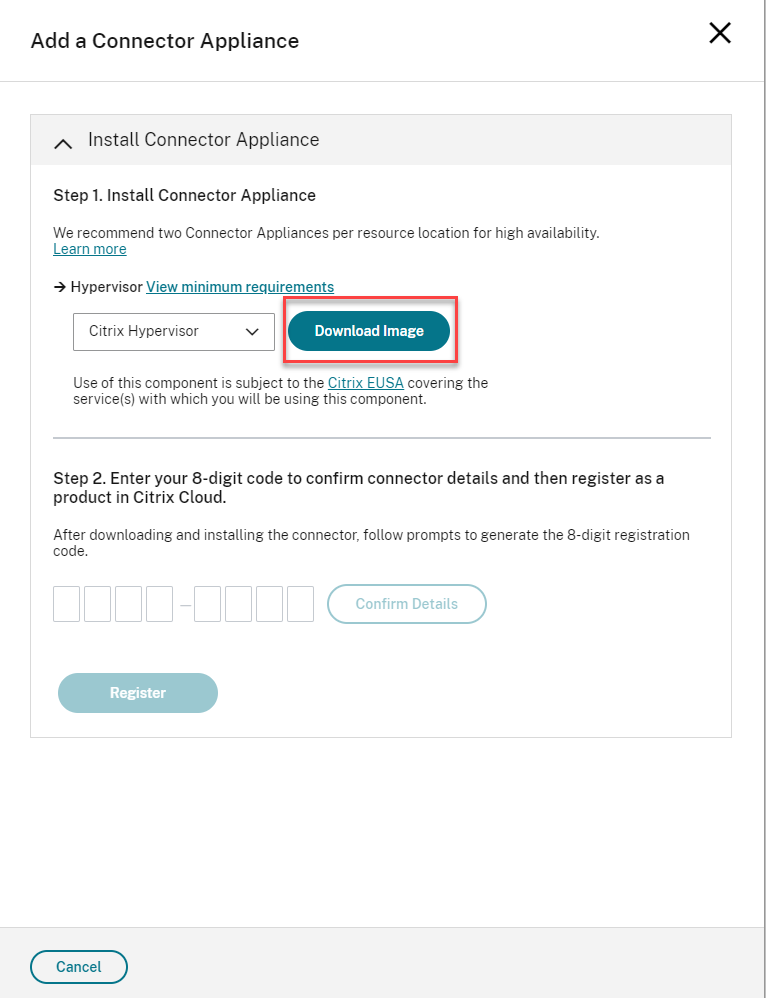
- Select Add a Connector Appliance
- Download the image associated with the appropriate hypervisor and leave this browser window open
- Once downloaded, import the image into the hypervisor
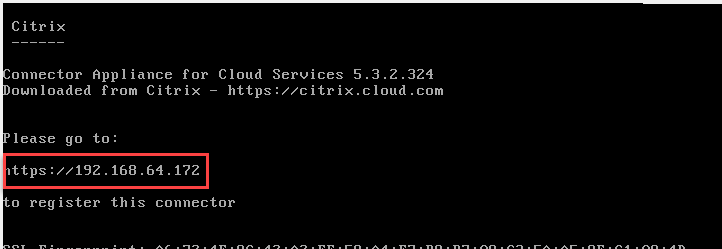
- When the image starts, it will provide the URL to use to access the console
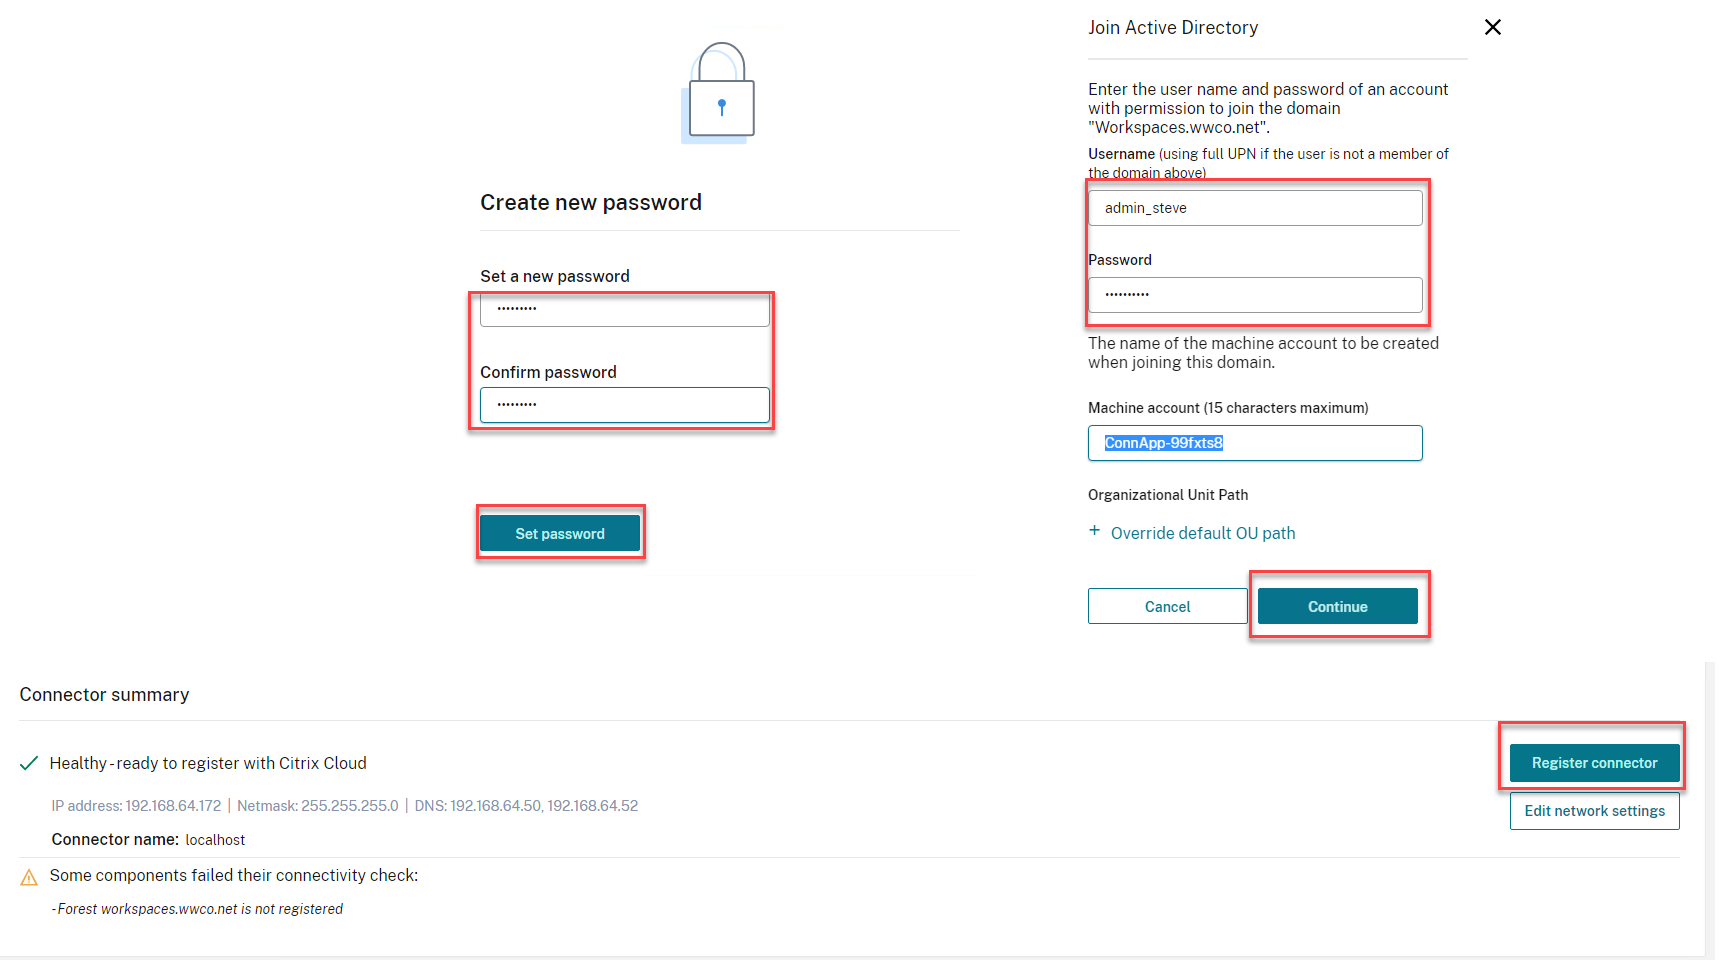
- Log into the Connector and change the admin password, and set the network IP address
- Give the appliance a name and login to the domain for that Resource Location
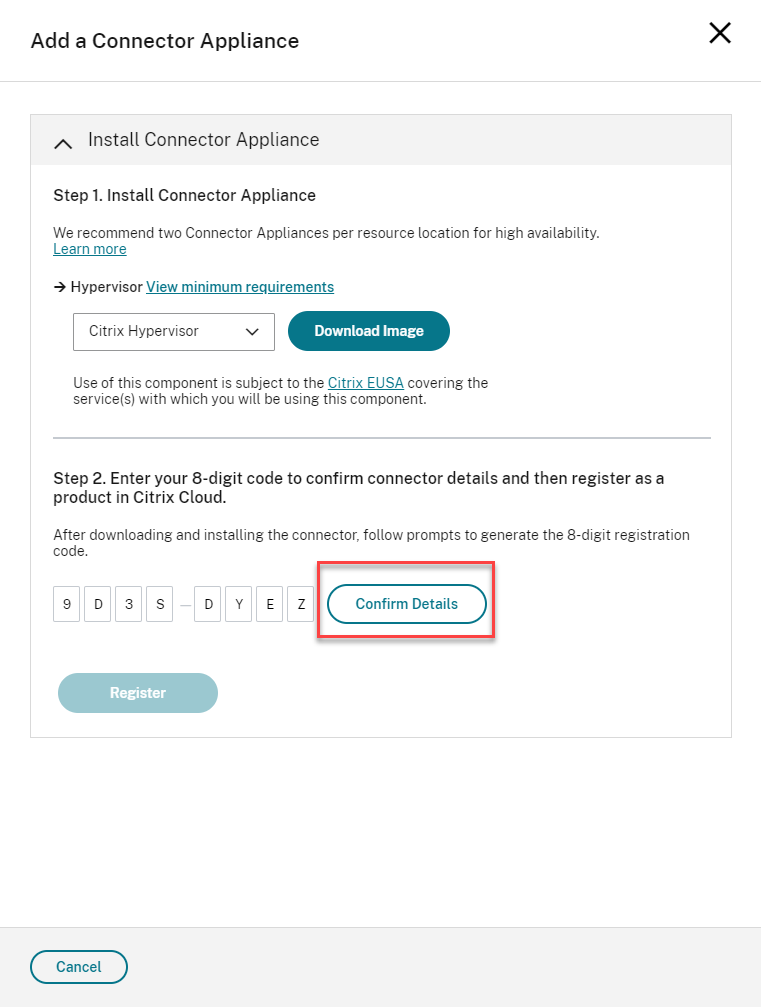
- Select Register and copy the registration code
- Return to the Citrix Cloud page and submit the registration code to complete the Connector Appliance setup
- (It is best practice to repeat the process, to install a 2nd Connector Appliance, for production environments)
Configure Client-Server App
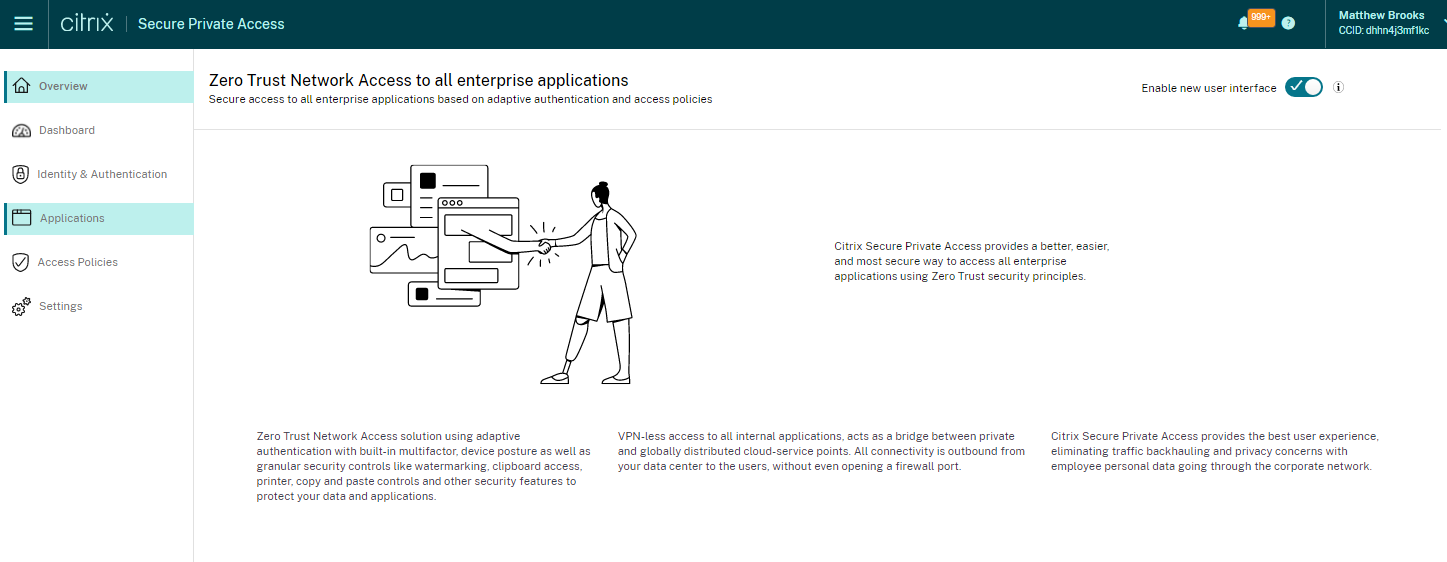
- Within Citrix cloud, select Manage from the Secure Private Access tile
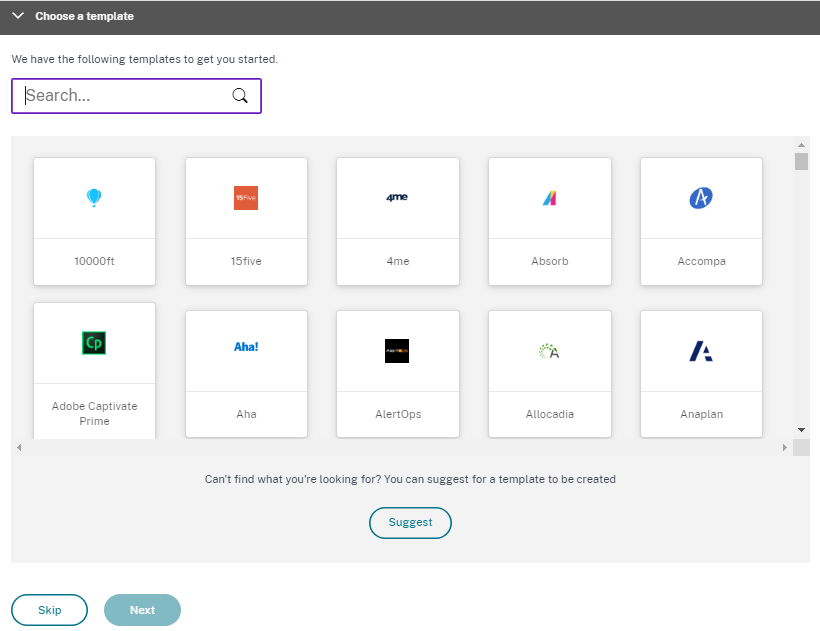
- Select Applications followed by Add an App
- In the Choose a template wizard, select Skip
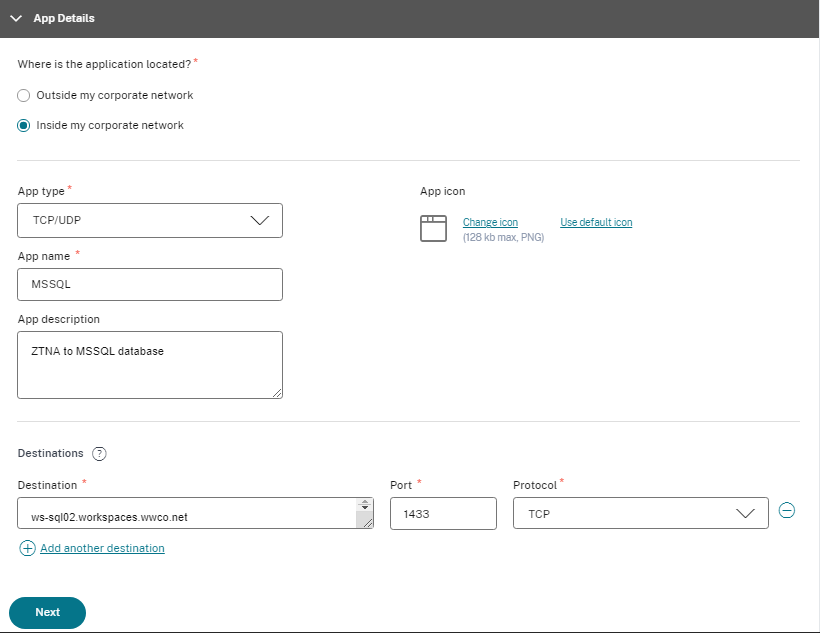
- In the App details window, select Inside my corporate network
- Specify TCP/UDP as the App Type
- Provide a App name and description for the application
- Followed by Destination, Port, and Protocol. In our example, we use the internal FQDN of the MSSQL database ws-sql02.workspaces.wwco.net, port 1433, and TCP
- Select Next
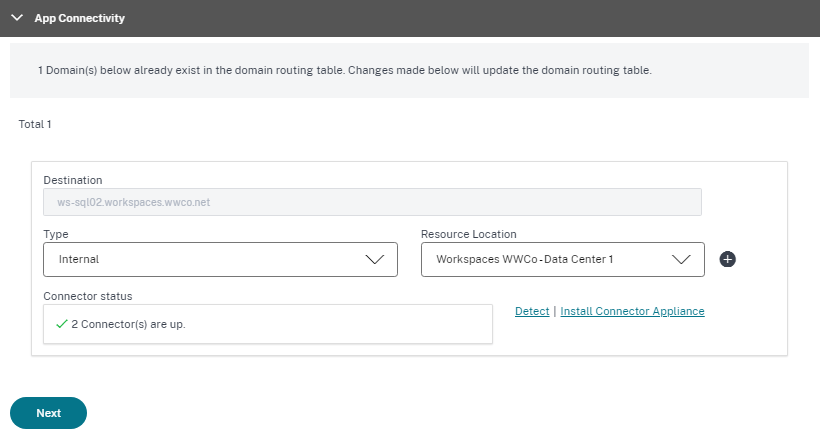
- In the App Connectivity window, verify the Type is set to internal, and the Resource Location is set to the location where you installed Connector Appliances earlier
- Select Next
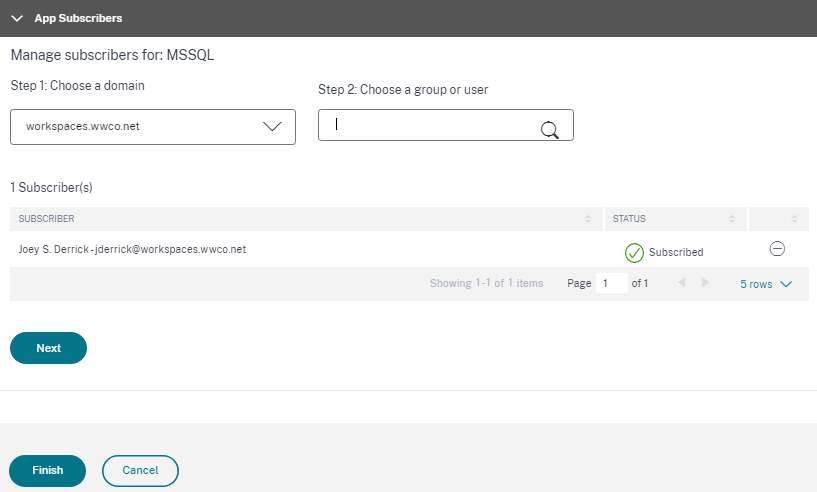
- In the App Subscribers window, Choose a domain in the drop down list, and Choose a group or user to assign the application to
- Select Finish
Configure the endpoint
To successfully configure the endpoint, the administrator needs to do the following:
- Install Citrix Secure Access agent
- Configure registry key
- Install Microsoft Edge Runtime
- Configure the Workspace URL connection
Install Citrix Secure Access agent
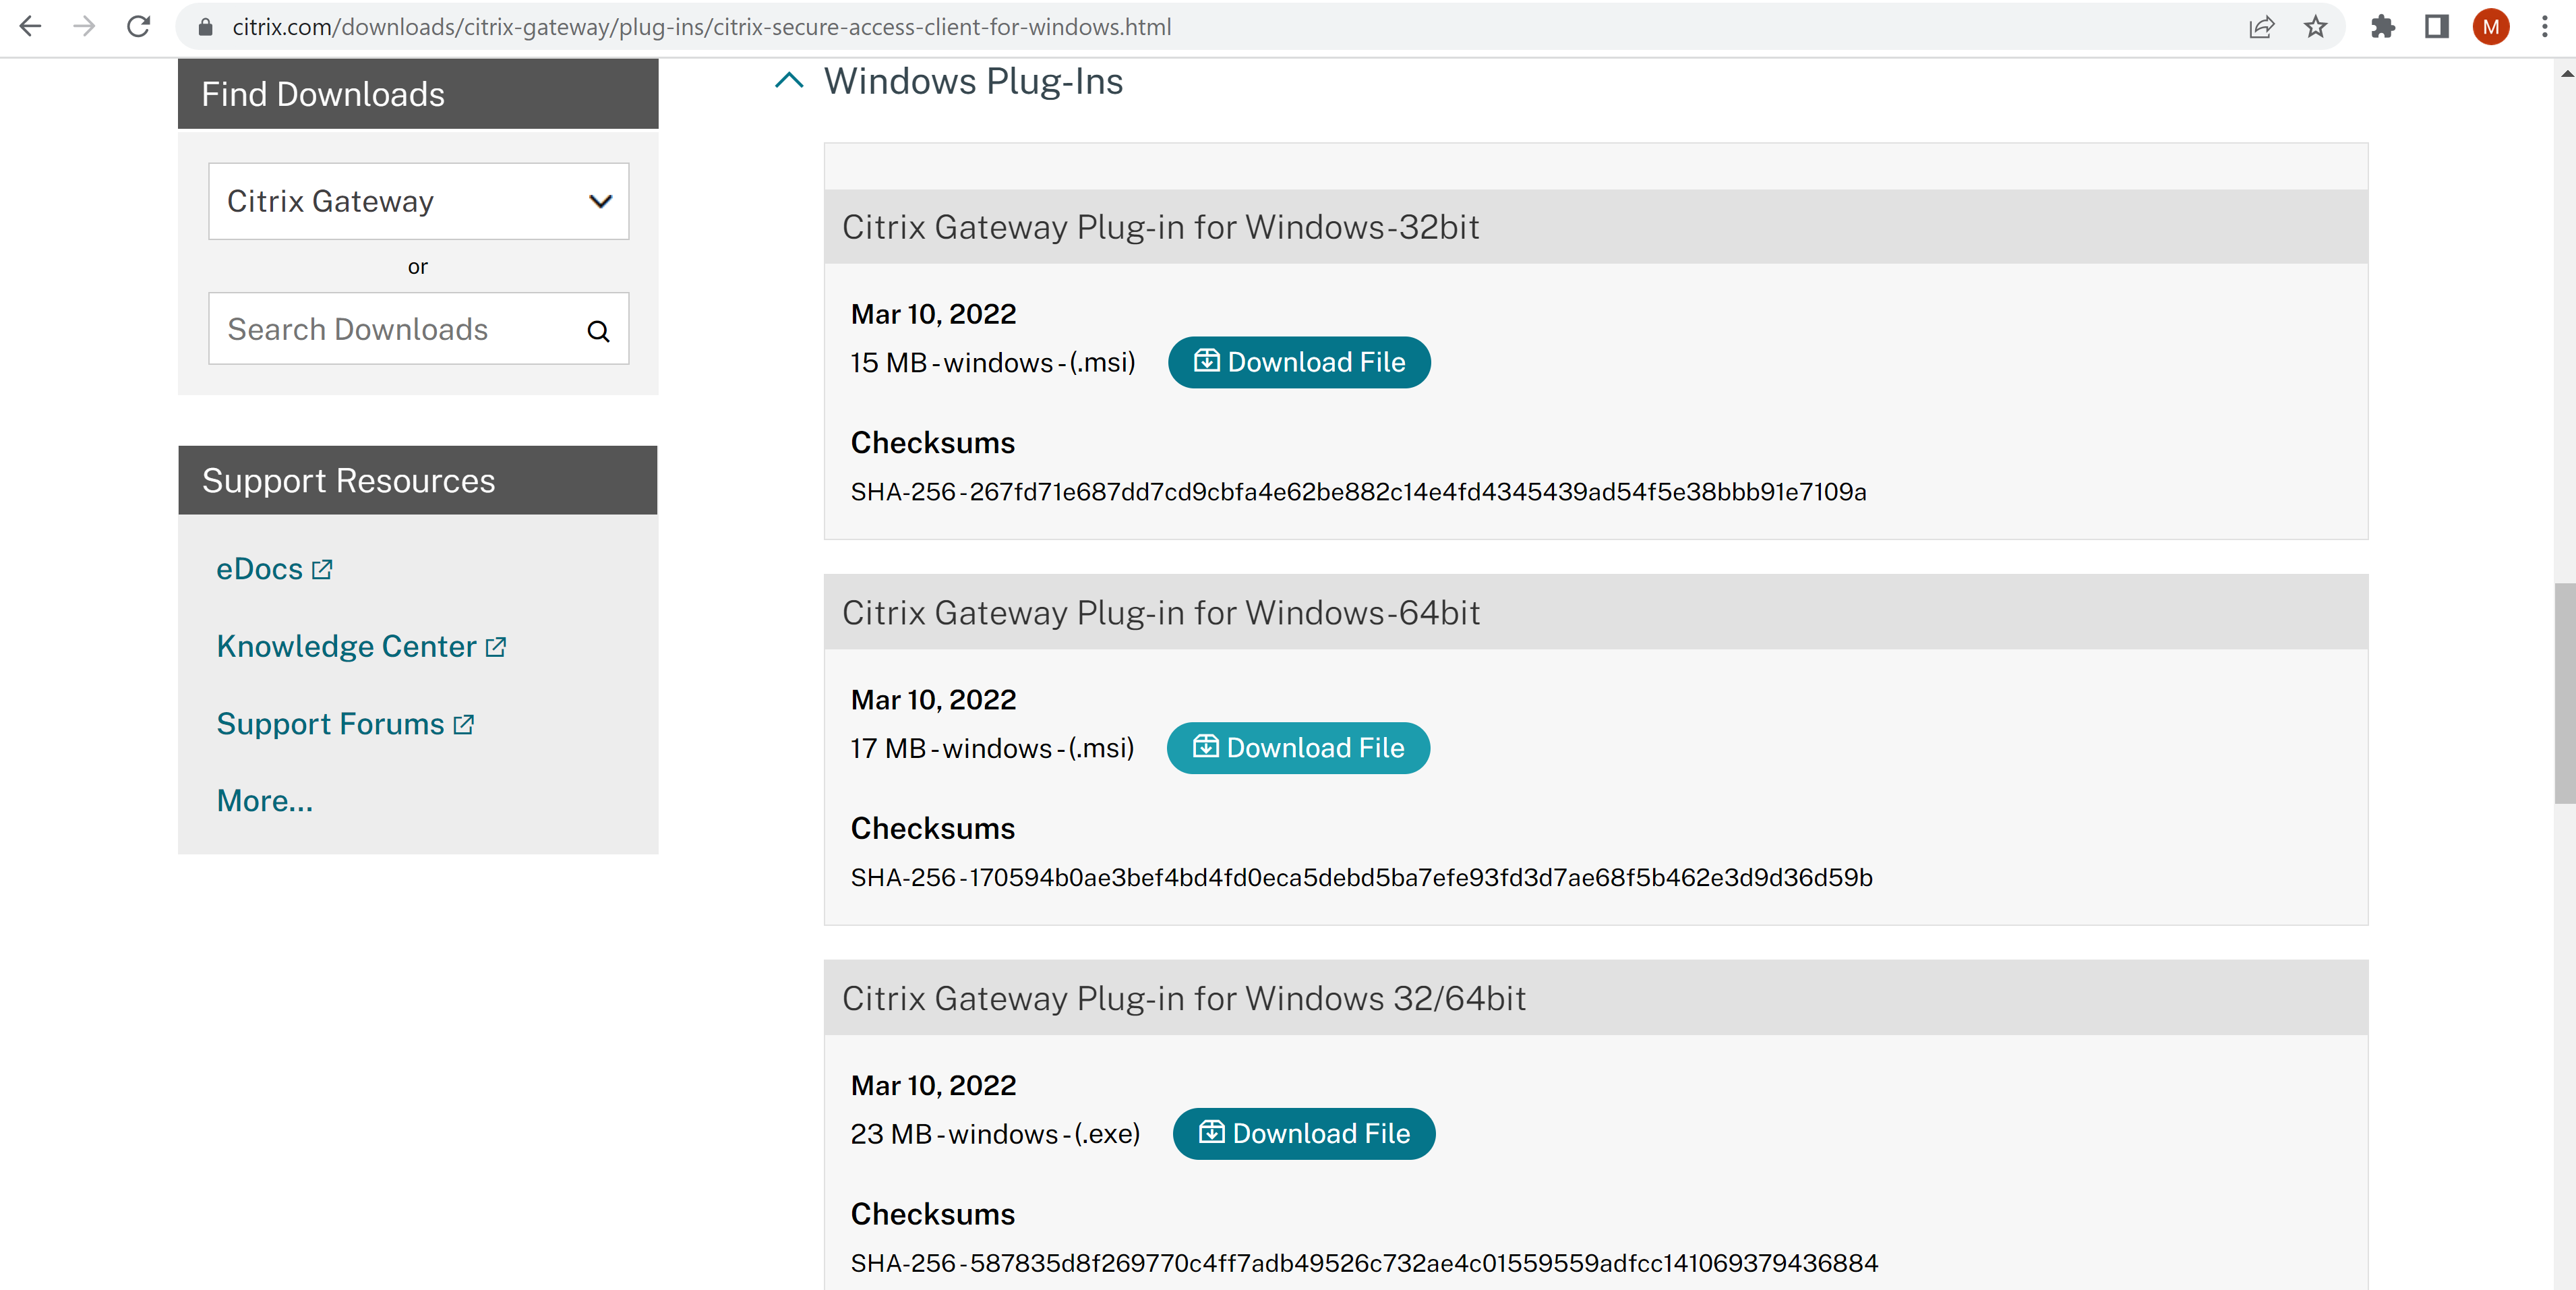
- Login to Citrix.com/downloads
- Select Citrix Gateway > Plug-Ins / Clients
- Scroll to Citrix Gateway Plug-in for Windows-64bit, select Download File, and follow agreement steps to complete the download
- Double-click the .msi installer and follow prompts to complete the installation
Configure registry key
- On your Windows endpoint open Registry Editor as an administrator
- Navigate to HKEY_LOCAL_MACHINE\SOFTWARE\Citrix\Secure Access Client Name
- Create key cloudAuthAllowed; Type: REG_DWORD; Value data: 1
- Close the Registry Editor
Install Microsoft Edge Runtime
- Navigate to Microsoft Edge Runtime
- Follow prompts to complete the installation
Configure the Workspace URL connection
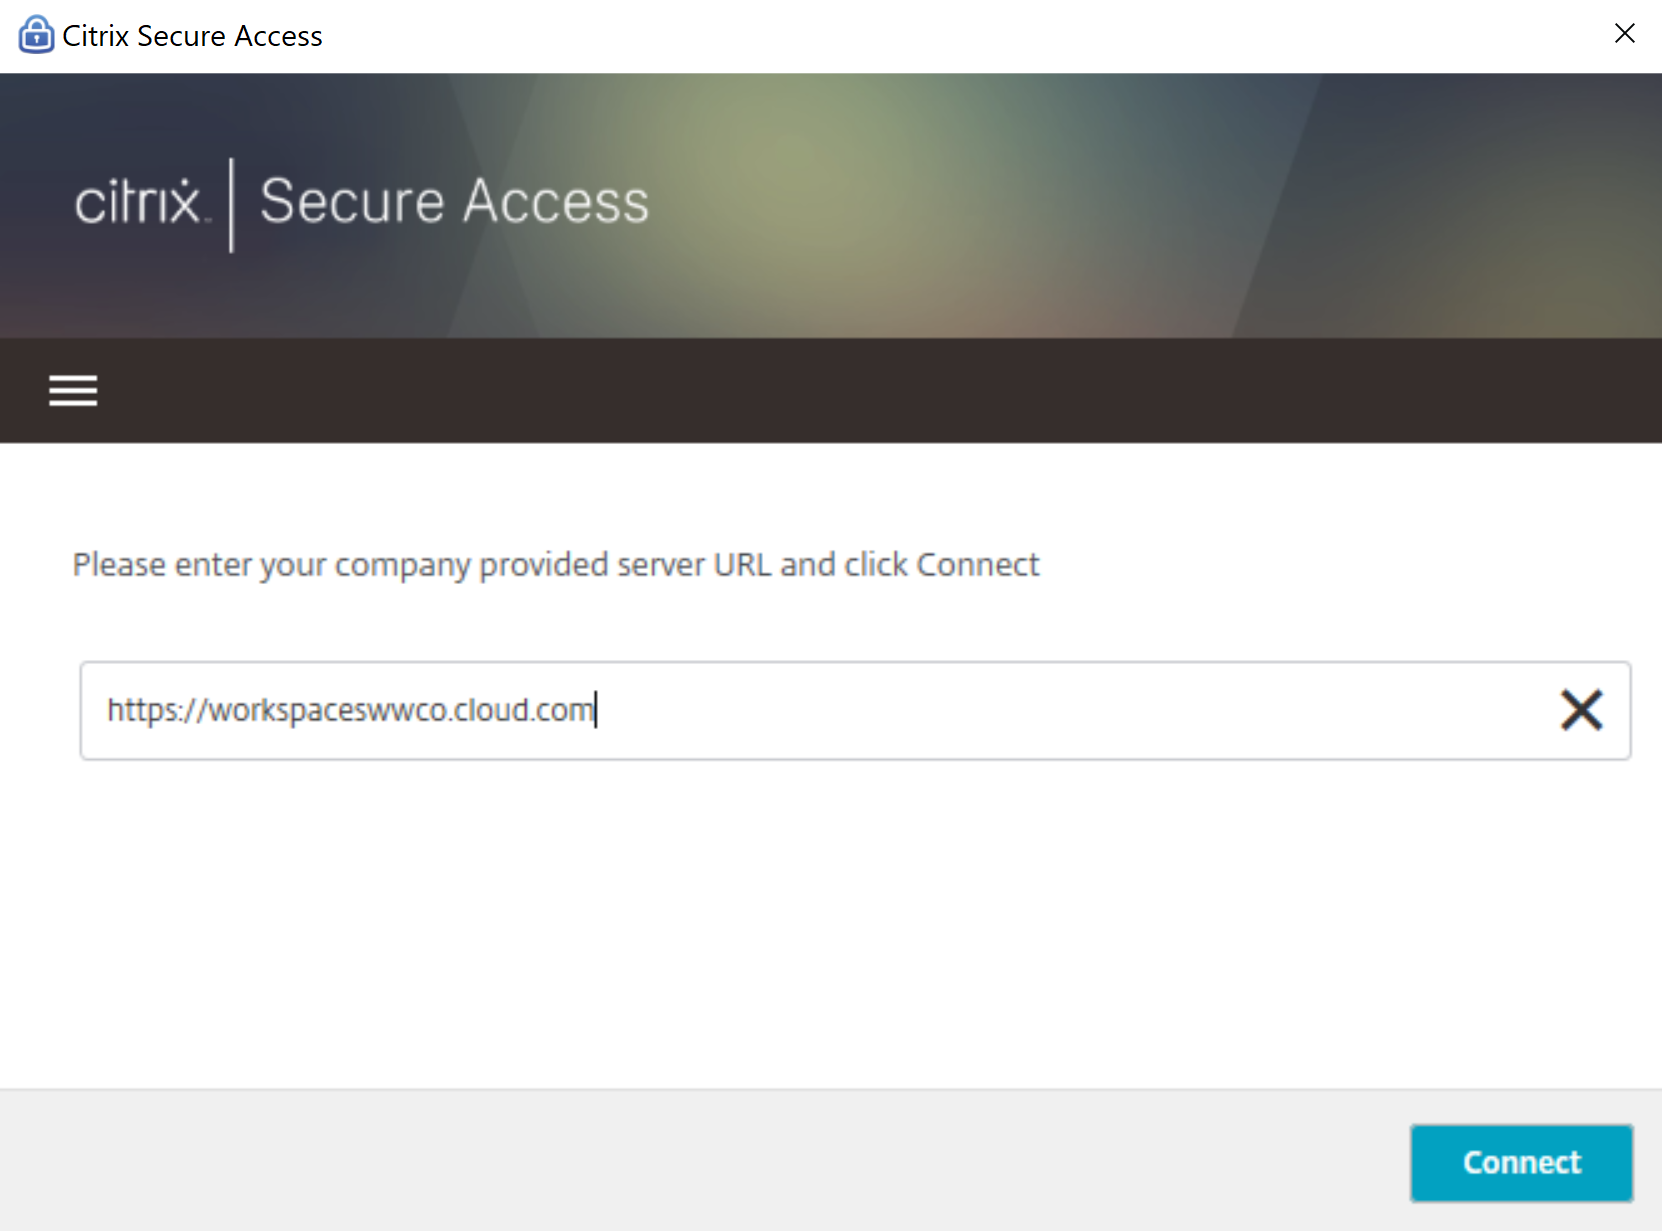
- Open the Citrix Secure Access agent
- Enter URL for your Citrix Cloud environment that you created earlier
- Select Connect
Validate
- Enter login credentials (or first open the Citrix Secure Access agent, and select Connect, if not done in the previous step)
- Select Log On
- After the connection setup is complete open Microsoft SQL Server Management Studio and enter administrative credentials to access the database
