Adaptive access policy configuration and management
In today’s ever changing situations, application security is vital for any business. Making context-aware security decisions and then enabling access to the applications reduces the associated risks while enabling access to users.
The Citrix Secure Private Access™ service adaptive access feature offers a comprehensive zero-trust access approach that delivers secure access to the applications. Adaptive access enables admins to provide granular level access to the apps that users can access based on the context. The term “context” here refers to:
- Users and groups (users and user groups)
- Devices (desktop or mobile devices)
- Location (geo-location or network location)
- Device posture (device posture check)
- Risk (user risk score)
The adaptive access feature applies adaptive policies to the applications that are being accessed. These policies determine the risks based on the context and make dynamic access decisions to grant or deny access to the Enterprise Web, SaaS, TCP, and UDP apps.
How it works
To grant or deny access to applications, admins create policies based on the users, user groups, the devices from which the users access the applications, the location (country or network location) from where the user is accessing the application, and the user risk score.
The adaptive access policies are evaluated in the following scenarios:
-
During a Web, SaaS, TCP, or a UDP app enumeration from the Secure Private Access service – If the application access is denied to this user, the user cannot see this application in the workspace.
-
While launching the application – After you have enumerated the app and if the adaptive policy is changed to deny access, users cannot launch the app even though the app was enumerated earlier.
Create an access policy with multiple rules
You can create multiple access rules and configure different access conditions for different users or user groups within a single policy. These rules can be applied separately for both HTTP/HTTPS and TCP/UDP apps, all within a single policy.
Access restrictions must be configured through the Google Admin console rather than within the Secure Private Access interface.
Rules are configured in the Google Admin console > Rules. These rules are advanced settings related to DLP, such as adding a watermark, blocking the download of files with social security numbers, and URL filtering.
For details on creating policies and rules for Google Chrome in the Google Admin console, see the following topics:
Prerequisites
Ensure that you have configured the applications for your users. For details, see Add apps for your users.
Steps to create an access policy:
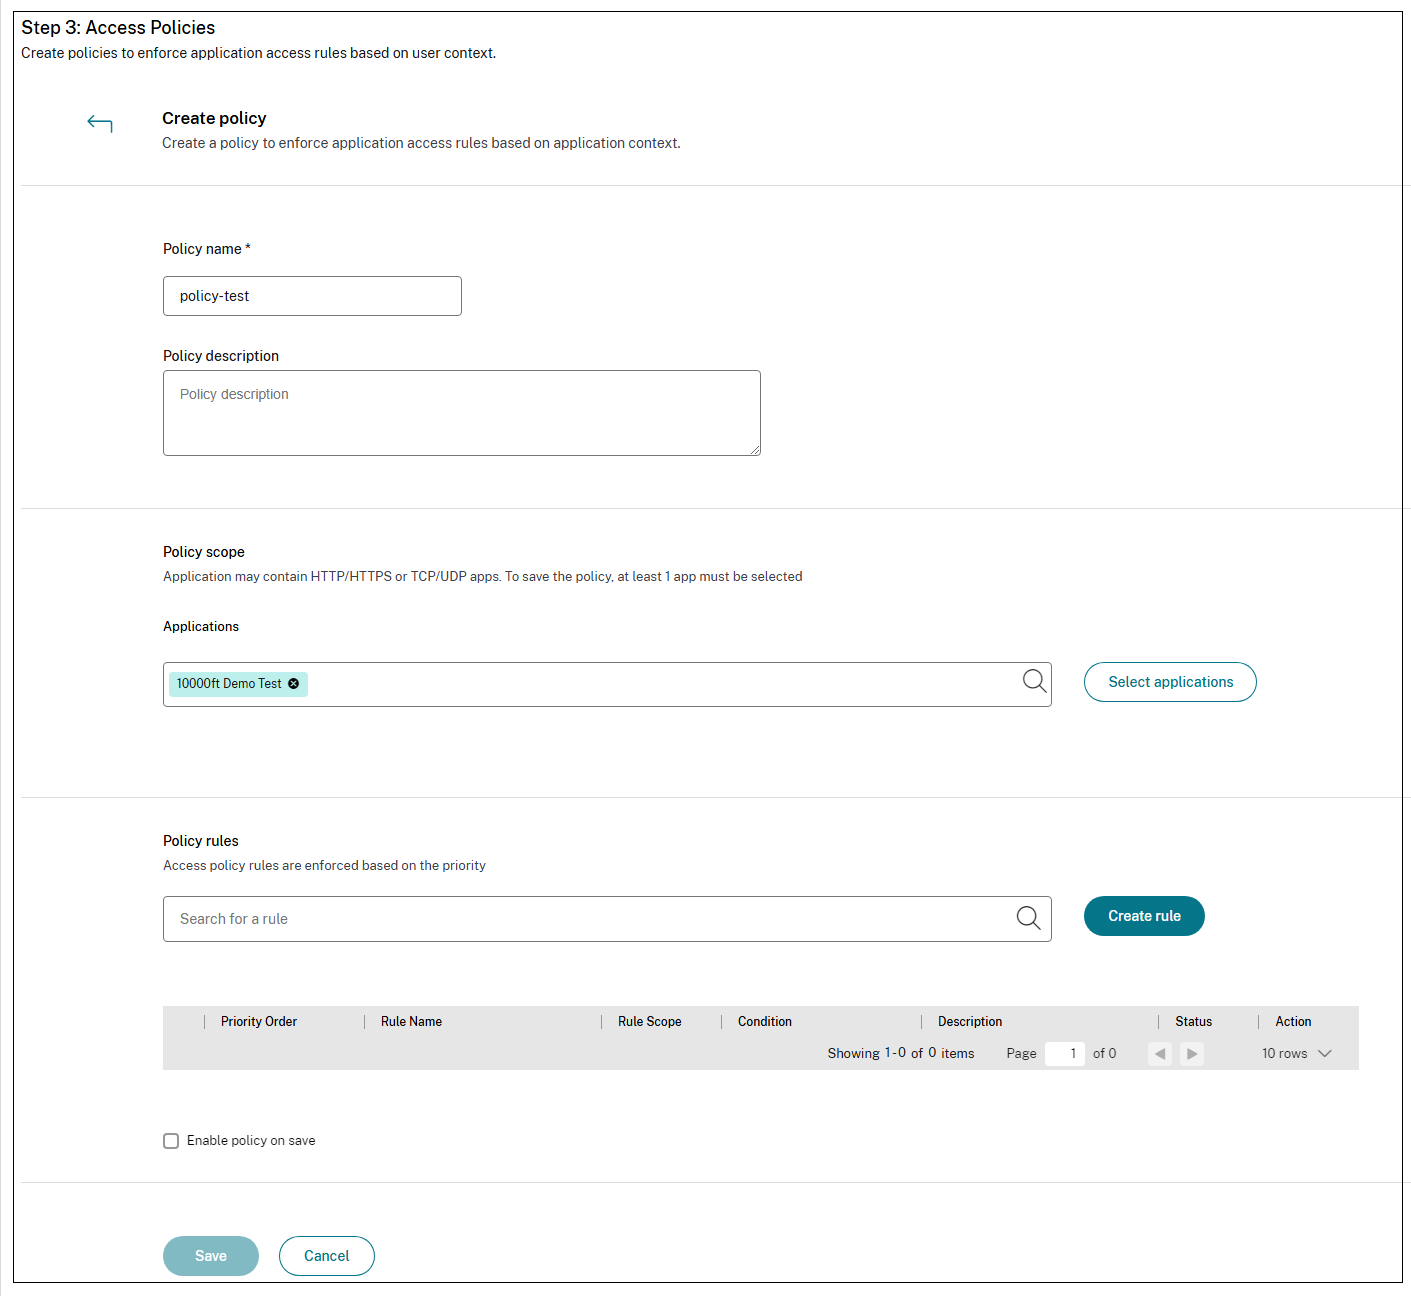
- Open the Access Policies page, and then click Create policy.
- Enter the policy name and description of the policy.
- In Applications, select the app or set of apps on which this policy must be enforced.
-
Click Create Rule to create rules for the policy.
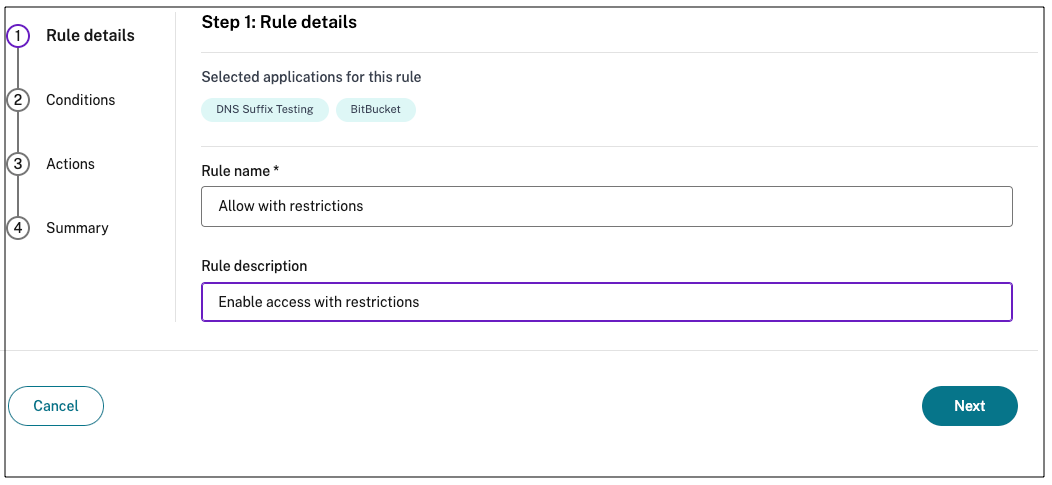
-
Enter the rule name and a brief description of the rule, and then click Next.
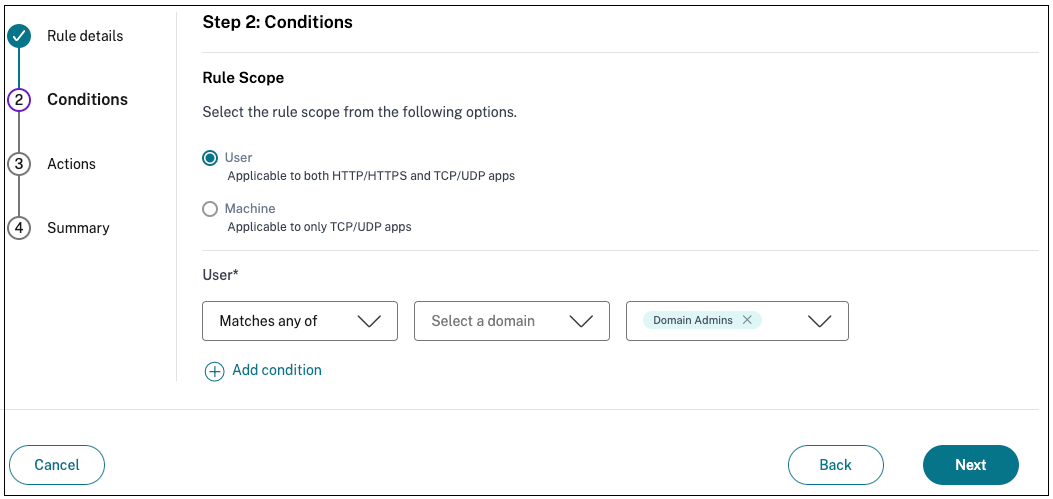
-
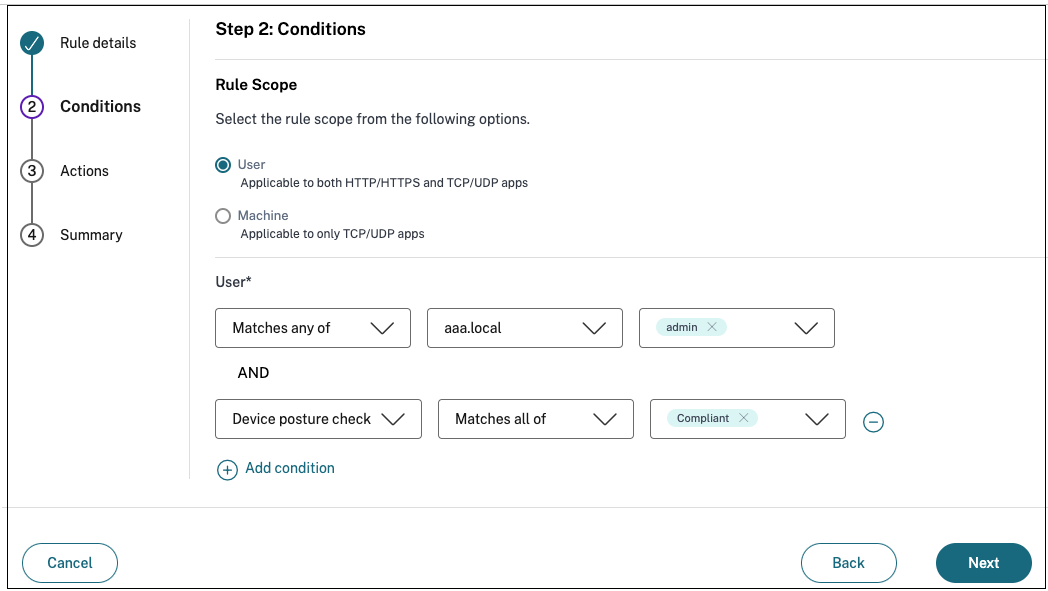
Select the users’ conditions. The Users condition is a mandatory condition to be met to grant access to the apps for the users. You can select the condition, followed by the domain, and then users.
Select one of the following:
- Matches any of – Only the users or groups that match any of the names listed in the field and belonging to the selected domain are allowed access.
-
Does not match any - All users or groups except those listed in the field and belonging to the selected domain are allowed access.
Note:
You can search for users by display name, email ID, or user principal name. This search option allows admins to accurately identify and grant access to the correct user, even if they have multiple accounts.
-
(Optional) Click + to add multiple conditions based on the context.
When you add conditions based on a context, an AND operation is applied on the conditions and the policy is evaluated only if the Users and the optional contextual based conditions are met. You can apply the following conditions based on context.
-
Geo location – Select the condition and the geographic location from where the users are accessing the apps.
- Matches any of: Only users or user groups accessing the apps from any of the geographic locations listed are enabled for access to the apps.
- Does not match any: All users or user groups other than those from the listed geographic locations are enabled for access.
-
Network location – Select the condition and the network using which the users access the apps.
- Matches any of: Only users or user groups accessing the apps from any of the network locations listed are enabled for access to the apps.
- Does not match any: All users or user groups other than those from the listed network locations are enabled for access.
- Device posture check – Select the conditions that the user device must fulfill to access the apps.
-
Geo location – Select the condition and the geographic location from where the users are accessing the apps.
- Click Next.
-
Select the actions that must be applied based on the condition evaluation.
- Allow access
- Deny access
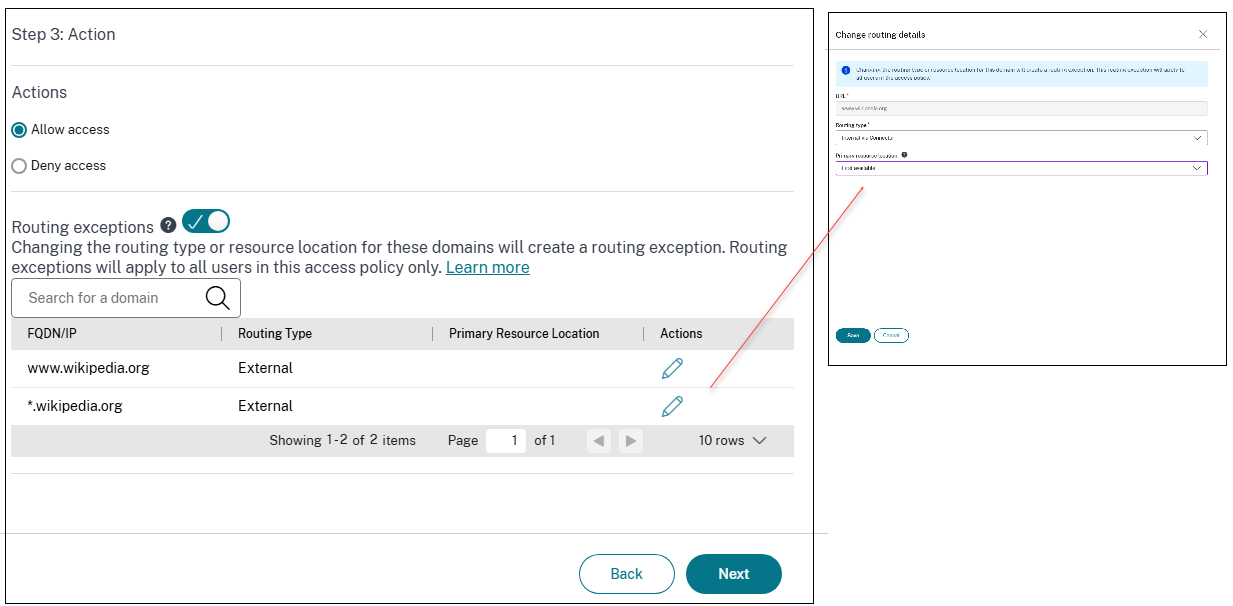
-
(Optional) Modify the routing type or resource location for a specific domain, if required. The Routing exceptions toggle allows you to edit the resource locations and routing information for domains of the apps added in the access policy.
-
In Routing type, modify the routing type:
- Internal: The traffic flows through the Connector Appliance. For a web app, the traffic flows within the data center. For a SaaS app, the traffic is routed outside the network through the Connector Appliance.
- Internal - Bypass Proxy: The domain traffic is routed through Citrix Cloud Connector™ appliances, bypassing the customer’s web proxy configured on the Connector Appliance.
- External: The traffic flows directly to the internet.
-
In Resource location, modify the resource location, if necessary. This option is applicable only for the internally routed domains.
For more information about contextual routing, see Context-based app routing and resource locations selection.
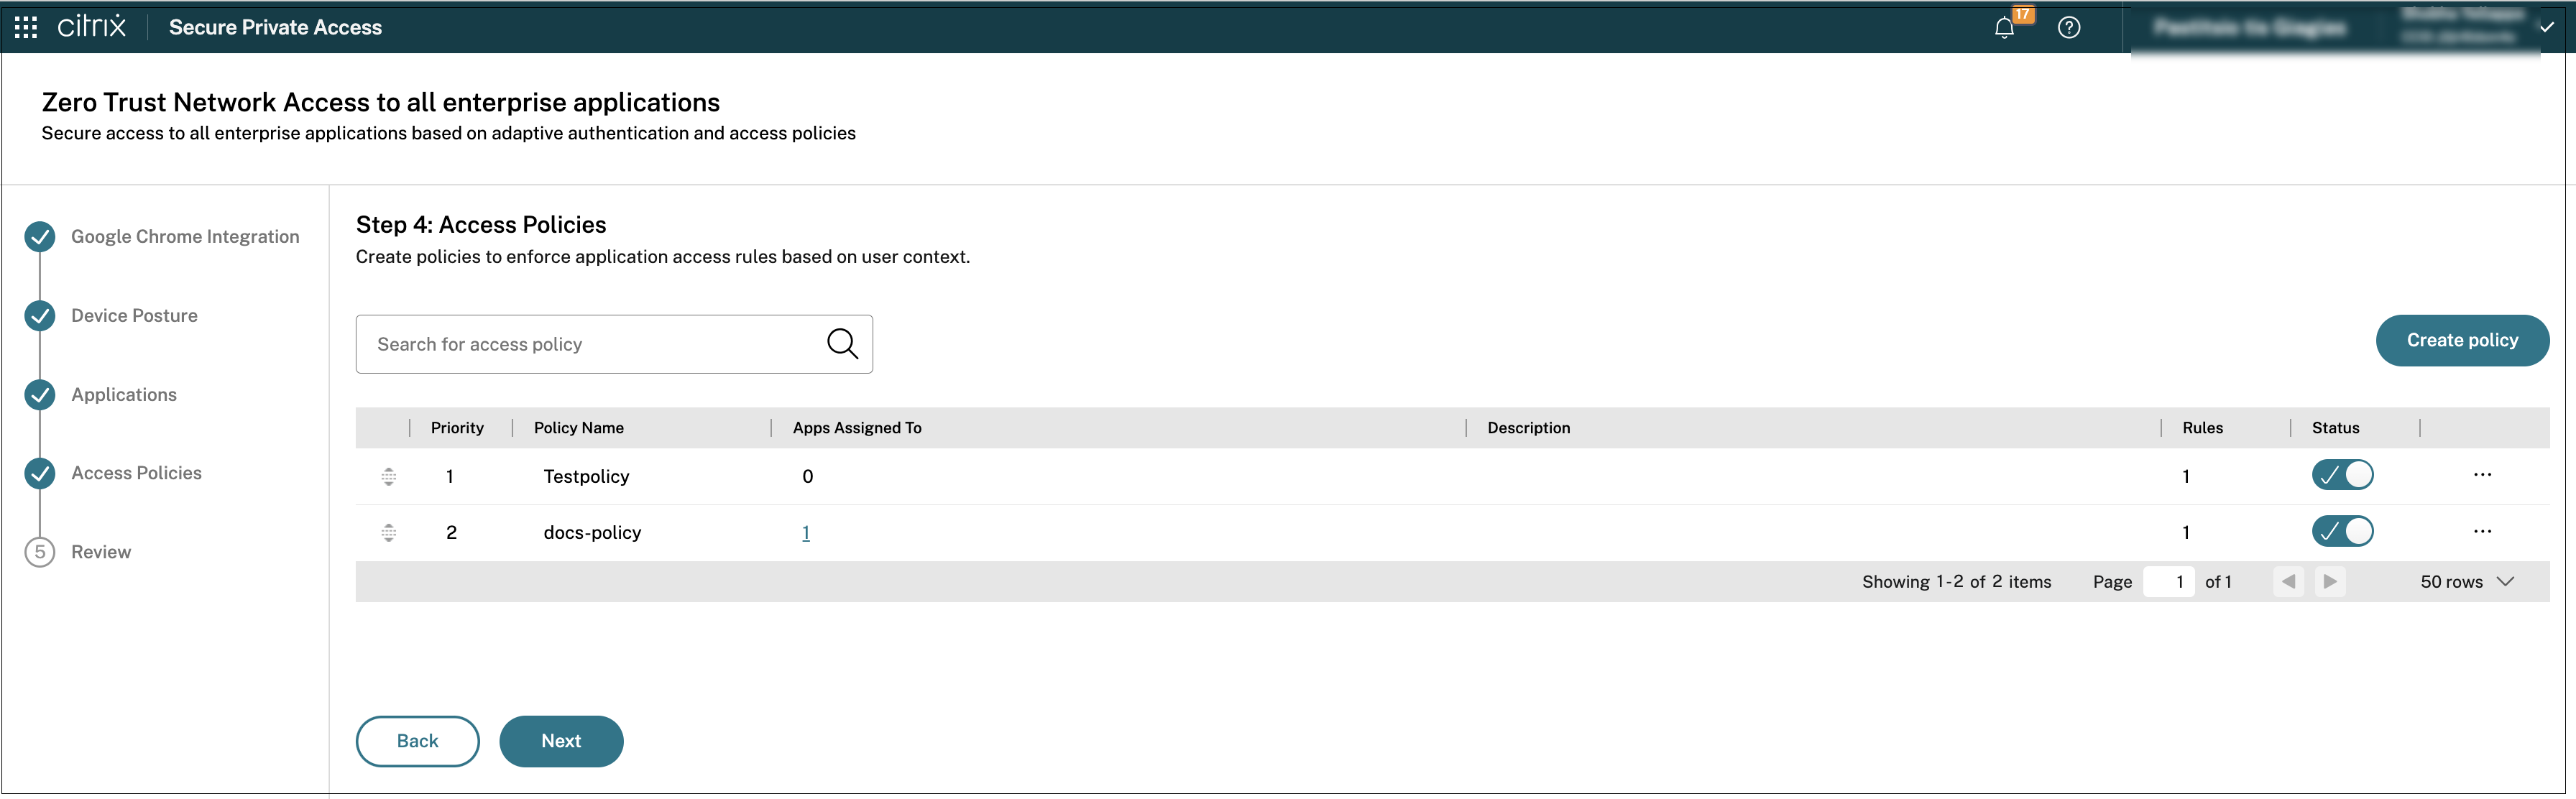
After you create the policies, they are listed in the Access policies page.
-
Points to remember after a policy is created
-
The policy that you created appears under the Policy rules section and is enabled by default. You can disable the rules, if required. However, ensure that at least one rule is enabled for the policy to be active.
-
A priority order is assigned to the policy by default. The priority with a lower value has the highest preference. The rule with a lowest priority number is evaluated first. If the rule (n) does not match the conditions defined, the next rule (n+1) is evaluated and so on.
Evaluation of rules with priority order example:
Consider that you have created two rules, Rule 1 and Rule 2. Rule 1 is assigned to user A and Rule 2 is assigned to user B, then both rules are evaluated. Consider that both rules Rule 1 and Rule 2 are assigned to user A. In this case, Rule 1 has the higher priority. If the condition in Rule 1 is met, then Rule 1 is applied and Rule 2 is skipped. Otherwise, if the condition in Rule 1 is not met, then Rule 2 is applied to user A.
Note:
If none of the rules are evaluated, then the app is not enumerated to the users.
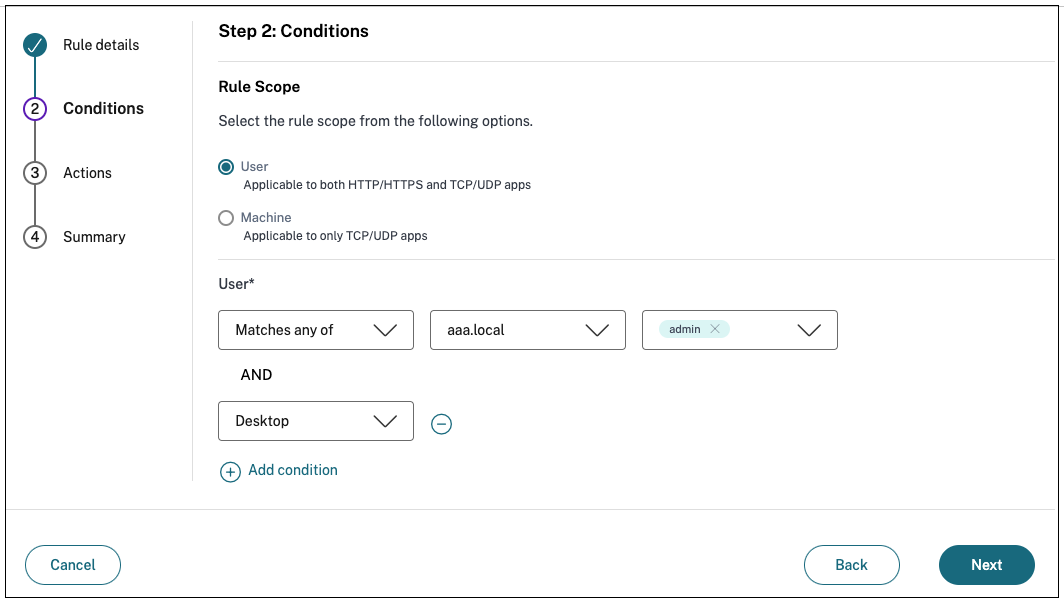
Adaptive access based on devices
To configure an adaptive access policy based on the platform (mobile device or a desktop computer) from which the user is accessing the application, see Adaptive access policy configuration and management.
- In Step2: Conditions page, click Add condition.
- Select Desktop or Mobile device.
- Complete the policy configuration.
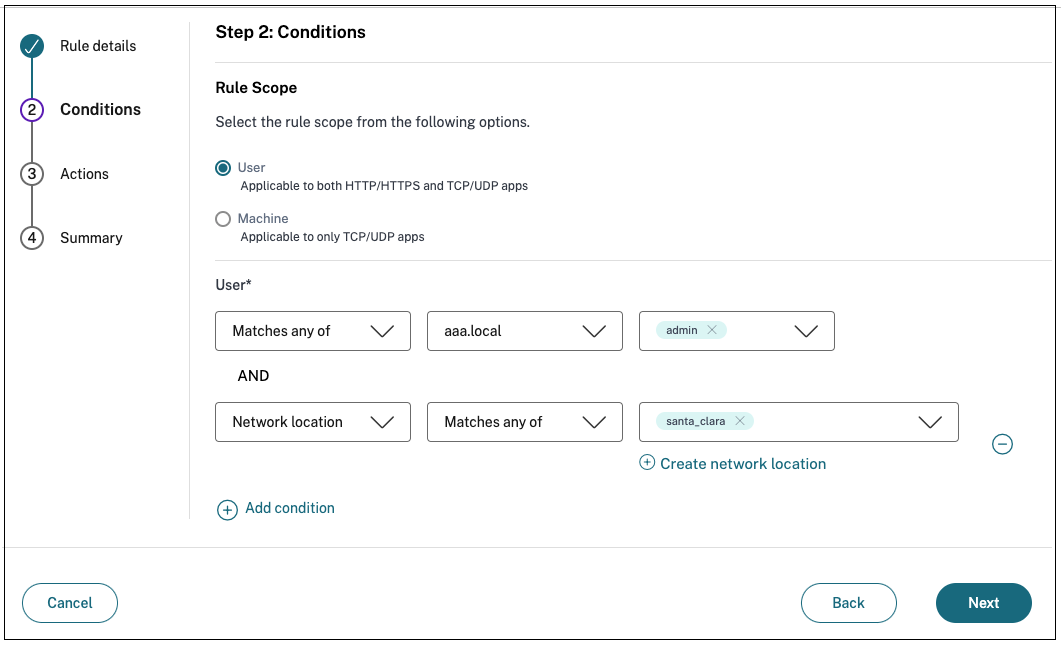
Adaptive access based on the location
An admin can configure the adaptive access policy based on the location from where the user is accessing the application. The location can be the country from where the user is accessing the application or the user’s network location. The network location is defined using an IP address range or subnet addresses.
To configure an adaptive access policy based on the location, use the [Create an adaptive access policy with multiple rules procedure with the following changes.
- In Step2: Conditions page, click Add condition.
- Select Geo-location or Network location.
- If you have configured multiple geo-locations or network locations, then select one of the following as per your requirement.
- Matches any of – The geographic locations or network locations match any of the geographic locations or network locations configured in the database.
- Does not match any – The geographic locations or network locations do not match with the geographic locations or network locations configured in the database.
Note:
-
If you select Geo-location, the source IP address of the user is evaluated with the IP address of the country database. If the IP address of the user maps to the country in the policy, the policy is applied. If the country does not match, this adaptive policy is skipped and the next adaptive policy is evaluated.
-
For Network location, you can select an existing network location or create a network location. To create a new network location, click Create network location.
-
Ensure that you have enabled Adaptive Access from Citrix Cloud > Citrix Workspace > Access > Adaptive Access. If not, you cannot add the location tags. For details, see Enable Adaptive Access.
-
You can also create a network location from the Citrix Cloud console. For details, see Citrix Cloud network location configuration.
- Complete the policy configuration.
Adaptive access based on the device posture
You can configure Secure Private Access service to enforce access control using device posture tags. After a device is allowed to log in after the device posture verification, the device can be classified as compliant or non-compliant. This information is available as tags to the Citrix DaaS™ service and Citrix Secure Private Access service and is used to provide contextual access based on device posture.
For complete details on the Device Posture service, see Device Posture.
To configure an adaptive access policy based on the device posture, use the Create an adaptive access policy with multiple rules procedure with the following changes.
- In Step2: Conditions page, click Add condition.
- Select Device posture check and the logical expression from the drop-down menu.
- Enter one of the following values in custom tags:
- Compliant - For compliant devices
- Non-Compliant - For non-compliant devices
Note:
The syntax for the device classification tags must be entered in the same manner as captured earlier, that is initial caps (Compliant and Non-Compliant). Else the device posture policies do not work as intended.
Adaptive access based on user risk score
Important:
This feature is available to the customers only if they have the Security Analytics entitlement.
User risk score is a scoring system to determine the risks associated with the user activities in your enterprise. Risk indicators are assigned to user activities that look suspicious or can pose a security threat to your organization. The risk indicators are triggered when the user’s behavior deviates from the normal. Each risk indicator can have one or more risk factors associated with it. These risk factors help you to determine the type of anomalies in the user events. The risk indicators and their associated risk factors determine the risk score of a user. The risk score is calculated periodically and there is a delay between the action and the update in the risk score. For details, see Citrix user risk indicators.
To configure an adaptive access policy with risk score, use the Create an adaptive access policy with multiple rules procedure with the following changes.
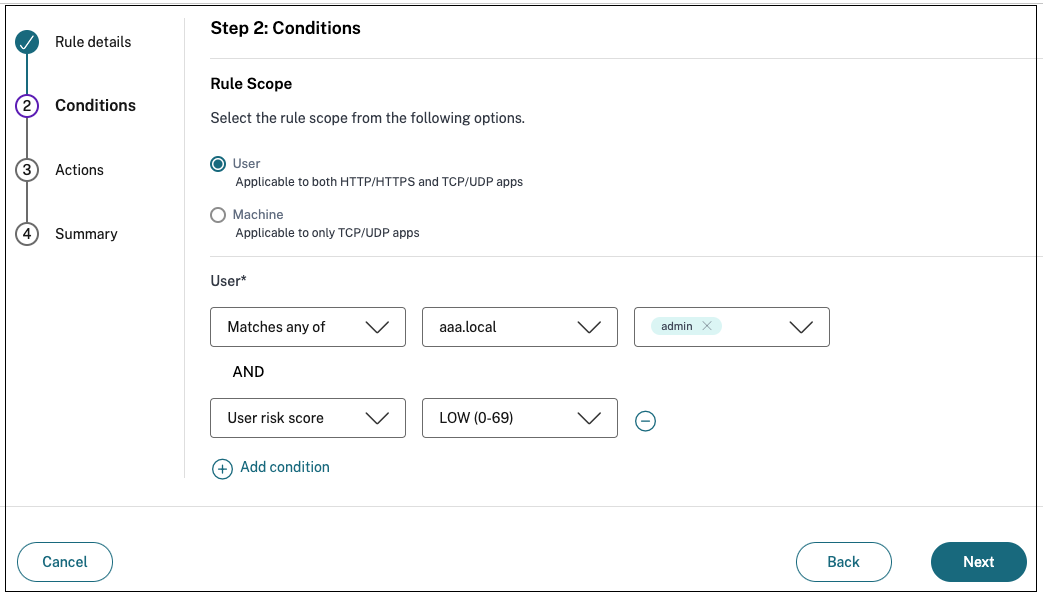
- In Step2: Conditions page, click Add condition.
-
Select User risk score and then select the risk condition.
-
Preset tags fetched from the CAS service
- LOW 1–69
- MEDIUM 70–89
- HIGH 90–100
Note:
A risk score of 0 is not considered to have a risk level “Low.”
- Threshold types
- Greater than or equal to
- Less than or equal to
- A number range
- Range
-