Policy modeling tool
When managing multiple applications and access policies, it can be challenging for administrators to determine the exact end-user access result. Whether a user is allowed or denied access to an application based on all current configurations.
The policy modeling tool, located under Access policies > Policy modeling, provides administrators with comprehensive visibility into expected app access outcomes (allowed, allowed with restriction, or denied) based on current configurations. Admins can check the access results for any user based on conditions such as device type, device posture, geo-location, network location, user risk score, and workspace URL. Admins can also evaluate the access policies for specific application destinations.
Access the policy modeling tool
- In the Secure Private Access console, click Access Policies and then click the Policy modeling tab.
-
The policy modeling tool user interface appears.
- The All Apps tab is selected by default. This tab can be used for analyzing policies that are applicable across multiple users, user groups, or machines within the environment.
- To understand how policies are enforced on specific network destinations, such as a specific website domain, an IP address, or a network port, you must use the URL or IP/Port tabs and enter the destination details.
Analyze policies for a set of users or machines
-
Select the Users or the Machines tab and enter the following details.
- Device type: Select the device type of the end user. (Desktop is selected by default).
- Domain: Select the domain associated with the user.
- Username or user group: (Applicable only if you have selected the Users tab) Select the user name for which you want to analyze the applications and associated policies.
- Machine name: (Applicable only if you have selected the Machines tab) Enter the machine name based on which you want to analyze the applications and associated policies.
-
To search for accurate results, add the exact user or machine conditions.
- Click Simulate conditions.
- Select the condition (Device posture, Geo-location, Network location, User risk score, and Workspace URL) and then select the associated value.
- Click the + sign to add more conditions.
- Click Apply.
Analyze policies for specific destinations
- Click the URL tab for Web/SaaS applications and IP/Port tab for the TCP/UDP applications.
-
Enter the following details:
- URL: The URL of the application for which you want to analyze the access policies.
- IP:Port: The IP and port number of the TCP/UDP app for which you want to analyze the access policy. You can also enter the host name followed by the port number.
Examples: 192.0.2.20:443; example.test.net:443
- Click Apply.
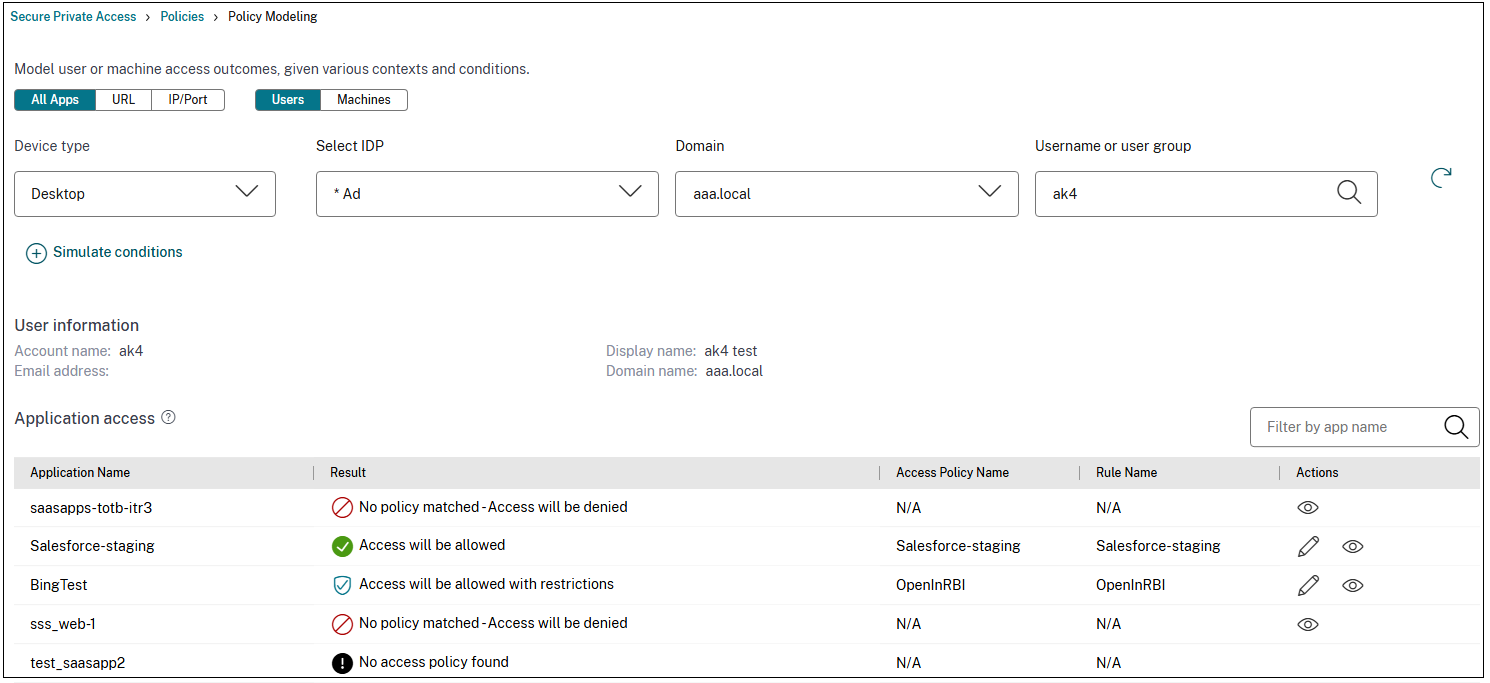
The Application Access section displays the list of applications and the associated policies based on your search. An eye icon appears alongside the application for which an exact policy match or no policy match has occurred. The admins can also edit a policy for the apps for which access is allowed or access is allowed with restriction.
The following figure displays the policy analyzer for all apps:
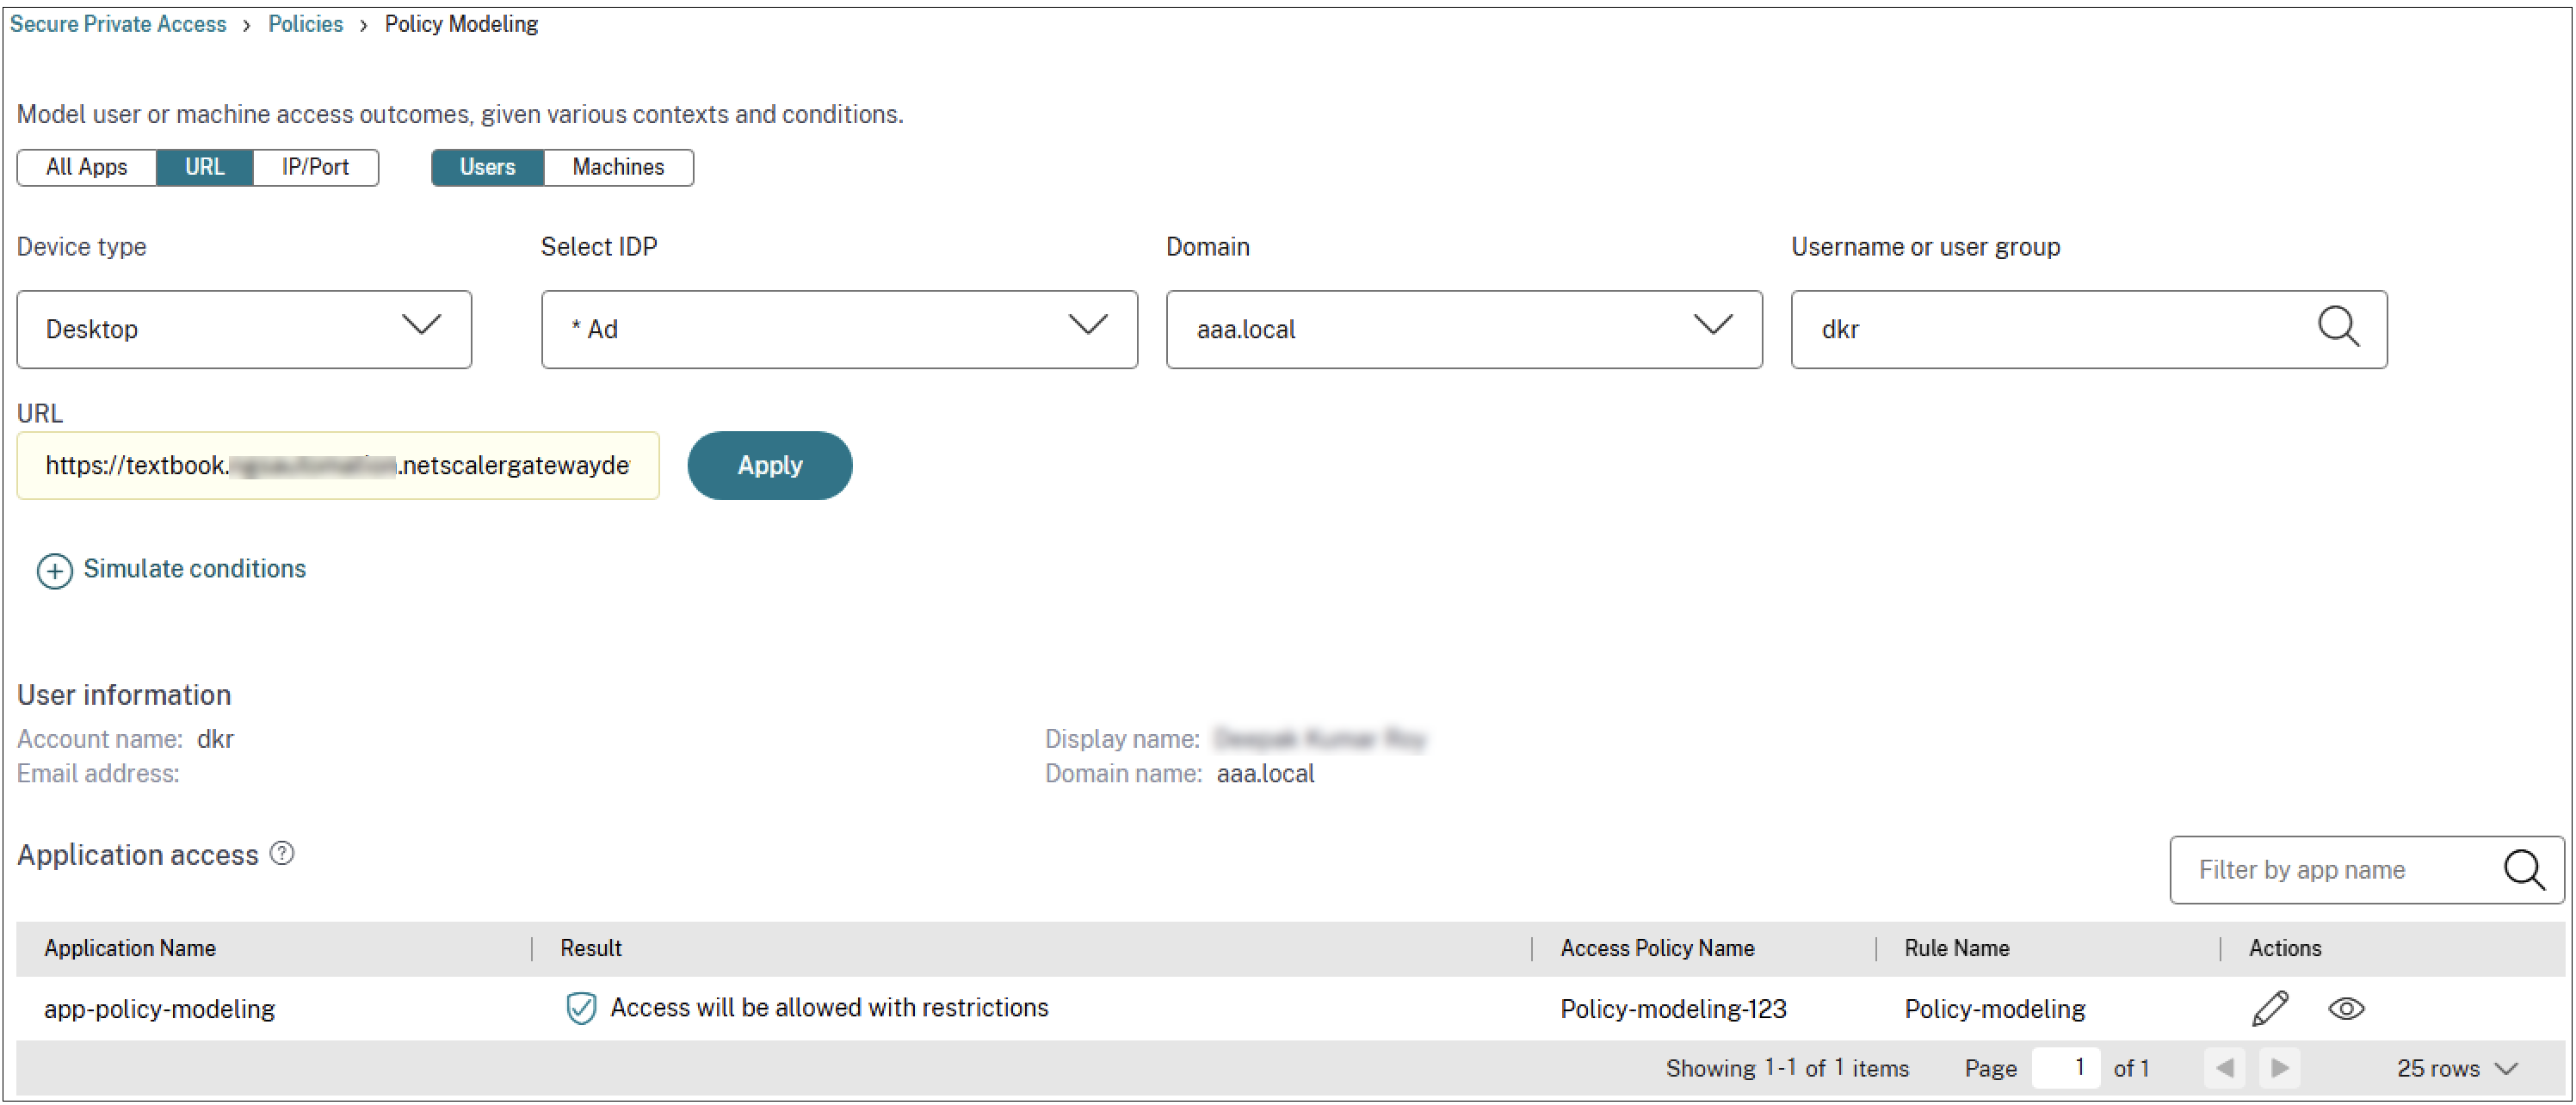
The following figure displays the policy analyzer for a web app:
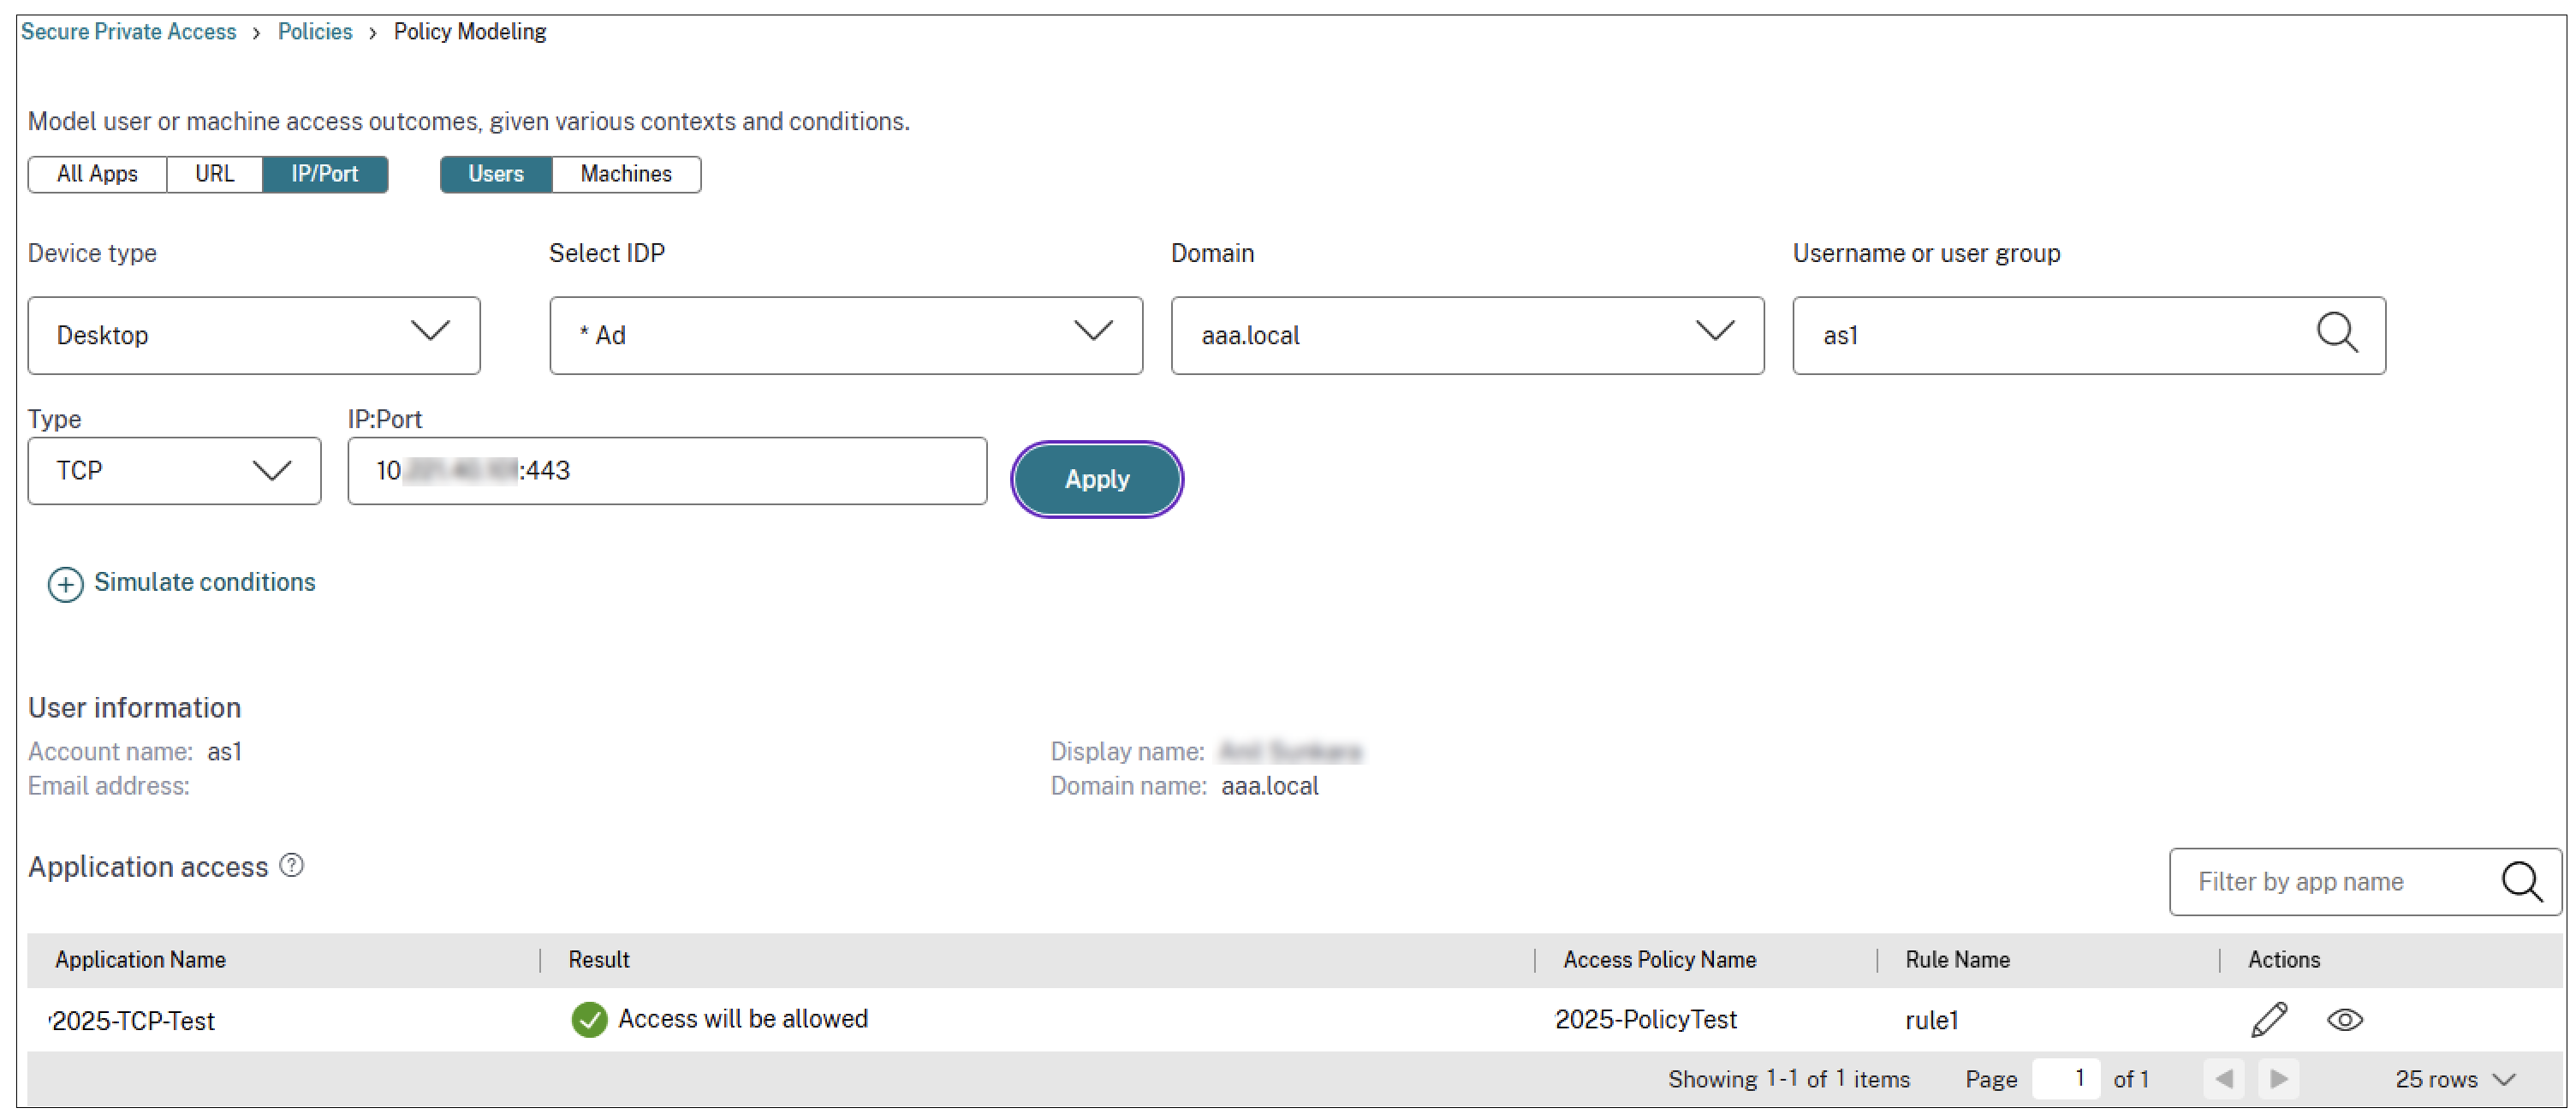
The following figure displays the policy analyzer for a TCP app:
Drill down into access policies
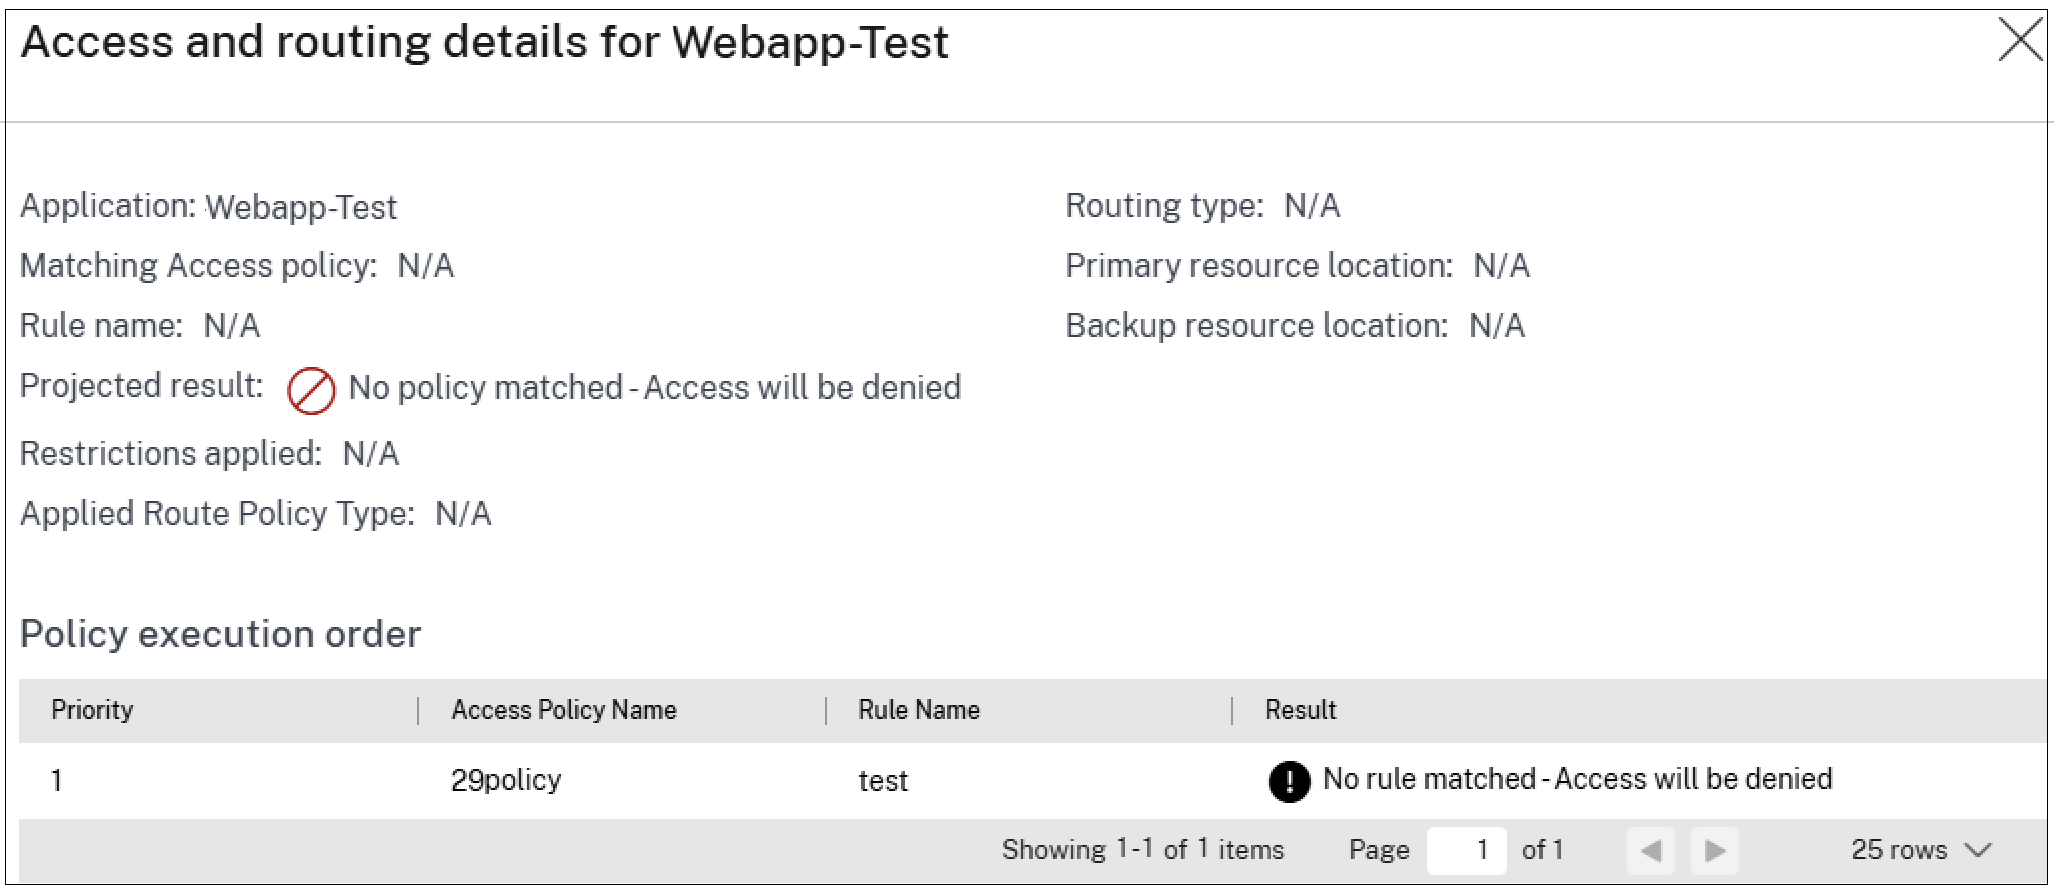
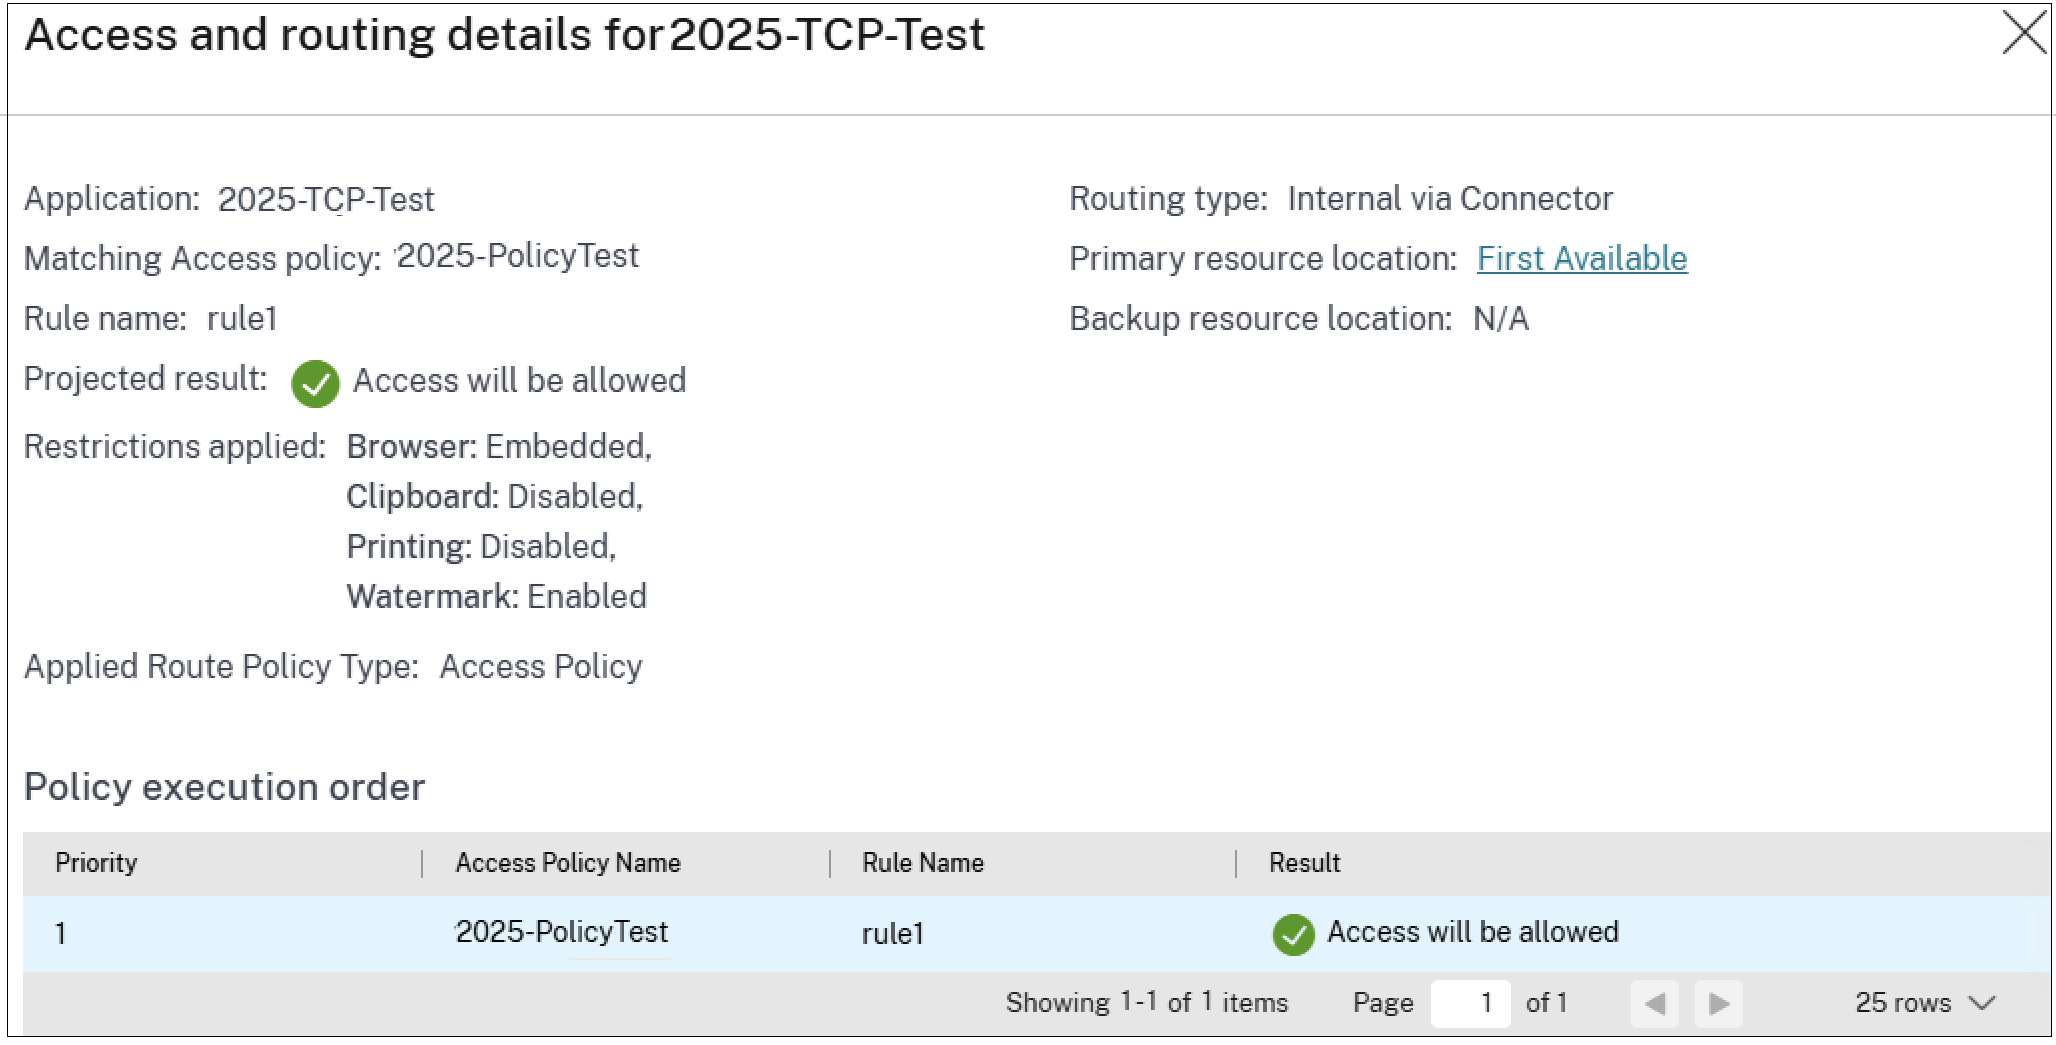
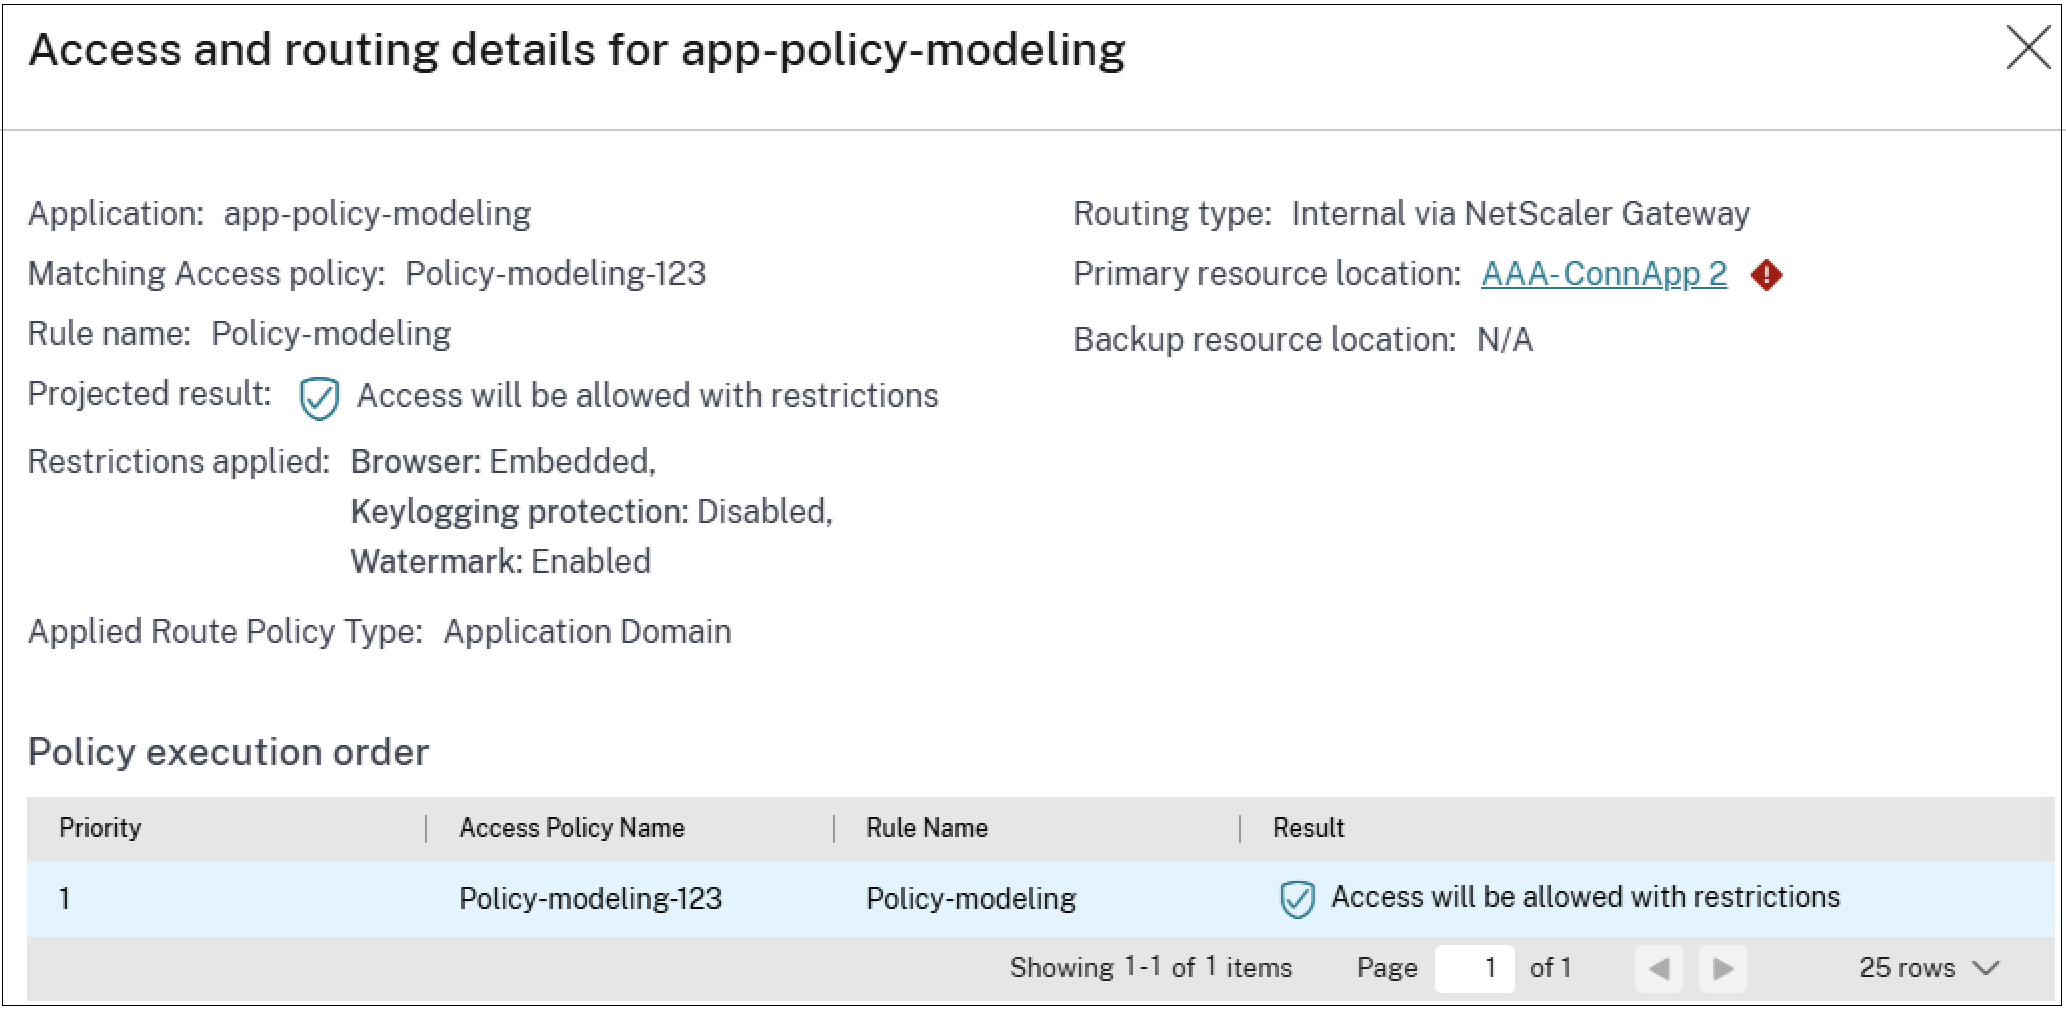
In the Application Access section, click the eye icon to view the access and routing details page. The Access and routing details page displays a comprehensive list of all relevant policies that influenced the access decisions for that application. This page displays the following information:
| Field | Description |
|---|---|
| Application | Name of the application. |
| Matching Access Policy | The name of the access policy that has an exact match or major match with the application. |
| Rule Name | The specific rule associated with the matching policy. |
| Projected Result | The action determined based on the policy evaluation (for example, allow, deny, allow with restriction). |
| Restrictions Applied | Access restrictions, if any, enforced on the application. |
| Applied Route Policy Type
|
Indicates the type of policy that determined the applications routing behavior. The policy type is access policy, session policy, or application domain. |
| Identifies the hierarchy in routing decisions. The precedence order being access policy (highest priority), followed by session policy, and then the default application domain (lowest priority). | |
| Routing Type
|
The routing type details the path a user’s request takes through the Secure Private Access service. |
| External Requests are routed directly to the intended destination. | |
| Internal via Connector Requests are routed through a Connector. | |
| Internal via Gateway Requests are routed through NetScaler Gateway. This routing type is applicable only for hybrid data path that is supported with the Citrix Secure Access client. For details, see Hybrid data path for Secure Private Access services. | |
| Primary Resource Location | Name associated with the primary location of the application. |
| Backup Resource Location | Name of the backup location (if configured). |
The following figure displays the policy drill-down results for a TCP app for which access is allowed.
The following figure displays the policy drill-down results for a web app for which access is allowed with restrictions.
The following figure displays the policy drill-down results for a web app for which access is denied:
