Configure Citrix Workspace app
You can configure Citrix Workspace app for Mac using Global App Configuration service User Interface (UI) and Mobile Device Management. Settings can be configured for both cloud (Citrix Workspace) and on-premises (Citrix StoreFront) environments.
For more information, see the following:
Quit background processes with Quick Access menu
Starting with version 2503, Citrix Workspace™ app for Mac ensures that all background processes, including the Citrix Workspace Helper, quit when user exits the main application through the Quick Access menu. This enhancement addresses common concerns where certain apps, like Citrix Workspace Helper, remained active after users closed the main workspace application. To provide a better user experience, this functionality ensures that:
- When users select the Quit option from the Quick Access menu of the Citrix Workspace app, all associated background processes are closed.
- If the Citrix Workspace app is exited through other methods, such as Command+Q or quitting from the dock, the background processes remain running. This behavior ensures that necessary background functionalities remain operational unless explicitly exited.
Keyboard layout synchronization
Keyboard layout synchronization enables you to switch between the preferred keyboard layouts on the client device. For more information, see Keyboard layout synchronization.
Channel support for Global App Configuration service
The Global App Configuration service for Citrix Workspace allows a Citrix administrator to deliver Workspace service URLs and Workspace App settings through a centrally managed service. Global App Configuration service now allows administrators to test the settings before rolling it out to all users. This feature allows to resolve any issues before applying the global app configurations to the entire user base.
You can achieve the channel support by mapping the settings that you want to test to a channel and then add the channel in the payload. For more information, see Global App Configuration service documentation.
Citrix Virtual Channel SDK
The Citrix Virtual Channel software development kit (VCSDK) supports writing server-side applications and client-side drivers for more virtual channels using the ICA protocol. The server-side virtual channel applications are on Citrix Virtual Apps and Desktops™ servers. If you want to write virtual drivers for other client platforms, contact Citrix Technical support.
The Virtual Channel SDK provides:
- The Citrix Virtual Driver Application Programming Interface (VDAPI) is used with the virtual channel functions in the Citrix Server API SDK (WFAPI SDK) to create new virtual channels. The virtual channel support provided by VDAPI makes it easy to write your own virtual channels.
- The Windows Monitoring API, which enhances the visual experience and support for third-party applications integrated with ICA.
- Working source code for virtual channel sample programs to demonstrate programming techniques.
The Virtual Channel SDK requires the WFAPI SDK to write the server side of the virtual channel.
Load Custom Virtual Channels on Macs with Apple Silicon
As an end-user, you can load the Custom Virtual Channel SDK (VCSDK) successfully on a Mac with the M1 and M2 chipset. With universal architecture, you must load the VCSDK by recompiling your Custom Virtual Channels using the latest VCSDK on the M1 and M2 chipset device. You can download the universal architecture build from the Virtual Channel SDK 2204 for macOS (Apple silicon) - Universal Architecture section at Downloads.
To load the VCSDK, do the following:
- Download Virtual Channel SDK 2204 for macOS from Downloads.
- Open your Custom Virtual Channel project in Xcode.
- Change your code.
- Compile your Custom Virtual Channel to generate the virtual channel bundle.
Test your Virtual Channel Software Development Kit (VCSDK)
If you’re using the Citrix Virtual Channel Software Development Kit (VCSDK), you must customize so your customized virtual channels run correctly. To test your VCSDKs, do the following:
- Ensure that all the linked libraries of your customized virtual channels are compiled for Universal Binary.
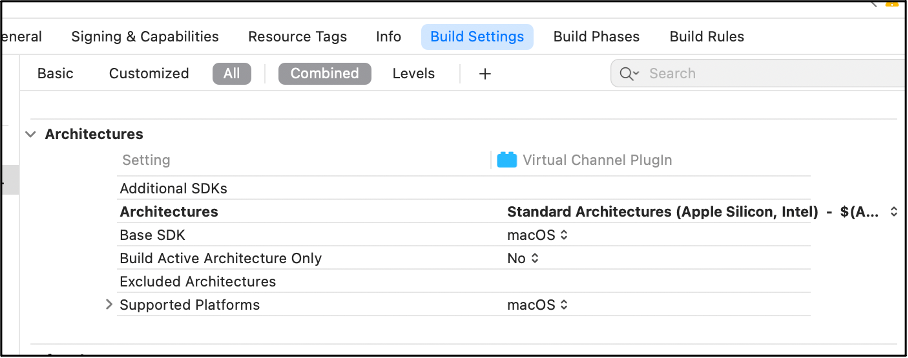
- Change the Project file to support Universal Binary:
- Open Project > Build Settings.
- Set Architectures to Standard Architectures.
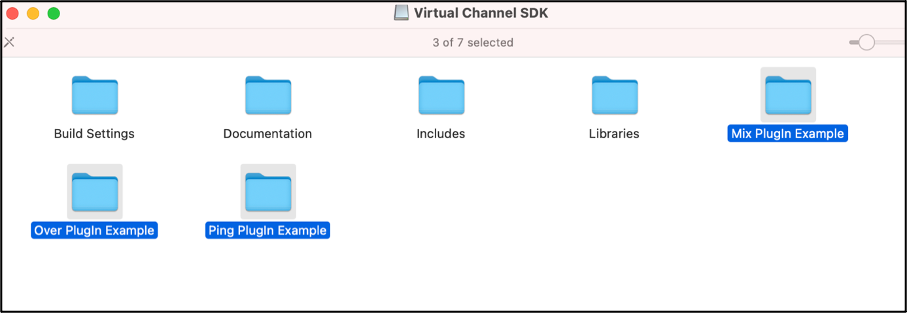
Examples for the VCSDK can be found inside VCSDK.dmg. These examples support Apple’s Universal macOS Binary that runs natively on both Apple silicon and Intel-based Mac computers. Because it contains executable code for both architectures. You can use these examples as a reference.
Modernized Citrix Virtual Channel SDK for Citrix Workspace app for Mac
Starting with the 2311 version, the Citrix Virtual Channel Software Development Kit (VCSDK) supports writing server-side applications and client-side drivers for more virtual channels using the ICA protocol. The server-side virtual channel applications are on Citrix Virtual Apps and Desktops servers. This version of the SDK supports writing new virtual channels and screen sharing for Citrix Workspace app for Mac.
For more information, see Citrix Virtual Channel SDK for Citrix Workspace app for Mac in the Developer documentation.
Increase in the number of supported virtual channels
Previously, Citrix Workspace app for Mac supported up to 32 virtual channels. Starting with the 2308 version, you can use up to 64 virtual channels in a session.
Modernized Citrix Virtual Channel SDK for Citrix Workspace app for Mac
Starting with the 2405 version, the Citrix Virtual Channel Software Development Kit (VCSDK) supports the desktop and screen sharing VCSDK API and gbuffer sharing.
For more information, see Virtual driver screen sharing and app-sharing functions.
Support for regional GACS discovery endpoints for US Government customers
Starting with version 2508, Citrix Workspace app for Mac transitions from using a single global GACS discovery endpoint to support regional compliance requirements for US Government customers. Administrators can configure government or regional customer settings through Mobile Device Management (MDM), enabling the app to either directly access regional settings endpoints or connect to region-specific discovery endpoints for US Government environments.
Configuration
Configure using MDM policy with the following parameters:
| Policy Key | Values | Description |
|---|---|---|
| GACSDiscoveryRegion | us_gov | Uses United States Government-compliant endpoints |
| default | Uses global endpoints (standard behavior) |
Example:
<key>GACSDiscoveryRegion</key>
<string>us_gov</string>
<!--NeedCopy-->
Behavior
- No configuration: App uses existing global discovery endpoint.
- us_gov setting: App connects through US Government-compliant regional endpoints.