Configure self-signed certificates for WebSocket
Starting with the initial release of the 2402 LTSR, Citrix Virtual Apps and Desktops allows you to use WebSocket technology over the Citrix Brokering Protocol (CBP) to facilitate communication between VDAs and Delivery Controllers. This feature requires only the TLS port 443 for communication from the VDA to the Delivery Controller. For more information, see WebSocket communication between VDA and Delivery Controller in the Citrix Virtual Apps and Desktops documentation.
WebSocket is a powerful technology for enabling real-time, bidirectional communication between a client and a server. However, to ensure a secure connection, particularly when using wss://, configuring a self-signed certificate is often necessary, especially in development or testing environments. This article outlines the best practices for configuring self-signed certificates for WebSocket.
Step 1: (For non-domain-joinded VDAs only) Configure the DNS server
- For Ubuntu and Debian VDAs:
-
Change the DNS settings by editing /etc/systemd/resolved.conf as follows:
[Resolve] # Some examples of DNS servers which may be used for DNS= and FallbackDNS=: # Cloudflare: 1.1.1.1#cloudflare-dns.com 1.0.0.1#cloudflare-dns.com 2606:4700:4700::1111#cloudflare-dns.com 2606:4700:4700::1001#cloudflare-dns.com # Google: 8.8.8.8#dns.google 8.8.4.4#dns.google 2001:4860:4860::8888#dns.google 2001:4860:4860::8844#dns.google # Quad9: 9.9.9.9#dns.quad9.net 149.112.112.112#dns.quad9.net 2620:fe::fe#dns.quad9.net 2620:fe::9#dns.quad9.net DNS=<DNS IP address> #FallbackDNS= #Domains= #DNSSEC=no #DNSOverTLS=no #MulticastDNS=no #LLMNR=no #Cache=no-negative #CacheFromLocalhost=no #DNSStubListener=yes #DNSStubListenerExtra= #ReadEtcHosts=yes #ResolveUnicastSingleLabel=no <!--NeedCopy--> -
Restart the systemd-resolved service.
sudo service systemd-resolved restart
<!--NeedCopy-->
For more information, see https://notes.enovision.net/linux/changing-dns-with-resolve.
- For RHEL, Rocky Linux,and SUSE VDAs:
-
Run the following nmcli command to get a list of connection names:
sudo nmcli connection <!--NeedCopy--> -
Run another nmcli command to set up the DNS IP address:
sudo nmcli con mod {connectionNameHere} ipv4.dns "<dns ip address>"
<!--NeedCopy-->
For example, you can set the DNS IP address to 192.168.2.254 by using the following command:
sudo nmcli con mod eth0 ipv4.dns "192.168.2.254" <!--NeedCopy--> -
Reload the new DNS settings by running either of the following commands:
sudo systemctl restart NetworkManager.service
<!--NeedCopy-->
sudo nmcli connection reload <!--NeedCopy-->For more information, see https://www.cyberciti.biz/faq/change-dns-ip-address-rhel-redhat-linux/.
Step 2: Request a certificate from a Certificate Authority (CA)
-
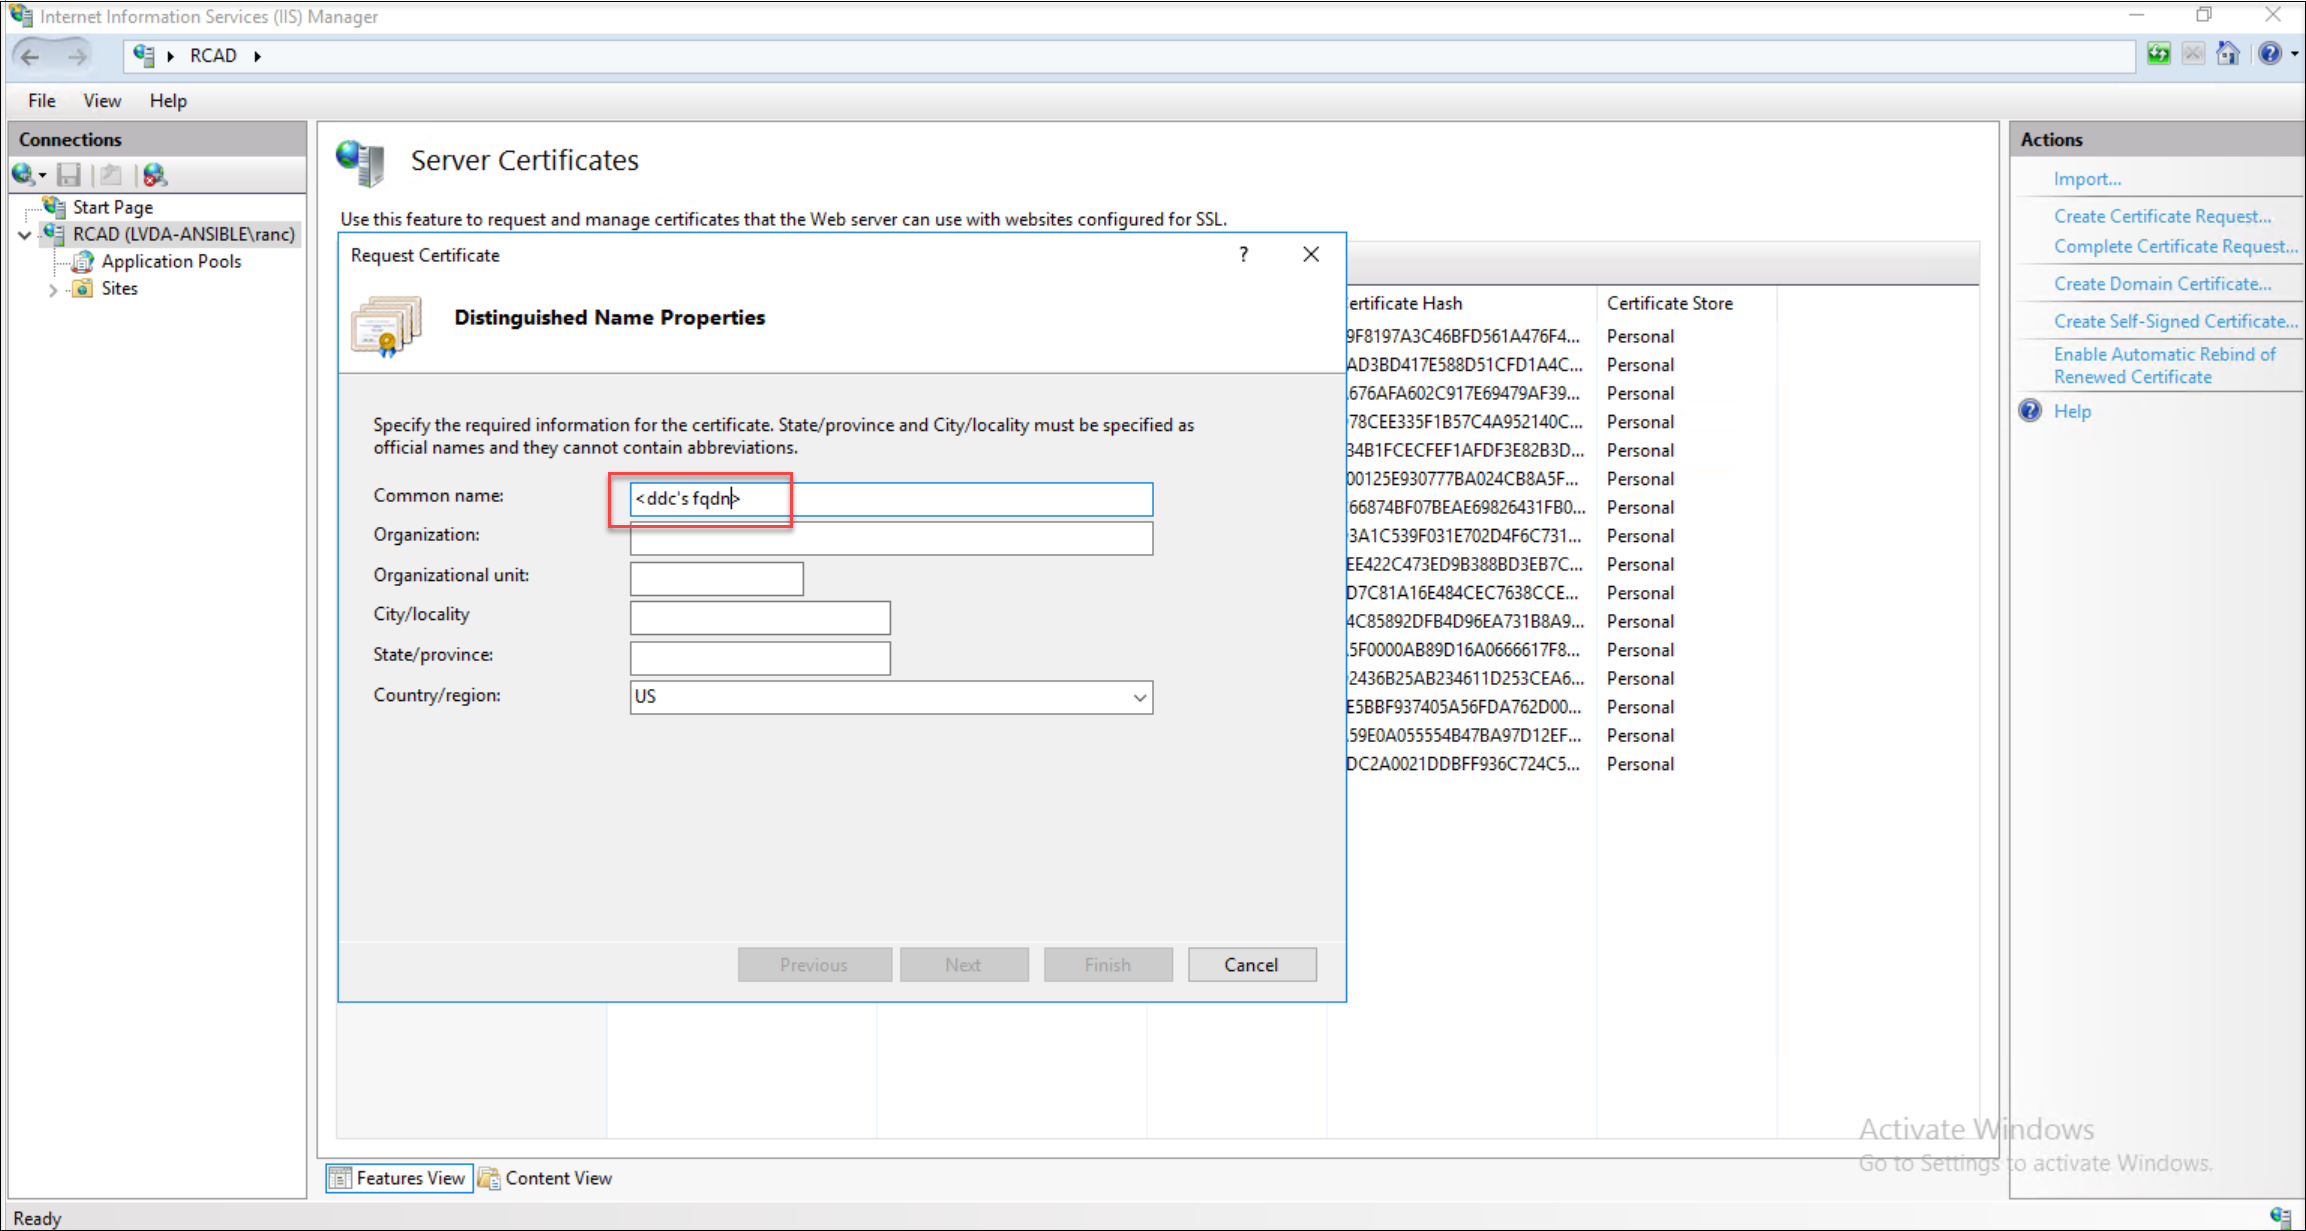
Initiate a certificate request. When you initiate a certificate request, fill in the Fully Qualified Domain Name (FQDN) of the Delivery Controller.
-
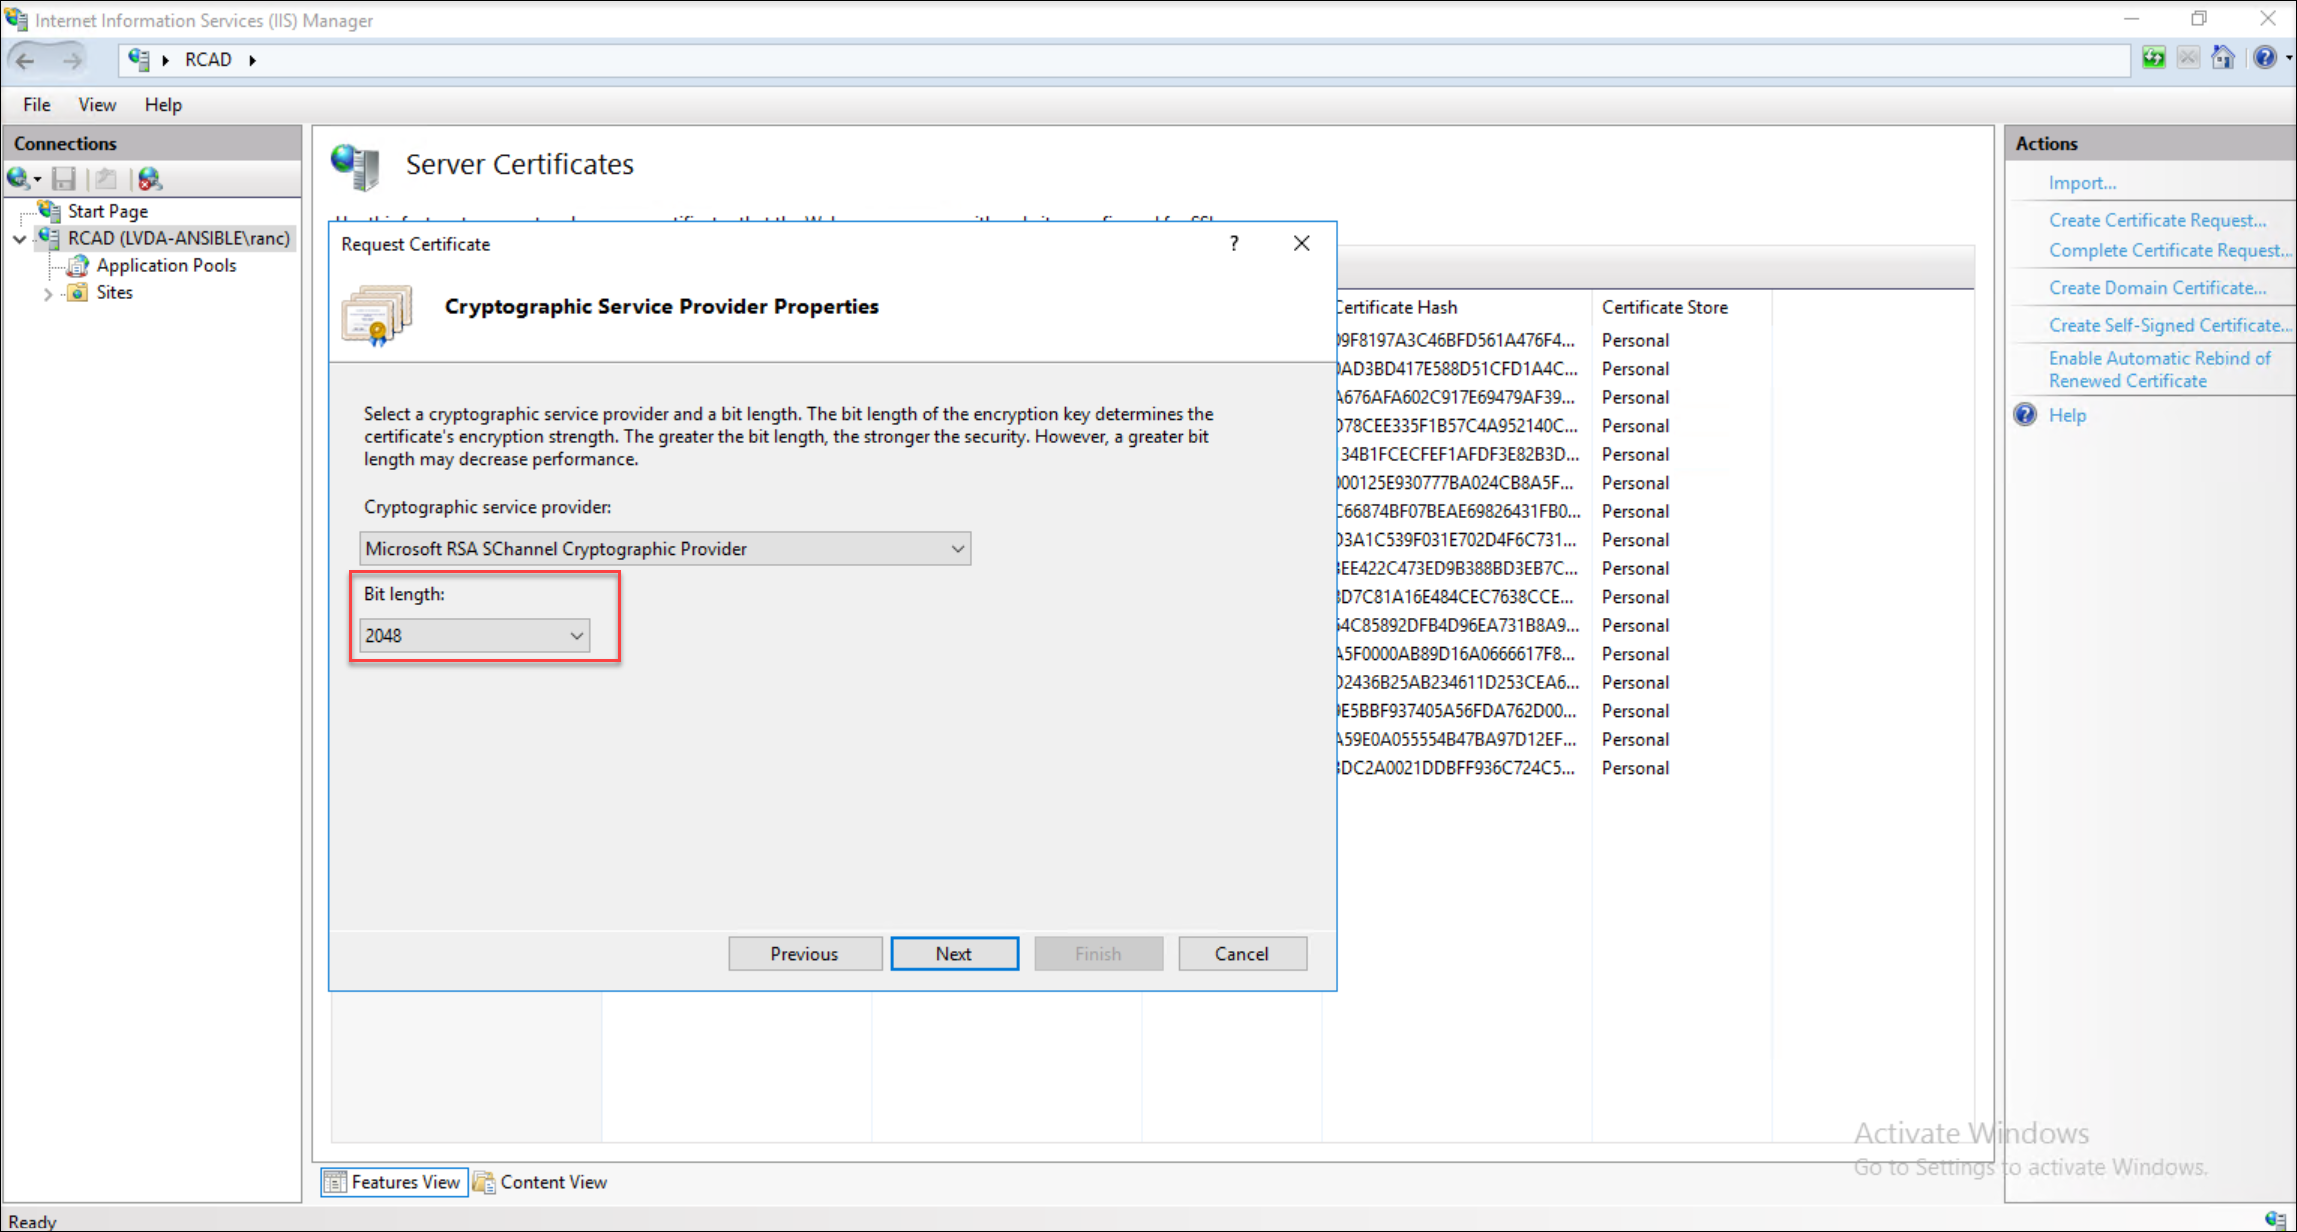
Select a bit length of 2048 or higher to ensure robust security for your certificate.
-
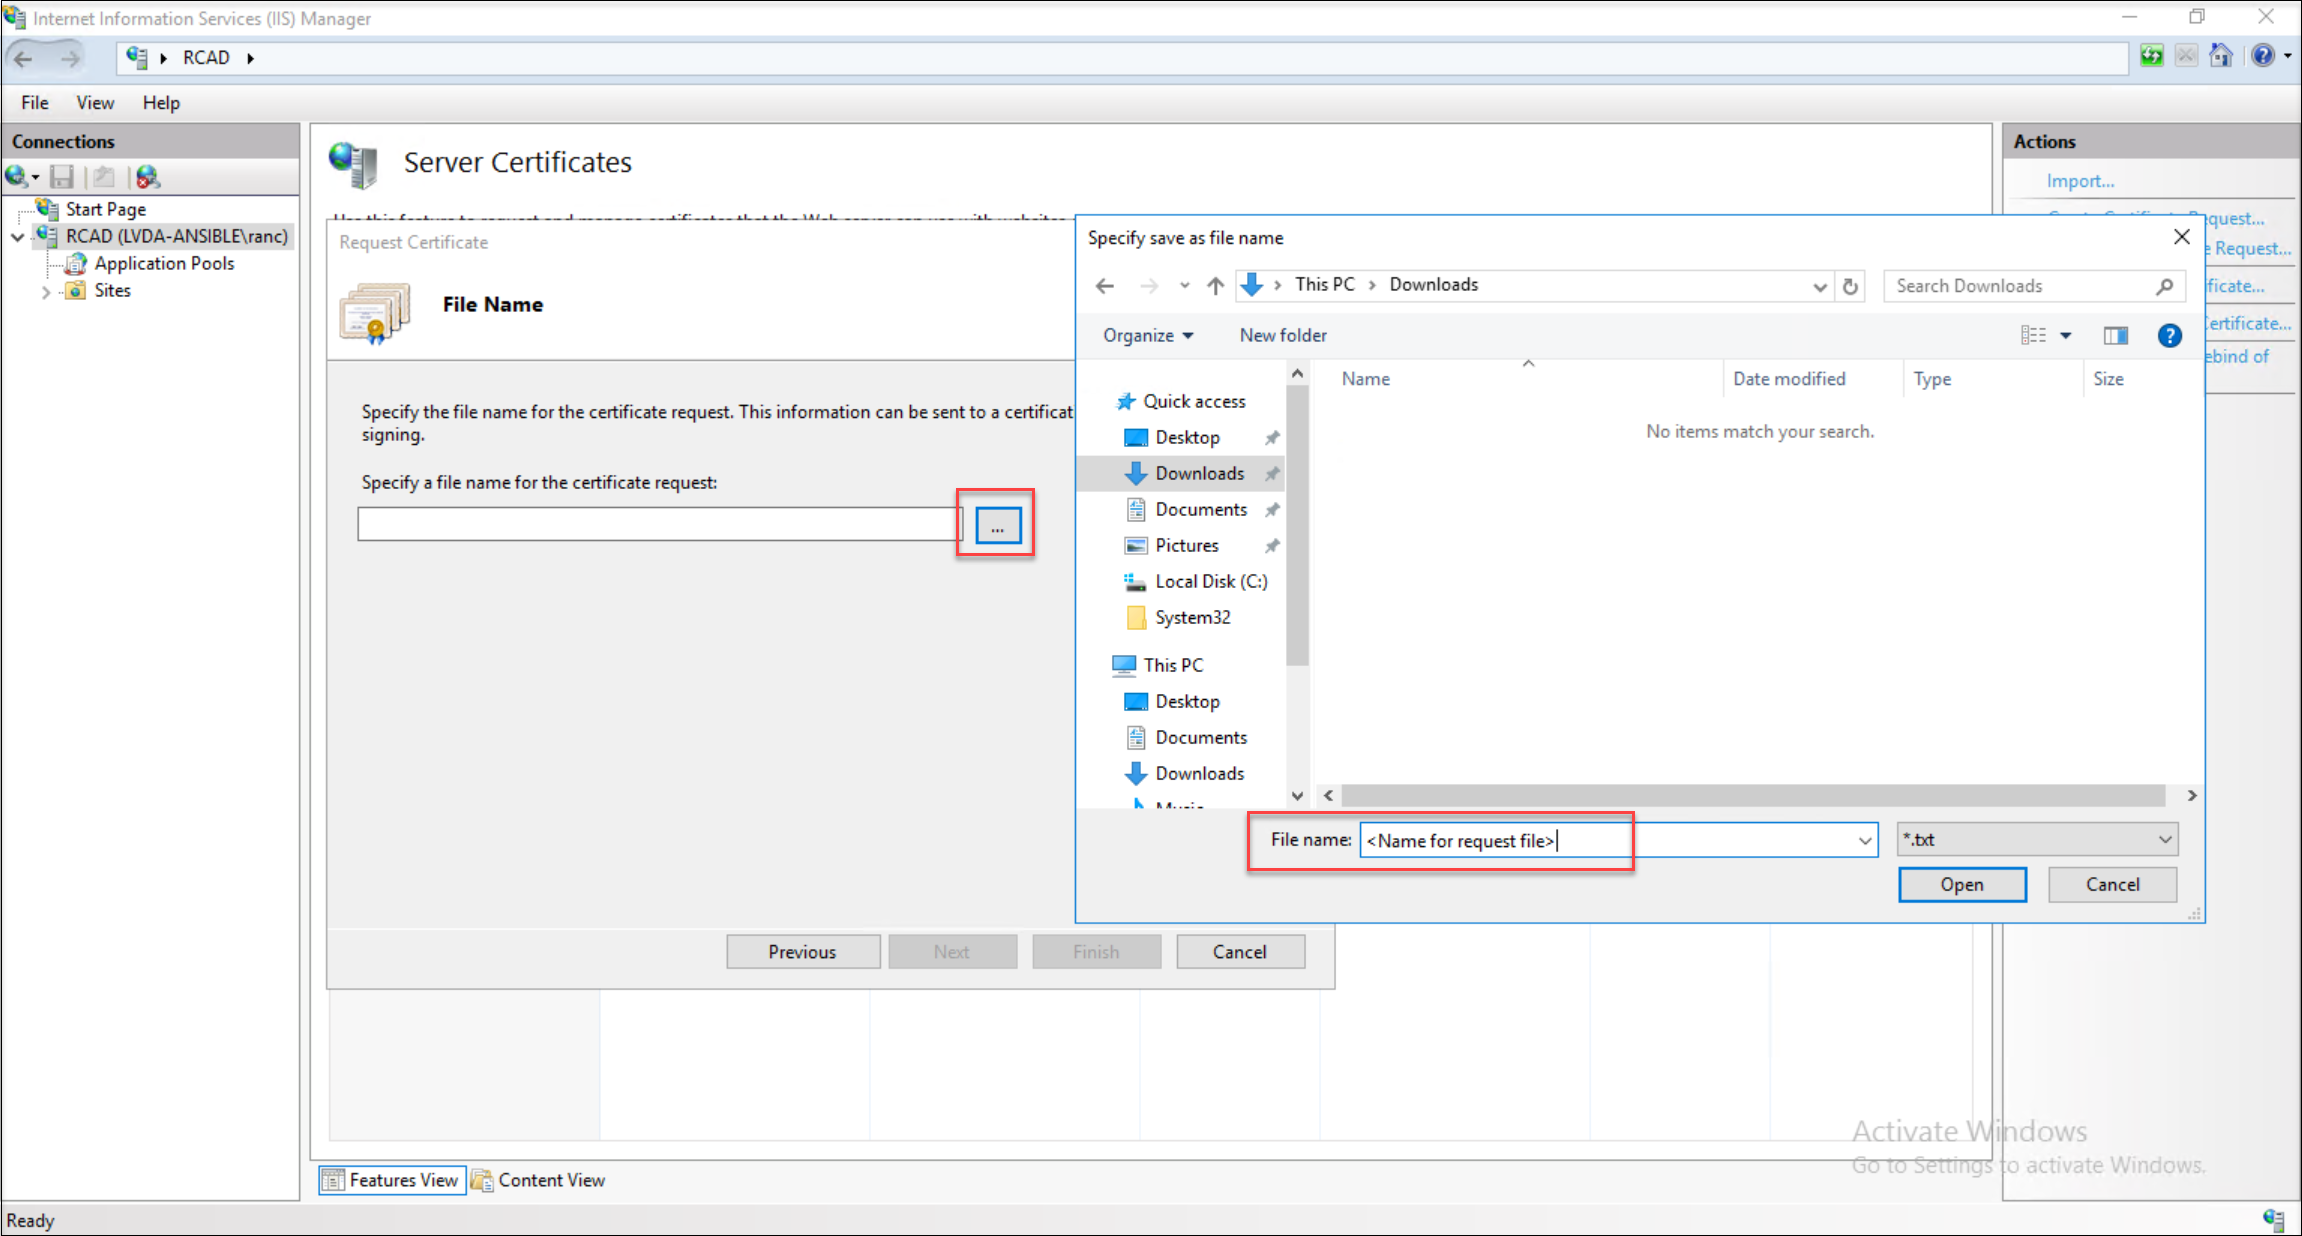
Assign a descriptive name to your certificate request file for easy identification.
-
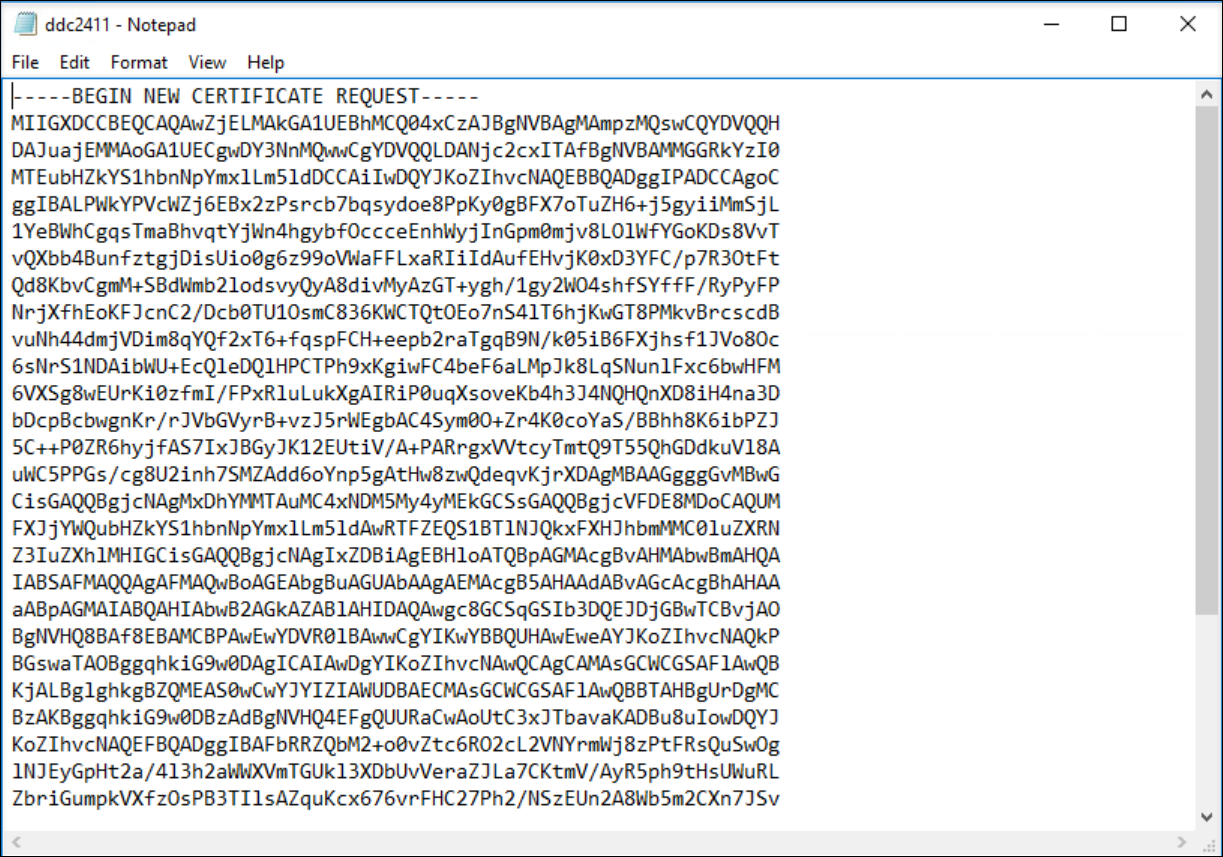
Open the generated certificate request file using a text editor like Notepad and select all the content within.
-
Log in to your web certificate server and proceed to request a certificate.
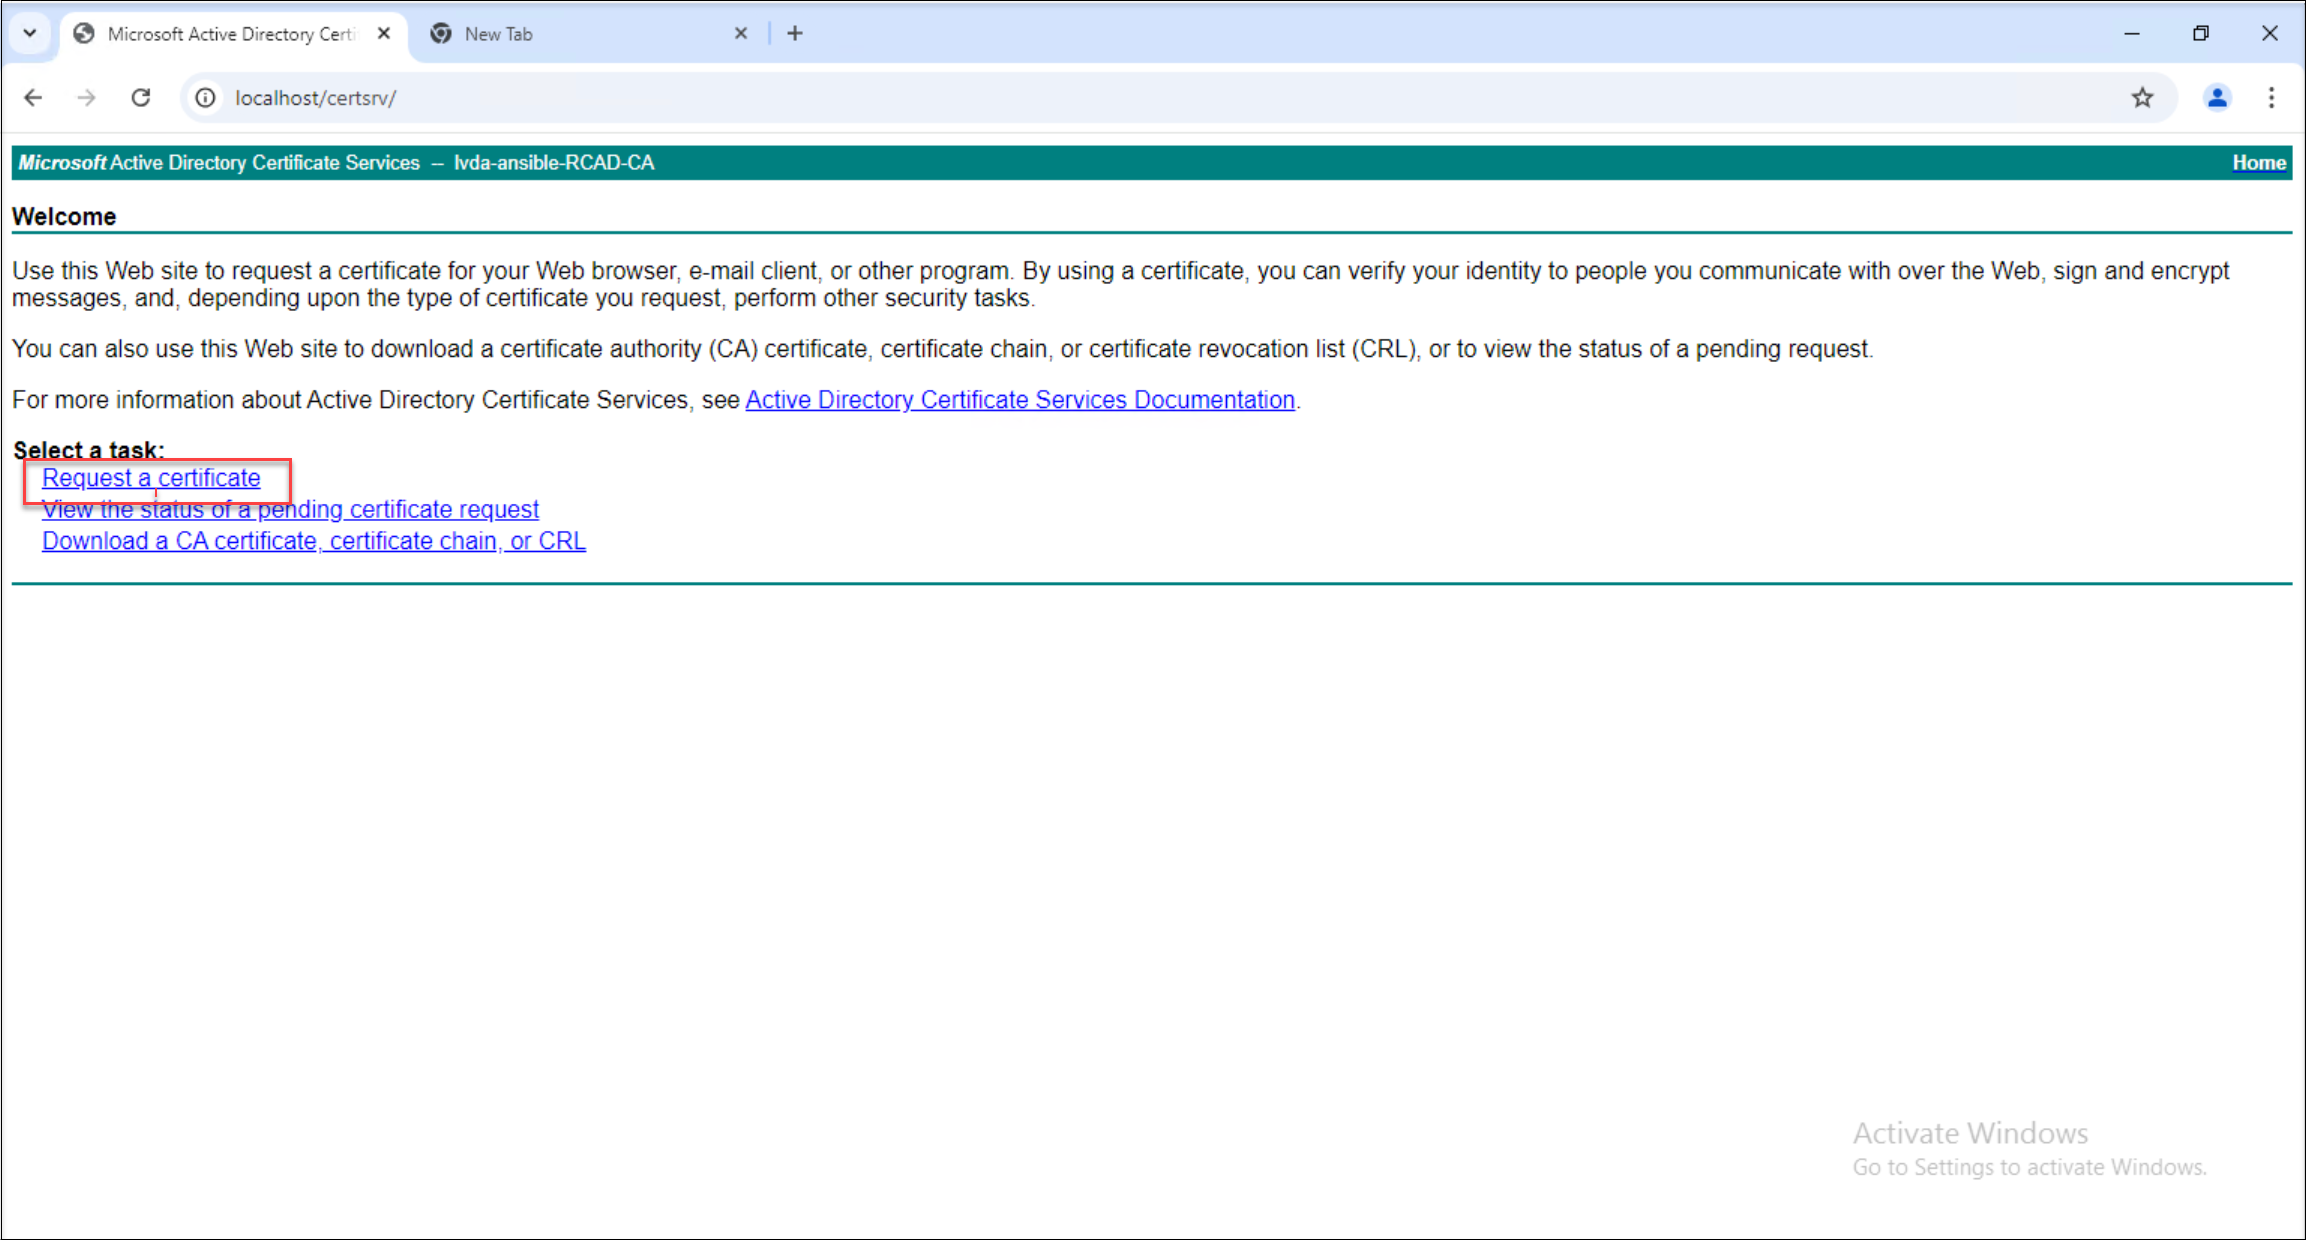
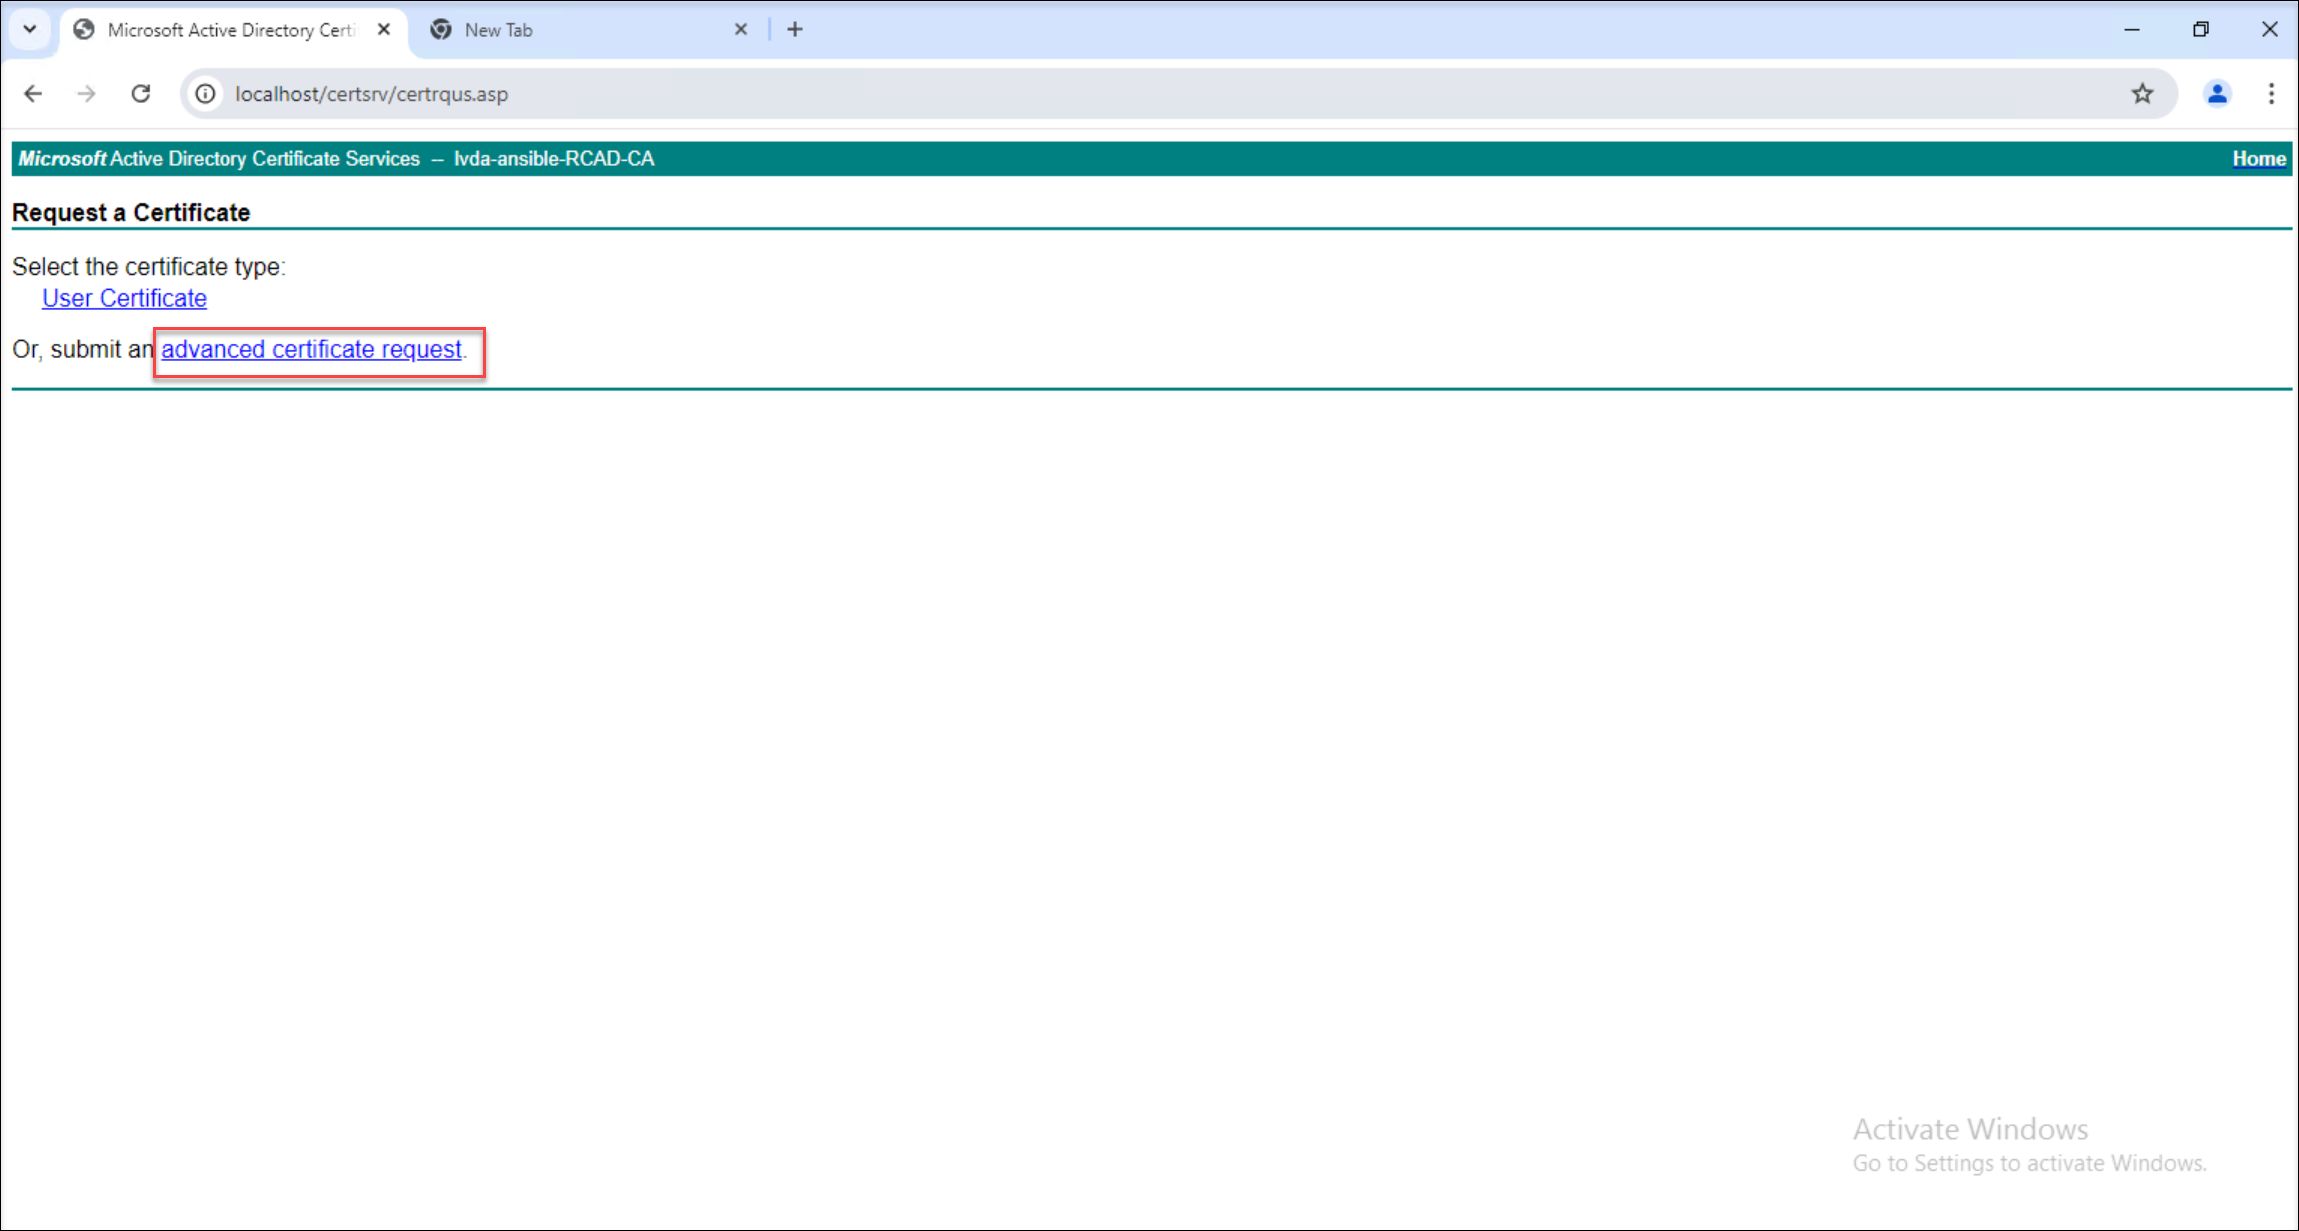
-
Paste the copied request file content into the appropriate field on the web server and select the Web Server certificate template.
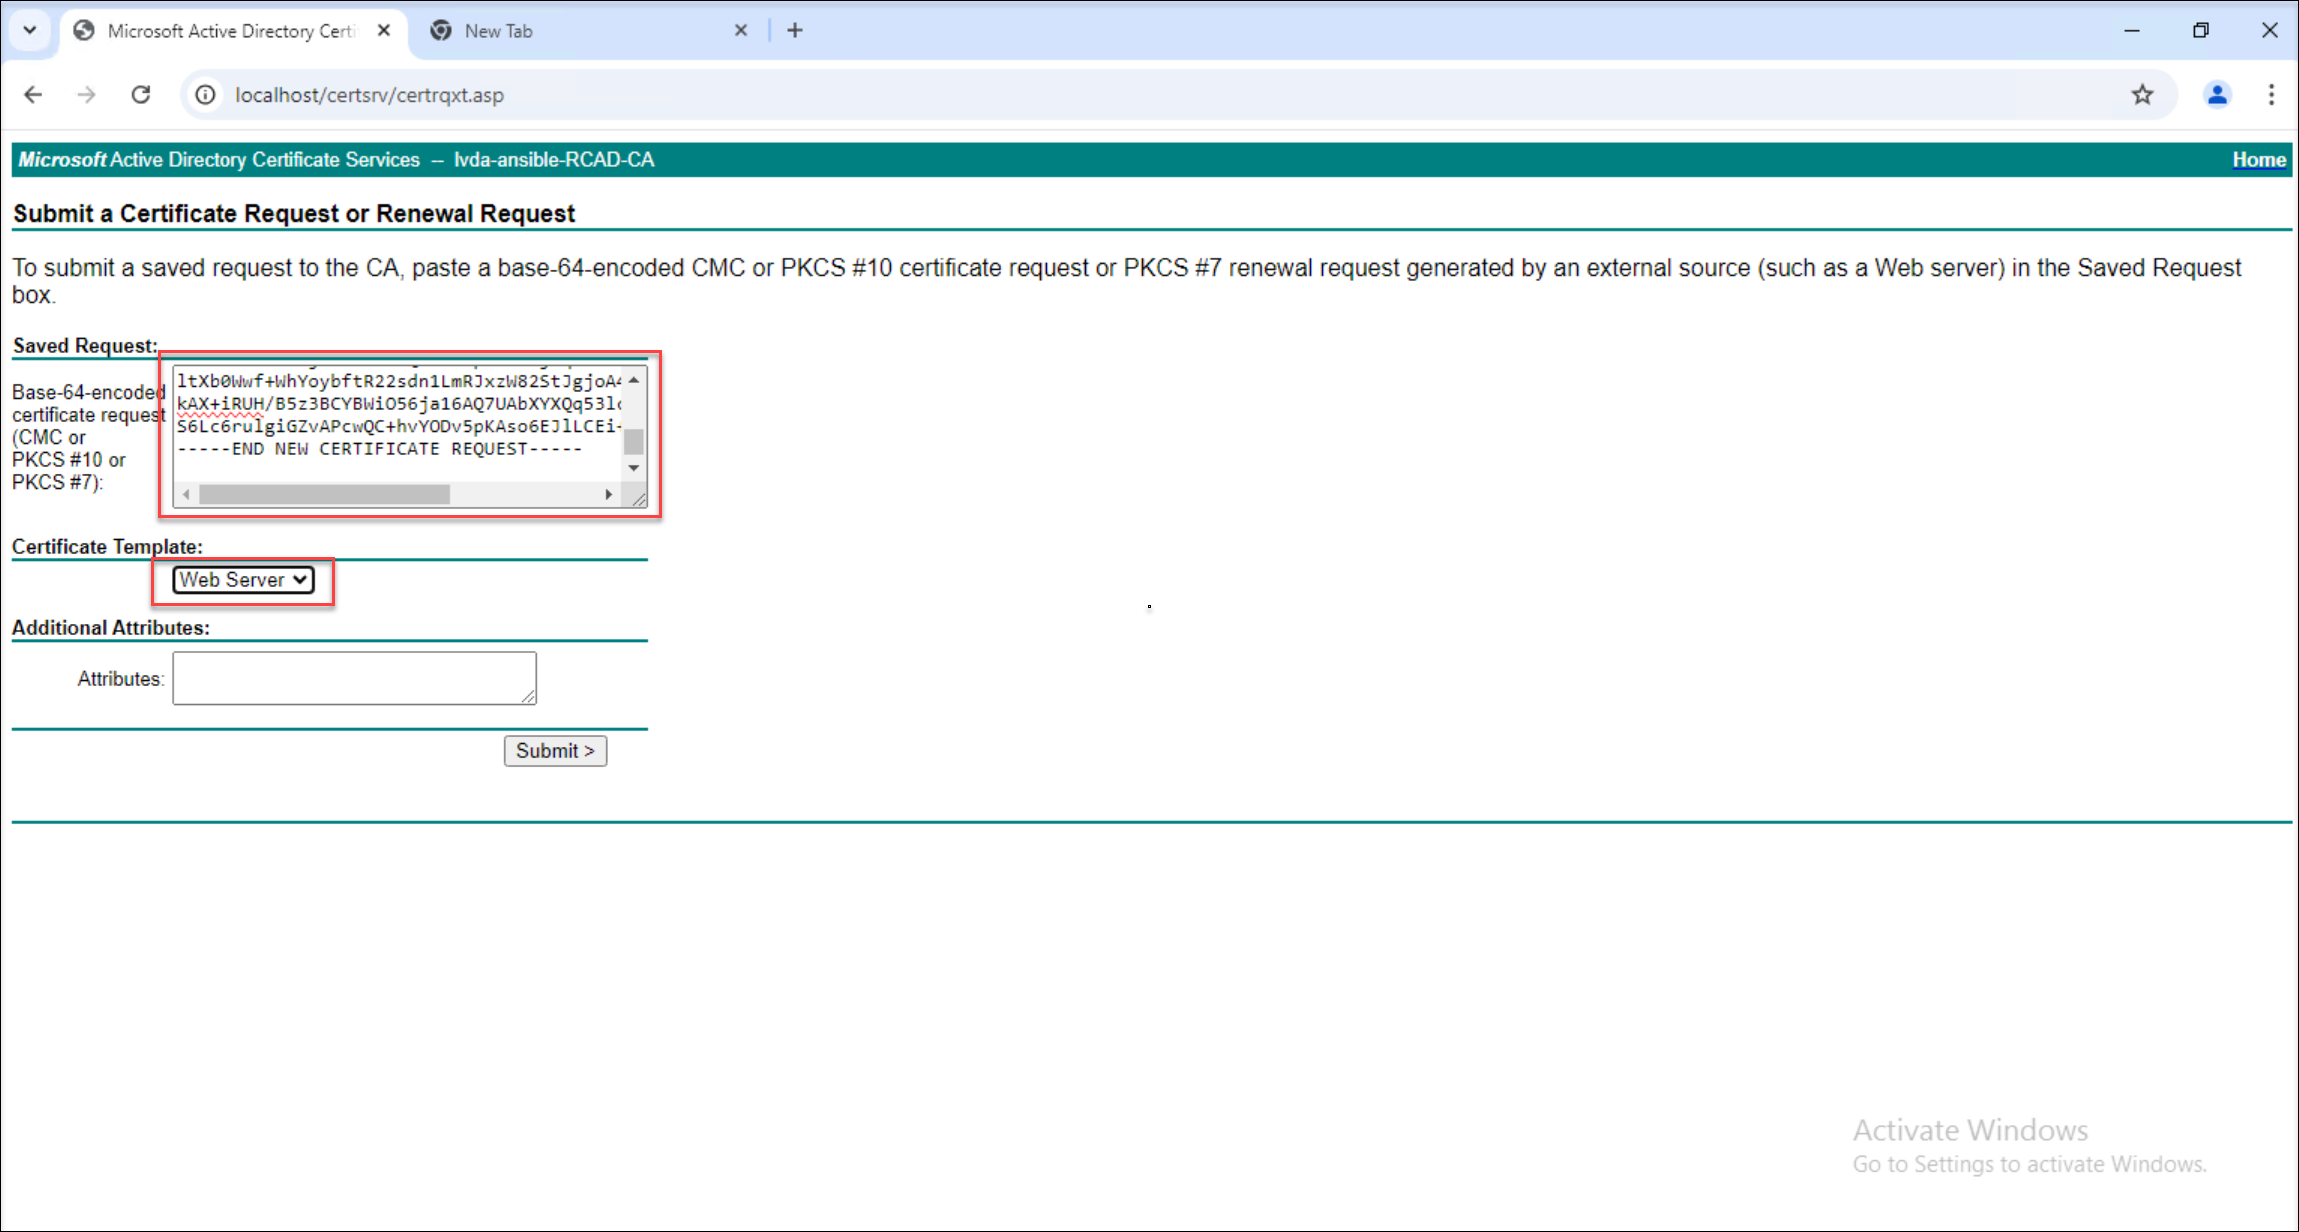
-
Download the certificate in Base 64 encoded format.
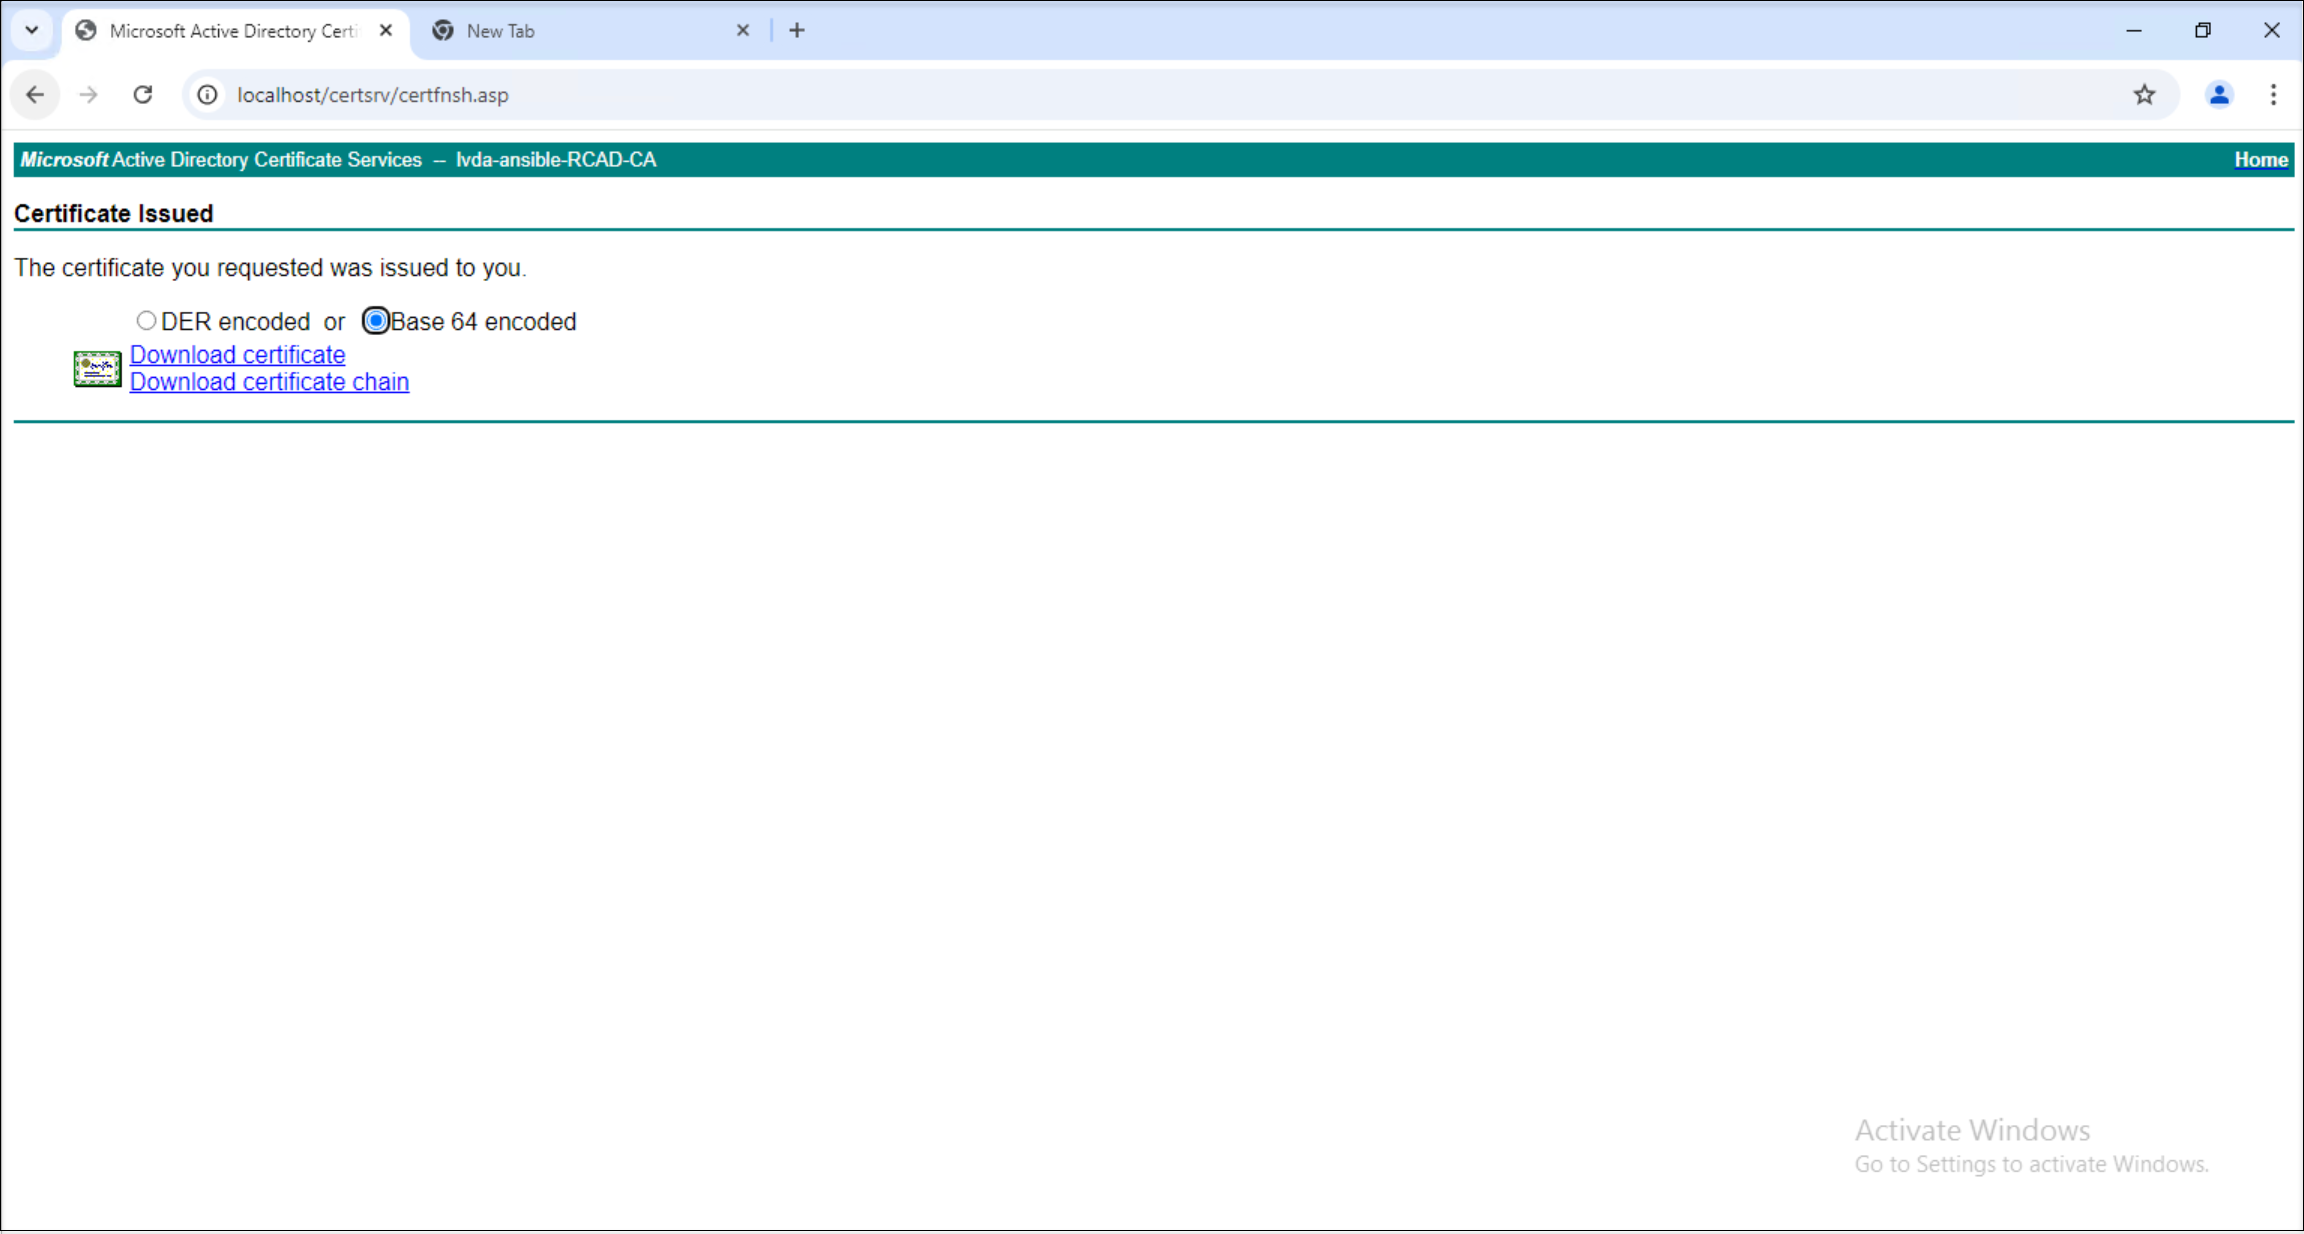
-
Complete the certificate request. Upon downloading, the certificate request process is complete.
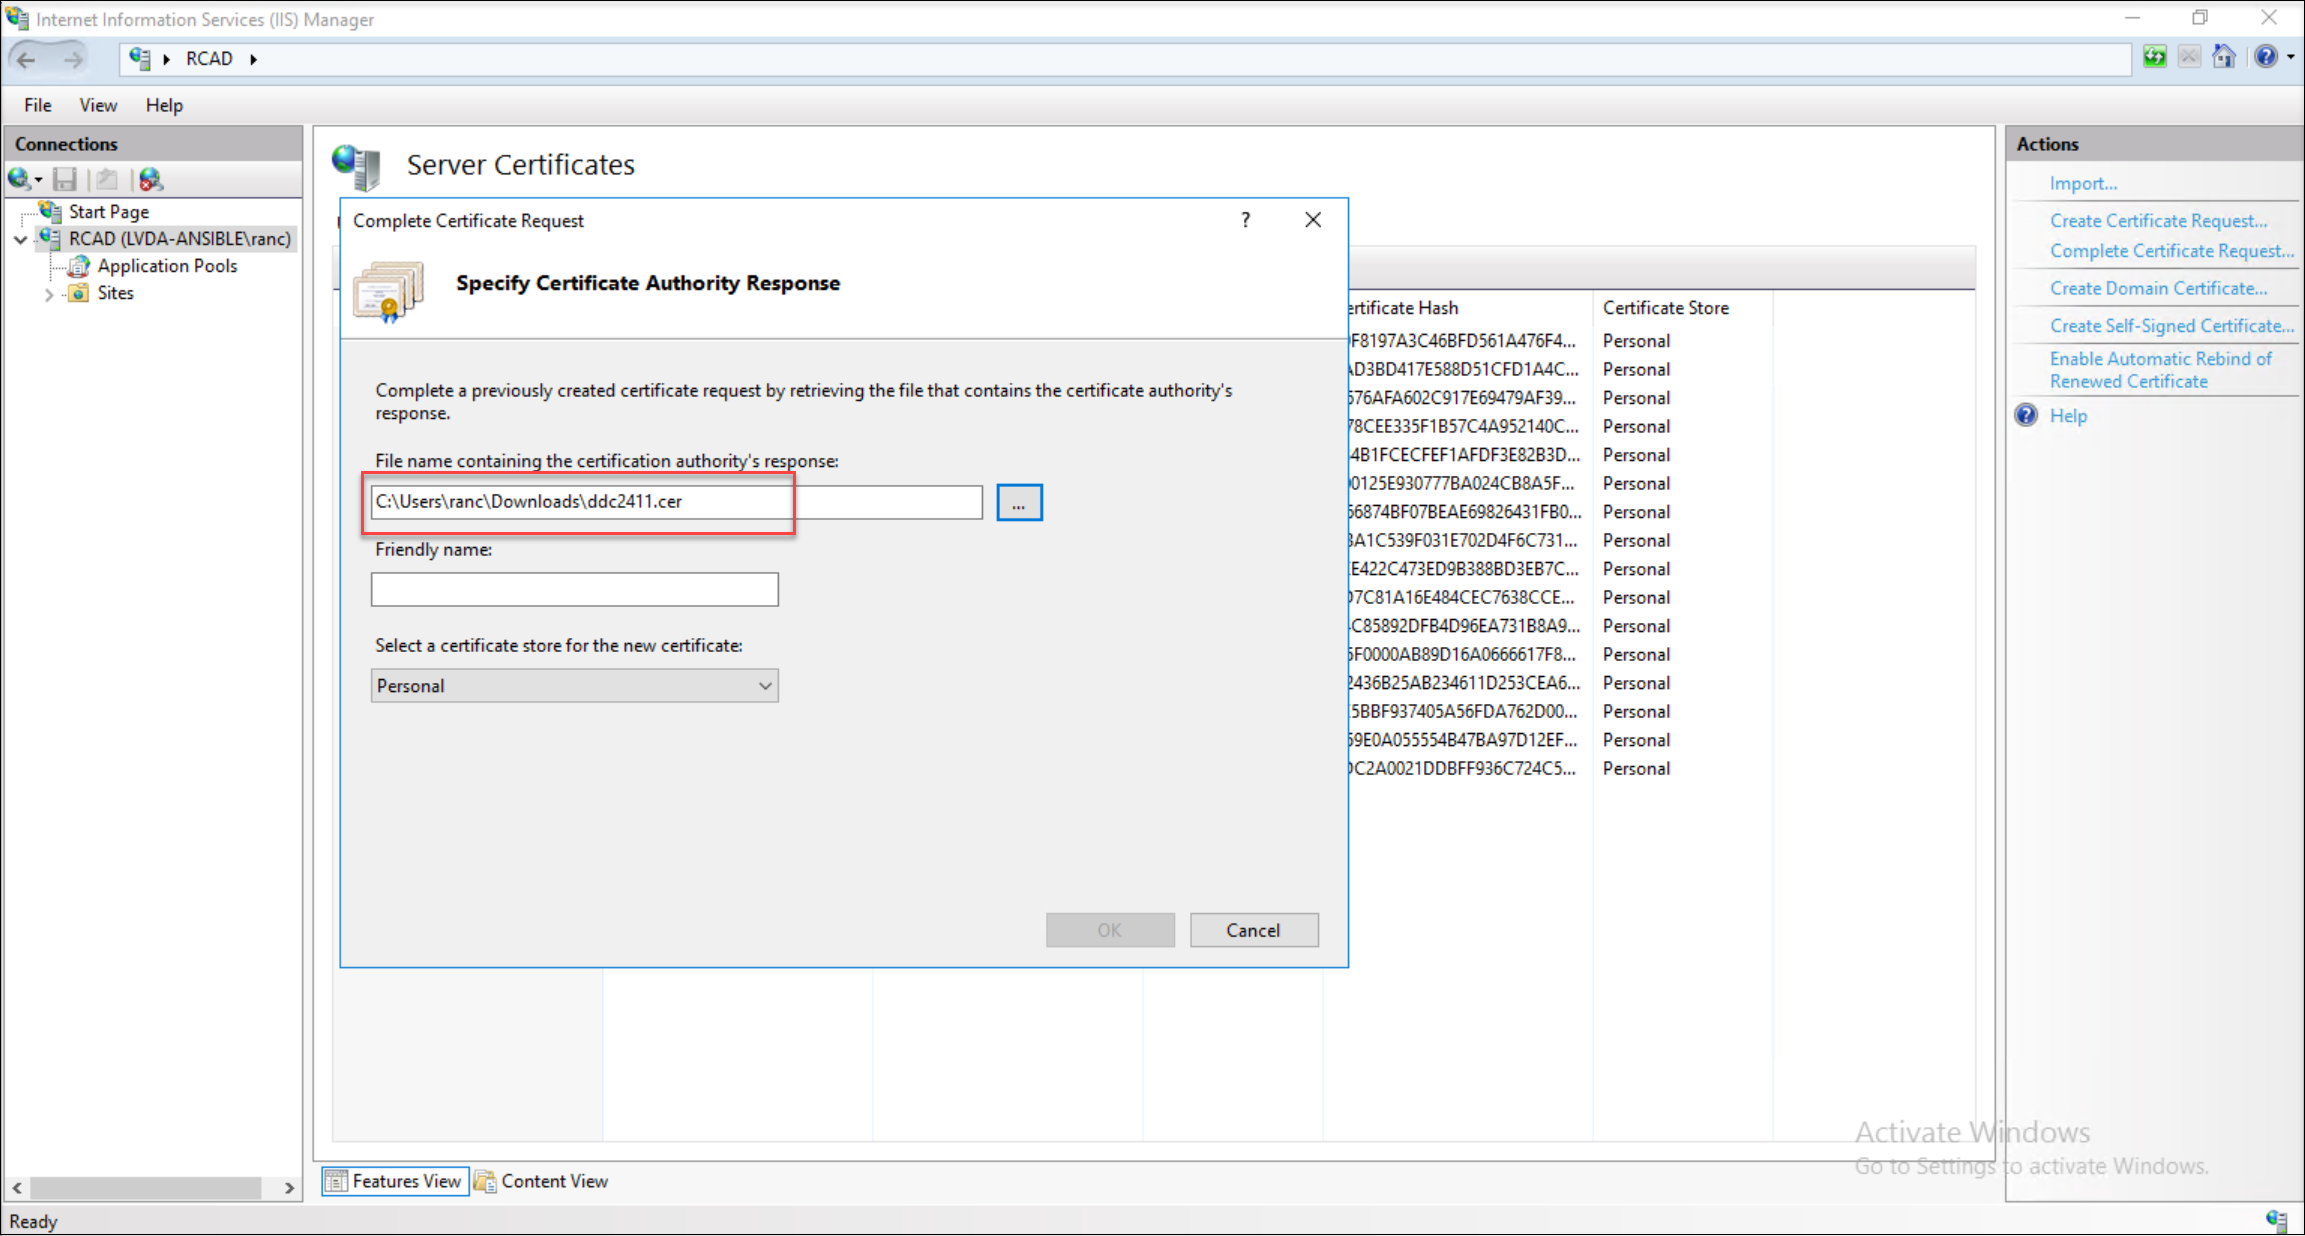
Step 3: Bind the Delivery Controller FQDN certificate
-
Export the Delivery Controller FQDN certificate as a PFX file.
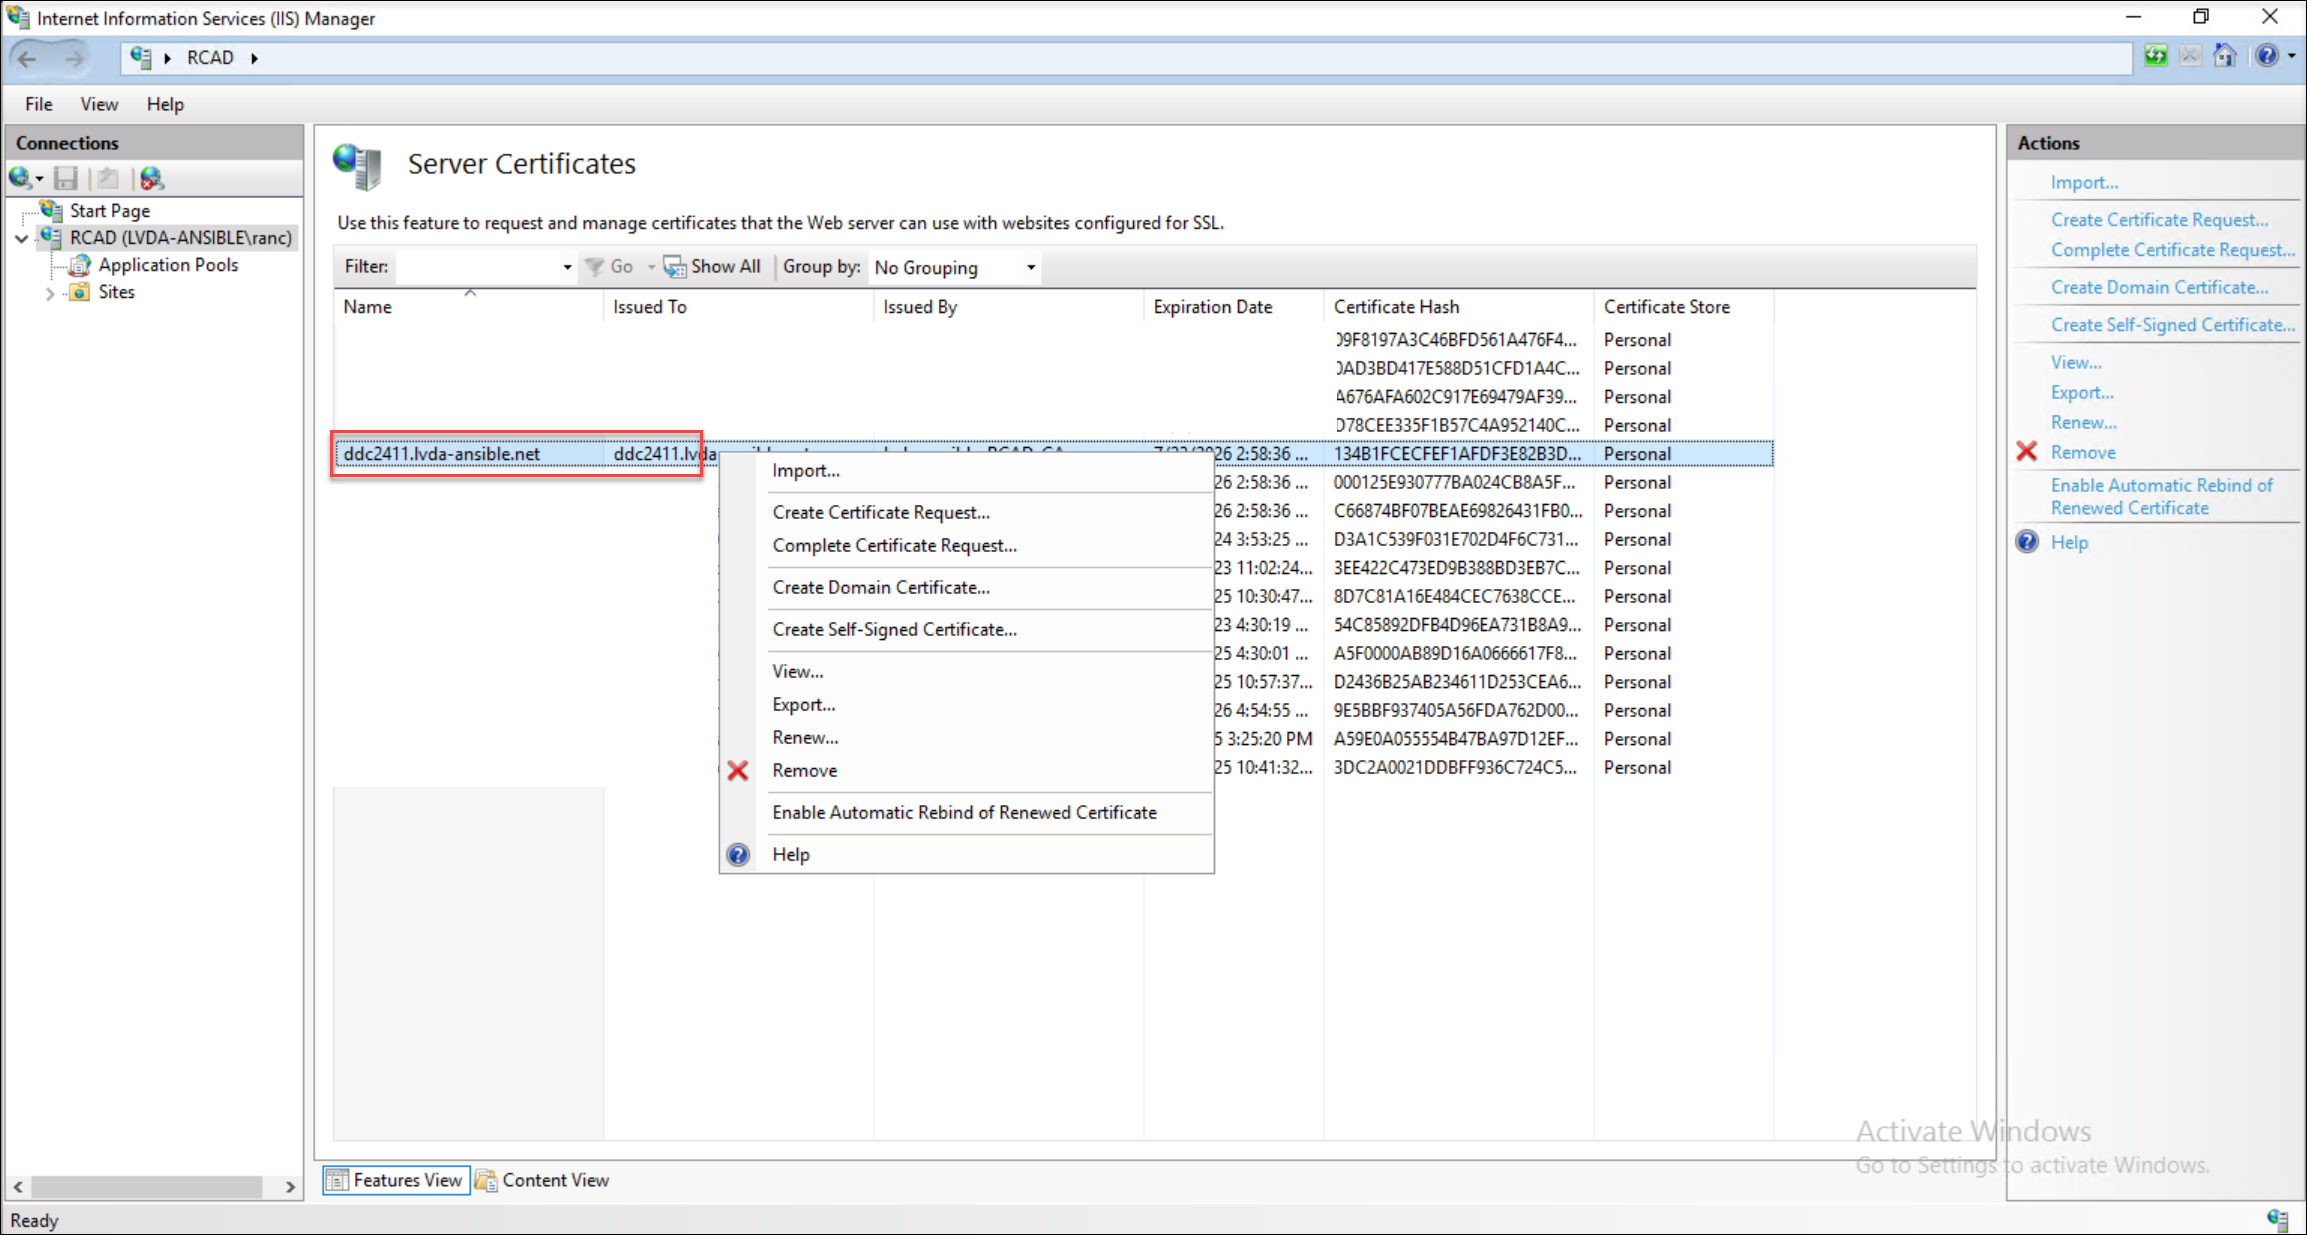
-
Import the exported PFX certificate into your Delivery Controller server’s Internet Information Services (IIS).
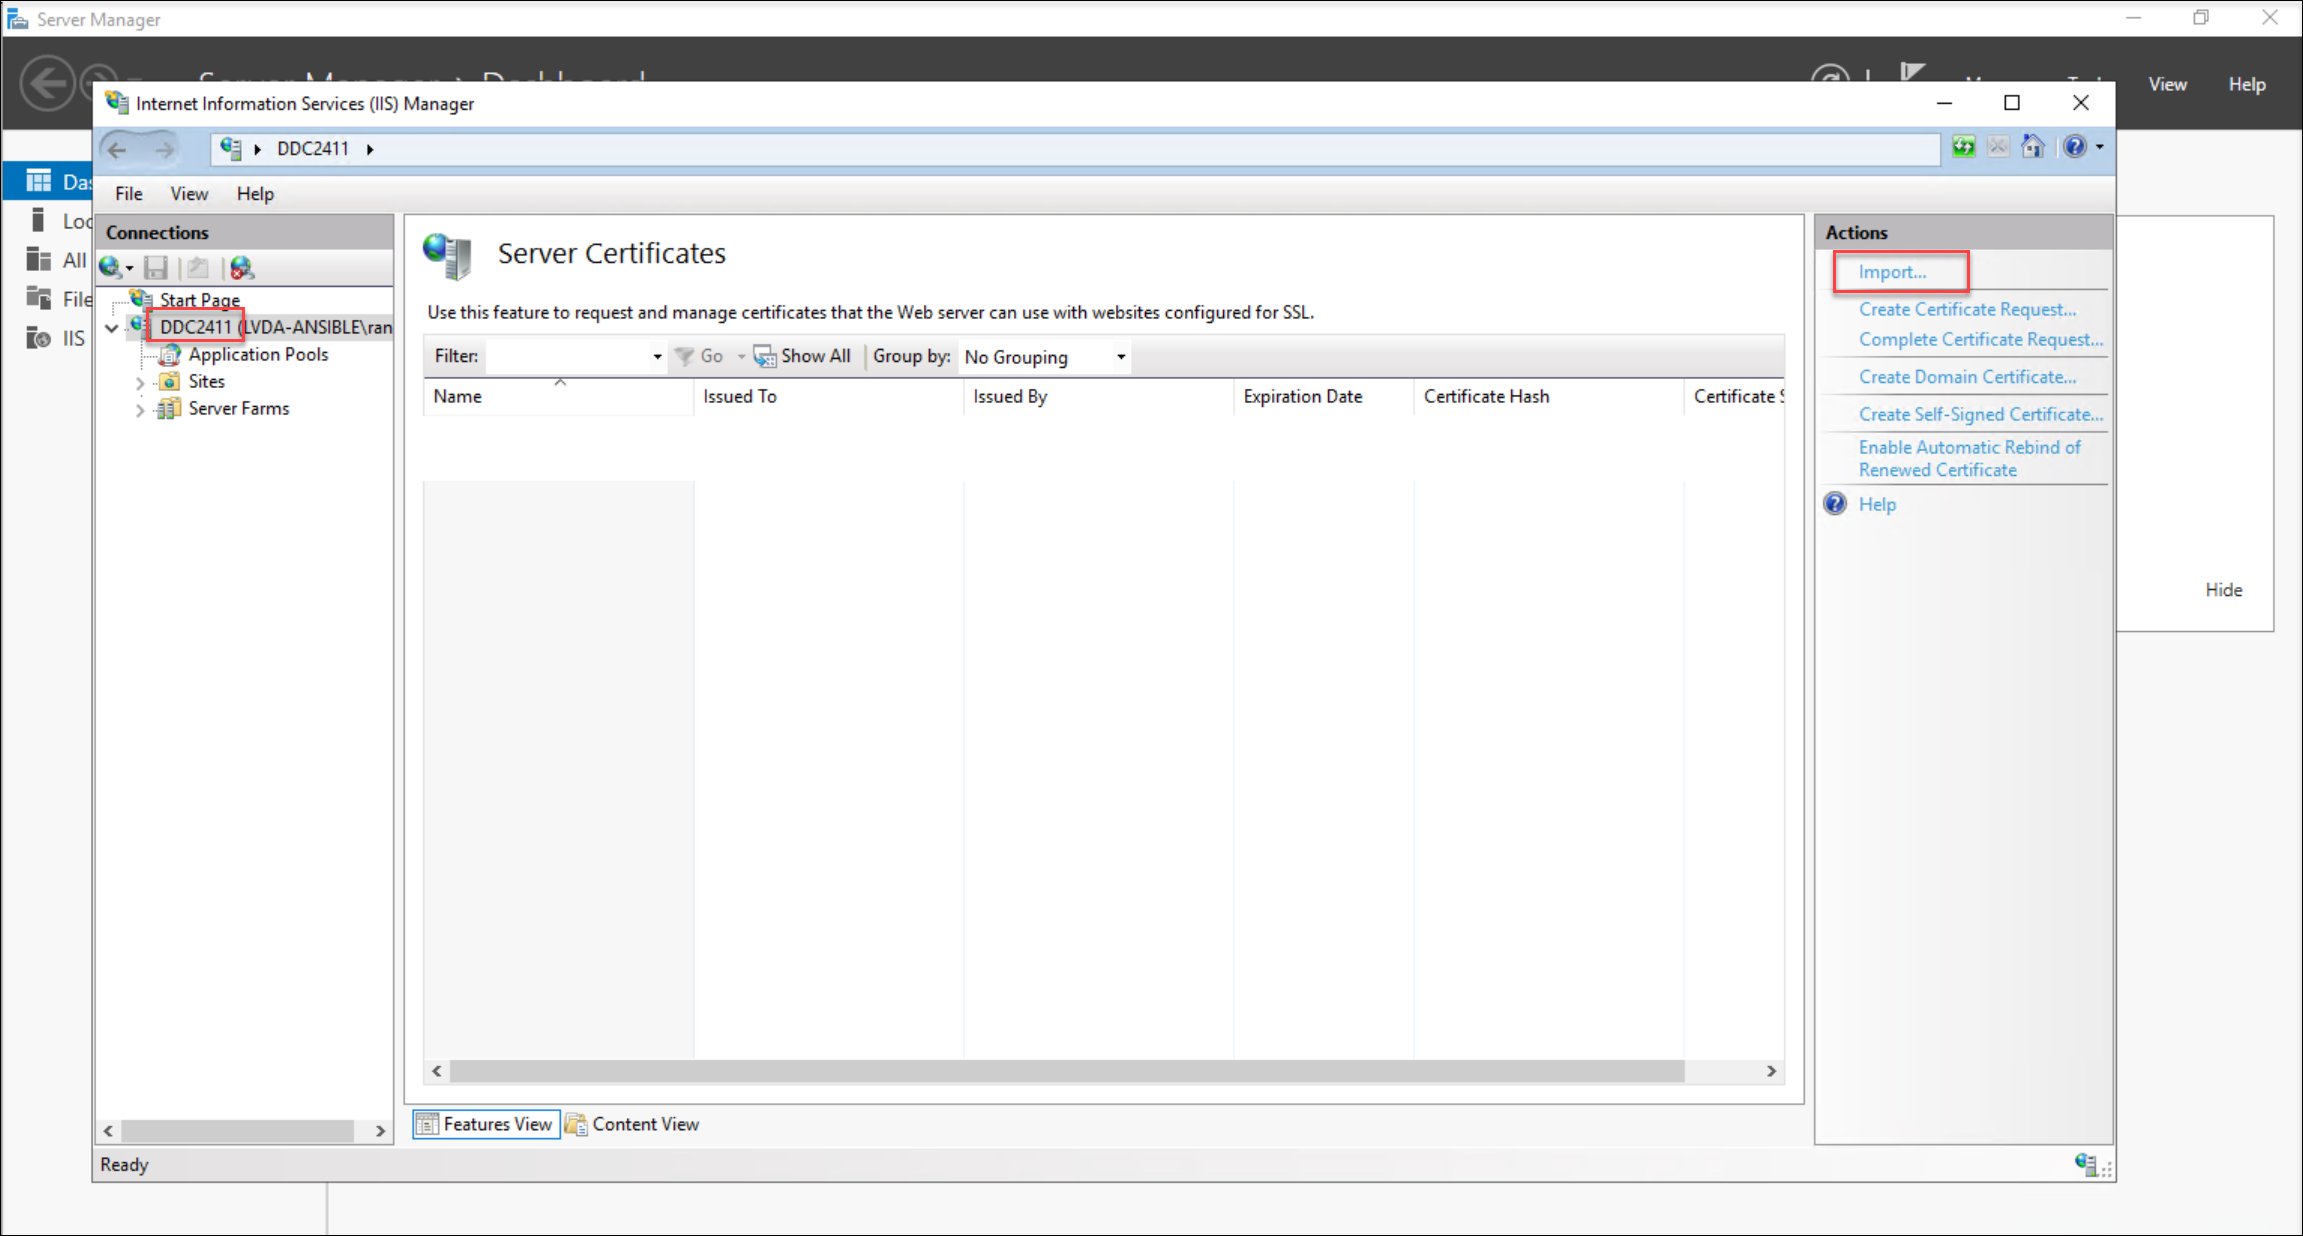
-
Bind the imported certificate to your default website within IIS.
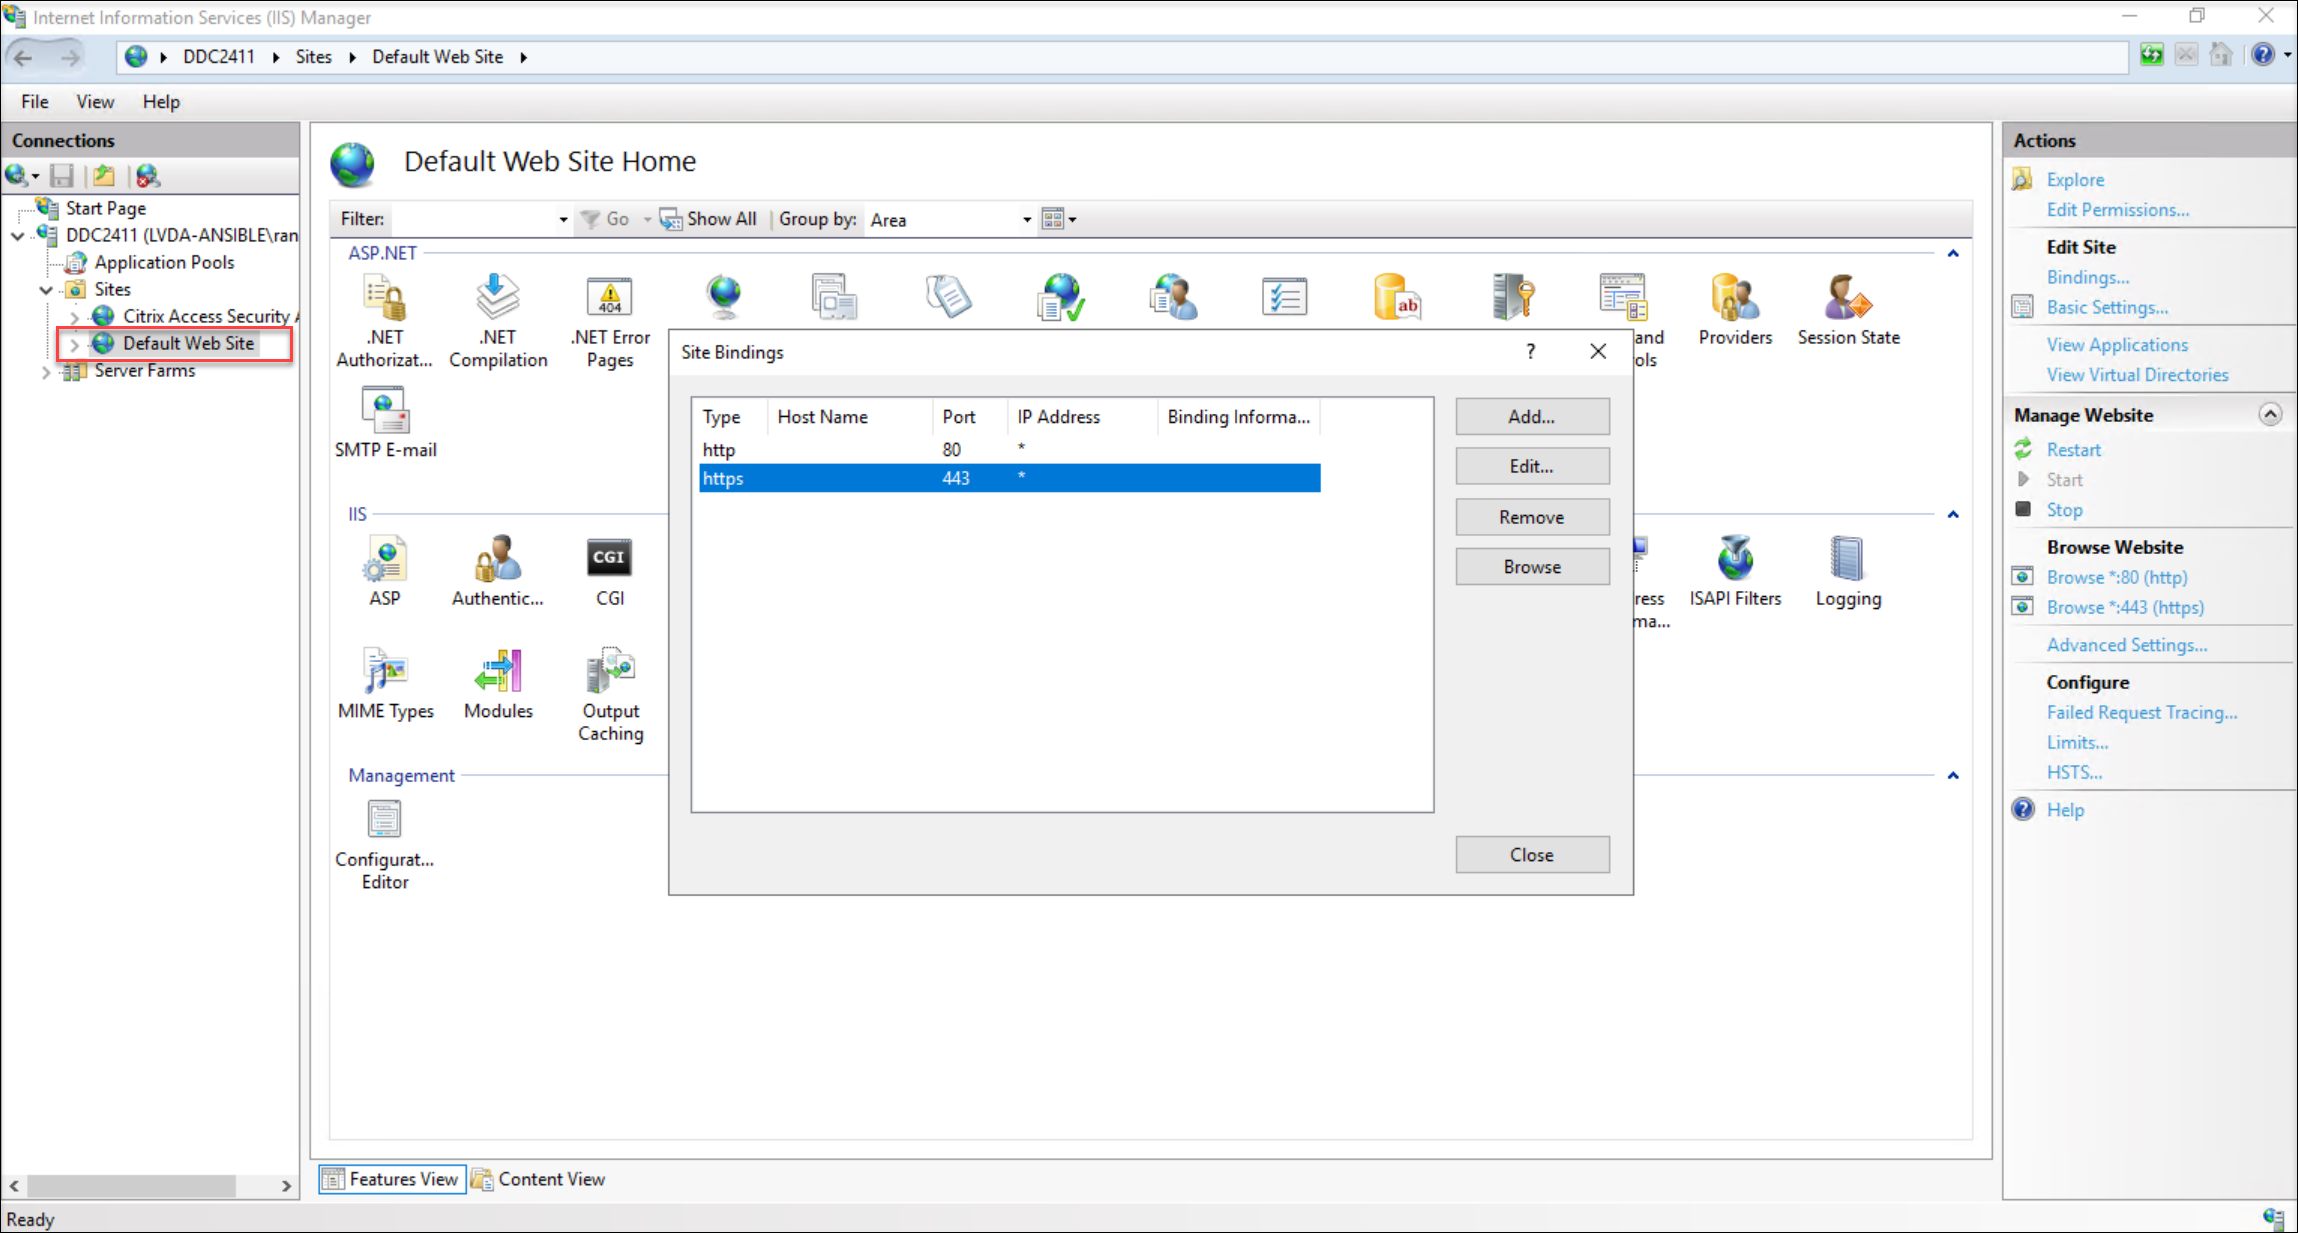
-
During the binding process, make sure to select the specific certificate you imported.
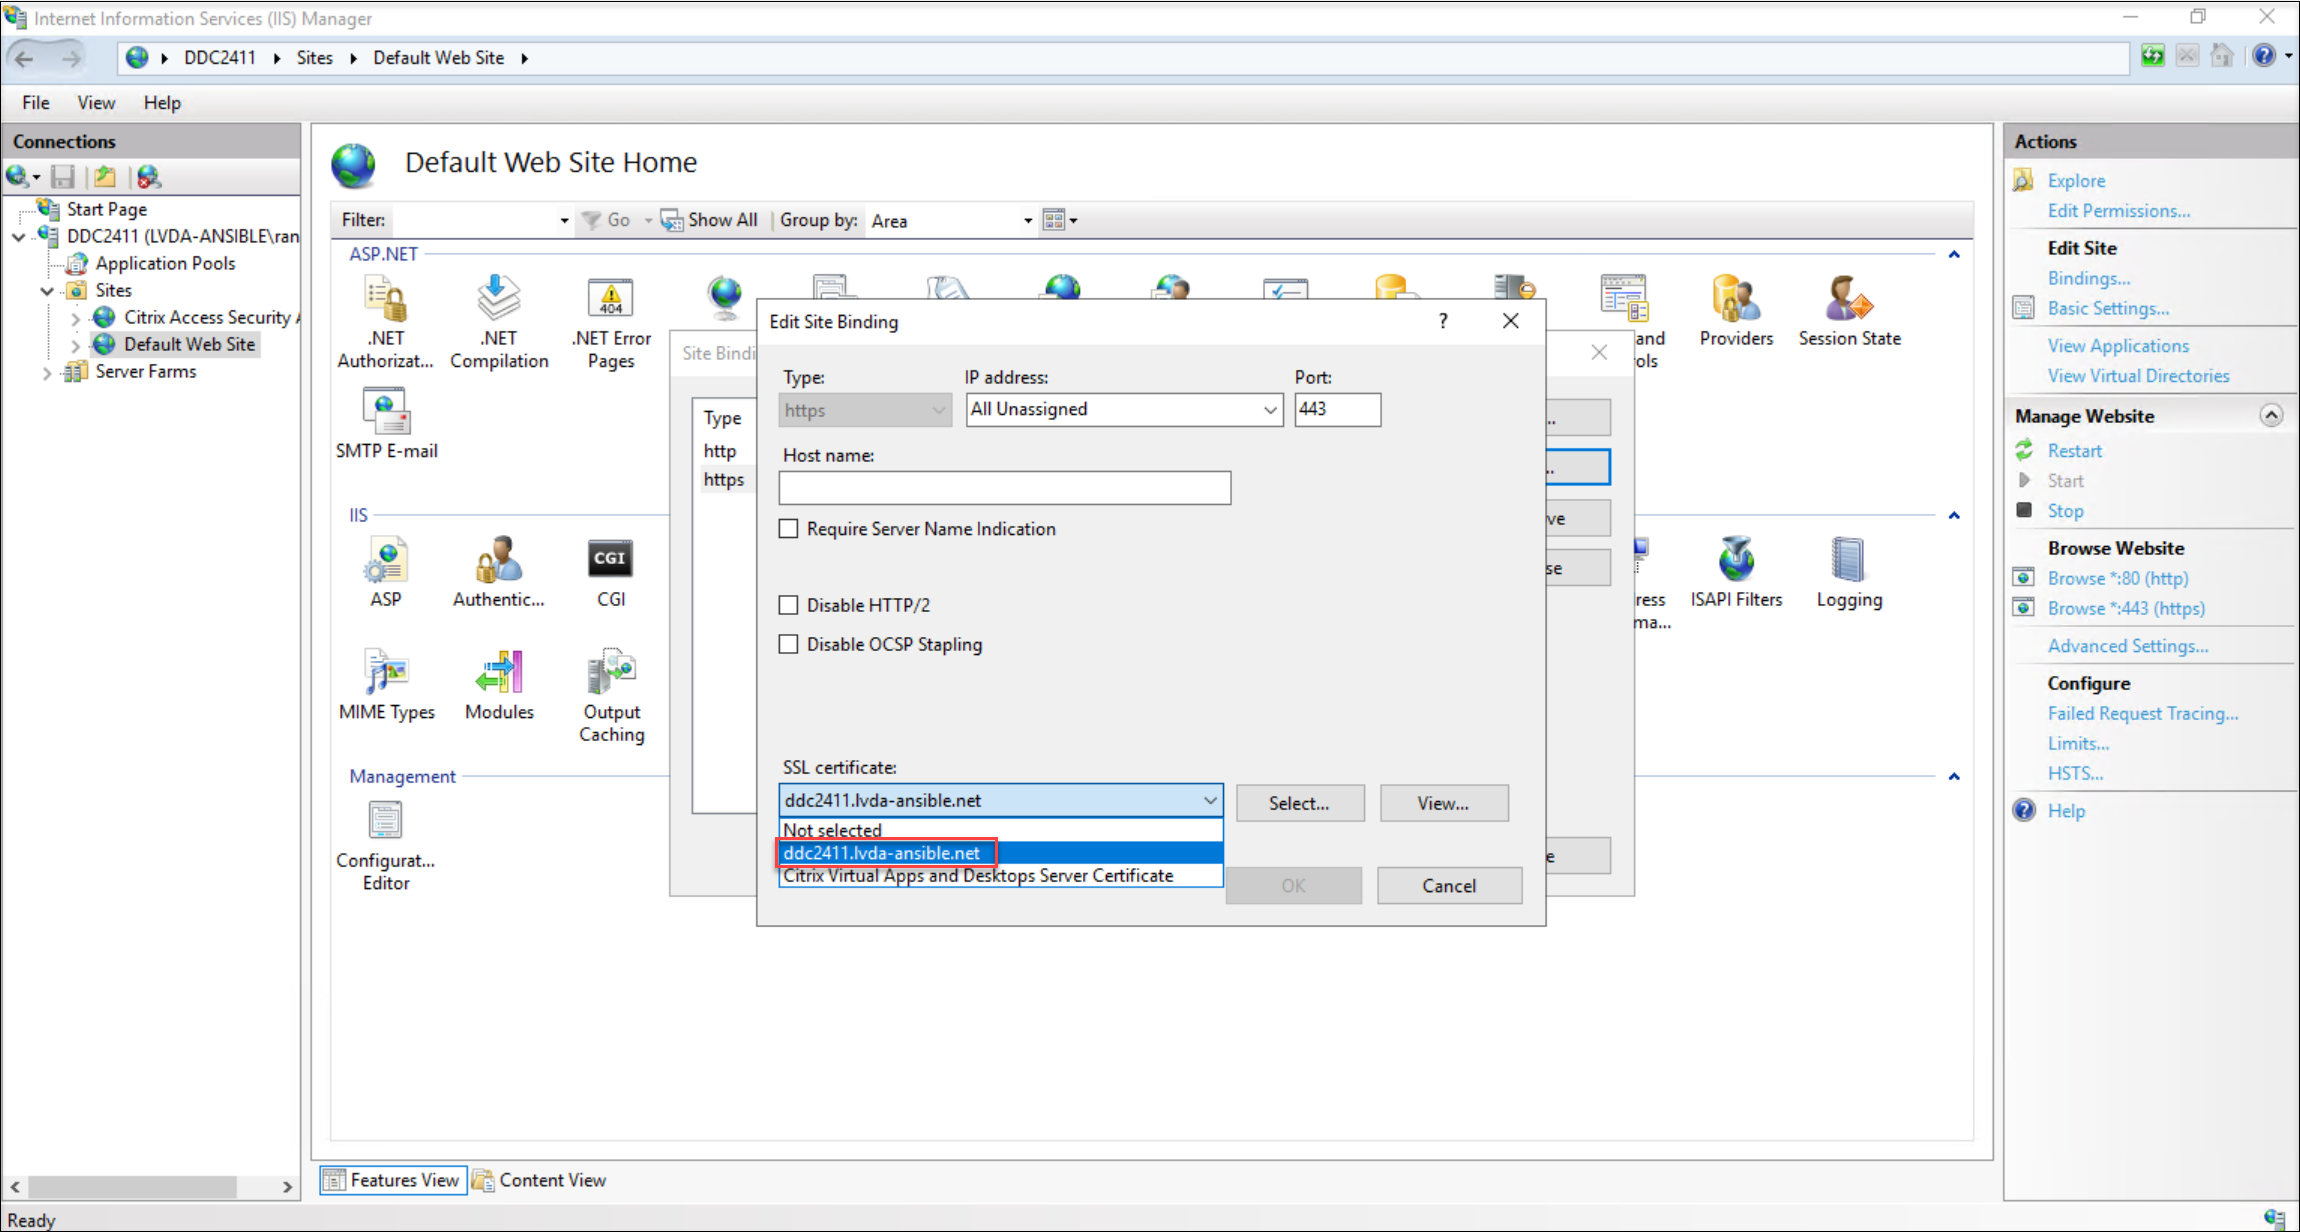
Step 4: Save and update the CA certificate on the Linux VDA
-
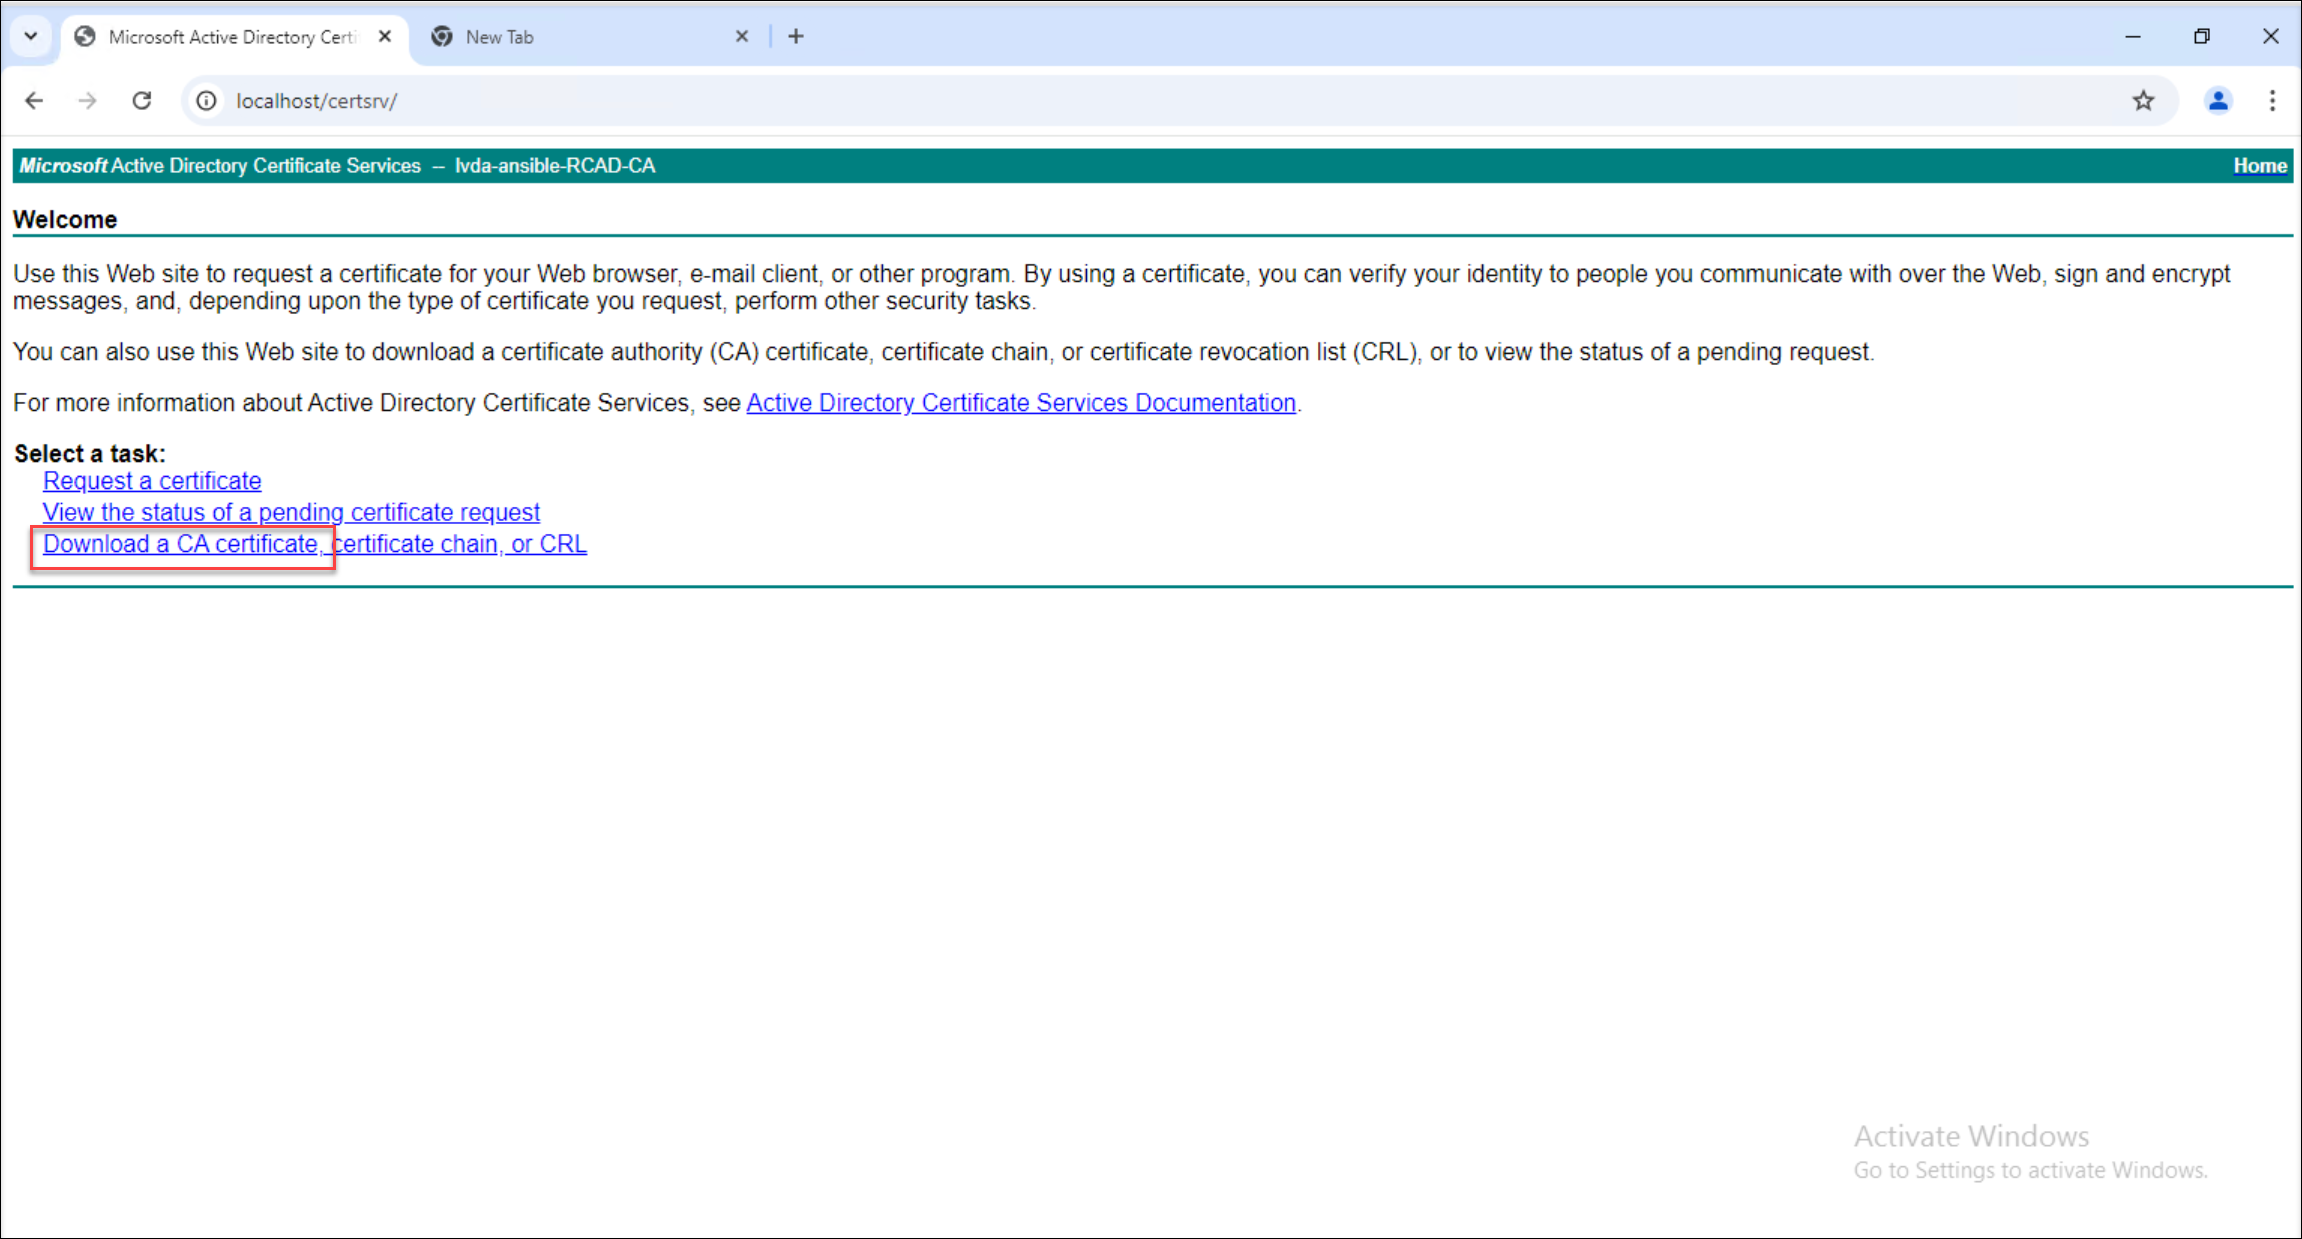
Download the CA certificate. For example:
-
Place and update the CA certificate.
-
For RHEL and Rocky Linux:
Use the trust anchor <path/CA certificate> command to add the CA certificate. Ensure that no certificates are manually placed in the /etc/pki/ca-trust/source/anchors directory. If you encounter errors related to read-only fields, remove any certificates present in that directory.
-
For SUSE, Ubuntu, and Debian:
Place the root CA certificate in the /usr/local/share/ca-certificates directory. If the certificate doesn’t have a .crt extension, rename it accordingly. Then, run the update-ca-certificate command.
-