Authentication with Azure Active Directory
Note:
This feature is available only for Azure-hosted VDAs.
Based on your needs, you can deploy two types of Linux VDAs in Azure:
- Azure AD DS-joined VMs. The VMs are joined to an Azure Active Directory (AAD) Domain Services (DS) managed domain. Users use their domain credentials to log on to the VMs.
- Non-domain-joined VMs. The VMs integrate with the AAD identity service to provide user authentication. Users use their AAD credentials to log on to the VMs.
For more information about AAD DS and AAD, see this Microsoft article.
This article shows you how to enable and configure the AAD identity service on non-domain-joined VDAs.
Supported distributions
- Ubuntu 24.04, 22.04
- RHEL 8.10
- SUSE 15.6
For more information, see this Microsoft article.
Step 1: Create a template VM on the Azure portal
Create a template VM and install the Azure CLI on the VM.
-
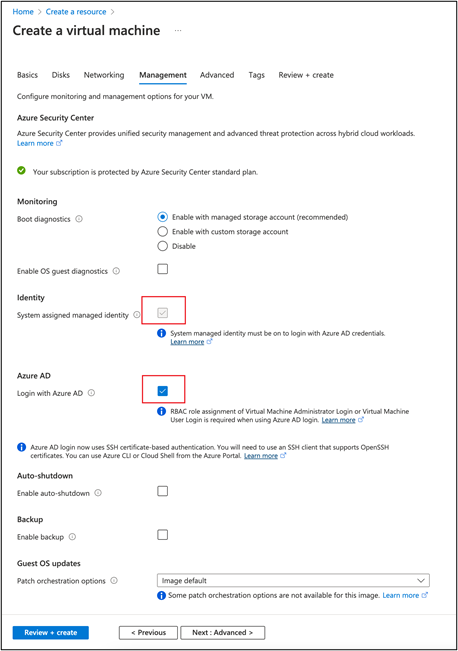
On the Azure portal, create a template VM. Be sure to select Login with Azure AD on the Management tab before clicking Review + create.
-
Install the Azure CLI on the template VM. For more information, see this Microsoft article.
Step 2: Prepare a master image on the template VM
To prepare a master image, follow Step 3: Prepare a master image in Use MCS to create Linux VMs on Azure.
Step 3: Set the template VM to non-domain-joined mode
After you create a master image, follow these steps to set the VM to non-domain-joined mode:
-
Run the following script from the command prompt.
Modify /var/xdl/mcs/mcs_util.sh <!--NeedCopy--> -
Locate
function read_non_domain_joined_info(), and then change the value ofNonDomainJoinedto2. See the following code block for an example.function read_non_domain_joined_info() { log "Debug: Enter read_non_domain_joined_info" # check if websocket enabled TrustIdentity=`cat ${id_disk_mnt_point}${ad_info_file_path} | grep '\[TrustIdentity\]' | sed 's/\s//g'` if [ "$TrustIdentity" == "[TrustIdentity]" ]; then NonDomainJoined=2 fi ... } <!--NeedCopy--> -
Save the change.
-
Shut down the template VM.
Step 4: Create the Linux VMs from the template VM
After you have the non-domain-joined template VM ready, follow these steps to create VMs:
-
Sign in to Citrix Cloud.
-
Double-click Citrix DaaS™, and then access the Full Configuration management console.
-
In Machine Catalogs, choose to use Machine Creation Services to create the Linux VMs from the template VM. For more information, see the Citrix DaaS article Non-domain-joined.
Step 5: Assign AAD user accounts to the Linux VMs
After you create the non-domain-joined VMs, assign AAD user accounts to them.
To assign AAD user accounts to a VM, follow these steps:
- Access the VM using an administrator account.
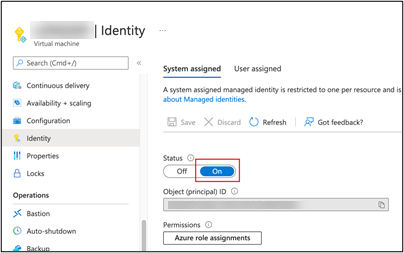
-
On the Identify > System assigned tab, enable System Identity.
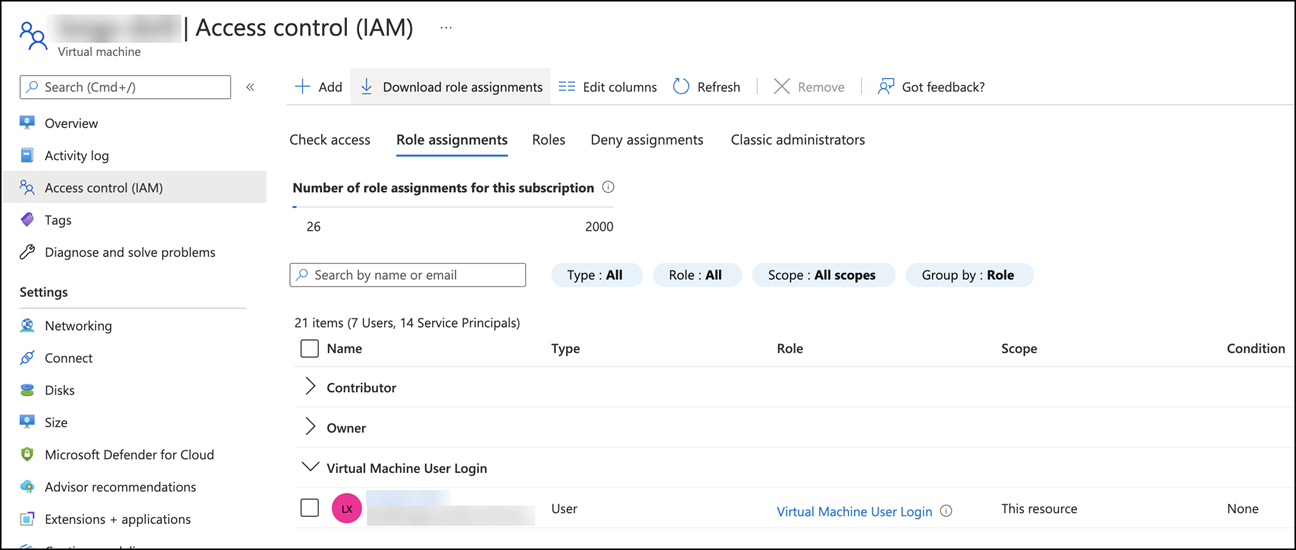
-
On the Access control (IAM) > Role assignments tab, locate the Virtual Machine User Login area, and then add the AAD user accounts as needed.
Log on to non-domain-joined VDAs
End users in your organization can log on to a non-domain-joined VDA in two ways. Detailed steps are as follows:
- Start the Workspace app, and then log on to the workspace by entering the AAD user name and password. The Workspace page appears.
-
Double-click a non-domain-joined desktop. The AAD LOGIN page appears.
The page varies depending on the login mode set on the VDA: Device Code or AAD account/password. By default, Linux VDAs authenticate AAD users using Device Code login mode as follows. As the administrator, you can change the login mode to AAD account/password if needed. See the following section for detailed steps.

- Based on the onscreen instructions, log on to the desktop session in one of the following ways:
- Scan the QR code and enter the code.
- Enter the AAD user name and password.
Change to AAD account/password login mode
By default, Linux VDAs authenticate AAD users with device codes. See this Microsoft article for details. To change the login mode to AAD account/password, follow these steps:
Run the following command on the VDA, locate the key AADAcctPwdAuthEnable, and change its value to 0x00000001.
/opt/Citrix/VDA/bin/ctxreg create -k "HKLM\System\CurrentControlSet\Services\CitrixBrokerAgent\WebSocket" -t "REG_DWORD" -v "AADAcctPwdAuthEnable" -d "0x00000001" --force

<!--NeedCopy-->
Note:
This approach doesn’t work with Microsoft accounts or accounts that have two-factor authentication enabled.
In this article
- Supported distributions
- Step 1: Create a template VM on the Azure portal
- Step 2: Prepare a master image on the template VM
- Step 3: Set the template VM to non-domain-joined mode
- Step 4: Create the Linux VMs from the template VM
- Step 5: Assign AAD user accounts to the Linux VMs
- Log on to non-domain-joined VDAs