Migrate
Important:
- If you intend to migrate your existing on-premises WEM database into the WEM service, make sure that you use the latest version of the migration tool.
- To ensure that the migration tool works as expected, you might must upgrade the .NET Framework. If you use WEM 1909 or earlier, upgrade to .NET Framework 4.7.1 or later on the machine where you run the tool.
- We recommend that you run the migration tool on the machine where the infrastructure service is installed. Doing so ensures that the infrastructure service can connect to the WEM database and that the machine on which the infrastructure service is running has the necessary components.
We provide you with a toolkit to migrate your existing on-premises Workspace Environment Management™ (WEM) database into the WEM service. The toolkit includes a wizard to generate an SQL file containing the contents of your WEM database, and a simple way to upload the SQL file to the WEM service Azure database. This article describes how to complete your on-premises database migration. Review the entire sequence before starting the migration process so that you know what to expect.
Before you migrate your WEM database, keep the following in mind:
- After your migration completes successfully, all data associated with your current WEM service database will be lost.
- You can migrate your WEM database only after your WEM service is successfully provisioned.
- Before starting the migration process, Citrix® recommends that you back up your on-premises WEM database.
- Before starting the migration process, Citrix recommends that you configure your database maintenance on the Database Maintenance tab. Doing so reduces the size of your WEM database so that you have a better migration experience. For more information on database maintenance, see Configure the infrastructure service.
- If you attempt to migrate your WEM database while the WEM service is upgrading, the following error message appears in the notifications area in the top-right corner of the Citrix Cloud™ user interface: “The Workspace Environment Management database migration has failed because the Workspace Environment Management service is upgrading. Please try again later.” When this happens, try uploading the SQL file after your WEM service is upgraded successfully. Service upgrades are also notified in the top-right corner of the Citrix Cloud user interface.
System requirements
The toolkit supports the migration from WEM 4.7 and later. To migrate from an earlier version, upgrade WEM 4.x to WEM 4.7 or later, and then migrate the database to the WEM service. For more information on upgrading, see Upgrade a deployment.
Get started
Log on to your Citrix Cloud account. For more information, see What is a Citrix Cloud account.
Migrate your on-premises database
Step 1: Download the migration tool
Download the migration tool (WEM-migration-tool.zip) from the WEM service Utilities tab. Extract the zip file to a convenient folder.
Note:
Citrix recommends that you run the migration tool on the machine where the infrastructure service is installed. Doing so ensures that the infrastructure service can connect to the WEM database and the machine on which the infrastructure service is running has the necessary components.
Step 2: Export the database data to an SQL file
Run the Citrix WEM Migration Tool.exe contained in the zip file.
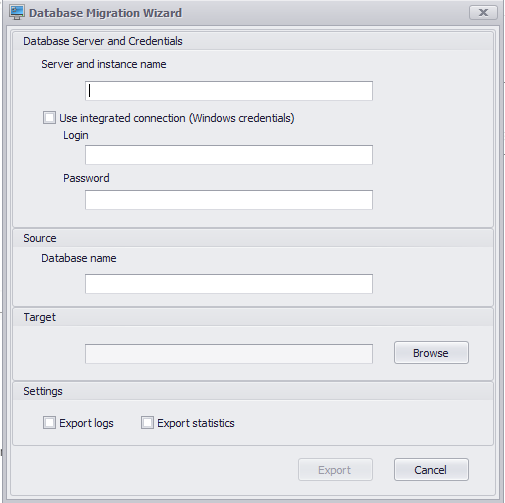
Enter the following data in the wizard:
Server and instance name. Address of the SQL server instance that hosts the database. It must be reachable from the infrastructure server exactly as typed here.
Use integrated connection (Windows credentials). If selected, allows the Database Migration Wizard to use the Windows account of the identity it is running under to connect to the SQL server, and then generate the SQL file containing the contents of your on-premises WEM database. If this Windows account does not have sufficient permissions, run the Citrix WEM Migration Tool.exe using a Windows account with sufficient privileges, or clear this option and provide an SQL account with sufficient privileges instead.
Database name. Name of the database to be migrated.
Target. The desired folder for saving the SQL file containing the contents of your on-premises WEM database. Use the Browse button to navigate to the folder where you want to save the SQL file.
Export logs. Controls whether to export logs. The logs contain changes made to your WEM agents. If enabled, the database file to be exported contains the logs. To speed up your migration, we recommend that you do not enable this option.
Export statistics. Controls whether to export agent and user statistics. If enabled, the database file to be exported contains the statistics. By default, this option is disabled. To speed up your migration, we recommend that you do not enable this option.
Note:
When saving as a file, your WEM database file is automatically renamed to “Your database name_upload.7z.”
Click Export to start the database export process or click Cancel to exit the Database Migration Wizard.
During the export process, the Database Migration Status window appears.
After the export process finishes, click Finish to close the window and to return to the Database Migration Wizard.
Note:
Depending on your database size, the export process can take from a few seconds to a few minutes or even a few hours.
If you close the Database Migration Status window when the database export is in progress, you return to the Database Migration Wizard, but the Export button is disabled because the database export process continues in the background. To stop the export process completely, click Cancel.
If there are errors during export, check the Citrix WEM Migration Tool Debug Log file in the migration tool folder that contains the Citrix WEM Migration Tool.exe.
Step 3: Upload the SQL file into your WEM service database
Important:
Do not close the Workspace Environment Management service page before the upload finishes. Otherwise, your SQL file cannot be uploaded successfully.
- On the WEM service Utilities tab, click Upload to start the upload process.
- Click Choose File on the Upload SQL file page and then select the SQL file to be uploaded.
- Click OK to start the upload and to return to the WEM service Utilities tab.
After you return to the WEM service Utilities tab, the progress message appears under Upload, which updates as the upload progresses. After your SQL file is uploaded successfully, the migration process starts automatically.
Note:
After your SQL file is uploaded successfully, you must wait 10 minutes before you can upload again.
After migration
You receive a notification message a few hours later, communicating the result of the migration to you. See notifications in the top-right corner of the Citrix Cloud user interface. After the migration completes successfully, perform the following steps on the Manage tab to view the data migrated from your on-premises WEM database.
Step 1: Load the migrated data into the WEM service console
-
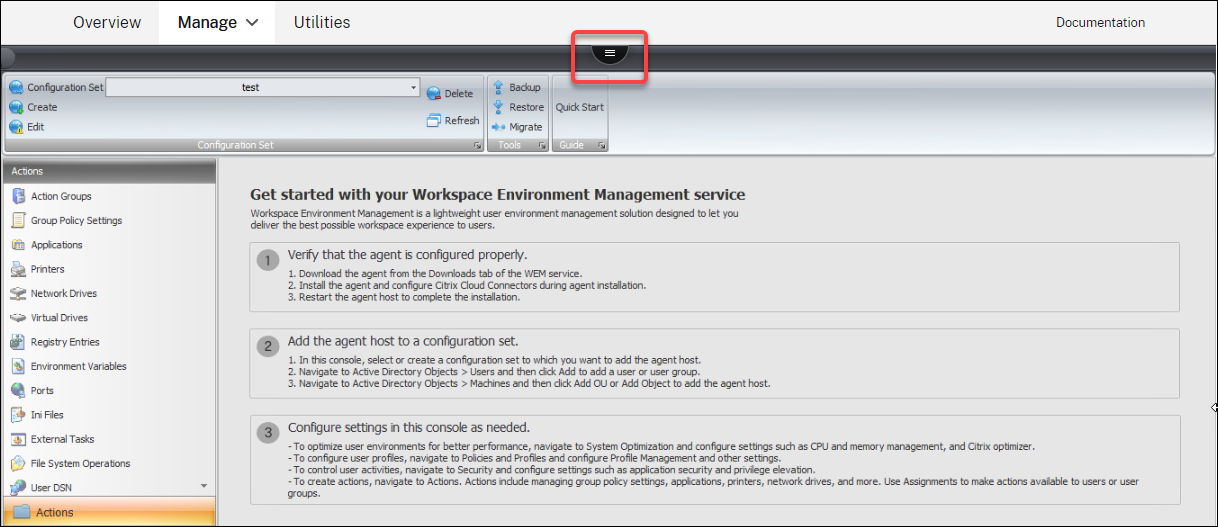
In Manage > Legacy Console, hover over the hamburger menu.
-
Click the Citrix Workspace™ icon.
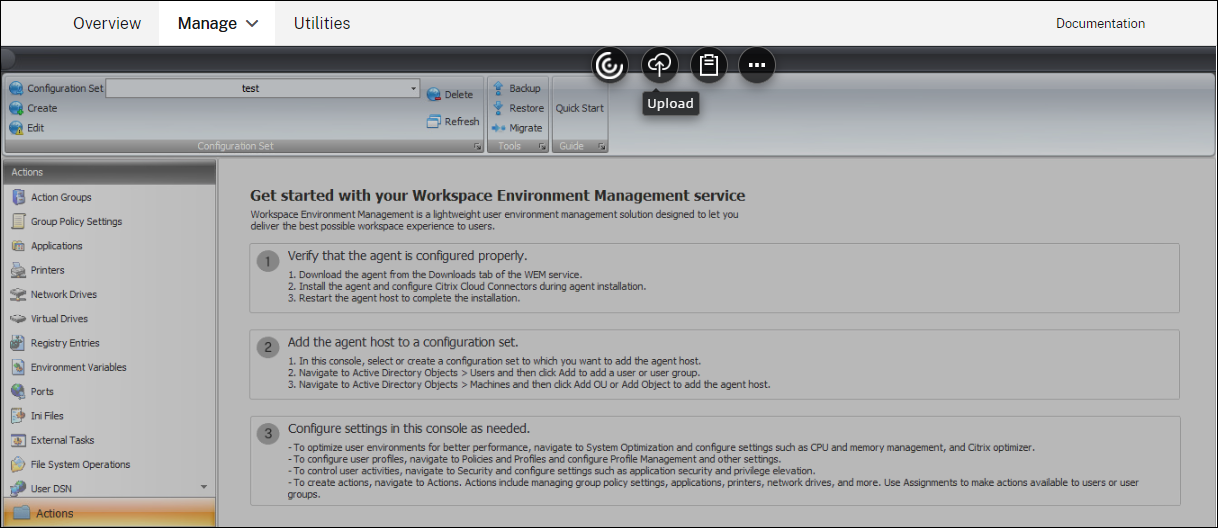
- Click the ellipsis icon to expand additional options.
- Click Log Off to disconnect from the WEM service.
- Refresh your browser window to reconnect to the WEM service and to view the data migrated from your on-premises WEM database.
Step 2: Switch to service agent mode
Use the agent switch feature to switch from on-premises to service agent mode. For information about the agent switch, see Agent Switch.
Important:
The agent switch feature is available in Workspace Environment Management 1909 and later. For earlier versions, you must reinstall the agent or upgrade it to version 1909 or later before using the agent switch.
Alternatively, you can download the agent from the service’s Utilities tab and then manually reinstall the agent.