Get started
Set up
Desktops and applications appear after logging in. You can search for resources and click an icon to start a desktop or application in a new window.
When you start an extra application, Citrix Workspace app for ChromeOS checks if the application can be launched in an existing session before creating a session. This capability enables you to access many applications in a single session.
You can configure the features and functionalities of Citrix Workspace app for ChromeOS using any of the following methods:
- Google Admin Policy
- Web.config in StoreFront
- default.ica
- configuration.js
Note:
With version 1901, the splash screen is no longer visible to users. The schema “splashScreen”: false” will no longer be supported in future releases. You must remove the schema, if present, from the Google Admin policy or the configuration.js file.
Using Google Admin policy
Note:
Citrix recommends using this method only when Citrix Workspace app for ChromeOS is repackaged for users.
Before Version 2.1, only store or beacon related configurations can be pushed through the Google Admin Policy. For additional information about this policy, see Knowledge Center articles CTX141844 and CTX229141.
With Citrix Workspace app for ChromeOS Version 2.1, other Chrome configurations can also be pushed through the Google Admin Policy.
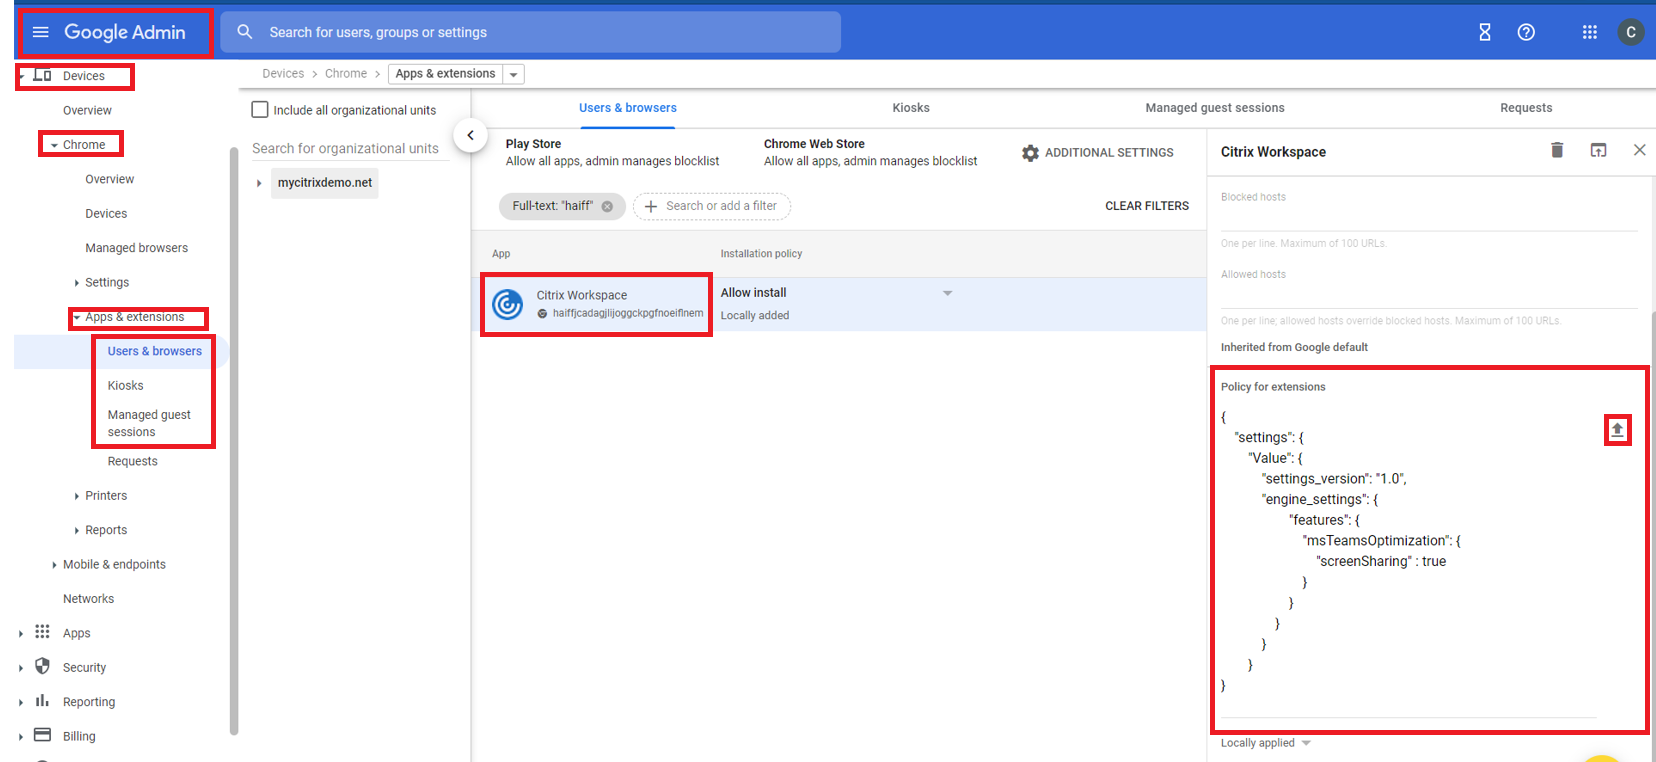
How to push policies through the Google Admin console
To push any policy through the Google admin console, follow these steps:
- In the Google Admin console, select Devices > Chrome > Apps & extensions > Users & browsers.
- Search for Citrix Workspace app (enter the web store app id, for example,
haiffjcadagjlijoggckpgfnoeiflnem). - Click the Citrix Workspace app icon.
- The policy for extensions appears. Copy and paste the policy or upload the policy.txt file with the relevant JSON.
- Click Save.
- Repeat the steps for Kiosk and Managed guest sessions as required.
For more information, see Google support.
Verifying the configuration of policies
To verify that policies are pushed correctly, do the following:
-
Navigate to
chrome://policy/. -
Click
Reload policies. -
Search for the Citrix Workspace app for ChromeOS Web Store ID, which is
haiffjcadagjlijoggckpgfnoeiflnem.-
If policies are pushed successfully from the Google Admin Console, they appear under the Web Store ID:
haiffjcadagjlijoggckpgfnoeiflnem. If not, verify that the policies are configured correctly. To create or edit the policy, make sure to use theConfiguration Utility Tool. -
If the policies appear under the Web Store ID but do not take effect in the session, contact Citrix Technical support.
-
Using webconfig
Note:
Citrix recommends that you use the web.config file method for configuration purposes only when a store version of Citrix Workspace app for ChromeOS is being used.
To change the configuration using the Web.config file method (only for those using on-premises StoreFront):
- Open the web.config file for the Citrix Receiver for Web site. This file is in C:\inetpub\wwwroot\Citrix\<storenameWeb>, where storename is the name specified for the store when it was created.
- Locate the chromeAppPreferences field and set its value with the configuration as a JSON string.
For example:
chromeAppPreferences = {
    "ui": {
        "toolbar": {
            "menubar": false
            }
            }
            }
<!--NeedCopy-->
Another sample example is as follows,

Using the default.ica file
Note:
Citrix recommends that you use the default.ica file method for configuration purposes only for Web Interface users.
Citrix Workspace app for ChromeOS allows Custom.ica files without any initial program value.
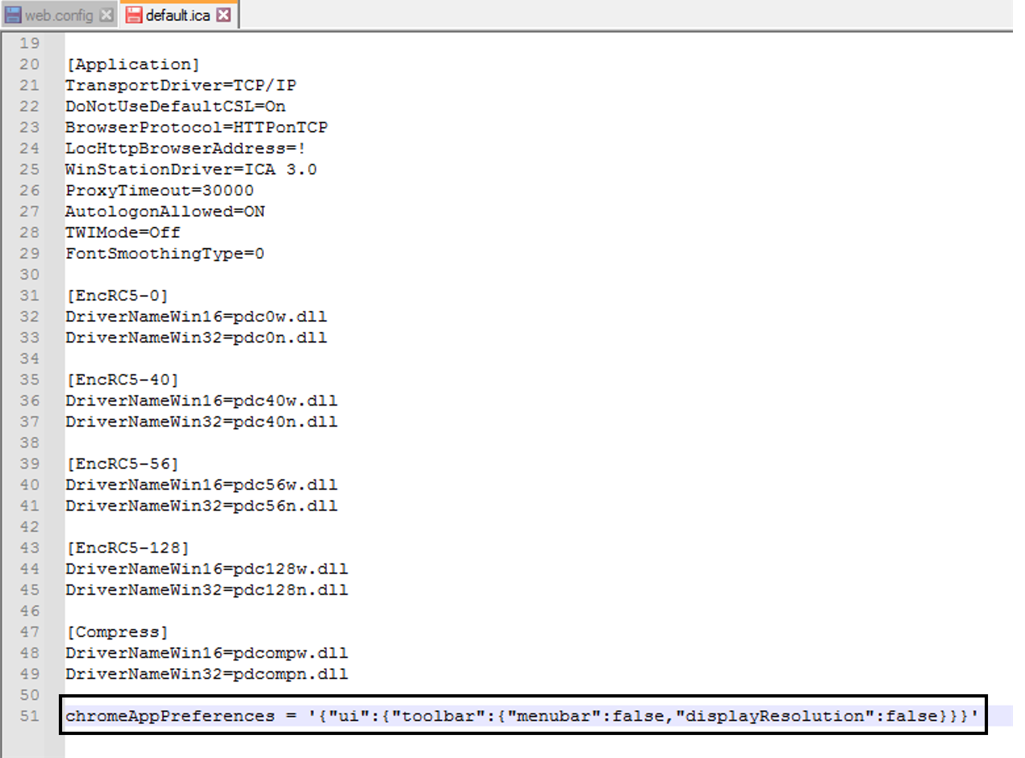
To change the configuration using the default.ica file:
- Open the default.ica file from C:\inetpub\wwwroot\Citrix\<site name>\conf\default.ica for Web interface customers, where sitename is the name specified for the site when it was created. For StoreFront customers, the default.ica file is at C:\inetpub\wwwroot\Citrix\<Storename>\App_Data\default.ica, where storename is the name specified for the store when it was created.
- Add a key at the end of the file, chromeAppPreferences with its value set to configuration as the JSON object.
For example:
chromeAppPreferences={
    "ui":{
        "toolbar": {
            "menubar": false
            }
            }
            }
<!--NeedCopy-->
A sample default.ica file looks as follows:
Using the configuration.js file
The configuration.js file is in the ChromeApp root folder. Access this file directly to modify Citrix Workspace app for ChromeOS.
Note:
- Citrix recommends that you back up the configuration.js file before you modify.
- Administrator-level credentials are required to edit the configuration.js file; after editing the file, repackage the app to make other modifications to toolbar elements.
- In kiosk mode, the toolbar is hidden by default. When editing the configuration.js file to enable the toolbar, verify that kiosk mode is disabled. Citrix recommends that you use one of the alternative methods (for example, the default.ica file) to enable the toolbar.
Custom branding of logo and icon
You can customize the Citrix Workspace app logo and icons for apps and desktops as you want. You can customize them as follows:
- Install the Citrix Workspace app for ChromeOS build from the chrome web store.
- Navigate to the folder /chromeAppUI/resources/images.
- Replace the following images with the images that you want but with the same dimensions:
- icon_16x16.png
- icon_32x32.png
- icon_48x48.png
- icon_128x128.png
- icon_256x256.png
- Navigate to the ChromeApp root folder and open the manifest.json file.
- Replace the value for the name and description with the required text.
- Save the changes.
- Reload the app from the extensions page.