Store configuration
Store
This article is a reference document to help you set up your environment after you install Citrix Workspace app.
A store aggregates available applications and desktops for a user into a single place. A user can have multiple stores and switch across stores as needed. An admin delivers the store URL that has preconfigured resources and settings. You can access these stores through the Citrix Workspace app.
Types of stores
You can add the following store types in the Citrix Workspace app:
Cloud stores
Cloud stores are hosted by Citrix® StoreFront cloud.
Local stores
Local stores are hosted by StoreFront. Remote users can connect to the store via a Citrix Gateway.
Custom web stores
If you have created your own custom web portal then you can add it to Citrix Workspace app as a custom web store. To use this feature, the admin must add the domain or custom web store to Client app management allowed URLs.
For more information about configuring custom web store URLs for end-users, see Client app management.
You can provide the custom web store URL in the Add Account screen in Citrix Workspace app. The custom web store opens in the native Citrix Workspace app window.
To remove the custom web store, go to Accounts > Add or Remove accounts, select the custom web store URL, and click Remove.
Adding a store to Citrix Workspace app
You can provide users with the account information that they need to access virtual apps and desktops using the following methods:
- Providing users with account information to enter manually
- Configuring email-based account discovery
- Adding store through CLI
- Provisioning file
- Using the Group Policy Object administrative template
Provide users with account information to enter manually
Upon successful installation of Citrix Workspace app, the following screen appears. Users are required to enter an email or server address to access the apps and desktops. When a user enters the details for a new account, Citrix Workspace app tries to verify the connection. If successful, Citrix Workspace app prompts the user to sign in to the account.
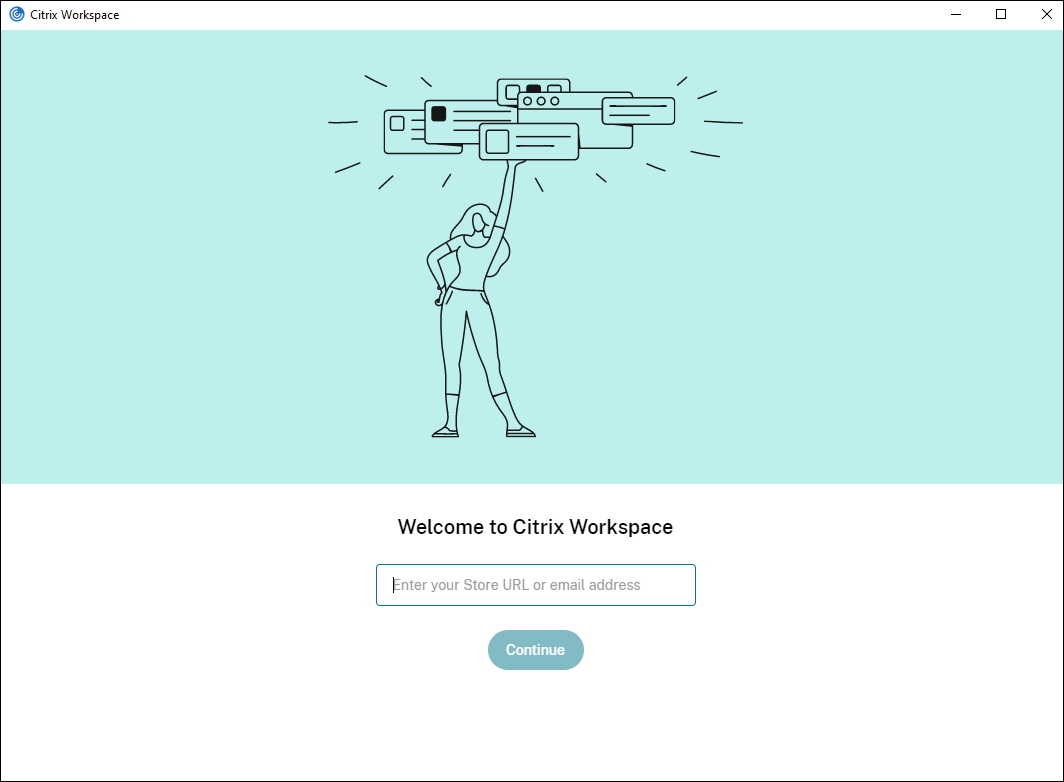
To enable users to set up accounts manually, be sure to distribute the information required to connect to their virtual apps and desktops.
- To connect to a cloud store, provide the cloud store URL.
- If the client can reach the StoreFront deployment without going through a Citrix Gateway, you have the following options:
- To present a list of all of the non-hidden stores on the server for the user to choose from, provide the base URL. For example:
https://servername.company.com. - To connect to a specific store, provide the Store URL. For example:
https://servername.company.com/Citrix/Store. Note this is different from the store website URL.
- To present a list of all of the non-hidden stores on the server for the user to choose from, provide the base URL. For example:
- If the user must connect to StoreFront through Citrix Gateway, you have the following options:
- To present all stores configured for remote access, provide the Citrix Gateway fully qualified domain name.
-
To connect to a particular store, provide users with the Citrix Gateway fully qualified domain name and the store name in the form:
CitrixGatewayFQDN?MyStoreName:
For example, if a store named “SalesApps” has remote access enabled for
server1.comand a store named HRApps has remote access enabled forserver2.com, a user must enter:-
server1.com?SalesAppsto access SalesApps or -
server2.com?HRAppsto access HRApps.
CitrixGatewayFQDN?MyStoreName form requires a new user to create an account by entering a URL and isn’t available for email-based discovery.
-
Once Citrix Workspace app is configured with the store URL, the account can be managed from the Accounts option in the profile menu.
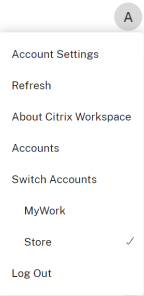
On client machines configured for proxy authentication, if the proxy credentials aren’t stored in the Windows Credential Manager, an authentication prompt appears, asking you to enter the proxy credentials. Citrix Workspace app then saves the proxy server credentials in Windows Credential Manager. This results in a seamless login experience because you don’t need to manually save your credentials in Windows Credential Manager before accessing Citrix Workspace app.
Configure email-based account discovery
When you configure Citrix Workspace app for email-based account discovery, users enter their email address rather than a server URL during initial Citrix Workspace app installation and configuration. Citrix Workspace app reads configuration from Global App Config Service or DNS to find the store URL.
Global App Config Service
You can configure email discovery using the Global App Config Service. For more information, see Configure settings for cloud stores or Configure settings for on-premises stores.
DNS SRV records
For StoreFront stores, you can use DNS SRV records to configure which StoreFront server Citrix Workspace app must use for an email domain.
On your DNS server for your email domain add a SRV record with the following properties:
| Property | Value |
|---|---|
| Service | _citrixreceiver |
| Proto | TCP |
| Target | The fully qualified domain name (FQDN) and port for your appliance (to support both local and remote users) or StoreFront server (to support local users only) in the form servername.domain:port. |
If your environment includes both internal and external DNS servers, you can add a SRV record specifying the StoreFront server FQDN on your internal DNS server and another record on your external server specifying the FQDN. With this configuration, local users are provided with the StoreFront details, while remote users receive connection information.
DNS discoverReceiver record
For StoreFront stores, as an alternative to the other methods, you can create a DNS alias to the StoreFront server discoverReceiver on the email domain. For example if your email domain is example.com, create a DNS alias called discoverReceiver.example.com. If no SRV record is found in the specified domain, Citrix Workspace app searches for a machine named “discoverReceiver” to identify a StoreFront server.
If you use this mechanism, ensure that discoverReceiver is included as a subject alternate name in the HTTPS certificate for your StoreFront server.
Adding store through CLI
To add a store from the command line, run the following:
SelfService.exe -init -createprovider storename https://servername.domain/storepath
<!--NeedCopy-->
Provide users with provisioning files
StoreFront provides provisioning files that users can open to connect to stores.
You can use StoreFront to create provisioning files that include connection details for accounts. After installing Citrix Workspace app, users simply open the file to configure Citrix Workspace app. For more information, see To export store provisioning files for users in the StoreFront documentation.
If users have access to a store using a web browser, they can go to account settings and download a provisioning file by themselves.
Using the Group Policy Object Administrative Template
To add or specify a Citrix StoreFront or Gateway using the Group Policy Object administrative template:
- Open the Citrix Workspace app Group Policy Object administrative template by running
gpedit.msc. - Under the Computer Configuration node, go to Administrative Templates > Classic Administrative Templates (ADM) > Citrix Components > Citrix Workspace > StoreFront.
- Select Citrix Gateway URL/StoreFront Accounts List.
- Select the Enabled option and click Show. If you enable this policy setting, you can enter a list of StoreFront Accounts and NetScaler Gateway URL.
- Enter the URL in the Value field.
-
Specify the store URL that is used with the Citrix Workspace app:
STOREx="storename;http[s]://storeurl/discovery;[On, Off]; [storedescription]"Values:
-
storename- The name that the user sees for this store. -
storeurl- The URL for the store, followed by/discovery. If using a Citrix Gateway, enter the gateway URL, followed by#storename -
[On, Off]- The store enabled state. -
storedescription- The description that the user sees for the store, such as HR App store.
-
For example
STORE0="HRStore;https://hr.mycompany.com#Storename;On;HR store"
STORE1="AccountsStore;https://accounts.mycompany.com/discovery;On;Accounts store"
<!--NeedCopy-->
Note:
- The Citrix Gateway store URL must be first in the list (parameter STORE0).
- In a multi-store setup, only one Citrix Gateway store URL configuration is allowed.
Prevent users from adding stores to Citrix Workspace app for Windows
You can choose to prevent users from adding their store to Citrix Workspace app. This could be useful if you prefer users to access their store and launch resources from a web browser, but use Citrix Workspace app to connect to those resources.
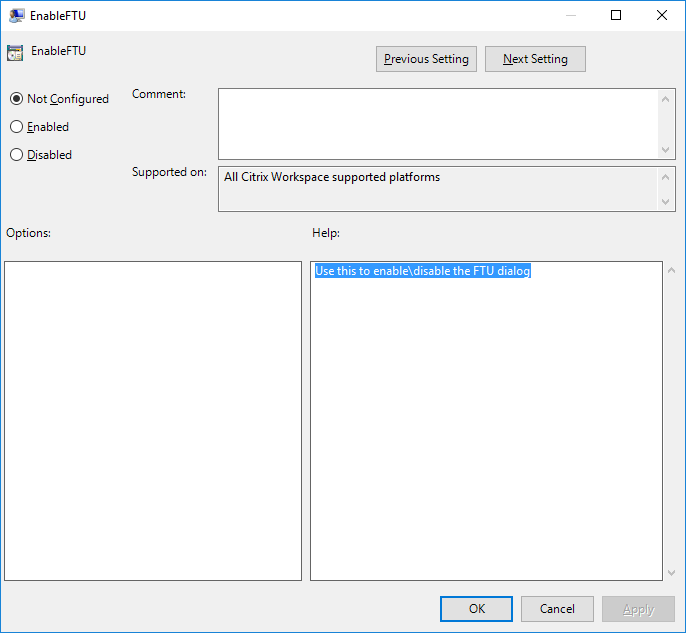
To hide the Add Account option from the Citrix Workspace app installation wizard, disable EnableFTUpolicy under Self-Service node in Local Group Policy Object administrative template as shown below. This is a per-machine setting, hence the behavior is applicable for all users.
Prevent users from using their store from a web browser
You can configure StoreFront and Citrix Workspace so that when users open a store website in their browser, it automatically opens Citrix Workspace app and adds the store.
For more information configuring StoreFront Cloud, see Customize store access.
For more information on configuring StoreFront, see Require use of Citrix Workspace app.
For more information on StoreFront stores accessed through a gateway, see Require Citrix Workspace app when connecting through a gateway.
Domain Name Service name resolution
You can configure Citrix Workspace app for Windows that uses the Citrix XML Service to request a Domain Name Service (DNS) name for a server instead of an IP address.
Important:
Unless your DNS environment is configured specifically to use this feature, Citrix recommends that you do not enable DNS name resolution on the server.
By default, DNS name resolution is disabled on the server and enabled on the Citrix Workspace app. When DNS name resolution is disabled on the server, any Citrix Workspace app request for a DNS name returns an IP address. There’s no need to disable DNS name resolution on Citrix Workspace app.
To disable DNS name resolution for specific user devices:
If your server deployment uses DNS name resolution and you experience issues with specific user devices, you can disable DNS name resolution for those devices.
Caution:
Using the Registry Editor incorrectly might cause serious problems that require you to reinstall the operating system. We do not guarantee that problems resulting from the incorrect use of the Registry Editor can be solved. Use the Registry Editor at your own risk. Back up the registry before you edit it.
-
Add a string registry key xmlAddressResolutionType to
HKEY\_LOCAL\_MACHINE\Software\Wow6432Node\Citrix\ICA Client\Engine\Lockdown Profiles\All Regions\Lockdown\Application Browsing. -
Set the value to IPv4-Port.
-
Repeat for each user of the user devices.
StoreFront to StoreFront Cloud Migration
StoreFront to StoreFront Cloud migration enables you to seamlessly migrate your end users from a local store to a cloud store with minimal user interaction.
Consider, all your end users have a StoreFront store storefront.com added to their Citrix Workspace app. As an administrator, you can configure a local URL to cloud URL mapping {‘storefront.com’:’xyz.cloud.com’} in the Client app management. Client app management pushes the setting to all Citrix Workspace app instances, on both managed and unmanaged devices, that have the store URL storefront.com.
Once the setting is detected, Citrix Workspace app adds the mapped cloud store URL xyz.cloud.com as another store. When the end user launches the Citrix Workspace app, the Citrix Workspace store opens. The previously added StoreFront store storefront.com remains added to the Citrix Workspace app. Users can always switch back to the StoreFront store storefront.com using the Switch Accounts option in the Citrix Workspace app. Admins can control the removal of the StoreFront store storefront.com from the Citrix Workspace app at the users’ end points. The removal can be done through the Global App Configuration service.
To enable the feature, do the following steps:
-
Configure local store to cloud store mapping using client app management. For more information, see Global App Configuration service.
-
Edit the payload in the app config service:
{
 "serviceURL": {
"url": "https://storefront.acme.com:443",
"migrationUrl": [
  {
    "url": "https://sampleworkspace.cloud.com:443",
    "storeFrontValidUntil": "2023-05-01"
  }
 ]
},
"settings": {
"name": "Productivity Apps",
"description": "Provides access StoreFront to Workspace Migration",
"useForAppConfig": true,
"appSettings": {
  "windows": [
    {
      "category": "root",
      "userOverride": false,
      "assignmentPriority": 0,
      "assignedTo": [
        "AllUsersNoAuthentication"
     ],
      "settings": [
      {
       "name": "Hide advanced preferences",
        "value": false
      }
     ]
    }
   ]
  }
 }
}
<!--NeedCopy-->
Note:
If you’re configuring the payload for the first time, use
POST. If you’re editing the existing payload configuration, usePUTand check that you have the payload that consists of all the supported settings. -
Specify the local store URL
storefront.comas the value for URL in the serviceURL section. -
Configure the cloud store URL
xyz.cloud.cominside the section migrationUrl. -
Use storeFrontValidUntil to set the timeline for the removal of the StoreFront store from the Citrix Workspace app. This field is optional. You can set the following value based on your requirement:
- Valid date in the format (YYYY-MM-DD)
Note:
If you have provided a past date, then the StoreFront store is removed immediately upon URL migration. If you have provided a future date, then the StoreFront store is removed on the set date.
- Valid date in the format (YYYY-MM-DD)
After the app config service settings are pushed, the following screen appears:
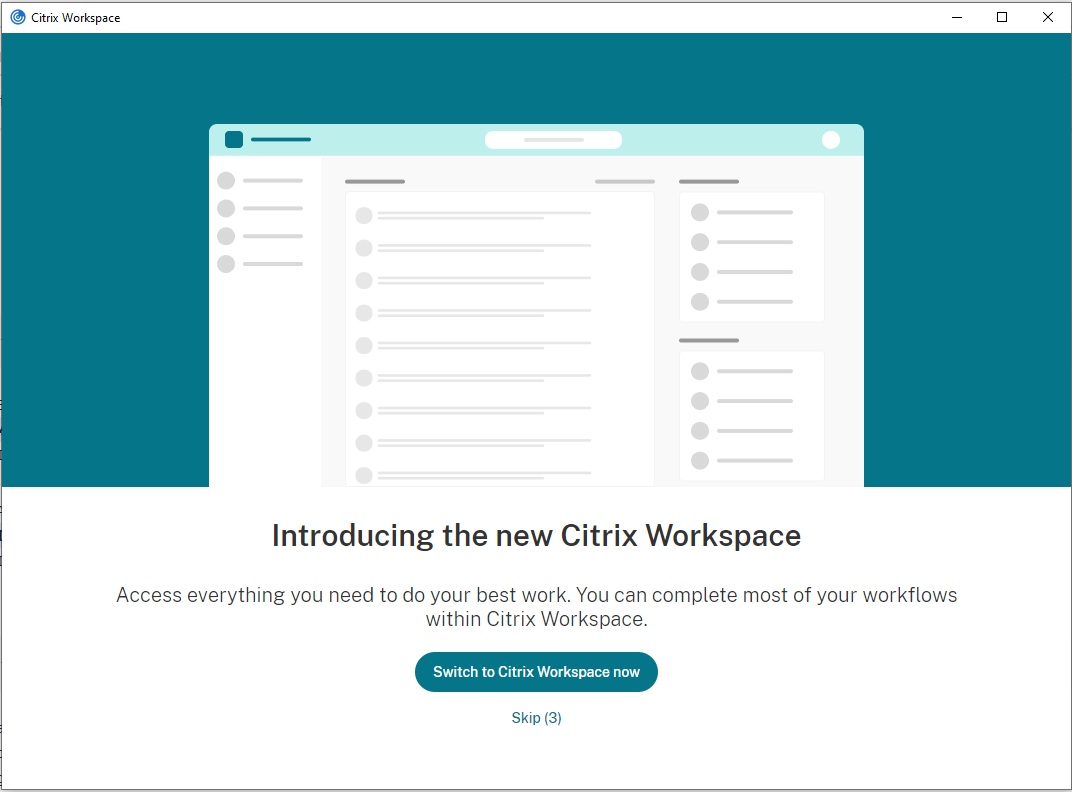
When the user clicks Switch to Citrix Workspace now, the cloud store URL is added to Citrix Workspace app and the authentication prompt appears. Users have a limited option to delay the transition up to three times.
Support for local app discovery within the Citrix Workspace app
Starting with the 2112.1 release, admins can configure the discovery and enumeration of locally installed apps within the Citrix Workspace app. You can configure this feature by using the Global App Configuration service. For more information, see Global App Configuration service. This feature is ideal for devices that runs in the kiosk mode and for those applications that can’t be virtualized within the Citrix Workspace.
Support for GACS claimed URLs for the US Gov region
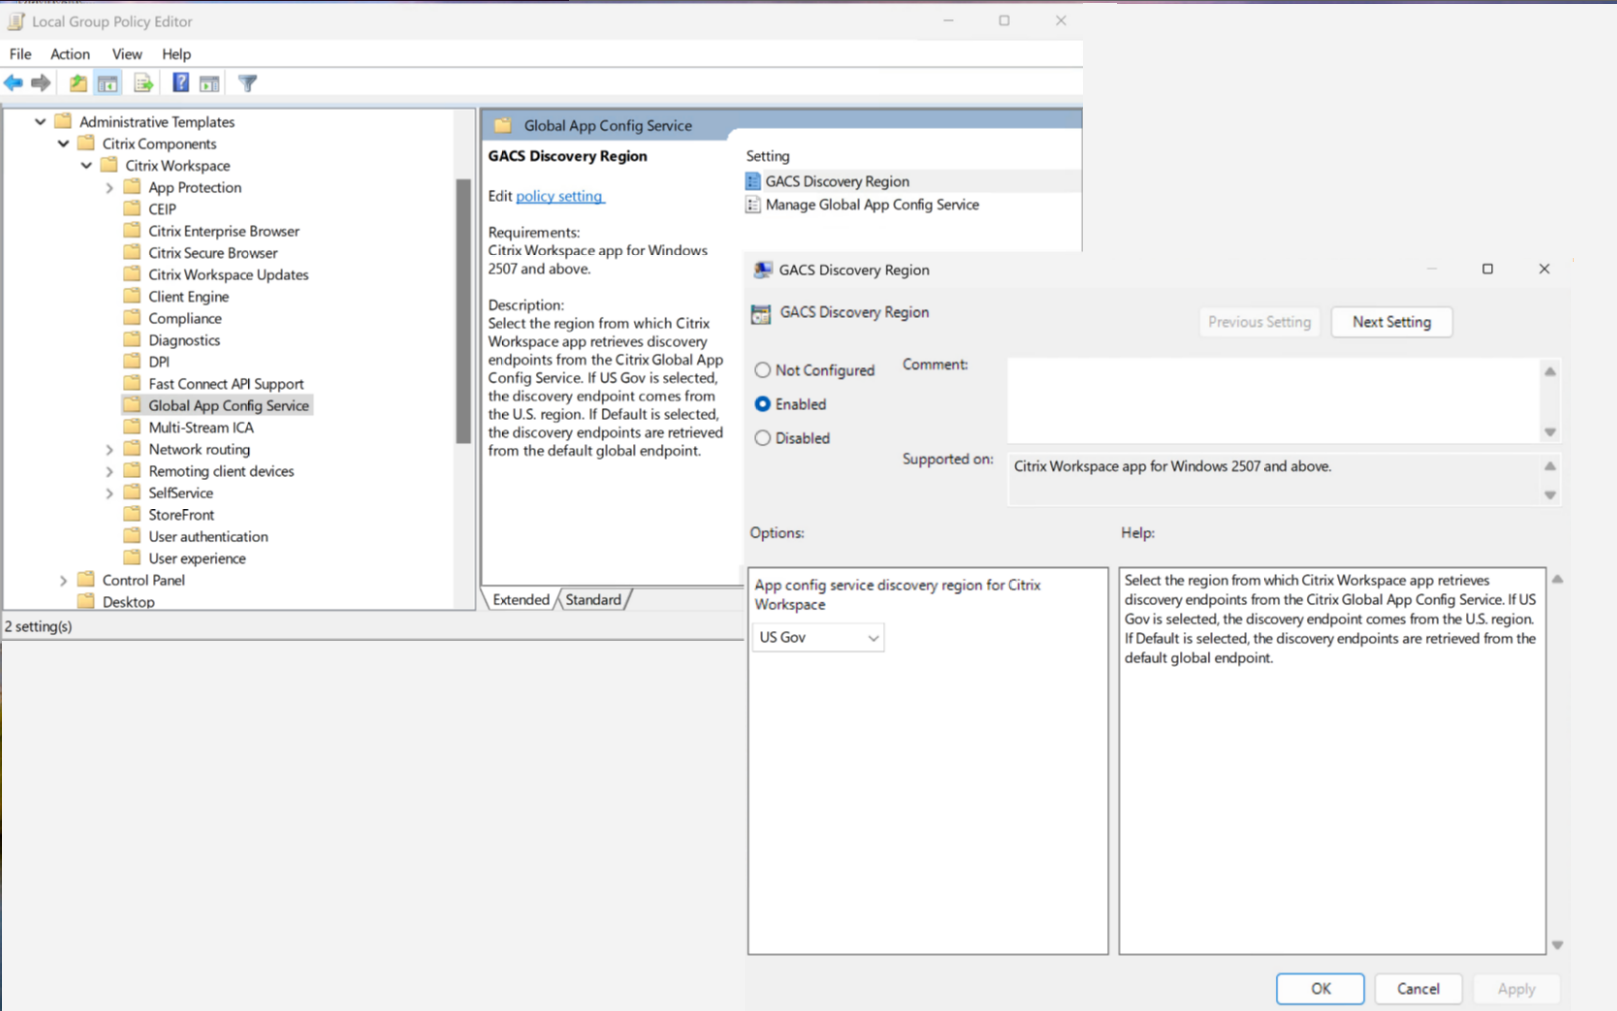
Starting with version 2507, Citrix Workspace app supports discovery of Global App Config Service (GACS) claimed URLs for the US Gov region alongside commercial cloud deployments.
You can select the region from which Citrix Workspace app retrieves discovery endpoints using the GACS Discovery Region policy setting.
-
Open the Citrix Workspace app Group Policy Object administrative template by running
gpedit.msc. -
Under the Computer Configuration node, go to Administrative Templates > Citrix Components > Citrix Workspace > Global App Config Service.
-
Select the GACS Discovery Region option.
-
Select Enabled.
-
Select one of the following options:
- US Gov - Discovery endpoint uses the U.S. region.
- Default - Discovery endpoints uses the default global endpoint.
For more information, see the following:
In this article
- Store
- Types of stores
- Adding a store to Citrix Workspace app
- Prevent users from adding stores to Citrix Workspace app for Windows
- Prevent users from using their store from a web browser
- Domain Name Service name resolution
- StoreFront to StoreFront Cloud Migration
- Support for local app discovery within the Citrix Workspace app
- Support for GACS claimed URLs for the US Gov region