Create Linux VDAs in Citrix DaaS Standard for Azure
You can create both domain-joined and non-domain-joined Linux VDAs in Citrix DaaS Standard for Azure (formerly Citrix Virtual Apps and Desktops Standard for Azure) to deliver virtual apps and desktops to any device from Microsoft Azure. Linux distributions supported by both the Linux VDA and Azure can use this feature. For more information, see Citrix DaaS Standard for Azure.
Step 1: Prepare a master image in Azure
Note:
You can also use the Linux VDA self-update feature to schedule automatic software updates. To achieve this goal, add command lines to the etc/xdl/mcs/mcs_local_setting.reg file on the master image. For example, you can add the following command lines:
create -k "HKLM\System\CurrentControlSet\Control\Citrix\SelfUpdate" -t "REG_DWORD" -v "fEnabled" -d "0x00000001" --force

create -k "HKLM\System\CurrentControlSet\Control\Citrix\SelfUpdate" -t "REG_SZ" -v "ScheduledTime" -d "Immediately" --force

create -k "HKLM\System\CurrentControlSet\Control\Citrix\SelfUpdate" -t "REG_SZ" -v "Url" -d "<Your-Azure-Container-Url>" --force

create -k "HKLM\System\CurrentControlSet\Control\Citrix\SelfUpdate" -t "REG_SZ" -v "CaCertificate" -d "<Local-Certificate-Path-of-PortalAzureCom>" --force
<!--NeedCopy-->
- In Azure, create a Linux VM of a supported distribution.
- Install a desktop environment on the Linux VM if necessary.
-
On the VM, install .NET based on your Linux distribution.
In addition to the .NET Runtime, you must install .ASP.NET Core Runtime on all supported Linux distributions before you install or upgrade the Linux VDA. Version 6 is required for Amazon Linux 2. Version 8 is required for other distributions.
If your Linux distribution contains the .NET version that you require, install it from the built-in feed. Otherwise, install .NET from the Microsoft package feed. For more information, see https://docs.microsoft.com/en-us/dotnet/core/install/linux-package-managers.
- (For Ubuntu only) Add the
source /etc/network/interfaces.d/*line to the/etc/network/interfacesfile. -
(For Ubuntu only) Point
/etc/resolv.confto/run/systemd/resolve/resolv.confinstead of pointing it to/run/systemd/resolve/stub-resolv.conf:unlink /etc/resolv.conf ln -s /run/systemd/resolve/resolv.conf /etc/resolv.conf <!--NeedCopy--> - Install the Linux VDA package.
-
Specify a database to use.
You can use SQLite or built-in registry service in addition to PostgreSQL. You can also switch between SQLite, PostgreSQL and built-in registry service after installing the Linux VDA package. To do so, complete the following steps:
-
Run
/opt/Citrix/VDA/sbin/ctxcleanup.sh. Omit this step if it is a fresh installation. -
Edit
/etc/xdl/db.confbefore runningdeploymcs.sh.Note:
- We recommend you use SQLite for VDI mode only.
- For easy install and MCS, you can switch between SQLite and PostgreSQL and built-in registry service without having to install them manually. Unless otherwise specified through
/etc/xdl/db.conf, the Linux VDA uses built-in registry service by default. If you require a custom version of PostgreSQL instead of the version provided by your Linux distribution, you must install the specified version manually, edit/etc/xdl/db.confto reflect the new version, and start the PostgreSQL service before running the easy install script (ctxinstall.sh) or the MCS script (deploymcs.sh). For an example db.conf file, see Step 7: Specify a database to use. - You can also use
/etc/xdl/db.confto configure the port number for PostgreSQL. - To use build-in registry service on RHEL9, RHEL10 and Rocky9, the CodeReady Builder repository is required to enable: RHEL9: subscription-manager repos –enable codeready-builder-for-rhel-9-$(arch)-rpms RHEL10: subscription-manager repos –enable codeready-builder-for-rhel-10-$(arch)-rpms Rocky9: dnf config-manager –enable crb
-
-
Change MCS variables.
There are two ways to configure MCS variables:
- Edit the
/etc/xdl/mcs/mcs.conffile. -
Use the easy install GUI. To open the easy install GUI, run the
/opt/Citrix/VDA/bin/easyinstallcommand in the desktop environment of your Linux VDA.Note:
Leave the
dnsvariable unspecified. If you select the Static or Random type when creating a machine catalog, setVDI_MODE=Y.If you configure MCS variables by editing
/etc/xdl/mcs/mcs.conf, run/opt/Citrix/VDA/sbin/deploymcs.sh. If you configure MCS variables by using the GUI, click Deploy. After you click Deploy on the GUI, the variables you set on the GUI override the variables you set in the/etc/xdl/mcs/mcs.conffile.
- Edit the
-
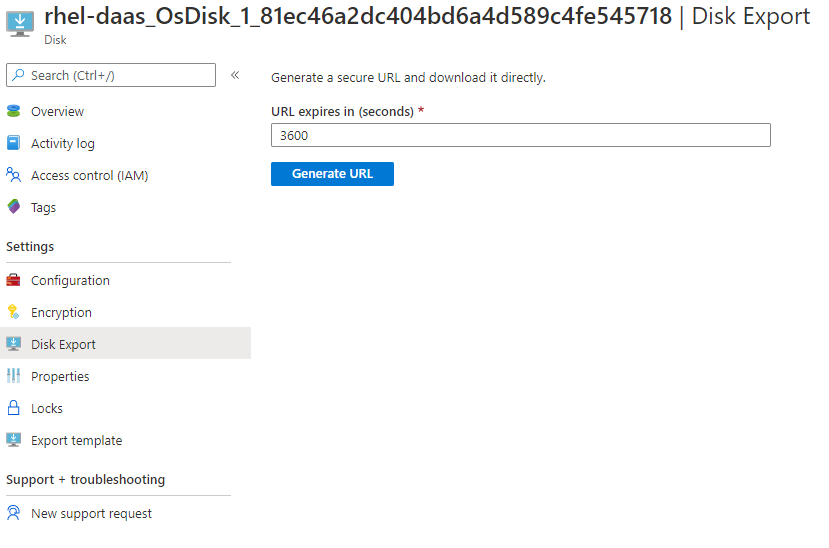
In Azure, stop (or deallocate) the VM. Click Disk Export to generate a SAS URL for the Virtual Hard Disk (VHD) file that you can use as a master image to create other VMs.
-
(Optional) Make group policy settings on the master image. You can use the
ctxregtool to make group policy settings. For example, the following command enables the Auto-create PDF Universal Printer policy for PDF printing./opt/Citrix/VDA/bin/ctxreg create -k "HKLM\Software\Citrix\GroupPolicy\Defaults\PrintingPolicies" -t "REG_DWORD" -v "AutoCreatePDFPrinter" -d "0x00000001" --force <!--NeedCopy-->
Step 2: Import the master image from Azure
-
From the Manage dashboard, expand Master Images on the right. The display lists the master images that Citrix provides, and images that you created and imported.
Tip:
Most of the administrator activities for this service are managed through the Manage and Monitor dashboards. After you create your first catalog, the Manage dashboard launches automatically after you sign in to Citrix Cloud™ and select the Managed Desktops service.
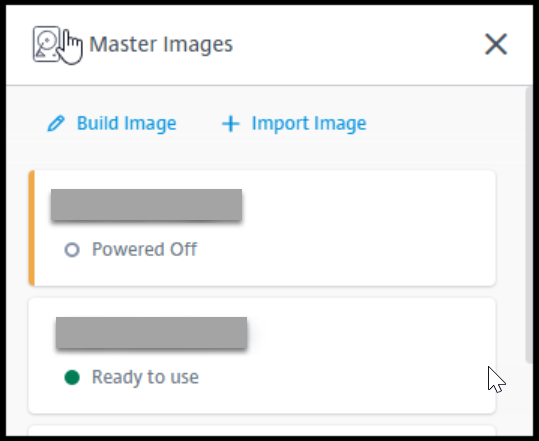
- Click Import Image.
-
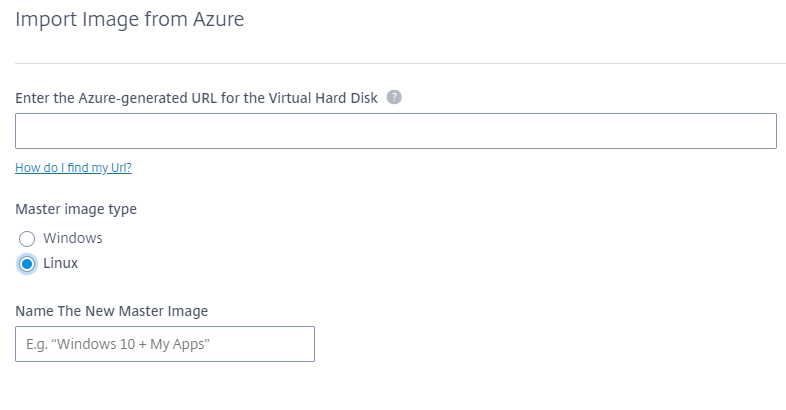
Enter the SAS URL for the VHD file that you generated in Azure. Select Linux for the master image type.
- Follow the instructions in the wizard to complete importing the master image.
Step 3: Create a machine catalog
Access the Manage dashboard and click Create Catalog. When creating the Machine Catalog, choose the master image you created earlier.
Note:
The VM used as a master image is not accessible through SSH or RDP. To access the VM, use the Serial Console in the Azure portal.