Install the Linux VDA on SUSE manually
Important:
For fresh installations, we recommend you use easy install for a quick installation. Easy install saves time and labor and is less error-prone than the manual installation detailed in this article.
Step 1: Prepare configuration information and the Linux machine
Step 1a: Launch the YaST tool
The SUSE Linux Enterprise YaST tool is used for configuring all aspects of the operating system.
To launch the text-based YaST tool:
su -

yast
<!--NeedCopy-->
To launch the UI-based YaST tool:
su -

yast2 &
<!--NeedCopy-->
Step 1b: Configure networking
The following sections provide information on configuring the various networking settings and services used by the Linux VDA. Configuring networking is carried out via the YaST tool, not via other methods such as Network Manager. These instructions are based on using the UI-based YaST tool. The text-based YaST tool can be used but has a different method of navigation that is not documented here.
Configure the host name and Domain Name System (DNS)
- Launch the UI-based YaST tool.
- Select System and then Network Settings.
- Open the Hostname/DNS tab.
- Select the no option for Set Hostname via DHCP.
- Select the Use Custom Policy option for Modify DNS Configuration.
-
Edit the following to reflect your networking setup:
- Static Hostname – Add the DNS host name of the machine.
- Name Server – Add the IP address of the DNS server. It is typically the IP address of the AD Domain Controller.
- Domain Search List – Add the DNS domain name.
-
Change the following line of the
/etc/hostsfile to include the FQDN and host name as the first two entries:127.0.0.1 <FQDN of the VDA> <hostname of the VDA> localhost
Note:
The Linux VDA currently does not support NetBIOS name truncation. Therefore, the host name must not exceed 15 characters. Tip:
Use a–z, A–Z, 0–9, and hyphen (-) characters only. Avoid underscores (_), spaces, and other symbols. Do not start a host name with a number and do not end with a hyphen. This rule also applies to Delivery Controller host names.
Check the host name
Verify that the host name is set correctly:
hostname
<!--NeedCopy-->
This command returns only the machine’s host name and not its Fully Qualified Domain Name (FQDN).
Verify that the FQDN is set correctly:
hostname -f
<!--NeedCopy-->
This command returns the machine’s FQDN.
Check name resolution and service reachability
Verify that you can resolve the FQDN and ping the domain controller and Delivery Controller™:
nslookup domain-controller-fqdn

ping domain-controller-fqdn

nslookup delivery-controller-fqdn

ping delivery-controller-fqdn
<!--NeedCopy-->
If you cannot resolve the FQDN or ping either of these machines, review the steps before proceeding.
Step 1c: Configure the NTP service
It is crucial to maintain accurate clock synchronization between the VDAs, Delivery Controllers, and domain controllers. Hosting the Linux VDA as a virtual machine (VM) can cause clock skew problems. For this reason, maintaining time using a remote NTP service is preferred. Some changes might be required to the default NTP settings.
For SUSE 15.6:
- Launch the UI-based YaST tool.
- Select Network Services and then NTP Configuration.
- In the Start NTP Daemon section, select Now and on Boot.
- Select Dynamic for Configuration Source.
- Add NTP servers as needed. The NTP service is normally hosted on the Active Directory domain controller.
-
Delete or comment the following line in /etc/chrony.conf if it exists.
include /etc/chrony.d/*.confAfter editing chrony.conf, restart the
chronydservice.sudo systemctl restart chronyd.service <!--NeedCopy-->
Step 1d: Install Linux VDA dependent packages
The Linux VDA software for SUSE Linux Enterprise depends on the following packages:
- Open Motif Runtime Environment 2.3.1 or later
- Cups 1.6.0 or later
- ImageMagick 6.8 or later
Add repositories
You can obtain most of the required packages except ImageMagick from the official repositories. To obtain the ImageMagick packages, enable the sle-module-desktop-applications repository by using YaST or the following command:
SUSEConnect -p sle-module-desktop-applications/<version number>/x86_64
Install the Kerberos client
Install the Kerberos client for mutual authentication between the Linux VDA and the Delivery Controllers:
sudo zypper install krb5-client
<!--NeedCopy-->
The Kerberos client configuration depends on which Active Directory integration approach is used. See the following description.
Install and specify a database to use
Note:
We recommend you use SQLite for VDI mode only and use PostgreSQL or built-in registry service for a hosted shared desktops delivery model.
For easy install and MCS, you can specify SQLite,PostgreSQL or built-in registry service to use without having to install them manually. Unless otherwise specified through /etc/xdl/db.conf, the Linux VDA uses built-in registry service by default. If you require a custom version of PostgreSQL instead of the version provided by your Linux distribution, you must install the specified version manually, edit
/etc/xdl/db.confto reflect the new version, and start the PostgreSQL service before running the easy install script (ctxinstall.sh) or the MCS script (deploymcs.sh).For manual installations, you must install SQLite, PostgreSQL, or both or or built-in registry service related dependencies manually. You can use a custom version of PostgreSQL instead of the version provided by your Linux distribution. If you install both SQLite and PostgreSQL, you can specify one of them to use by editing /etc/xdl/db.conf after installing the Linux VDA package.
Install PostgreSQL
This section describes how to install the version of PostgreSQL provided by your Linux distribution. If a custom version of PostgreSQL is necessary, you can install it based on your specific requirements.
To install Postgresql, run the following commands:
sudo zypper install postgresql-server

sudo zypper install postgresql-jdbc
<!--NeedCopy-->
Run the following commands to start PostgreSQL upon machine startup or immediately, respectively:
sudo systemctl enable postgresql

sudo systemctl restart postgresql
<!--NeedCopy-->
Install SQLite
For SUSE, run the following command to install SQLite:
sudo zypper install sqlite3
<!--NeedCopy-->
Install built-in registry service
Run the following command to install built-in registry service related dependencies:
sudo zypper install lmdb
<!--NeedCopy-->
Specify a database to use
If you install SQLite, PostgreSQL and built-in registry service you can specify one of them to use by editing /etc/xdl/db.conf after installing the Linux VDA package.
- Run /opt/Citrix/VDA/sbin/ctxcleanup.sh. Omit this step if it is a fresh installation.
-
Edit /etc/xdl/db.conf to specify a database to use. The following is an example db.conf file:
# database configuration file for Linux VDA ## database choice # possible choices are: # SQLite # PostgreSQL # ctxregd - use the built-in registry service # default choice is ctxregd DbType="ctxregd" ## database port # specify database port for the database. # if not specified, default port will be used: # SQLite: N/A # PostgreSQL: 5432 DbPort=5432 ## PostgreSQL customized # only the following value means true, otherwise false: # true # yes # y # YES # Y # default is false DbCustomizePostgreSQL=false ## PostgreSQL service name # specify the service name of PostgreSQL for Linux VDA # default is "postgresql" DbPostgreSQLServiceName="postgresql" <!--NeedCopy--> -
To use a custom version of PostgreSQL, set DbCustomizePostgreSQL to true.
- Run ctxsetup.sh.
Note:
You can also use /etc/xdl/db.conf to configure the port number for PostgreSQL.
Step 2: Prepare the hypervisor
Some changes are required when running the Linux VDA as a VM on a supported hypervisor. Make the following changes based on the hypervisor platform in use. No changes are required if you are running the Linux machine on bare metal hardware.
Fix time synchronization on XenServer (formerly Citrix Hypervisor™)
If the XenServer® Time Sync feature is enabled, within each paravirtualized Linux VM you experience issues with NTP and XenServer. Both try to manage the system clock. To avoid the clock becoming out of sync with other servers, synchronize the system clock within each Linux guest with NTP. This case requires disabling host time synchronization. No changes are required in HVM mode.
If you are running a paravirtualized Linux kernel with XenServer VM Tools installed, you can check whether the XenServer Time Sync feature is present and enabled from within the Linux VM:
su -

cat /proc/sys/xen/independent_wallclock
<!--NeedCopy-->
This command returns 0 or 1:
- 0 - The time sync feature is enabled, and must be disabled.
- 1 - The time sync feature is disabled, and no further action is required.
If the /proc/sys/xen/independent_wallclock file is not present, the following steps are not required.
If enabled, disable the time sync feature by writing 1 to the file:
sudo echo 1 > /proc/sys/xen/independent_wallclock
<!--NeedCopy-->
To make this change permanent and persistent after restart, edit the /etc/sysctl.conf file and add the line:
xen.independent_wallclock = 1
To verify these changes, restart the system:
reboot
<!--NeedCopy-->
After restart, verify that the setting is correct:
su -

cat /proc/sys/xen/independent_wallclock
<!--NeedCopy-->
This command returns the value 1.
Fix time synchronization on Microsoft Hyper-V
Linux VMs with Hyper-V Linux Integration Services installed can apply the Hyper-V time synchronization feature to use the host operating system’s time. To ensure that the system clock remains accurate, enable this feature alongside the NTP services.
From the management operating system:
- Open the Hyper-V Manager console.
- For the settings of a Linux VM, select Integration Services.
- Ensure that Time synchronization is selected.
Note:
This approach is different from VMware and XenServer (formerly Citrix Hypervisor), where host time synchronization is disabled to avoid conflicts with NTP. Hyper-V time synchronization can coexist and supplement NTP time synchronization.
Fix time synchronization on ESX and ESXi
If the VMware Time Synchronization feature is enabled, within each paravirtualized Linux VM you experience issues with NTP and the hypervisor. Both try to synchronize the system clock. To avoid the clock becoming out of sync with other servers, synchronize the system clock within each Linux guest with NTP. This case requires disabling host time synchronization.
If you are running a paravirtualized Linux kernel with VMware Tools installed:
- Open the vSphere Client.
- Edit settings for the Linux VM.
- In the Virtual Machine Properties dialog, open the Options tab.
- Select VMware Tools.
- In the Advanced box, clear Synchronize guest time with host.
Step 3: Add the Linux VM to the Windows domain
The following methods are available for adding Linux machines to the Active Directory (AD) domain:
Follow instructions based on your chosen method.
Note:
Session launches might fail when the same user name is used for the local account in the Linux VDA and for the account in AD.
Samba Winbind
Join Windows domain
Your domain controller must be reachable and you must have an Active Directory user account with permissions to add machines to the domain:
-
Launch YaST, select Network Services and then Windows Domain Membership.
-
Make the following changes:
- Set the Domain or Workgroup to the name of your Active Directory domain or the IP address of the domain controller. Ensure that the domain name is in uppercase.
- Check Use SMB information for Linux Authentication.
- Check Create Home Directory on Login.
- Check Single Sign-on for SSH.
- Ensure that Offline Authentication is not checked. This option is not compatible with the Linux VDA.
-
Click OK. If you are prompted to install some packages, click Install.
-
If a domain controller is found, it asks whether you want to join the domain. Click Yes.
-
When prompted, type the credentials of a domain user with permission to add machines to the domain and click OK.
-
Restart your services manually or restart the machine. We recommend you restart the machine:
su -
reboot
<!--NeedCopy-->
Verify domain membership
The Delivery Controller requires that all VDA machines (Windows and Linux VDAs) have a computer object in Active Directory.
Run the net ads command of Samba to verify that the machine is joined to a domain:
sudo net ads testjoin
<!--NeedCopy-->
Run the following command to verify extra domain and computer object information:
sudo net ads info
<!--NeedCopy-->
Verify Kerberos configuration
Make sure that the system keytab file has been created and contains valid keys:
sudo klist –ke
<!--NeedCopy-->
This command displays the list of keys available for the various combinations of principal names and cipher suites. Run the Kerberos kinit command to authenticate the machine with the domain controller using these keys:
sudo kinit -k MACHINE\$@REALM
<!--NeedCopy-->
The machine and realm names must be specified in uppercase. The dollar sign ($) must be escaped with a backslash (\) to prevent shell substitution. In some environments, the DNS domain name is different from the Kerberos realm name. Ensure that the realm name is used. If this command is successful, no output is displayed.
Verify that the TGT ticket for the machine account has been cached using:
sudo klist
<!--NeedCopy-->
Examine the machine account details using:
sudo net ads status
<!--NeedCopy-->
Verify user authentication
Use the wbinfo tool to verify that domain users can authenticate with the domain:
wbinfo --krb5auth=domain\\username%password
<!--NeedCopy-->
The domain specified here is the AD domain name, not the Kerberos realm name. For the bash shell, the backslash (\) character must be escaped with another backslash. This command returns a message indicating success or failure.
Verify that the Winbind PAM module is configured correctly. To do so, log on to the Linux VDA using a domain user account that has not been used before.
ssh localhost -l domain\\username
id -u
<!--NeedCopy-->
Verify that a corresponding Kerberos credential cache file was created for the uid returned by the id -u command:
ls /tmp/krb5cc_uid
<!--NeedCopy-->
Verify that the tickets in the user’s Kerberos credential cache are valid and not expired:
klist
<!--NeedCopy-->
Exit the session.
exit
<!--NeedCopy-->
A similar test can be performed by logging on to the Gnome or KDE console directly. Proceed to Step 6: Install the Linux VDA after the domain-joining verification.
Quest authentication service
Configure Quest on domain controller
Assume that you have installed and configured the Quest software on the domain controllers, and have been granted administrative privileges to create computer objects in Active Directory.
Enable domain users to log on to Linux VDA machines
To enable domain users to establish HDX™ sessions on a Linux VDA machine:
- In the Active Directory Users and Computers management console, open Active Directory user properties for that user account.
- Select the Unix Account tab.
- Check Unix-enabled.
- Set the Primary GID Number to the group ID of an actual domain user group.
Note:
These instructions are equivalent for setting up domain users for logon using the console, RDP, SSH, or any other remoting protocol.
Configure Quest on Linux VDA
Configure VAS daemon
Autorenewal of Kerberos tickets must be enabled and disconnected. Authentication (offline logon) must be disabled:
sudo /opt/quest/bin/vastool configure vas vasd auto-ticket-renew-interval 32400

sudo /opt/quest/bin/vastool configure vas vas_auth allow-disconnected-auth false
<!--NeedCopy-->
This command sets the renewal interval to nine hours (32,400 seconds) which is one hour less than the default 10-hour ticket lifetime. Set this parameter to a lower value on systems with a shorter ticket lifetime.
Configure PAM and NSS
To enable domain user logons through HDX and other services such as su, ssh, and RDP, configure PAM and NSS manually:
sudo /opt/quest/bin/vastool configure pam

sudo /opt/quest/bin/vastool configure nss
<!--NeedCopy-->
Join Windows domain
Join the Linux machine to the Active Directory domain using the Quest vastool command:
sudo /opt/quest/bin/vastool -u user join domain-name
<!--NeedCopy-->
The user is any domain user who has permission to join machines to the Active Directory domain. The domain-name is the DNS name of the domain, for example, example.com.
Restart the Linux machine after domain joining.
Verify domain membership
The Delivery Controller requires that all VDA machines (Windows and Linux VDAs) have a computer object in Active Directory. To verify that a Quest-joined Linux machine is on the domain:
sudo /opt/quest/bin/vastool info domain
<!--NeedCopy-->
If the machine is joined to a domain, this command returns the domain name. If the machine is not joined to any domain, the following error appears:
ERROR: No domain could be found.
ERROR: VAS_ERR_CONFIG: at ctx.c:414 in _ctx_init_default_realm
default_realm not configured in vas.conf. Computer may not be joined to domain
Verify user authentication
Verify that Quest can authenticate domain users through PAM. To do so, log on to the Linux VDA using a domain user account that has not been used before.
ssh localhost -l domain\\username
id -u
<!--NeedCopy-->
Verify that a corresponding Kerberos credential cache file was created for the uid returned by the id -u command:
ls /tmp/krb5cc_uid
<!--NeedCopy-->
Verify that the tickets in the Kerberos credential cache are valid and not expired:
/opt/quest/bin/vastool klist
<!--NeedCopy-->
Exit the session.
exit
<!--NeedCopy-->
A similar test can be performed by logging on to the Gnome or KDE console directly. Proceed to Step 6: Install the Linux VDA after the domain-joining verification.
Centrify DirectControl
Join Windows domain
With the Centrify DirectControl Agent installed, join the Linux machine to the Active Directory domain using the Centrify adjoin command:
sudo adjoin -w -V -u user domain-name
<!--NeedCopy-->
The user is any Active Directory domain user who has permission to join machines to the Active Directory domain. The domain-name is the name of the domain to join the Linux machine to.
Verify domain membership
The Delivery Controller requires that all VDA machines (Windows and Linux VDAs) have a computer object in Active Directory. To verify that a Centrify-joined Linux machine is on the domain:
sudo adinfo
<!--NeedCopy-->
Verify that the Joined to domain value is valid and the CentrifyDC mode returns connected. If the mode remains stuck in the starting state, then the Centrify client is experiencing server connection or authentication problems.
More comprehensive system and diagnostic information is available using:
adinfo --sysinfo all

adinfo –diag
<!--NeedCopy-->
Test connectivity to the various Active Directory and Kerberos services.
adinfo --test
<!--NeedCopy-->
Proceed to Step 6: Install the Linux VDA after the domain-joining verification.
SSSD
If you are using SSSD on SUSE, follow the instructions in this section. This section includes instructions for joining a Linux VDA machine to a Windows domain and provides guidance for configuring Kerberos authentication.
To set up SSSD on SUSE, complete the following steps:
- Join the domain and create a host keytab
- Configure PAM for SSSD
- Set up SSSD
- Enable SSSD
- Verify domain membership
- Verify the Kerberos configuration
- Verify user authentication
Join the domain and create a host keytab
SSSD does not provide Active Directory client functions for joining the domain and managing the system keytab file. You can use the Samba approach instead. Complete the following steps before configuring SSSD.
-
Stop and disable the Name Service Cache Daemon (NSCD) daemon.
sudo systemctl stop nscd sudo systemctl disable nscd <!--NeedCopy--> -
Check the host name and Chrony time synchronization.
hostname hostname -f chronyc traking <!--NeedCopy--> -
Install or update the required packages:
sudo zypper install samba-client sssd-ad <!--NeedCopy--> -
Edit the
/etc/krb5.conffile as a root user to permit the kinit utility to communicate with the target domain. Add the following entries under the [libdefaults], [realms], and [domain_realm] sections:Note:
Configure Kerberos based on your AD infrastructure. The following settings are meant for the single-domain, single-forest model.
[libdefaults]

    dns_canonicalize_hostname = false

    rdns = false

    default_realm = REALM

    forwardable = true

[realms]

    REALM = {

        kdc = fqdn-of-domain-controller

        default_domain = realm

        admin_server = fqdn-of-domain-controller
    }
[domain_realm]

    .realm = REALM
<!--NeedCopy-->
realm is the Kerberos realm name, such as example.com. REALM is the Kerberos realm name in uppercase, such as EXAMPLE.COM.
-
Edit
/etc/samba/smb.confas a root user to permit the net utility to communicate with the target domain. Add the following entries under the [global] section:[global] workgroup = domain client signing = yes client use spnego = yes kerberos method = secrets and keytab realm = REALM security = ADS <!--NeedCopy-->domain is the short NetBIOS name of an Active Directory domain, such as EXAMPLE.
-
Modify the passwd and group entries in the /etc/nsswitch.conf file to reference SSSD when resolving users and groups.
passwd: compat sss group: compat sss <!--NeedCopy--> -
Use the configured Kerberos client to authenticate to the target domain as Administrator.
kinit administrator <!--NeedCopy--> -
Use the net utility to join the system to the domain and generate a system keytab file.
net ads join osname="SUSE Linux Enterprise Server" osVersion=15 -U administrator
<!--NeedCopy-->
Configure PAM for SSSD
Before configuring PAM for SSSD, install or update the required packages:
sudo zypper install sssd sssd-ad
<!--NeedCopy-->
Configure the PAM module for user authentication through SSSD and create home directories for user logons.
sudo pam-config --add  --sss
sudo pam-config --add --mkhomedir
<!--NeedCopy-->
Set up SSSD
-
Edit
/etc/sssd/sssd.confas a root user to permit the SSSD daemon to communicate with the target domain. An examplesssd.confconfiguration (extra options can be added as needed):[sssd] config_file_version = 2 services = nss,pam domains = domain-dns-name [domain/domain-dns-name] id_provider = ad auth_provider = ad access_provider = ad ad_domain = domain-dns-name ad_server = fqdn-of-domain-controller ldap_id_mapping = true ldap_schema = ad # Kerberos settings krb5_ccachedir = /tmp krb5_ccname_template = FILE:%d/krb5cc_%U # Comment out if the users have the shell and home dir set on the AD side fallback_homedir = /home/%d/%u default_shell = /bin/bash # Uncomment and adjust if the default principal SHORTNAME$@REALM is not available # ldap_sasl_authid = host/client.ad.example.com@AD.EXAMPLE.COM ad_gpo_access_control = permissive <!--NeedCopy-->domain-dns-name is the DNS domain name, such as example.com.
Note:
ldap_id_mapping is set to true so that SSSD itself takes care of mapping Windows SIDs to Unix UIDs. Otherwise, the Active Directory must be able to provide POSIX extensions. ad_gpo_access_control is set to permissive to prevent an invalid logon error for Linux sessions. See the man pages for
sssd.confandsssd-ad. -
Set the file ownership and permissions on
sssd.conf:sudo chmod 0600 /etc/sssd/sssd.conf <!--NeedCopy-->
Enable SSSD
Run the following commands to enable and start the SSSD daemon at system startup:
sudo systemctl enable sssd
sudo systemctl start sssd
<!--NeedCopy-->
Verify domain membership
-
Run the
net adscommand of Samba to verify that the machine is joined to a domain:sudo net ads testjoin <!--NeedCopy--> -
Run the following command to verify extra domain and computer object information:
sudo net ads info
<!--NeedCopy-->
Verify Kerberos configuration
Make sure that the system keytab file has been created and contains valid keys:
sudo klist -ke
<!--NeedCopy-->
This command displays the list of keys available for the various combinations of principal names and cipher suites.
Run the Kerberos kinit command to authenticate the machine with the domain controller using these keys:
sudo kinit –k MACHINE\$@REALM
<!--NeedCopy-->
The machine and realm names must be specified in uppercase. The dollar sign ($) must be escaped with a backslash (\) to prevent shell substitution. In some environments, the DNS domain name is different from the Kerberos realm name. Ensure that the realm name is used. If this command is successful, no output is displayed.
Verify that the TGT ticket for the machine account has been cached using:
sudo klist
<!--NeedCopy-->
Verify user authentication
SSSD does not provide a command-line tool for testing authentication directly with the daemon, and can only be done via PAM.
To verify that the SSSD PAM module is configured correctly, log on to the Linux VDA using a domain user account that has not been used before.
ssh localhost -l domain\\username

id -u

klist

exit
<!--NeedCopy-->
Verify that the Kerberos tickets returned by the klist command are correct for that user and have not expired.
As a root user, verify that a corresponding ticket cache file was created for the uid returned by the previous id -u command:
ls /tmp/krb5cc_uid
<!--NeedCopy-->
A similar test can be performed by logging on to the Gnome or KDE console directly. Proceed to Step 6: Install the Linux VDA after the domain-joining verification.
PBIS
Download the required PBIS package
For example:
wget https://github.com/BeyondTrust/pbis-open/releases/download/9.1.0/pbis-open-9.1.0.551.linux.x86_64.rpm.sh
<!--NeedCopy-->
Make the PBIS installation script executable
For example:
chmod +x pbis-open-9.1.0.551.linux.x86_64.rpm.sh
<!--NeedCopy-->
Run the PBIS installation script
For example:
sh pbis-open-9.1.0.551.linux.x86_64.rpm.sh
<!--NeedCopy-->
Join a Windows domain
Your domain controller must be reachable and you must have an Active Directory user account with permissions to add machines to the domain:
/opt/pbis/bin/domainjoin-cli join domain-name user
<!--NeedCopy-->
The user is a domain user who has permissions to add machines to the Active Directory domain. The domain-name is the DNS name of the domain, for example, example.com.
Note: To set Bash as the default shell, run the /opt/pbis/bin/config LoginShellTemplate/bin/bash command.
Verify domain membership
The Delivery Controller requires that all VDA machines (Windows and Linux VDAs) have a computer object in Active Directory. To verify that a PBIS-joined Linux machine is on the domain:
/opt/pbis/bin/domainjoin-cli query
<!--NeedCopy-->
If the machine is joined to a domain, this command returns the information about the currently joined AD domain and OU. Otherwise, only the host name appears.
Verify user authentication
Verify that PBIS can authenticate domain users through PAM. To do so, log on to the Linux VDA using a domain user account that has not been used before.
ssh localhost -l domain\\user

id -u
<!--NeedCopy-->
Verify that a corresponding Kerberos credential cache file was created for the UID returned by the id -u command:
ls /tmp/krb5cc_uid
<!--NeedCopy-->
Exit the session.
exit
<!--NeedCopy-->
Proceed to Step 6: Install the Linux VDA after the domain-joining verification.
Step 4: Install .NET
In addition to the .NET Runtime, you must install .ASP.NET Core Runtime on all supported Linux distributions before you install or upgrade the Linux VDA. Version 6 is required for Amazon Linux 2. Version 8 is required for other distributions.
If your Linux distribution contains the .NET version that you require, install it from the built-in feed. Otherwise, install .NET from the Microsoft package feed. For more information, see https://docs.microsoft.com/en-us/dotnet/core/install/linux-package-managers.
After installing .NET, run the which dotnet command to find your runtime path.
Based on the command output, set the .NET runtime binary path. For example, if the command output is /aa/bb/dotnet, use /aa/bb as the .NET binary path.
Step 5: Download the Linux VDA package
- Go to the Citrix Virtual Apps and Desktops download page.
- Expand the appropriate version of Citrix Virtual Apps and Desktops.
-
Expand Components to find the Linux VDA. For example:
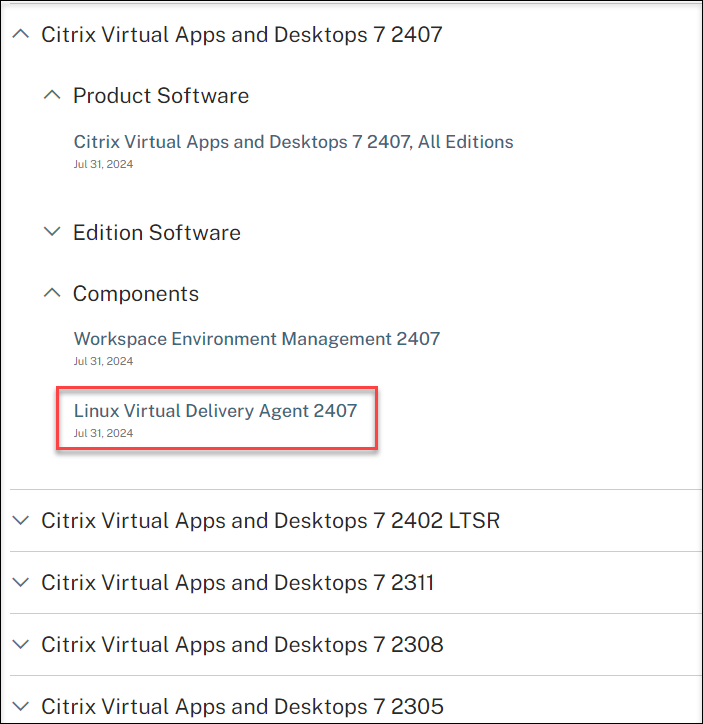
-
Click the Linux VDA link to access the Linux VDA downloads.
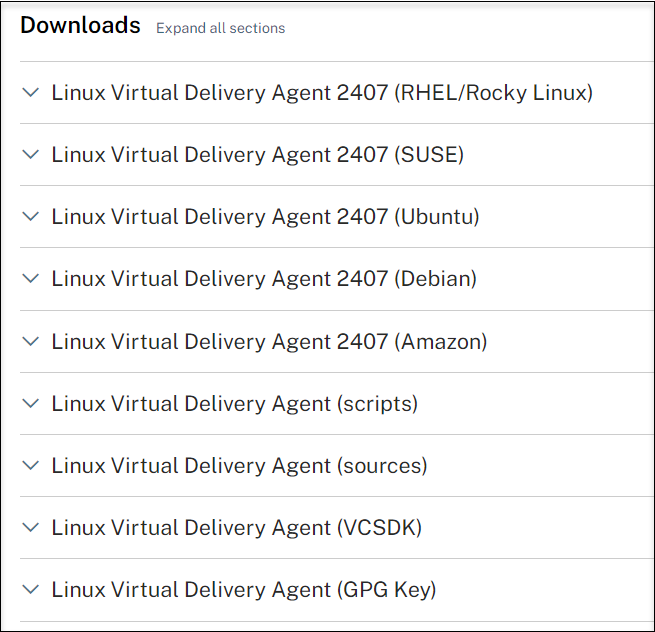
-
Download the Linux VDA package that matches your Linux distribution.
-
Download the GPG public key that you can use to verify the integrity of the Linux VDA package. For example:
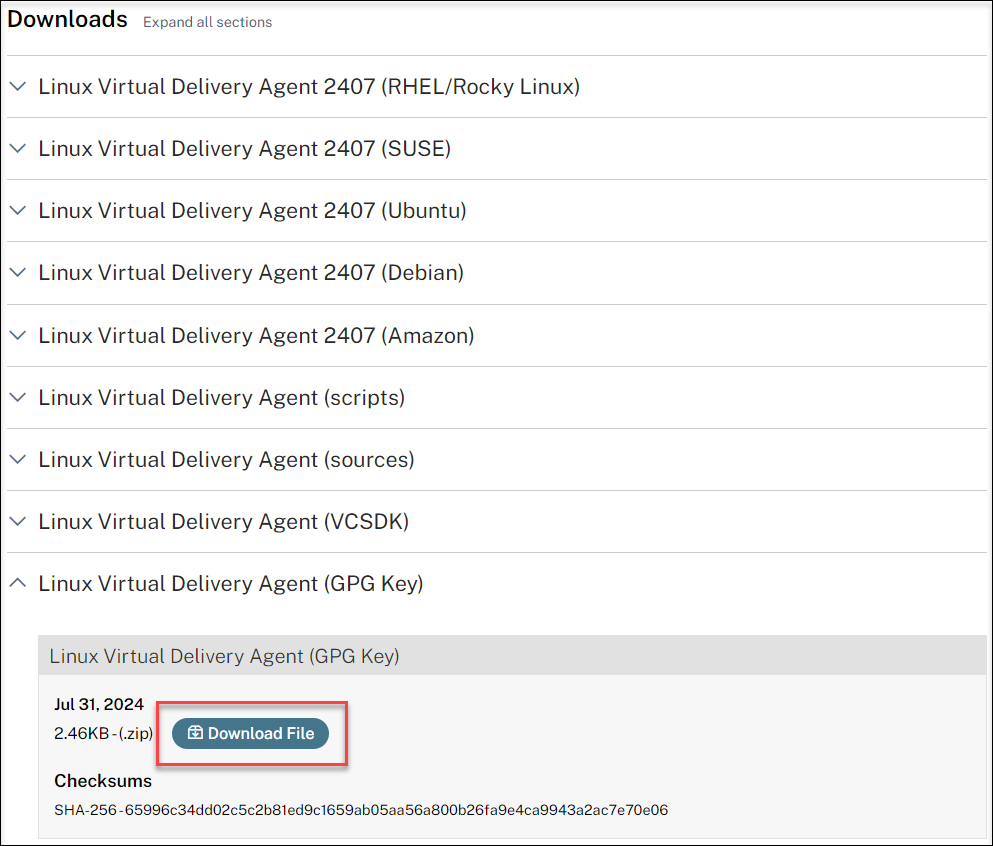
To verify the integrity of the Linux VDA package by using the public key, run the following commands to import the public key into the RPM database and to check the package integrity:
rpmkeys --import <path to the public key>
rpm --checksig --verbose <path to the Linux VDA package>
<!--NeedCopy-->
Step 6: Install the Linux VDA
Step 6a: Uninstall the old version
If you installed an earlier version other than the previous two and an LTSR release, uninstall it before installing the new version.
-
Stop the Linux VDA services:
sudo systemctl stop ctxvda

sudo systemctl stop ctxhdx
<!--NeedCopy-->
Note:
Before you stop the ctxvda and ctxhdx services, run the systemctl stop ctxmonitord command to stop the monitor service daemon. Otherwise, the monitor service daemon restarts the services you stopped.
-
Uninstall the package:
sudo rpm -e XenDesktopVDA
<!--NeedCopy-->
Important:
Upgrading from the latest two versions is supported.
Note:
You can find installed components under /opt/Citrix/VDA/.
To run a command, the full path is needed; alternatively, you can add /opt/Citrix/VDA/sbin and /opt/Citrix/VDA/bin to the system path.
Step 6b: Install the Linux VDA
Install the Linux VDA software using Zypper:
sudo zypper install XenDesktopVDA-<version>.sle15_x.x86_64.rpm
<!--NeedCopy-->
Step 6c: Upgrade the Linux VDA (optional)
The Linux VDA supports upgrades from the most recent version. For example, you can upgrade the Linux VDA from 2308 to 2311 and from 1912 LTSR to 2203 LTSR.
Note:
Upgrading an existing installation overwrites the configuration files under /etc/xdl. Before you conduct an upgrade, make sure to back up the files.
sudo zypper -i install <PATH>/<Linux VDA RPM>
<!--NeedCopy-->
RPM Dependency list for SUSE 15:
java-17-openjdk >= 17
ImageMagick >= 7.0
dbus-1 >= 1.12.2
dbus-1-x11 >= 1.12.2
xorg-x11 >= 7.6_1
libXpm4 >= 3.5.12
libXrandr2 >= 1.5.1
libXtst6 >= 1.2.3
pam >= 1.3.0
bash >= 4.4
findutils >= 4.6
gawk >= 4.2
sed >= 4.4
cups >= 2.2
cups-filters >= 1.25
libxml2-2 >= 2.9
libmspack0 >= 0.6
ibus >= 1.5
libQt5DBus5 >= 5.12
libtcmalloc4 >= 2.5
libcap-progs >= 2.26
mozilla-nss-tools >= 3.53.1
libpython3_6m1_0 >= 3.6~
libQt5Widgets5 >= 5.12
libqrencode4 >= 4.0.0
libImlib2-1 >= 1.4.10
libgtk-2_0-0 >= 2.24
libgthread-2_0-0 >= 2.48
pulseaudio-utils >= 5.0
lsb-release >= 2.0
pkexec >= 121
cyrus-sasl-gssapi >= 2.1
libfuse2 >= 2.9
<!--NeedCopy-->
Important:
Restart the Linux VDA machine after upgrading.
Step 7: Install NVIDIA GRID drivers
Enabling HDX 3D Pro requires you to install the NVIDIA GRID drivers on your hypervisor and on the VDA machines.
To install and configure the NVIDIA GRID Virtual GPU Manager (the host driver) on the specific hypervisors, see the following guides:
To install and configure the NVIDIA GRID guest VM drivers, perform the following general steps:
- Make sure that the guest VM is shut down.
- In the hypervisor control panel, allocate a GPU to the VM.
- Start the VM.
- Install the guest VM driver (from your cloud vendor or NVIDIA) on the VM.
Step 8: Configure the Linux VDA
Note:
Before setting up the runtime environment, ensure that the en_US.UTF-8 locale is installed on your OS. If the locale is not available on your OS, run the sudo locale-gen en_US.UTF-8 command. For Debian, edit the /etc/locale.gen file by uncommenting the # en_US.UTF-8 UTF-8 line and then run the sudo locale-gen command.
After installing the package, you must configure the Linux VDA by running the ctxsetup.sh script. Before the script makes any changes, it verifies the environment and ensures that all dependencies are installed. If necessary, you can rerun the script at any time to change settings.
You can run the script manually with prompting, or automatically with preconfigured responses. Review Help about the script before proceeding:
sudo /opt/Citrix/VDA/sbin/ctxsetup.sh –help
<!--NeedCopy-->
Prompted configuration
Run a manual configuration with prompted questions:
sudo /opt/Citrix/VDA/sbin/ctxsetup.sh
<!--NeedCopy-->
Automated configuration
For an automated installation, provide the options required by the setup script with environment variables. If all required variables are present, the script does not prompt for any information.
Supported environment variables include:
-
CTX_XDL_NON_DOMAIN_JOINED=’y|n’ – Whether to join the machine to a domain. The default value is ‘n’. For domain-joined scenarios, set it to ‘n’.
-
CTX_XDL_AD_INTEGRATION=’winbind|sssd|centrify|pbis|quest’ – The Linux VDA requires Kerberos configuration settings to authenticate with the Delivery Controllers. The Kerberos configuration is determined from the installed and configured Active Directory integration tool on the system.
-
CTX_XDL_DDC_LIST=’<list-ddc-fqdns>‘ – The Linux VDA requires a space-separated list of Delivery Controller Fully Qualified Domain Names (FQDNs) to use for registering with a Delivery Controller. At least one FQDN or CNAME must be specified.
-
CTX_XDL_VDI_MODE=’y|n’ – Whether to configure the machine as a dedicated desktop delivery model (VDI) or hosted shared desktop delivery model. For HDX 3D Pro environments, set the value to ‘y’.
-
CTX_XDL_HDX_3D_PRO=’y|n’ – The Linux VDA supports HDX 3D Pro, a set of GPU acceleration technologies designed to optimize the virtualization of rich graphics applications. If HDX 3D Pro is selected, the VDA is configured for VDI desktops (single-session) mode - (that is, CTX_XDL_VDI_MODE=‘y’).
-
CTX_XDL_START_SERVICE=’y|n’ – Determines whether the Linux VDA services are started when the configuration is complete.
-
CTX_XDL_REGISTER_SERVICE=’y|n’ – The Linux Virtual Desktop services are started after machine startup.
-
CTX_XDL_ADD_FIREWALL_RULES=’y|n’ – The Linux VDA services require incoming network connections to be allowed through the system firewall. You can open the required ports (by default ports 80 and 1494) automatically in the system firewall for the Linux Virtual Desktop.
-
CTX_XDL_DESKTOP_ENVIRONMENT=gnome/gnome-classic/mate/’<none>‘ – Specifies the GNOME, GNOME Classic, or MATE desktop environment to use in sessions. If you set it to ‘<none>‘, the default desktop configured on the VDA is used.
You can also switch between desktop environments by running commands or using the system tray. For more information, see Desktop switching commands and System tray.
-
CTX_XDL_DOTNET_RUNTIME_PATH=path-to-install-dotnet-runtime – The path to install .NET for supporting the new broker agent service (ctxvda). The default path is ‘/usr/bin’.
-
CTX_XDL_VDA_PORT=port-number – The Linux VDA communicates with Delivery Controllers through a TCP/IP port.
-
CTX_XDL_SITE_NAME=<dns-name> – The Linux VDA discovers LDAP servers through DNS. To limit the DNS search results to a local Site, specify a DNS Site name. If unnecessary, set to ‘<none>‘.
-
CTX_XDL_LDAP_LIST=’<list-ldap-servers>‘ – The Linux VDA queries DNS to discover LDAP servers. If DNS cannot provide LDAP service records, you can provide a space-separated list of LDAP FQDNs with LDAP ports. For example, ad1.mycompany.com:389 ad2.mycompany.com:3268 ad3.mycompany.com:3268. To enable faster LDAP queries within an Active Directory forest, enable Global Catalog on a domain controller and specify the relevant LDAP port number as 3268. This variable is set to ‘<none>‘ by default.
-
CTX_XDL_SEARCH_BASE=search-base-set – The Linux VDA queries LDAP through a search base set to the root of the Active Directory Domain (for example, DC=mycompany,DC=com). To improve search performance, you can specify a search base (for example, OU=VDI,DC=mycompany,DC=com). If unnecessary, set to ‘<none>‘.
-
CTX_XDL_SUPPORT_DDC_AS_CNAME=’y|n’ – The Linux VDA supports specifying a Delivery Controller name using a DNS CNAME record.
Set the environment variable and run the configuration script:
export CTX_XDL_NON_DOMAIN_JOINED='n'
export CTX_XDL_AD_INTEGRATION=sssd|winbind|centrify|pbis|quest
export CTX_XDL_DDC_LIST='<list-ddc-fqdns>'
export CTX_XDL_VDI_MODE='y|n'
export CTX_XDL_HDX_3D_PRO='y|n'
export CTX_XDL_START_SERVICE='y|n'
export CTX_XDL_REGISTER_SERVICE='y|n'
export CTX_XDL_ADD_FIREWALL_RULES='y|n'
export CTX_XDL_DESKTOP_ENVIRONMENT= gnome|gnome-classic|mate|'<none>'
export CTX_XDL_DOTNET_RUNTIME_PATH='<path-to-install-dotnet-runtime>'
export CTX_XDL_VDA_PORT='<port-number>'
export CTX_XDL_SITE_NAME='<dns-site-name>'|'<none>'
export CTX_XDL_LDAP_LIST='<list-ldap-servers>'|'<none>'
export CTX_XDL_SEARCH_BASE='<search-base-set>'|'<none>'
export CTX_XDL_SUPPORT_DDC_AS_CNAME='y|n'
sudo -E /opt/Citrix/VDA/sbin/ctxsetup.sh --silent
<!--NeedCopy-->
When running the sudo command, type the -E option to pass the existing environment variables to the new shell it creates. We recommend that you create a shell script file from the preceding commands with #!/bin/bash as the first line.
Alternatively, you can specify all parameters by using a single command:
sudo CTX_XDL_NON_DOMAIN_JOINED='n' \
CTX_XDL_AD_INTEGRATION=winbind|centrify|sssd|pbis|quest \
CTX_XDL_DDC_LIST='<list-ddc-fqdns>' \
CTX_XDL_VDI_MODE='y|n' \
CTX_XDL_HDX_3D_PRO='y|n' \
CTX_XDL_START_SERVICE='y|n' \
CTX_XDL_REGISTER_SERVICE='y|n' \
CTX_XDL_ADD_FIREWALL_RULES='y|n' \
CTX_XDL_DESKTOP_ENVIRONMENT= gnome|gnome-classic|mate|'<none>' \
CTX_XDL_DOTNET_RUNTIME_PATH='<path-to-install-dotnet-runtime>' \
CTX_XDL_VDA_PORT='<port-number>' \
CTX_XDL_SITE_NAME='<dns-site-name>'|'<none>' \
CTX_XDL_LDAP_LIST='<list-ldap-servers>'|'<none>' \
CTX_XDL_SEARCH_BASE='<search-base-set>'|'<none>' \
CTX_XDL_SUPPORT_DDC_AS_CNAME='y|n' \
/opt/Citrix/VDA/sbin/ctxsetup.sh --silent
<!--NeedCopy-->
Remove configuration changes
In some scenarios, you might have to remove the configuration changes made by the ctxsetup.sh script without uninstalling the Linux VDA package.
Review Help about this script before proceeding:
sudo /usr/local/sbin/ctxcleanup.sh --help
<!--NeedCopy-->
To remove configuration changes:
sudo /usr/local/sbin/ctxcleanup.sh
<!--NeedCopy-->
Important:
This script deletes all configuration data from the database and renders the Linux VDA inoperable.
Configuration logs
The ctxsetup.sh and ctxcleanup.sh scripts display errors on the console, with additional information written to a configuration log file:
/tmp/xdl.configure.log
Restart the Linux VDA services to have the changes take effect.
Step 9: Run XDPing
Run sudo /opt/Citrix/VDA/bin/xdping to check for common configuration issues with a Linux VDA environment. For more information, see XDPing.
Step 10: Run the Linux VDA
After configuring the Linux VDA by using the ctxsetup.sh script, you can run the following commands to control the Linux VDA.
Start the Linux VDA:
To start the Linux VDA services:
sudo systemctl start ctxhdx

sudo systemctl start ctxvda
<!--NeedCopy-->
Stop the Linux VDA:
To stop the Linux VDA services:
sudo systemctl stop ctxvda

sudo systemctl stop ctxhdx
<!--NeedCopy-->
Note:
Before you stop the ctxvda and ctxhdx services, run the systemctl stop ctxmonitord command to stop the monitor service daemon. Otherwise, the monitor service daemon restarts the services you stopped.
Restart the Linux VDA:
To restart the Linux VDA services:
sudo systemctl stop ctxvda

sudo systemctl restart ctxhdx

sudo systemctl restart ctxvda
<!--NeedCopy-->
Check the Linux VDA status:
To check the running status of the Linux VDA services:
sudo systemctl status ctxvda

sudo systemctl status ctxhdx
<!--NeedCopy-->
Step 11: Create machine catalogs
The process for creating machine catalogs and adding Linux VDA machines is similar to the traditional Windows VDA approach. For a more detailed description of how to complete these tasks, see Create machine catalogs and Manage machine catalogs.
For creating machine catalogs that contain Linux VDA machines, there are a few restrictions that differentiate the process from creating machine catalogs for Windows VDA machines:
- For the operating system, select:
- The Multi-session OS option for a hosted shared desktops delivery model.
- The Single-session OS option for a VDI dedicated desktop delivery model.
- Do not mix Linux and Windows VDA machines in the same machine catalog.
Note:
Early versions of Citrix Studio did not support the notion of a “Linux OS.” However, selecting the Windows Server OS or Server OS option implies an equivalent hosted shared desktops delivery model. Selecting the Windows Desktop OS or Desktop OS option implies a single user per machine delivery model.
Tip:
If you remove and rejoin a machine to the Active Directory domain, you must remove and add the machine to the machine catalog again.
Step 12: Create delivery groups
The process for creating a delivery group and adding machine catalogs containing Linux VDA machines is almost identical to Windows VDA machines. For a more detailed description of how to complete these tasks, see Create delivery groups.
For creating delivery groups that contain Linux VDA machine catalogs, the following restrictions apply:
- Make sure that the AD users and groups that you select have been properly configured to log on to the Linux VDA machines.
- Do not allow logon of unauthenticated (anonymous) users.
- Do not mix the delivery group with machine catalogs that contain Windows machines.
Important:
Publishing applications is supported with Linux VDA Version 1.4 and later. However, the Linux VDA does not support the delivery of desktops and apps to the same machine.
For information about how to create machine catalogs and delivery groups, see Citrix Virtual Apps and Desktops 7 2503.
In this article
- Step 1: Prepare configuration information and the Linux machine
- Step 2: Prepare the hypervisor
- Step 3: Add the Linux VM to the Windows domain
- Step 4: Install .NET
- Step 5: Download the Linux VDA package
- Step 6: Install the Linux VDA
- Step 7: Install NVIDIA GRID drivers
- Step 8: Configure the Linux VDA
- Step 9: Run XDPing
- Step 10: Run the Linux VDA
- Step 11: Create machine catalogs
- Step 12: Create delivery groups