PoC Guide: Configuring Non-Domain Joined Virtual Desktops in Citrix DaaS
Overview
Many organizations need to support non-domain joined solutions where the Citrix-accessed virtual machine is not managed through Active Directory. Several use cases that can require this type of configuration include:
- Providing non-domain joined desktops to developers or contractors where local administrator rights are needed to install specific applications.
- Researchers in the healthcare space that require these same rights.
- Temporary workforce where the workload are only needed for a short time.
With Citrix DaaS and Citrix Gateway service support for non-domain joined Virtual Delivery Agents (VDA), this is achievable.
The following guide provides the requirements and step-by-step instructions to create and configure a non-domain joined Windows 11 virtual machine hosted in Azure, a machine catalog and delivery group using Citrix DaaS, and access to end users via Citrix Workspace™ or Citrix Workspace app.
Requirements and Prerequisites
Review the requirements for creating and accessing non-domain joined virtual machines via Citrix DaaS. Both single-session (desktops only) and multi-session (apps and desktops) are supported.
For this POC Guide, the following are being used:
- A current Citrix DaaS subscription.
- Single-session Windows 11 image hosted in Azure.
- Citrix VDA 2303
- Rendezvous v2 enabled.
- Azure Active Directory for Citrix Workspace authentication.
Note
Service continuity is not supported for non-domain joined VDAs.
Enable Authentication for Citrix Workspace
Citrix Workspace supports several authentication identity providers to allow users access to non-domain joined virtual machines including:
- Azure Active Directory
- Active Directory
- Active Directory and Token
- Okta
- Google IdP
- SAML
- Citrix Gateway
- Adaptive Authentication
Azure Active Directory is being used for this POC Guide. Ensure that the authentication option you have chosen is connected to your Citrix Cloud tenant in Identity and Access Management. Refer here for the instructions to connect an identity provider.
Configure Azure Active Directory authentication for Citrix Workspace
-
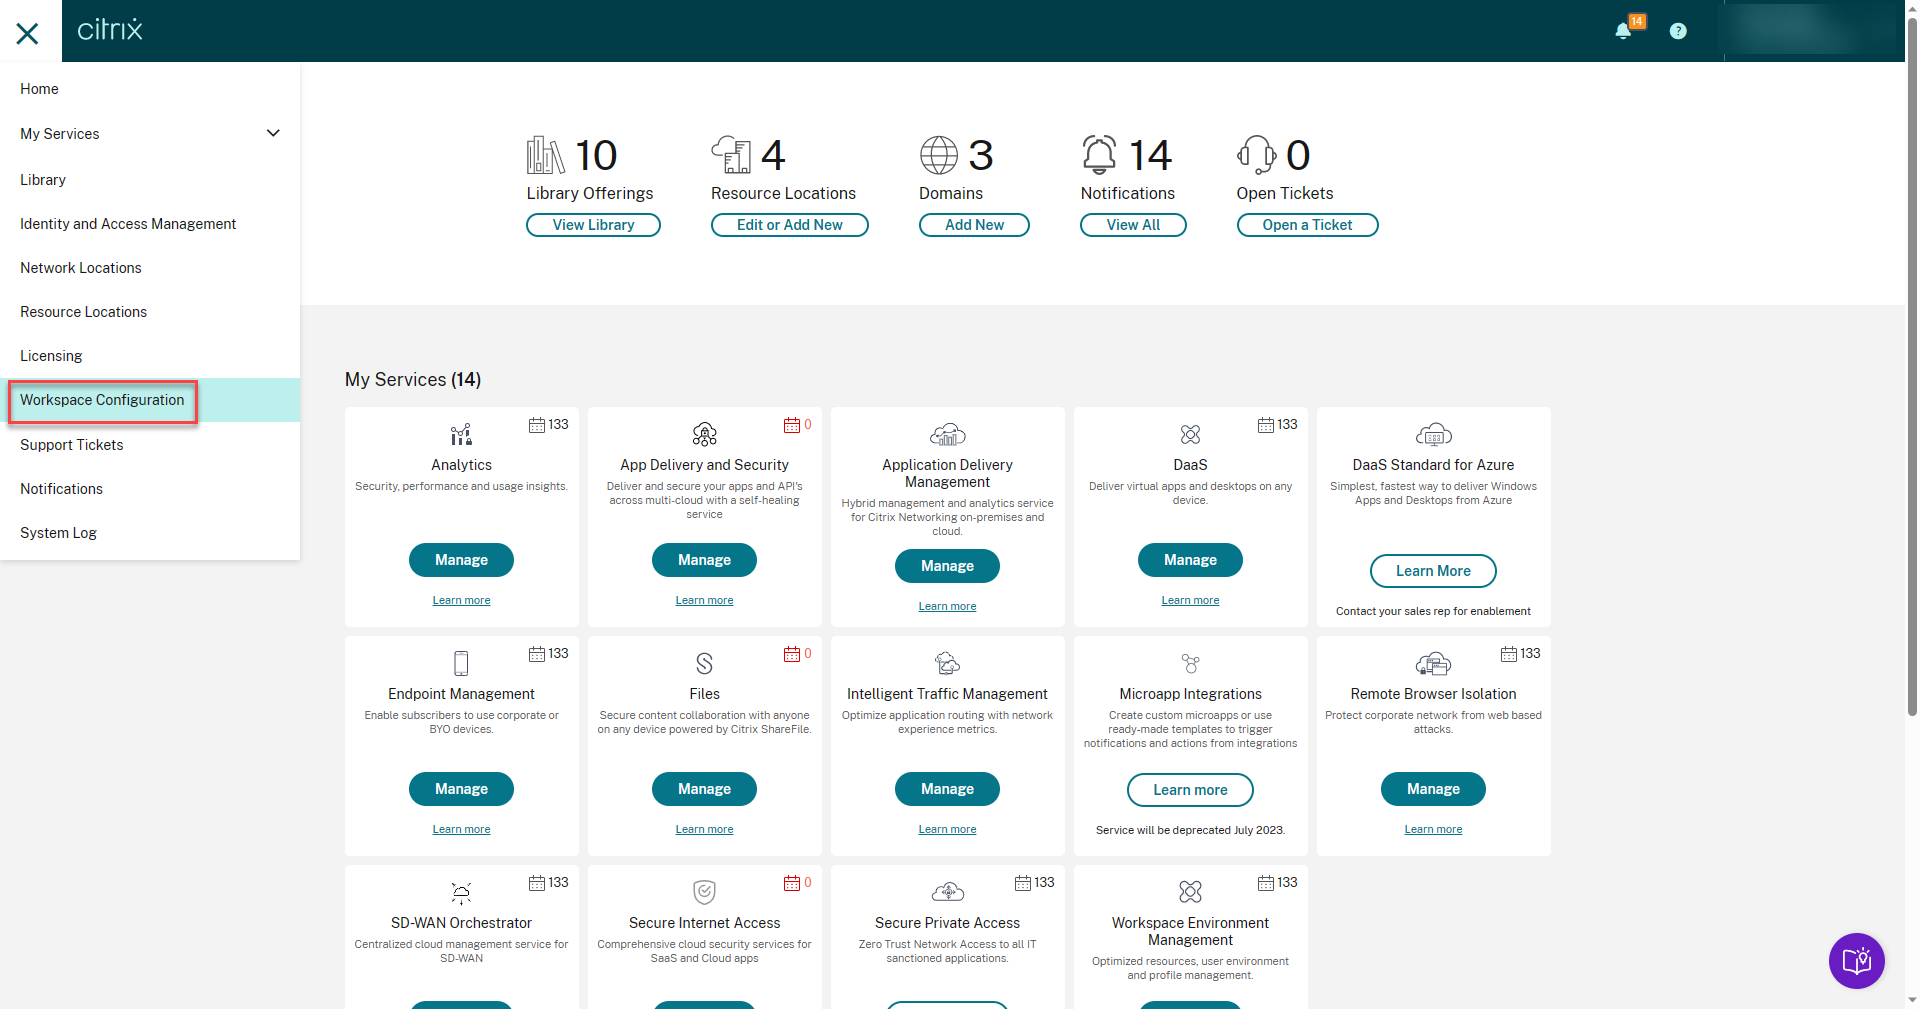
From the Citrix Cloud™ menu, select Workspace Configuration.
-
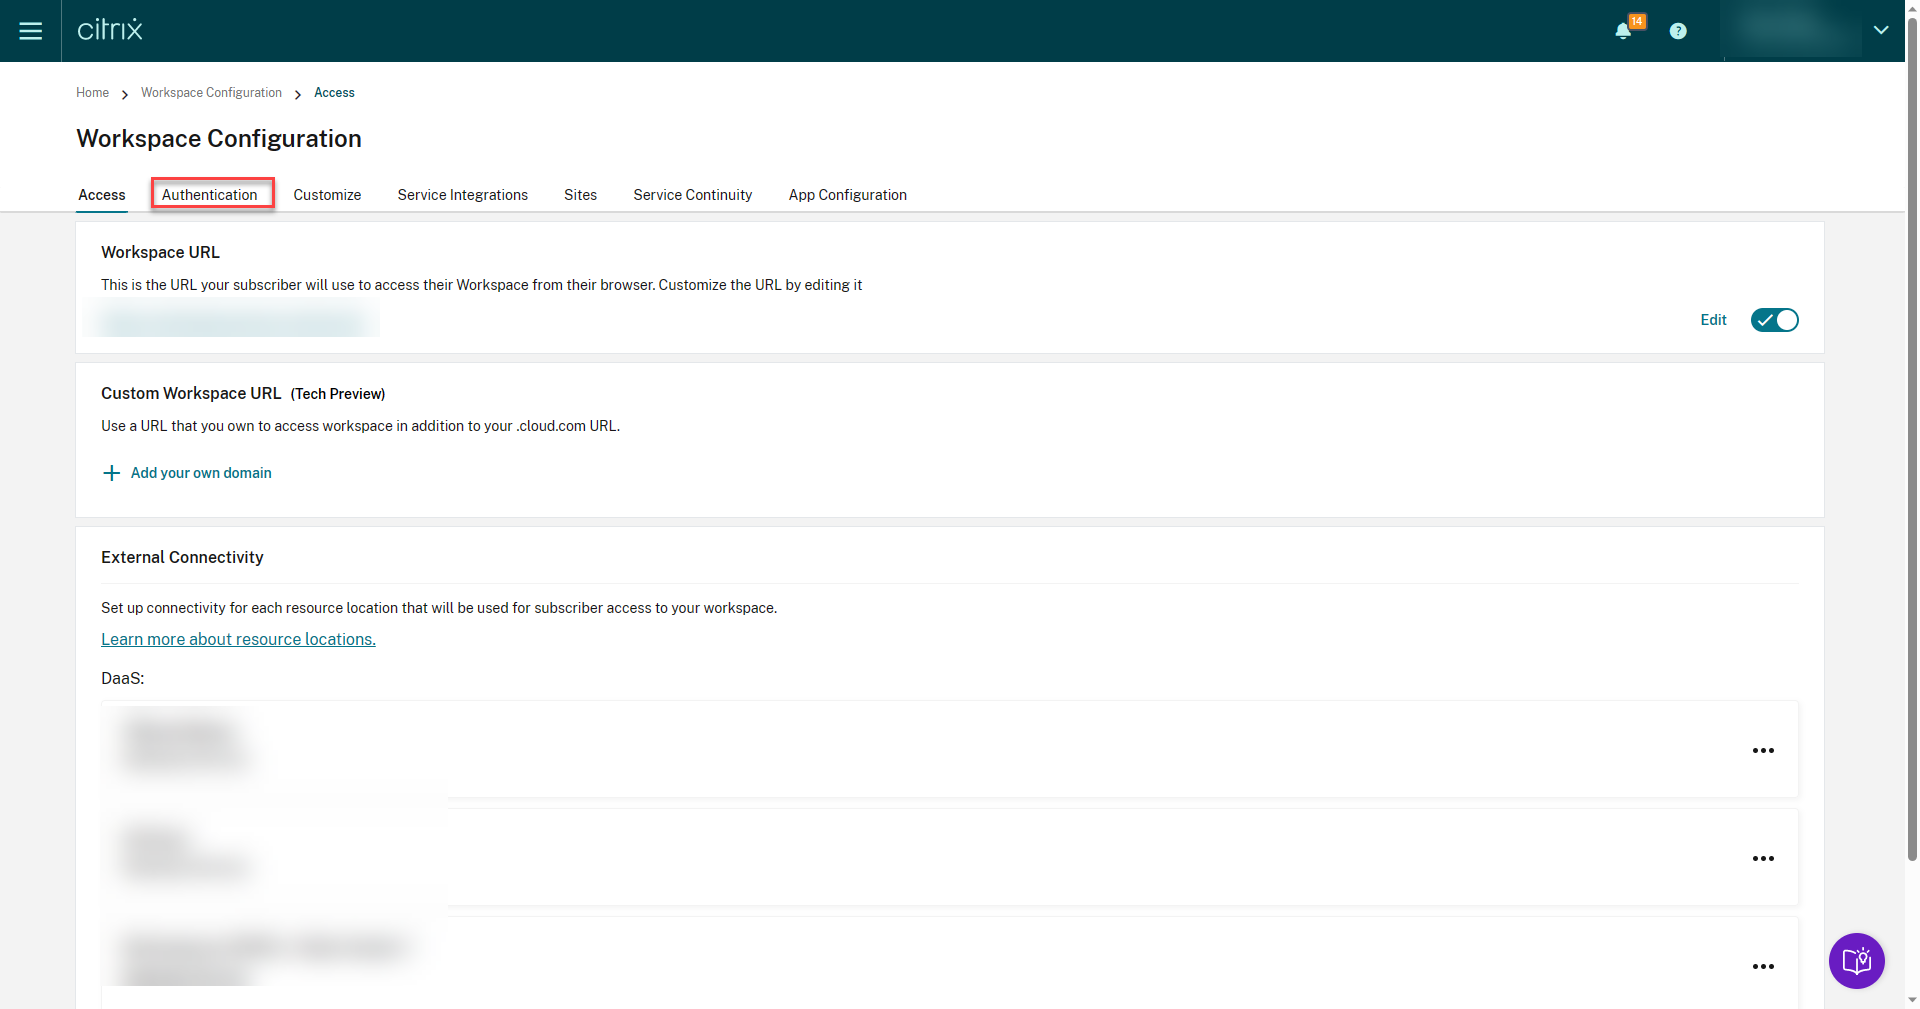
Select Authentication.
-
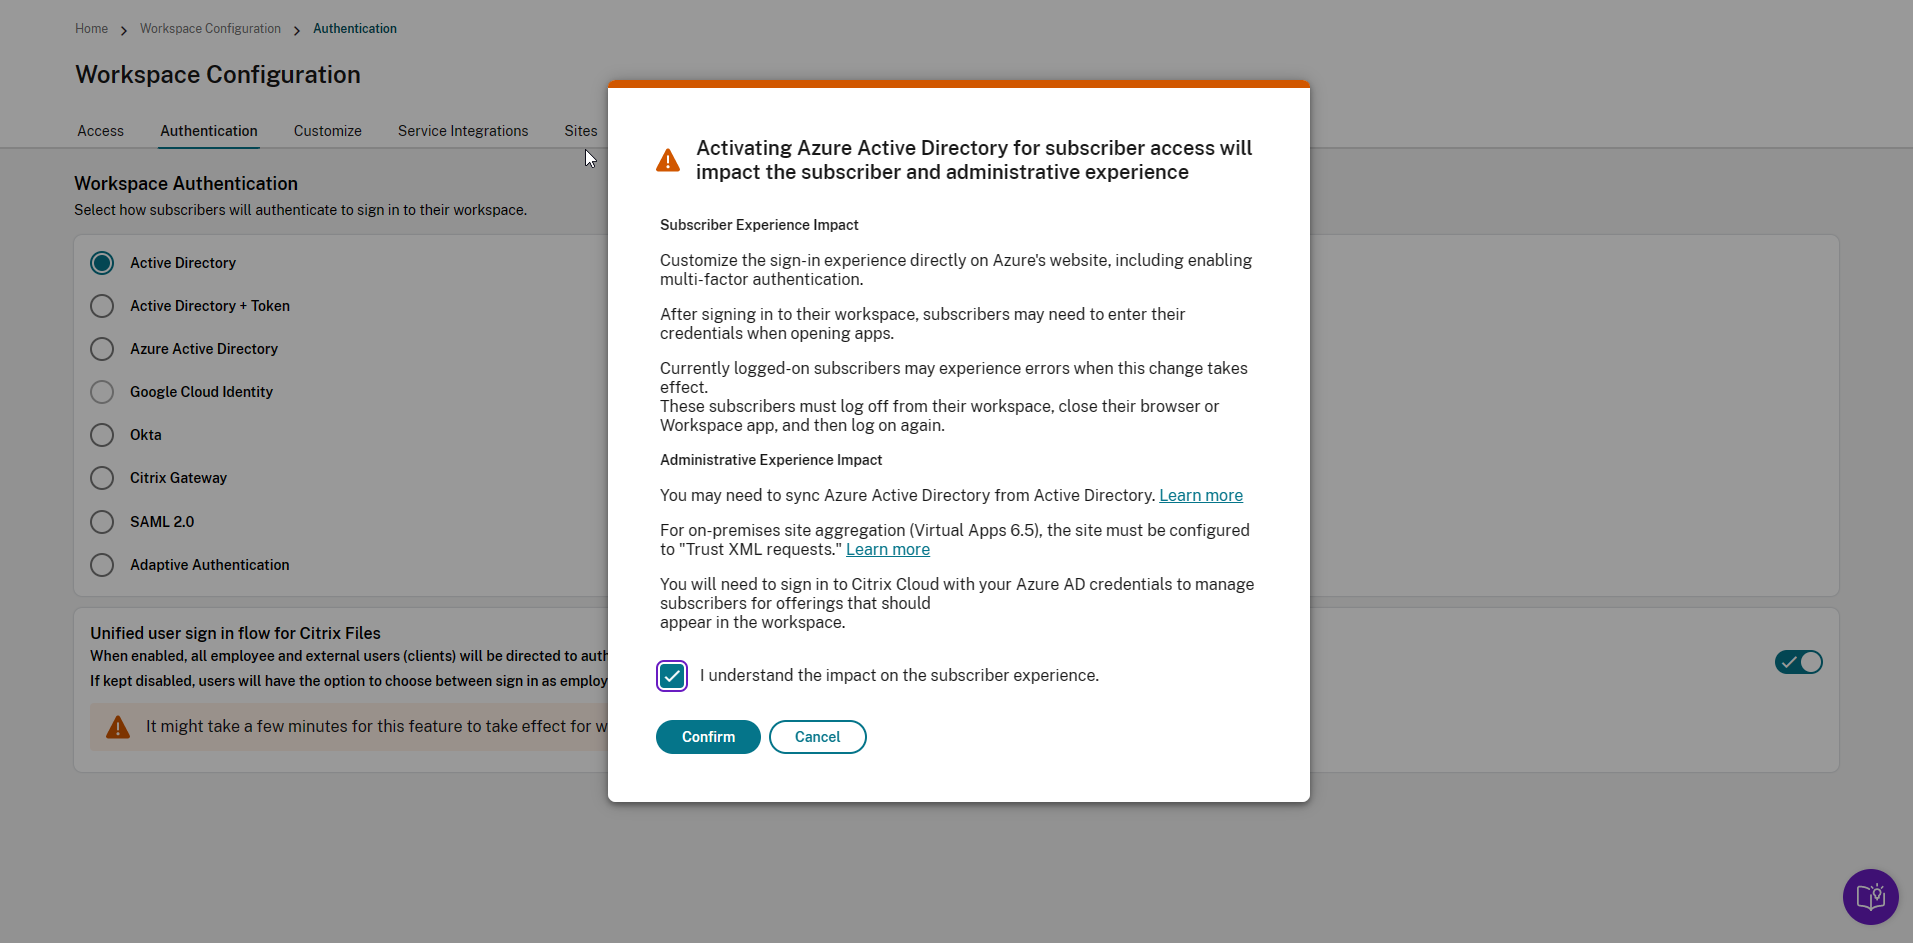
Select Azure Active Directory, select I understand the impact on the subscriber experience, then click Confirm.
Create Windows Virtual Machine
Non-domain joined machines are supported on all platforms supported by Citrix Machine Creation Services™ (MCS). In this step, you create the Windows virtual machine on any supported hypervisor or hyperscaler supported for MCS. In our case, Microsoft Azure is being used. Once your virtual machine is created, follow these steps:
- RDP into your virtual machine
-
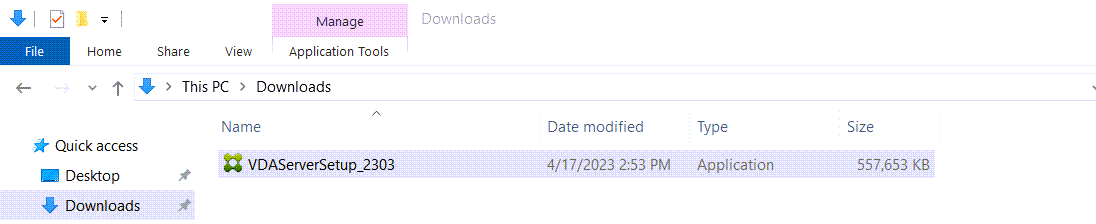
Download the latest release and correct OS type release of the Citrix Virtual Delivery Agent
-
Install the required applications.
-
Run the VDA setup
-
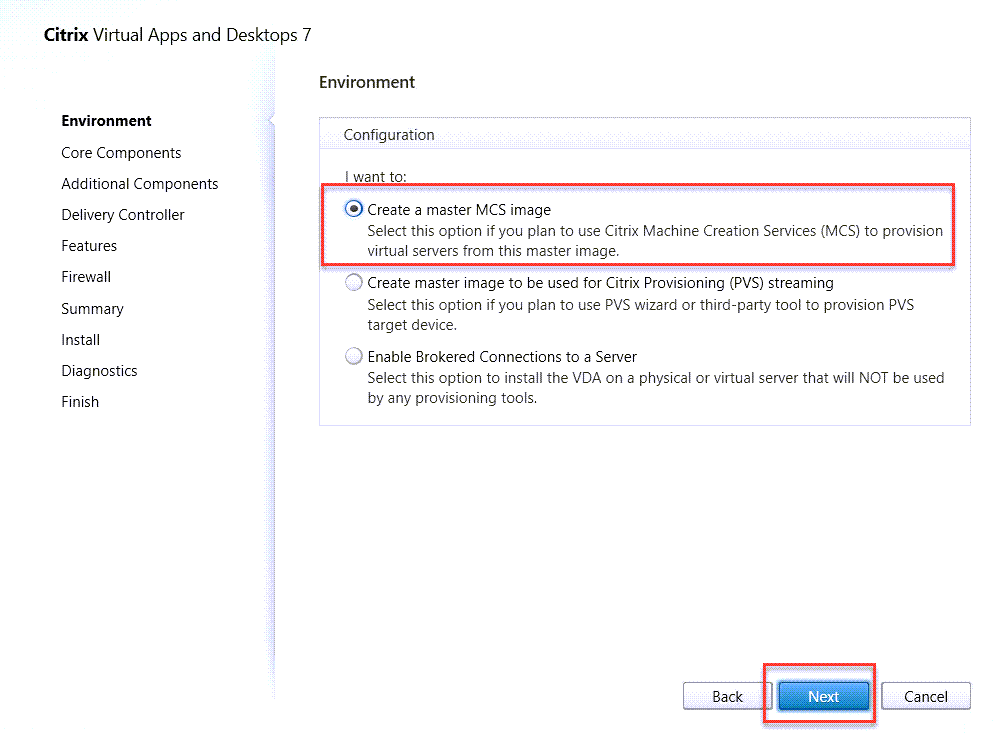
Select Create a master MCS image, then click Next.
-
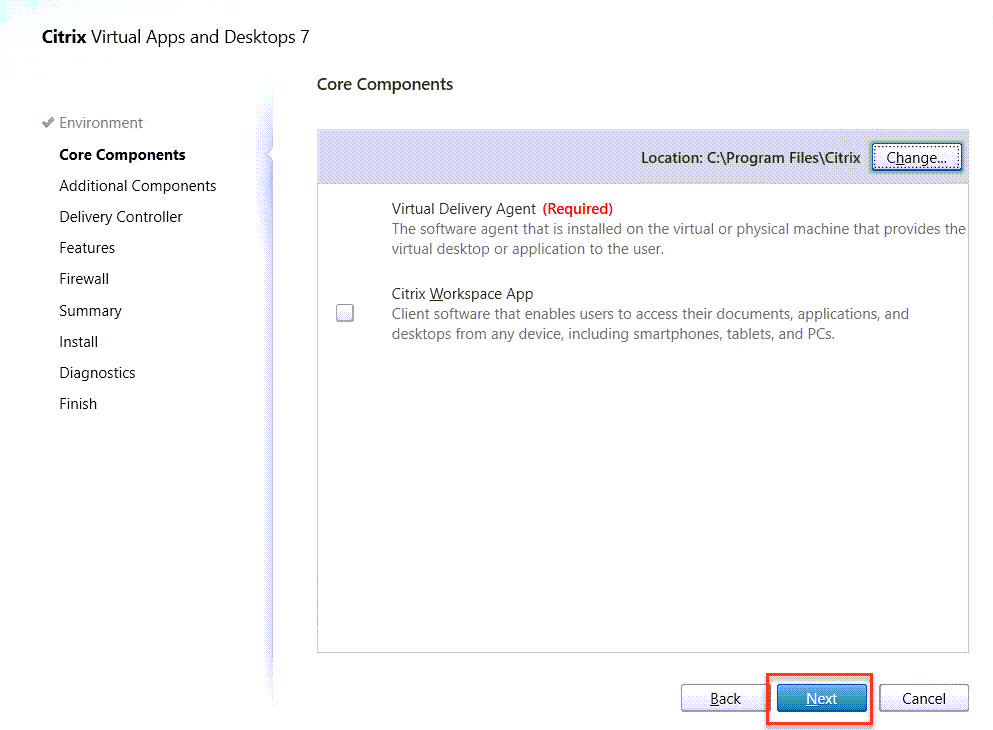
In the Core Components window, click Next.
-
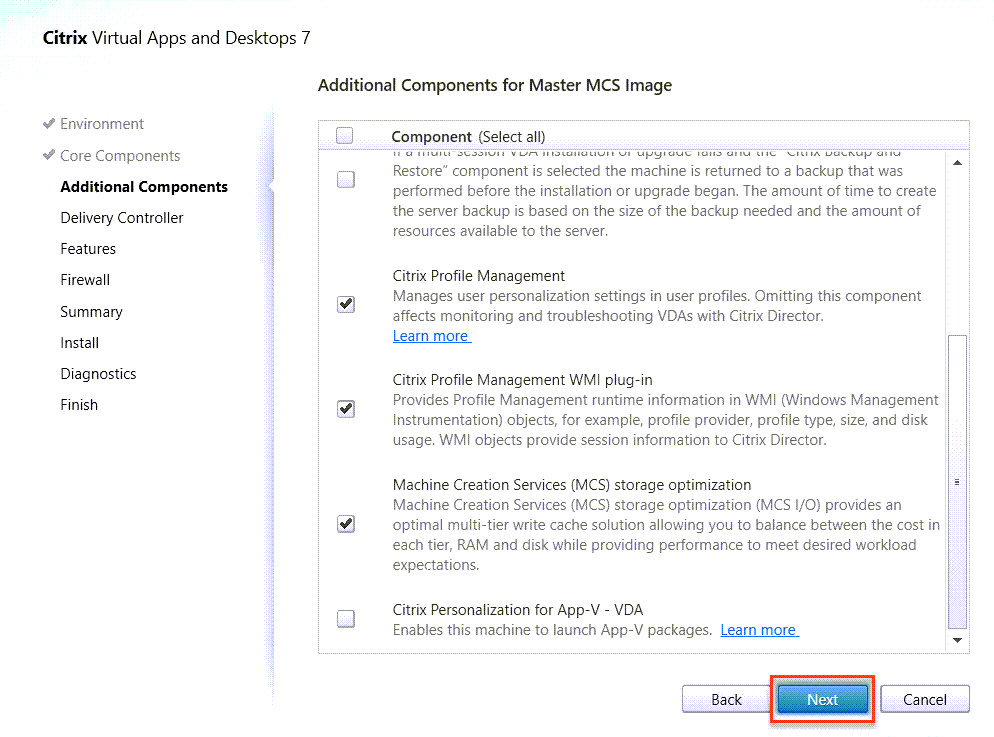
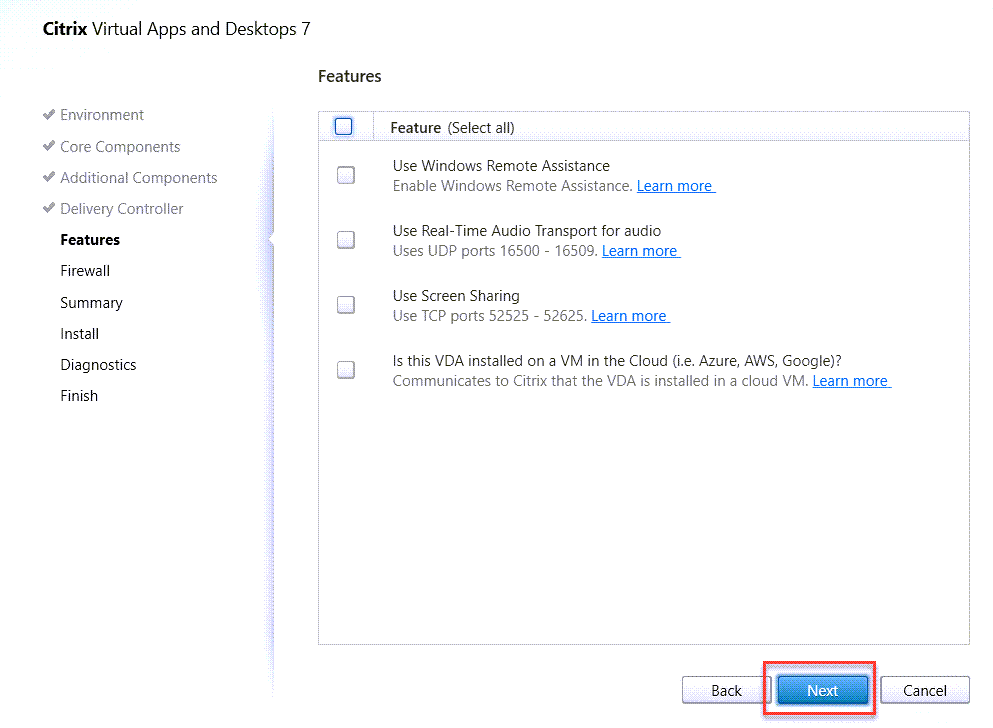
Select any Additional Components your deployment requires, such as Citrix Profile Management and Machine Creation Services storage optimization, click Next.
-
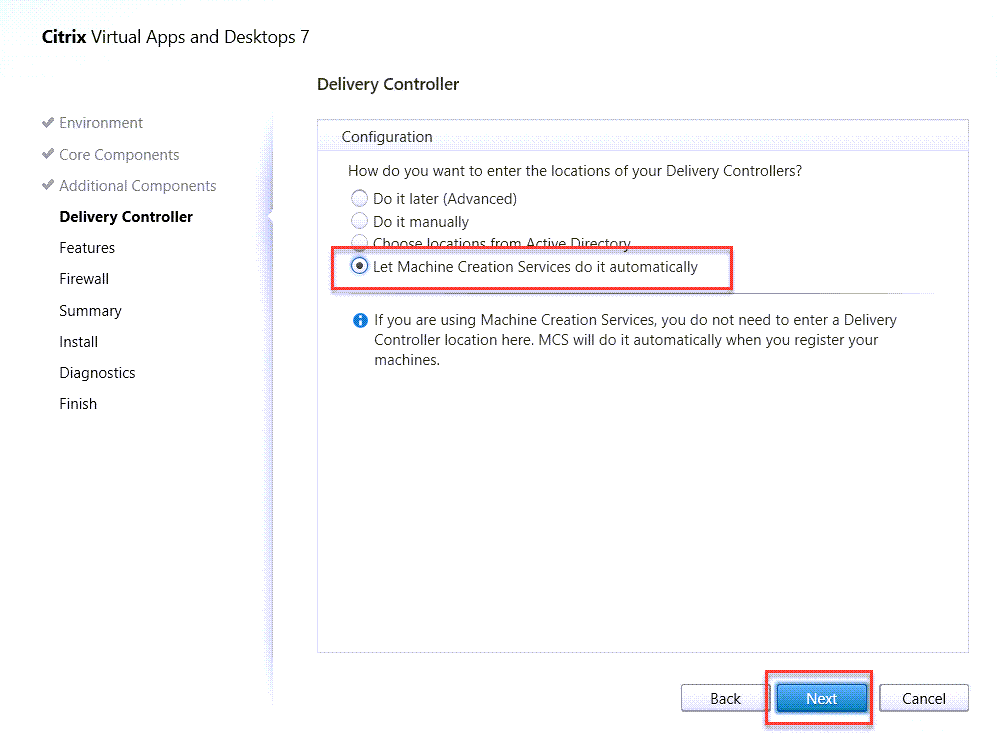
In Delivery Controller™, select Let Machine Creation Services do it automatically, Click Next.
-
Click Next.
-
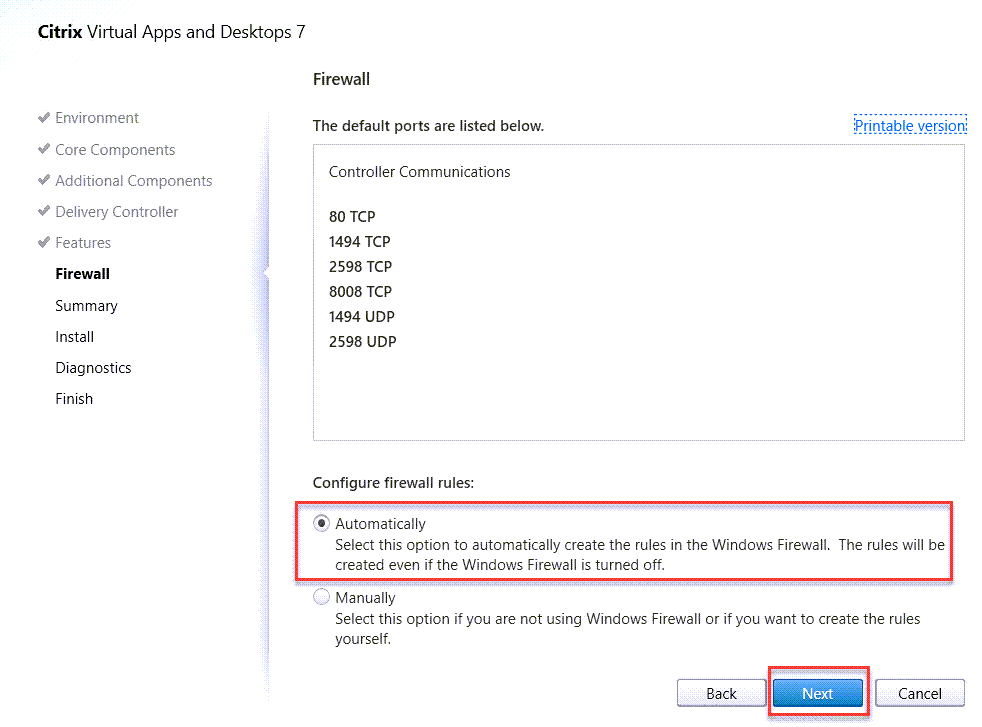
Select Automatically, click Next.
-
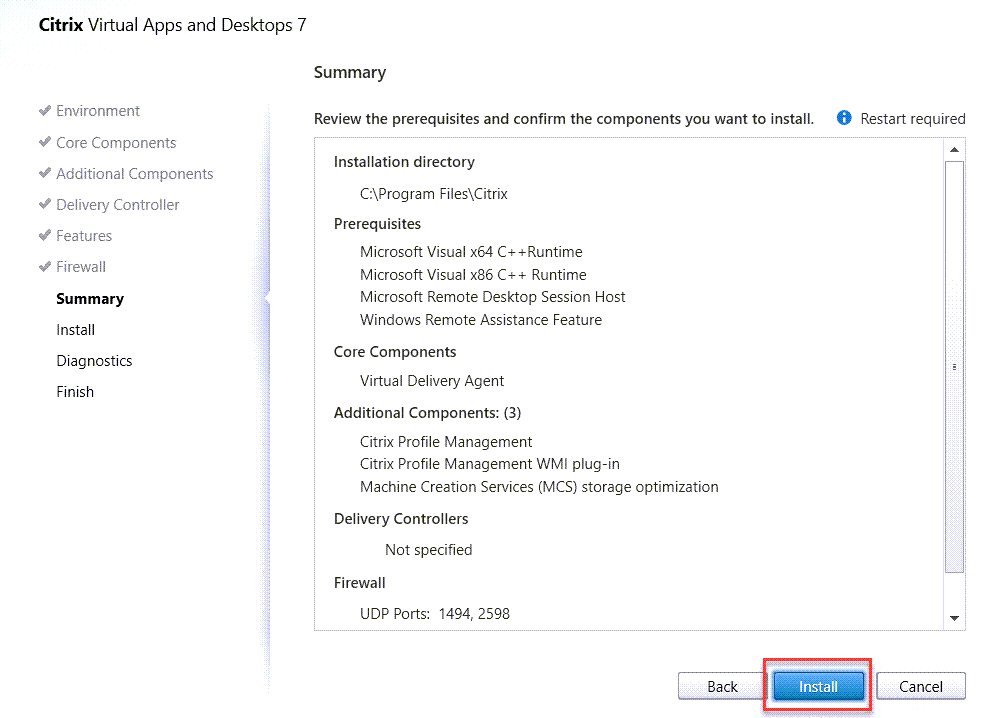
Review the summary page, click Install.
-
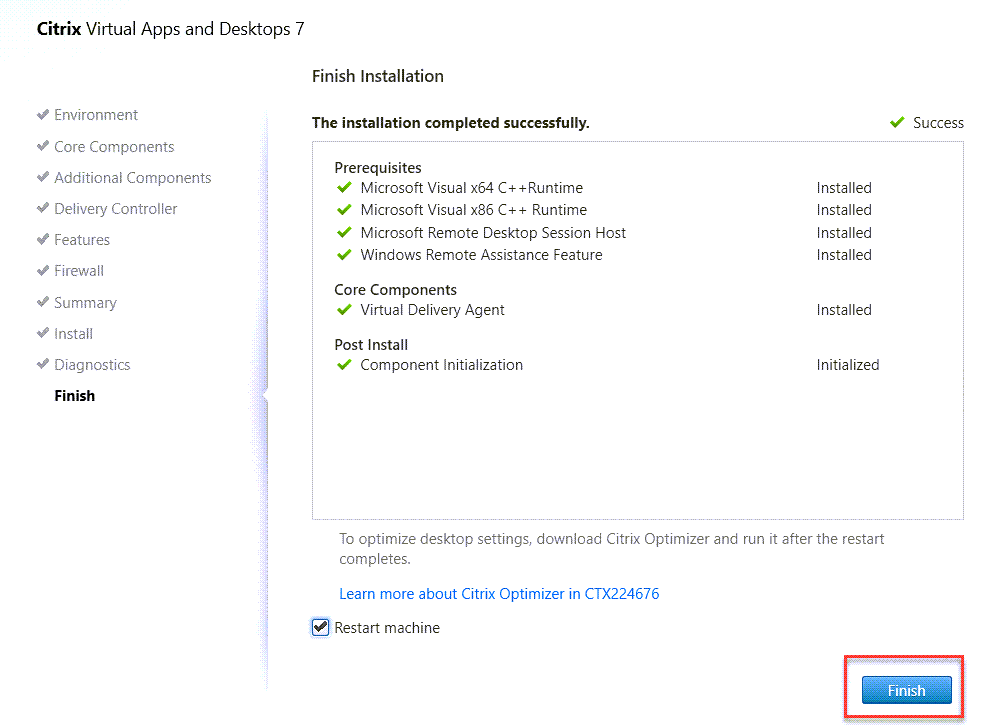
When the installation is complete, click Finish and let the machine restart.
-
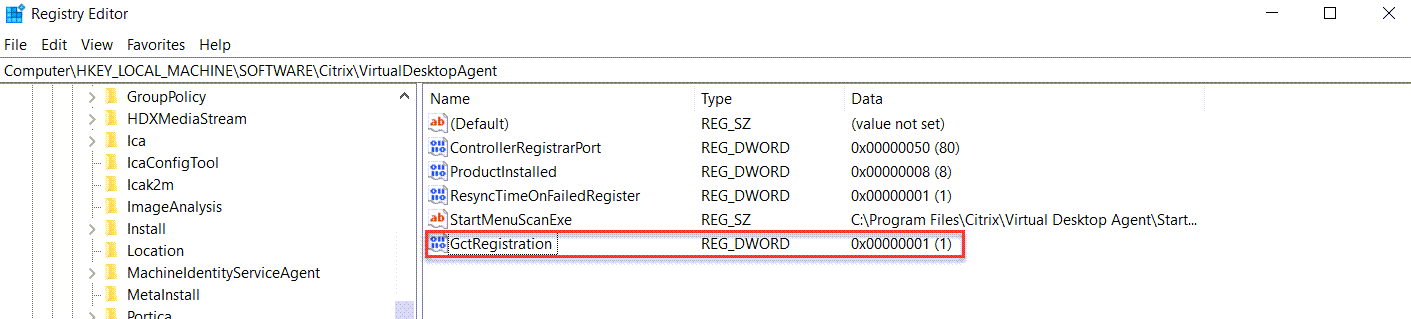
Once the machine restarts, edit the following registry value: HKEY_LOCAL_MACHINE\SOFTWARE\Citrix\VirtualDesktopAgent
Create Machine Catalogs
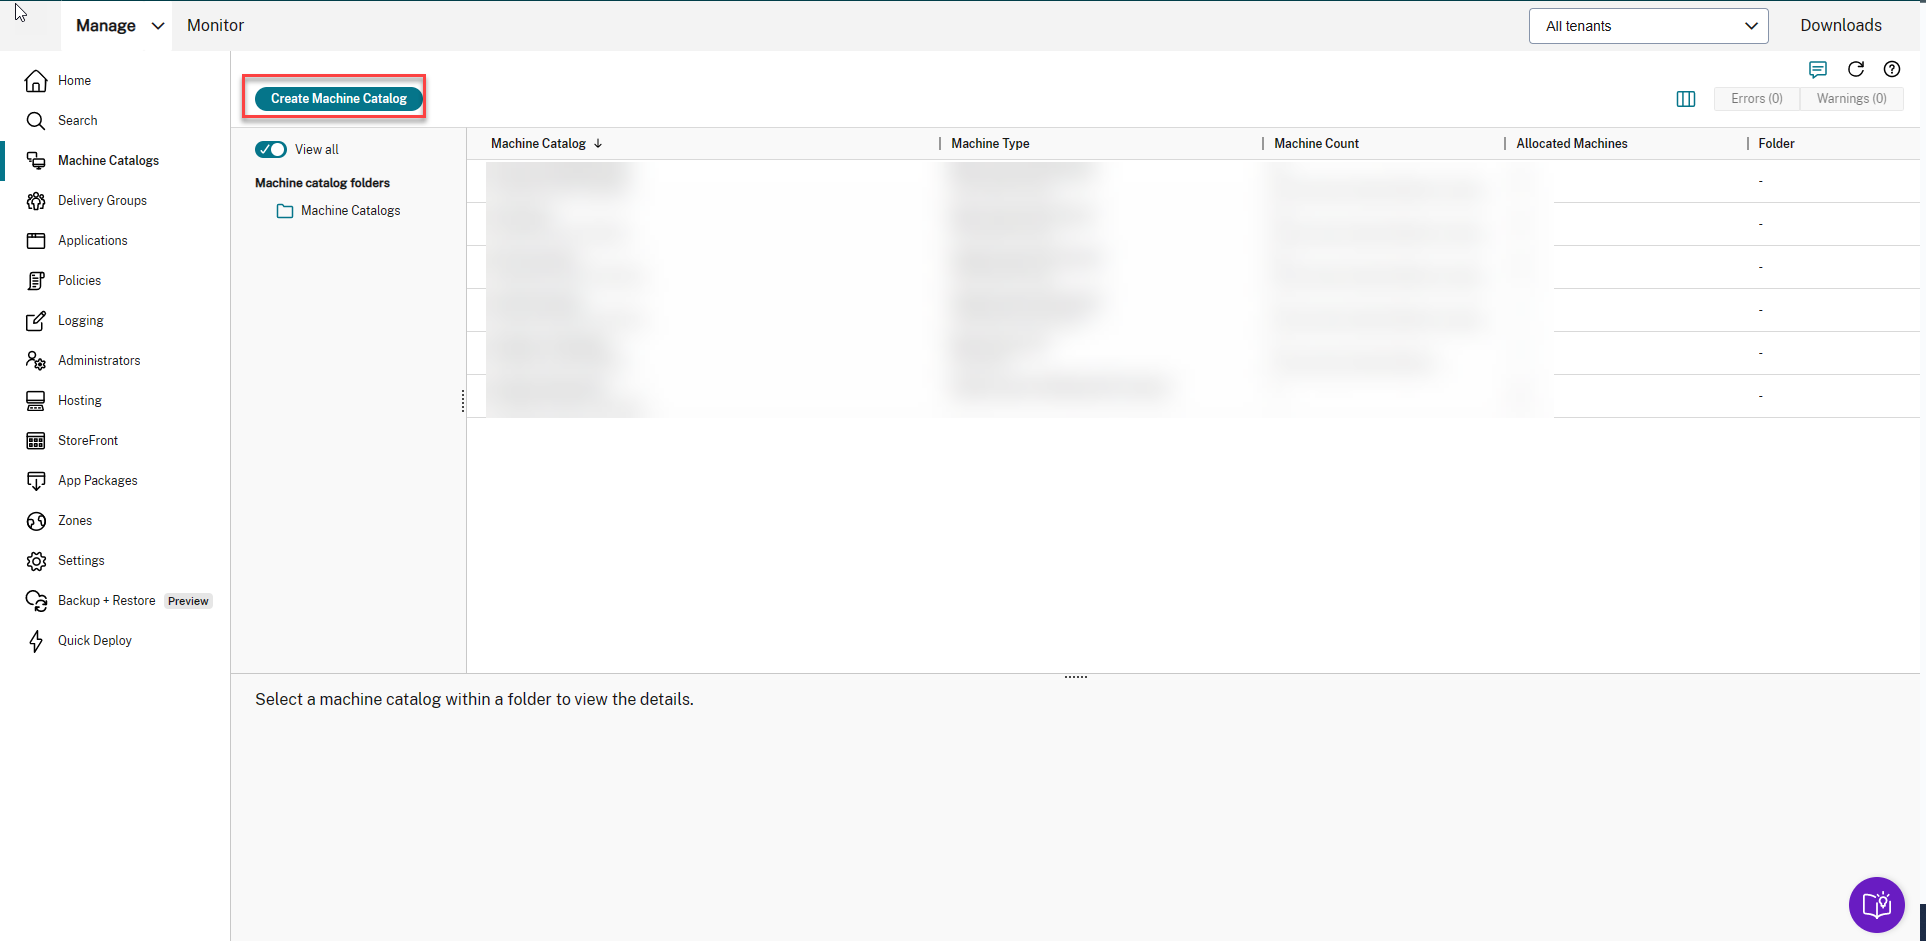
- Click Machine Catalogs, then click Create Machine Catalog.
-
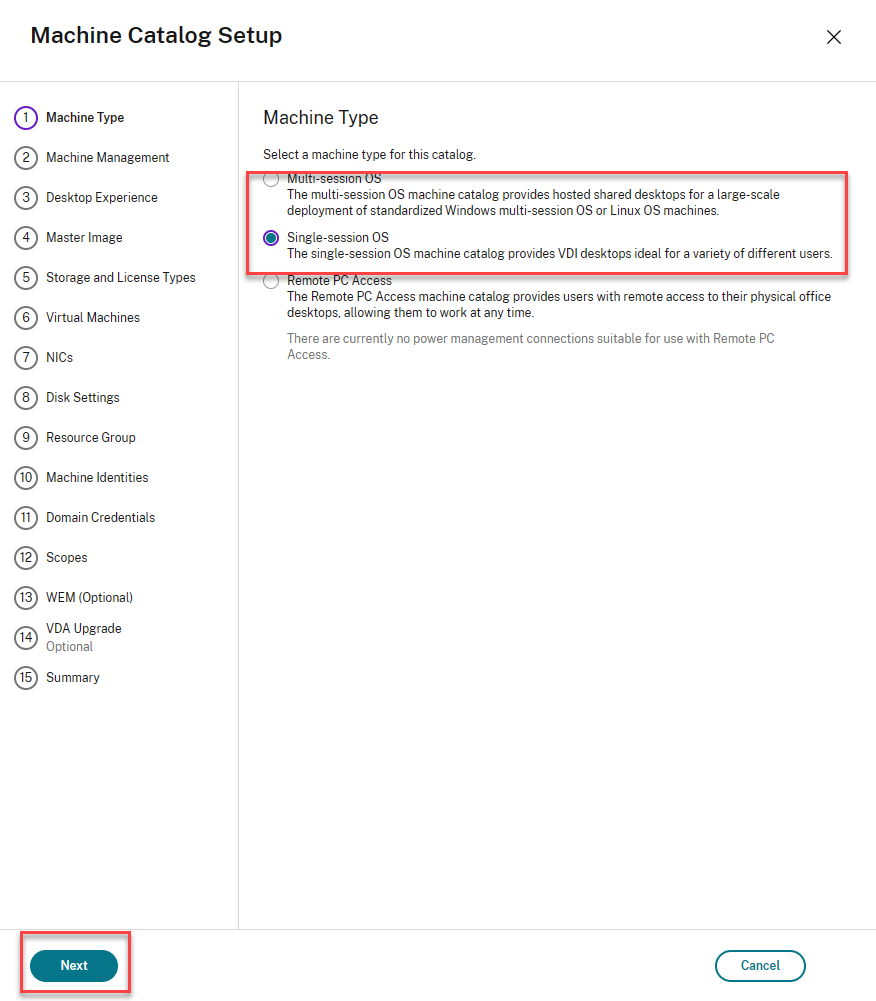
Select Single-session OS for the Machine Type, click Next.
-
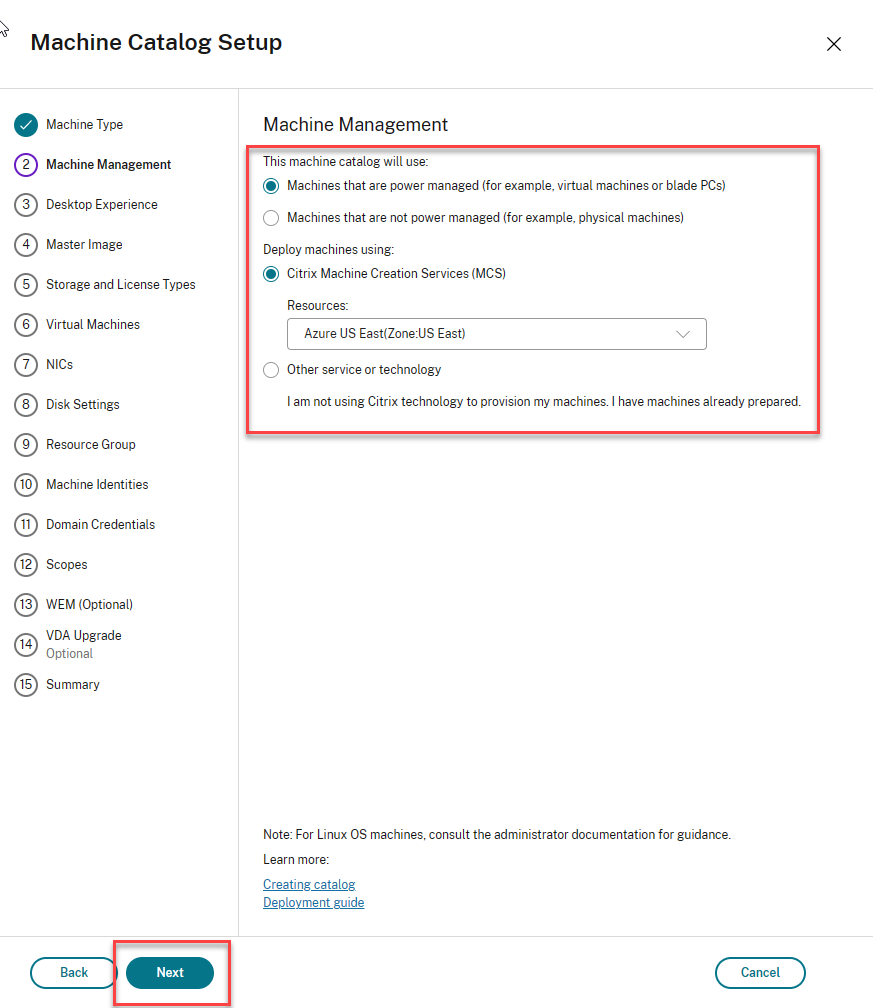
In Machine Management, select Machines that are power managed, Citrix Machine Creation Services (MCS), and the appropriate resources from the drop-down list. click Next.
-
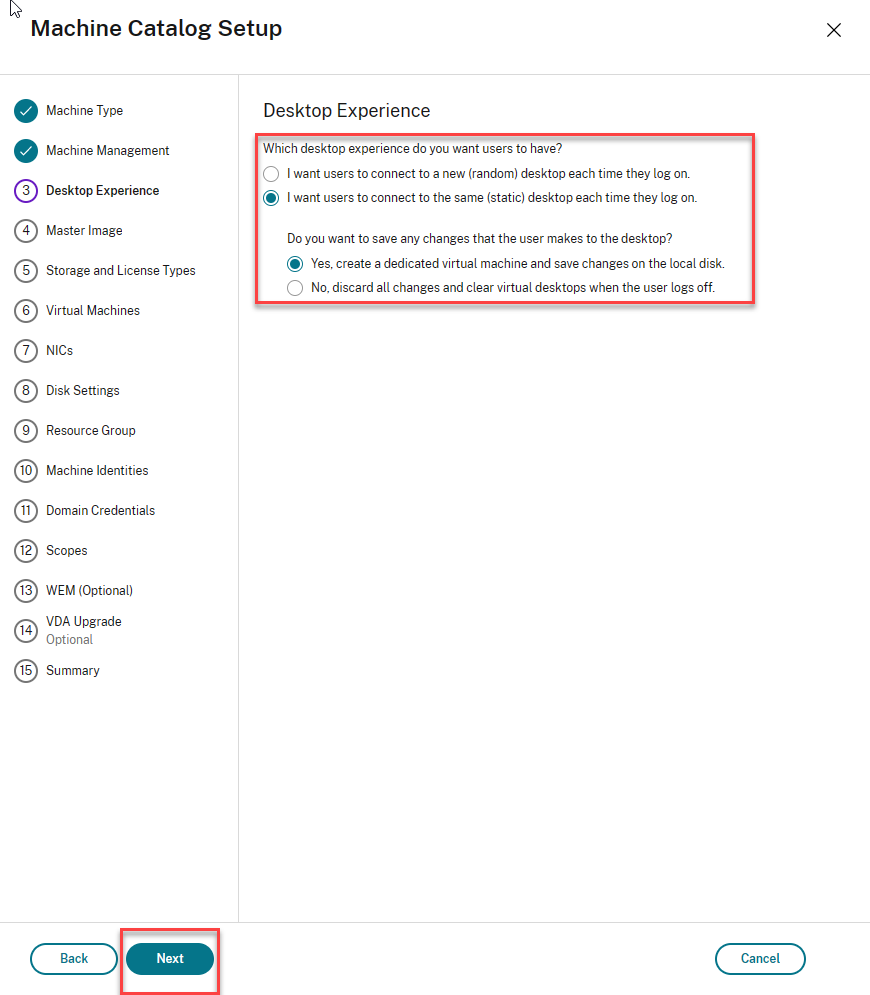
Select I want users to connect to the same (static) desktop each time they log on and Yes, create a dedicated virtual machine and save changes on the local disk for the Desktop Experience, click Next.
-
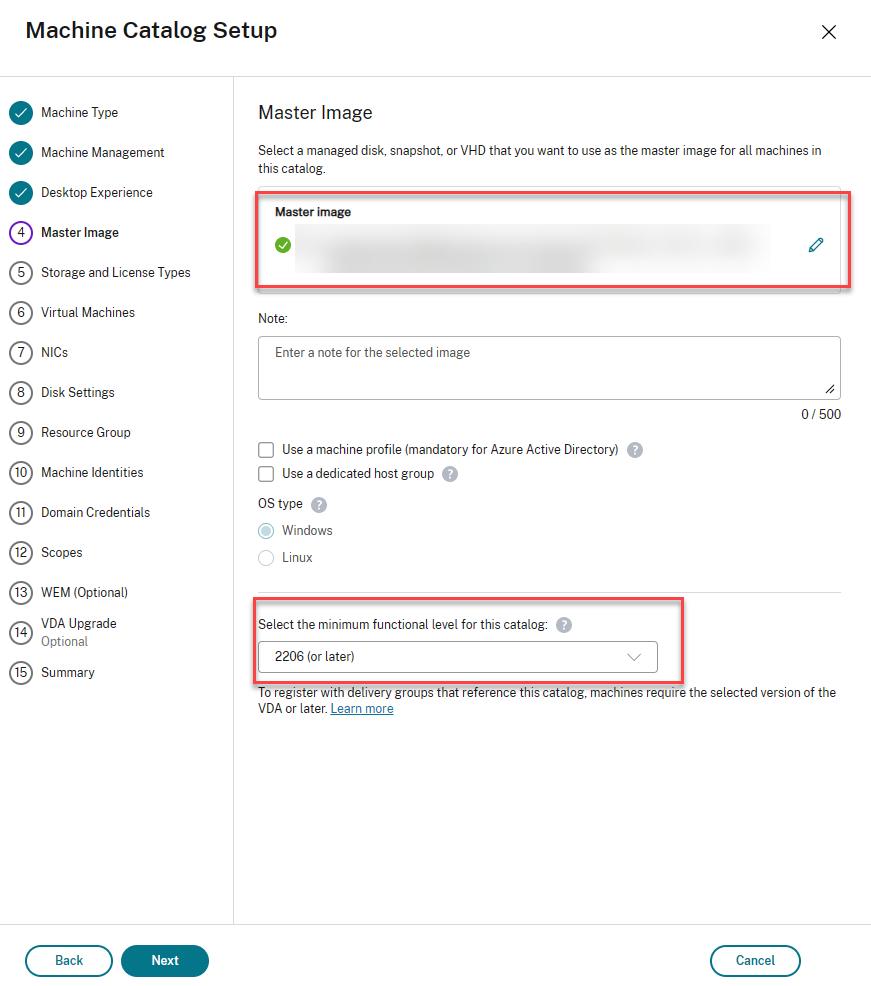
Select the Master Image, set the VDA functional level to 2206 (or later), click Next.
-
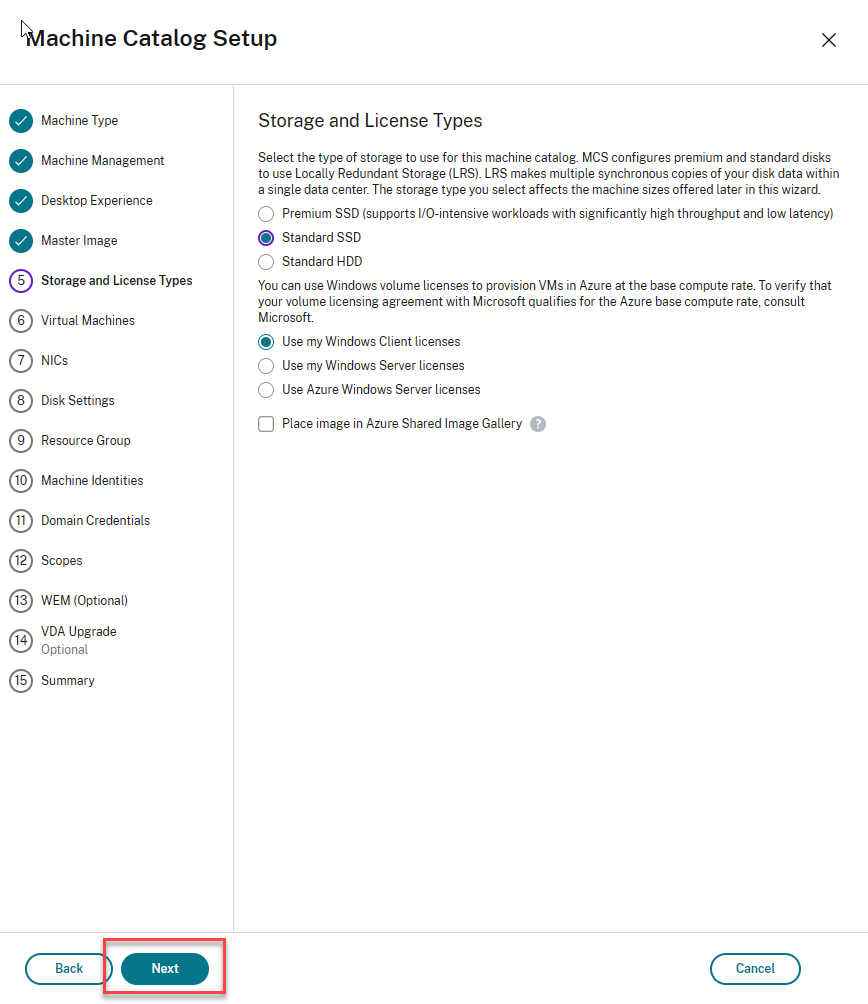
Select your storage and Windows license type, click Next.
-
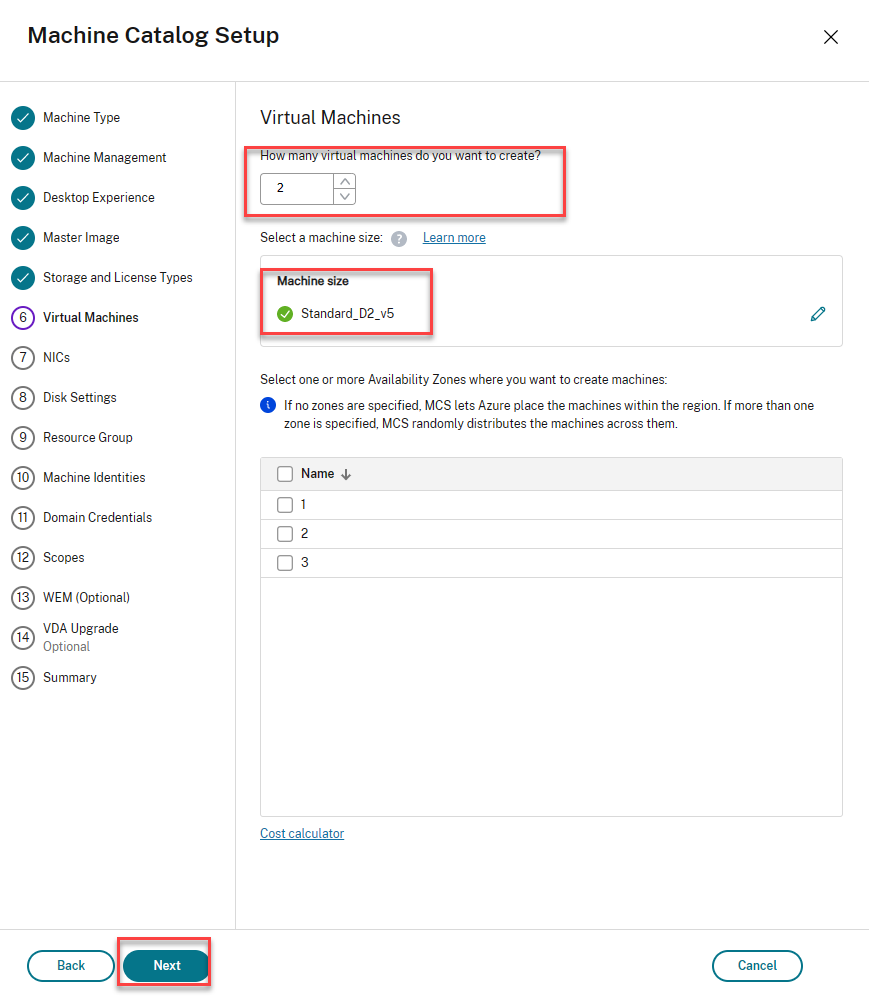
In Virtual Machines, choose the number of virtual machines to create and the machine size, click Next.
-
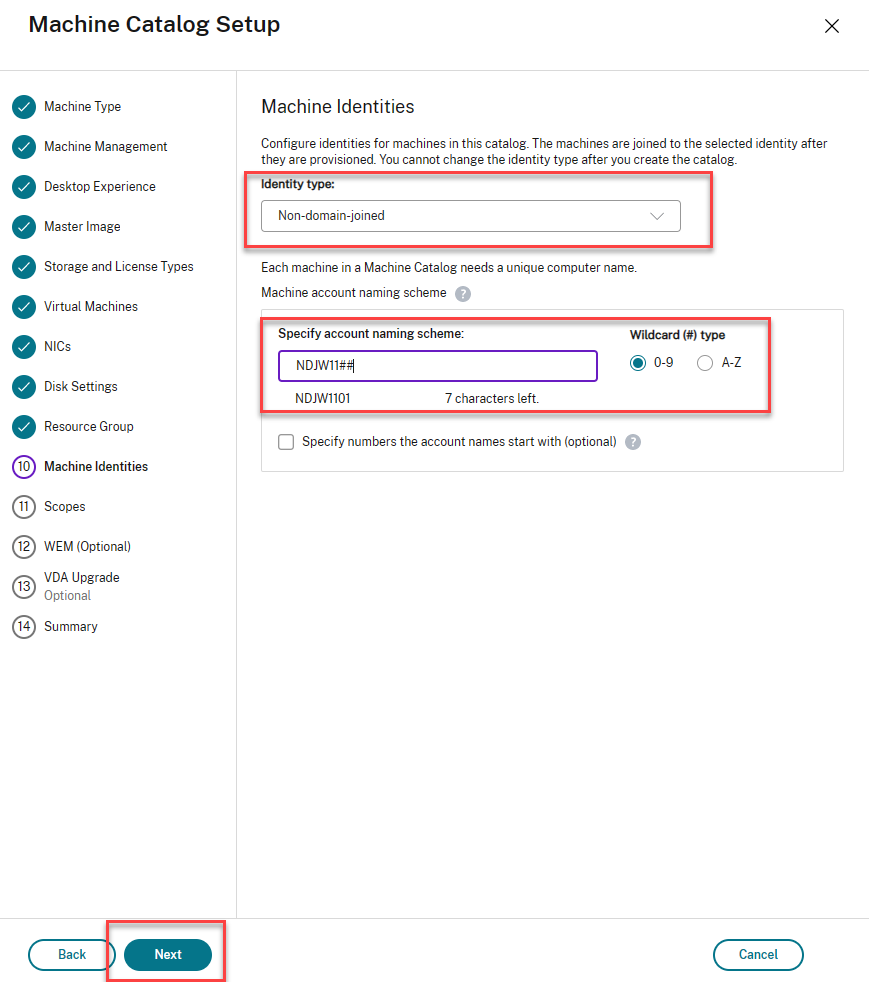
Choose non-domain-joined for the Identity type, provide a name for desktops, click Next.
-
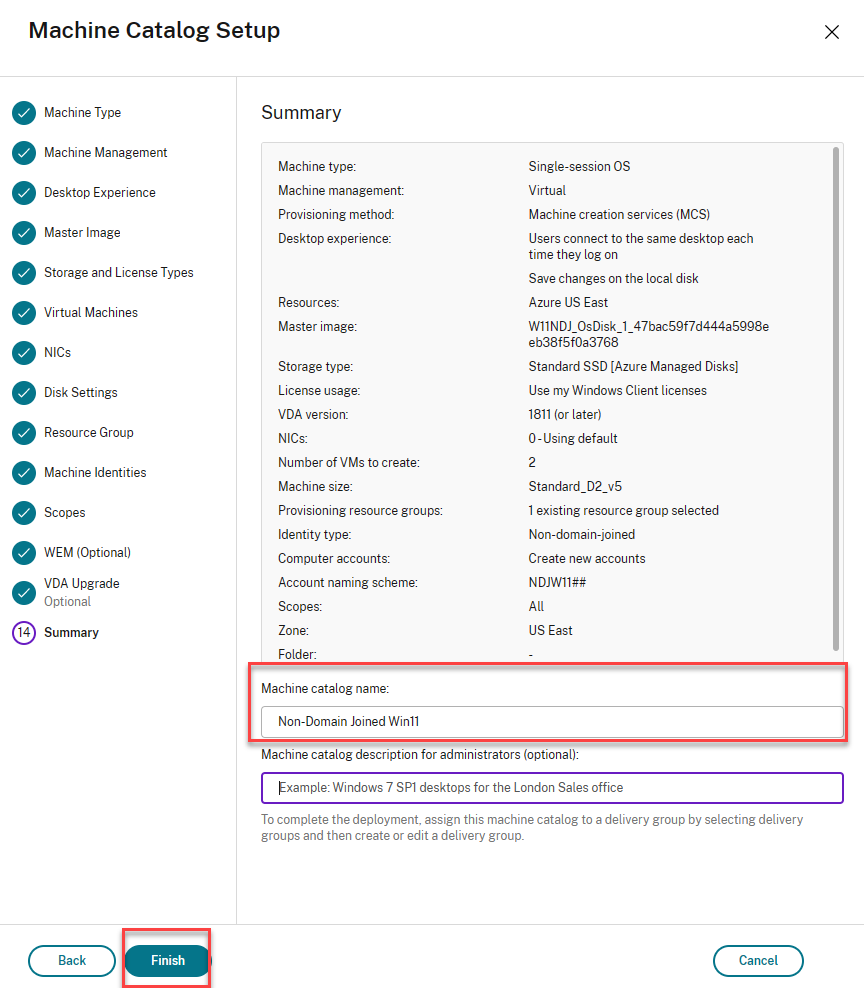
On the summary page, provide a name for the Machine Catalog, click Finish.
-
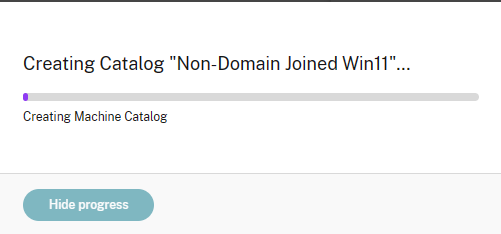
The Machine Catalog is now being created. Once complete, move on to creating the Delivery Group.
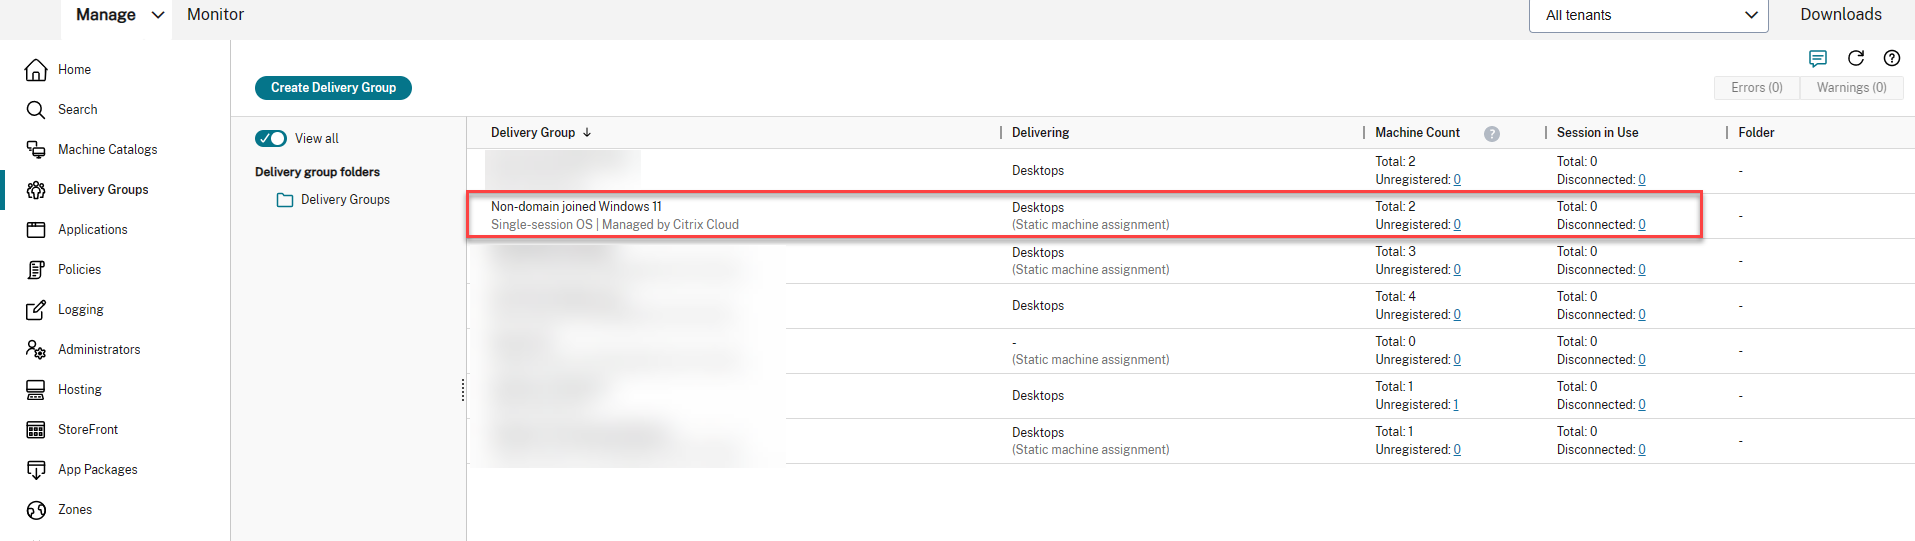
Create Delivery Groups
-
Select Delivery Groups, then click Create Delivery Group.

-
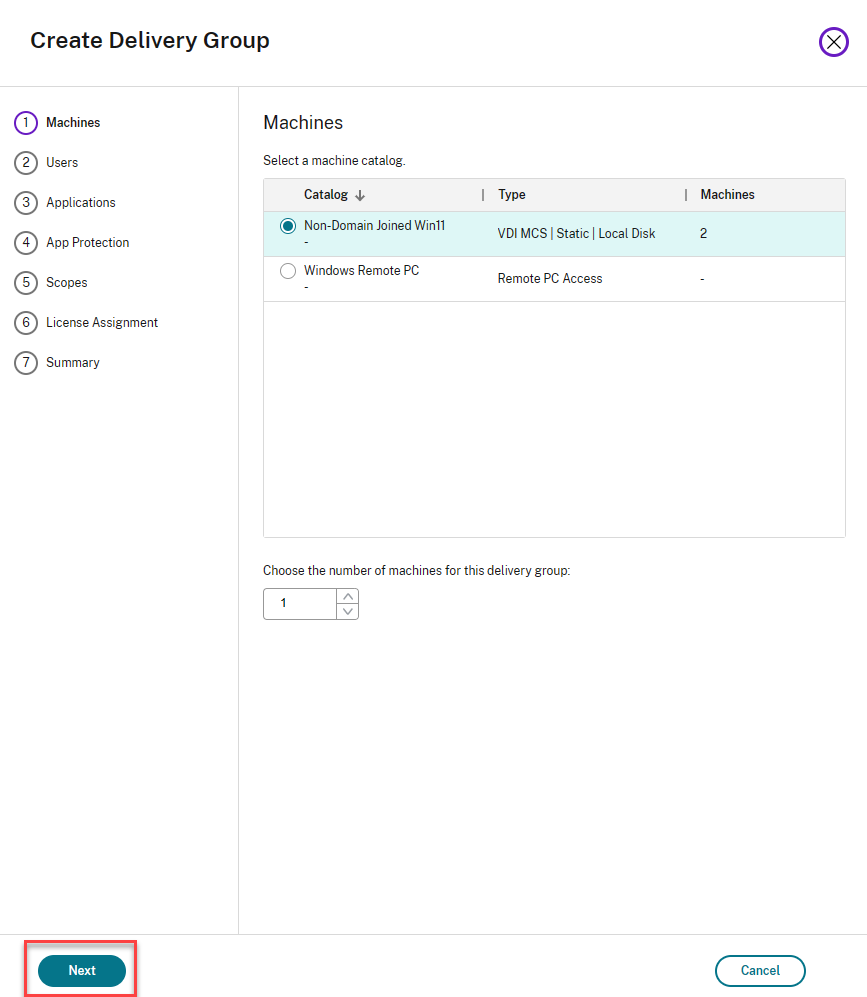
Select the desktops and number of machines to add, then click Next.
-
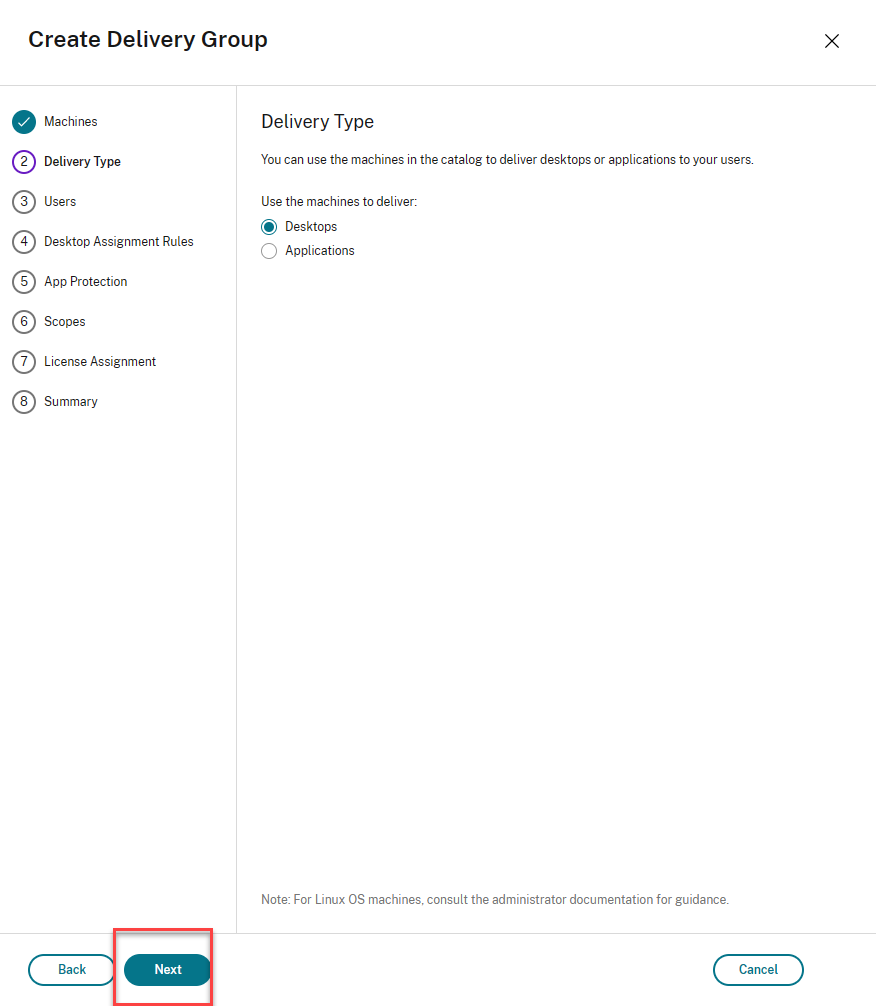
Select Desktops as the delivery type, click Next.
-
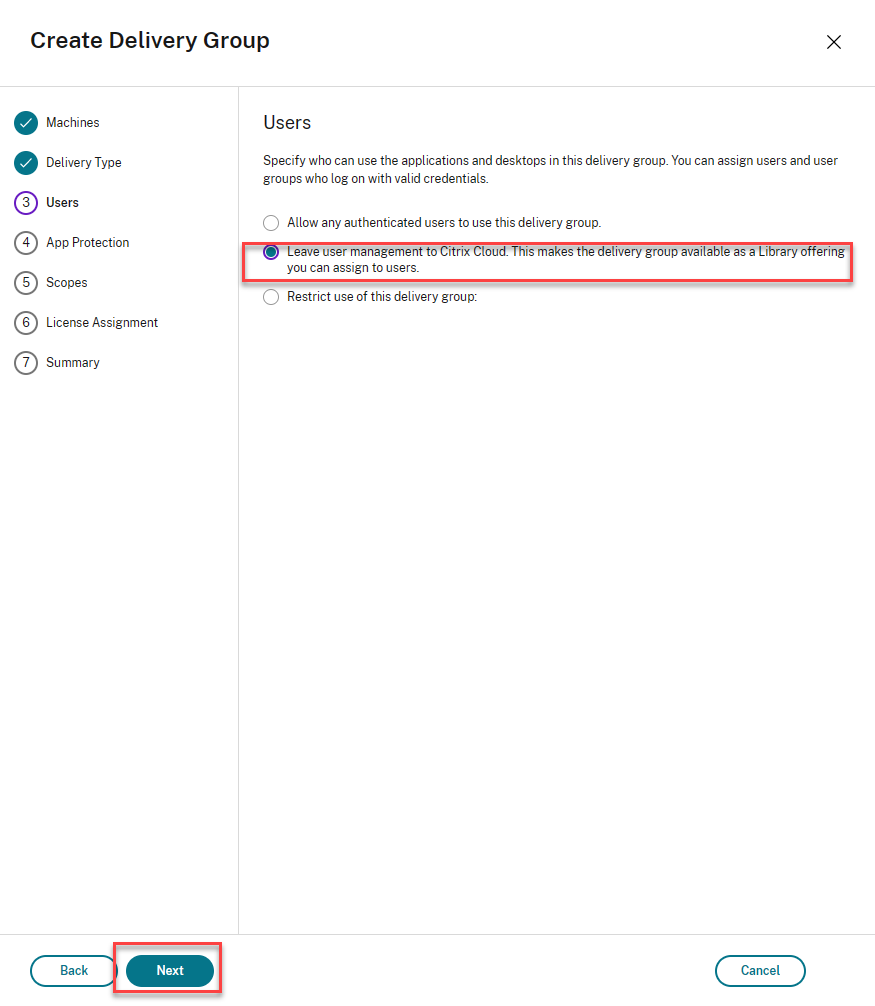
Choose Leave user management to Citrix Cloud option, then click Next.
-
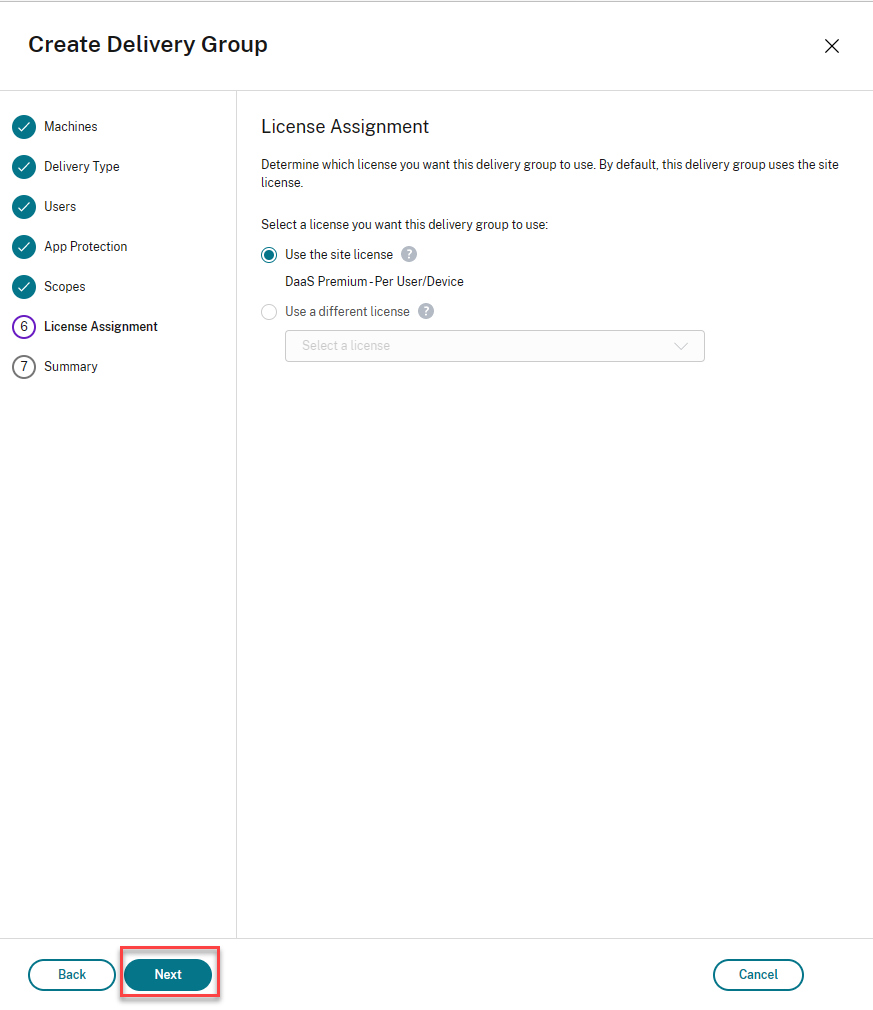
Select your license type, then click Next.
-
Review the summary, give the Delivery Group, and display a name, then click Finish.
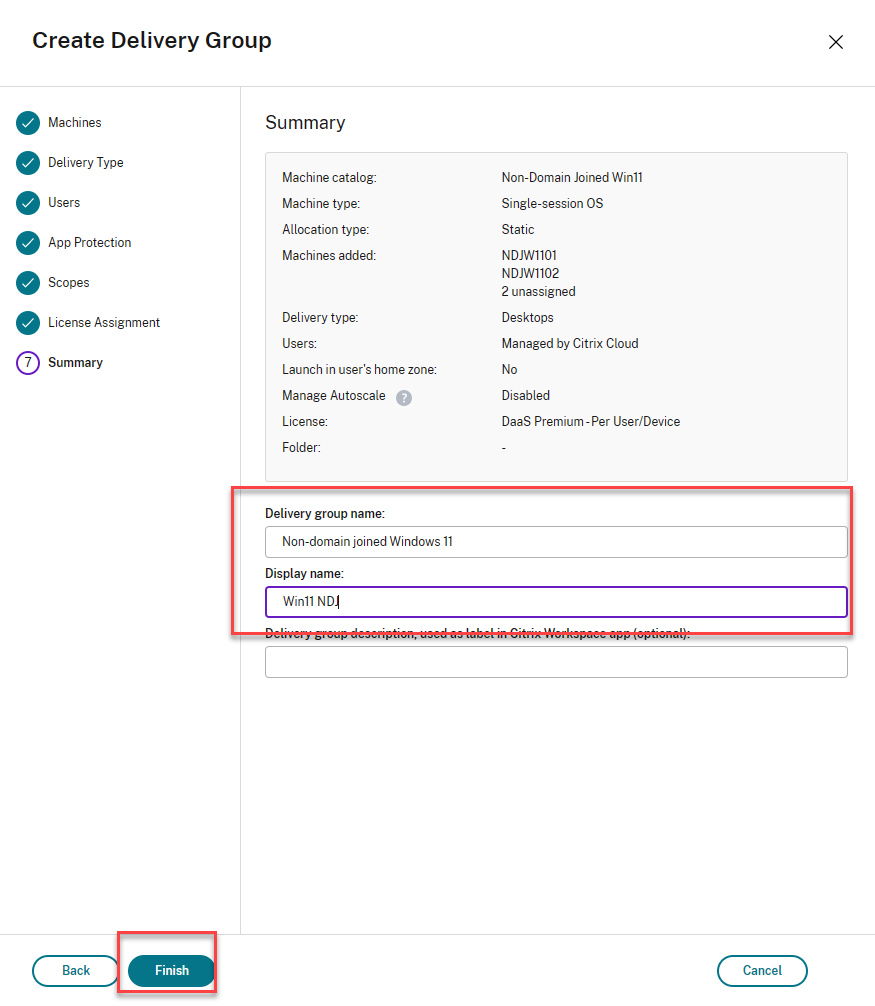
Your Non-domain joined Delivery Group is now ready.
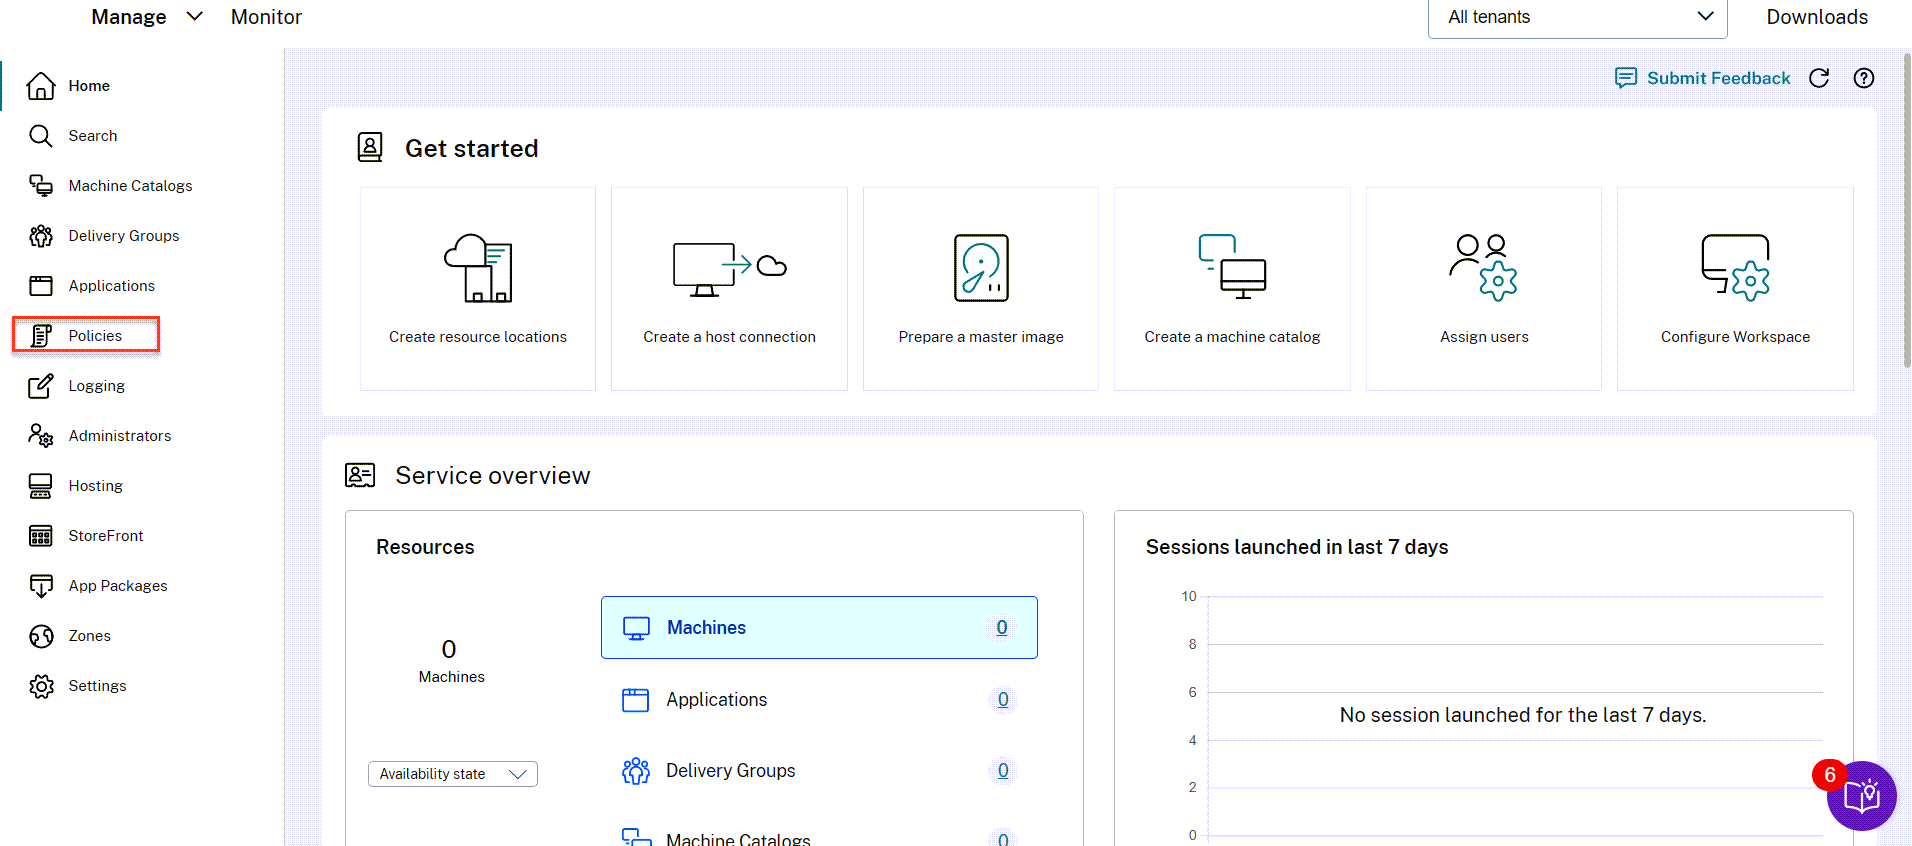
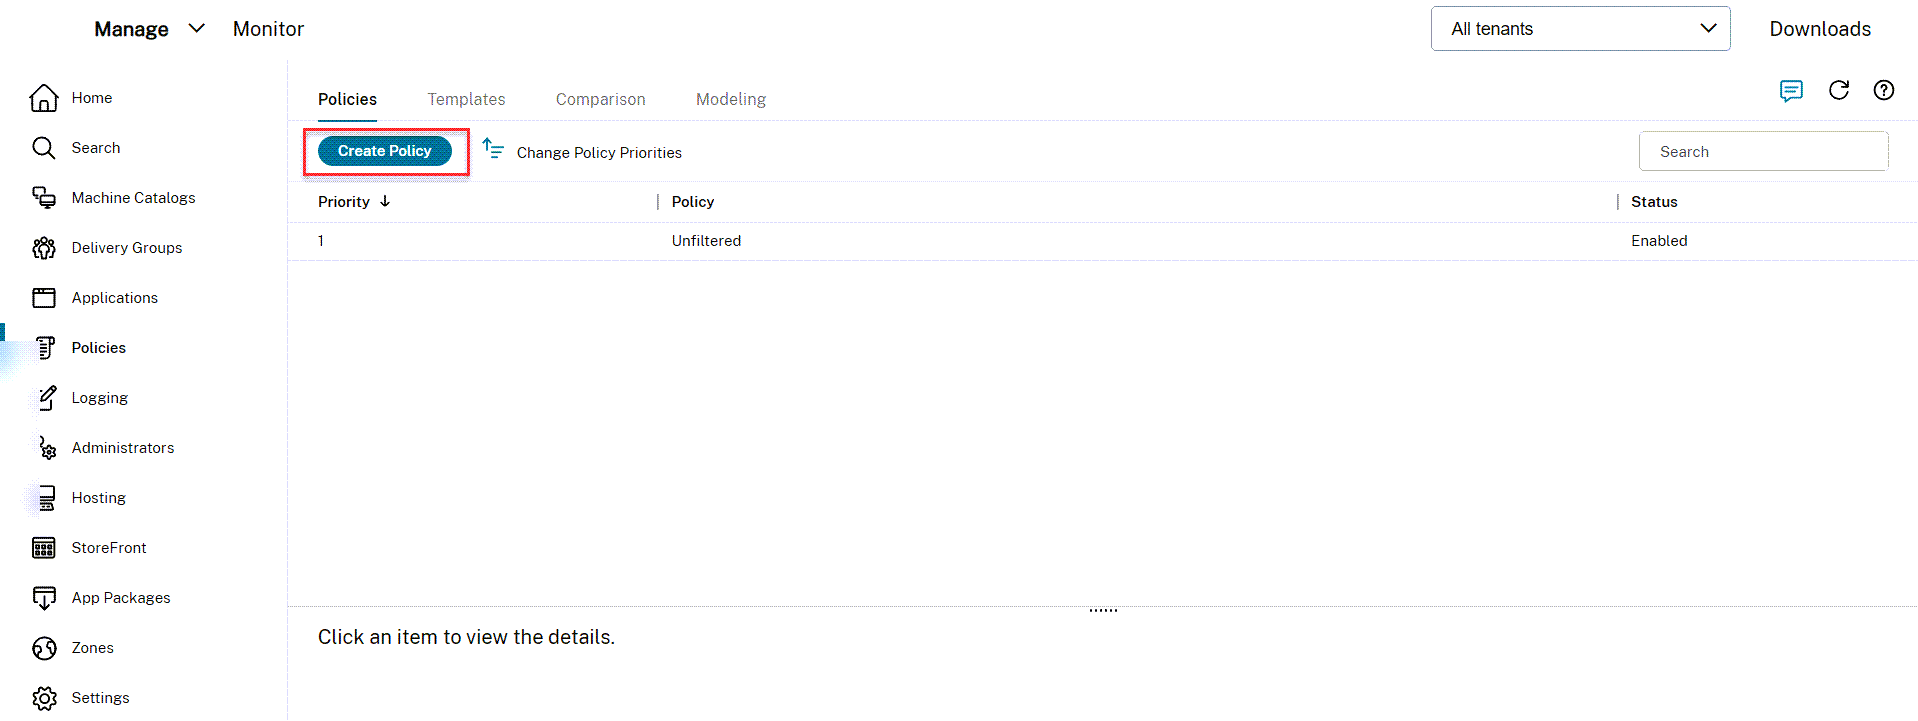
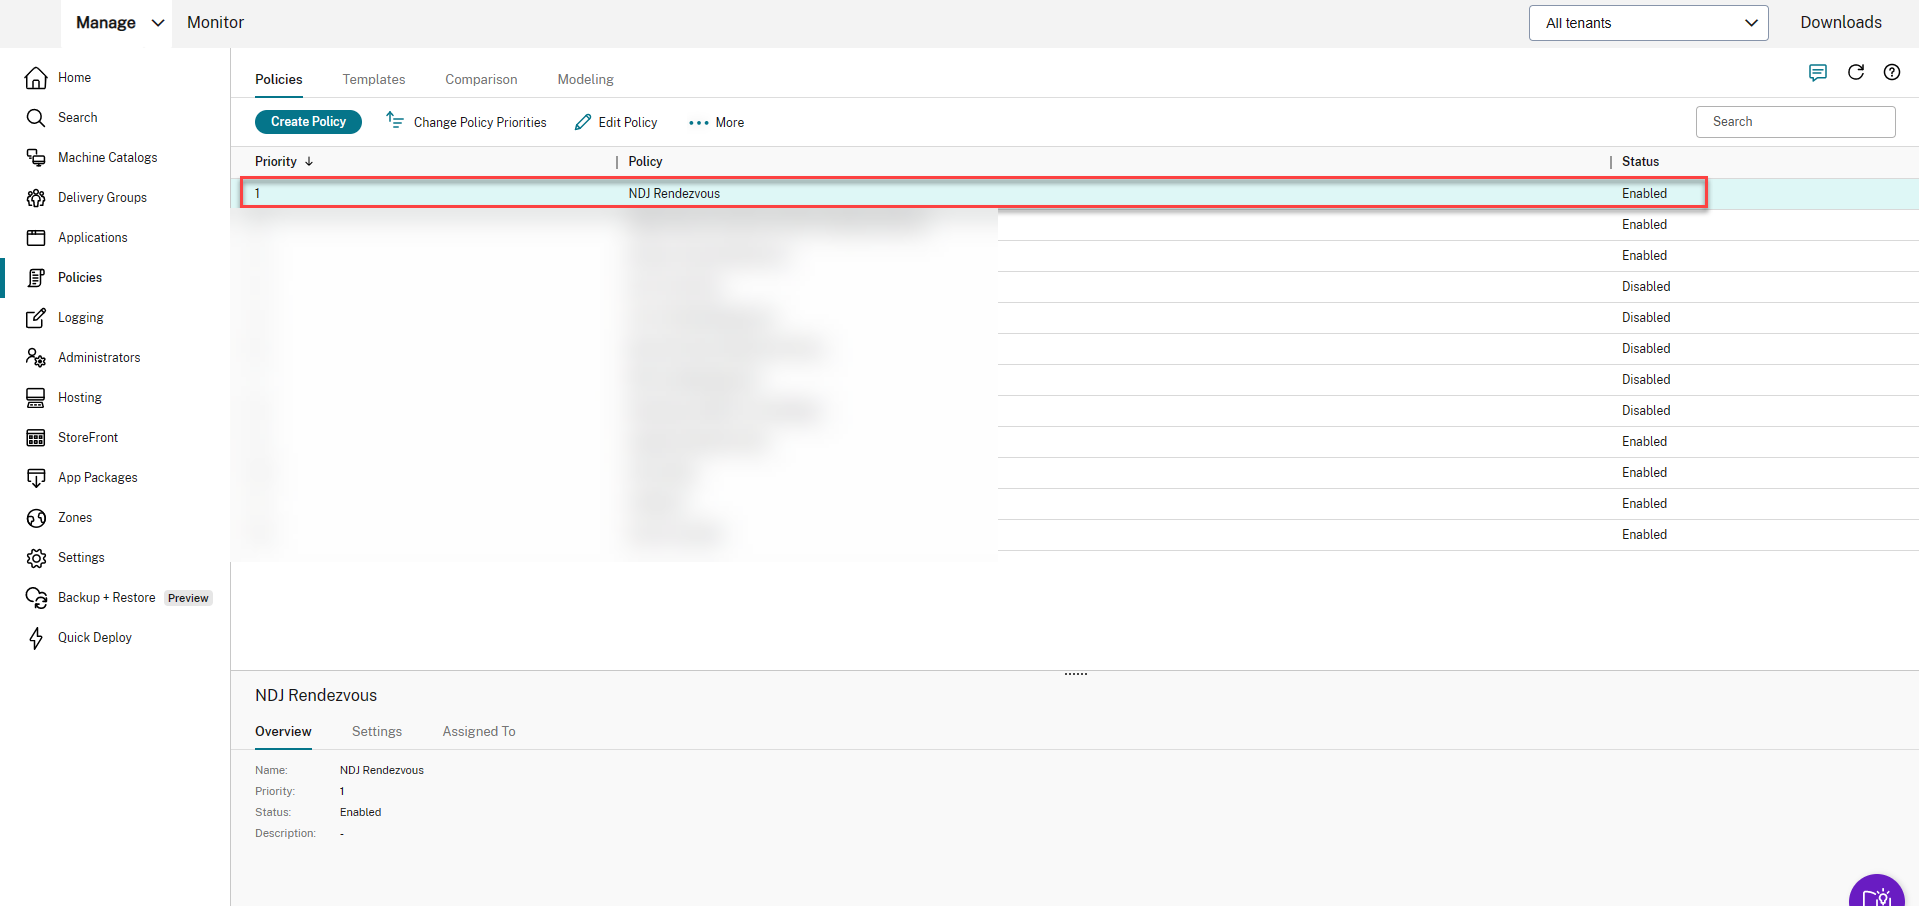
Create Rendezvous Citrix Policy
-
Click Policies
-
Click Create Policy
-
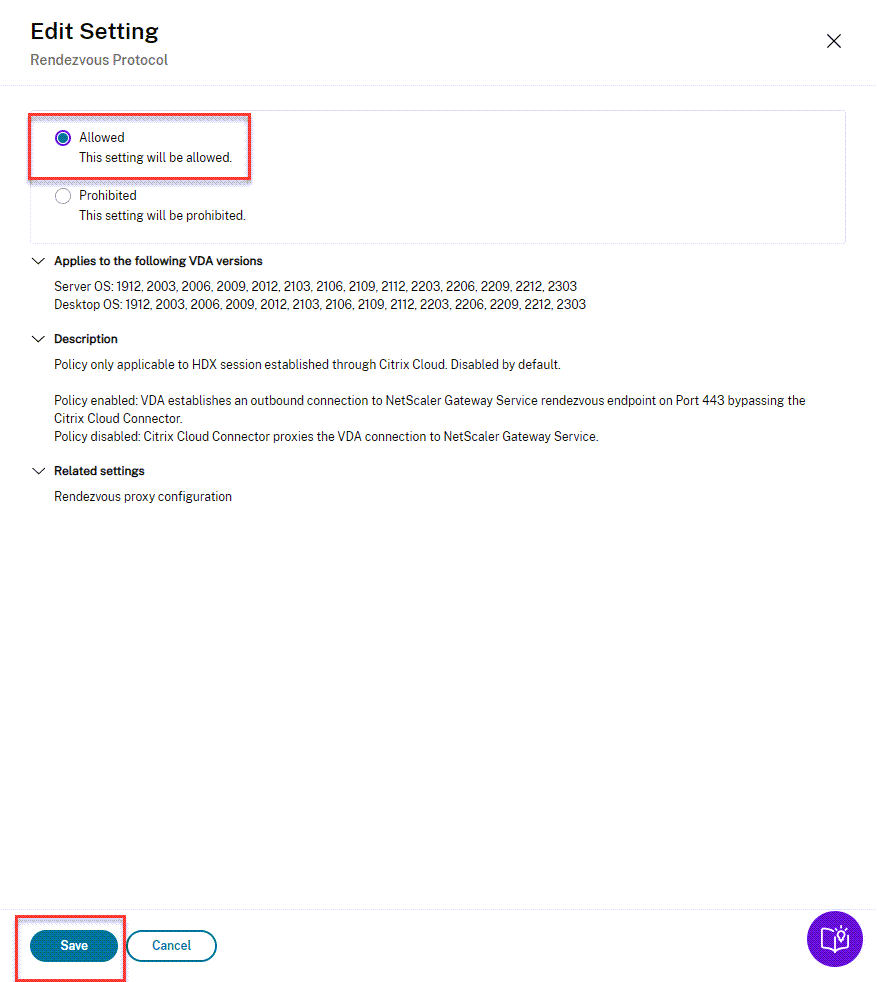
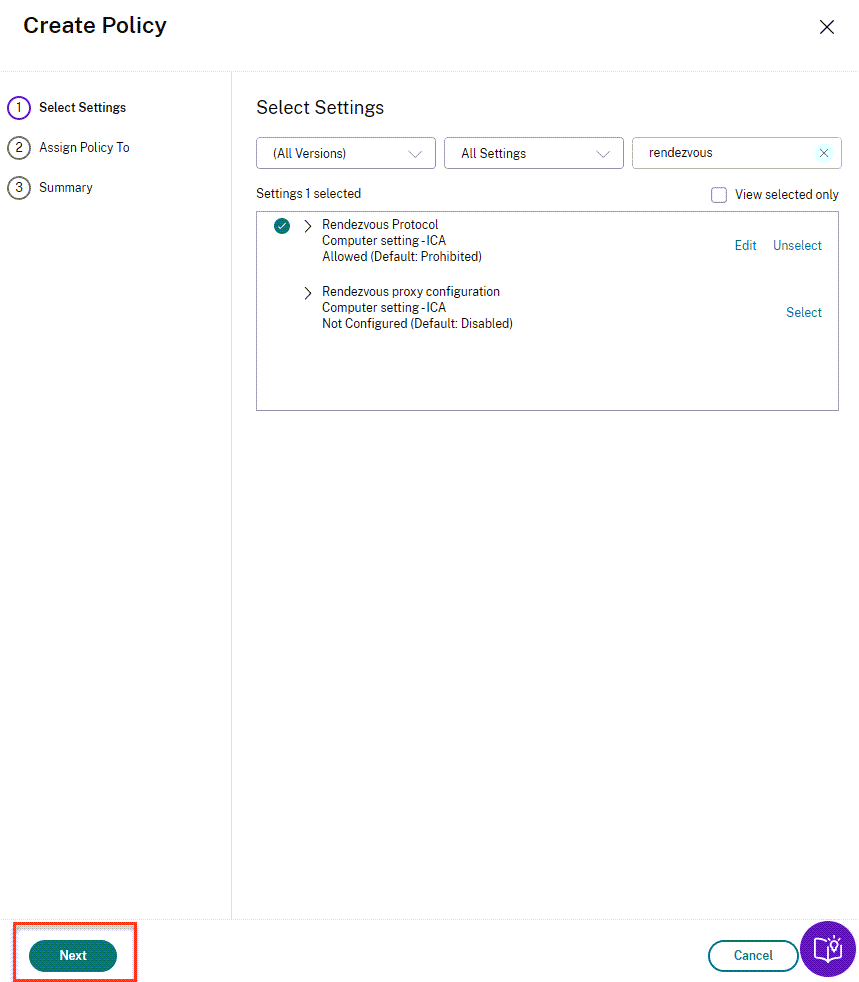
Find the Rendezvous Protocol settings and click Select.

-
Select Allowed, then click Save.
-
Click Next
-
Choose the policy assignment method by Delivery Group.
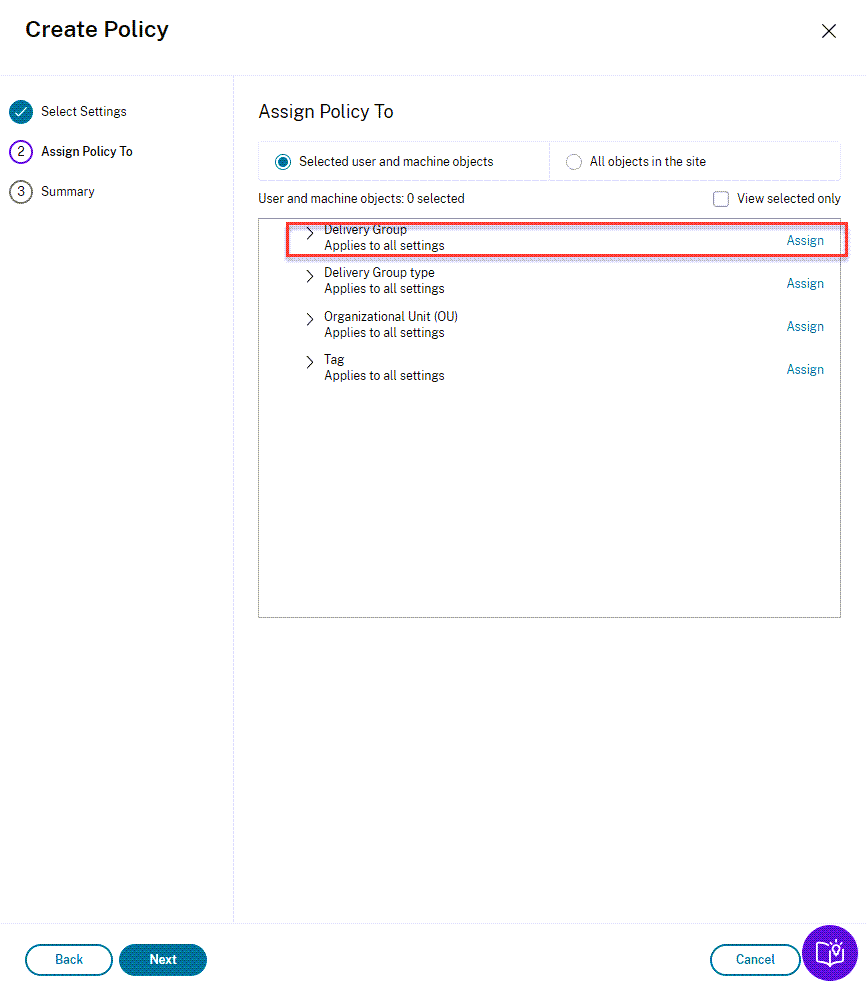
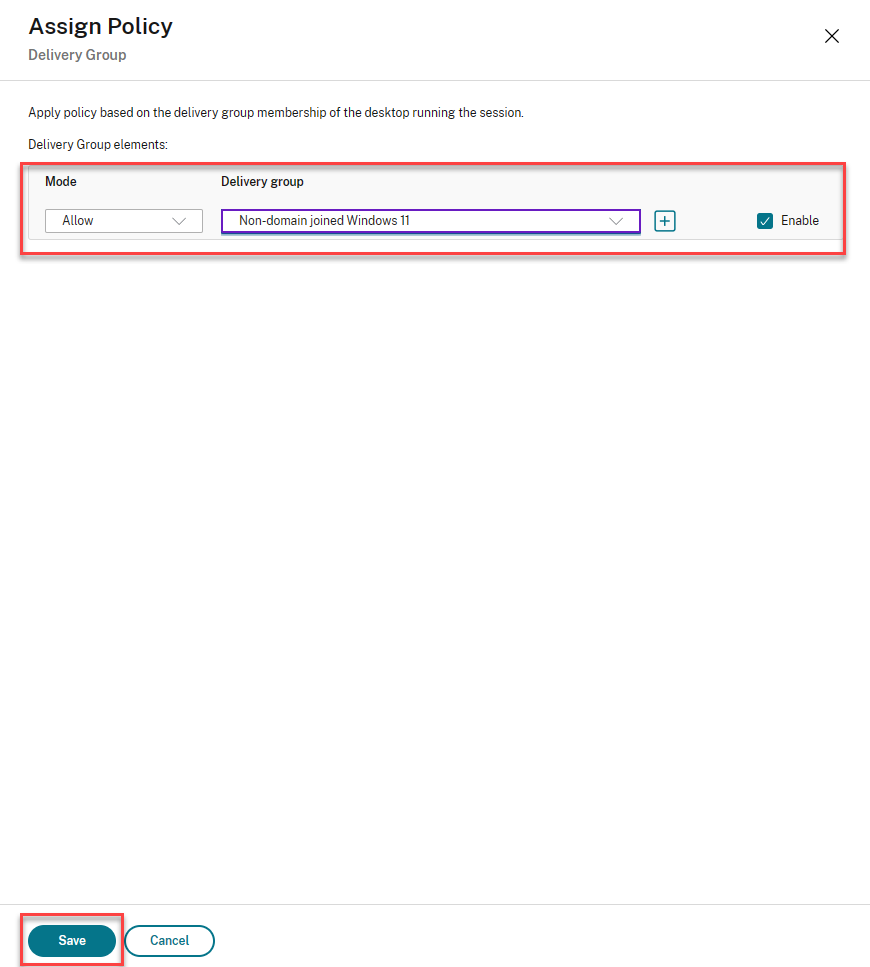
-
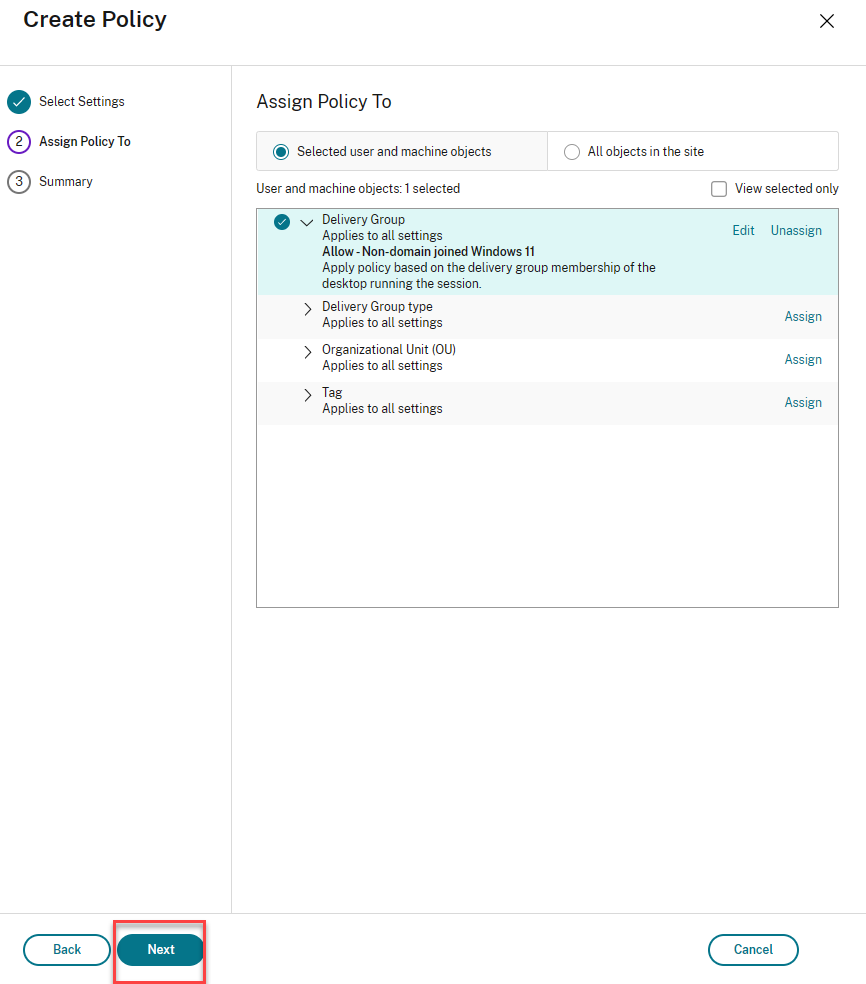
Select the delivery group in the drop-down list, ensure Enable is selected, then click Save.
-
Click Next.
-
Select Enable policy, name the policy, and then click Finish.
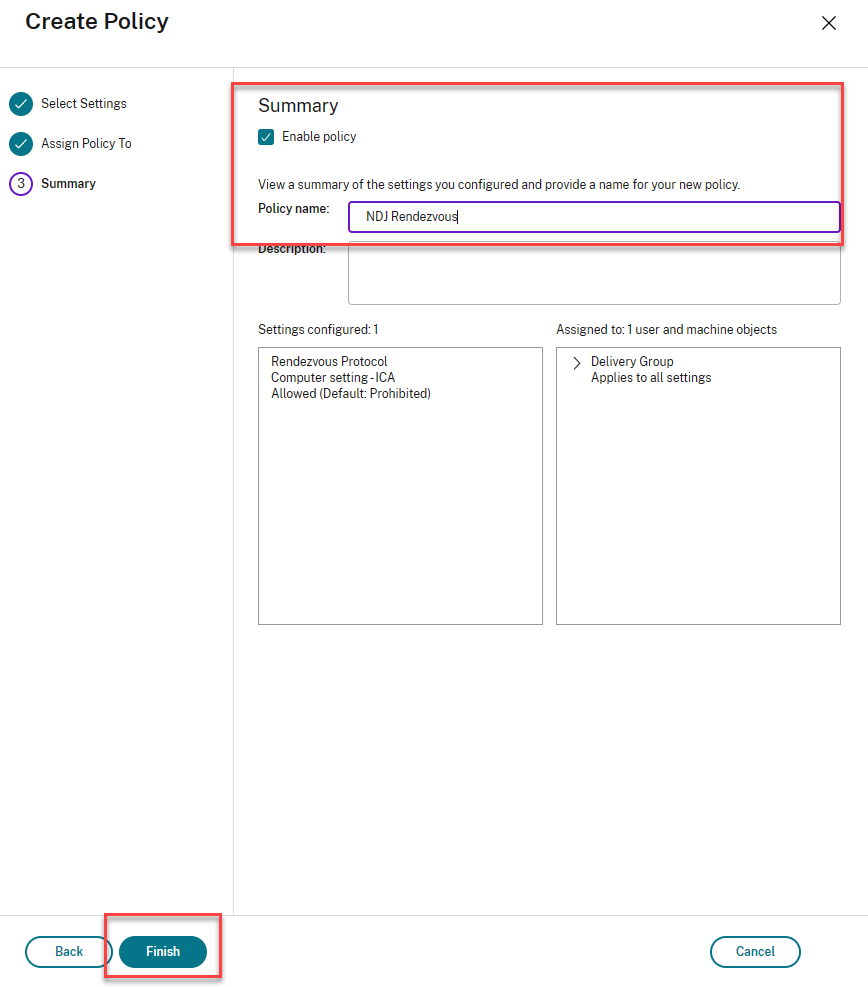
The rendezvous protocol policy is now enabled.
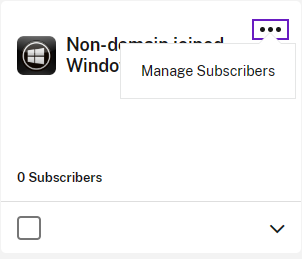
Assign Desktops
-
On the Citrix Cloud home page, click View Library.

-
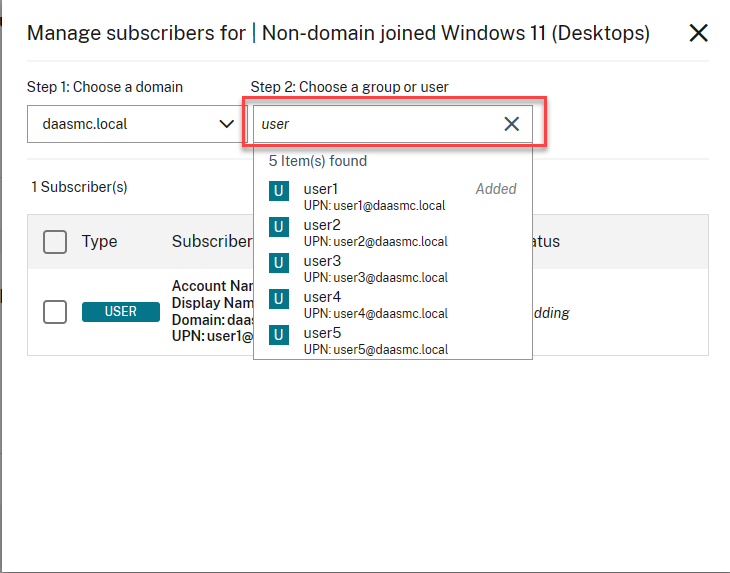
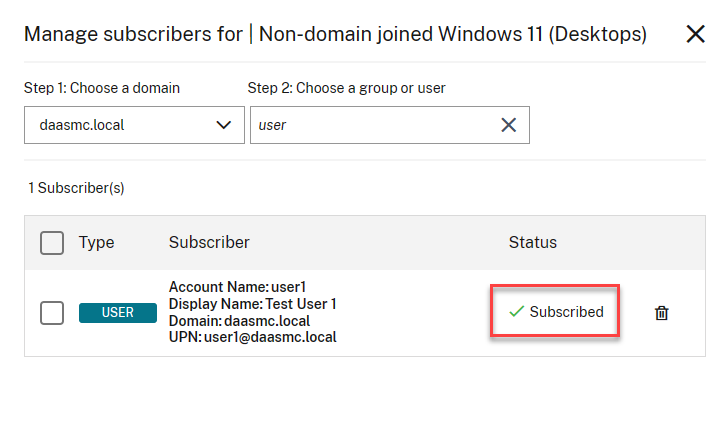
Click the ellipsis for the Non-domain Joined Windows 11(Desktops) and select Manage Subscribers
-
Begin to type the name of the user, then select the user.
-
Once all users/groups have been Subscribed, close the screen.
Launch Desktop
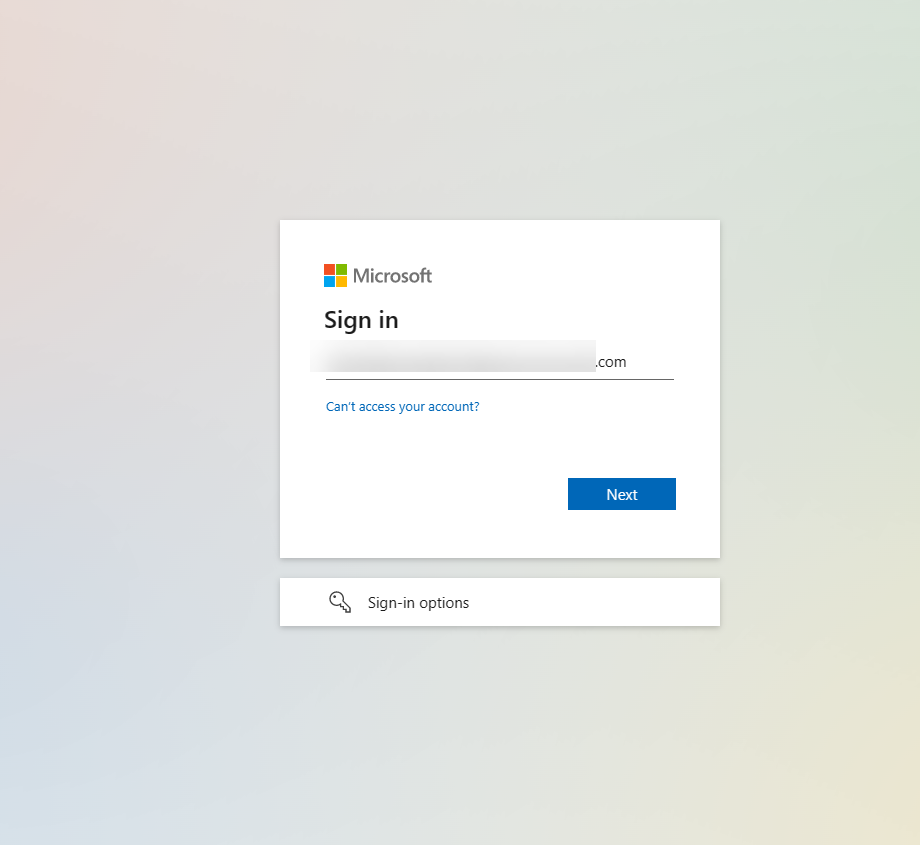
-
Connect to your Workspace URL, and provide credentials for login.

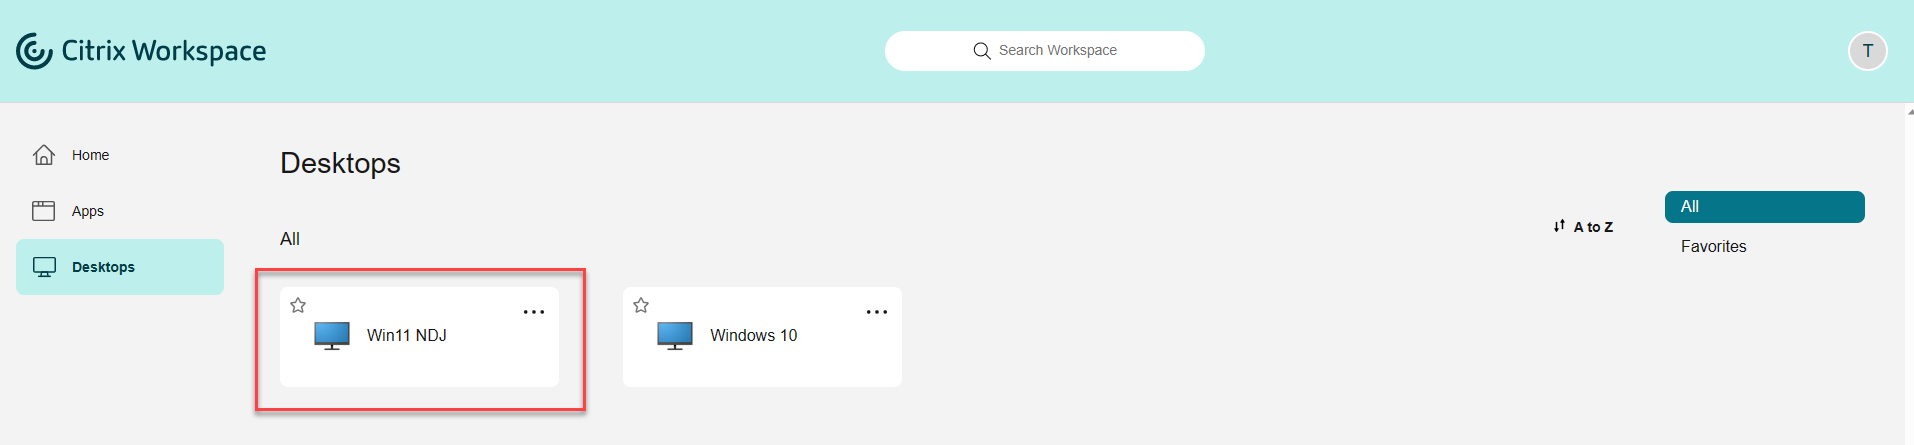
-
Select the desktop to launch.
Summary
This guide walked you through creating a non-domain joined Windows 11 virtual machine in Microsoft Azure. You learned how to enable Azure Active Directory for your Citrix Cloud tenant, create a Windows 11 master image, Machine Catalog, Delivery Group, and a Citrix Policy to enable the Rendezvous protocol. Lastly you assigned the desktops via the Citrix Cloud library and then accessed them via Citrix Workspace. Please refer to the following references for any additional information on the topics covered in this POC Guide.